Small DIY & Crafts

DIY Wedding Vases

A super easy & cheap way to make DIY wedding vases. These bright blue sparkly vases from our wedding centerpieces can be used for other events too!

Can you believe that these DIY wedding vases were originally drink cartons? Check out the blog for the super easy and cheap process of turning juice and milk cartons into bright blue sparkly vases for wedding centerpieces and decor. And, check out the other ways I used this same DIY to add some other sparkles to our wedding day as well :)

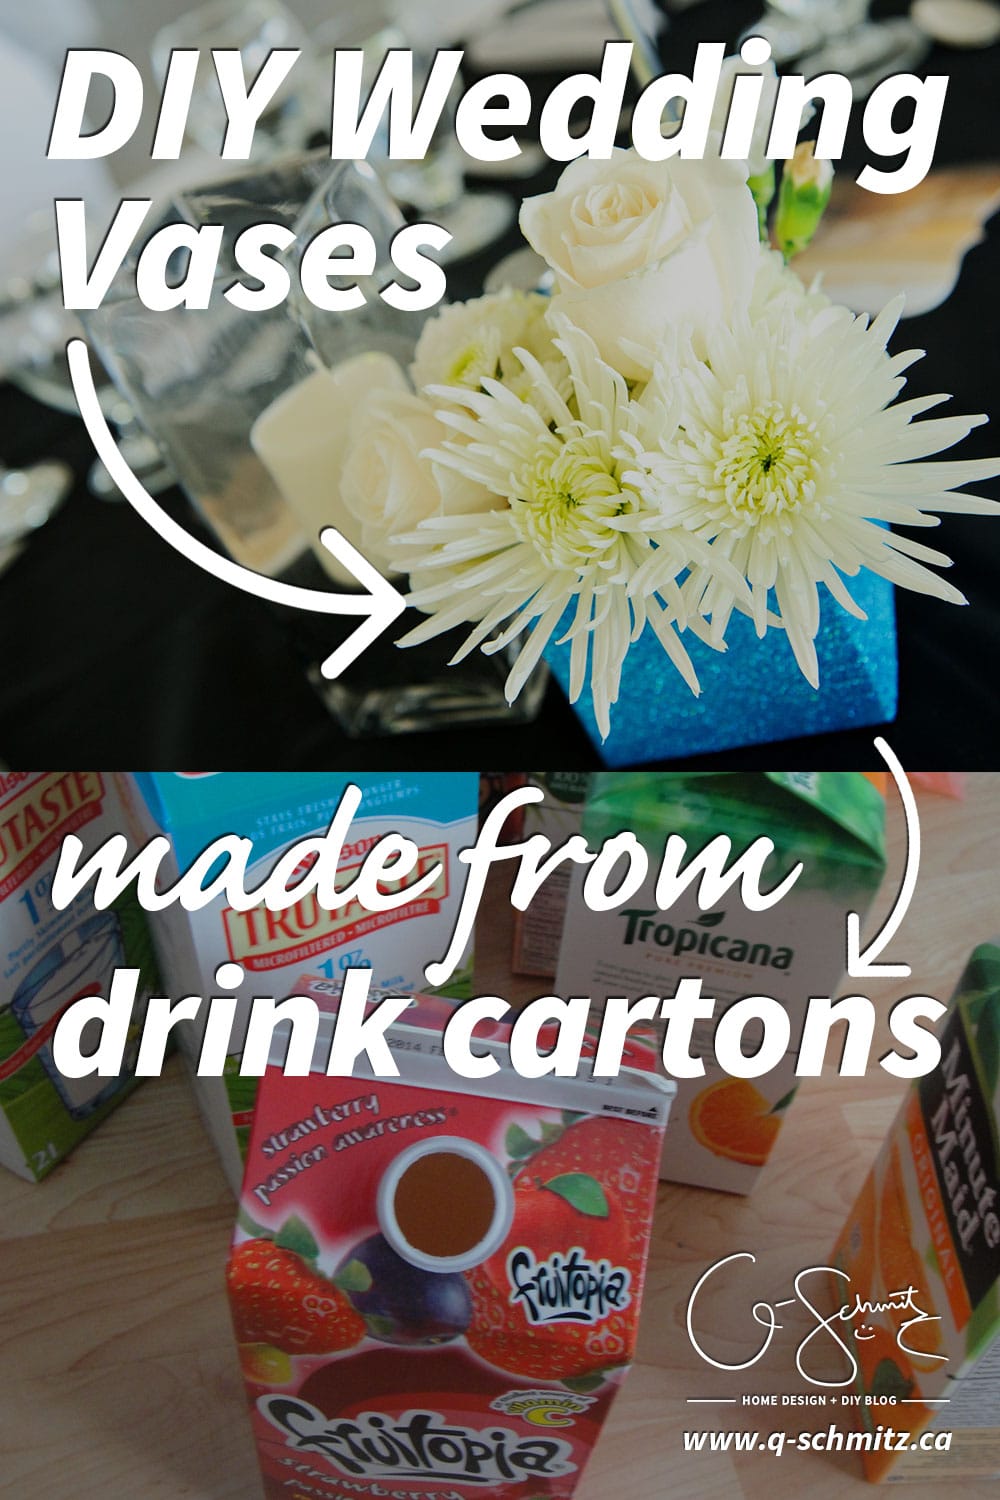
Continuing with the month of June wedding theme, today I’ll be going through the process of how I made the centerpieces for our wedding last year.  I bet you can’t guess what these DIY wedding vases were made from!?  Continue reading for all the details :)


– Note: This post contains affiliate links. See more information about affiliates here

Can you believe that these DIY wedding vases were originally drink cartons? Check out the blog for the super easy and cheap process of turning juice and milk cartons into bright blue sparkly vases for wedding centerpieces and decor. And, check out the other ways I used this same DIY to add some other sparkles to our wedding day as well :)

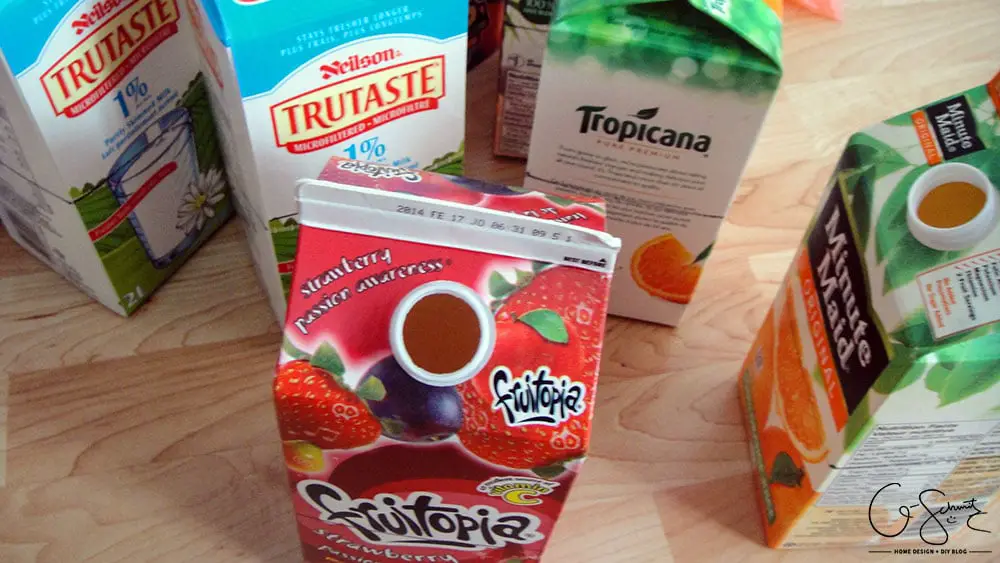
Yes, that’s right – they were drink cartons!  Over a couple of months I made sure to purchase 2L juice cartons, and once we were done with them, I would clean them out and store them away.  My parents also hoarded some cartons for me, as I needed over 20 for our centerpieces.  We weren’t sure how many tables we would have, but estimated that we would be inviting about 200 guests, divided by 8 per table = 25 tables.

Can you believe that these DIY wedding vases were originally drink cartons? Check out the blog for the super easy and cheap process of turning juice and milk cartons into bright blue sparkly vases for wedding centerpieces and decor. And, check out the other ways I used this same DIY to add some other sparkles to our wedding day as well :)

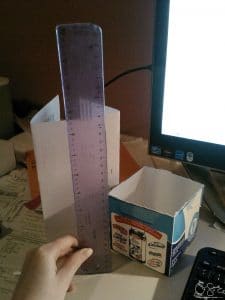
Once I had amassed 25 cartons, I then used said cartons to measure where my cuts would go.  I did this by lining up one of my cartons along the bottom of another, and tracing a line across the top; so that they would be perfect cubes.

Can you believe that these DIY wedding vases were originally drink cartons? Check out the blog for the super easy and cheap process of turning juice and milk cartons into bright blue sparkly vases for wedding centerpieces and decor. And, check out the other ways I used this same DIY to add some other sparkles to our wedding day as well :)

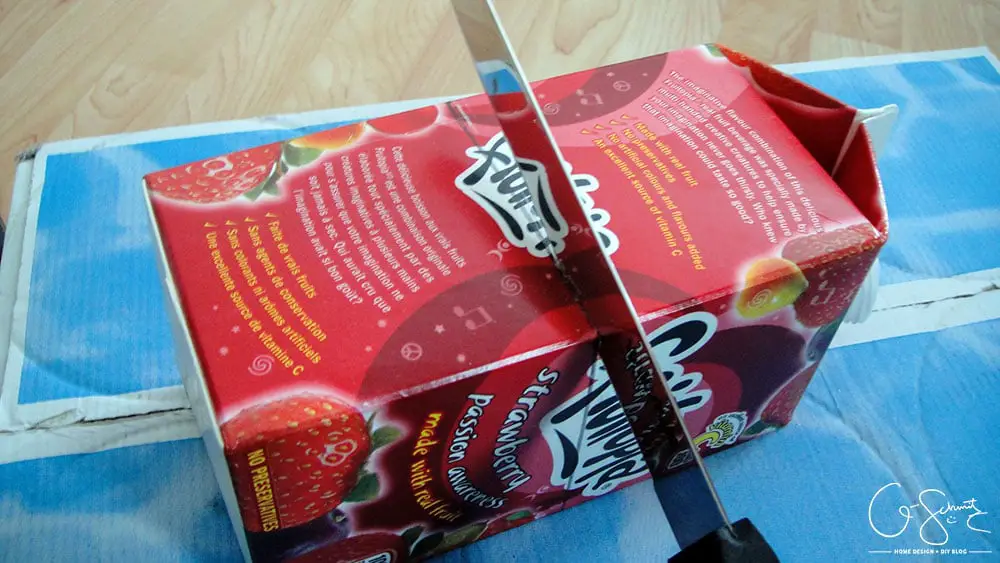
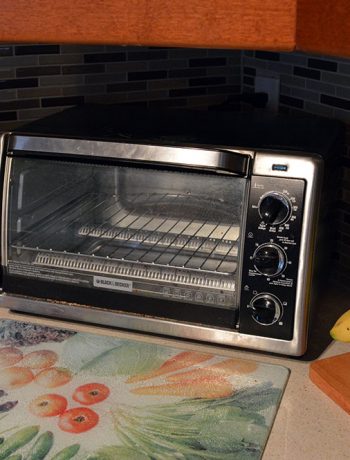
I then grabbed a long serrated kitchen knife, and quickly cut through the cartons across my lines.  In the past, I’ve cut a lot of boxes with kitchen knives, so I knew that it would be way easier than to try and squeeze a pair of scissors through.

Can you believe that these DIY wedding vases were originally drink cartons? Check out the blog for the super easy and cheap process of turning juice and milk cartons into bright blue sparkly vases for wedding centerpieces and decor. And, check out the other ways I used this same DIY to add some other sparkles to our wedding day as well :)

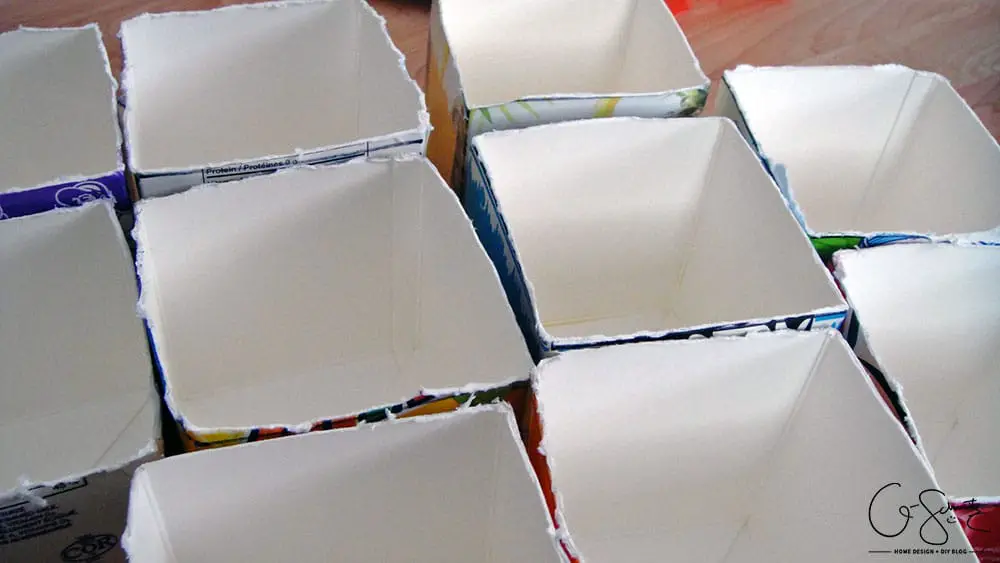
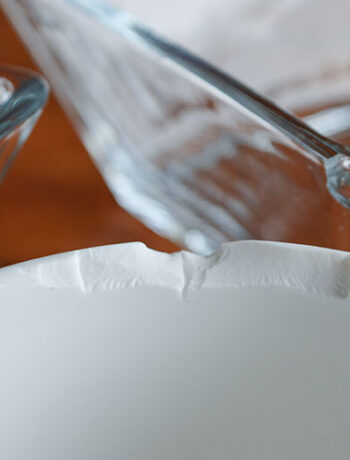
The edges were a bit jagged, and I attempted two methods to smooth them out.  The first was to fold a piece of painters tape along the edge, and the second was to go over the cuts again, but this time with a pair of scissors.  The scissors method worked the best FYI.

Can you believe that these DIY wedding vases were originally drink cartons? Check out the blog for the super easy and cheap process of turning juice and milk cartons into bright blue sparkly vases for wedding centerpieces and decor. And, check out the other ways I used this same DIY to add some other sparkles to our wedding day as well :) Can you believe that these DIY wedding vases were originally drink cartons? Check out the blog for the super easy and cheap process of turning juice and milk cartons into bright blue sparkly vases for wedding centerpieces and decor. And, check out the other ways I used this same DIY to add some other sparkles to our wedding day as well :)

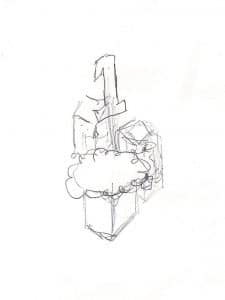
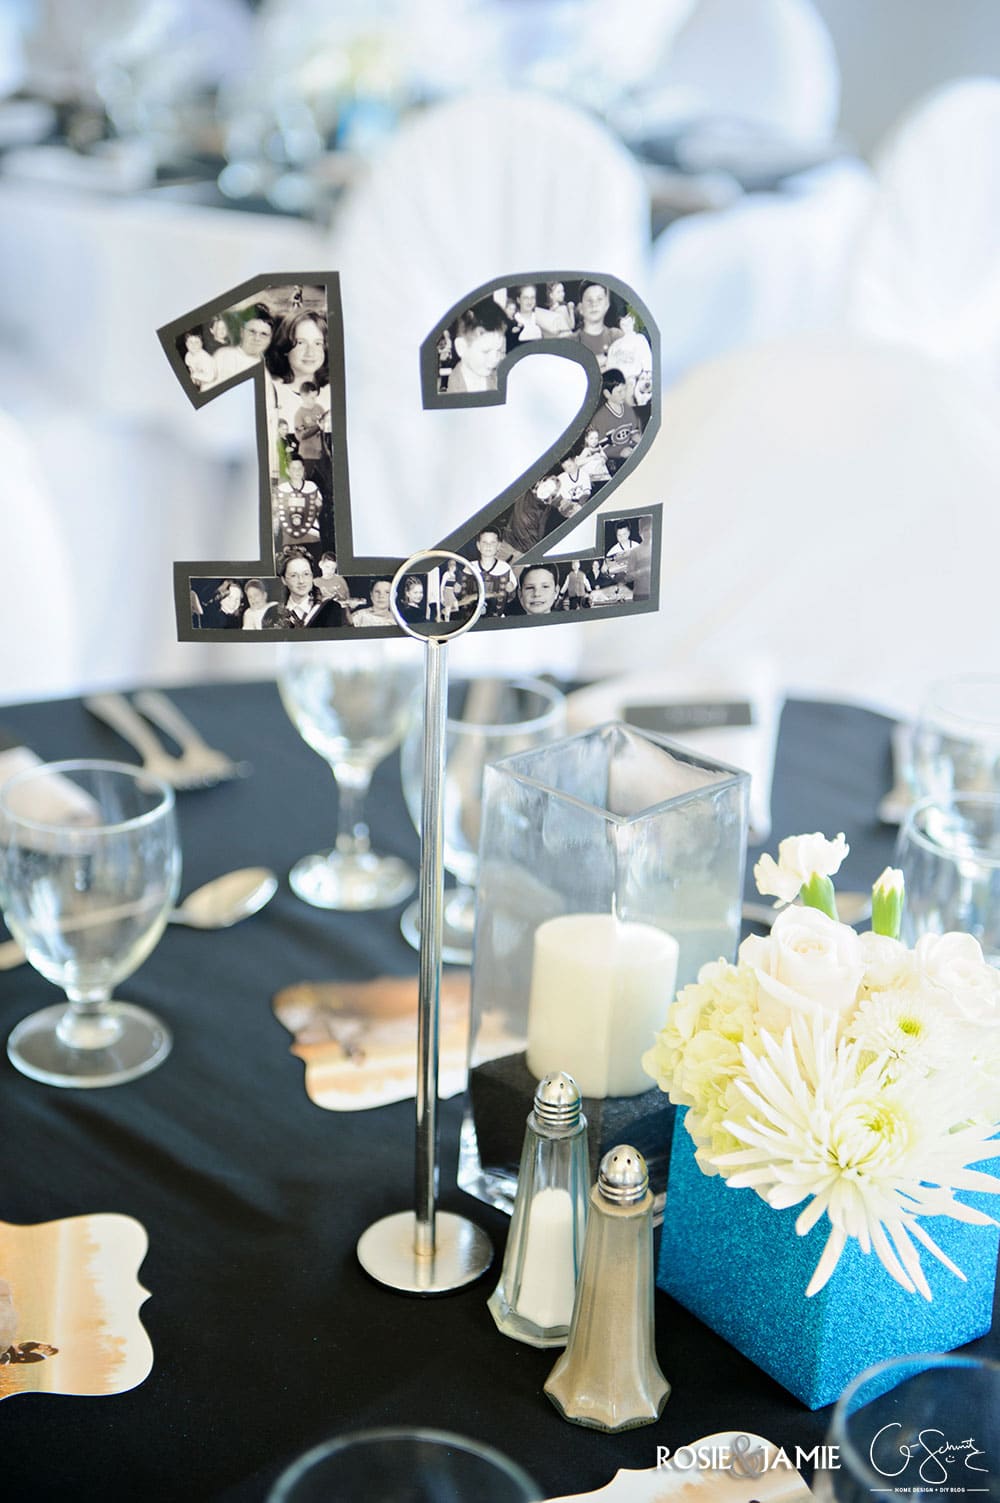
I knew that I wanted a tri-height centerpiece with three main elements: flowers, candles, and lights; and I also wanted to have my table numbers sticking out from the center (so you could see the numbers easily when you looked throughout the hall).  I had sketched a quick design of my idea, and used my carton cube as a measuring off point to determine the other vase sizes.  The shortest vase (the carton cube) would be the fattest, then the mid-height vase would be a medium width, and the tallest vase would be the skinniest.  At this point I searched online and found a website where I could order bulk glass vases (with lots of sizes to choose from).  I had tried looking in dollar stores, or even Michaels, but I could never find the sizes I wanted…

Pinterest Inspiration:

I had saved some images on my personal Pinterest wedding board, and here are some examples showing my centerpiece inspiration:

Tri-Height Square Option     Tri-Height Cubes      Tall Tri-Height      Tri-Height with Petals

For those who might not know me, I LOVE squares and I don’t like circles.  So my vases would have to be square shaped (hence using the drink cartons!):

Yellow Flowers      Beautiful Blue Square Vase      White Rose Cube      White and Black Cubes

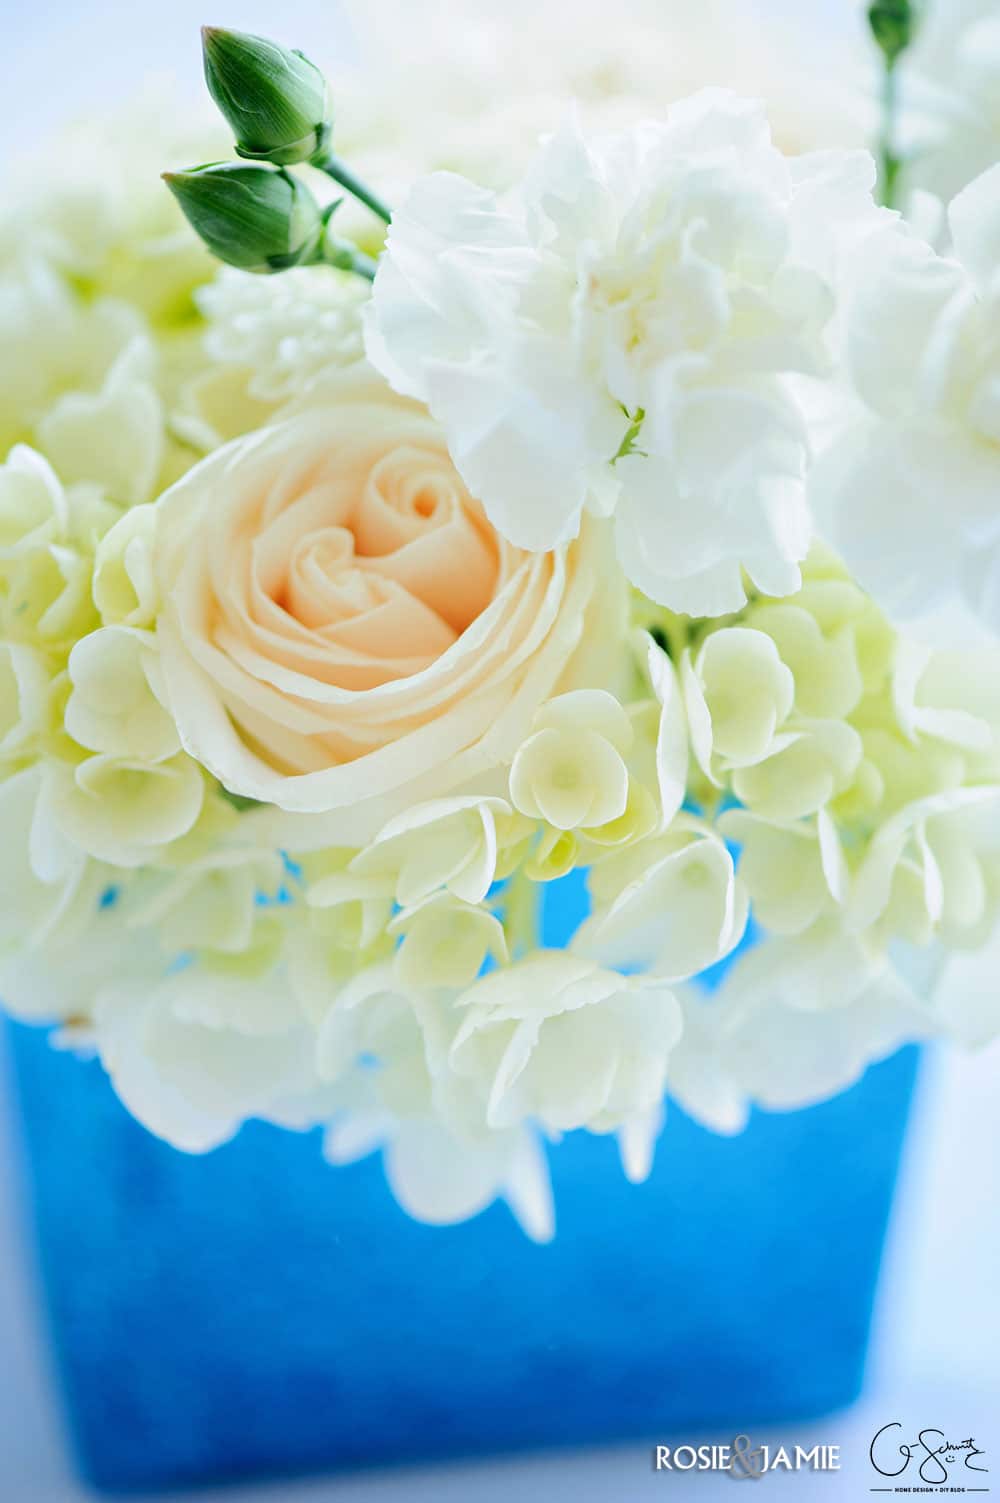
Looking at these photos, I knew that I really liked the look of the flowers “bursting” out of the short cube vases.

Can you believe that these DIY wedding vases were originally drink cartons? Check out the blog for the super easy and cheap process of turning juice and milk cartons into bright blue sparkly vases for wedding centerpieces and decor. And, check out the other ways I used this same DIY to add some other sparkles to our wedding day as well :) Can you believe that these DIY wedding vases were originally drink cartons? Check out the blog for the super easy and cheap process of turning juice and milk cartons into bright blue sparkly vases for wedding centerpieces and decor. And, check out the other ways I used this same DIY to add some other sparkles to our wedding day as well :)

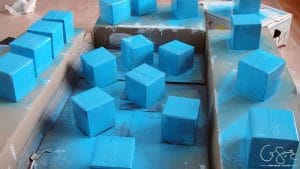
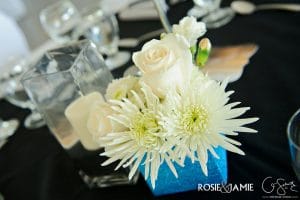
Anyways, back to the vase DIY!  Once they were all cut, I placed the vases upside-down in a box and on a plastic sheet so I could spray paint them.  I used this type of spray paint, but in “Caribbean Blue” to paint the cartons.

Can you believe that these DIY wedding vases were originally drink cartons? Check out the blog for the super easy and cheap process of turning juice and milk cartons into bright blue sparkly vases for wedding centerpieces and decor. And, check out the other ways I used this same DIY to add some other sparkles to our wedding day as well :) Can you believe that these DIY wedding vases were originally drink cartons? Check out the blog for the super easy and cheap process of turning juice and milk cartons into bright blue sparkly vases for wedding centerpieces and decor. And, check out the other ways I used this same DIY to add some other sparkles to our wedding day as well :)

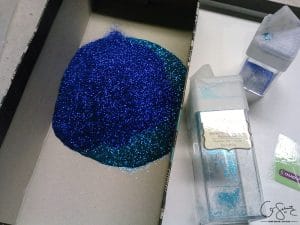
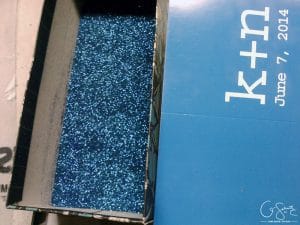
From there, I mixed up some blue glitter in a box to try and match our wedding colour, which is Pure Cyan (also call process cyan – basically it’s the colour that blue printer ink is).

Can you believe that these DIY wedding vases were originally drink cartons? Check out the blog for the super easy and cheap process of turning juice and milk cartons into bright blue sparkly vases for wedding centerpieces and decor. And, check out the other ways I used this same DIY to add some other sparkles to our wedding day as well :)

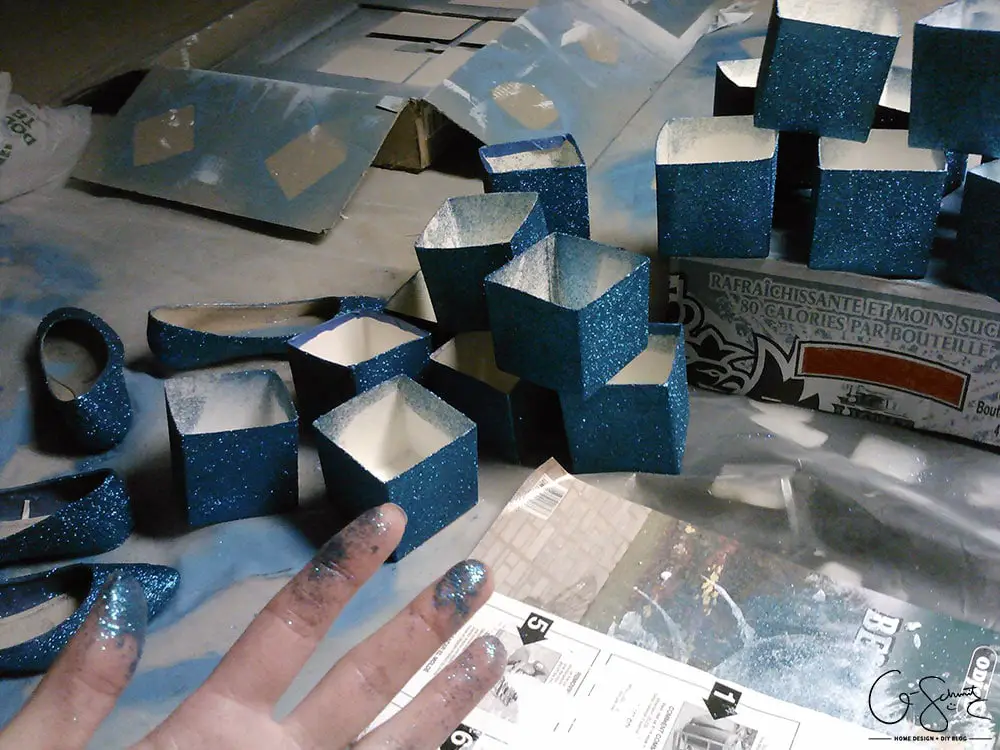
I then sprayed the (dried) cartons with clear adhesive and dunked them into the sparkles.  It was a messy job!  A few days later, I shook as much of the loose sparkles off the vases as possible; but just to be safe I added a clear coat of spray paint to hold everything in.

Can you believe that these DIY wedding vases were originally drink cartons? Check out the blog for the super easy and cheap process of turning juice and milk cartons into bright blue sparkly vases for wedding centerpieces and decor. And, check out the other ways I used this same DIY to add some other sparkles to our wedding day as well :)

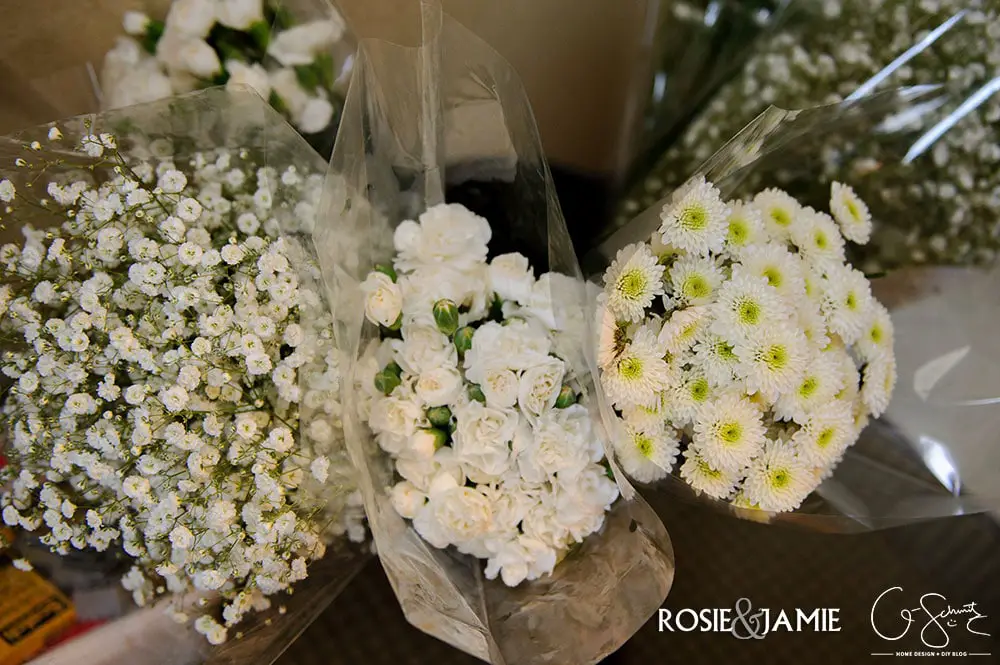
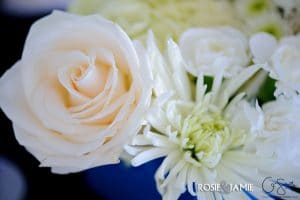
My parents came down a few weeks before the wedding so we could practice assembling the centerpieces.  I had no idea how many flowers we would need (but knew that I would be buying them at Costco), so we got one of each type of white flower bouquets they had and tested how many it would take to fill one vase.  From there, I ordered different amounts of each type (you can have Costco order you in flowers for a specific date FYI) and picked them up the day before our wedding.

For those who are wondering, I got:

  • 6 bunches of Hydrangeas (3 flowers each)
  • 4 bunches of Spider flowers (10 flowers each)
  • 2 bunches of Baby’s Breath (Gypsophila?)
  • 2 bunches of Roses (they were one or two dozen each?)
  • 3 bunches of Mini Daisies
  • There may have been carnations too?

Anyways, it was less than 12$ a bunch (except the roses were a bit more), so for less than 250$ dollars I was able to get enough flowers for ALL my centerpiece bouquets (we had 15 tables in the end, but I had the other bouquets scattered in other places as well) AND we had leftovers for our extra glass vases too!

Can you believe that these DIY wedding vases were originally drink cartons? Check out the blog for the super easy and cheap process of turning juice and milk cartons into bright blue sparkly vases for wedding centerpieces and decor. And, check out the other ways I used this same DIY to add some other sparkles to our wedding day as well :) Can you believe that these DIY wedding vases were originally drink cartons? Check out the blog for the super easy and cheap process of turning juice and milk cartons into bright blue sparkly vases for wedding centerpieces and decor. And, check out the other ways I used this same DIY to add some other sparkles to our wedding day as well :)

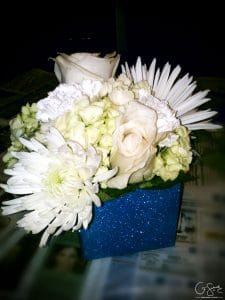
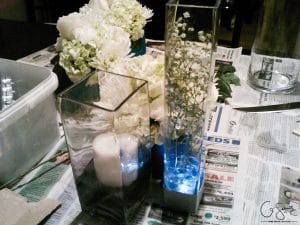
Back to the planning.  By now, I had also determined what my other two vases would be: the medium height one I filled with black sand and a white pillar candle, and the tall one I placed a small LED light, some clear and blue beads I bought from the dollar store, water and a stem or two of baby’s breath flowers.  Just an added recommendation on those lights – we had them turned on for hours, and they never got dimmer… and I mean like over 30+ hours (I tested one before the wedding to see how long it would last, but gave up because it took too long!)

Can you believe that these DIY wedding vases were originally drink cartons? Check out the blog for the super easy and cheap process of turning juice and milk cartons into bright blue sparkly vases for wedding centerpieces and decor. And, check out the other ways I used this same DIY to add some other sparkles to our wedding day as well :)

I think these DIY vases turned out great!

Can you believe that these DIY wedding vases were originally drink cartons? Check out the blog for the super easy and cheap process of turning juice and milk cartons into bright blue sparkly vases for wedding centerpieces and decor. And, check out the other ways I used this same DIY to add some other sparkles to our wedding day as well :) Can you believe that these DIY wedding vases were originally drink cartons? Check out the blog for the super easy and cheap process of turning juice and milk cartons into bright blue sparkly vases for wedding centerpieces and decor. And, check out the other ways I used this same DIY to add some other sparkles to our wedding day as well :)

And here are some more shots of what they looked like the day of…

Can you believe that these DIY wedding vases were originally drink cartons? Check out the blog for the super easy and cheap process of turning juice and milk cartons into bright blue sparkly vases for wedding centerpieces and decor. And, check out the other ways I used this same DIY to add some other sparkles to our wedding day as well :)

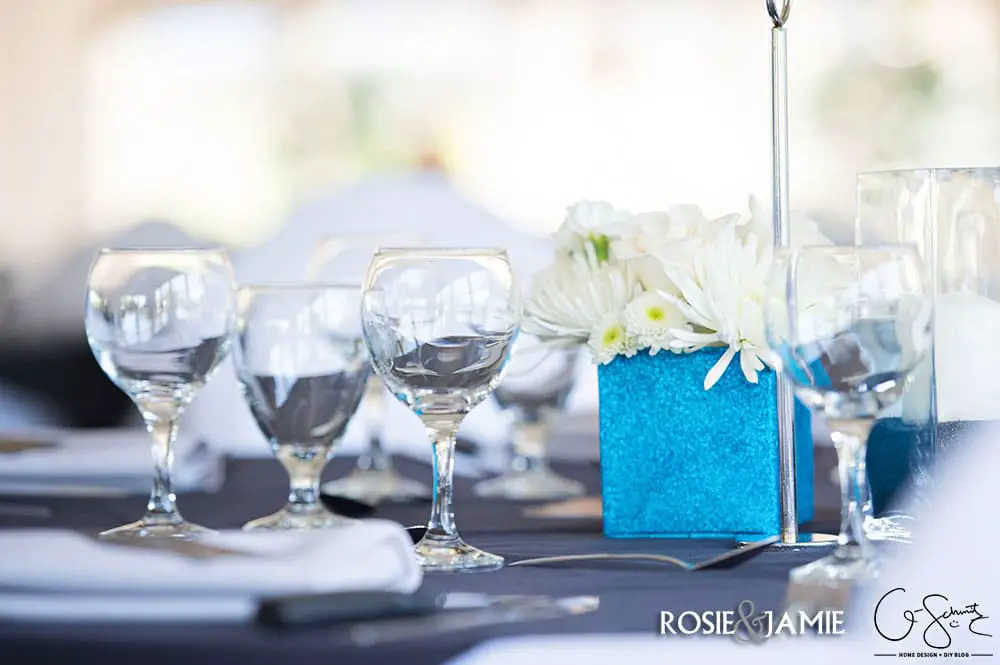
And here’s some more with the table numbers too!  For the numbers, I had scanned a bunch of childhood photos of me and the Husband and each table number corresponded to our age in the photos (ie: for table 8, the photos of us are from when we were 8 years old).  The bridesmaids had cropped the photos and shaped them into numbers in Photoshop (did I mention I’m a multimedia designer, and I met most of the bridesmaids through my program at school?).

Can you believe that these DIY wedding vases were originally drink cartons? Check out the blog for the super easy and cheap process of turning juice and milk cartons into bright blue sparkly vases for wedding centerpieces and decor. And, check out the other ways I used this same DIY to add some other sparkles to our wedding day as well :)

I then had them printed in black and white, cut the number shape out, glued them to black cardstock, and then cut the number shape out again.  The bridesmaids and I did this… the night before the wedding!  OH MAN – was that a mad dash to have these done in time!  I definitely should have done these sooner… but that’s more of a mistake on me, and it was not something that I included in my list of 5 things I wish I had done differently on our wedding day.

Can you believe that these DIY wedding vases were originally drink cartons? Check out the blog for the super easy and cheap process of turning juice and milk cartons into bright blue sparkly vases for wedding centerpieces and decor. And, check out the other ways I used this same DIY to add some other sparkles to our wedding day as well :)

The photos of our centerpieces were taken the morning-ish of our wedding, and we didn’t have the tall vases up at this point.  The bridesmaids (and helpers) were busy putting them together at this time :)  I should also mention that I had GREAT helpers that also worked on putting together these blue DIY vases the day before (we had an assembly line going and everything!), so thanks again for the help, friends & family!

Can you believe that these DIY wedding vases were originally drink cartons? Check out the blog for the super easy and cheap process of turning juice and milk cartons into bright blue sparkly vases for wedding centerpieces and decor. And, check out the other ways I used this same DIY to add some other sparkles to our wedding day as well :)

If I didn’t tell you that these cute blue sparkly vases were originally drink cartons, would you even know it to look at them?  Drink cartons were a great material to use, because I knew that the water wouldn’t leak out from them (compared to say cardboard boxes).  I placed a couple of rocks at the bottom of the vases to weigh them down, and it also helped to give the flower stems something to stick into.

So what do you think – are there other ways you could use drink cartons as DIY vases?  I still have these stored away – and I’m thinking that maybe I can use them again for a baby shower or something?  I’d probably make half of them pink (because I wouldn’t want to know the gender of the baby until after).  But that’s not for a while – so don’t get too excited!  Let me know your thoughts/suggestions/ideas about the vases in the comments!

Can you believe that these DIY wedding vases were originally drink cartons? Check out the blog for the super easy and cheap process of turning juice and milk cartons into bright blue sparkly vases for wedding centerpieces and decor. And, check out the other ways I used this same DIY to add some other sparkles to our wedding day as well :)

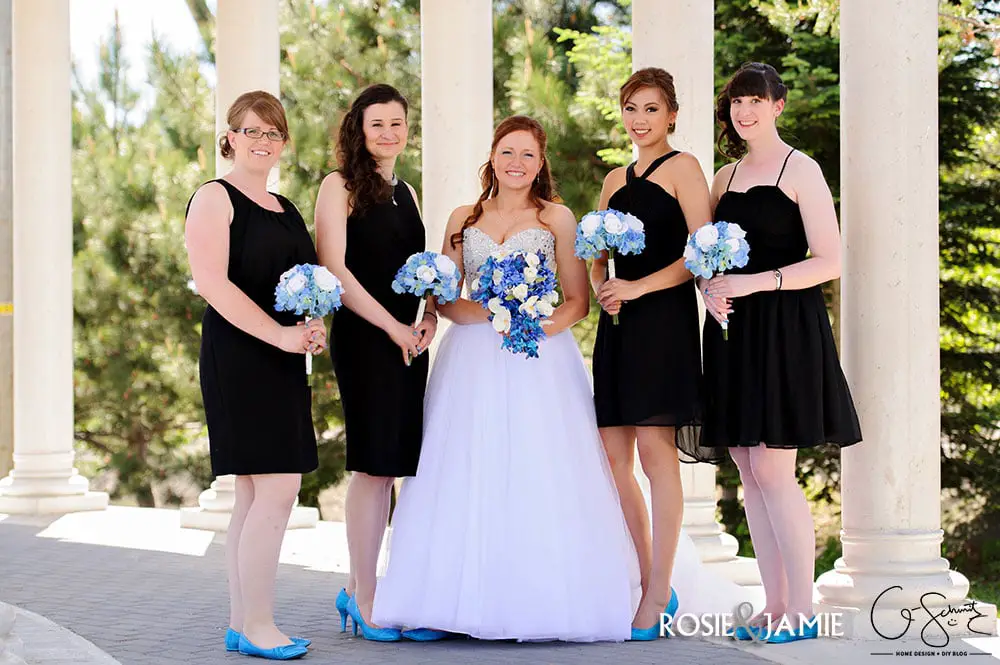
Fun Fact: did you notice the shoes on the ground in the picture way above with the newly sparkled vases?  I used this same method to paint mine and the bridesmaids’ shoes so we would all be sparkly!  I simply had them send me a pair of shoes that they would be wearing on the wedding day and DIY’d those too :)  I know I was happy that I could buy a cheap pair of comfy flats, and they would still be amazing looking!
Can you believe that these DIY wedding vases were originally drink cartons? Check out the blog for the super easy and cheap process of turning juice and milk cartons into bright blue sparkly vases for wedding centerpieces and decor. And, check out the other ways I used this same DIY to add some other sparkles to our wedding day as well :)
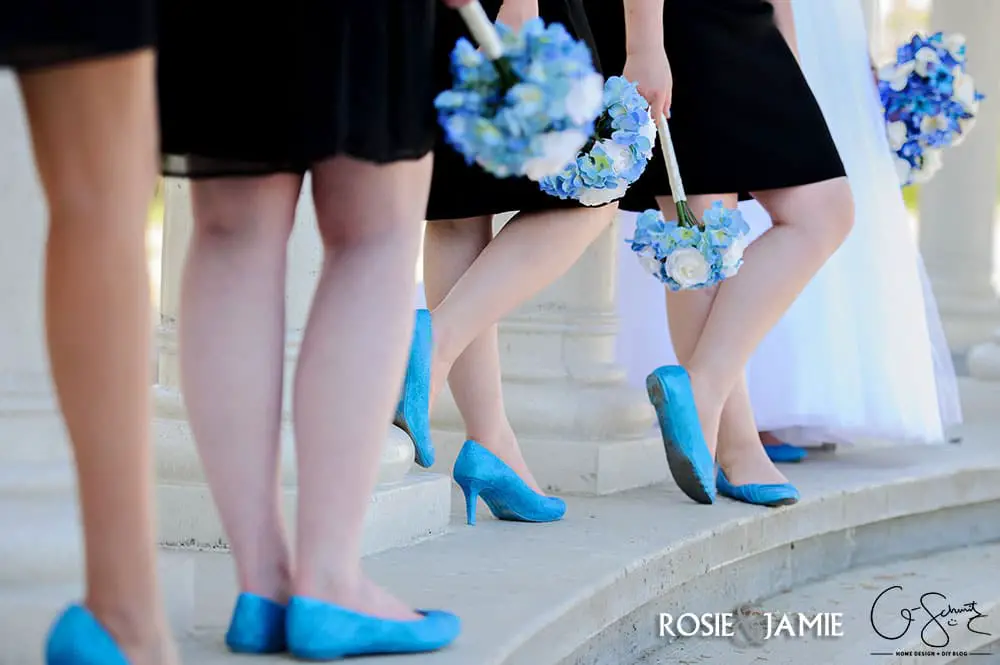
Disclaimer: All photos from our wedding day were taken from our great photographers Rosie and Jamie of Photo Captiva.

Subscribe & Follow

Newsletter

You Might Also Like

1 Comment

  • Reply
    25 DIY Budget Friendly Wedding Ideas Our Crafty Mom
    March 19, 2024 at 2:37 pm

    […] DIY Wedding Vases from Madness and Method […]

  • Leave a Reply

    This site uses Akismet to reduce spam. Learn how your comment data is processed.