
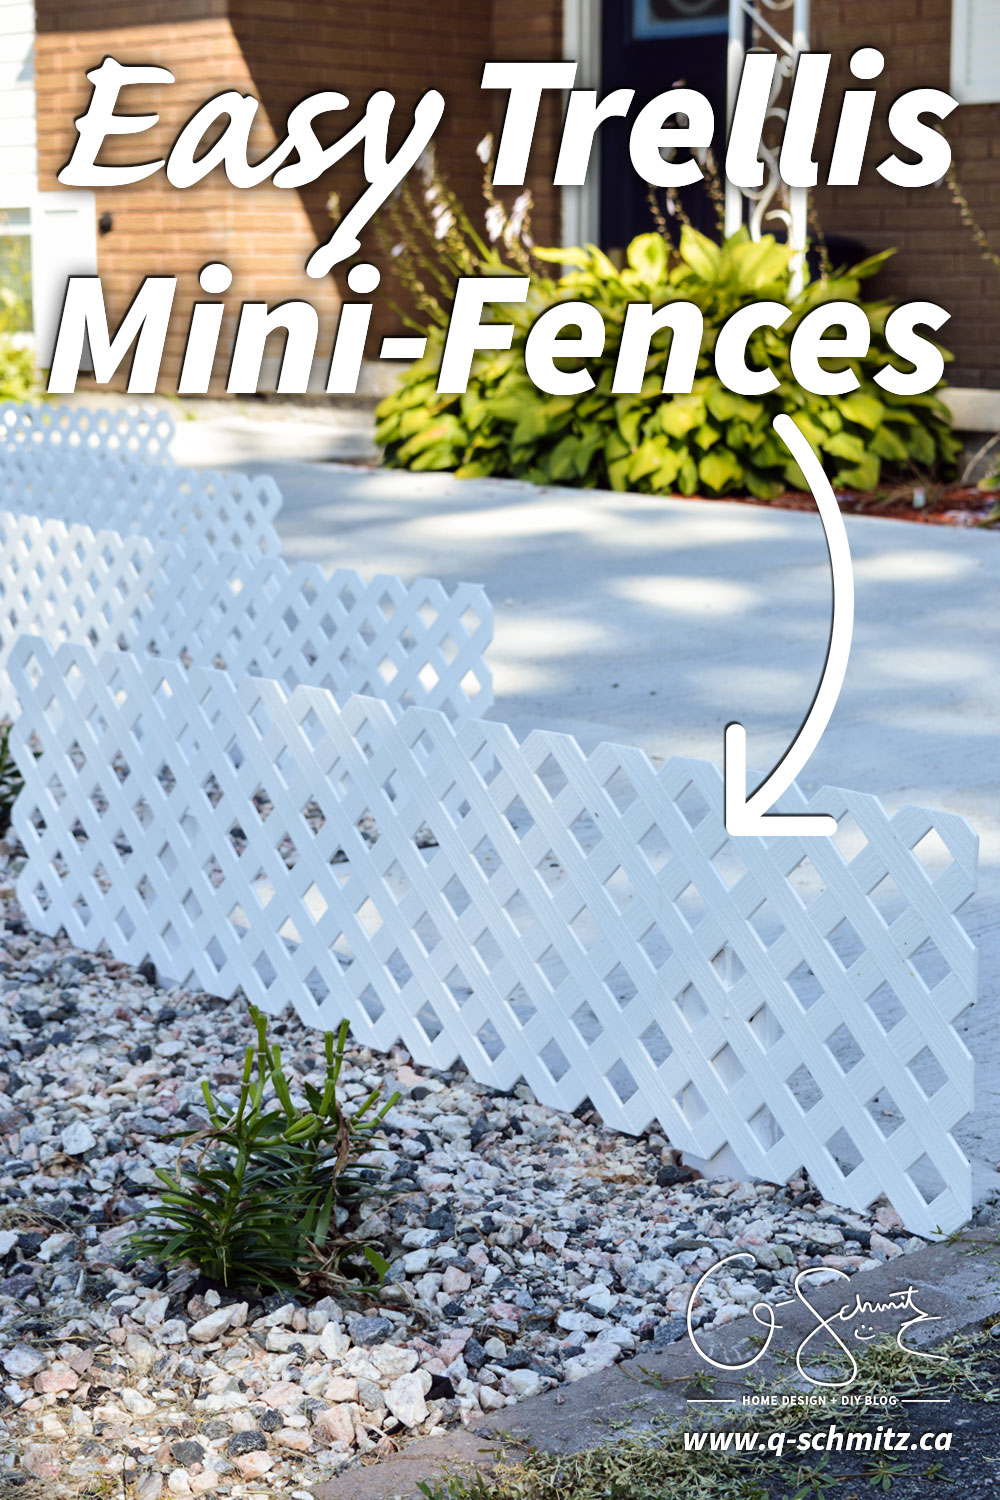
Last week I talked about adding rocks around plants without damaging them, and today I’m back with this last update to our front walkway flowerbed! Check out these cute and easy trellis mini-fences that I wanted to install to add height and definition to our concrete front walkway. Let’s dive in, shall we!?
– This post contains affiliate links. See here for more information about affiliates. –
I first mentioned the idea for these little fences wayyyy back last year in my original walkway design planning post. We finally got around to finishing them last week and here is a small tutorial in case you wanted to make something similar.
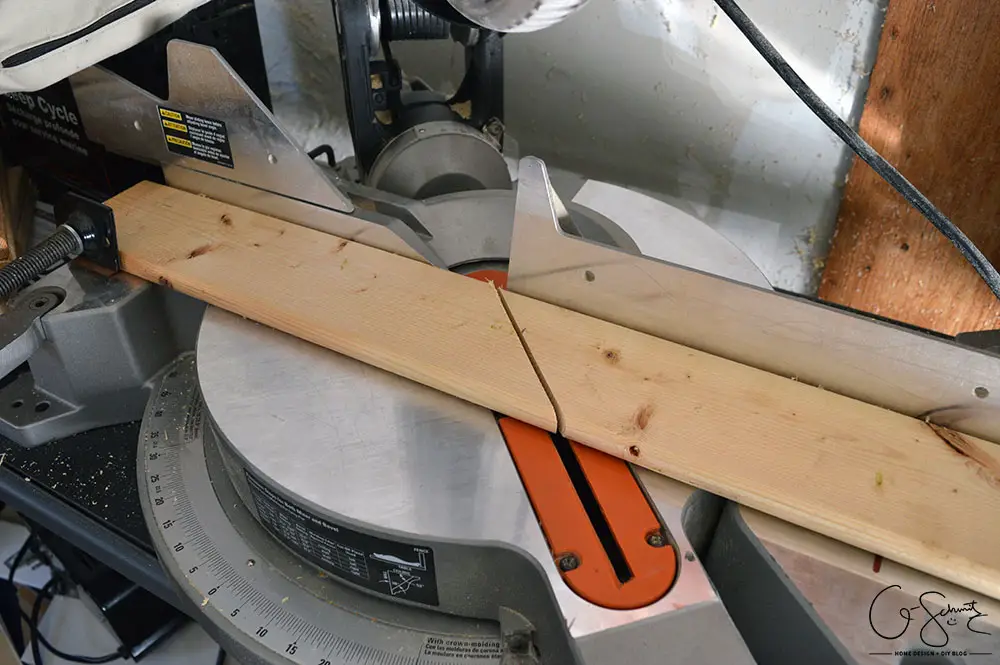
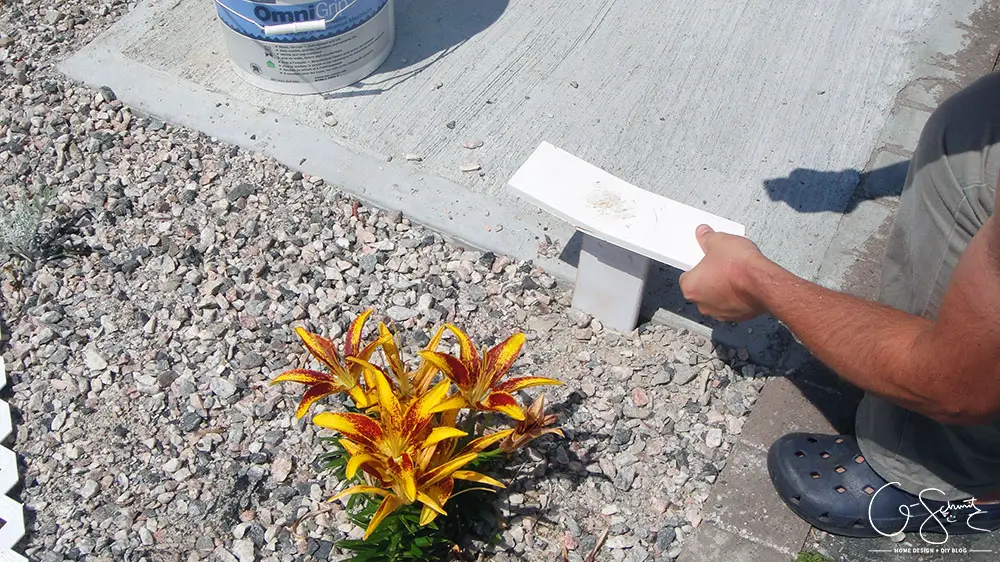
The first step involved marking the halfway point on some 3′ scrap lumber pieces (actually leftover Ikea bed slats) and cutting them diagonally with our mitre saw.
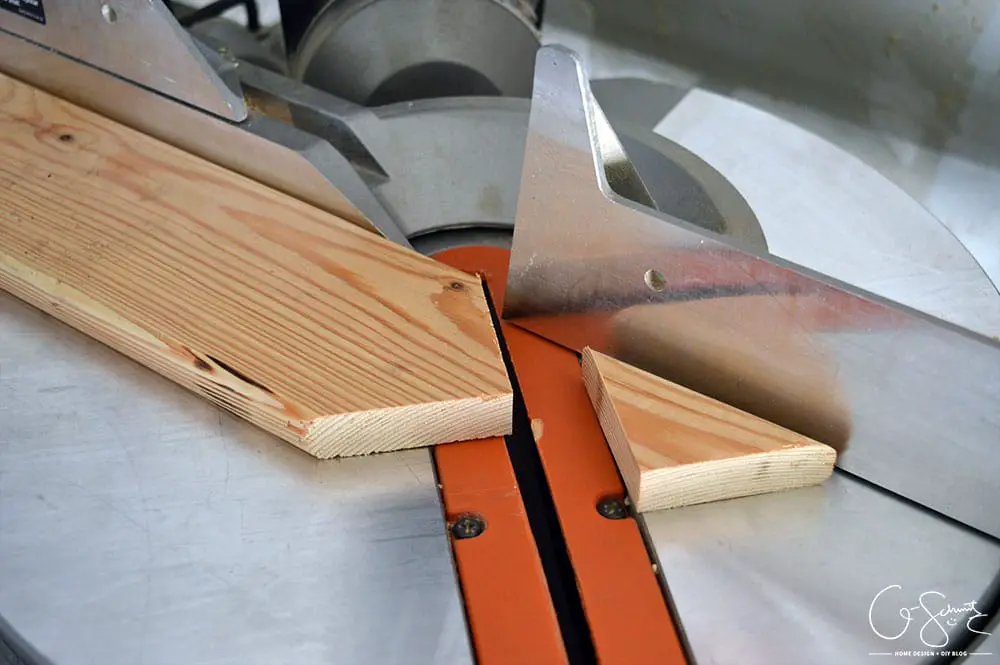
I then flipped them over and cut the other diagonal so that they would form a little stake shape.
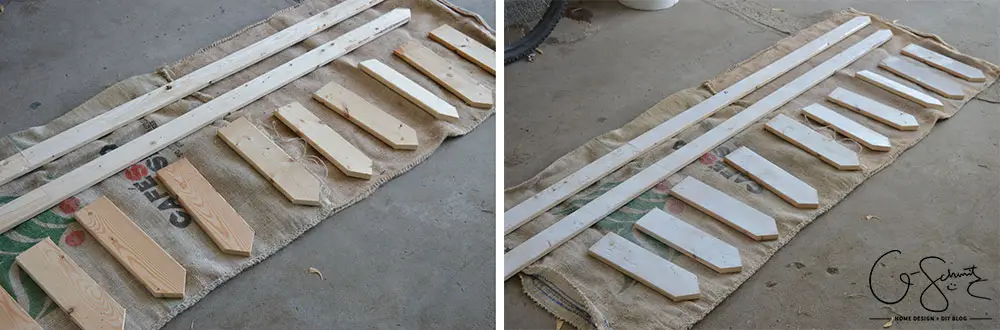
Once I had all my stakes cut, I placed them on the ground and sprayed a couple of coats of white spray paint on each side (over a few days). I also had two longer pieces, but we’ll get to that in a bit!
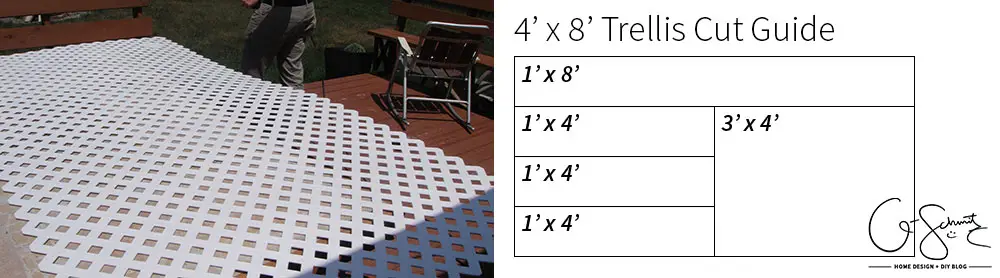
The Husband and I picked up a piece of 4’x8′ white trellis/lattice. I had already planned all my cuts ahead of time and he got to work ripping down the piece into the sizes I wanted. Note that our trellis was plastic and the plastic shards/residue got everywhere! A quick vacuum was needed on our deck, but for some reason they were all static-y to me so it was a bit of a hassle to get them off of my legs…
My original plan was to build the complete trellis mini-fences and then stick them in the ground, but the Husband said it would be easier to put the stakes in place first then add the trellis/front part. (Note how beautiful our plants are here – the petals have now fallen of course).
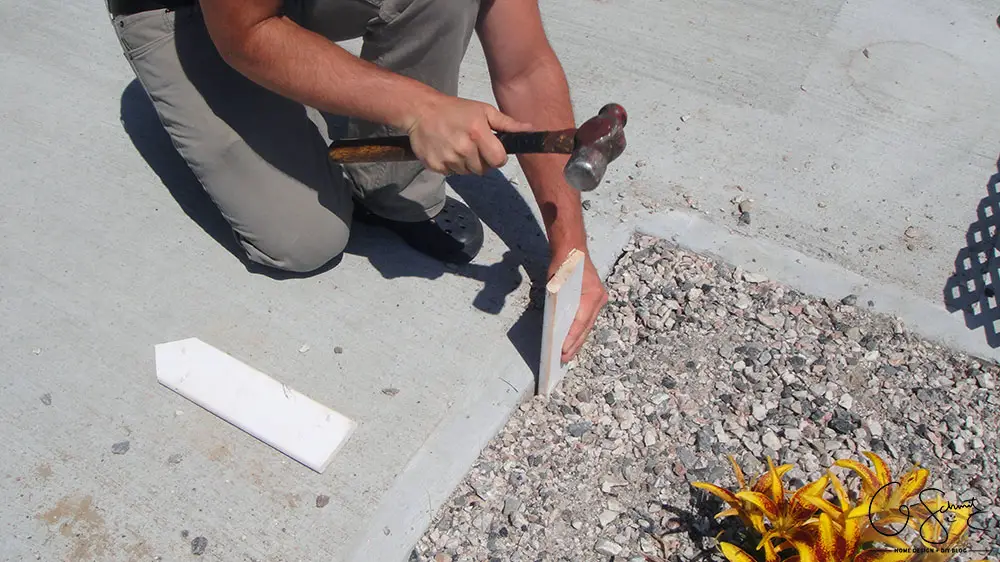
Anyways, he hammered them carefully into the ground along the edge of the walkway. They were in a good few inches deep and hopefully shouldn’t move!
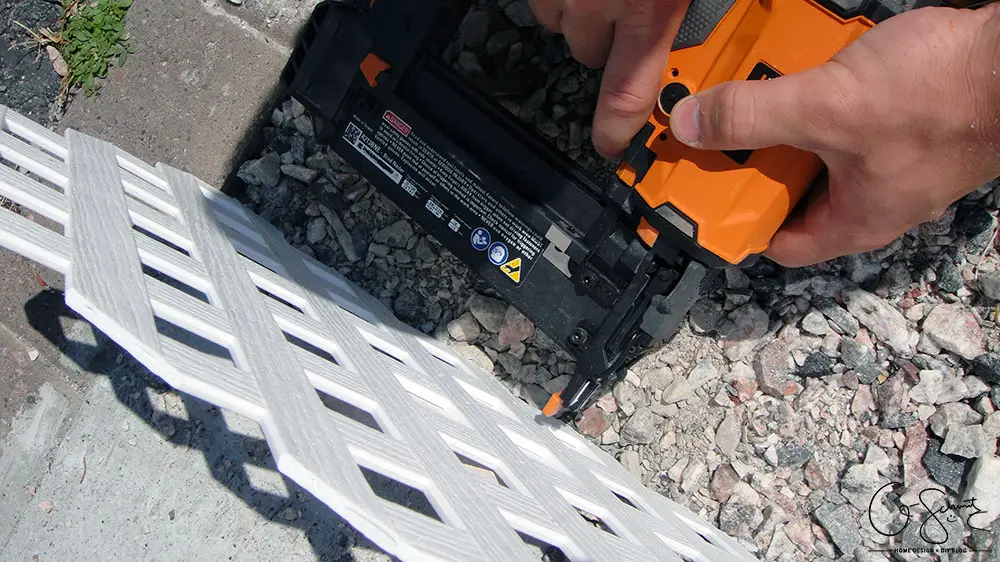
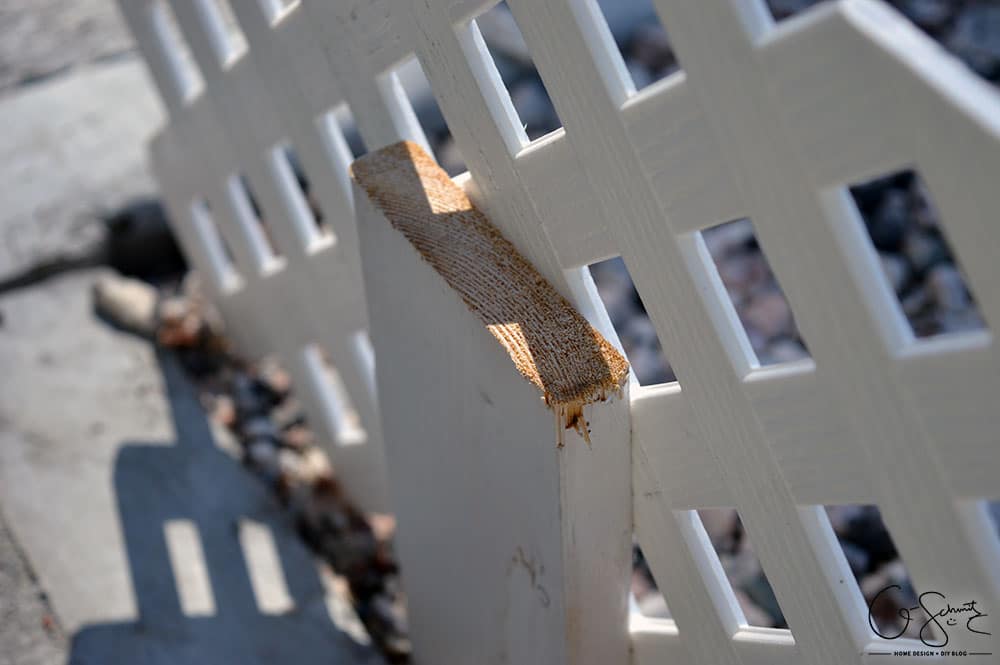
Then we took our cut trellis pieces and nailed them to the front of the stakes.
UPDATE: I wish I would have installed them using little screws instead of nails. We left them out all winter and one of them was a little loose from the nails. Also, when we re-poured our concrete front porch, we had to remove the privacy fence and it was way easier to screw it back in.
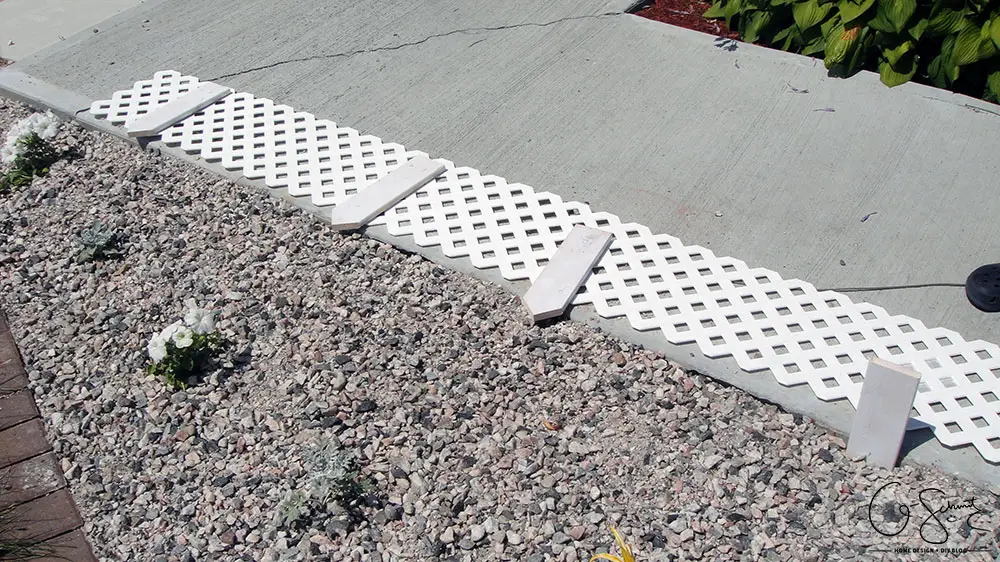
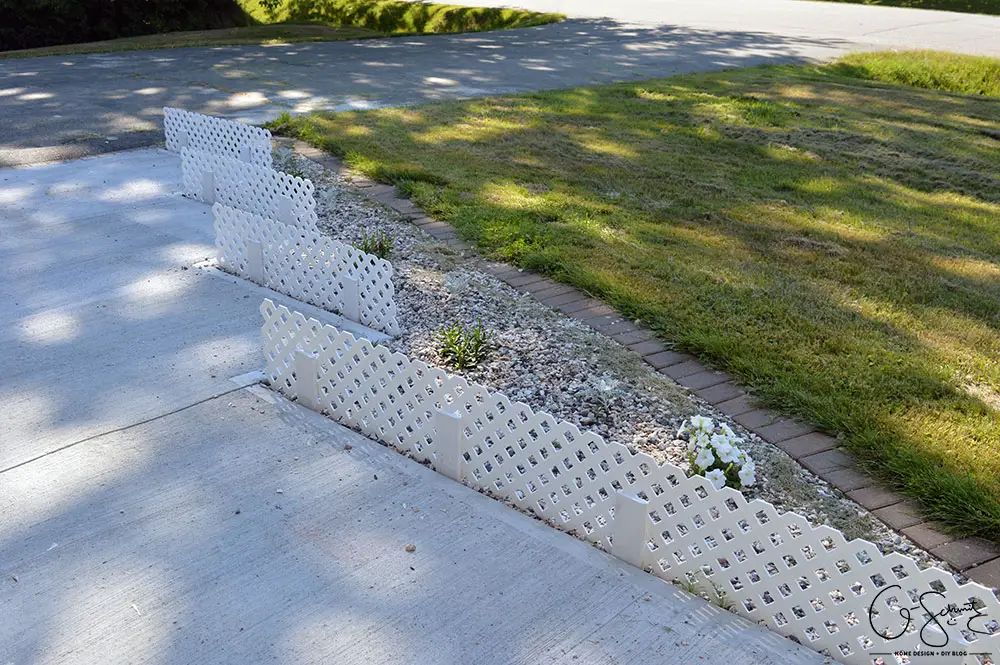
Our small 4′ fences had two stakes per piece, and the longer 8′ section had 4 pieces. The original front walkway design plan had a 4′ section here, but I thought the 8′ looked better (and the full length is 9′ anyways).
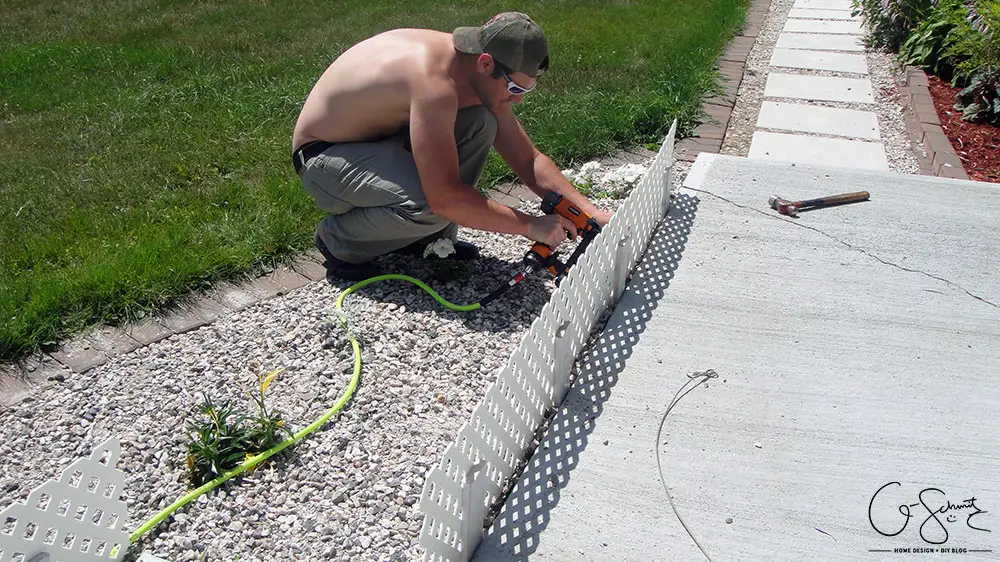
Yes, here is the lovely Husband in his non-shirt wearing glory. It seems like whenever I want to get work done outside, he has to do it with his back exposed to the sun…
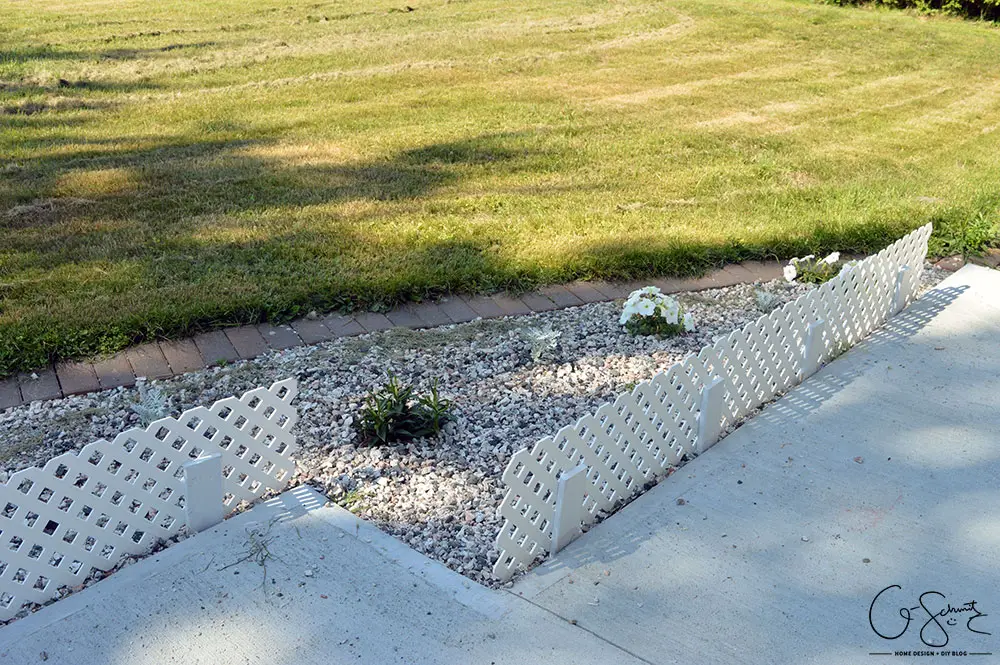
And the cute little fences are in place – easy right!? They actually sort of even stop Tootsie from rubbing her leash all over the flowers, so bonus!
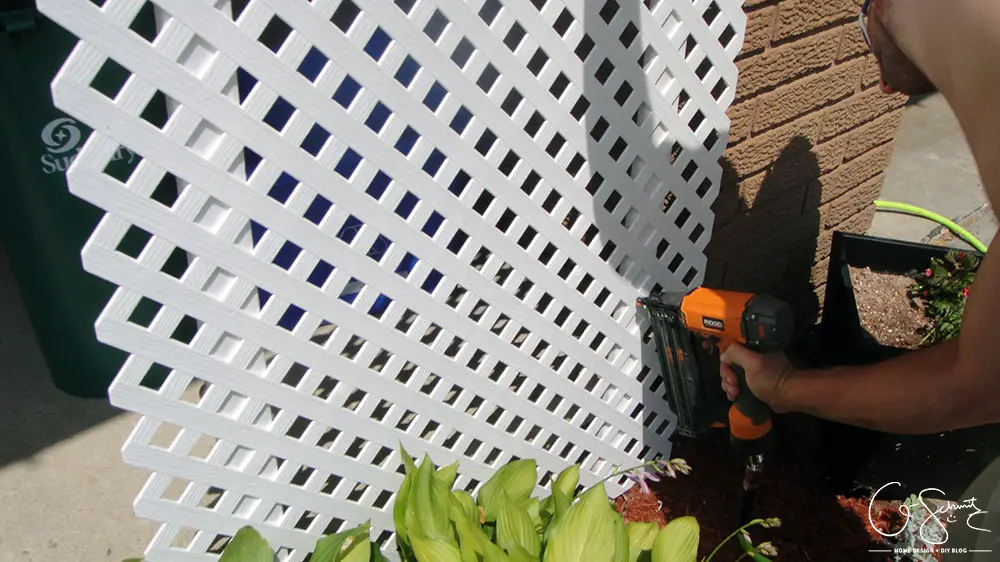
Remember that extra 3′ x 4′ section of trellis and the long pieces of wood that I painted? That became like a “privacy fence” that we installed against the garage wall on our porch.
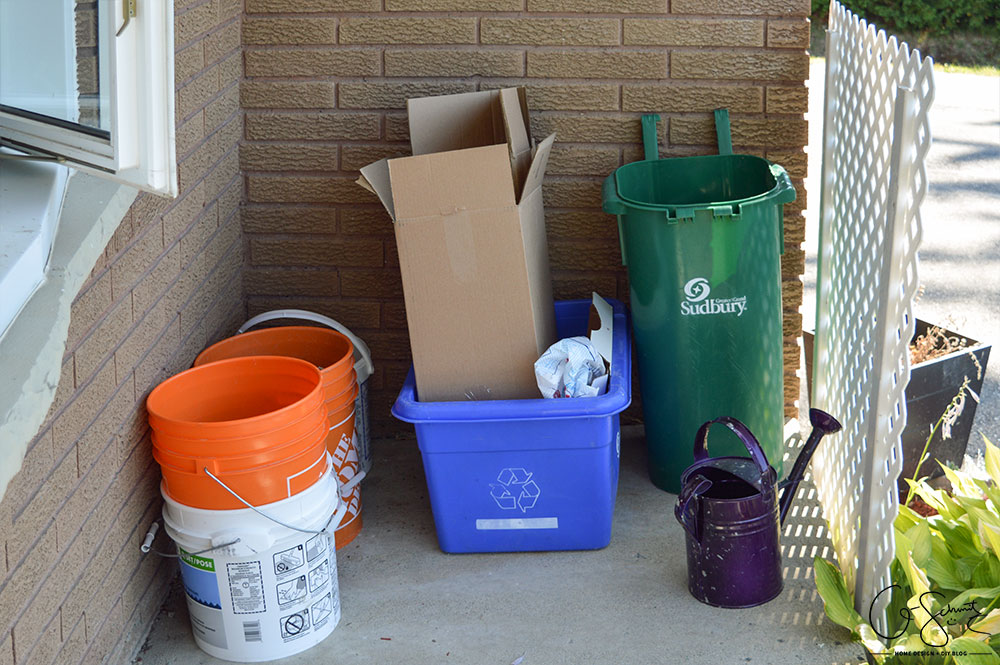
Which hides all of our recycling/compost bins! Those buckets are the ones that are full of rocks, and if I’m being honest they will probably stay here all winter until I figure out what to do with them (but I’m hoping we deal with them before so they don’t crack when they freeze).
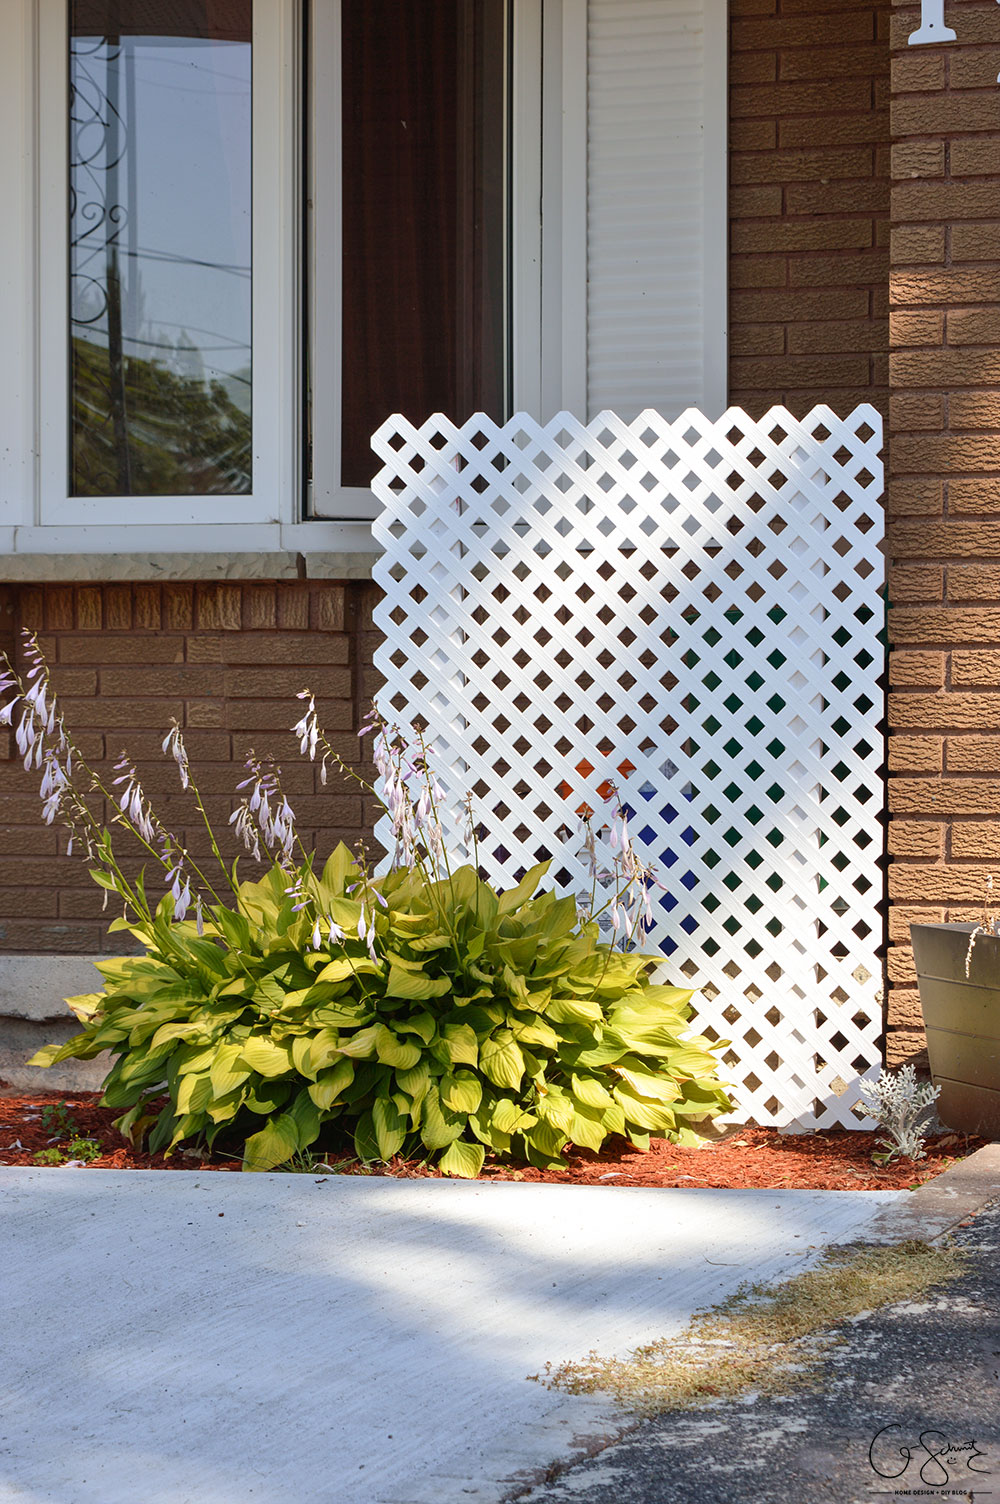
From the front it looks just like a cute little fence and you can’t even see the mess :)
The last thing I had to do was add some paint to the edges of the stakes (which I did this weekend) and I’m hoping the non-treated wood will survive the elements and not rot right away. I’m thinking we will have to remove the small fences during the winter since we tend to get A LOT of snow in this area, but the larger one hiding our bins might be able to stay up all winter.

Here’s what they look like together if you were wondering! Our hostas are also in bloom, so everything is looking real nice around here (which is a big departure from a couple of months ago).
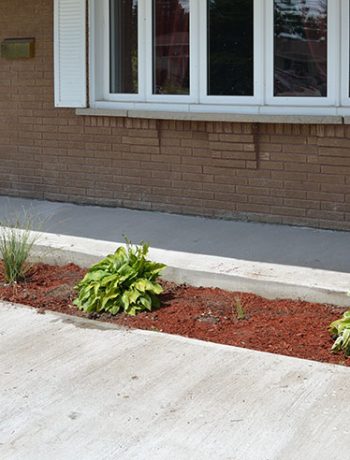
And, just because I like to do before/afters – I thought I would show the different areas how I envisioned them in the original design vs. now (reality).
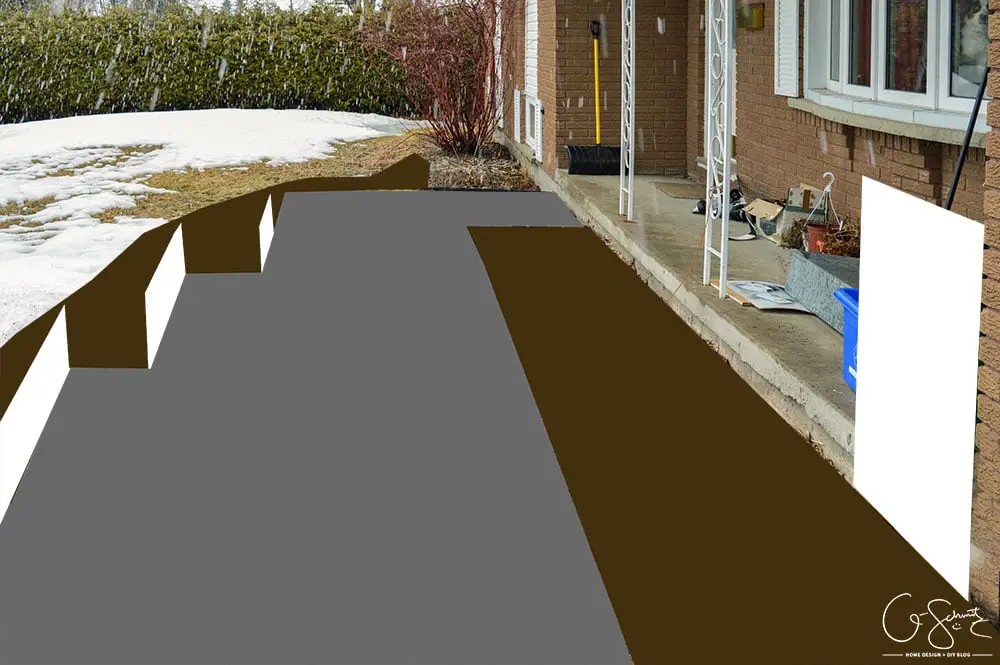
Photo original appeared in Front Walkway Plans
The straight view looking towards the house.
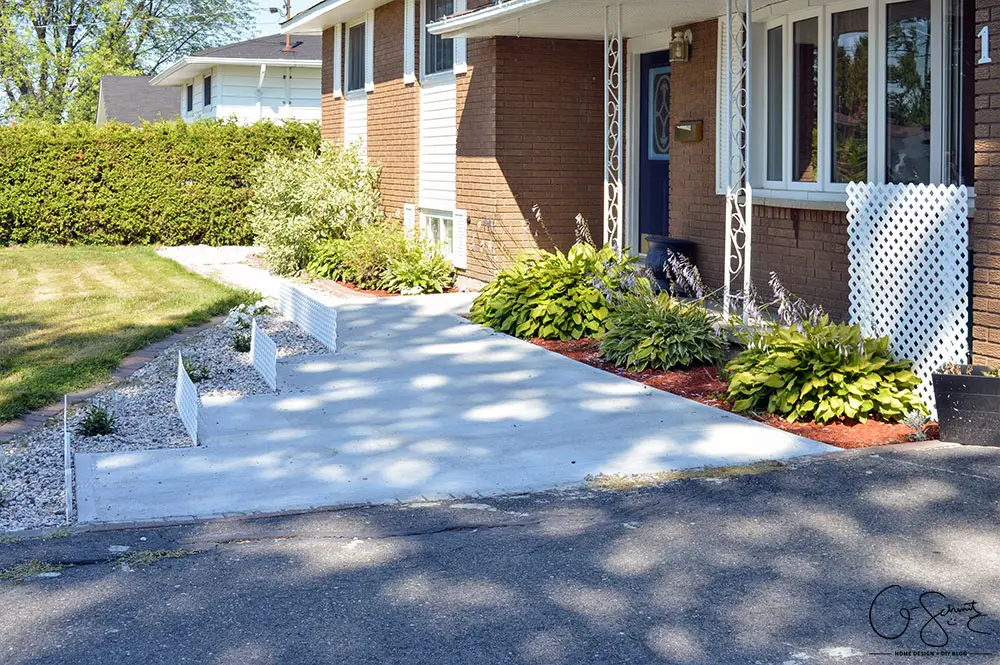
Not having snow helps too!
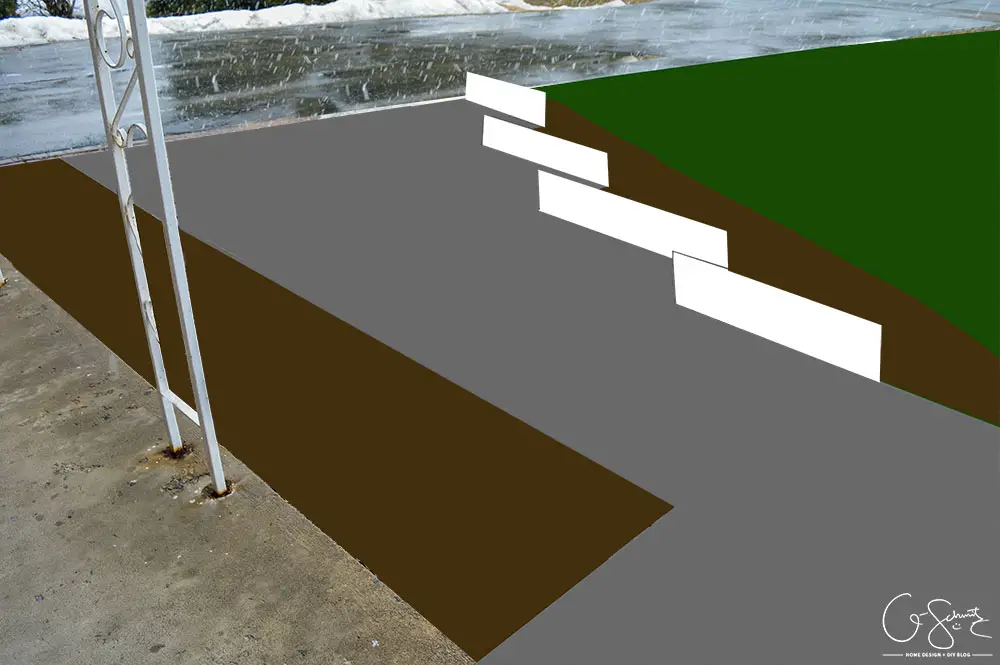
Photo original appeared in Front Walkway Plans
The view from the front door to the driveway.
The 8′ section works better I think.
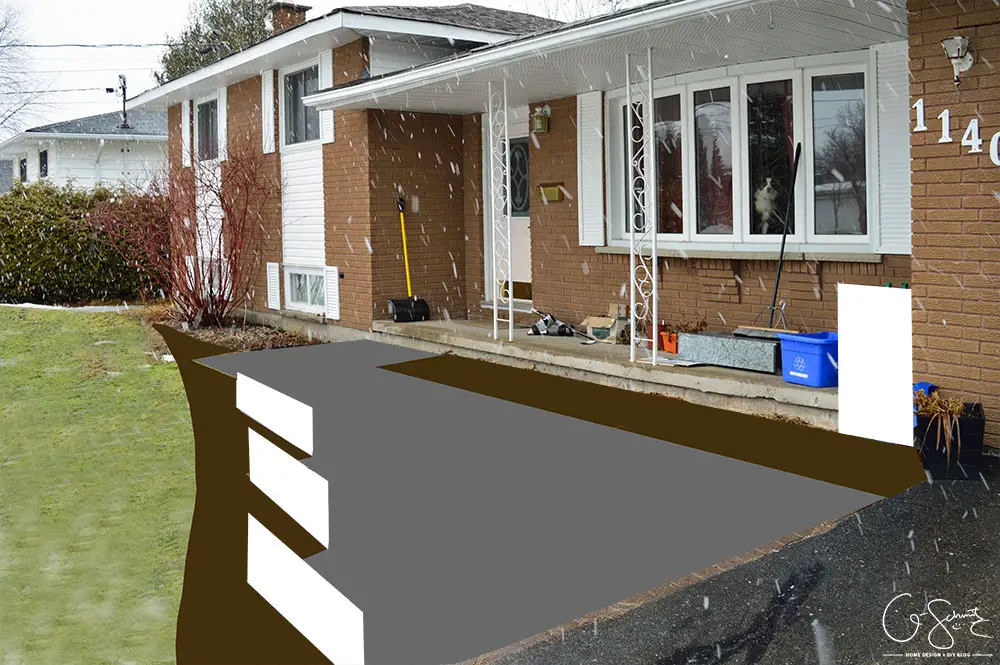
Photo original appeared in Front Walkway Plans
And finally, the diagonal view of the house.
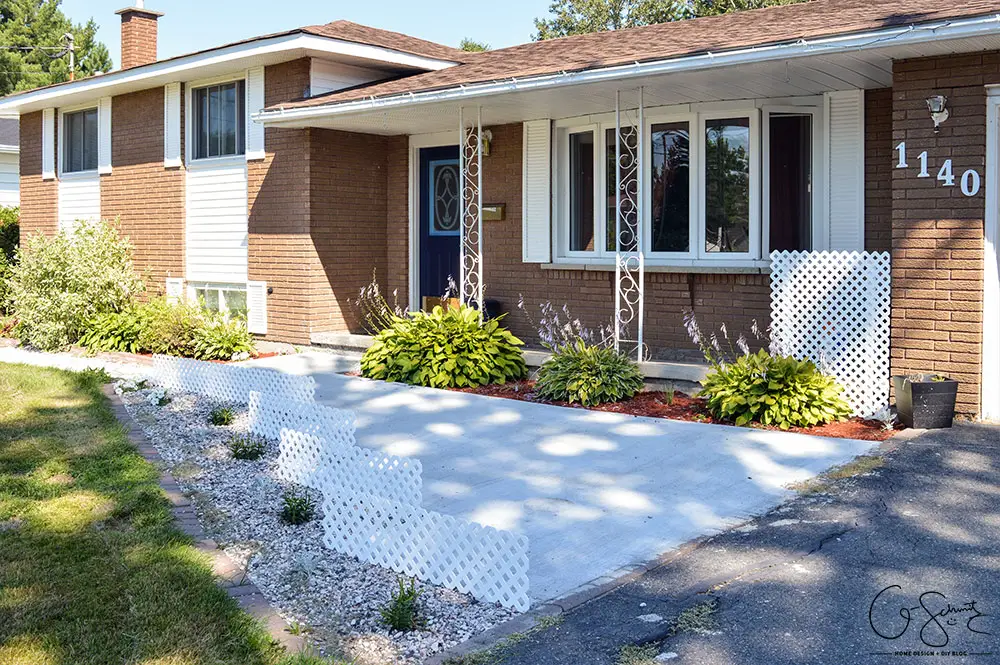
I like when my design visions come to life!
This area has certainly changed a lot from how it was, and even how it looked at the end of the summer last year. We now only have a bit of maintenance to do next year, and it should hopefully stay this good looking for a long time!
I hope you enjoyed reading about our easy trellis mini-fences, I’m really happy with the way they turned out :) I also like that the trellis comes pre-made, so it’s almost a fool-proof project! You could always build your own front part (maybe use lots of stakes and a cross section or two to make mini-picket fences?).
Next week I’ll be sharing pictures of the crack in the concrete, and what we did to “fix” it!
See you then :)
No Comments