
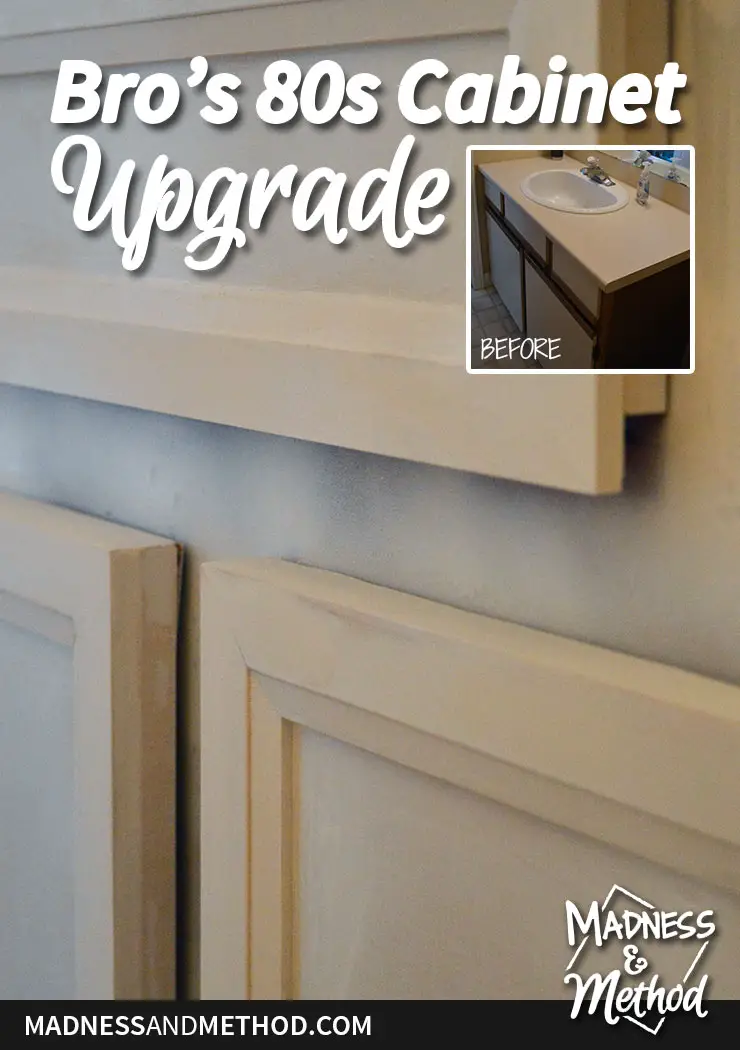
When you hear the words “80s cabinets” I’m hoping the same image pops up for everyone: an off-white melamine cabinet, with a stained wood lip at the top or bottom. This style of cabinet was super popular and can easily date your décor by a few decades. What if you love the layout of your kitchen or bathroom, but not the style? My brother had one of these cabinets as his bathroom vanity and I’ve come up with a great solution for an 80s cabinet upgrade… and bring it into this decade!
– Note: This post contains affiliate links. See more information about affiliates here. –
If you’ve been following along with my bro’s budget bathroom project, then you know that this is the 4th week that I’m linking to the One Room Challenge hosted by Linda from Calling it Home. I was hoping to have a 100% completed cabinet to show you this week, but you’ll just have to wait for the reveal. (I have a couple coats left of paint to add, and we need to add the hardware too, but for now you can imagine that, right?)
Anyways, in the second week I shared the demo and wall plans, and the updated counters in the third week.
You will notice in the pictures for today that the countertop is magically back to the original version, but again, I was hoping to be farther along (and we started the 80s cabinet upgrade first!).
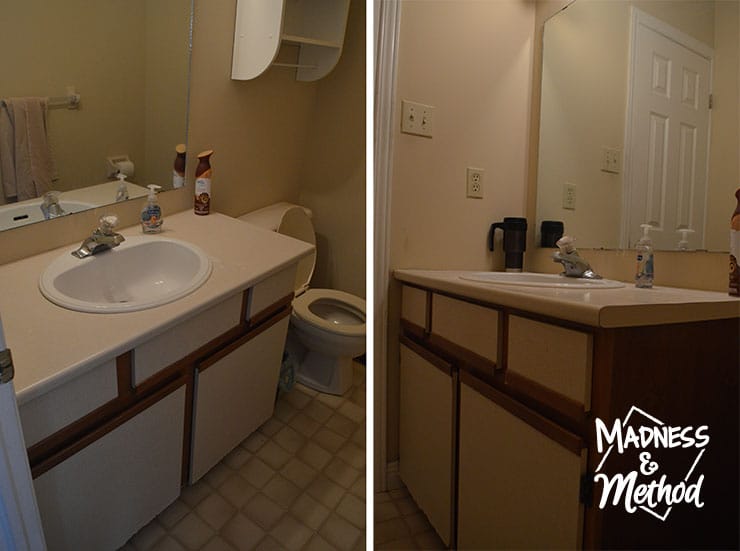
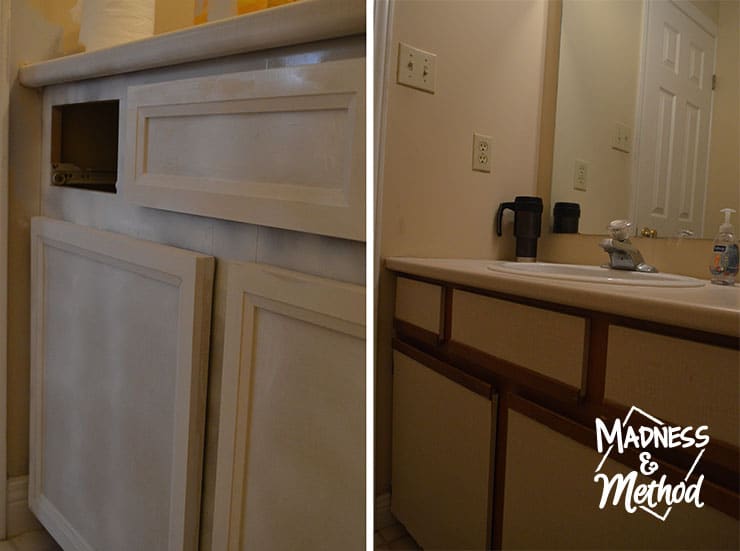
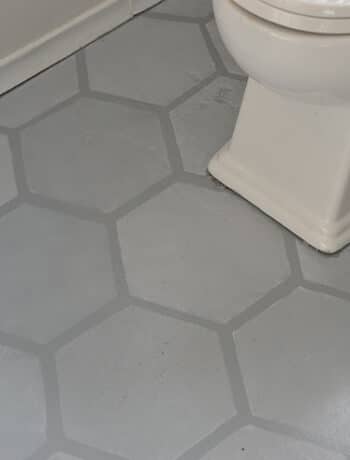
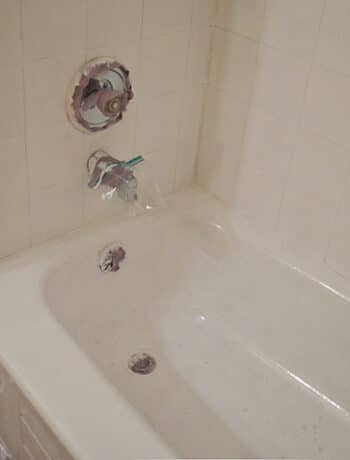
Just in case you needed a reminder of where we started with the space (and an example of an 80s cabinet). His vanity was a decent size and we definitely thought it would be more budget-friendly to leave it in place and update it, rather than rip it out, fix the floors/walls/etc. and buy a new one.
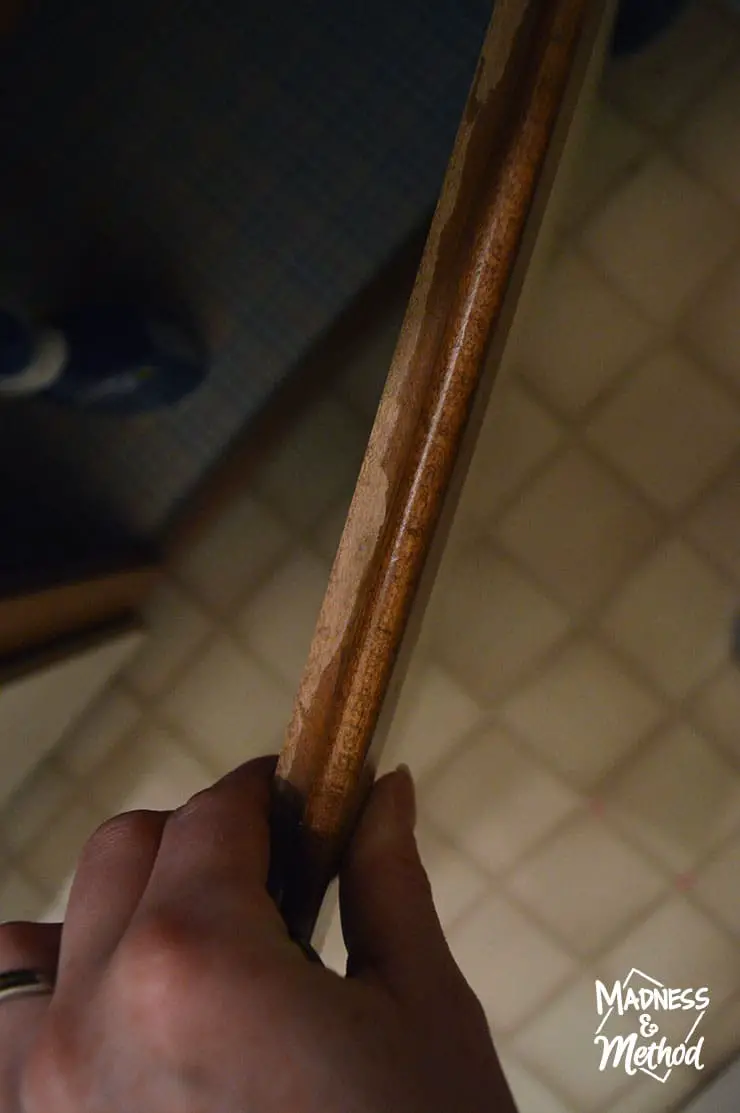
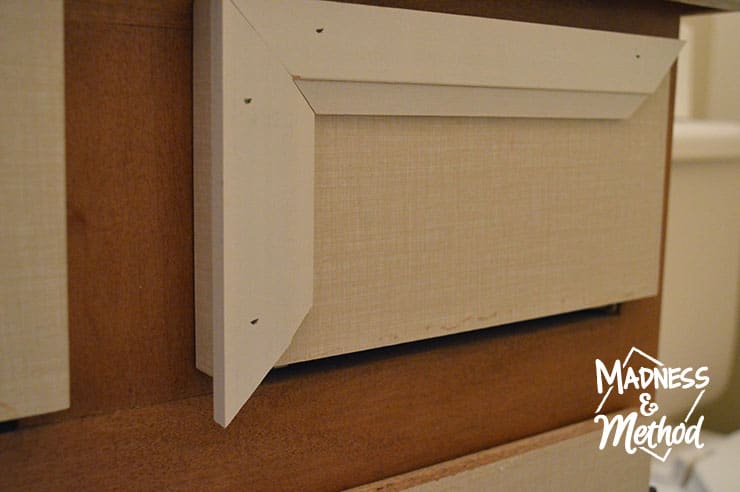
Depending if you’re dealing with a drawer or door, the wood trim “lips” will be at the top or bottom of the panel. They are most-likely added on afterwards, so you just need to locate the nail heads (for us they were going downward into the length of the panel, rather than from the back).
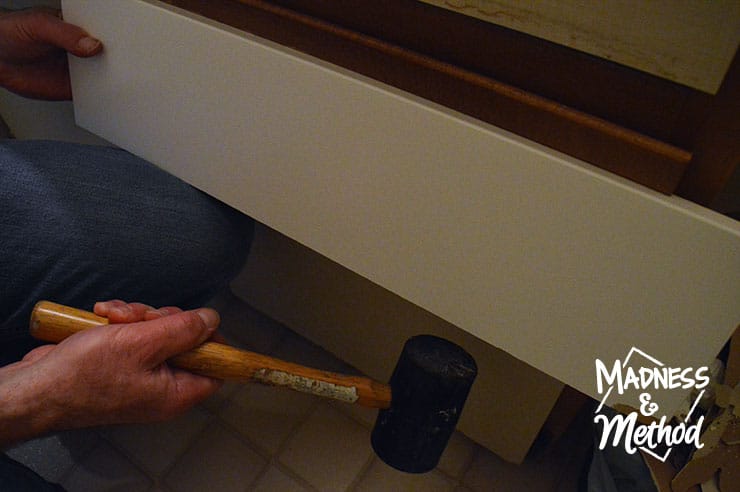
Then you’re going to grab a spare piece of wood and place it along the bottom of the cabinet lip (we had a panel leftover from my brother’s kitchen renovation). Using a rubber mallet (or a hammer), carefully tap upwards so that the wood is pushing into the lip (and popping the nails out).
It was actually SUPER quick for us, because any glue that might have been there wasn’t sticky anymore.
In fact, it took us less time to actually remove all the lips, than it did to go back and take a picture (which I forgot to do the first time around… we literally had to reinstall one of the lips because it kept falling for the photo haha!).
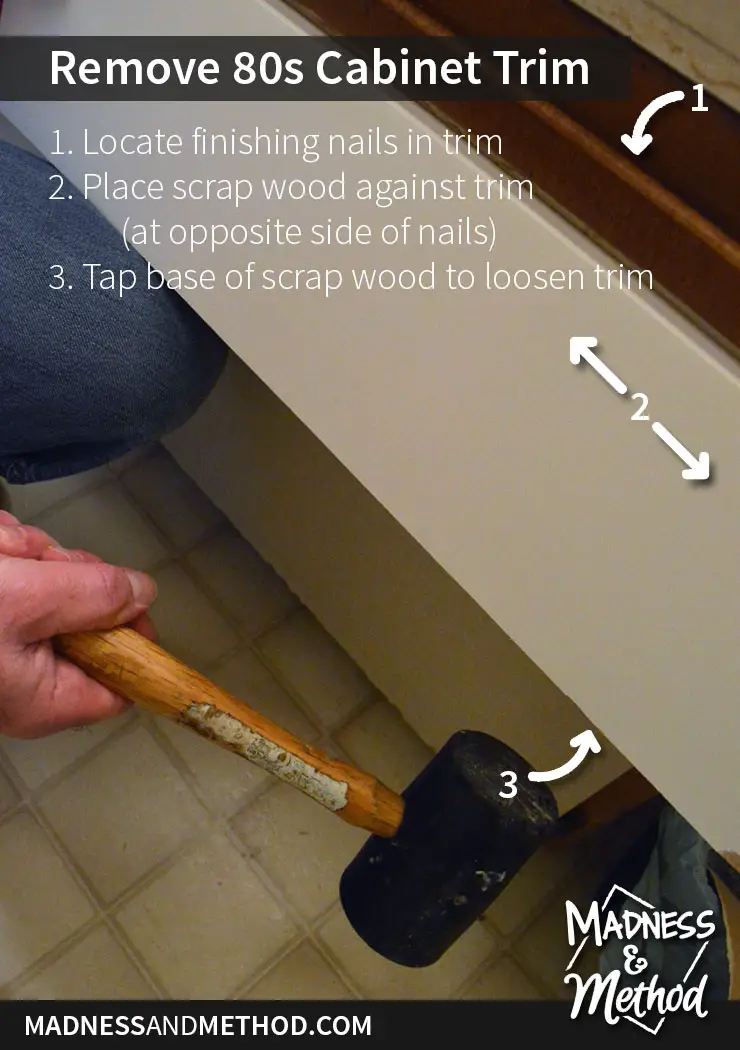
Here’s a handy graphic that explains all the steps in one. For the drawers, it was easier for us to remove them, and then hammer downwards.
Actually, if you’re planning on painting everything, you can probably remove the doors first. (I wasn’t planning on removing the doors, so that’s why we left them in place).
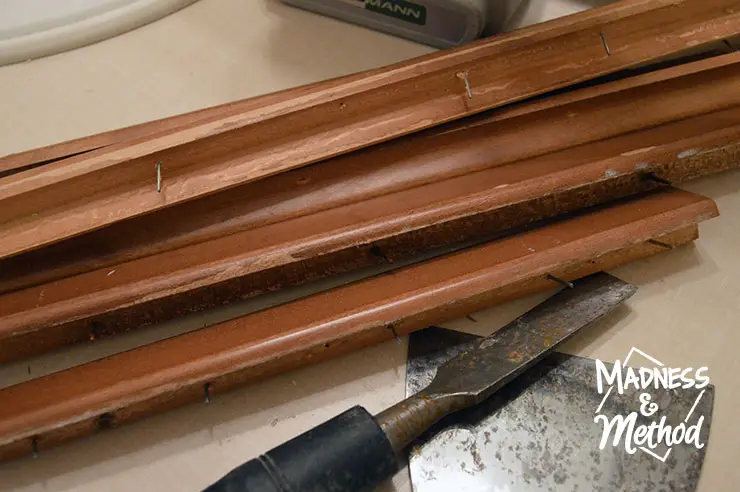
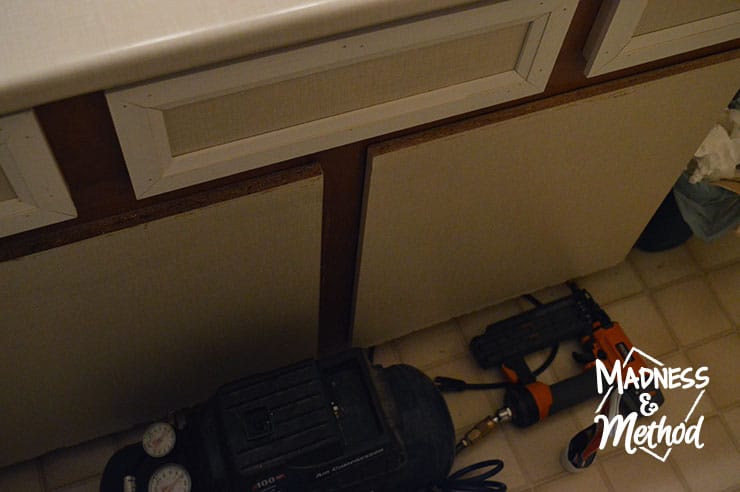
Nevertheless, you’ll be left with a bunch of random pieces of wood leftover. We had the chisel and palette knife out – because I originally thought we would have to remove them with those. Thankfully my Papa came up with this quick solution!
Depending on how your 80s cabinets are built, you may have some gaps to fill. Our doors were long enough, but the drawers were just a bit shorter. Either way, you’ll want to scrub down any leftover glue residue from the removed trim pieces.
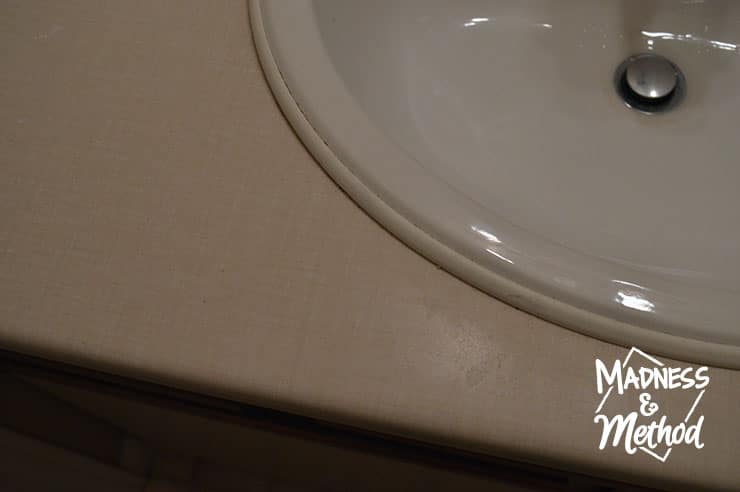
Oh, and remember last week when I said that the countertop had the same pattern as the cabinet doors? Just wanted to bring this photo back to show everyone what I meant haha!
80s Cabinet Upgrade… Getting Fancy!
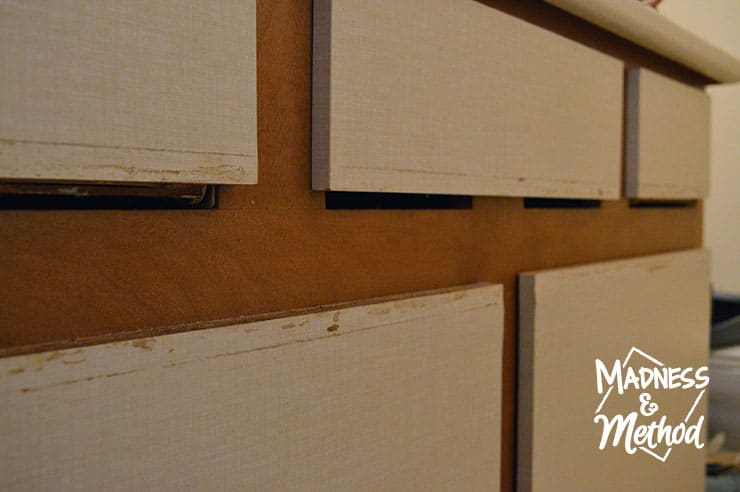
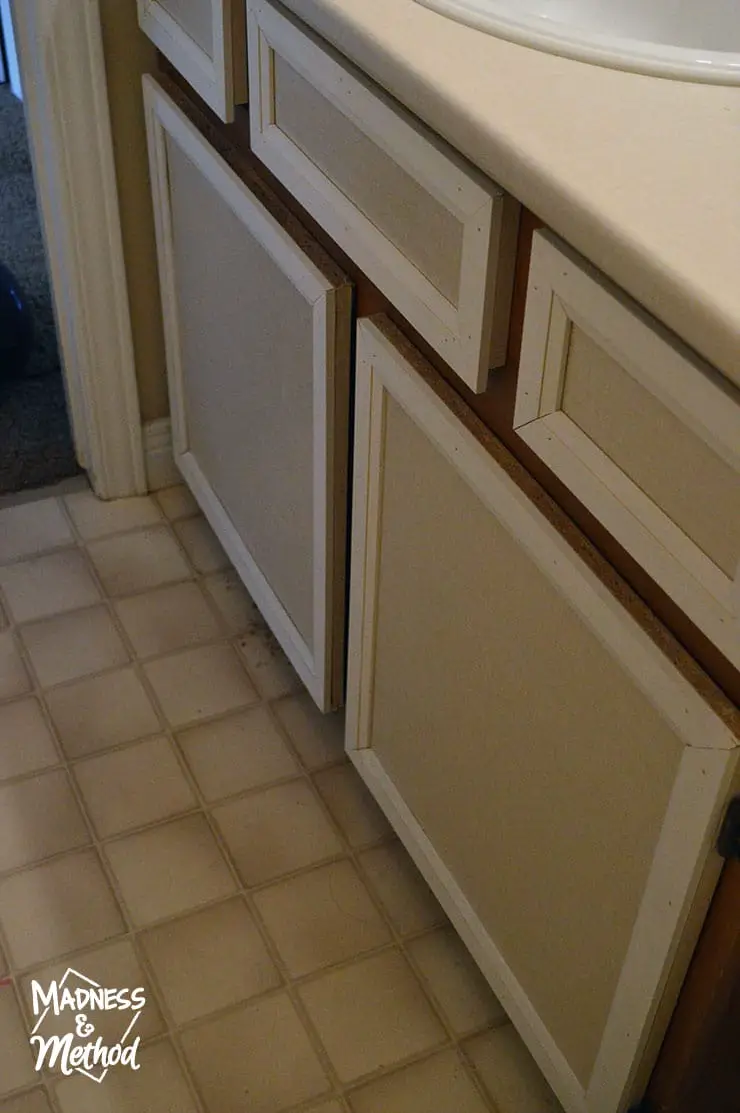
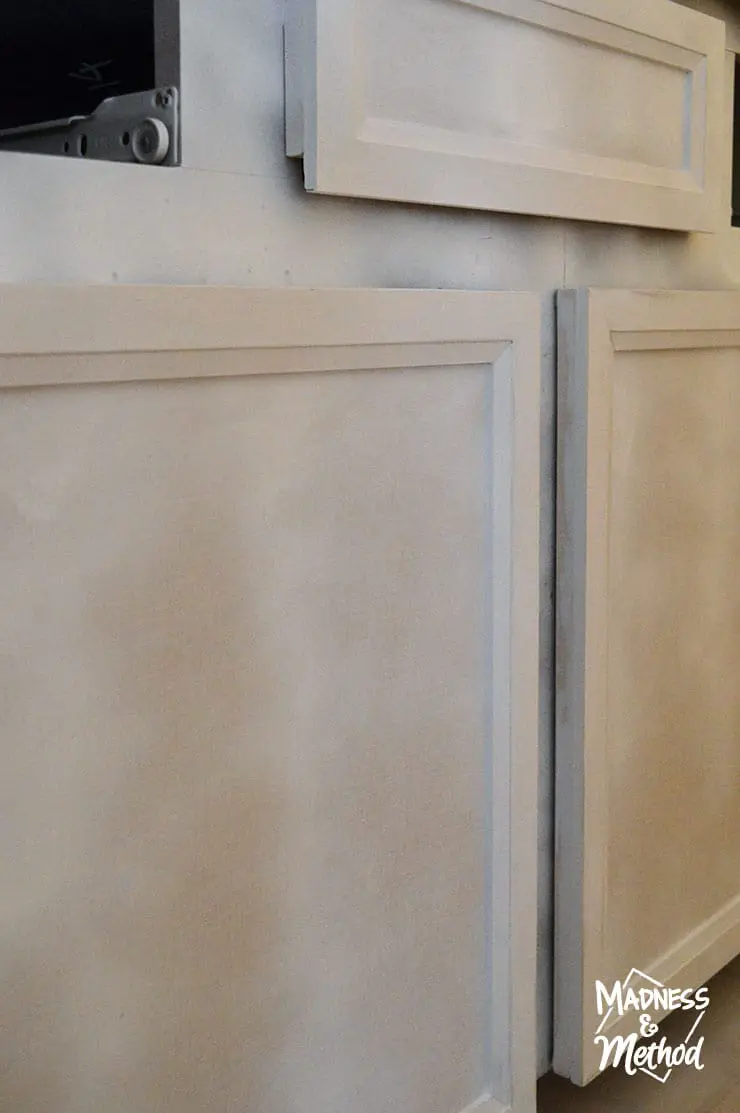
I knew I didn’t want to just leave the cabinet with the flat/plain panels – so thankfully I came up with the BEST solution using Metrie’s Poplar Door Stop. They are one of my sponsors for this One Room Challenge bathroom update, and as soon as I saw the door stop, I had to get casings and baseboards to match that same profile!
Fun Fact: Last year for the One Room Challenge I updated an Ikea Vanity, and that’s kind of what I was thinking (ie: framing out the doors).
For the small drawers, I made sure to go down just a bit farther so that it would hide the gap. You can technically still see it if you’re lying on the ground looking up… but who does that!?
I would add some No More Nails adhesive, then nail them in using 5/8″ nails. I actually installed the trim with everything in place, and that way I could guarantee I had the same height across all the panels.
Once all the doors were done, I went back in and filled the nail holes + outside edges, and caulked all the inside seams. Do you see that pile of saw dust underneath the left door? My brother said it had always been destroyed (you can see it better in the before photos at the top) – but I know one time we left Tootsie in there and she may have chewed some of the cabinet…
Thankfully my new edge trim covers that up :)
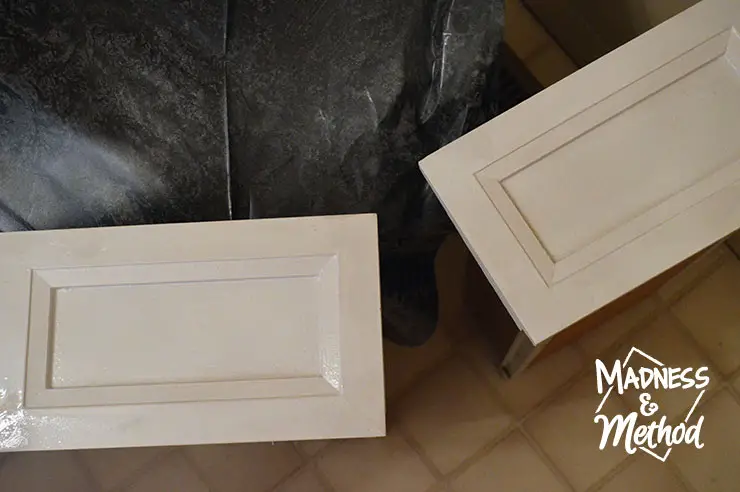
I then sprayed everything with Krylon’s Colour Master Paint + Primer in White Satin (another sponsor!). I really wanted a seamless finish, and knew that spraying would be better.
The drawers looked pretty good after one coat, but I had to do a few more on the cabinet and doors (we took them down after because it was much easier!).
Even though it’s not 100% done, I’m hoping you can still appreciate this 80s cabinet upgrade so far! We actually bought 4 of these black and metal pulls, and I am excited to get them on.
I’m hoping they go great with the Zura Single Handle Lavatory Faucet we have, which is a chrome/matte black finish. It was actually the reason I went with a mixed metal pull :)
And speaking of matte black and chrome, I sent my brother a BUNCH of lighting option links in either colour – and he emailed me back saying he liked this style the best (in the black finish). I told him they had the same style light in a 2-bulb for cheaper, and order whichever he wanted right away so that it would get there on time.
He went with the 2-blub, so fingers crossed it’s on time (or early!).
Because I’ve been home the last two weeks, we haven’t gotten anything else accomplished on our updated to-do list (that I shared last week). Actually, I picked up a couple accessories and will be sending the prints to get printed soon. Other than that, we still have a lot of projects to complete!
Wish us luck (and all the other ORC linking participants and featured bloggers too!)

This Project Has Been Sponsored By:
![]()
![]()
![]()
![]()
12 Comments
Julie
April 27, 2017 at 11:31 amThat looks like a ton of work, but the results are great! Your “new” cabinets look fantastic! We’re getting close to the finish line now…woot!
Nicole
April 27, 2017 at 11:56 amI’m really happy with how it looks – and it would definitely take a long time if you were doing an entire kitchen this way! Almost at the end :)
Angela @Simply Beautiful By Angela
April 27, 2017 at 3:21 pmWhat a difference! It looks like an entirely new vanity. I can’t wait to see how it turns out with the hardware :)
Nicole
April 28, 2017 at 5:13 pmI’m pretty sure no one will ever know how it is used to look!
Bre
April 27, 2017 at 9:25 pmWOW so brilliant to frame out those drawers! That is definitely upgrading the look! Can’t wait to see it all done.
Nicole
April 28, 2017 at 5:14 pmIt definitely looks so much better, and is a fun step up from just a plain front cabinet door :)
Andrea
April 28, 2017 at 12:00 amWow that’s a lot of work. Good for you! It looks amazing so far.
Nicole
April 28, 2017 at 5:15 pmI feel like I live for this kind of work haha! I’m happy everything is coming together :)
Danielle
April 28, 2017 at 10:01 amLooking good! You are knocking out some amazing changes! Love it.
Nicole
April 28, 2017 at 5:17 pmI’m definitely trying to go for big impact changes, without completely changing the room :)
Lora
May 3, 2017 at 9:51 pmWhat a huge improvement. We did work like this to our vanity, but ours was more structural — to make it deeper and taller.
Nicole
May 4, 2017 at 10:43 amWe’ve just finished painting it and still have to get the hardware on, but it’s so much better :)