
What would you say if I told you that you could easily update the look of your dressers, without making a permanent change? For our new nursery, I borrowed/stole a dresser from my parents and it was already painted white (my favourite colour for furniture!)… but I still wanted to make some sort of change. Using removable wallpaper, I was able to do an easy dresser makeover that makes a fun impact in our space.
– This post is part of a sponsored series sharing our new nursery, and new pulls were supplied from Liberty Hardware. This post may contain affiliate links. Click here for more information on affiliates.
Follow along here:
Week 1: Colour Journey | Week 2: Design Plans | Week 3: Upgrading Flat Doors | Week 4: DIY Baby Change Table Top | Week 5: Easy Dresser Makeover –
A picture from the dresser at my parent’s house:
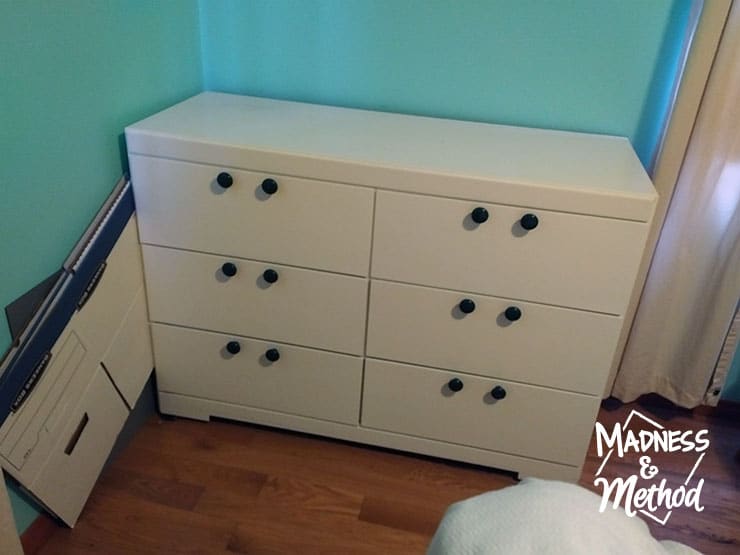
I’m pretty sure this was one of the dressers that my brother used as a child (and/or that I used until I got my big wardrobe). It was a nice size to add a change table top, and my parents were barely using it… so it was free for me :)
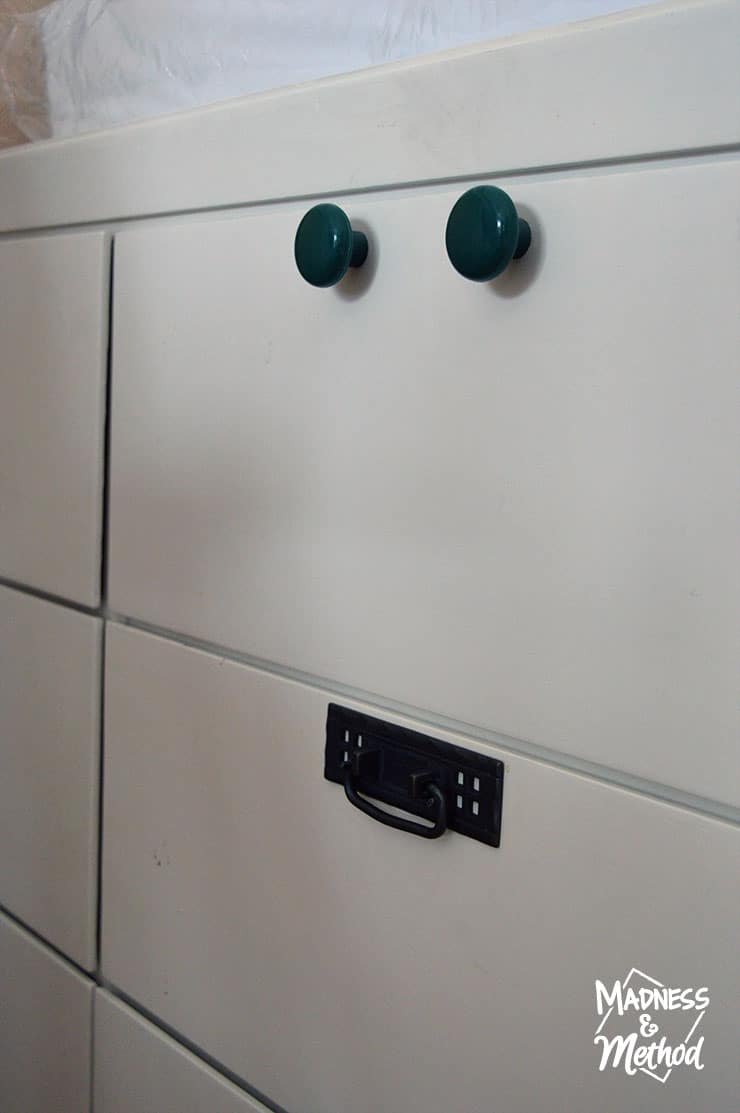
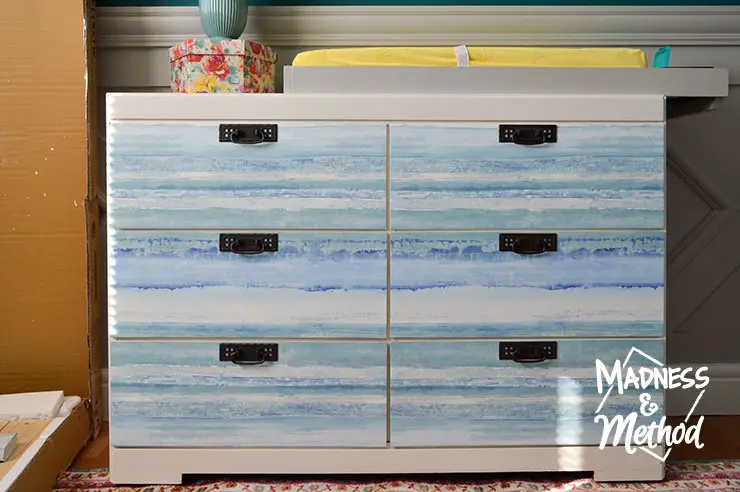
You may have noticed that there were 2 green knobs on each drawer before. I definitely wanted to upgrade to a single pull, and luckily Liberty Hardware had the perfect Bail Pulls that fit my existing 4.25″ hole pattern (which is not a common size by the way!). I liked the rectangular shape of these pulls, and they’re definitely unique and different. Before starting my easy dresser makeover, I definitely wanted to test out the fit of the pulls (just in case I measured wrong).
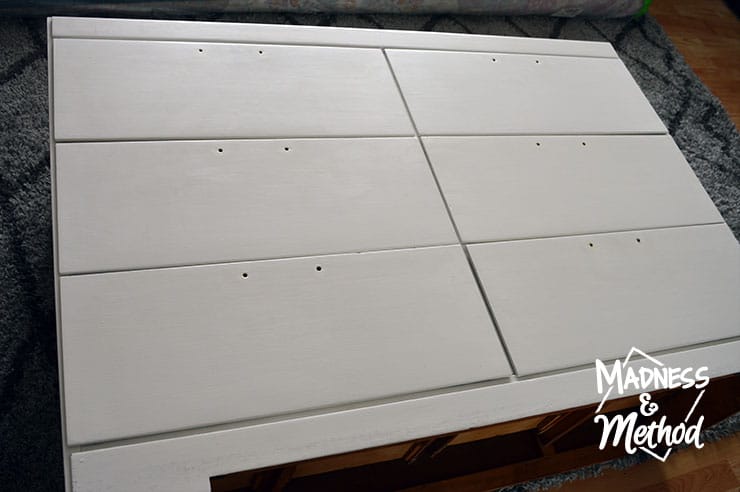
Anyways, once I knew the Bail Pulls would fit, I took out all the old knobs, gave the entire dresser a good wipe down with some multipurpose cleaner and laid it down on the floor.
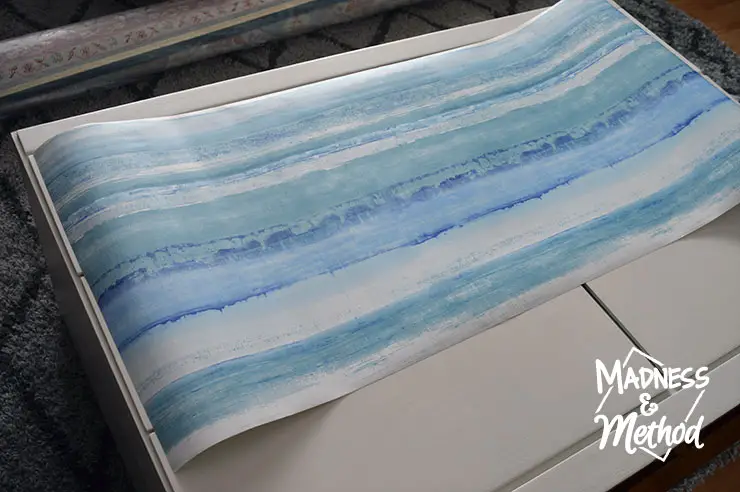
Like the rug for the new nursery, I agonized over which wallpaper pattern I wanted to use. You can see all of the options I considered on this Pinterest board section, and basically, I was looking for something that had my nursery colours included and didn’t bring in too many new colours. In the end, I went with this multi-blue watercolour pattern. It was one of the cheaper options I could find (a lot ship from the states and shipping was crazy expensive!) AND I was hoping that this simple pattern wouldn’t clash with other things in the room. (I liked a lot of the floral patterns, but I didn’t think they would go with the floral box that would be placed on the dresser). Oh, and I was hoping that one of the colour variations in this pattern would at least match my light turquoise lamp!
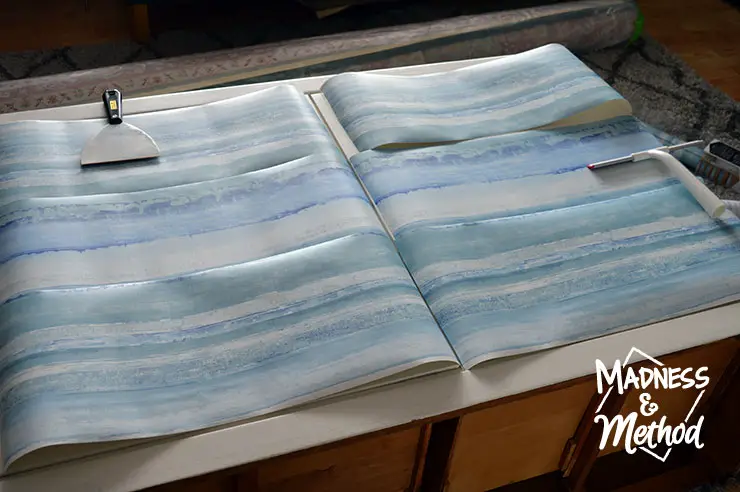
Next, I cut strips into the wallpaper that would fit over each drawer (allowing for some excess around each side). I didn’t necessarily like the dark blue stripe in the centre, so I made sure to use the same top pattern for the bottom drawers (rather than repeating that blue colour again).
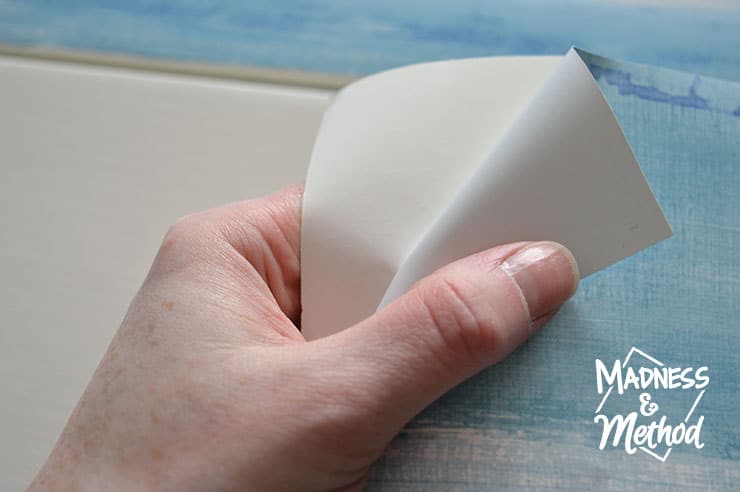
Because I was using a removable wallpaper, it was super easy just to peel the back layer off and then stick it into position. It was very similar to installing the fake stainless steel panel on our dishwasher.
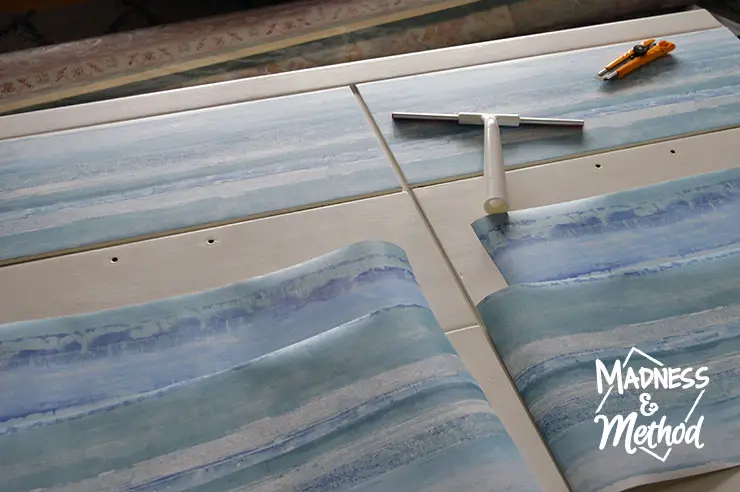
The only tools I needed (other than scissors I used to cut the initial shapes) was my bathroom squeegee and a utility knife. I didn’t get any photos (since it was a two-hand job) but I would roll out the wallpaper with my one hand, then follow along closely with the squeegee in my other hand and press the paper onto the drawer.
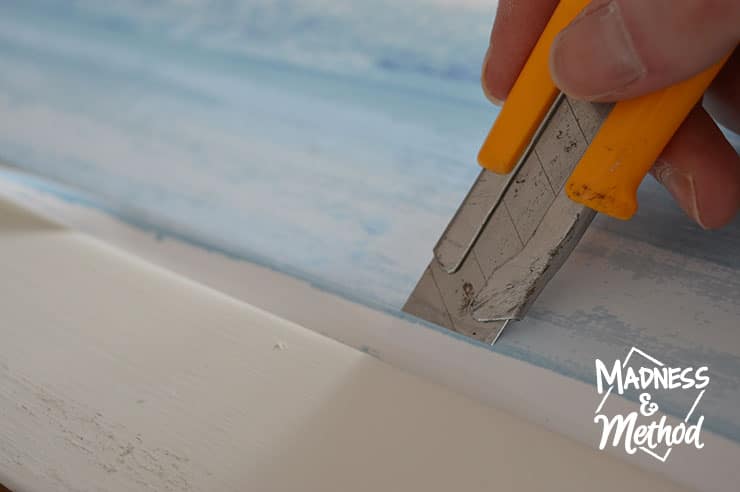
I then held the utility knife at a bit of an angle to cut off the excess along the edge, and it was a pretty smooth process. I did have a bit of trouble in some of the corners, but only because there wasn’t a drawer there to hold my knife against.
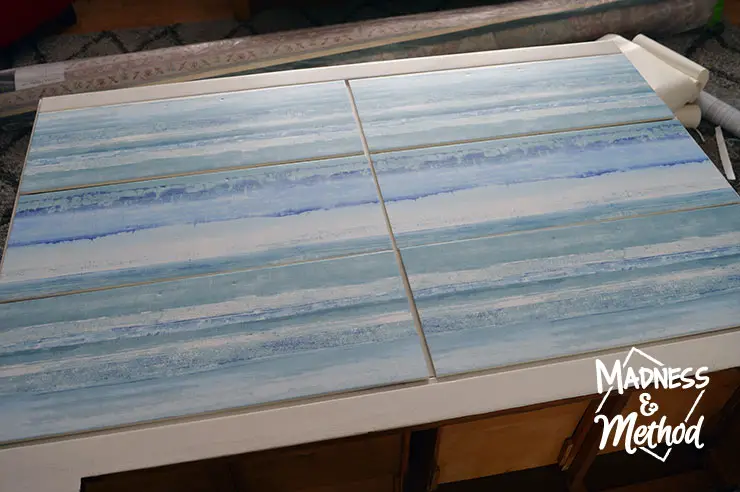
Once all the pieces were in place and looking good, I went back in with the utility knife to cut little slits where the drawer holes were.
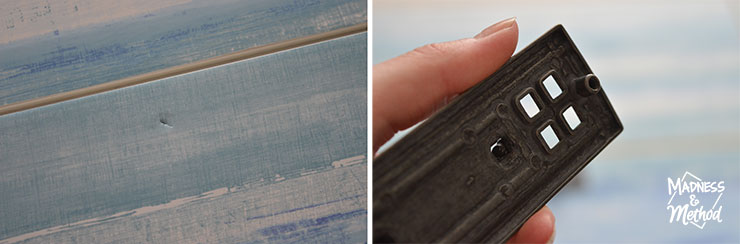
The Liberty Hardware Bail Pulls actually come with little stick outs in the back (that just happened to fit perfectly in the drilled holes from the desk) and I could easily push them into the marked slits.
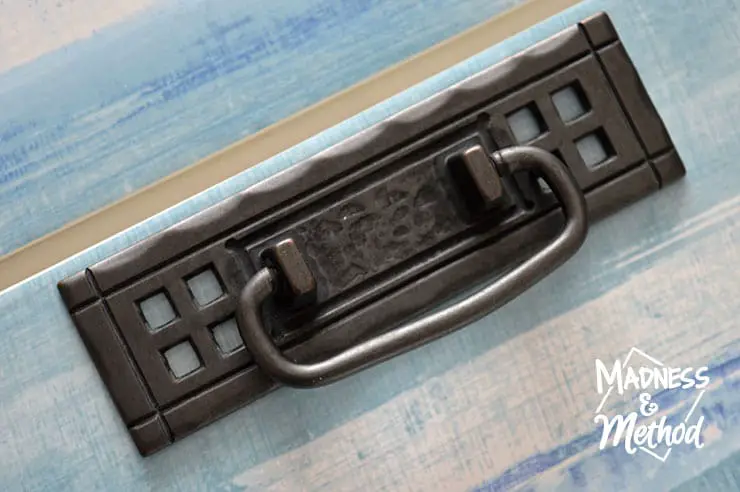
They actually held in place pretty good (even without the bolts screwed into the backs) but I figured I would eventually have babies/toddlers pulling on these, so I needed to include them, ha!
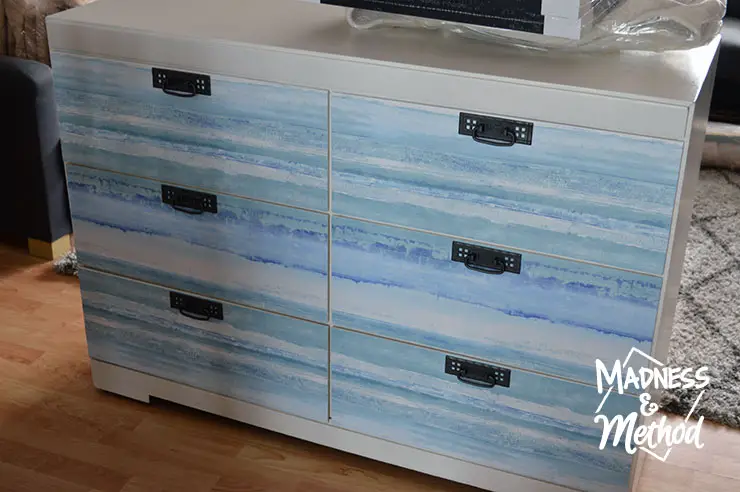
While Liberty Hardware does provide two different bolt lengths for their pulls, I ended up having to get some that were a 1/4″ shorter so that they would fit on these drawers (I think because it’s an older style, they made them a bit thinner back then!). Either way, I simply screwed them into the backs and this quick and easy dresser makeover was done in under an hour!
And here’s a little sneak preview of the dresser in the room, and the newly painted change table top.
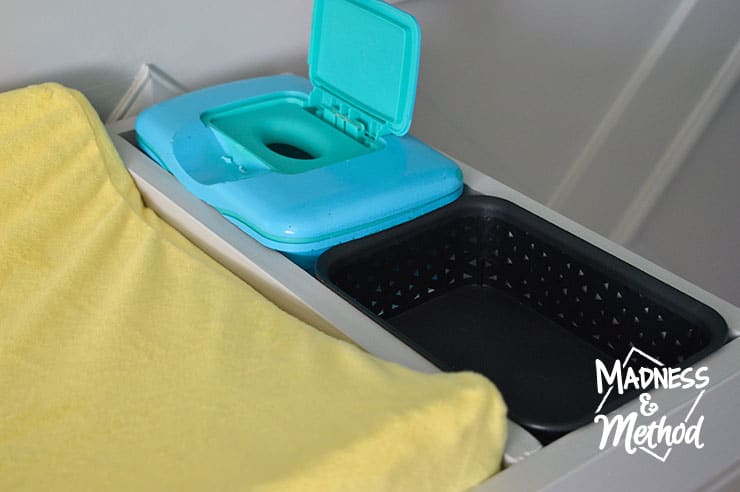
I ended up finding a perfect little container that fits on the storage side of the change table top. I was going to get 2, but figured the baby wipes box could just sit in there willy-nilly. Technically, there is no bottom so I may still add one in case we switch to a different wipe container (the little Zachary broke the clasp on this one…).
UPDATE: I added L-brackets to the bottom so that nothing would fall through
But this room is pretty much done so I may just take a break and wait for baby to arrive!
And what’s left of the ‘ole to-do list since last week:
Install new lightbulbPaint touch-upsInstall curtains and rodClean everything, bring in rug pad + rugAssemble crib- Finalize and bring in accessories (mostly done)
- Organize all the baby clothes + stuff
I was planning on taking all my reveal photos this past weekend, but I was literally waiting on paint to dry for a couple of the accessories, and then it became night time so they will have to wait! Plus, it’d be nice to get all the clothes in the drawers and stuff so that everything is done done, but I’m hoping that won’t take too long.
And before you know it, baby will be here :)

Thanks to all my nursery project sponsors:
![]()
![]()
![]()
![]()
Follow the Nursery Series:
- Week 1: Nursery Colour Journey
- Week 2: Deep Teal Nursery Plans
- Week 3: Upgrading Flat Doors
- Week 4: DIY Baby Change Table Top
- Week 5: Easy Dresser Makeover

4 Comments
Mommy aka Louise
March 7, 2018 at 8:58 pmThe dresser was originally your grandparents. They had antiqued them, I stripped them and brought back the walnut veneer when in University. When I had our set made I painted them white and they have been in the “kids” dressers ever since
I want those handles!! They would make a great mother’s day gift :-)
Nicole
March 12, 2018 at 1:06 pmOkay, will keep the handles then! Guess it’s been through a few DIY projects :)
Louise aka Mommy
March 15, 2018 at 10:57 amI meant the new Liberty ones. I never found any single pulls that fit the narrower holes
Nicole
March 21, 2018 at 1:47 pmYa, there aren’t many options for 4-1/4″ spacing – luckily these look great :)