
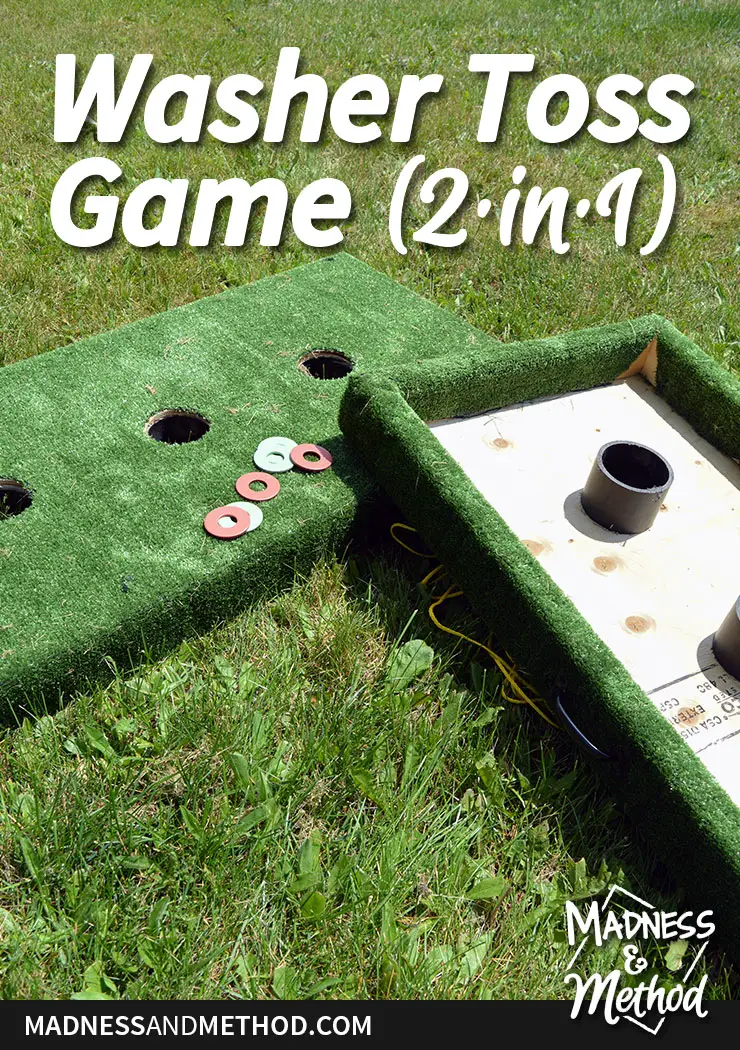
A few summers ago we were introduced to a washer toss games and we were hooked! Sometimes called “Texas Horseshoes” the game involved throwing steel washers onto a board with 3 holes, and it was actually a pretty simple setup. Last year, we played a “new” washer toss game where you throw a washer from a much farther distance, but into a pipe instead. Rather than have two different games, I decided to combine both sets into a washer toss game 2 in 1 – and I’m sharing the DIY!
– Note: This post was sponsored by Home Depot Canada and contains affiliate links. See more information about affiliates and sponsored posts here. –
Our friends have their own washer toss boards, so whenever we hosted a party they would have to bring them to our house. We had been thinking of eventually building our own set, so when Home Depot Canada asked if I could share an outdoor game DIY, I jumped at the chance! I purchased all the materials at the Home Depot, but had all of the tools already (so if you’re missing some from this list, don’t worry because you can get them at the Home Depot too!).
Materials Required:
- 1/2″ plywood (2 pieces 2′ x 4′)
- 3 lengths of 2×4
- 4″ plumbers pipe (about 20″ – these adapters may work too)
- Outdoor carpet (3′ x 12′ piece)
- 35+ feet of rope
- 2 handles
- 6 steel washers (2-1/2″ OD, these are the ones I used)
- 2 colours of spray paint
- Framing screws, staples
- Construction adhesive
- 2 screw-in hooks
Tools:
- Saws (circular and mitre)
- Drill/screwdriver/bits
- Pencil / straight edge
- Measuring tape
- 4″ hole saw (and/or jig saw)
- Stapling gun
- Utility knife / scissors
- Caulking gun
- Safety glasses / ear plugs, etc.
Washer Toss Game DIY Instructions
Building your own washer toss game is relatively simple, and it can be completed in a couple of hours (although there is some dry time required for the adhesive).
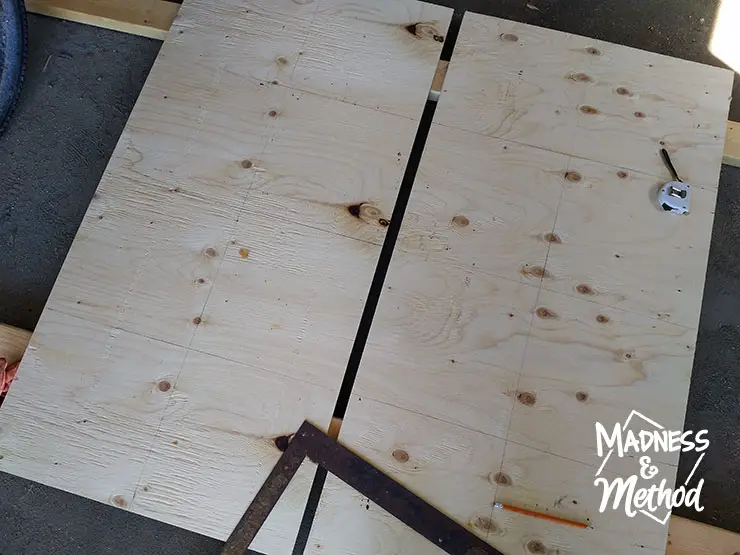
I purchased a 4×8 piece of plywood and cut it into two pieces of 2′ x 4′, but you can get it cut right at the Home Depot if you can’t cut it at home. Just be sure to get the “rough” plywood (near the structural lumber like 2x4s) instead of the finishing plywood (that you use for furniture building).
I then marked a line down the center widthwise, and at each quarter along the length. These will be your guides for the holes, and I decided to make ours equidistant. (You can also make your board smaller, I was going to do 18″ x 48″ but the Husband wanted it a bit bigger).
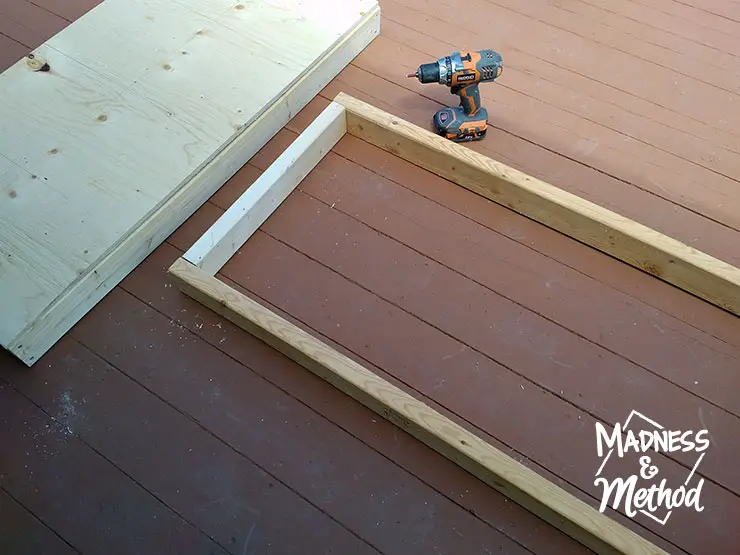
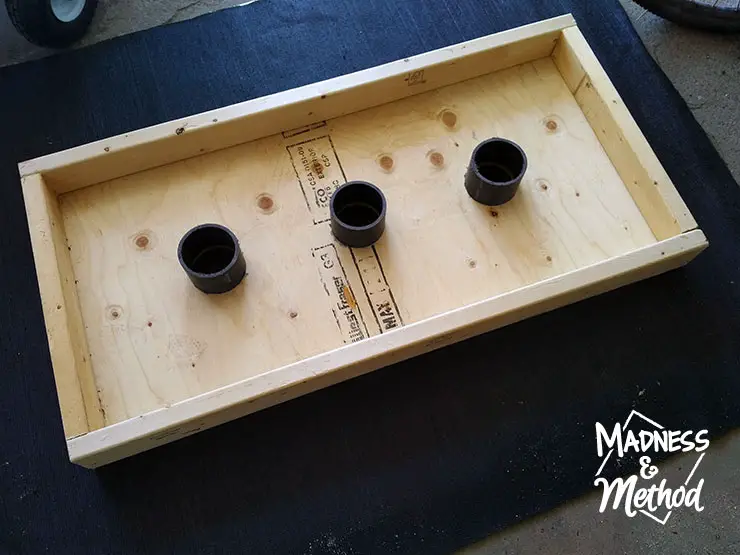
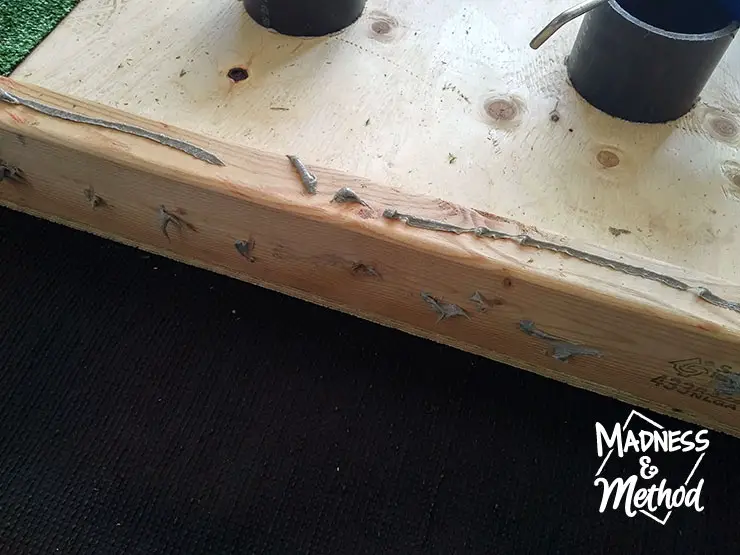
Then, build a frame the same size as your boards using the 2x4s. At first I was building these in the garage, but the floors in there aren’t level and it was SUPER wonky. I actually had to undo a few sides and build it on our deck, so make sure your frame is nice and level :)
DIY TIP: It’s so much easier when you drill pilot holes into your framing pieces. I actually use two drills to do this (one setup with my drill bit, the other with the screw bit)
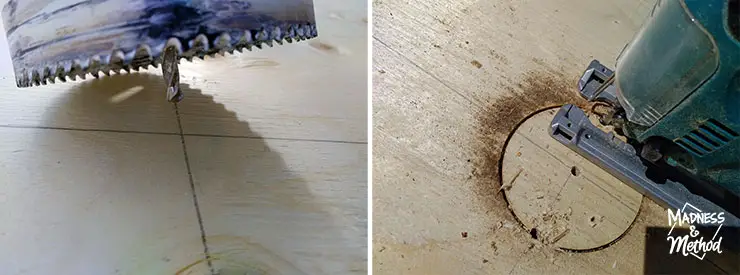
After screwing the plywood tops onto the frames, you’re going to need to drill the holes out. We already had a 4″ hole saw, and I first tried lining it up with my pencil lines (Tip: it was easier to pre-drill a pilot hole first). If you don’t have a hole saw (or don’t want to go through the intense workout to drill the holes), you can always use a jigsaw instead.
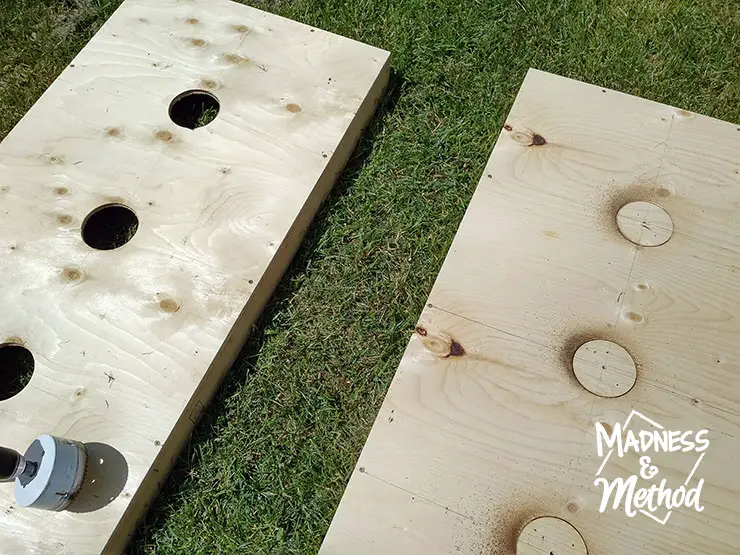
If you’ve never used a large hole saw before, let me tell you that it will be a challenge. It felt like it took me just as long to drill 3 holes as it did to build the plywood bases! You’ll also need to take frequent breaks so that your wood doesn’t overheat and burn (notice the black sawdust?).
DIY TIP: Drill two extra pilot holes where your hole-saw hole will be cut. You may need to use these to remove the piece of wood lodged in the hole saw.

I kind of wished the Husband could have done this for me, but at least I can say that I did do most of them with the hole saw (I gave up and used the jig saw after, which was MUCH quicker!). The holes aren’t as perfect, but it shouldn’t matter too much.

Now that the frame is setup, comes the fun part – finishing it! At the Home Depot, you can buy “bulk” carpet and there are a few outdoor options. You’ll want something with a low pile, and the Husband picked the basic green turf.
It comes in a 12′ length so all you need is a 3′ piece cut (we went with 4′, but it was too much).
After cutting the piece of carpet in half, I loaded the front of our board with construction adhesive and carefully laid it down in the centre of the carpet bottom. (Ignore the pipes for now; you should do that step later!). I squished it around, and then got to work to cover the sides.

It’s kind of like wrapping a big present, but the carpet is obviously much thicker! I found it was easiest to cut a square off at the edge, then sort of flip it up, and cut a small notch out at the top where the 2×4 was.
Then I would load up the sides with the construction adhesive, hold it tight and wrap it around. I added a bunch of staples along the top edge and inside corners, then would continue on to the other sides.
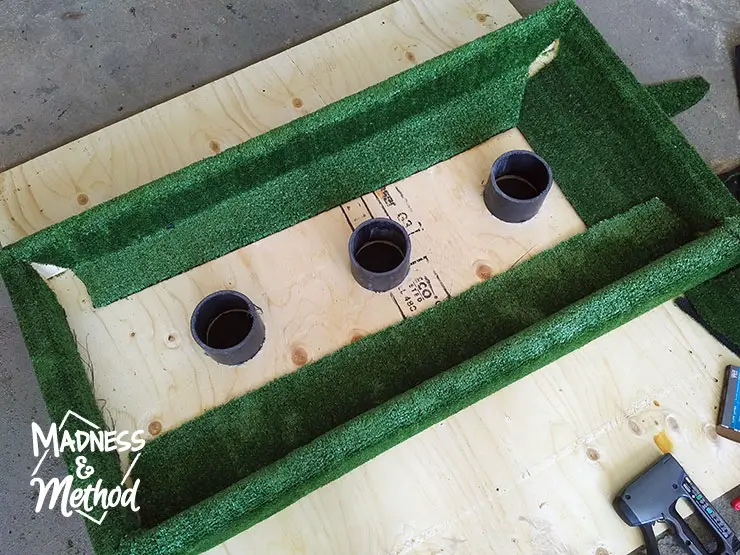
You’re going to want to leave it sit a while for all the glue to dry, and NOW you should also install the pipes (because you have to wait for that glue too!). Once everything was set, I cut off the excess carpet from the inside edge, and then added any more staples if it wasn’t tight.
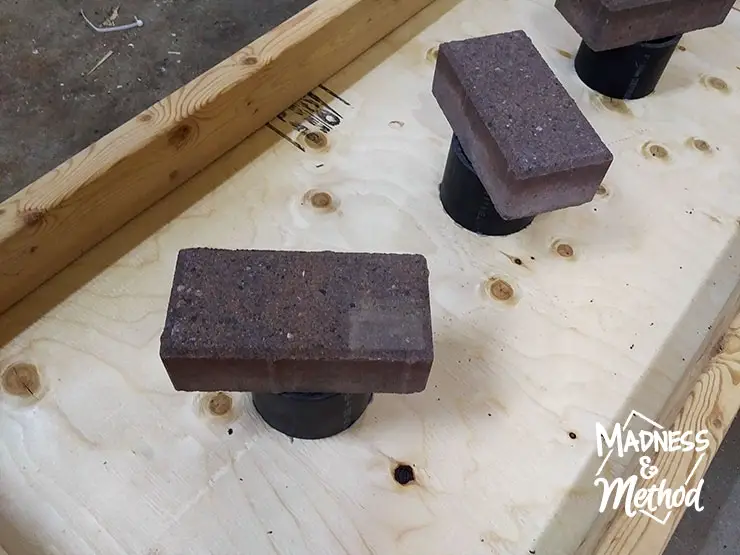
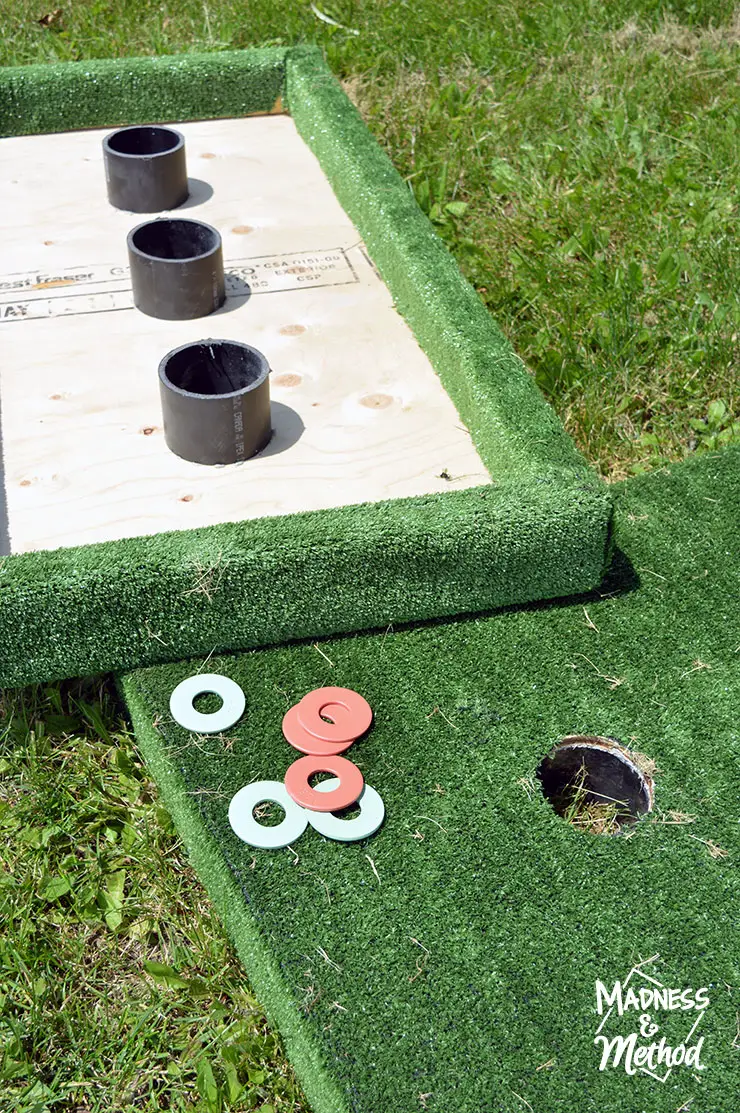
If you’re strictly building the Texas Horseshoe washer toss game, you could actually stop at this point (and omit the pipes). For the “2-in-1″ game version, you’re going to want to cut a 4″ plumbing pipe into (just over) 3″ sections. Basically, you want them to be just shorter than the 2x4s; so I think mine were 3.25” ish. Add some construction adhesive around the edge, and line them up at the holes. Wipe any glops of glue that went in the hole and add some weight on top while they dry (we still have patio stones leftover!).
Another Option: if you’re going to cut the holes with a jigsaw, you can certainly use the plumbing pipes as your guide. Your hole will be a bit bigger than 4″ so you can then install the pipes level with the plywood (so the plastic pipe will be the hole – just make sure it all fits before you add the carpet.
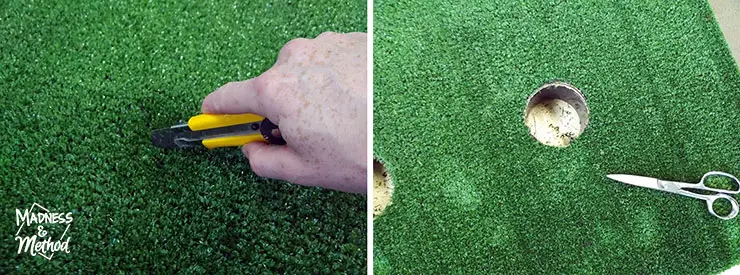
Finally, once the adhesive is completely dry, you’ll need to take a utility knife to cut out the holes. I found it was easiest to poke a hole through in the center, then find and scrape the knife along the edge all around the hole. (I first tried cutting it in pieces, but it was NOT even). I noticed there was a bit of play with the carpet around some of the holes, so I added some more construction adhesive and squished it down again to be safe.
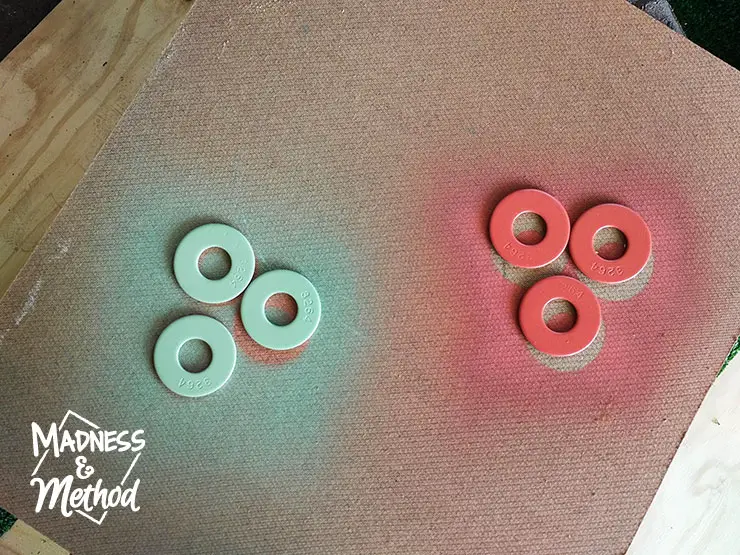
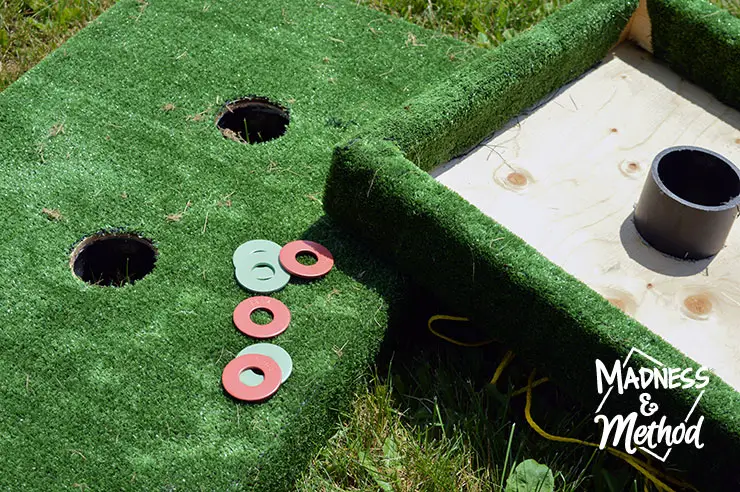
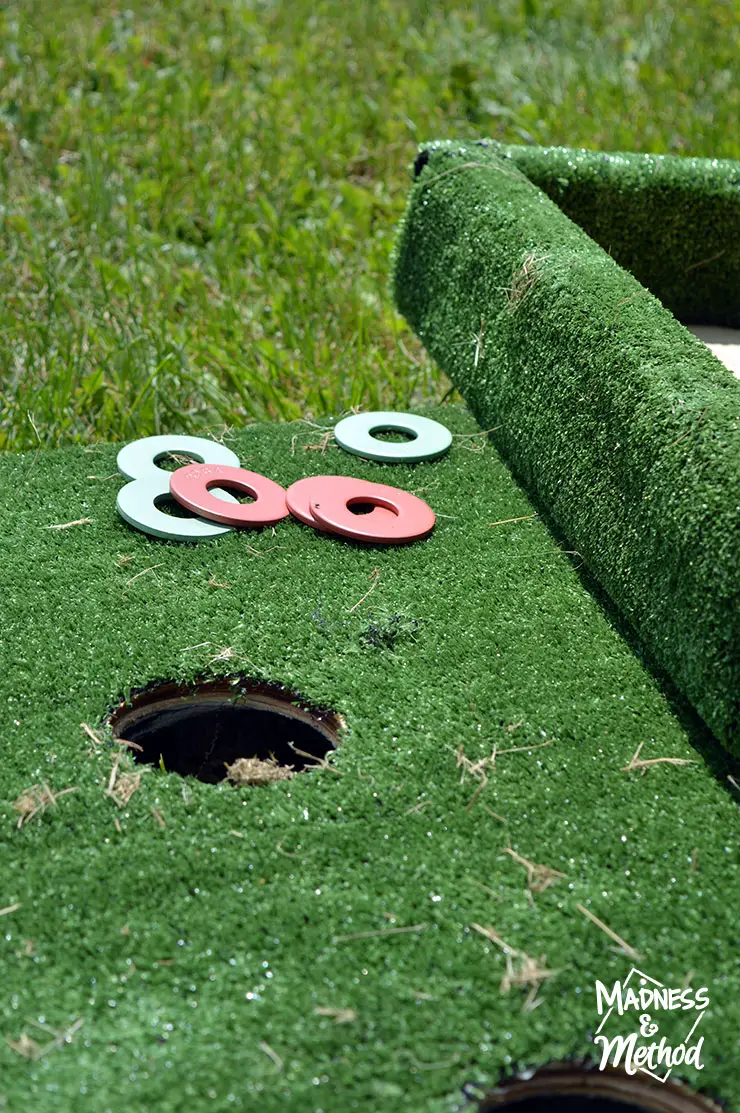
Don’t forget to paint your washers in contrasting colours! I picked two fun colours I had, and realized they are the exact same from our DIY snow scale… ha!
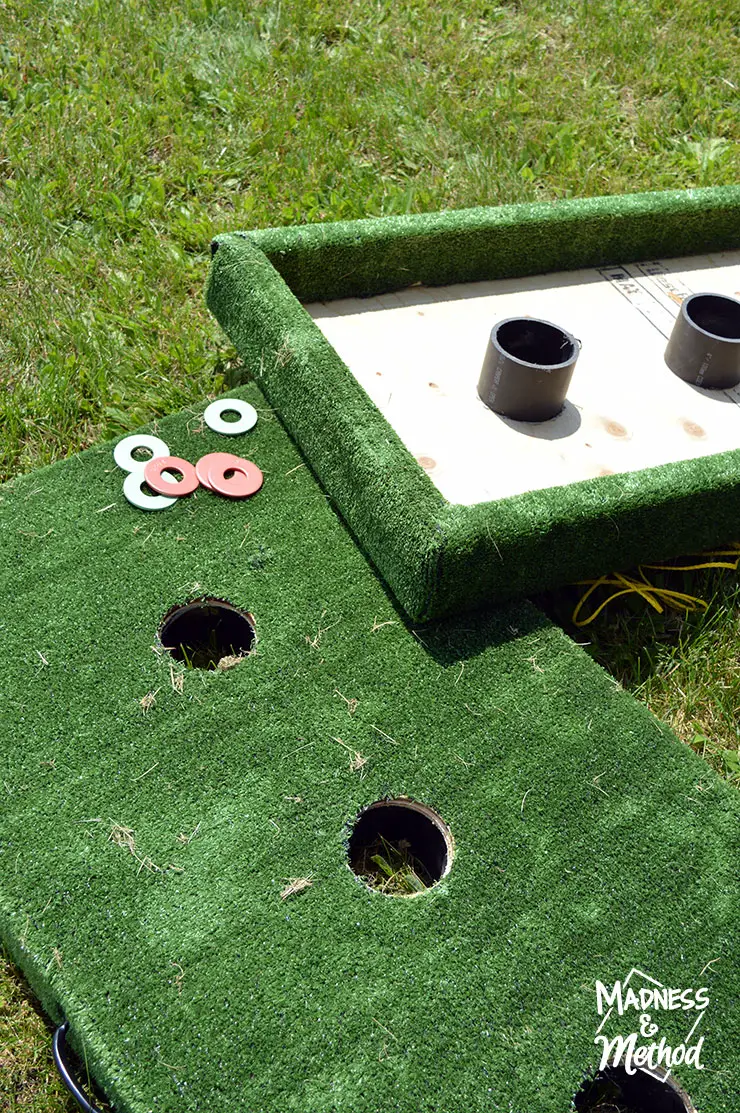
And now you have a 2-in-1 washer toss game! I realized I forgot to take pictures of the last finishing details, which included adding one handle on the long side of each board (to easily lift it up and carry it around) AND my string “measuring tapes”. Some versions of the Texas Horseshoe game are attached by a 10′ string to mark the distance. However because it’s a 2-in-1 version (and the distances are different), I just attached the strings (one to each board, one 10′ and one 25′) at the base.
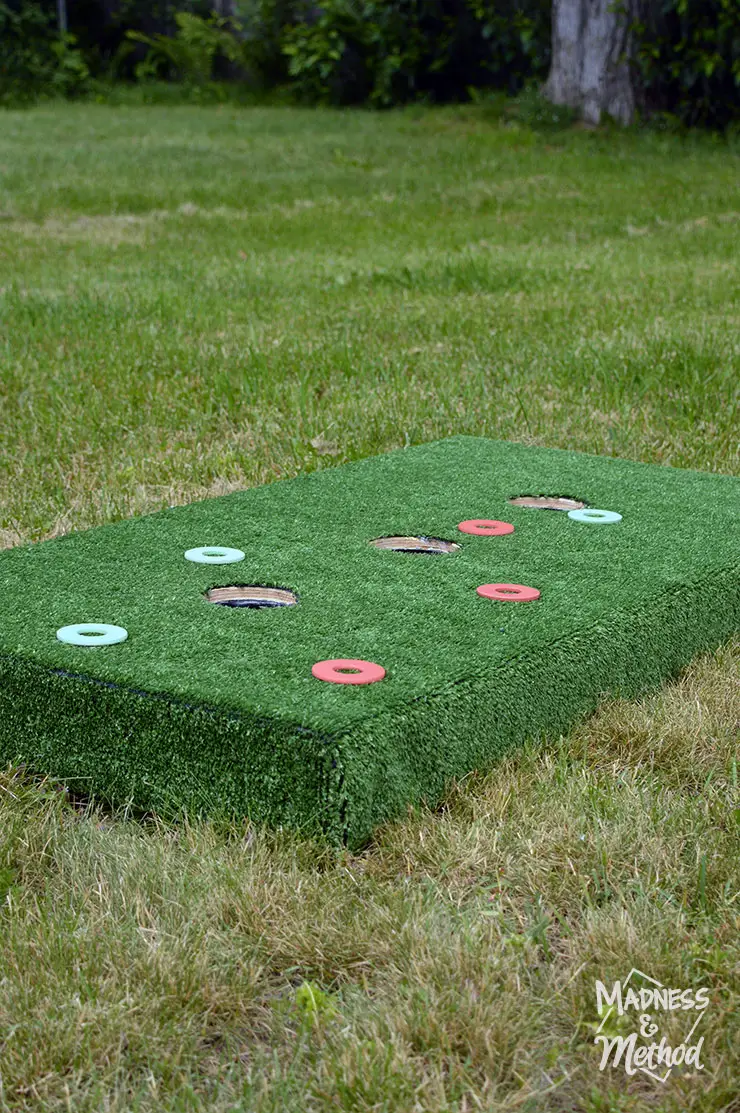
Now, depending which game you want to play – you simply have to flip your board to the appropriate side!
I’m going to give you a super quick breakdown of each version:
Texas Horseshoe Washer Toss Game Rules

This game is played with the boards facing each other on the “skinny” side, 10 feet apart. There are two teams (or two singles) that play, each tossing three washers towards the board. The first hole is 1 point, the middle is 3 points and the back one is 5 points. Normally you need to stand next to the board (behind the front), but the Husband likes to stand on the board (which is why he wanted it wider).
Basically, you just walk back and forth in between each side (or if playing partners, one partner stays on one side). Whoever got the most points in the preceding round goes first (throwing all their washers in sequence) until the game reaches 21 points. Any washers on the board do not count, and two opposing coloured washers in the same hole cancel each other out.
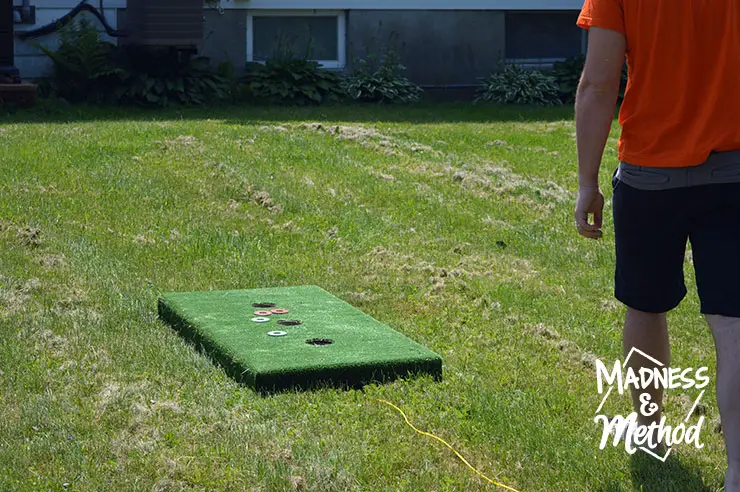
Traditional Washer Toss Game Rules
To play the regular washer toss game, you simply need to turn the boards over and place them further back (25 feet) in a “landscape” format.
Normally, this version only has one pipe and the base is filled with sand (but it’s not very portable that way!). You get 5 points for getting the washer in the hole, and 1 point for getting it on the board (the sand ensures that it doesn’t bounce out).
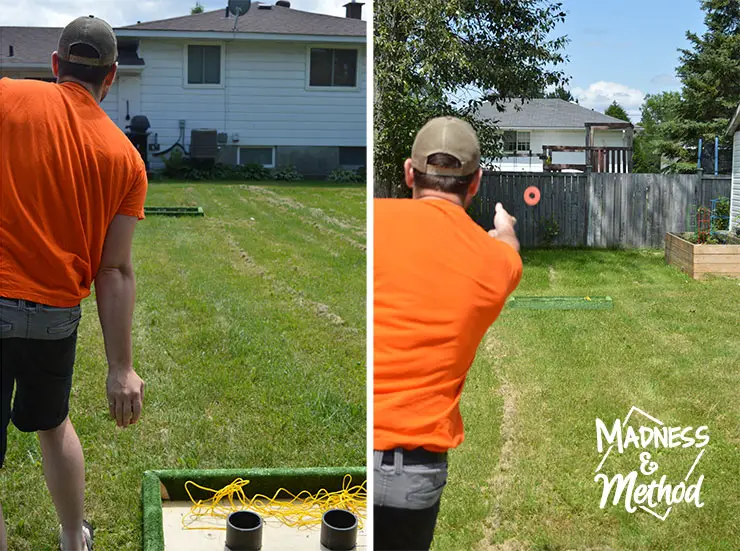
Ha, the Husband was talking about how we needed sand to make it easier, then I told him that he wasn’t doing too well anyways (not going anywhere near the board). I threw one washer as a test, and got it right on the board! You can keep the strings out-stretched, tuck them under the board or just put them inside while you’re playing (maybe it will help him haha…).
Having the 2-in-1 washer toss game also means that two groups can play both games at the same time, they’ll just have to walk back and forth a bit more :) Since building our boards, we haven’t had any friends over yet, but the Husband and I did a quick little round (and I’m sure we’ll be playing more)!
I’m thankful that the Home Depot Canada sponsored an outdoor game project; because now I have a fun washer toss game and we can use it for years to come! It will probably be a while before the mister can play, but we can always get some bean bags and play with those! (I was even telling the husband that the bean bags could be like a “liner” for the regular washer toss game and it would be a much cleaner substitute for sand.)
Have you played a washer toss game before? It was definitely a new one for me (maybe it’s a Northern Ontario thing?), but it’s a pretty big staple around here and now I can introduce it to all our out of town visitors :)

No Comments