
I knew I had wanted to build some raised garden beds for a while, and I was/am planning on using them for veggies. They would be going to the left and right of our shed, and I figured that maybe in the future we could do some planters along the fence as well? Either way, I hope my instructions on how to build a raised garden bed along the shed will also apply to any other structure you might want to build your garden beds against!
– Note: This post contains affiliate links. See more information about affiliates here –
Materials Used:
- 2″ x 6″ x 8′ Pressure Treated Lumber, x 4 lengths (cut in half)
- 2″ x 6″ x 12′ Pressure Treated Lumber, x 11 lengths
- 4″ x 4″ x 12′ Pressure Treated Lumber, x 1 length
- Deck Screws (I think 2-1/2″ long?), lots
- 4′ Level
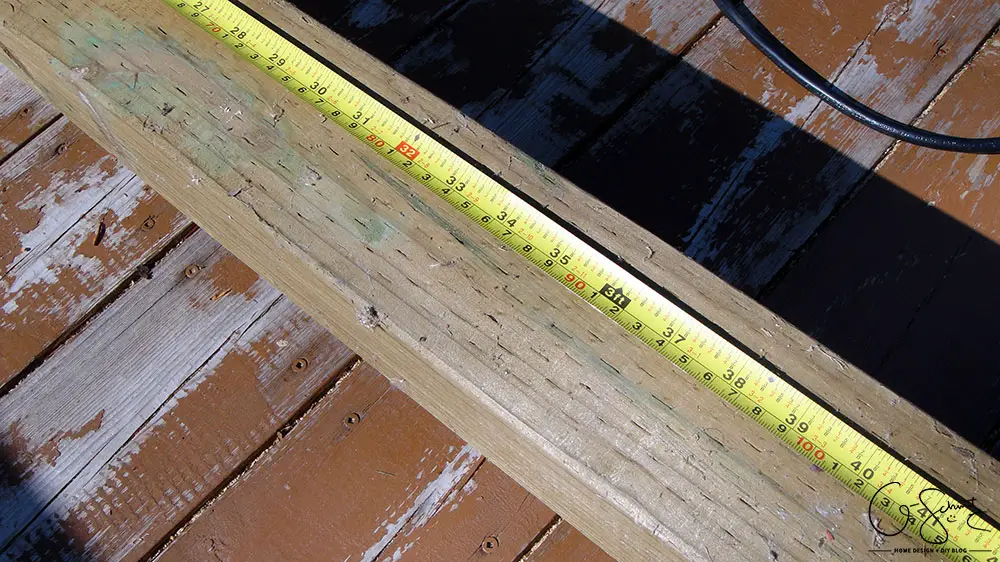
- Measuring Tape
- Mitre Saw (this is the mitre saw we have)
- Drill (this is the drill we have)
- Sledgehammer
- Clamps
This is what is needed for 1 box that measures 4′ x 12′ long, so if you are making a smaller box, make sure to use the material in lengths required for your measurements. Also note that we did use pressure treated lumber for our veggie garden (gasp!), so if you’re worried about any chemicals seeping out, you can substitute cedar instead. We just happened to have a lot of leftover 2x6x8s, and are not that worried about any contamination.
Update: You can read about how we filled the raised garden beds
Step 1: Install Corner Posts
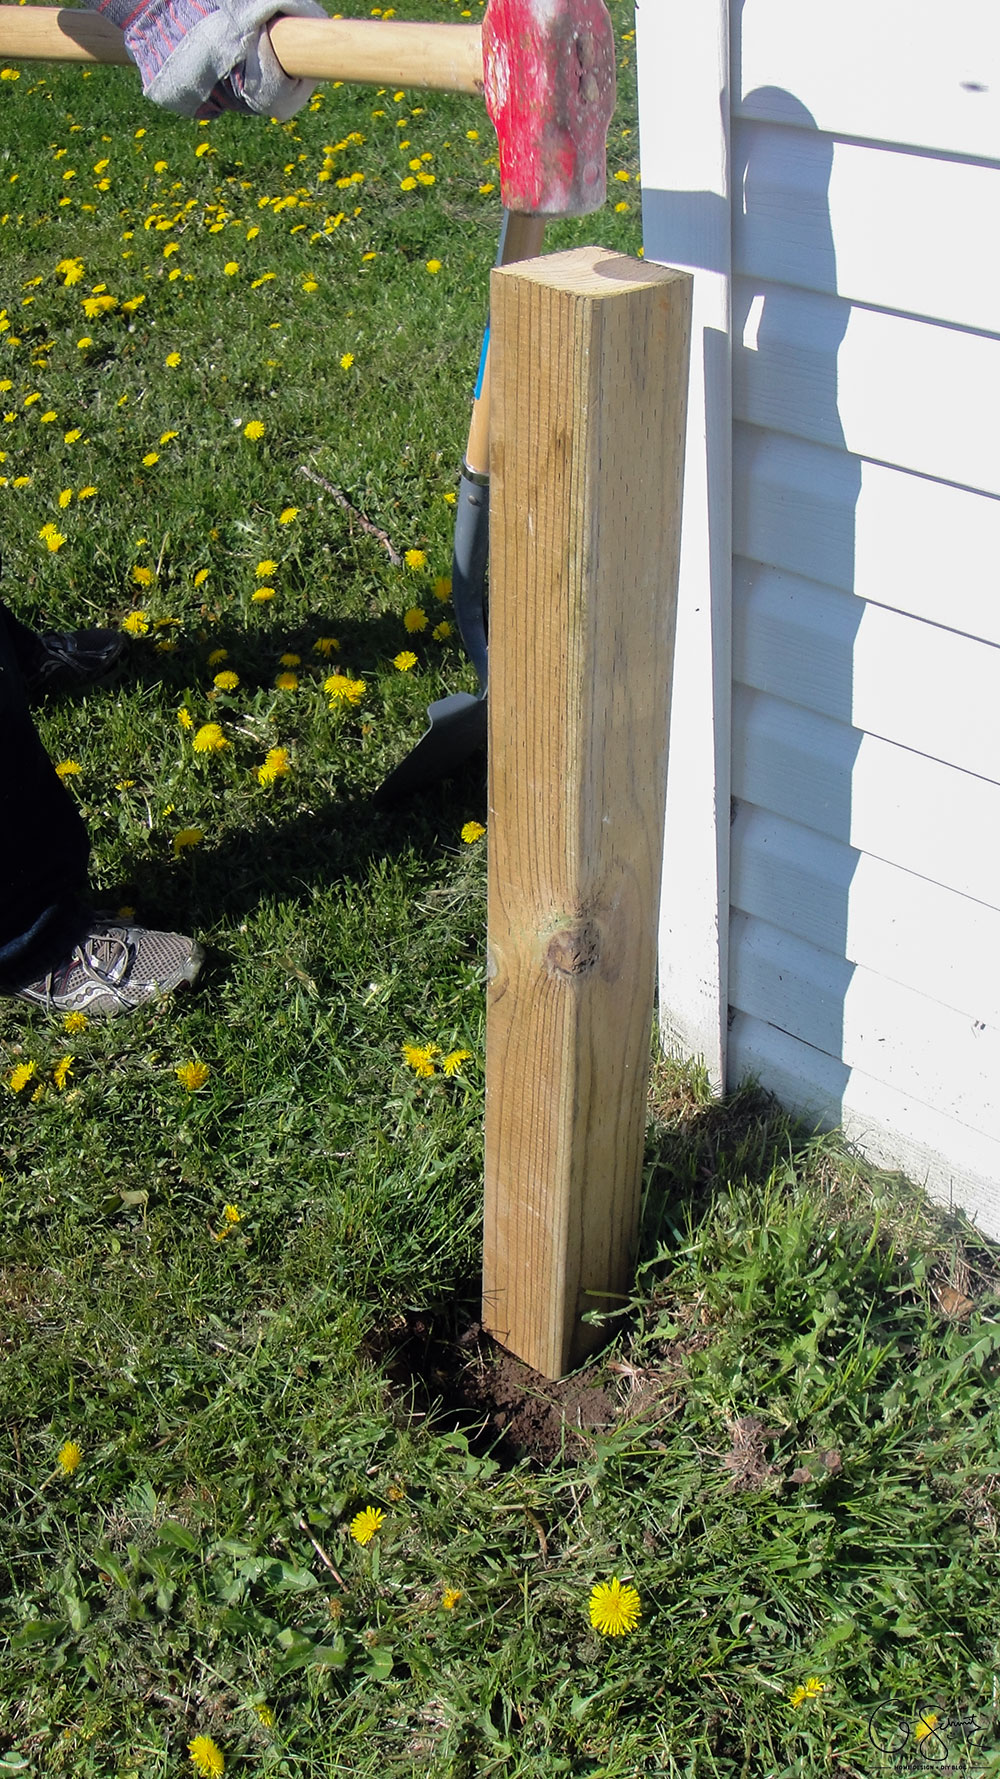
We had a 12′ length of 4×4 pressure treated wood sitting in our garage, so we cut it into four even sections.
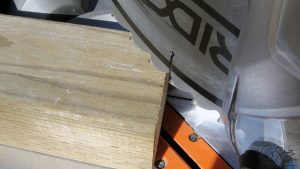
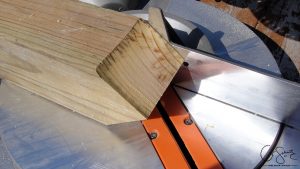
To help the wood go into the ground better, we angled our mitre saw to 45 and cut an edge on each side.

This created a stake that helped drive the posts into the ground (vampires beware!).
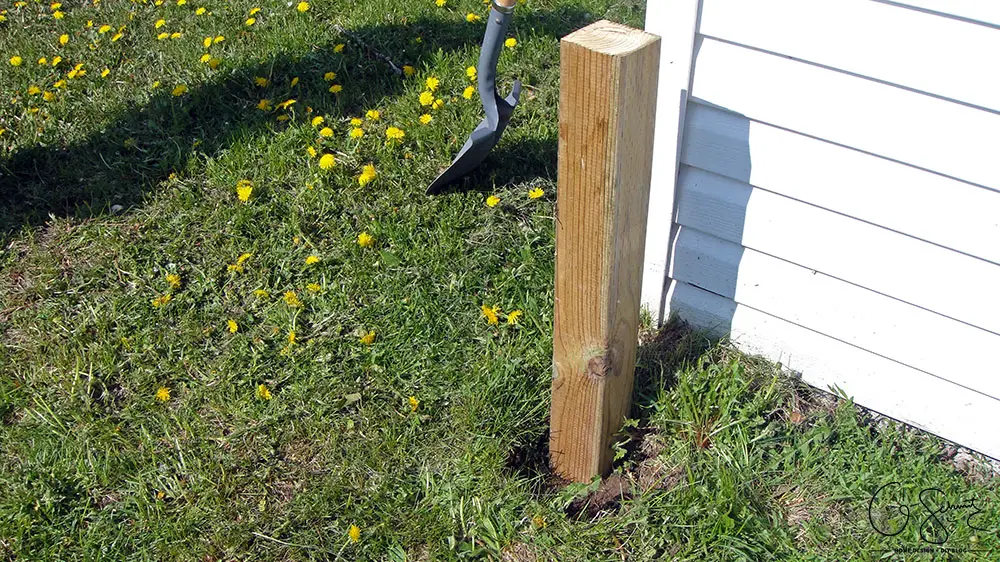
We dug out a little hole for the first pole about 1′ away from our shed and hammered in the post about 6″ deep to start. The hole actually did NOT help, it was much easier just to hammer the posts into the grass (with a sledgehammer).


The second post was placed 4′ from the shed (about 3′ from the first pole) – because I had wanted my planters to be 4′ x 12′. Anything wider than 4′ would not have been easy to reach across (when you’re gardening). We took our long level and placed it across the tops of the two posts to make sure they were even; and hammered the post(s) down until they were level.
Tip: You’ll also want to make sure your posts are level on all angles (ie: upwards from the front and side – aka Y and Z axis).
Step 2: Adding Boards Across the Top
At this point you should only have three posts in. The two closest to the shed (or whichever structure you’re building against), and only one of your outside corners. We left the last one out at this time so we could make sure they were all even and squared.
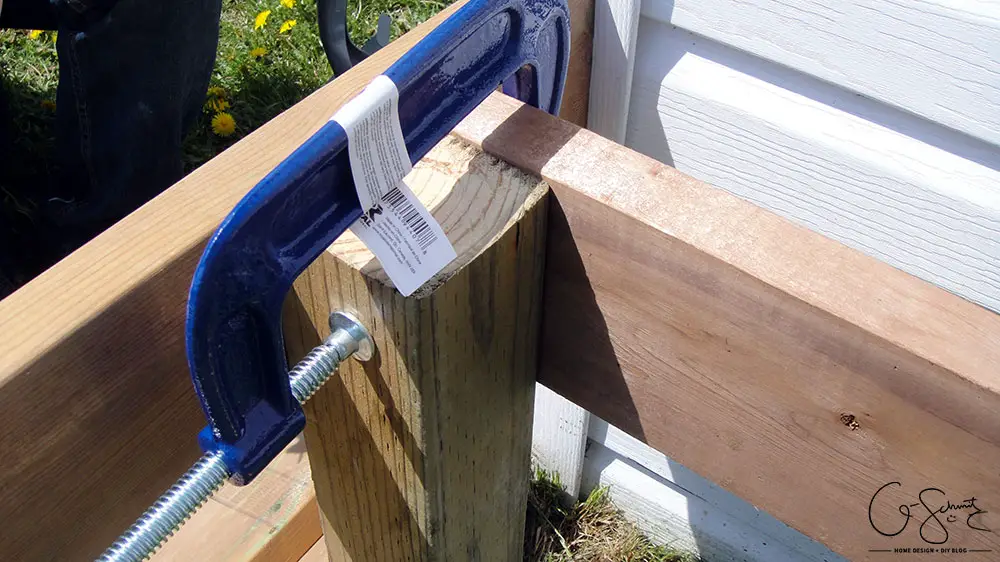
We butted up one of our cut 2x6x4 boards to the shed, lined up to the top of the post. After screwing that piece in, we clamped the long piece along the other side.
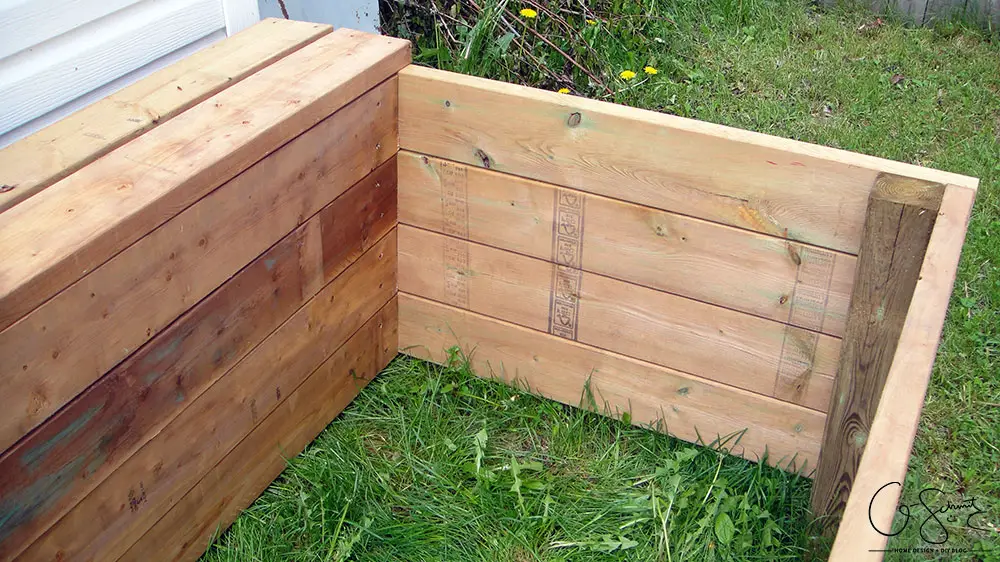
The photo above shows a better angle of what I mean (for the short piece lined up against the shed). Never mind the wood on the bottom for now, they are just sitting there for later!
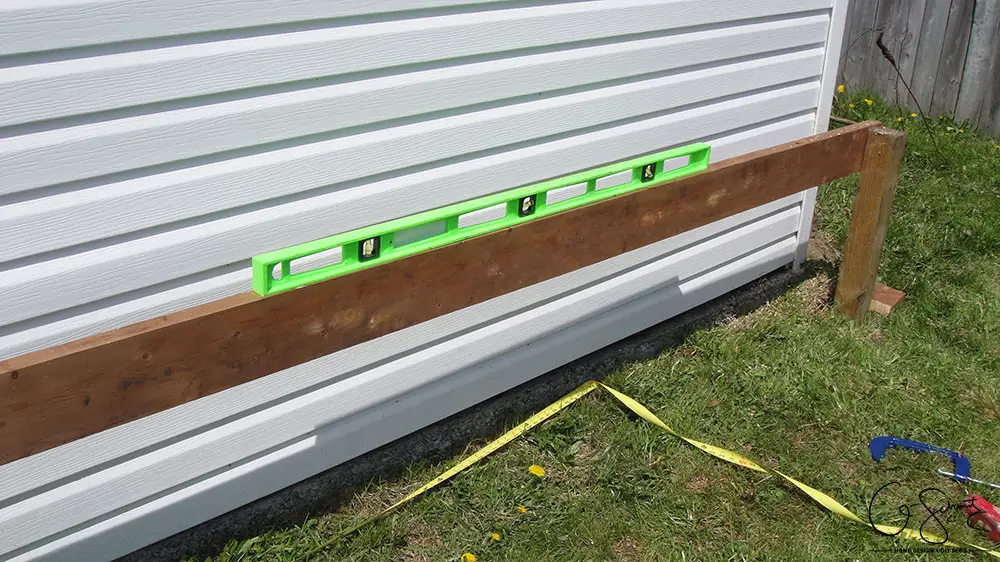
Make sure your board is level before you screw it into the post. You may need to hammer the posts in again, depending on your yard.
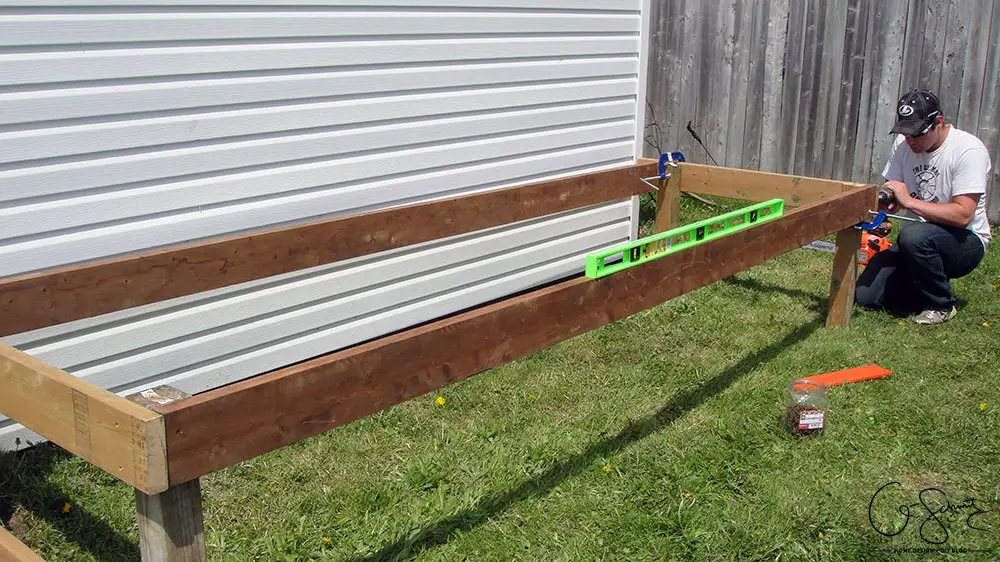
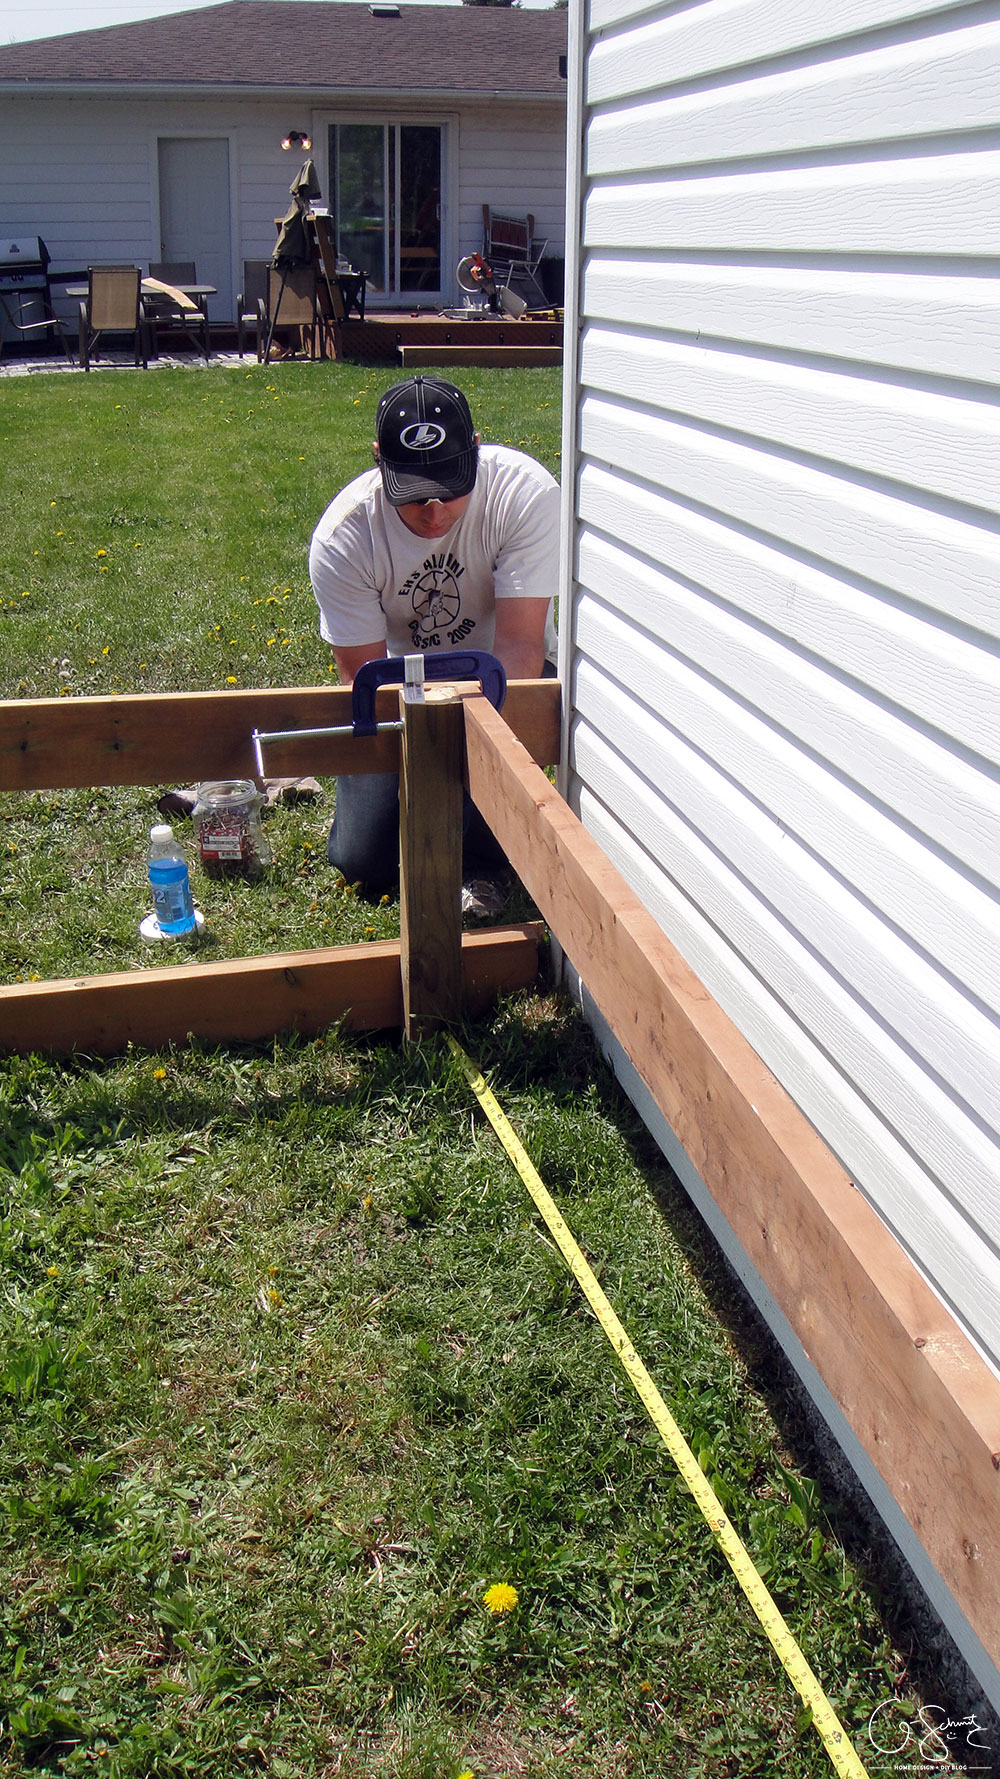
Once your three posts are all in and set, it’s time to put in the last one. Again, make sure the boards are level from the top before you screw them into place.
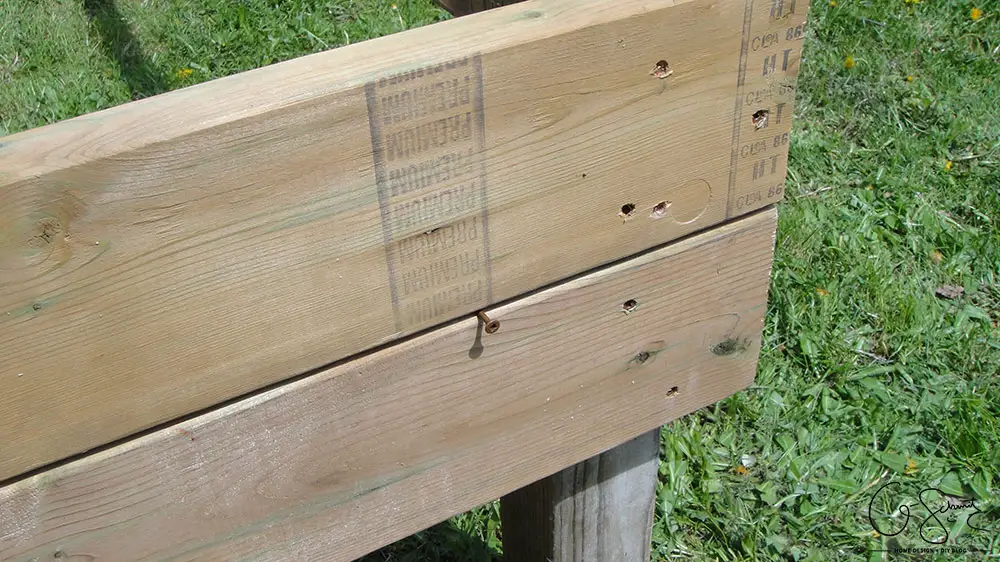
From there, you can put in the rest of your 4′ boards on the short ends. DIY/Pro Tip: we always use two screws as a spacer, and if they get stuck after, you can just drill them out!
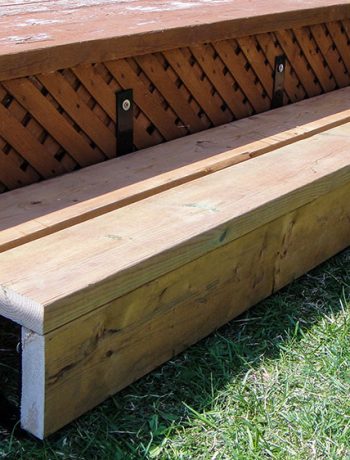
3. Build a Ledge
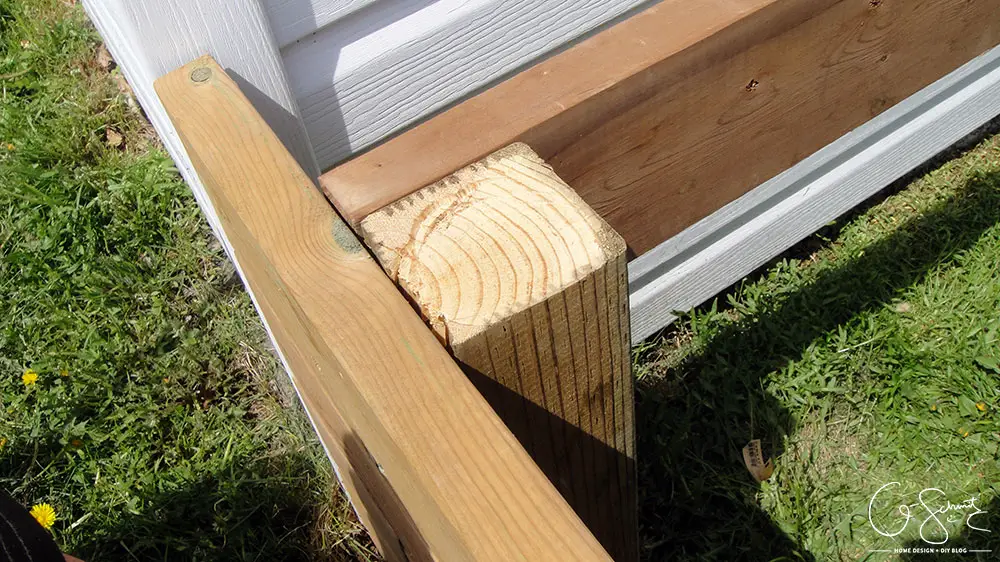
Remember how we put our first board a foot away from the shed which left a gap between the planter and the wall? We could have continued putting the long boards on the same side, but it would have been too hard to screw into. And we would still have that gap!
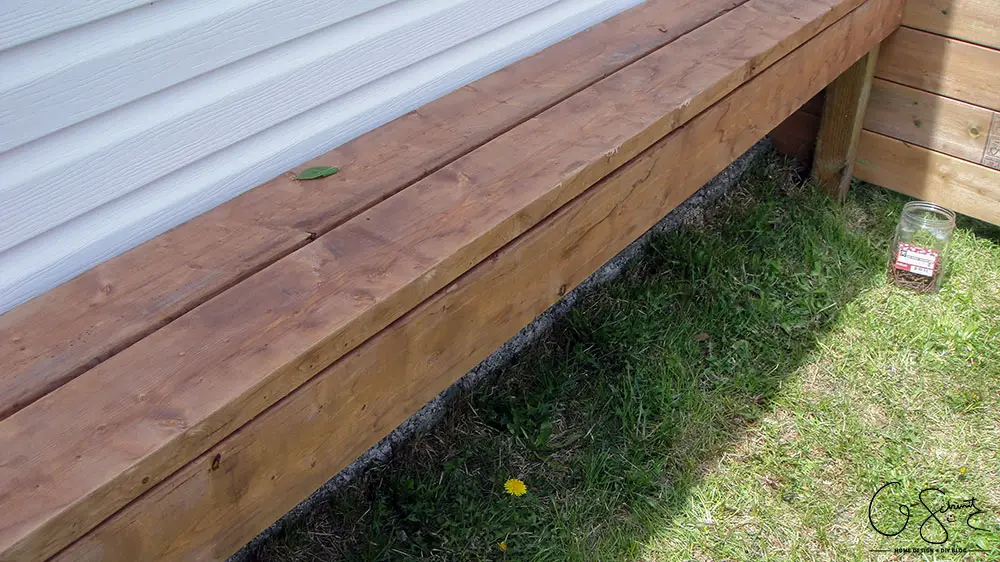
To solve this problem, we installed another two pieces of 2×6 across the top of the planter, along the wall.
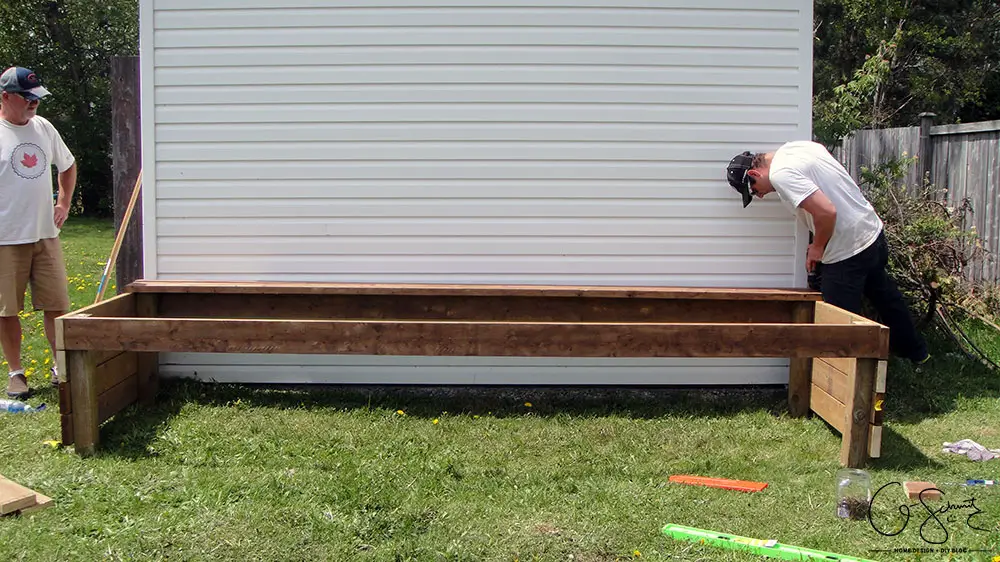
This photo above shows my planter idea “doubters”: my Papa on the left, and the Husband on the right. My Papa especially thought these planters were excessive, and wanted us to build some that were only a foot high… bah!
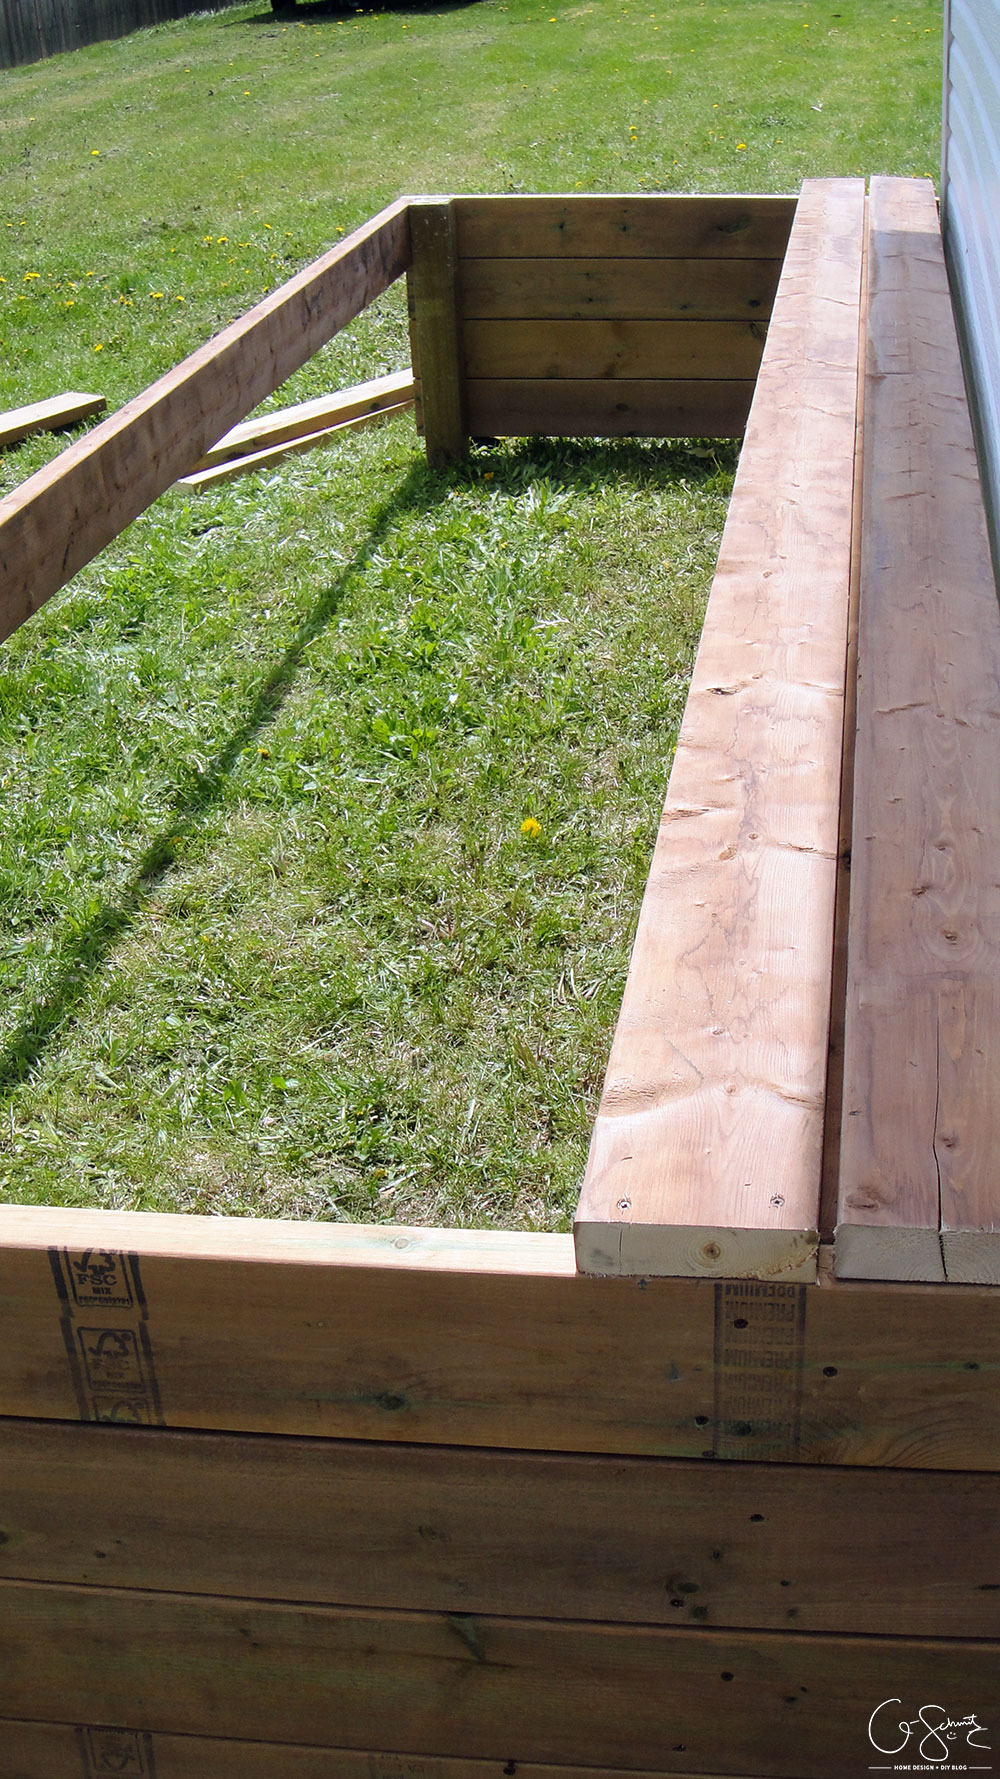
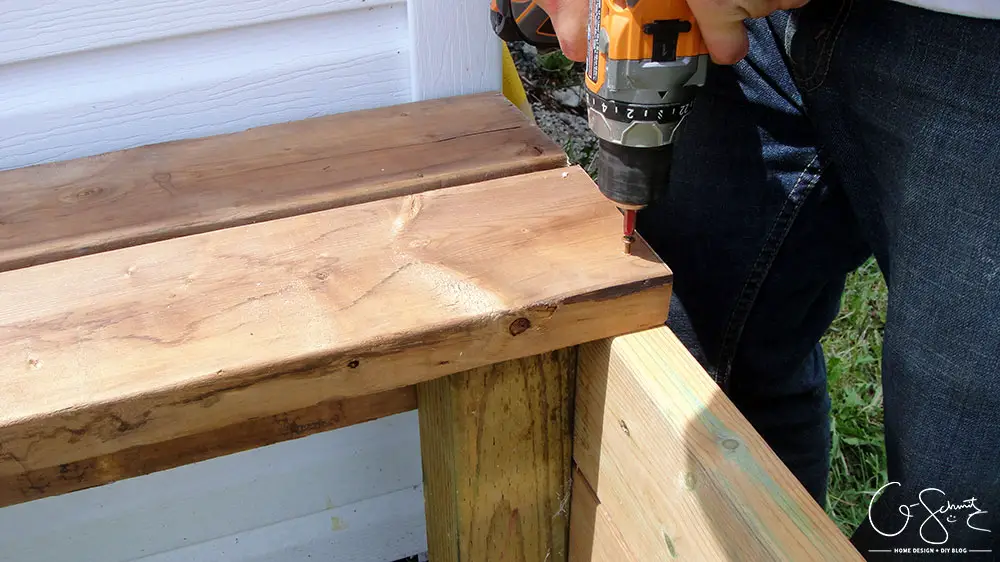
Anyways, back to the box building! The shelf adds a nice feature on our raised garden beds; I was even thinking that you could put some flower boxes across the top to add some nice colours to the space.
Update: The gardens are still going strong and the ledge works too!
We continued the walls on the inside of the box, and it butted up nicely against the top ledge.
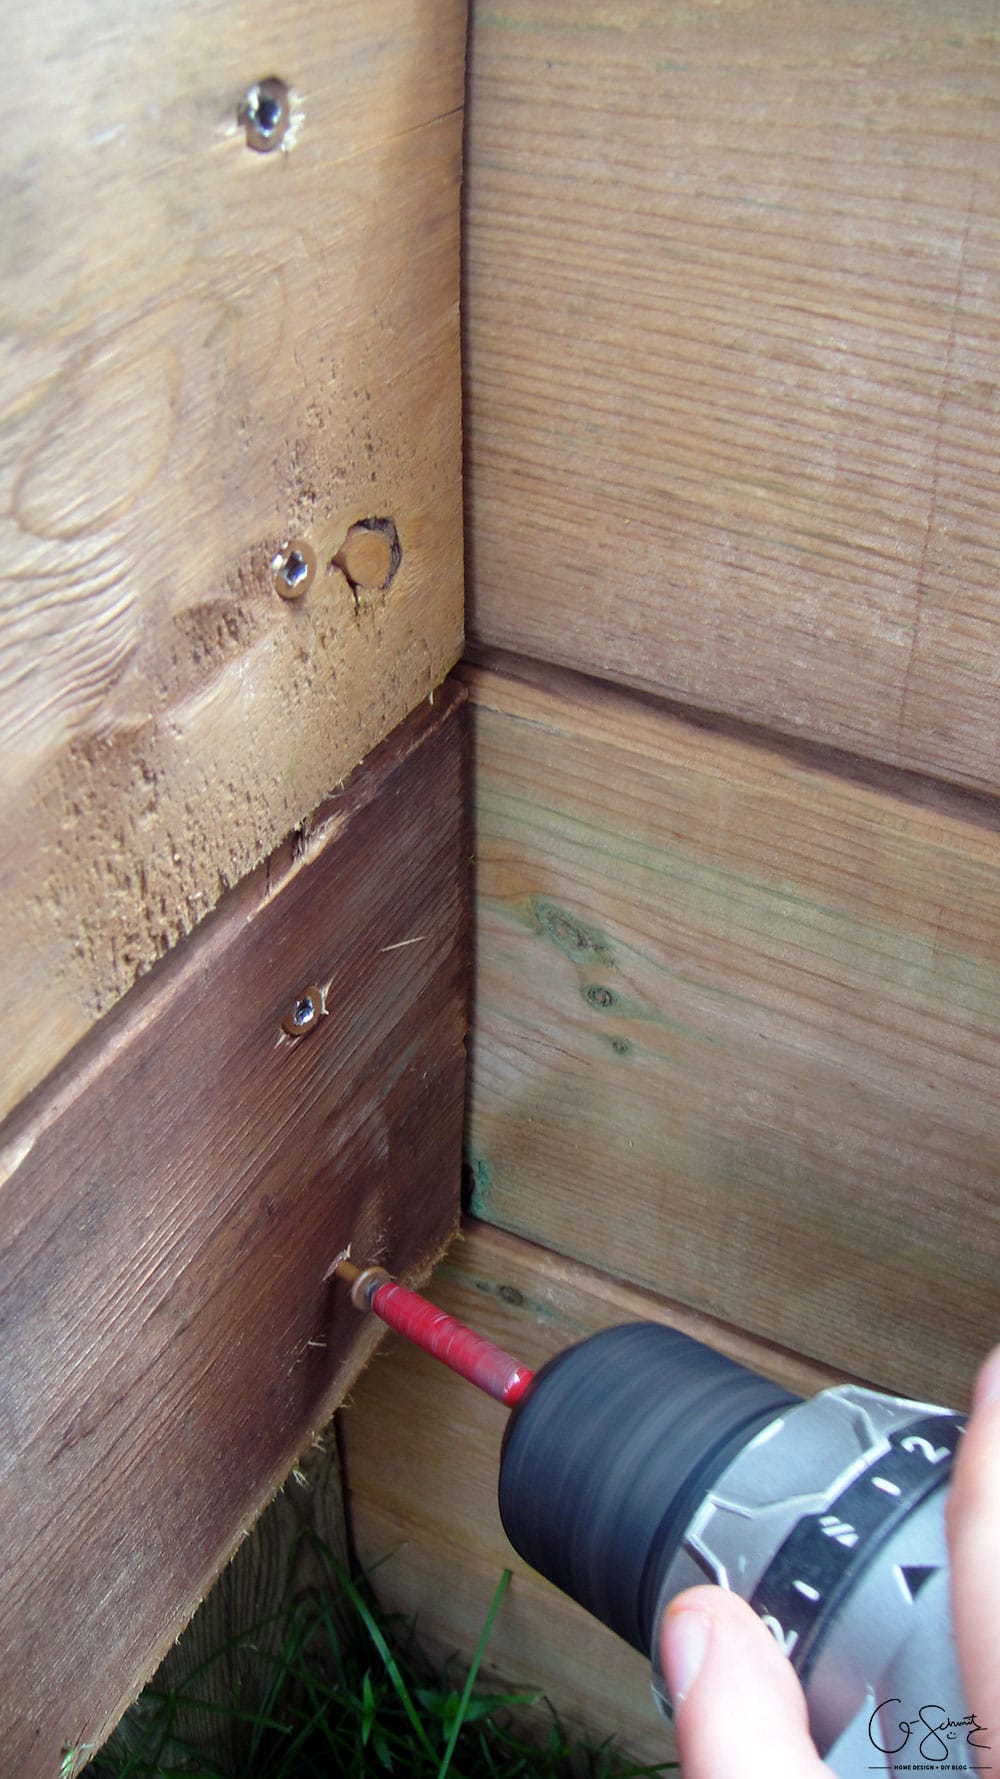
From there, we just had to add the rest of the 2×6 boards across the long sections in the back and front.
And there you have it – some large (and in charge!) raised garden beds.
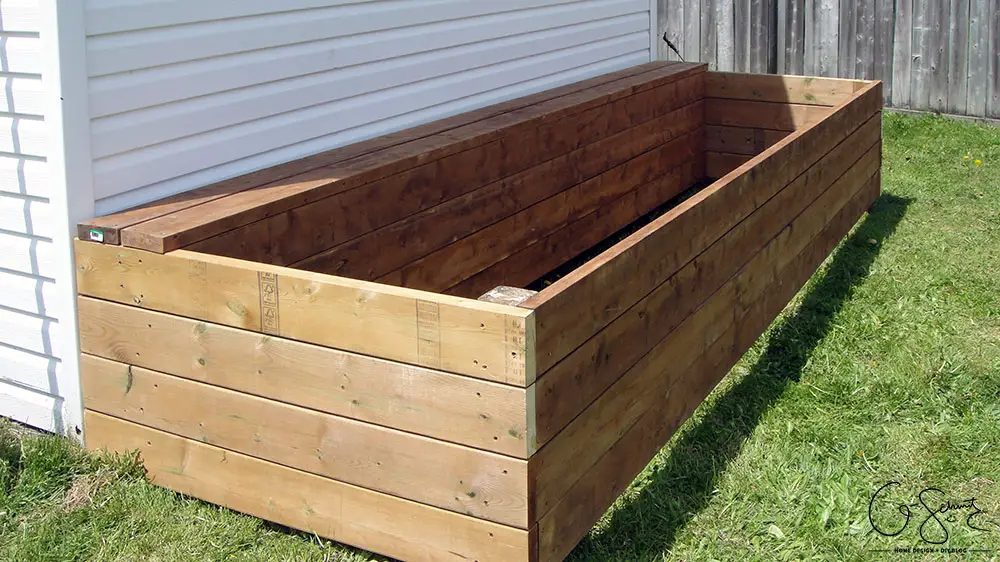
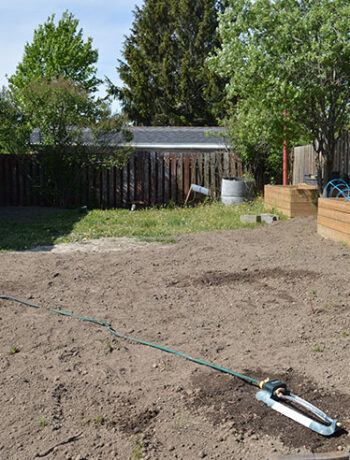
There is a bit of a gap along the ground at the center of the raised beds, but we’ll be able to fill that in with dirt when we get it delivered. Speaking of dirt… filling these things took almost as long as it did to build them! But that’s a story for next week…
In the end, it took approximately 5 hours for 2.5 people to build two of these in an afternoon (I say 2.5 because we didn’t always have three people working, not that we had a child help us or anything!).
So what do you think? Have you planted yet this year; and if not, how about building a raised garden bed for your veggies? I’d love to hear your thoughts in the comments, and remember to check back in next week for tips on how to fill your beds!
22 Comments
Tony
July 30, 2016 at 3:58 pmGreat pics and concept, but you shouldn’t use pressure treated lumber for raised bed gardening, as the chemicals used to pressure treat can “leak” into your garden plants. Use cedar or non-treated wood to stay safe.
Nicole
July 31, 2016 at 9:24 amYou’re right! I did mention that at the start of the post (we only used pressure treated because we had some on hand). Next time I build these I would definitely use cedar, thanks for reminding everyone :)
Thomas
September 20, 2022 at 8:46 pmHey Nicole is there a specific reason why you all left room between the siding and yalls planter? I know in Texas you technically can’t build planter boxes next to a building structure so i wondered if this was a way to get around that rule? Great idea with this though.
Nicole
September 22, 2022 at 6:30 pmHey Thomas :) I think we originally did it that way because we were screwing into the wood stakes/posts, and couldn’t go from behind since the shed was there (so it was more logistics than code or design). We did this style of planter a few years later against a fence, and it was perfect again since we didn’t know if the fence was ours or the neighbours. Plus, that back shelf really does come in handy. Thanks for commenting!
Jennifer
August 28, 2016 at 4:51 pmEh, it will probably be ok if you line the inside with landscaping plastic which will also help prevent the wood from rot. Looks great though! I think I’m going to do something like this against the fence line.
Nicole
August 29, 2016 at 2:28 pmWe did line the inside with landscaping fabric actually :) Our growing season is pretty short, so the plants aren’t really in there a supppperrr long time (compared to people who can grow things all year-round). I want to add some along our fences too, good luck!
Maureen
January 8, 2017 at 2:07 pmI am so tempted to try my hand at raised bed gardening this summer! With the price of organic produce I really would like to grow my own!
Nicole
January 9, 2017 at 10:28 amI was just telling the Husband that we need to garden like crazy – I’m planning on having a few kids, and I don’t want to spend thousands on groceries!
LisaDiane
April 8, 2017 at 10:18 pmActually, Nicole, there is NO EVIDENCE that pressure treated wood leaches dangerous chemicals into gardens where it is used as frames and barriers — first, anything that does make it into the soil does so after 30 years and stays on the surface, it doesn’t spread even 6 inches down; second, even if chemicals (like Arsenic) did end up in the soil and around the plants, the chemicals are not in a form that plants can absorb easily (if at all) anyway, so the only risk would be in touching the soil….but that’s not even what does happen!
Pressure treated wood has a 2-3% chemical solution “pressed” into the cellulose of the wood, which means it’s very hard to get it back out….actually, the only way would be to burn it, which IS a health concern, and should NEVER be done! But it is perfectly safe to use pressure treated wood to make raised garden beds!!
“The Hickson Corporation, a manufacturer of CCA-treated wood, analyzed carrots, okra, peppers, cucumbers, and tomatoes grown in raised beds made with CCA-treated wood. They found that As, Cr, and Cu contents were in the same range as those of vegetables purchased at a grocery store or grown in raised beds made with untreated wood. Analysis of grapes grown adjacent to CCA-treated stakes showed no increase in As, Cr, or Cu.4 Romaine lettuce grown in pots with soil that contained small (approx. 1 inch) cubes of CCA-treated wood showed increased uptake of As such that a normal serving (50 g) would contain 0.004 mg of As.5 This compares to the normal dietary intake of 0.004–0.01 mg of inorganic As and the estimated safe intake level of 0.05 mg of inorganic As. The average adult would have to eat over 1.3 pounds of this romaine lettuce every day to exceed the estimated safe intake level of As.”
Quoted from the end of the article found at http://extension.psu.edu/plants/crops/esi/treated-lumber
Nicole
April 9, 2017 at 8:37 pmThanks for all the info Lisa Diane – we weren’t concerned with using the PT wood; I felt like I should give the heads up anyways just in case. Hopefully people will read this info and make a well-informed decision for their gardens :)
Emily
April 24, 2017 at 11:52 pmThis looks fantastic! We built a raised bed for our vegetable garden years ago and I would love to build more one day!
Nicole
April 25, 2017 at 1:11 pmI’m really liking them! This will be our third summer using them, so hopefully I can keep working on finding an optimal veggie placement haha :)
Planning a Garden in Colder Climates (AKA Gardening in the Great White North)
April 27, 2017 at 10:11 am[…] Madness & Method | Building A Raised Garden Bed […]
12 DIY Planter Ideas - two purple couches
May 2, 2017 at 7:01 am[…] Building a Raised Garden Bed from Madness and Method […]
Kristen
July 10, 2017 at 11:49 amOh my goodness, thank you so much of posting this project!!! I am working on a raised bed to go on my patio/against my house. . .my 200 year old house. The foundation is made of crazy jagged rocks and boulders and bricks AND concrete and who knows what’s going on there. Haha. (You never know what you’re going to find when you do any project around our house. I think the only prerequisite of living here is that you want to try out multiple crazy DIY projects.) This is perfect though. I didn’t know how I would be able to get the sides and back looking nice and neat against the house, but building it after the posts are in place and adding that little shelf area is PERFECT! <3 Thank you again so much! I'm so excited to get moving forward on my project now!
Kely
August 23, 2017 at 10:03 amThis is probably a really dumb question, but why the gap along the back? Just for aesthetics or did you need that to keep the weight of soil from pushing on your shed wall? This is exactly what I want to do along my fence in my back yard so it’s very helpful for me! My fence line is 90ft long; I want to do this along at least 1/2 of that. BIG undertaking so I am in the early planning stages now.
Thanks for the awesome blog!
Jaydan F.
March 20, 2018 at 10:24 pmWere you worried about that little space at the bottom of the beds?
Nicole
March 21, 2018 at 1:42 pmFor the insides, we lined everything with landscape fabric, then filled with dirt so nothing would have come out: https://www.madnessandmethod.com/filling-and-planting-diy-raised-gardens/. We also had a lot of leftover dirt, so were able to buildup the uneven ground outside, and now it’s all grass.
NEAL
July 9, 2018 at 1:15 amwhat about putting it along my house?
Nicole
July 9, 2018 at 2:12 pmYou could certainly build these raised garden beds along a house – I’d just make sure that it wasn’t under an eave or overhang so that water could get to it properly!
DIY Raised Garden Beds - The Coastal Oak
March 25, 2020 at 4:47 pm[…] Nicole of Madness & Method designed her garden beds using leftover lumber. Her tutorial includes making stakes to drive down in the ground. She also built a small shelf in the back, how unique! You can find her tutorial here. […]
scribd downloader official
October 22, 2024 at 10:03 amI love the detailed instructions you provided for building a raised garden bed! The tips on choosing the right materials were especially helpful. I can’t wait to get started on my own garden project! Thanks for sharing your expertise!