
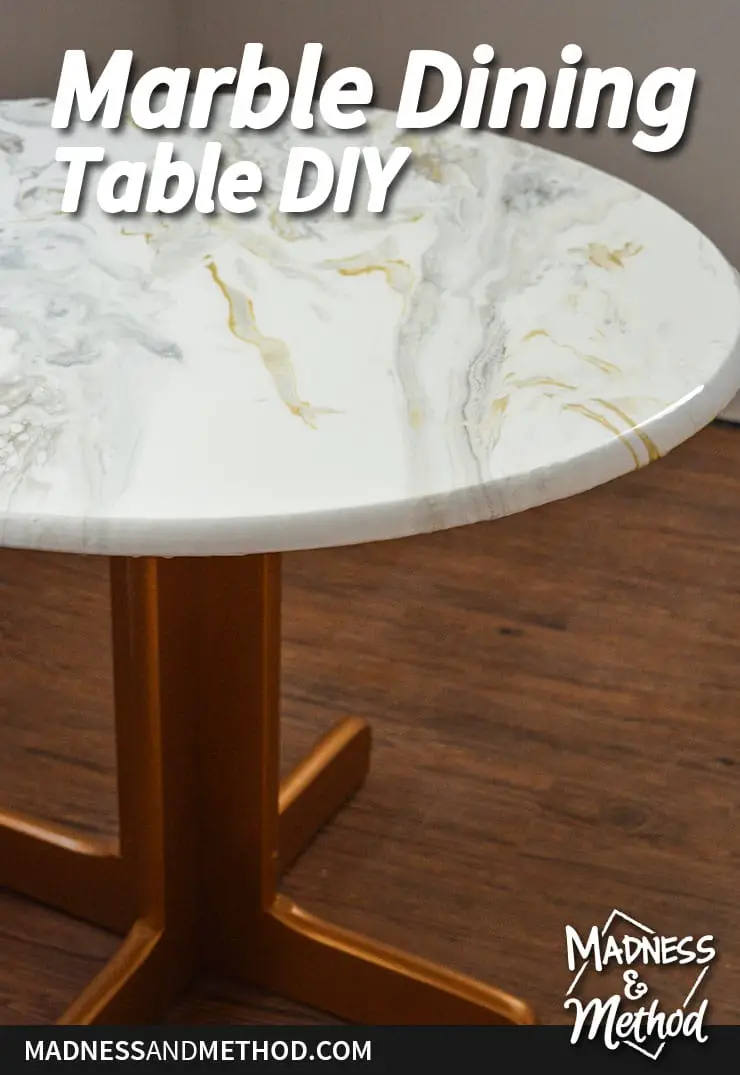
I have a great marble dining table DIY to share today! Now, if you read the post last week about paint pouring mistakes, then you already got a few hints as to how this project started. But you’re going to get the full story today, and I promise there’s a happy ending to the paint pour marble table saga :)
– Note: This post contains affiliate links. See more information about affiliates here. –
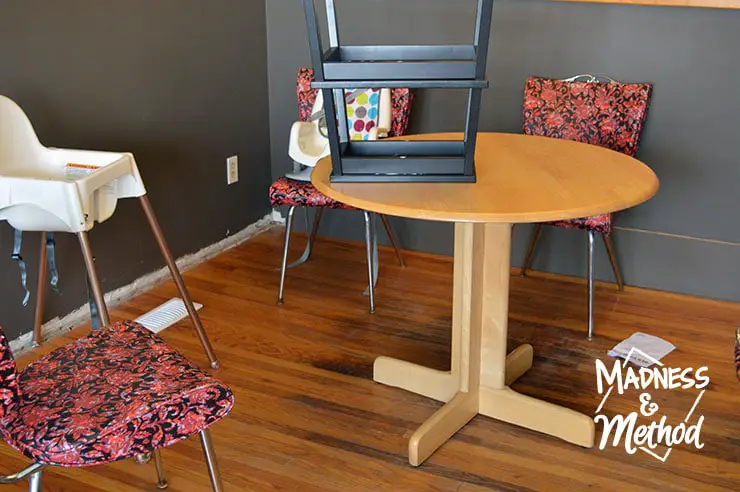
I really wanted to get a small round table for our rental renovation basement dining room. It would give us the flexibility to move the chairs around and would fit our family of four perfectly. I picked one up second-hand and knew that I would eventually be painting or staining it to match our décor.
Marble Table Inspiration
But then I found this marble and brass table, and it would have been perfect! Unfortunately, it didn’t ship to Canada, so I figured I could DIY something myself.

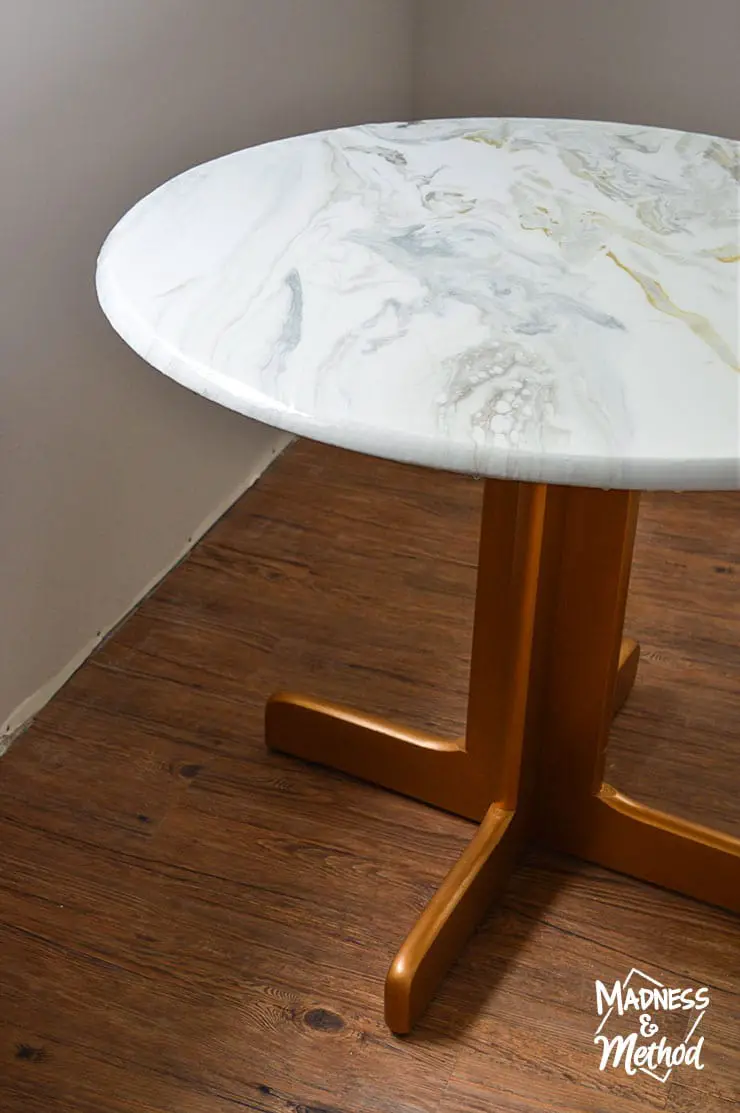
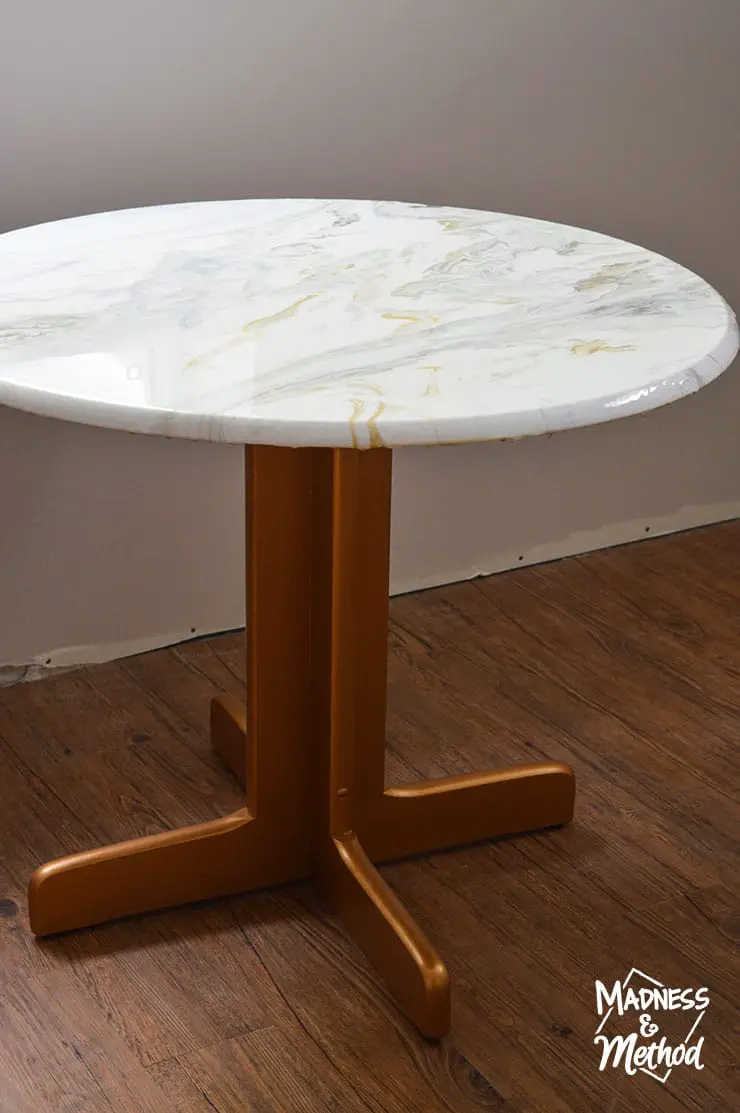
Luckily, the base unscrewed from the top, so I separated the pieces, painted the base with this gold paint and painted the top white in order to prep it for the paint pour.
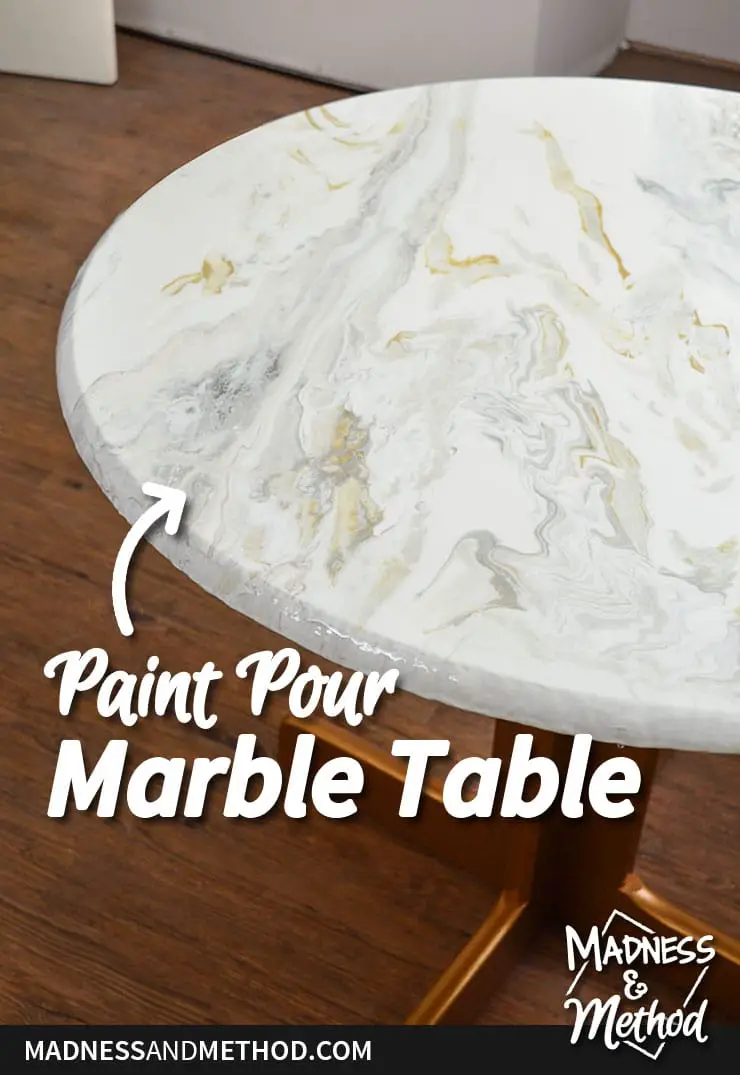
I was also contemplating getting marble wallpaper like this one, or even hand painting a marble texture like this – but ultimately went with a paint pour method. Actually, it was this painted dining table that totally inspired me to do a paint pour marble pattern.
Marble Paint Pour
See my paint pouring mistakes in the post last week to get a better idea of how everything went.
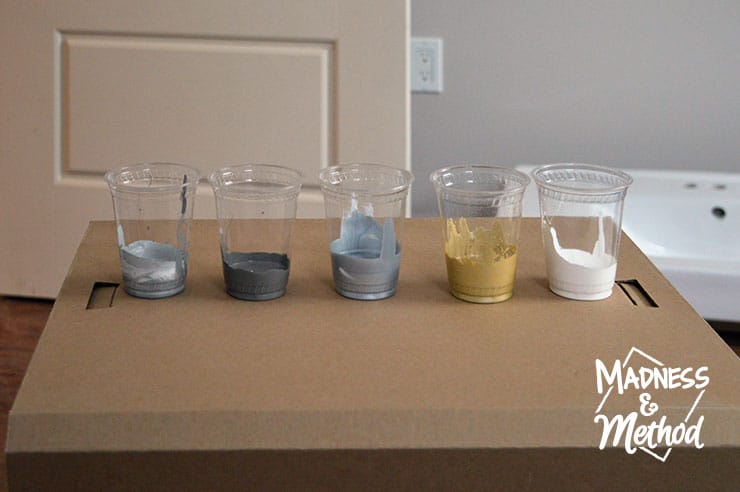
Here’s a Recap of What I Used
- Pouring Medium (buy at Michael’s, buy on Amazon)
- Acrylic Paints (Gold, Silver, Light Grey, Dark Grey and white ‘house’ paint)
- Palette knife (and a stir stick and brush)
- Plastic Cups (+ screw to make a hole)
- Garbage bag + paint tarp for area
- Round wood table + surface to prop it up
- Elmer’s Glue All and Clear Glue
- White Glitter (should have used glitter glue instead!)
- Epoxy Resin (buy on Amazon, buy at Michael’s)
I’ve also included the rest of the paint pouring video below (which includes footage of me filling the cracks and coating the top).
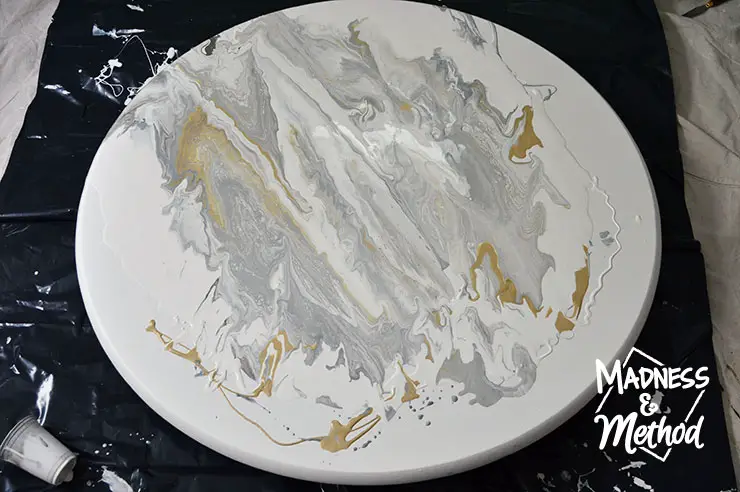
After my first batch of paint – clearly not enough! (And a bit too grey)
And if you remember, the main issue was that I hadn’t prepped enough paint (and the paint I did mix was a bit too thick).
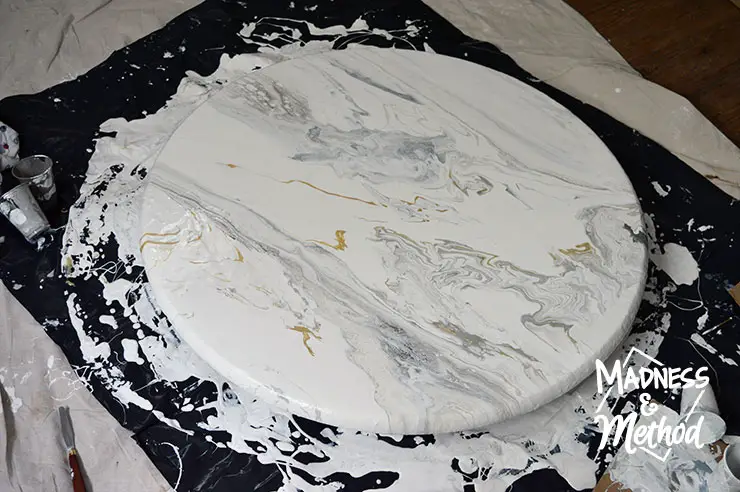
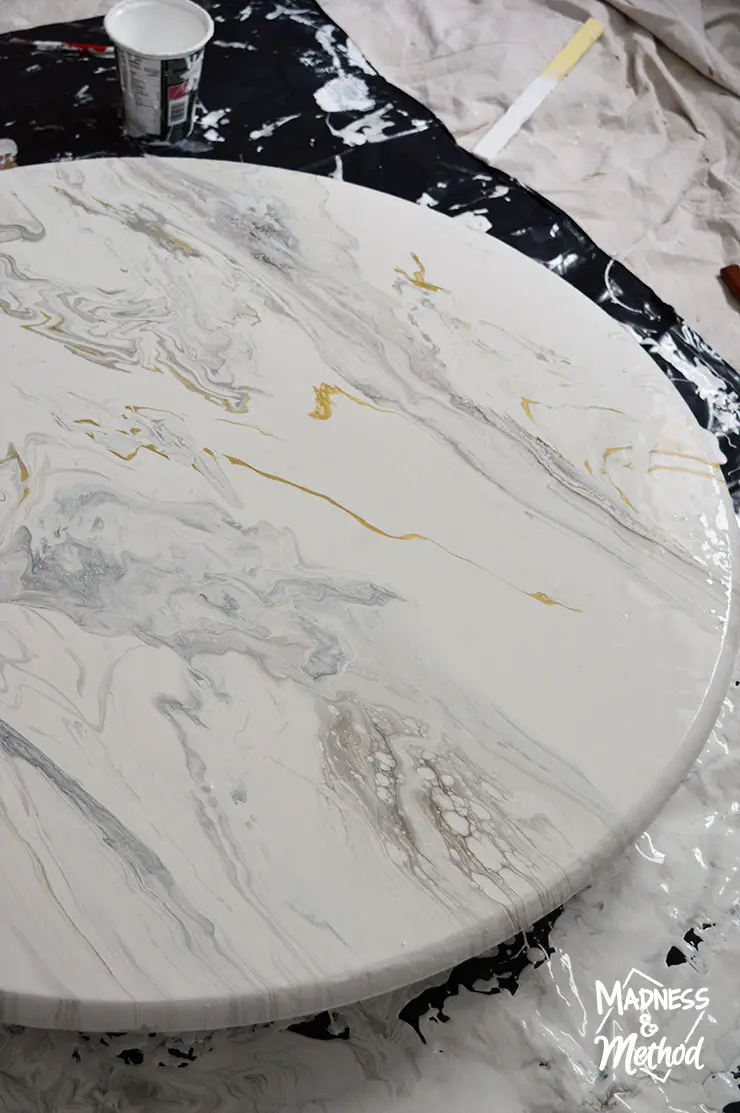
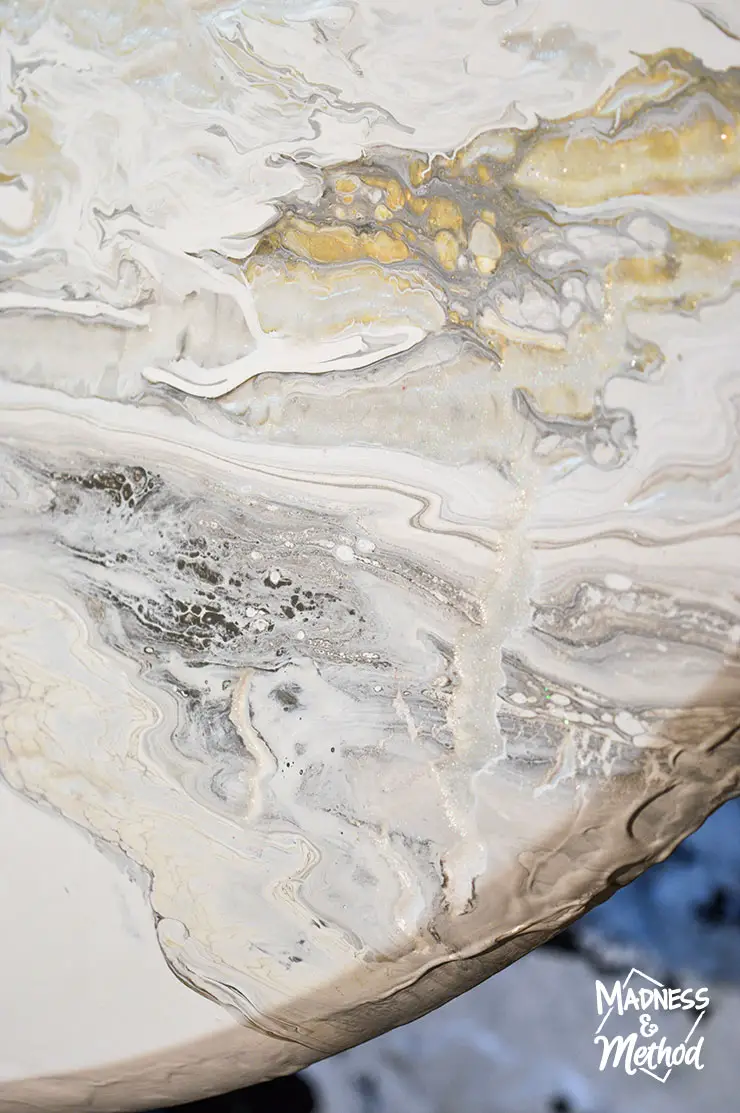
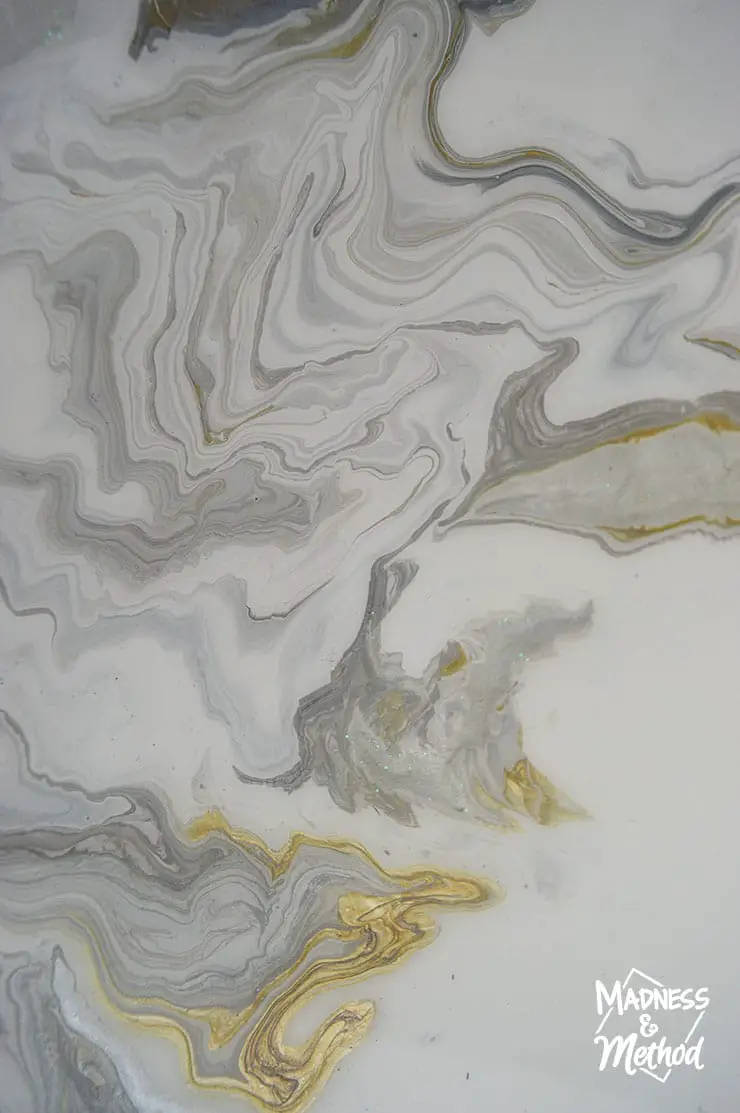
Anyways, after several pours and probably a gallon of paint, I ended up with a great looking marble table! It had the perfect blend of gold, white and greys, and I was excited for it to dry :)
Fixing Deep Paint Pour Crazes
Well, if last week’s post gave any indication how the paint pour turned out – let’s just say it didn’t dry as beautifully as I would have hoped :(
My solution was to mix up some Glue All and Clear Glue and fill it in the cracks. I had tested both glues individually on a plastic surface, and liked how they worked together. (The Glue All didn’t dry as clearly as I would have liked, and the Clear Glue on its own didn’t stick well).
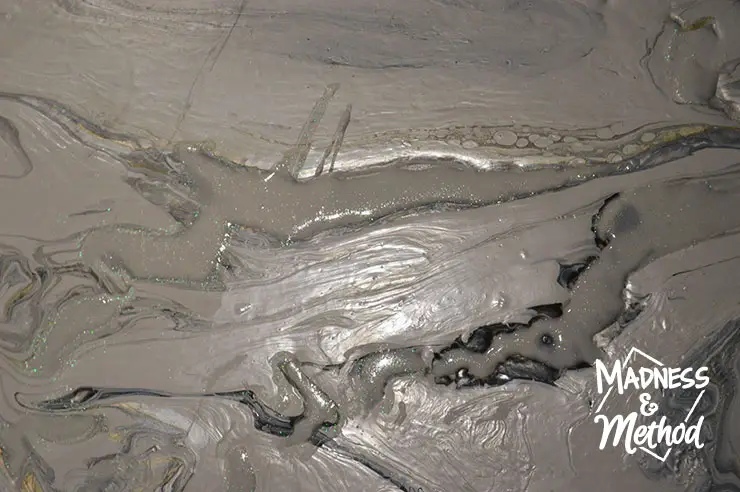
And, since I would be going through the trouble of filling the cracks, I thought it would be fun to add glitter for some added sparkle.
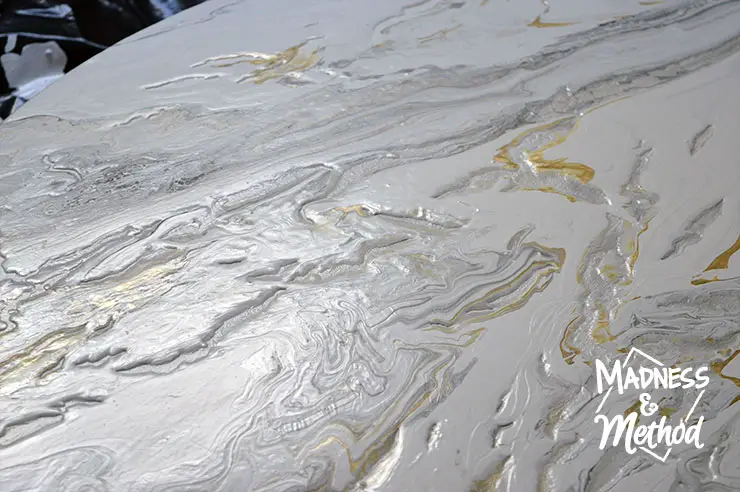
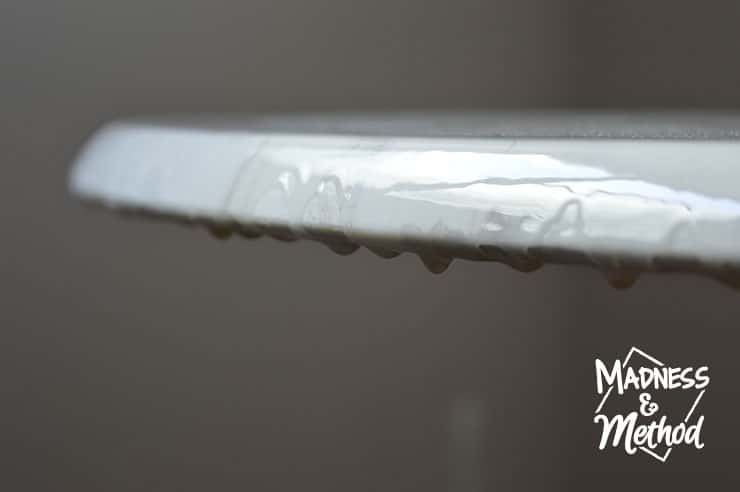
This photo shows some of the thick paint gloops along the edges
Even though I filled the cracks pretty level, once the glue mixture dried, they did cave in a bit – but I was okay with that since I knew it wouldn’t be a perfect solution.
Coating with Epoxy Resin
While I was hoping to get by with just a few coats of polycrylic, once I saw all the cracks/crazes, I knew that I needed something heavy-duty to level the surface perfectly.
Since we’ll be using this table as our main eating place, it would have been really annoying to have to scrub in all the little crevices to clean the food.
(And you know with littles, there would have been a lot of potential food messes!)
It was also my first time using an epoxy resin, and there is clearly a warning to do smaller projects before attempting a big pour, but in case you didn’t realize, I like to live my DIY life on the edge, ha!
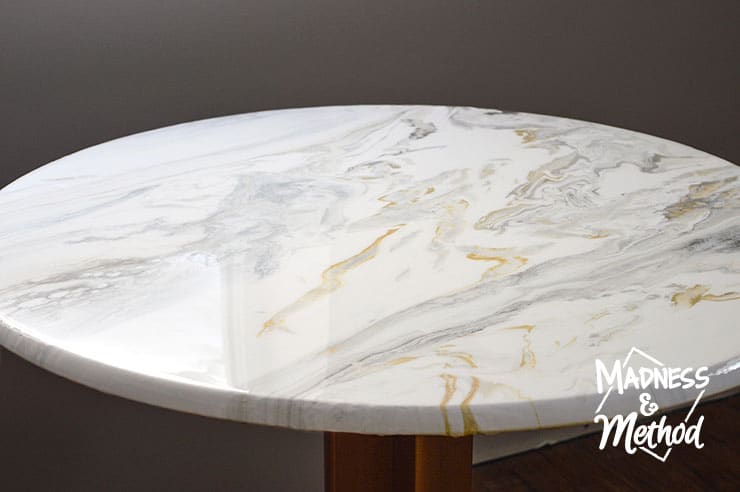
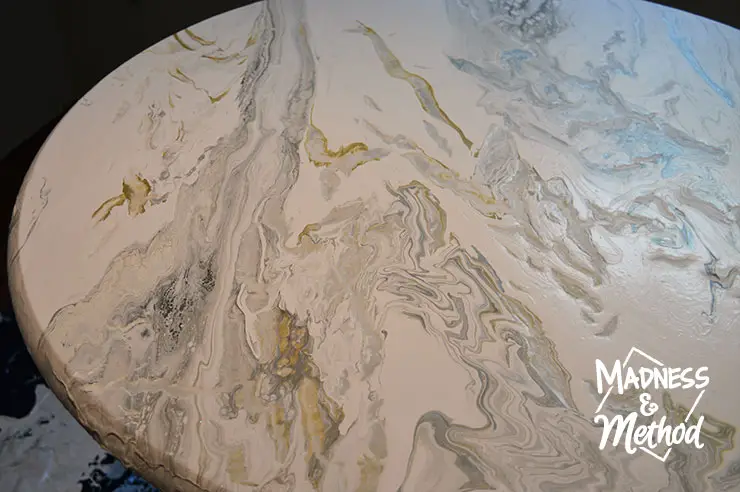
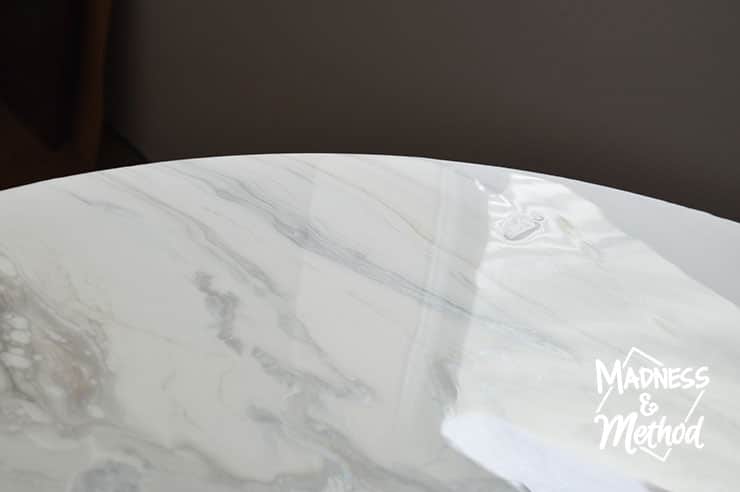
All is well, because the epoxy resin set up nicely and there is the most beautiful clear coat on my dining table!
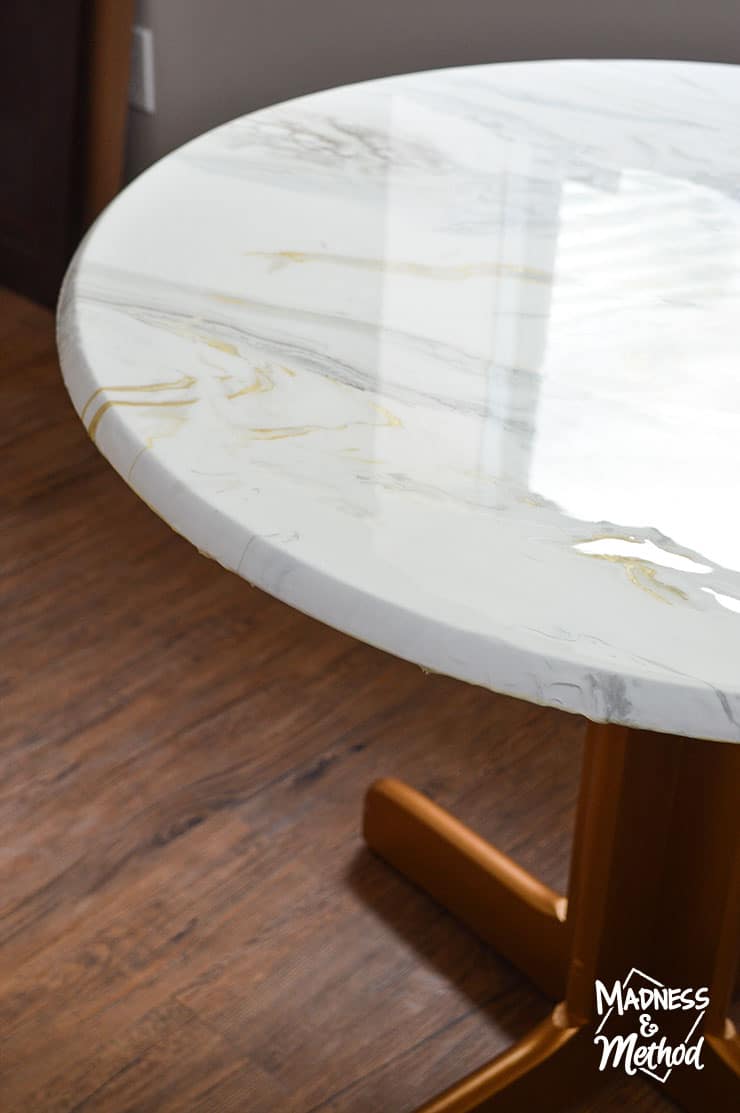
There are just a couple of small dips/bubbles on the surface (and maybe 5% of the edges that weren’t nicely covered) – but compared to how uneven the table was before, this is a big improvement!
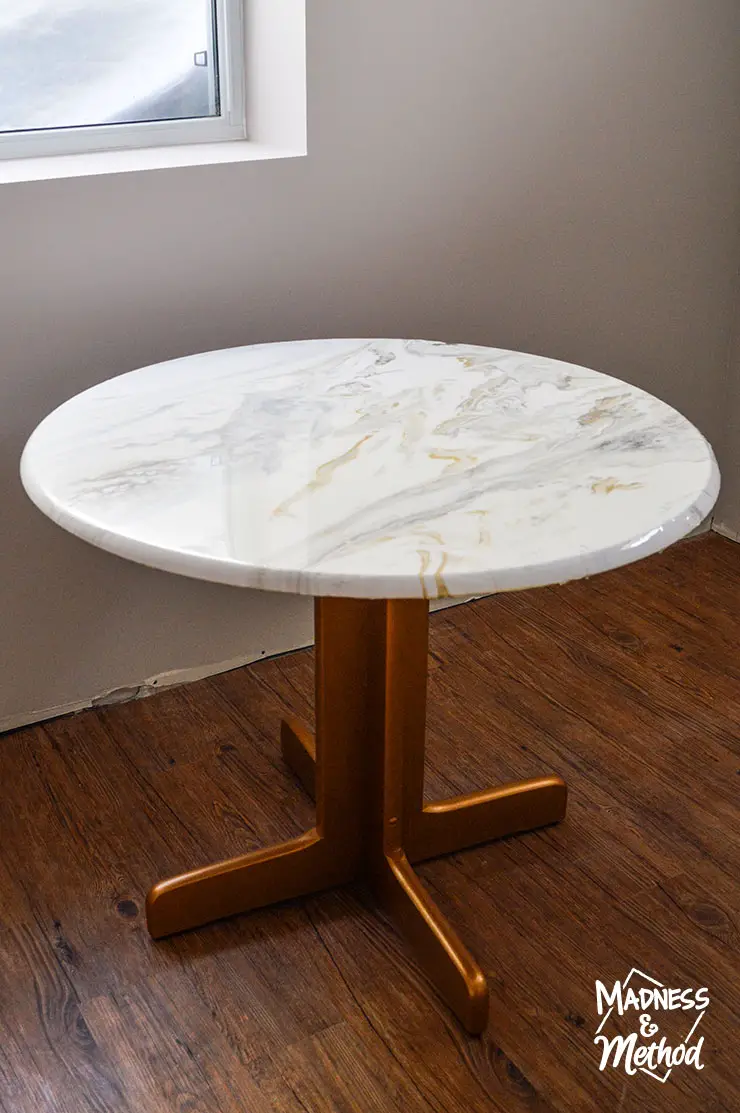
Beautiful Faux Marble and Brass Table!
I know, I know… the table was a bit more work than I anticipated – but just look at these results:
Could you even remember that it was a plain wood table before?
And, other than the extra lumps and bumps (mostly around the edges), you probably couldn’t even guess that this faux marble surface was made from paint.
A note on cost: Obviously doing an epoxy coat added a bit of money to my overall table cost that I wasn’t planning. In total, we spent I think 40 or 50 on the table itself, 0$ for most of the paint I had on hand, about 25$ for the Liquitex Medium (that I purchased with a 40% off coupon), about 25$ for the Epoxy Resin (that I purchased with a 45% off coupon), and maybe 10-15$ for misc. paints, and glues? So let’s say a total of 100-125$ – which isn’t so bad if you compare to the original table I wanted to buy.

Marble Dining Table DIY Lessons Learned
Last week I covered a lot of paint pouring mistakes that I’d like to address, but let me touch on a few more things I would do differently:
Crack Filling: I think I would have saved myself the hassle and just gone with simple glitter glue like this. I would have been easier to fill in compared to spreading it with my knife, and the stickiness wouldn’t have mattered (especially since I used the Epoxy coat).
I would have also chosen a different glitter colour (possibly gold). I was worried that the gold glitter would be too much gold on the table so went with a white glitter instead. In the light the white reflects green, and there could have been a lot more sparkle :)
Epoxy Resin: My technique was to pour the majority (75%) of the epoxy in the centre, wait for it to spread, then pour a bit more along the edges and then spread it around with my stick. I think it would have been better to pour it in the centre (75%), spread it out, and then pour the remainder in the centre so it levelled out better (and hopefully end up with less noticeable dips).
I also didn’t have a torch with me (we have one, I just didn’t have it) and ended up having to blow all the air bubbles myself – some which were a bit difficult to reach in the centre.
Oh, and if anyone has a dog, you know how hard it is to be in a completely dog hair-free zone! (I had to go back in and pick a few out by hand, so that might have contributed to some of the dips).
Paint Pour Marble Table Video
Now I’m mildly addicted to pouring surfaces (both the acrylic paint pour and the epoxy resin coat were similar), and I’m looking for other, possibly smaller, projects to tackle!
Although the Husband says I should focus on all the other important DIY projects around the rental renovation… So next week I’ll most likely be chatting about the bathroom renovation!
Did you enjoy this paint pour marble table DIY? It was definitely fun for me to try something new and explore different mediums that I haven’t worked with before.
And I do have the perfect (very similar) candidates for my next pour(s), so make sure to follow along to see how they turn out :)
Oh, and I’ll show the table in the proper dining room space when I share the completed living room, with an update on how it’s held up with eating/food messes.


No Comments