
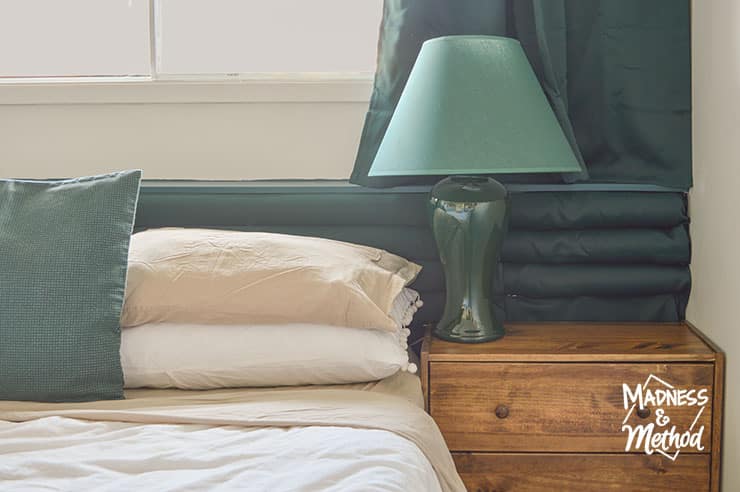
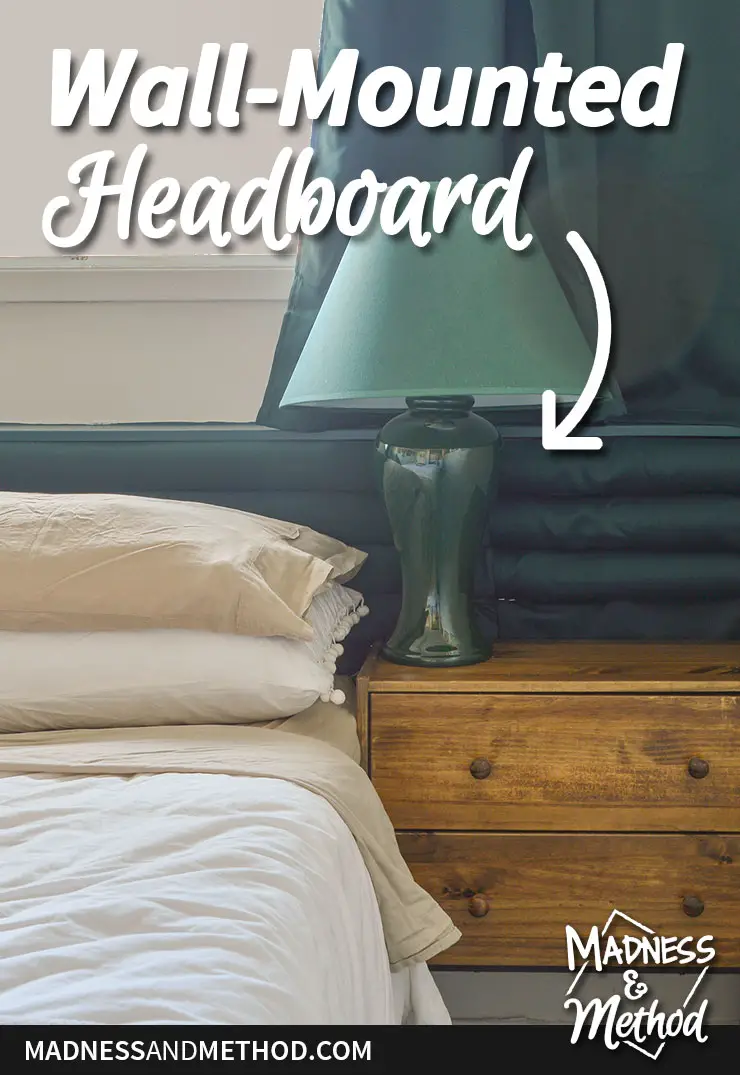
Our basement guest bedroom was in need of a refresh. For a while, we didn’t have a headboard (and the bed was in a different location). Thankfully, this pool noodle wall-mounted headboard was just what this room needed! This popular trend can be adapted to almost any design you want. In this case, I did a horizontal headboard across the whole wall – check it out!
– Note: This post contains affiliate links. See more information about affiliates here. –
Welcome back! Nicole here and I’m introducing myself because I am linking up as part of the One Room Challenge. This week I am 3 steps forward, one big step back! While I did manage to install most of the wall-mounted headboard and do the hex floors in the bathroom, the bedroom floors did not turn out as I wanted. Either way, we are moving forward and I have a few things to share. Plus, I learned for next time, and that’s always a good thing :)
For this 8-week makeover, I’m refreshing/resetting my raised ranch basement. So far, I’ve removed old vinyl flooring, painted the entry and removed the carpet in the bedroom. Today is all about how I installed a headboard (plus made a video for that embedded below) – so let’s get to it!
This post was originally titled “Wall-Mounted Headboard + Hex Floors (ORC Week 5)”. It has been split into two posts, read about Hexagon Faux Cement Tile Painted Floors here!
Here’s a little mockup of the headboard situation:
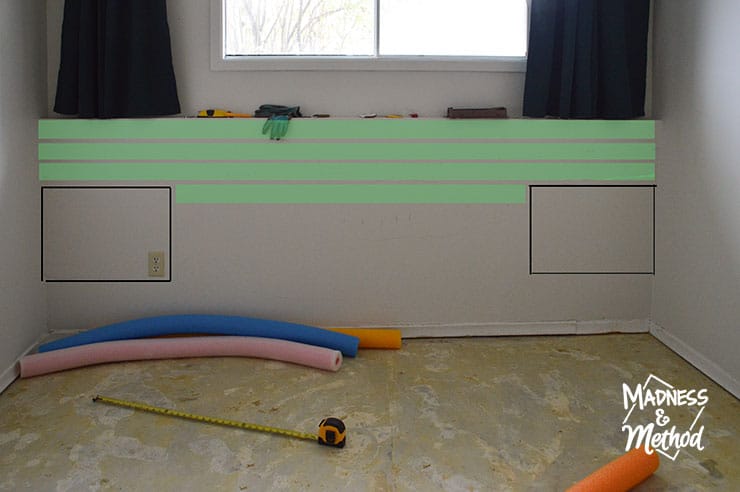
I had some leftover/old pool noodles from my parents. They’ll be cut in half, and then attached to plywood on the wall. Everything will be upholstered in the leftover curtain fabric. The black outlines are the nightstands, and I luckily have juuusttt enough pool noodles to make it down there. My original plan was to do 7 rows, but that would mean I’d have to buy more pool noodles (over an hour drive away).
Let’s go!
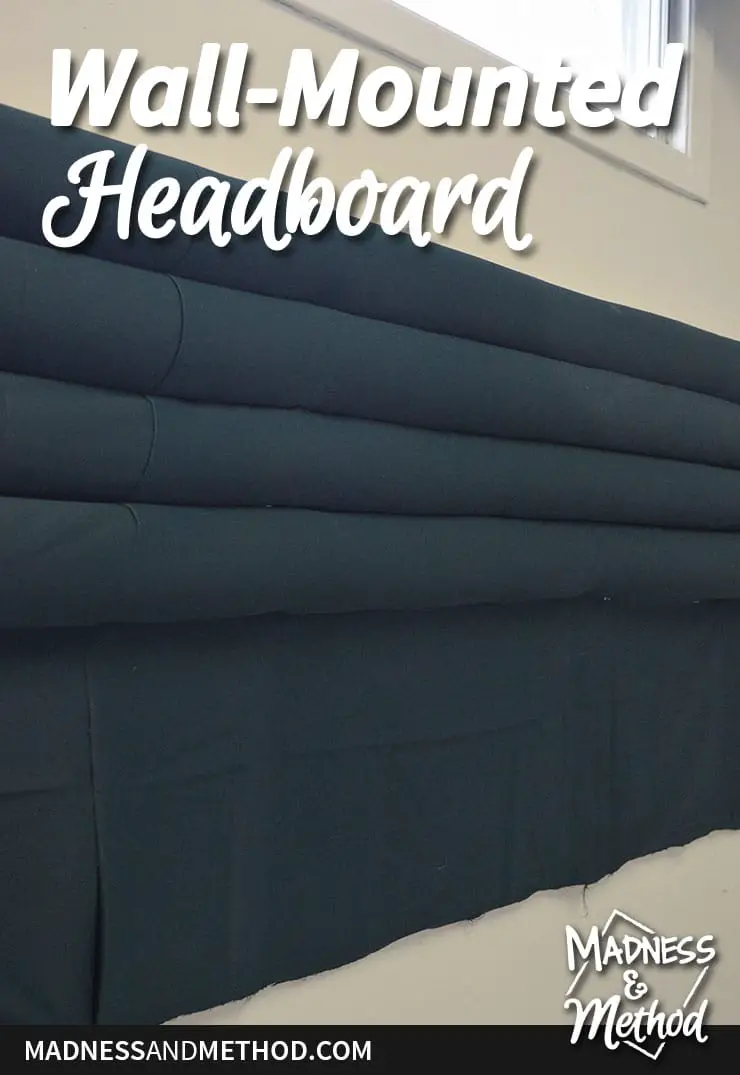
Installing a Wall-Mounted Headboard
I’ve seen a few channel-tufted headboard DIYs before, so this idea isn’t that new. I’ve even made a few headboards myself (like these and these wraparound ones). Even so, this was my first time doing a wall-mounted headboard and I decided to build it directly on the wall. If you’re attempting this DIY yourself, I’d suggest grabbing a friend to help you hold the wood :)
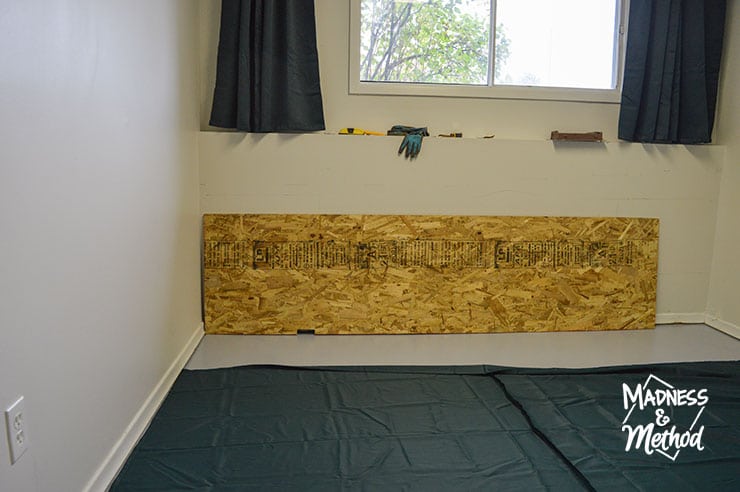
Essentially, our wall was just under 112″ wide, and I wanted my headboard to fit the whole way. I purchased a 1/2 piece of 4×8 aspenite sheet (I believe it was really 7/16). Aspenite/chipboard was cheaper than plywood, and no one would see it. It was cut in half lengthwise, and I just had to notch out a little spot for the outlet.
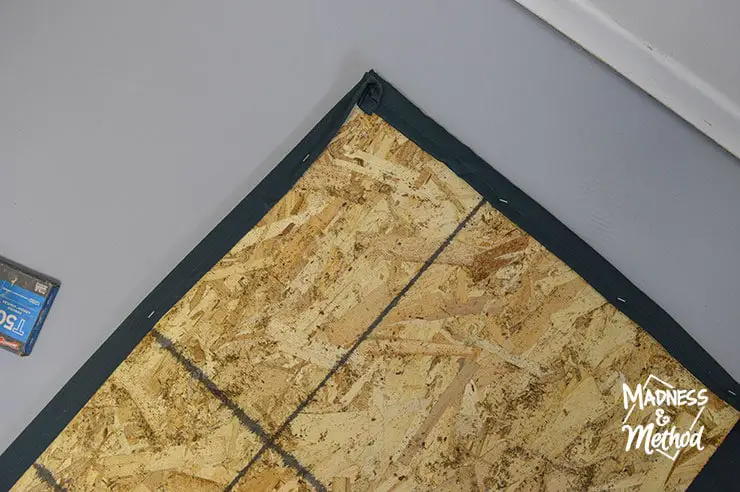
I stapled the leftover curtain material to the back (and one side) of the board. BUT I should have only done the top (I mentioned it in the video too). It was too tricky to try and shove the noodles in the tight areas.
Materials You May Need
- 1/2 Plywood (or aspenite/chipboard)
- Pool Noodles
- Fabric (I used leftovers from our curtains)
- Staples/Staple Gun
- Screws/Drill
- Scissors/Utility Knife
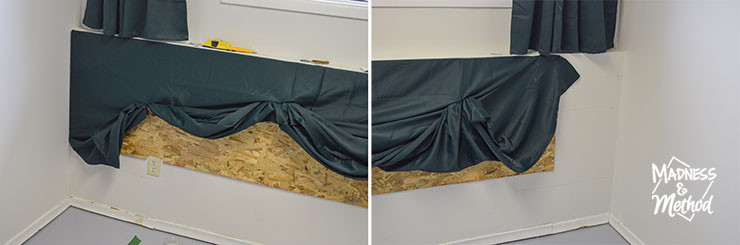
I knew that the fabric dangling down would get in the way while I was screwing it to the wall. So, I grabbed some clips and held it up. The trickiest part by far was holding the wood and trying to screw it in myself.

The pool noodles I had were easily cut in half. I should mention that these are the bigger 3-1/2″ ones with a hole in the center, as opposed to the skinnier ones without a whole.
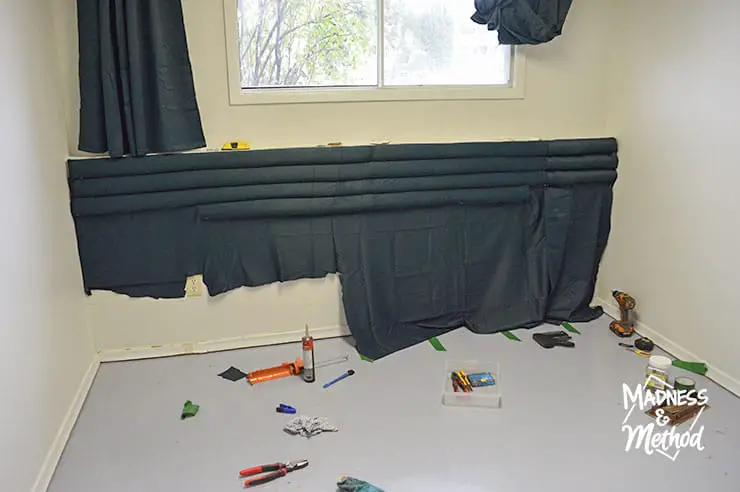
Then, it was just a matter of glueing the back of the noodle, lifting it into position, and then stapling the fabric around each row. For some reason, I didn’t have enough fabric to go all the way across – so I added another little bit at the end.
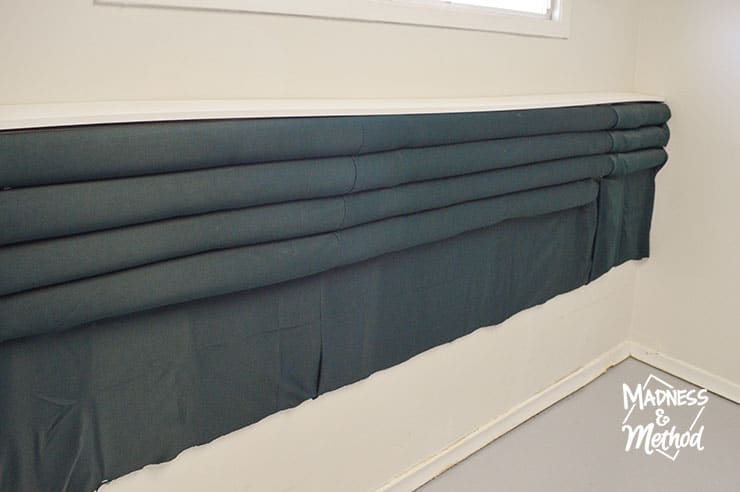
Now, I just need to paint my trim piece for the top to match (then nail it in). Our wall has a natural ledge there, and I wanted the headboard to be integrated with that. For the bottom, I nailed the fabric around to cover the wood, then cut it to length. It could be a bit better looking, but no one will notice when the bed and nightstands are in place.
I tried to get the headboard in as quickly as possible last week – so I could get the floor painted before we left. We spent the weekend in Sudbury (where we used to live) to attend a wedding. It was the first COVID wedding we went to, and a nice little break in the basement schedule ha.
Wall-Mounted Headboard Video
Check out the video above for more details on how I made the headboard.
About the One Room Challenge
Check out the One Room Challenge featured designers and hundreds of linking participants!

Follow my basement project:
Basement Reset BEFORE (ORC Week 1)
Removing Old Vinyl Flooring (ORC Week 2)
Painted Basement Entry (ORC Week 3)
Removing Carpets & Painting Concrete (ORC Week 4)
Wall-Mounted Headboard + Hex Floors (this week!)
And my budget breakdown:
2nd Week: – 2.95$
3rd Week: – 7.20$
4th Week: + 29$
This week I purchased wood for my headboard, glue, tape and a hook for 49.48$
Total: 30.63$
If you’re wondering where the photos of the rest of the basement are, don’t worry – nothing has changed since last week. The living room / laundry / workout room are still a complete mess. I promise you though, once the bedroom floors are done, I can start to move things. I’m looking forward to setting up the new bed frame and really maximizing the hidden storage in there.
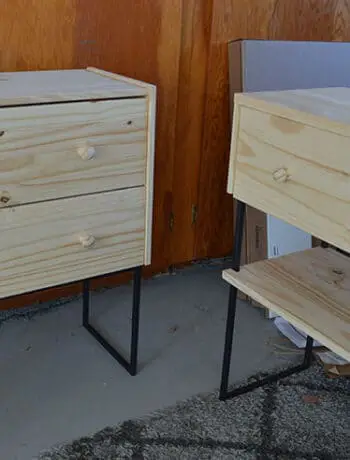
Other than that, I’ll also finish the last little bit of the painted hex floors. Then, maybe focus on building the other nightstands so we have a matching pair. Any stain/colour suggestions?
Just a few short weeks left!

No Comments