
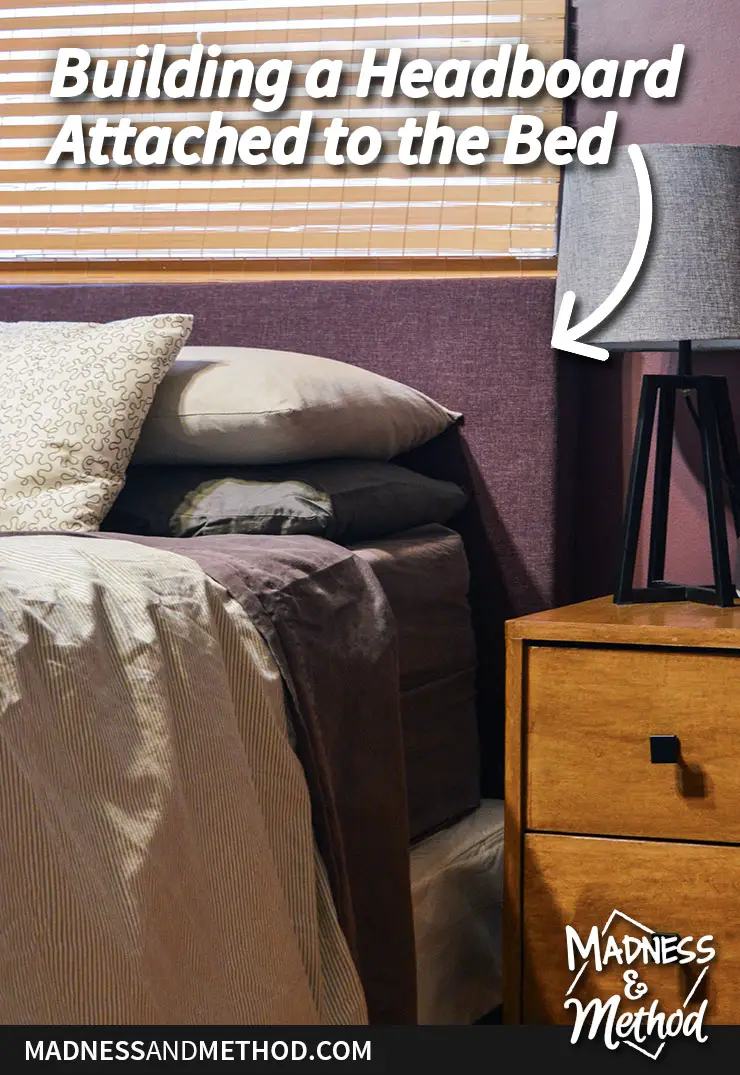
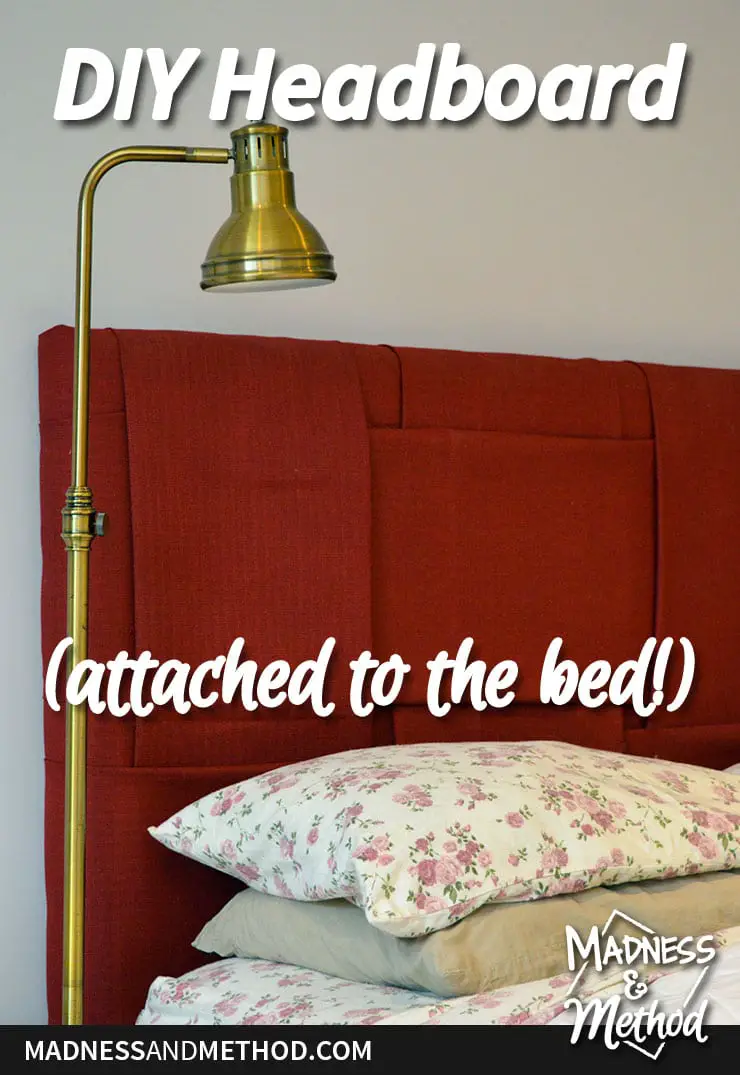
For our two recent bedroom makeovers, one of the projects I wanted to do for both rooms was building headboards attached to the bed. Today I’m going to share the super easy method to make your own DIY headboards, and have two different sizes/styles to show!
– Note: This post contains affiliate links. See more information about affiliates here. –
We’ve been living without a headboard for… hmmm… 5 years now? Visually, we had our bed in front of a window, so we didn’t really need a headboard to highlight the bed or anything. BUT every now and then we encountered some annoying issues, especially pillows falling down!
While you can easily get a cheap frame to hold your bed up (which is what we have, and both of them were secondhand!), sometimes adding a headboard makes everything look fancier, and it definitely creates a nice focal point in the room.
There are essentially 2 types of headboards you can have, one that is attached to the wall (you’ll find a lot of tutorials online for these!) or one that is attached to the bed frame itself.
Why a headboard attached to the bed?
- Helps prevent pillows from falling
- Don’t have to attach anything to the walls
- Easier to move the bed as one unit
- Prevents metal frame from damaging the wall
At our rental renovation, the bed frame was also rubbing against the wall and baseboards and creating a lot of damage. Not sure if it’s because the frame was lighter, or the floors slippery-er, or the wheels rolly-er, but the pillows would also fall nightly!
Anyways, both of our metal bed frames had a similar end piece (with long slotted sections), and I knew that it would be super easy to attach my DIY headboards to these without any fancy hardware!
DIY Headboard Materials You May Need
- Plywood cut to size (I used 1/2″, see cut graphic below)
- 2x4s (3-4 lengths per headboard)
- 2″ Foam or 1″ foam (I used both-ish, see graphic below)
- Batting and fabric to cover headboard
- Casters (optional)
- Construction tools (saws, drill, staple gun, scissors)
- Construction supplies (screws, glue, staples)
- Hardware to attach to frame (1/4-20 bolts, washers and nuts)
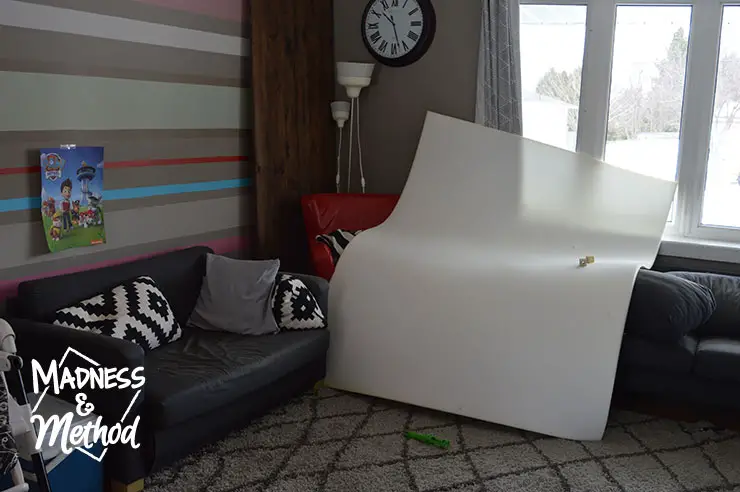
First things first, I determined how large I wanted our headboard(s!). They are both Queen sized beds, therefore measure 60″ across. For our main bedroom, I also knew that our headboard had to fit under the window, and simply measured the height of the bed and the height under the window.

For the rental renovation, the sky was the limit to the height (well, it had to fit in our 7′ foot ceilings I guess!), but I thought it would just be easier (and cheaper) to make it as tall as a piece of plywood, so 4′. That frame was also slightly wider, so I cut that piece of plywood at 61″.
I was also able to use the remaining piece of plywood to make two smaller pieces for the other headboard, and I would be joining them together with 2x4s.
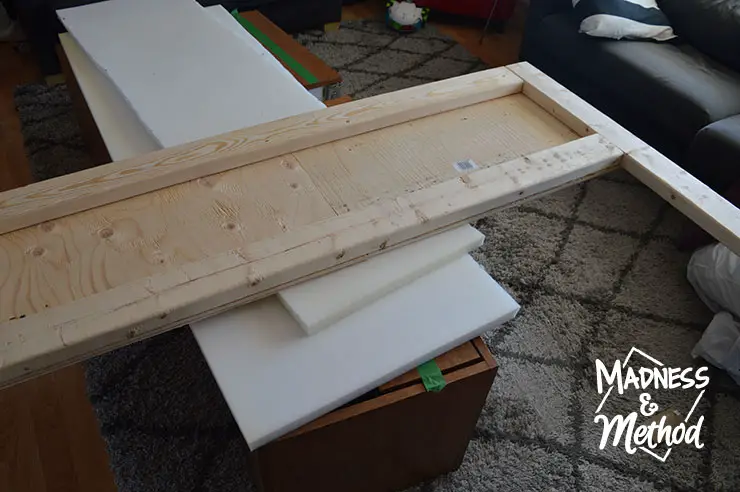
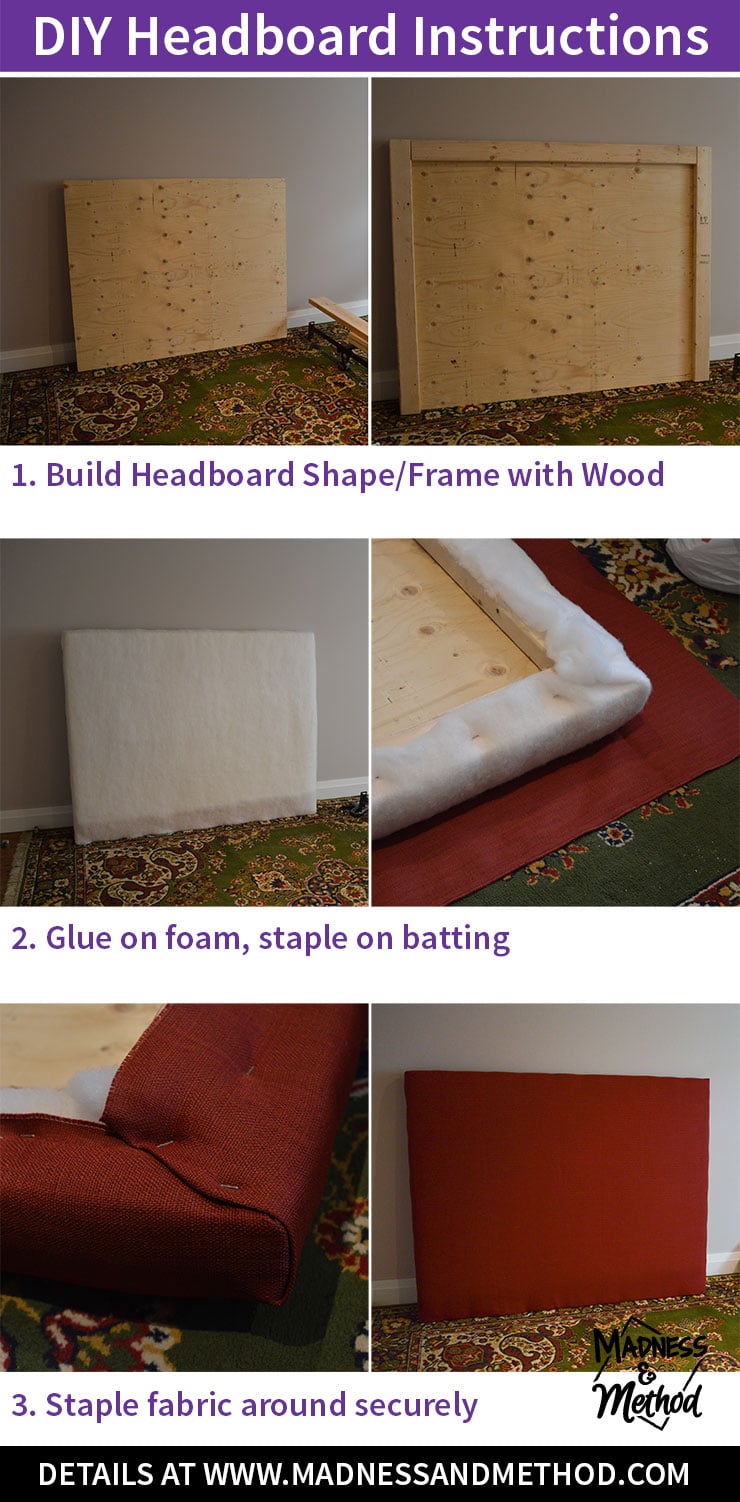
Essentially, most of the frame’s strength comes from the 2×4 construction, and the plywood mostly just holds the foam in place/creates a solid backing.
Oh, and you can totally make a wooden headboard too – I just wanted to have a nice soft surface :)
I found a local foam supplier and bought a piece of 1″ foam that measured 60″ x 80″ (but here is a 2″ foam on Amazon, or a 1″ foam on Amazon). I knew I wanted to make my bigger headboard only 1″ thick (for the rental renovation bed), and the smaller headboard 2″ thick. It was much more cost effective to buy one piece of foam and just double it up :)
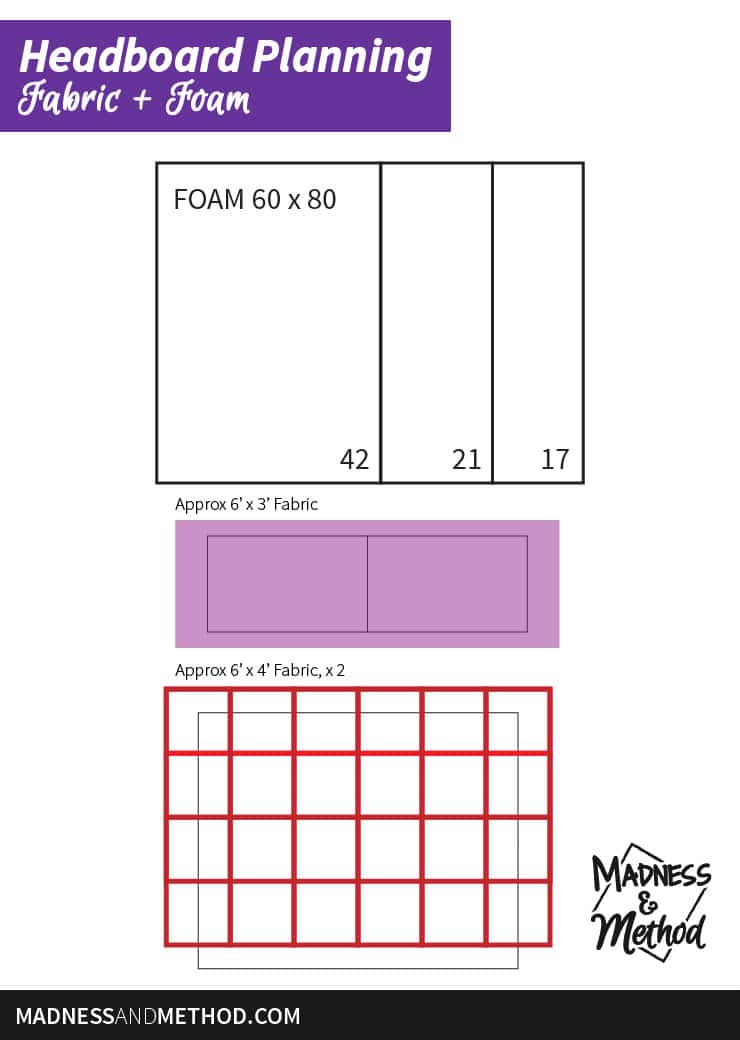
I cut my large piece of foam slightly smaller than the plywood piece (because I knew I had to screw into the wood and didn’t want foam in the way), and cut two smaller strips for the smaller headboard.
I also determined how much fabric I needed (just a small piece to cover the small headboard, and a LOT to create a basketweave pattern on the bigger headboard).
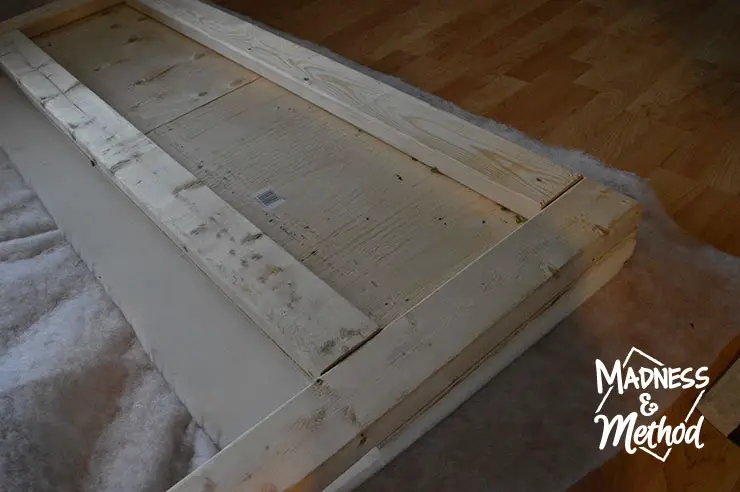
I built the smaller headboard first, and the next step was cutting my foam to size, and glueing it in place. I used a combination of spray glue and construction adhesive, and once everything was set, I cut some batting to size and stapled it on.
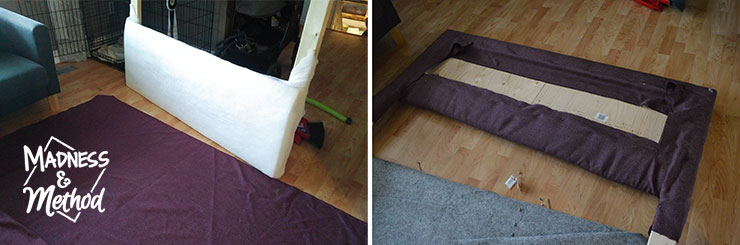
Having both pieces of foam (one longer than the other) created a nice curve at the bottom of my headboard. This would allow my mattress to squish in a bit.
The final step of construction was to staple the fabric onto the headboard.
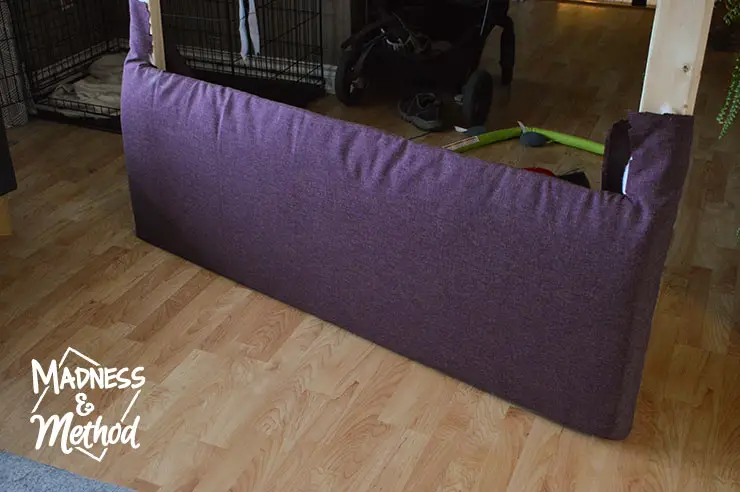
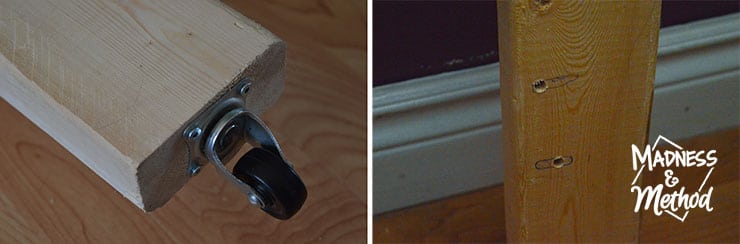
Oh, I wanted to include casters on the bottom of my headboard so that it would be easier to move the bed around together (and not have wood scraping the floor!). If you’re adding casters, make sure to do it at the end :)
(I did mine first, and let’s just say every time I went to flip the headboard up to look at it… it slid away!)
Now it was time to secure the headboard!
Attaching the Headboard to the Bed
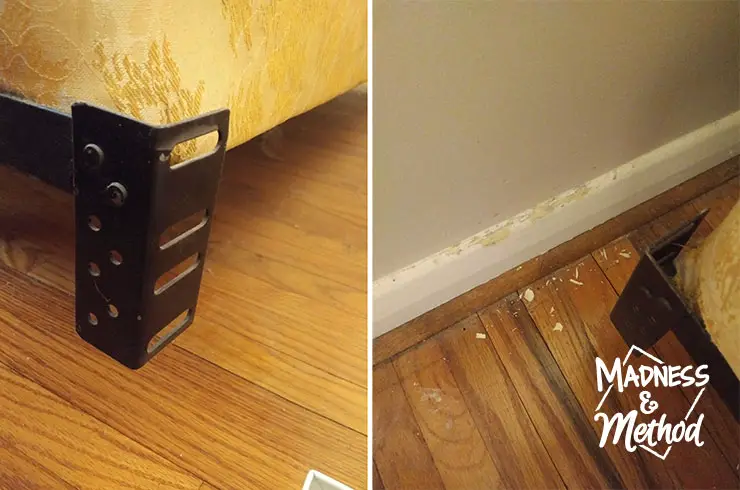
If you look at the photo above on the right, you’ll notice that I marked the slot holes from the bed frame and drilled a couple of big 1/4″ holes that fit into them. I was using 1/4″ bolts, so just make sure that the bolts you chose will fit in your slots (the ones for this headboard were 2″ long).
(PS: the top one is off-kilter to account for where the mattress sits, I didn’t want my bolt sticking into the mattress!).
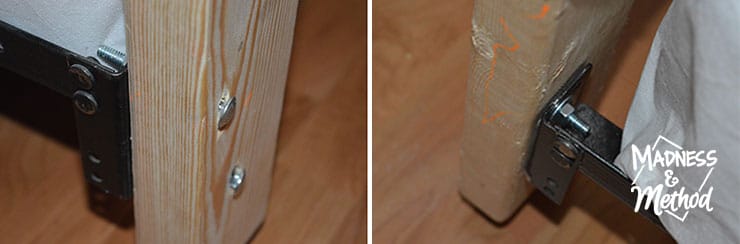
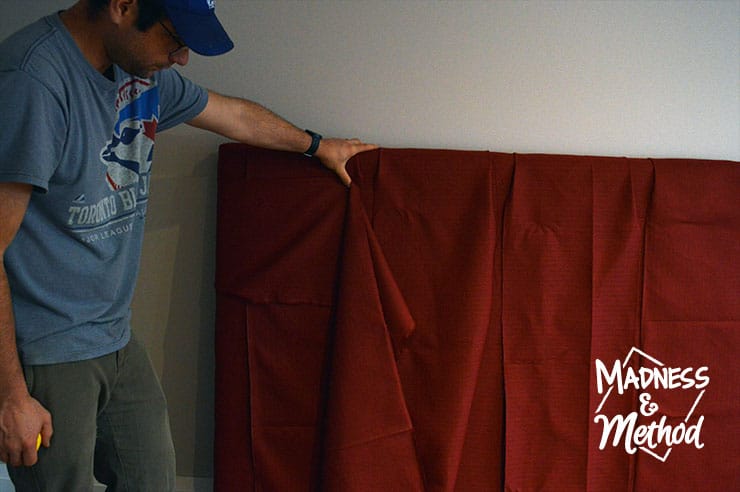
Then I took my 2″ bolts and went from the back into the front (towards the mattress) and attached them with some washers and nuts. I did it this way, and also sort of countersunk my bolt heads, so that I wouldn’t have sharp things sticking out the back that could potentially damage my walls!
I only hand-tightened them at the time, but I’m sure they could use a re-tightening.
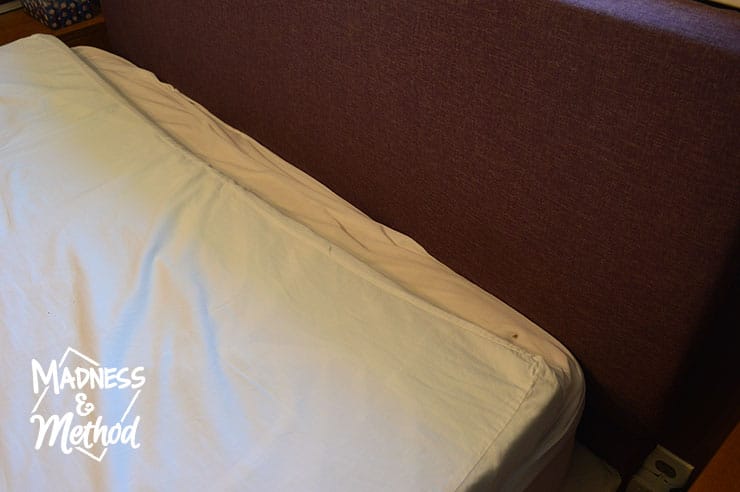
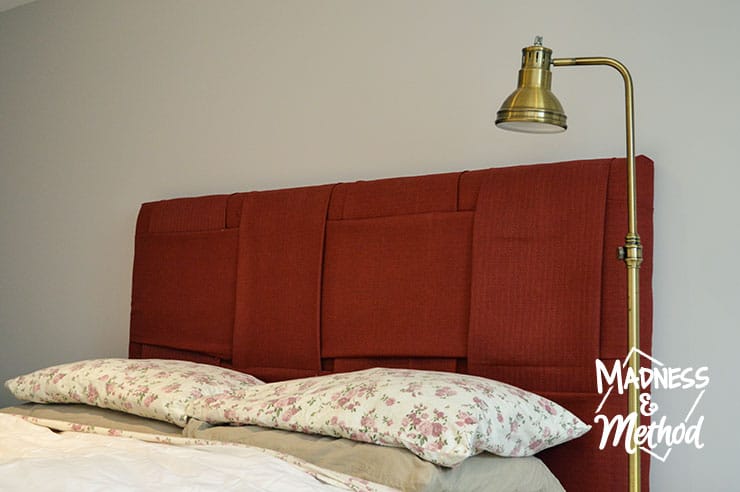
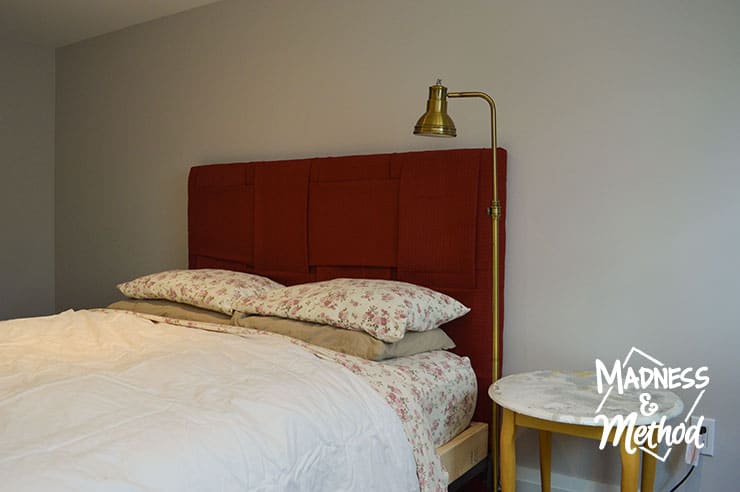
Now our pillows don’t fall down, and I’m sooooo happy! I also stapled a bit of leftover fabric to wrap the outside of the 2×4 at the leg area to make it look like it’s all fabric.
If only someone can give me a solution to figure out how to stop our pillow-top from sliding down :)
Building a DIY Headboard Recap
So I had one great headboard built (honestly, Zachary “helped” me with everything and he’s not even 3 yet, so it’s really simple!). All I had to do was repeat the process for the second headboard, so here is a quick collage to go through everything again:
Okay, I forgot that I wanted this headboard to be slightly taller than the plywood base, so make sure to build yours with little 2×4 feet (or at least DO NOT cover your fabric all the way down).
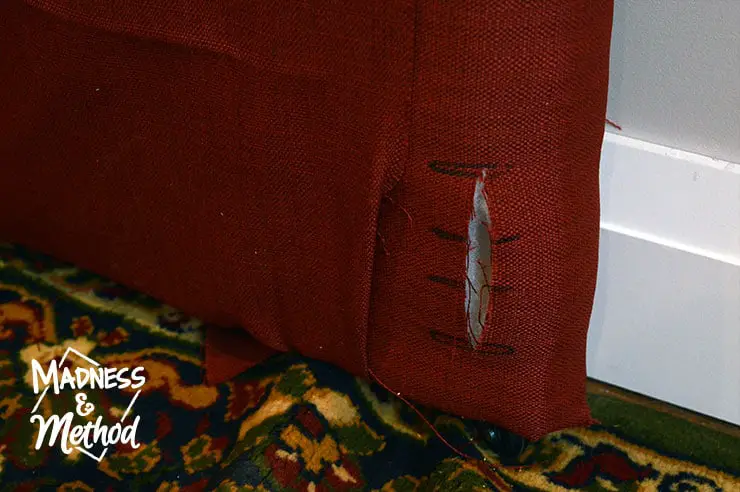
We ended up having to cut a slot in our fabric and batting to accommodate the bolts… because our drill kept getting caught in everything! Imagine drilling a bit, then having to stop, reverse, then clear a bunch of stuck on fuzz :(
I also wanted to do a basketweave pattern, so cut 14″ strips of fabric and placed a few across the top, and some along the sides and weaved them around to create the look. I didn’t sew the edges and tried to just fold them in place for the bedroom reveal photos, so they’re not 100% perfect…
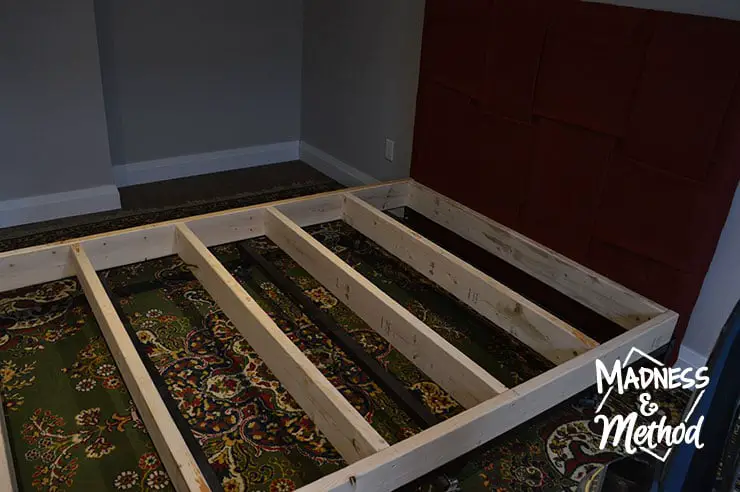
Oh, and another fun thing we realized? Our box spring wouldn’t fit down the staircase, so we had to run to the hardware store for some 2x6s and build our own makeshift one. We still have to add a plywood top, but my car can’t fit a 4×8 sheet :)
Anyways! Our second headboard turned out nicely as well, even with the exposed wood box spring. I’m planning on buying some more fabric to cover the edges, and we’ll probably be adding the plywood top soon.
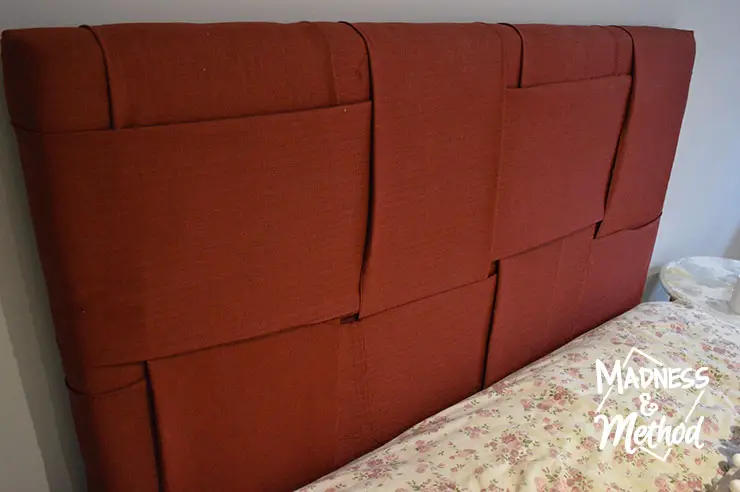
I also tried to fix the hems on our basketweave pattern, so thought some heat-and-bond would do the trick beautifully. Surprise surprise, our outdoor fabric is plastic-y and does not like the hot iron! I tried to add another sheet of fabric in front so that the headboard wouldn’t melt but still glue down, but nope…
So I’m either going to 1) buy/use a fancy hand sewer thing, 2) survive with it as is and just keep folding the edges back, or 3) take the weave off… but that’s a problem for future Nicole :)
I hope this DIY headboard tutorial was easy to follow and helped give you some ideas if you’re planning on building a headboard attached to the bed! I really like the upholstered headboard look, but there are a lot of options if you wanted something different.
Other Headboard Ideas
Either way, let me know how your headboard construction goes, and I’ll make sure to report back if we have any issues!
Oh, and don’t forget to check out more photos of the headboards with our main bedroom reveal here, or the basement bedroom reveal here!


No Comments