
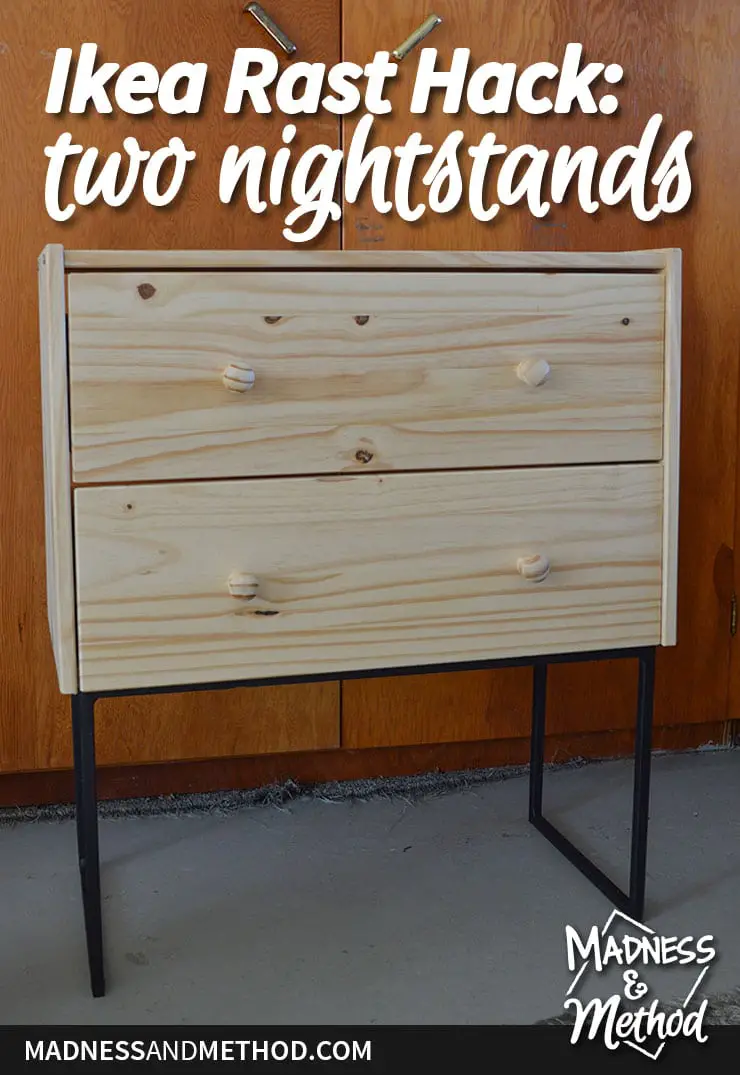
I wanted to have a completed project to share today. But alas, that’s not how it went for my first attempt at an Ikea Rast hack. I’d call this a good concept, and many lessons were learned… so that’s a win. Before I get to my Rast hack, ie: turning one dresser into two nightstands, I do want to let you know that I am looking for feedback! So get those fingers ready with the typing and get the ideas flying :)
– Note: This post contains affiliate links. See more information about affiliates here. –
If you’re not familiar, the Ikea Rast is a three-drawer pine dresser and it’s probably one of the most “hacked” Ikea products out there. By hacking, I mean that it’s easily customized to a different style, can be painted, stained, updated with new hardware… you name it! I believe the Rast was on sale when I purchased it (well, my mom did), and I was planning on using it as a nightstand for our guest bedroom.
Stylistically, I wanted it to look like a mini version of the nightstands that I had made for our bedroom. (Which technically were a hack of the McGee and Co. ones… so this is like a hack of a hack). I love double wood drawers on a metal base and the ease of cleaning underneath the nightstand is a big bonus. I’ve only ever found one more Ikea Rast hack that has a similar look right here.

To begin, I assembled my Rast dresser and got to work planning it out. Around the same time, my mom had mentioned that she wanted a floating drawer nightstand, so I figured that I could use the extra drawer/pieces for that.
Making a Two-Drawer Nightstand
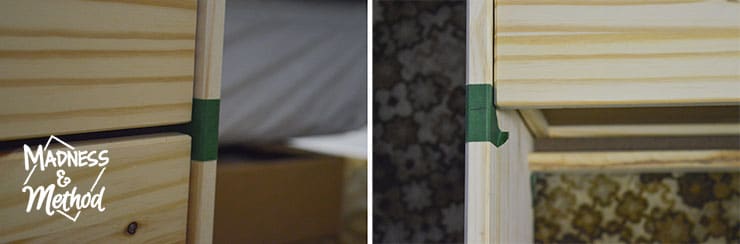
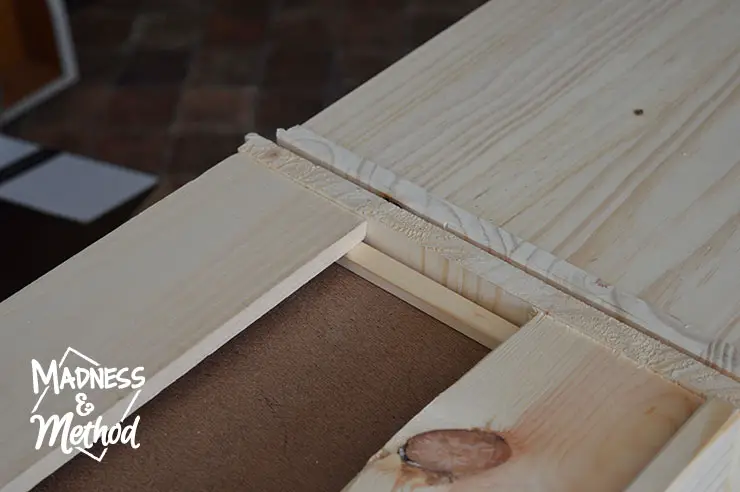
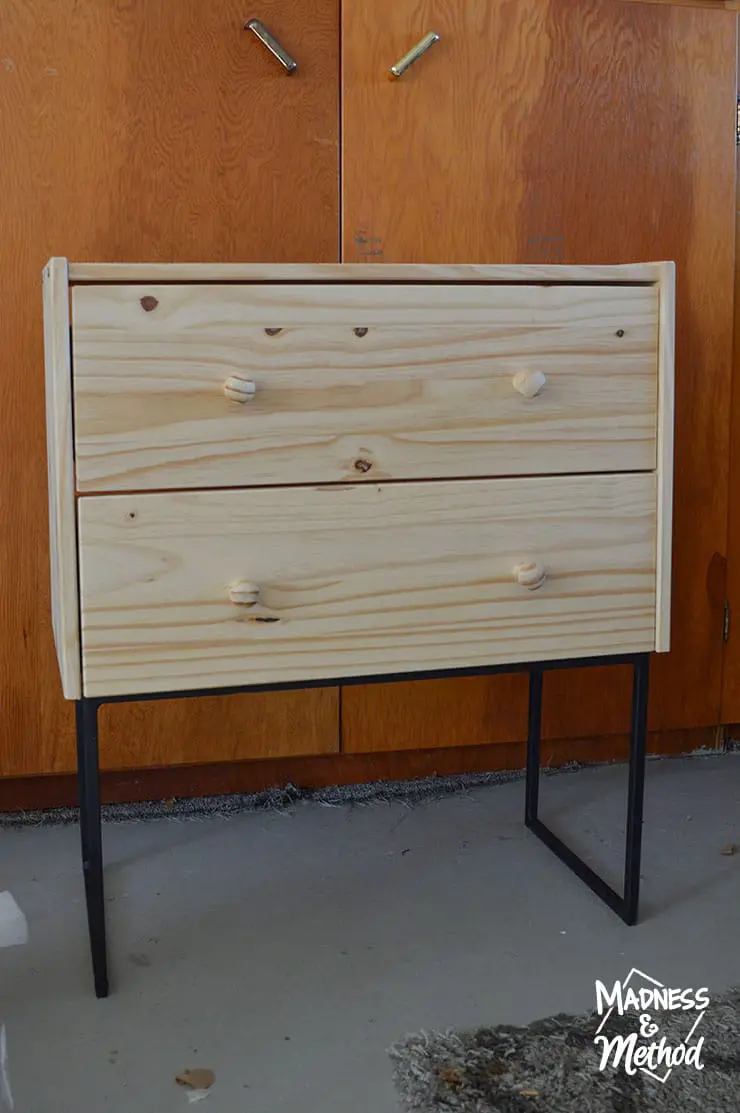
With all the drawers in place, I put a little piece of tape in between the second and third ones. I marked the centerline, measured all the way across to cut the dresser.
THIS IS WHERE I WOULD DO THINGS DIFFERENTLY. In hindsight, I would have added another inch or two. The end result would have been much better looking visually. At the time, I didn’t want to lose too much material for the other drawer… but get this – YOU CAN TURN IT AROUND TO CHANGE THE SPACE. Essentially, the drawer front isn’t perfectly centred between the sides/drawer slide, so I would have had more space had I just flipped the drawer upside down.

Anyways, back to my work. I purchased a piece of 12×48 Pine from the Home Depot and figured I could use it for both my nightstands. The boards wrapped in plastic are closer to 12″ wide compared to similar pine boards at the store, which are just over 11″ (but cheaper).
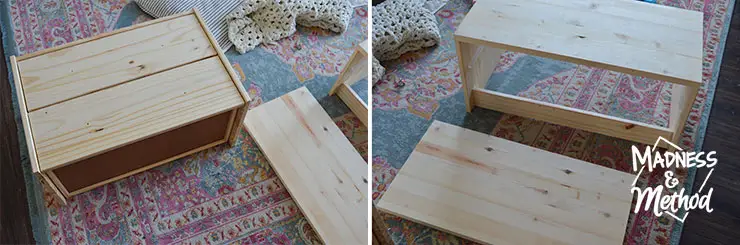
I cut the pine board into almost two even pieces and had two sections of the Ikea Rast dresser. The board wasn’t quite long enough to do two bottom bases (covering both the sides), so I had one go on the inside.
I took the smaller board and used my Kreg Pocket Hole Jig to attach it to the two-drawer shell. The bigger board was added to the top of the single shelf shell.
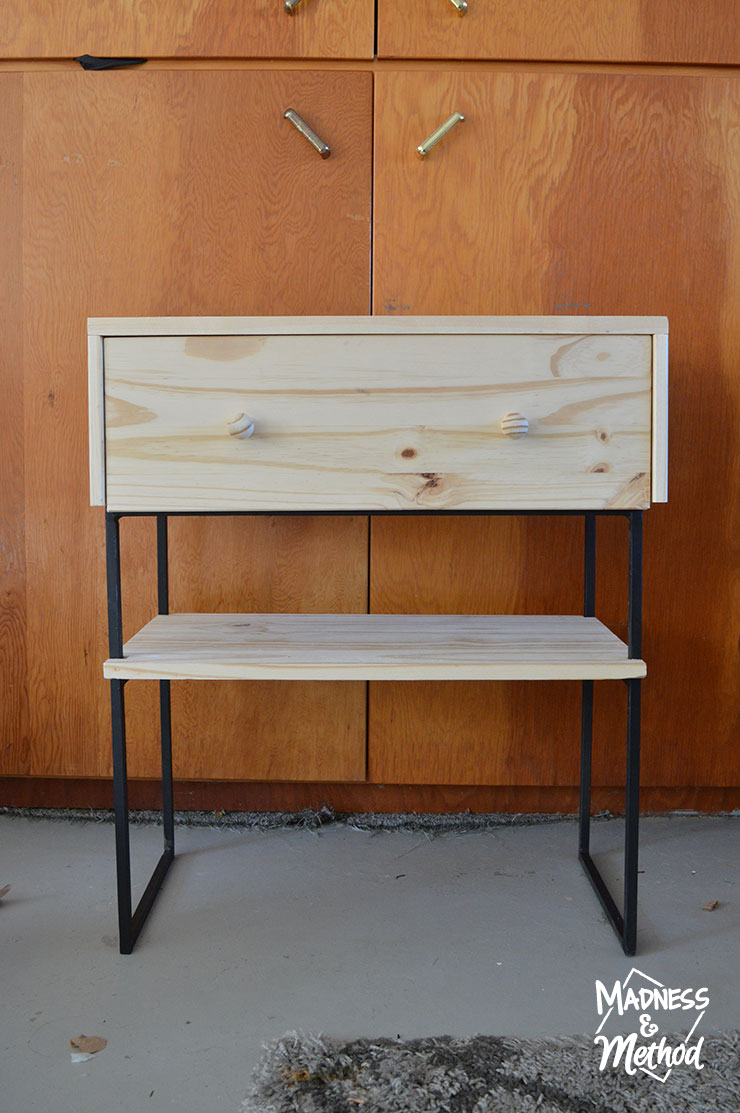
Making a Nightstand with a Shelf
To create a floating nightstand, I would have added an extra support board on the back. That would have been attached to the wall and hidden behind the drawer/foot kick piece.
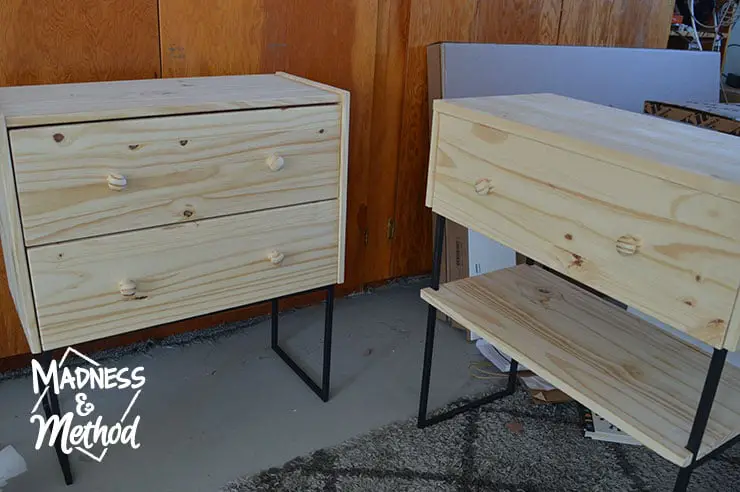
From there, I had the Husband build a couple of metal bases. The floating nightstand that my mom needed was just a few inches narrower than the Rast, so I decided to make a second nightstand, this time with a shelf. I guesstimated the height I’d need for the second one, but I should have cut the Ikea Rast ahead of time and made the base to fit…
To get the height, I turned it upside down and marked the height from the second one.
I didn’t have any pine board left (sort of), so I used some miscellaneous leftover wood I had in the garage. This is the bottom of the nightstand, so I figured it wouldn’t matter. I also ran out of 1″ Kreg screws, so have it held in place with bigger ones until I get more.
Then, I used a small piece of another pine board I had (for our kitchen renovation) to create the bottom shelf.
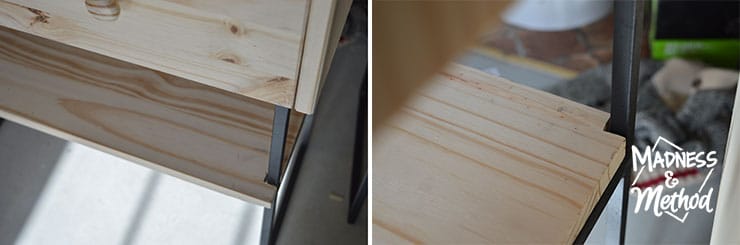
I cut little notches in the back to fit and front to fit around the wood. I think I’m going to slice another piece off of the front shelf because it looks a little weird with the overhang.
Materials Needed to Recreate This Project
- Ikea Rast Dresser
- Kreg Jig (and screws)
- Two 12×48 pine project boards (or one long one)
- Misc. tools like a mitre saw, circular saw, drill, measuring tape, etc.
- Supplies to finish your project (paint, stain, hardware etc.)
Placement/Finishing Ideas
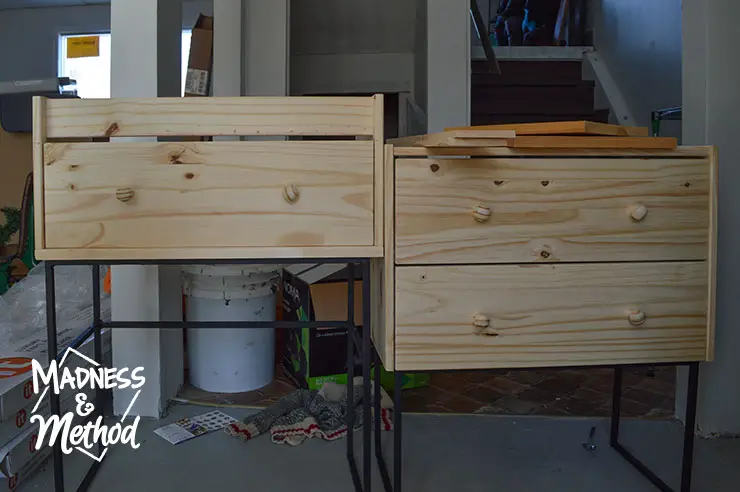
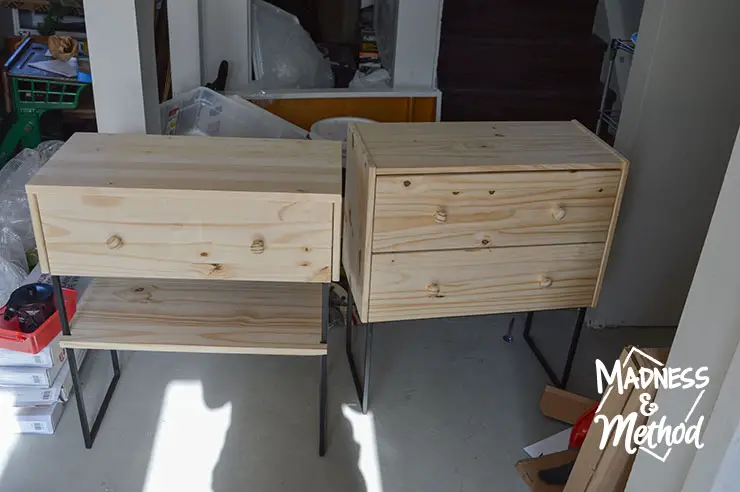
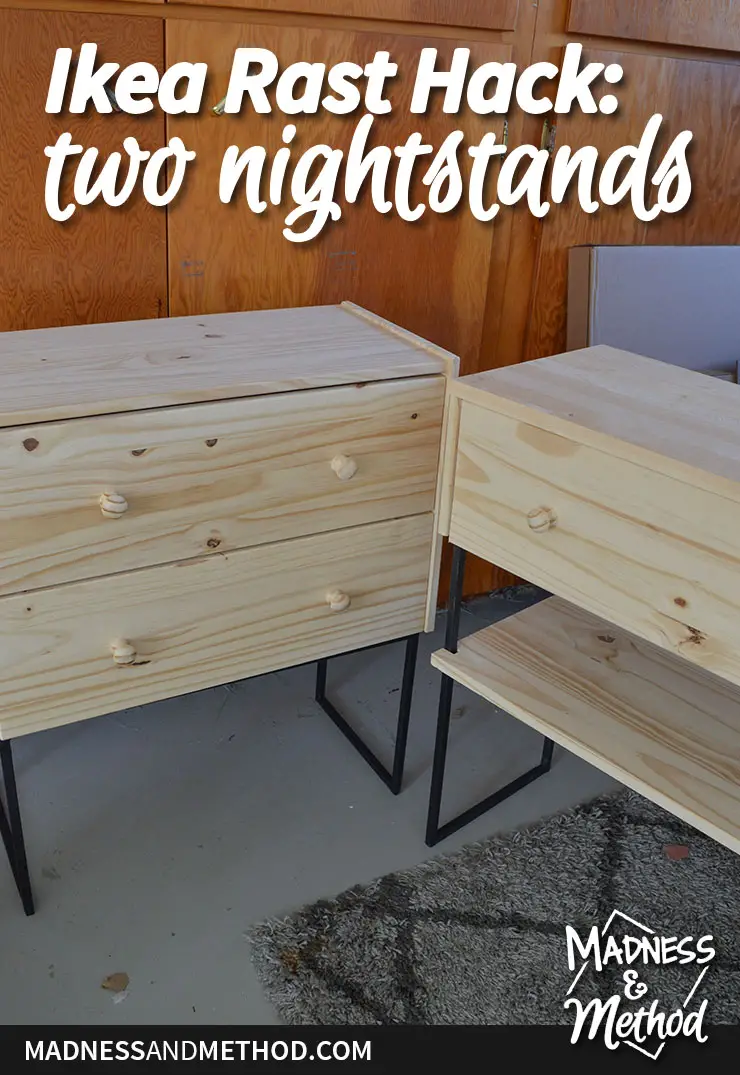
Now I have two similar, but different nightstands. I don’t have a concrete idea on how I’ll refinish them, but I was thinking of doing a grey wash technique. You’d still see the wood grain through, and I could always just paint them if they looked too shabby chic. Then, I’d add new hardware (maybe some extra copper knobs?).
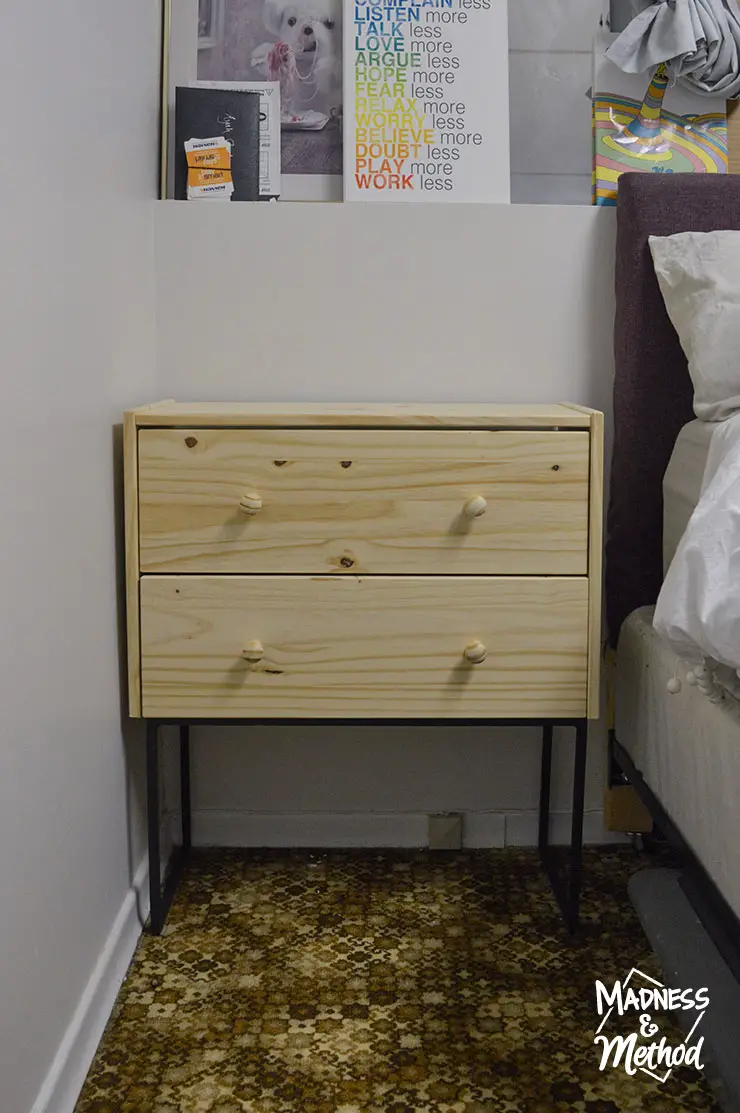
The two-drawer one would go on my “mom’s side” of our guest bedroom. She said she needed extra storage (hence the reason for this project). I had added some temporary plastic drawers (see a few photos above), but this seems like a nicer option.
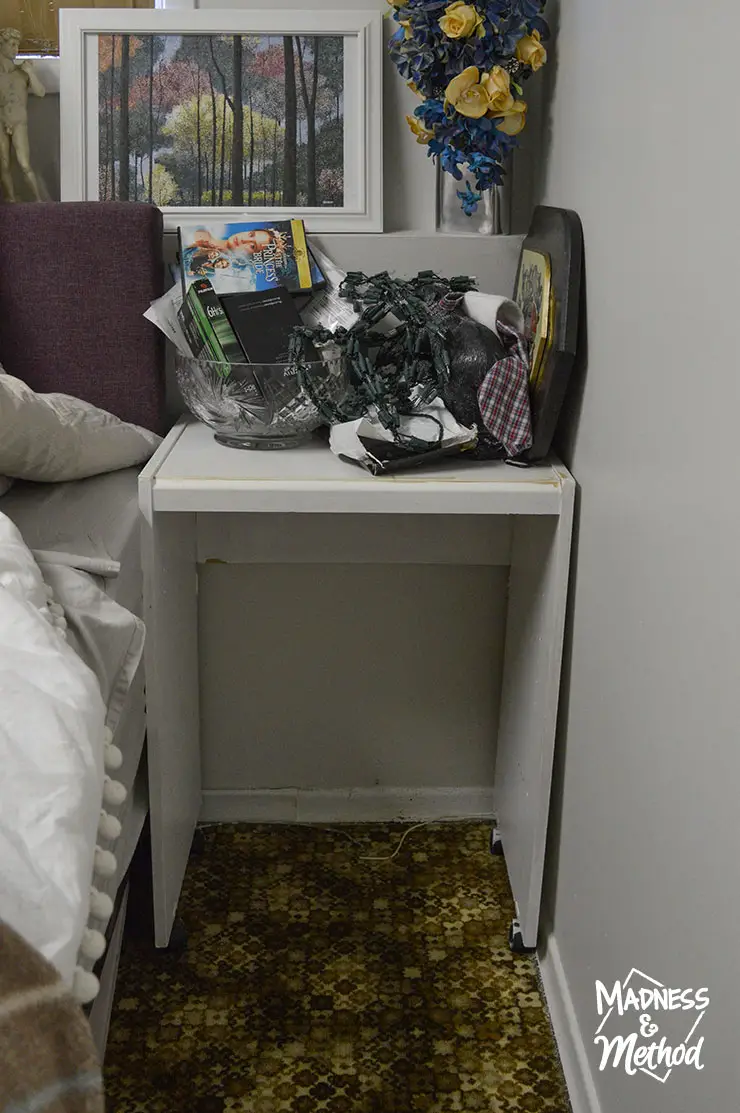
My dad’s side currently has a rolly shelf frame that I updated years ago. It’s seen some better days and was originally slated for the trash before I re-arranged the layout of this room. There are a few things in this photo that could probably use a heave-ho too :)
Up until I started editing these photos, I just figured I’d refinish the nightstands the same and call it that. But now… I think I may get ANOTHER Rast dresser and do the same thing. But, fix all my mistakes (ish – I do still want the pairs to match).
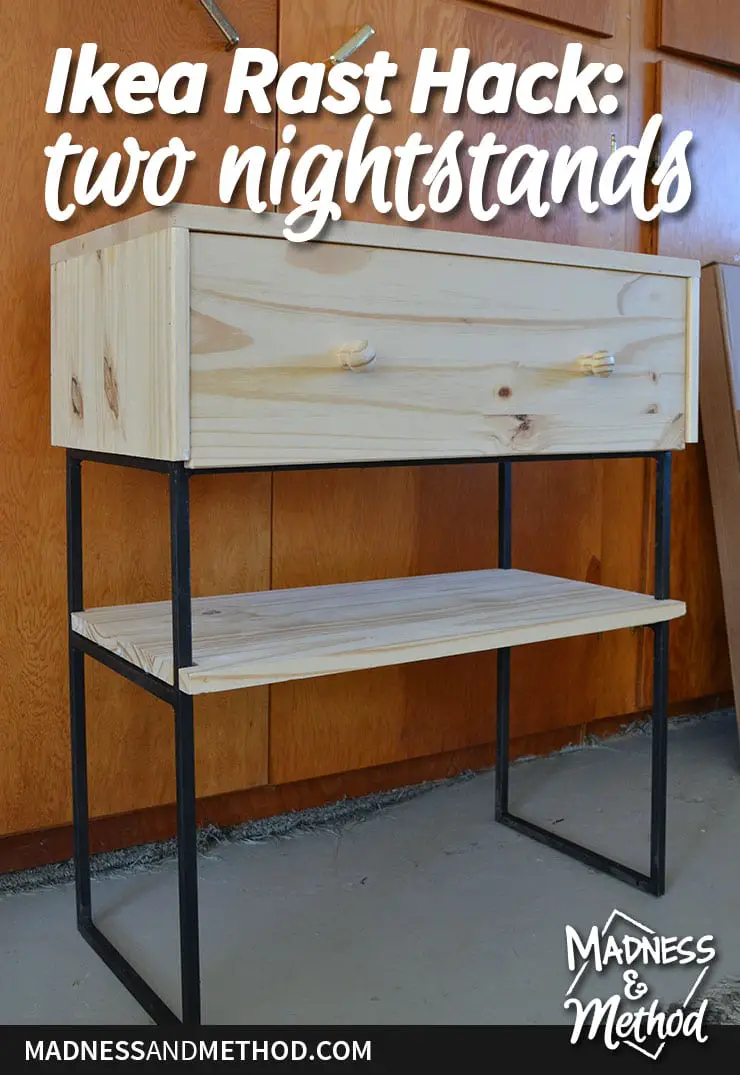
Visually, I wish that the side pieces were a little longer on the one-drawer nightstand. See how they’re just a little short of where the drawer stops? The drawer also rubs a bit too. Right now, I have the support boards inset, but I think I’ll recut more pieces so that they go below. (That would 100% solve the rubbing issue too).
Looking for Feedback!
Now that I’m planning on re-hacking another Rast nightstand, I’d like some feedback! Essentially, the matching pairs of nightstands would go together.
So, should they be painted? Stained? Any other major changes? Should I keep the wood knobs? Update the hardware? Do a pull instead? What about the colour of the metal stands!?
The two-drawer nightstands will end up in our guest bedroom, so I’d ideally like to get those figured out first. The ones with the shelves will be used in a different project – so I’m wondering if I should hold off on the design decisions until then?
Have you ever hacked an Ikea Rast before? What do you think of this attempt? Did you also notice all the mess/stuff in our basement everywhere? Ha! We’re right in the thick of our kitchen renovation, and I can’t wait to get things where they belong.
I’ll make sure to update you all on how my next Rast hack goes. Should I do a video for that one that explains the process more? So many questions!
But seriously, I’m open to the design feedback :)

5 Comments
Louise aka Mommy
March 14, 2021 at 9:07 amCan you add a little piece of moulding on the single drawer to make the side longer? I like the idea of the wash vs paint. Thank you! Now I have a couple drawers for my clothes when I visit!
Nicole
March 16, 2021 at 1:38 pmNo problem :)
Suroj
April 7, 2023 at 7:28 pmHow did your husband make the metal legs?
I would suggest making the side boards longer. For example on the one that is just 1 drawer, make the side board longer to the bottom of the shelf you added. I feel that gives your piece more substance and balance.
On the double drawer one, same idea and if even slightly longer could possibly add an open shelf on that one too, for extra storage of books or things.
Nicole
April 11, 2023 at 9:13 pmHey Suroj! You’re right, the sideboards should have been longer, with a bottom piece too (which is how I updated them later). Check out the stained version here: https://www.madnessandmethod.com/ikea-rast-hack-stained-nightstands/ The metal base was made from 1/2″ square stock and cut/welded together. You can get similar metal pieces at Home Depot (or similar) or have them made at a weld shop.
21 IKEA Rast Hacks, Die Ihre Kommode Von TRAIN TO FAB Bringen Werden - HausChic
February 16, 2025 at 4:28 am[…] von Wahnsinn und Methode nahm eine Rast -Kommode und verwandelte es in zwei […]