
One of the final details for any remodeling project would definitely be adding trim, whether around windows, in baseboards, or even crown moulding. For our kitchen renovation, we tried to re-use as much of the original trim as possible, and because we had a lot less area to cover than before, we had many old pieces to choose from. Today I’ll go over the process of finishing trim once it’s installed, which will really make your space look more polished and complete.
– This post contains affiliate links. See here for more information about affiliates. –
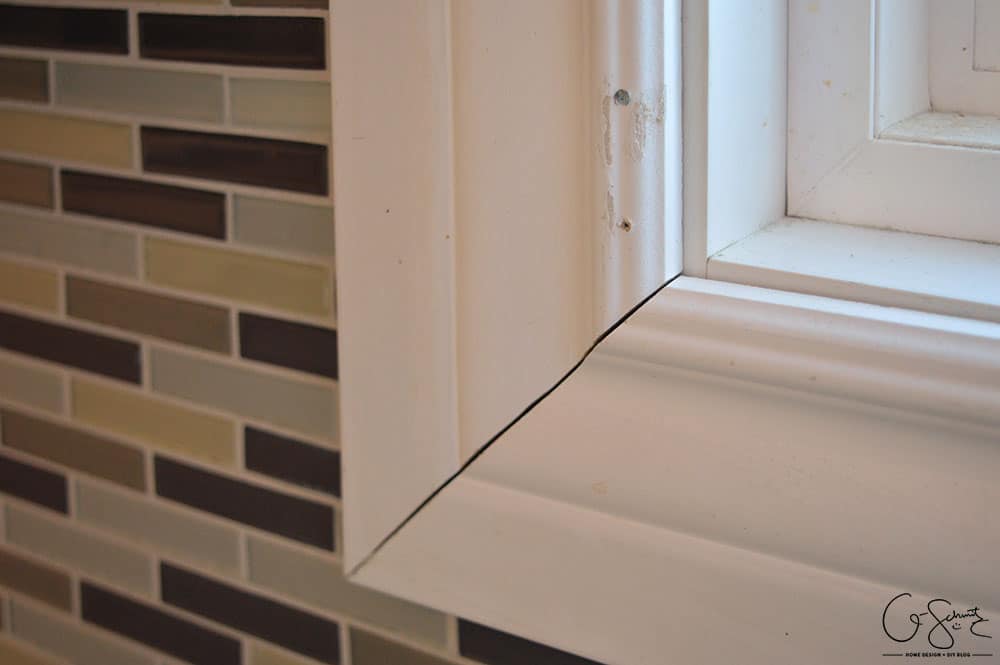
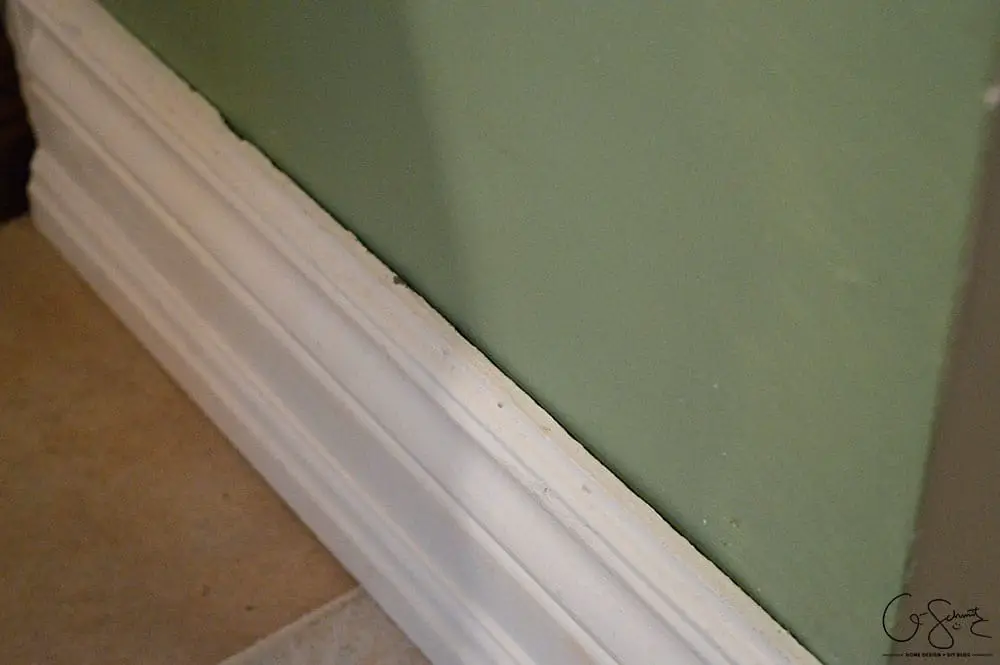
Because we did a bit of drywall work around the window area and then subsequently installed a backsplash, we had removed the trim around the window during the demolition phase. For this section, we had to use a new piece of trim, and there was a bit of a gap along the seams.
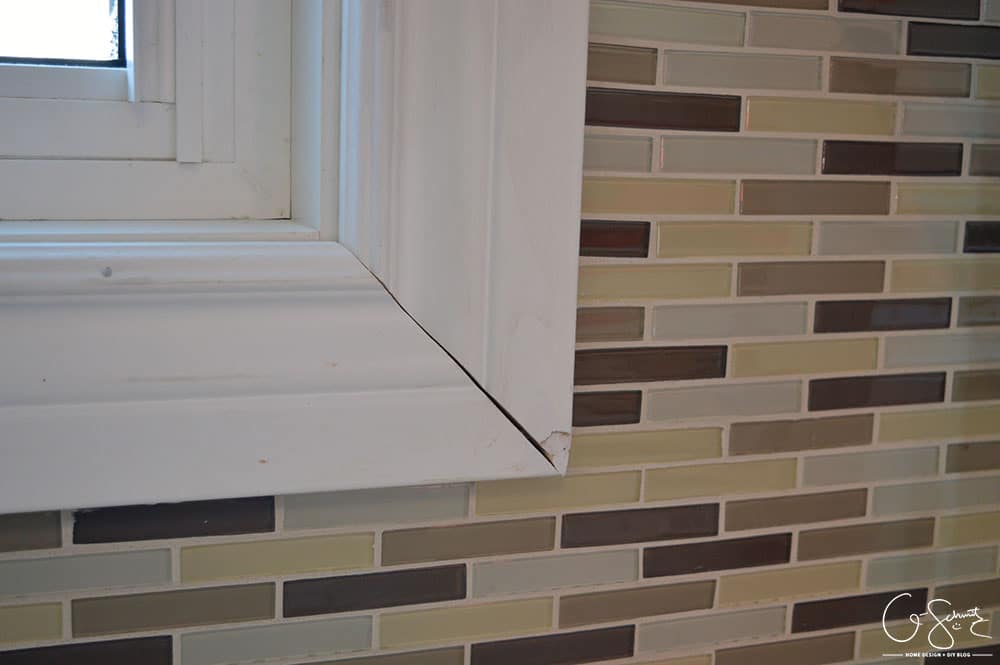
There was also a chunk in one section for some reason, but either way, all the gaps, holes and imperfections need to be smoothed out.
Materials You May Need
- Pieces of trim
- Mitre saw or hand saw and mitre box
- Wood filler, spackling or regular drywall joint compound
- Painter’s tape, paint brushes, paint, measuring tape
- Nail gun, compressor, etc.
- Caulk and caulking tube
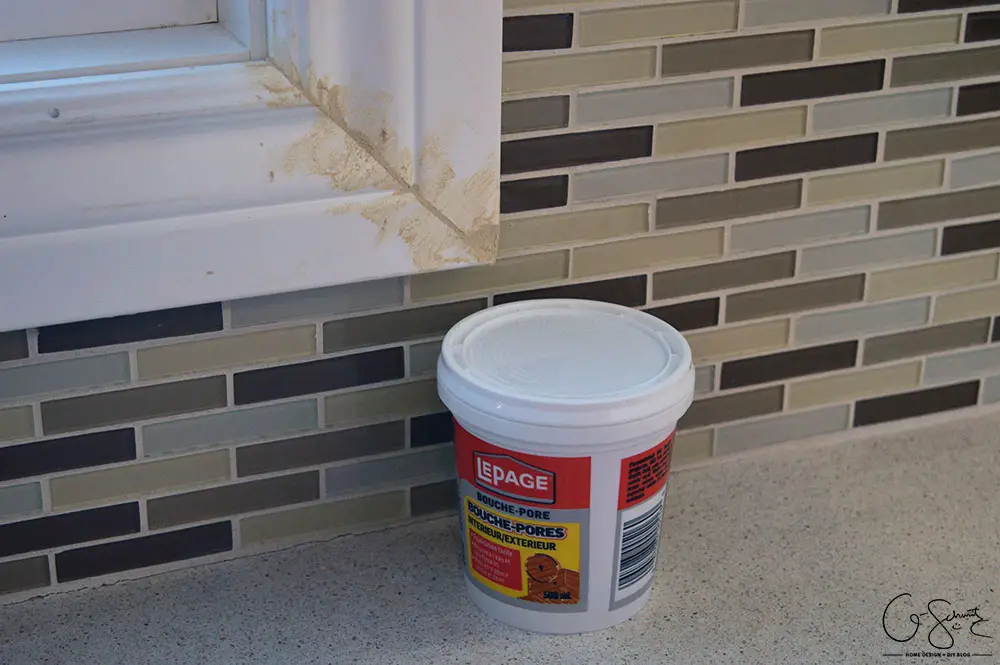
The first step is to use some wood filler (make sure it’s the paintable/stainable kind) and fill in the cracks as best as you can. Once it’s dry, simply sand the area smooth.

For this section, I had to go back and fill in the hole with another layer of wood filler. For some reason, I had another type of wood filler that I could test out, and this one turned white when it was dry. I think I preferred the pink one because the brown one was a bit grittier, and the pink one seemed to be more like the texture of drywall compound (aka smooth).
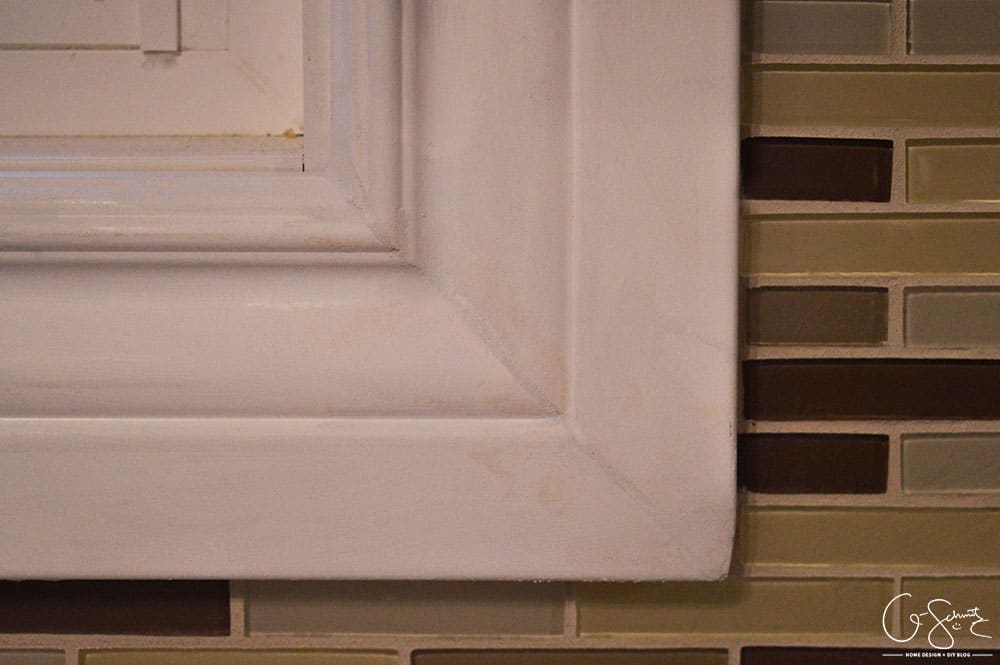
Again, once the filler is dry, give it a quick sanding to make sure it’s all smooth. I then gave the trim a quick prime, and you can tell from the image above that it’s looking better already! If you’re happy with the trim as is, feel free to give the entire surface a nice coat of high gloss paint (I would suggest a melamine).
For your baseboards, oftentimes there might be a gap along the top or bottom if your walls or floors aren’t completely straight (or maybe if your trim isn’t completely straight?). You could always try and shove some wood filler in this area, but that’s not the ideal solution since you’ll then have to sand it, prime it, and then paint both your trim and wall.
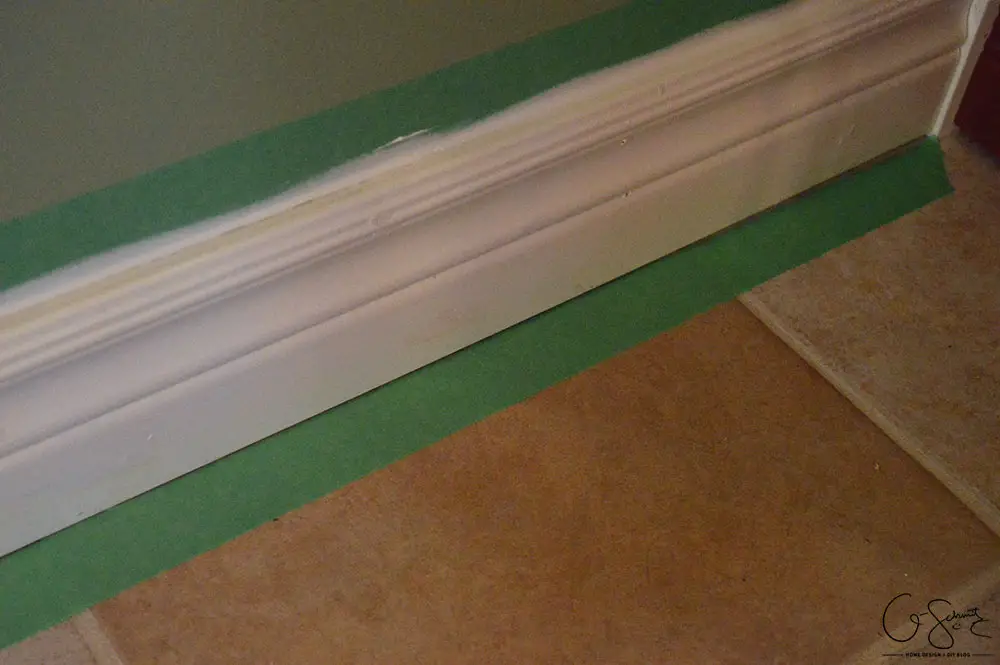
For these long continuous areas, the best thing to use is caulk (again, make sure it’s paintable). If you’re a professional, or at least think you are, feel free to caulk this area freely. After doing a test area, and knowing that my caulking skills are lacking, I knew that it would be best if I taped off the adjacent surfaces. Once you have a nice line of caulk, run a wet finger across smoothly, making sure there are no areas that pucker-up on the un-taped side.
Before the caulk has time to dry, slowly remove the tape and bask in your beautiful work! If for some reason you notice some imperfections at this stage, you can always carefully smooth them out.
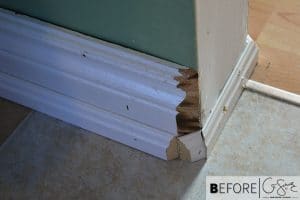
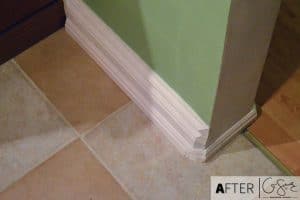
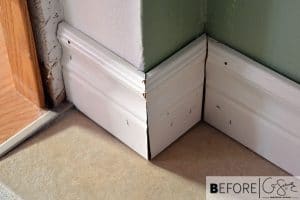

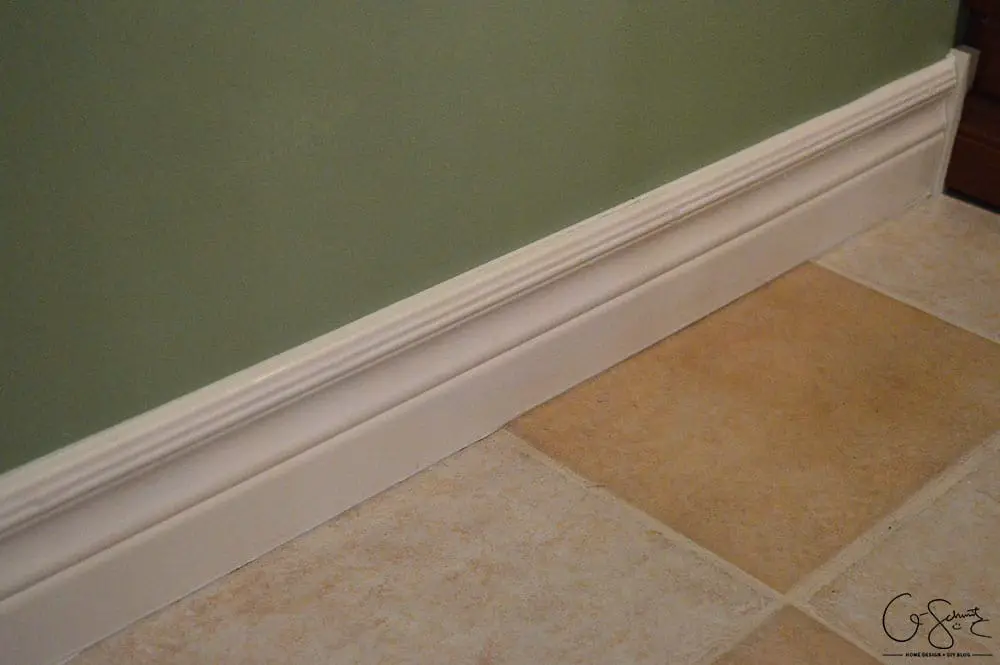
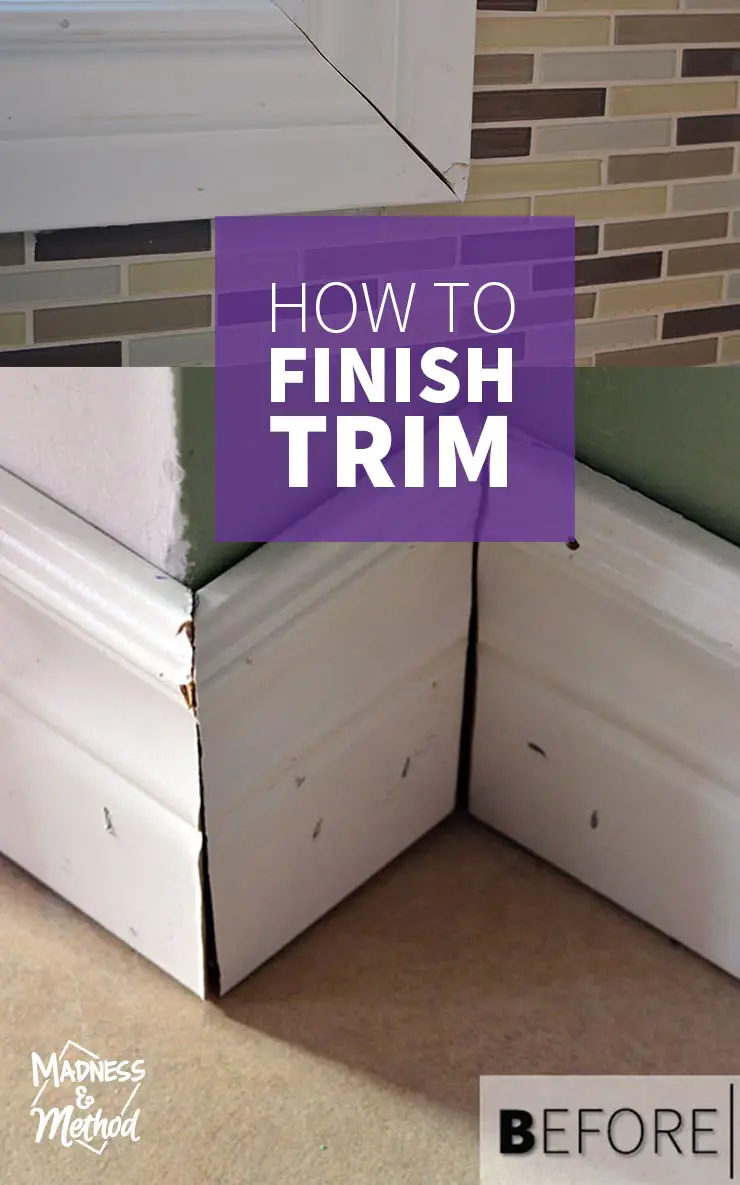
Check out the photos above that show some before and after examples of some of the areas we had in our kitchen. There was one really weird edge that we screwed up with the trim (partly because we were trying to match old pieces to fit into the new space) and I was able to fill it in (extensively) with wood filler to hide a huge gap. We had both outer and inner corners to deal with too! From my experience doing this project, I think it would be easiest to use the wood filler method on the outer corners (the ones sticking out) and then use caulk to seal in the gaps for the inside corners (because it was tricky to sand these tight areas smooth). Remember: you cannot sand your caulk smooth once it has dried!
So there you have it – the basic steps to finish up your installed trim! Have you tackled this type of project in your house? I know that every time I look down at the baseboards I notice some gaps that need filling… it seems like this could go on forever! I’d love to hear your thoughts :)
PS: Did I mention that we cut and installed all our baseboards and trim without using a miter saw? We just got one the other day… and let me tell you it would have made the whole project quicker and more precise!

6 Comments
Alice Carroll
July 21, 2020 at 3:09 amThanks for the tip that caulking is my best friend when it comes to gaps between the wall and the trim. I’m planning to hire a trim carpentry services soon because I’d like to add a little bit of glamour to my living room. The white accents that the trim will provide would surely elevate the colors of the room.
Nicole
July 21, 2020 at 1:36 pmThanks – although I’m sure a trim service would most likely provide tighter joints!
Patrick Coberley
March 15, 2022 at 8:40 amWhat’s wrong with measure twice cut once? It is obvious from trim that miter saw was out of alignment. Coping baseboards is the BEST way to install them with CRAZY gaps.
Nicole
March 16, 2022 at 2:23 pmHey Patrick – you’re right, you should definitely measure a few times to make sure that everything is perfectly cut! I guess you missed the part where I mentioned that we didn’t have a mitre saw when we did this project, and we were reusing a bunch of old pieces. Don’t worry though, we’ve upgraded our tools and have become much better at trim work in the last few years :)
Patrick Coberley
March 26, 2022 at 9:38 amI apologize Nicole for not reading the article. You state in one sentence you were “putting together old pieces” but later that “you DIDN’T use a miter saw to cut trim”. What did you use? Perhaps the title should have been , “How to FIX trim ERRORS with putty and caulk. I’m a professional remodeler and see too many do it yourself jobs muddled up with caulk and putty and yet homeowners call their patchwork results professional.
Nicole
April 1, 2022 at 2:57 pmWell, we’ve certainly gotten better in the last few years too :) I’ll try and do a similar/update post soon!