
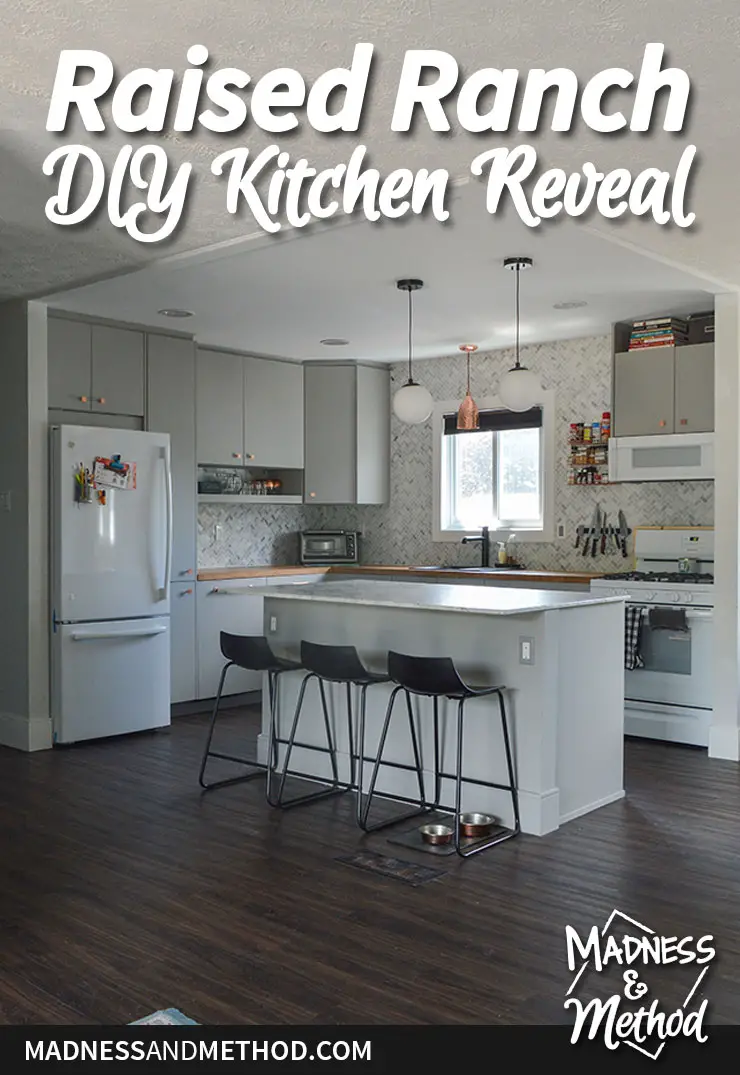
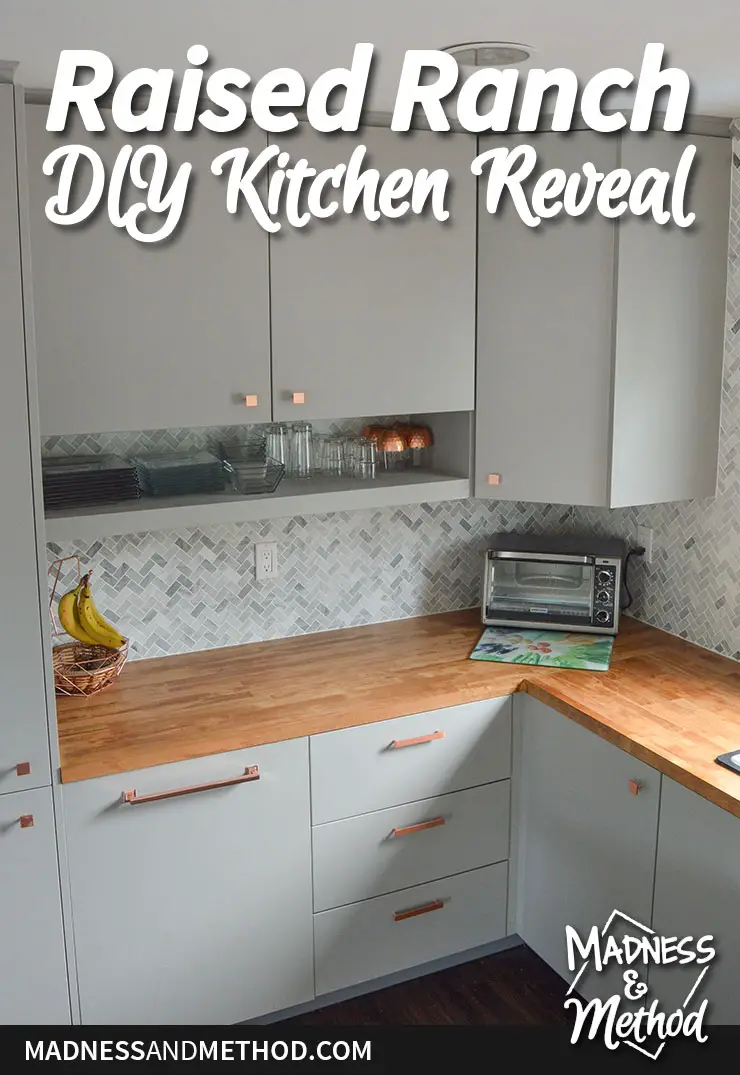
Finalllllly able to share our raised ranch kitchen reveal! We’ve been so close to being done for the longest time (the kitchen has been usable for a while), but trim delays due to COVID held up the final photos. I still need to film a video of the reveal, but I’ll add it to this post when it’s done :)
– Note: This post contains affiliate links. See more information about affiliates here. –
Okay, let me share a few photos, before I remind you of how this space used to look. You can also see the before tour of our house here, the one year update here (mid-renovation), and the latest progress (and cost) here.
I’ll go over everything in detail, but let me know if you have any questions.
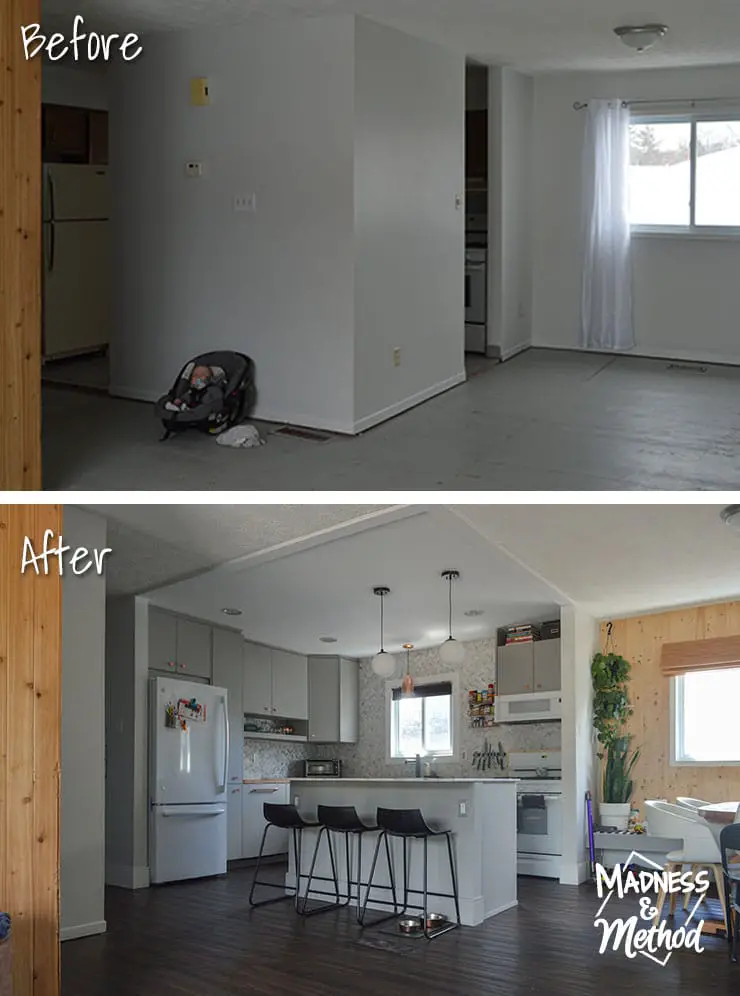
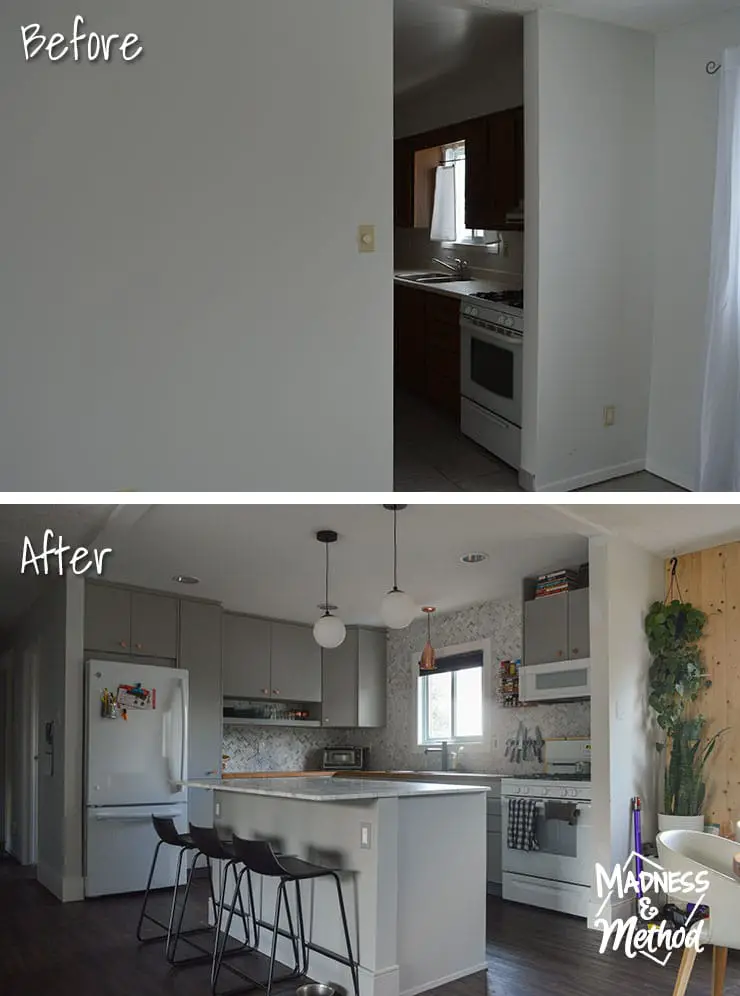
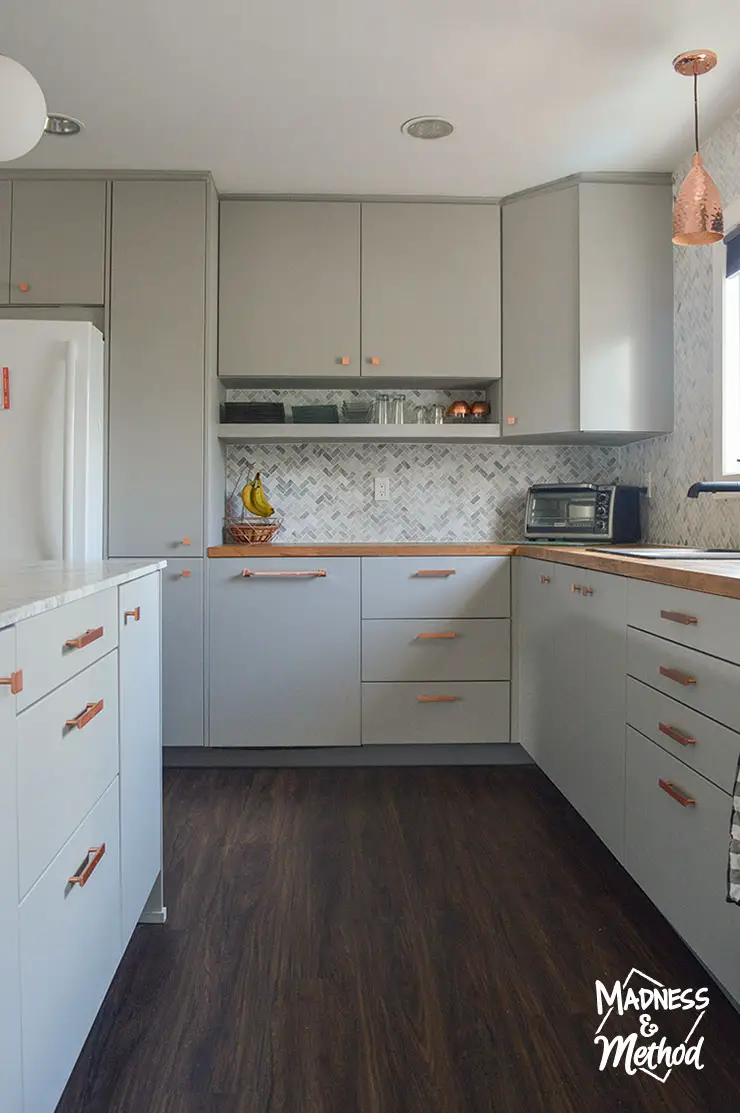
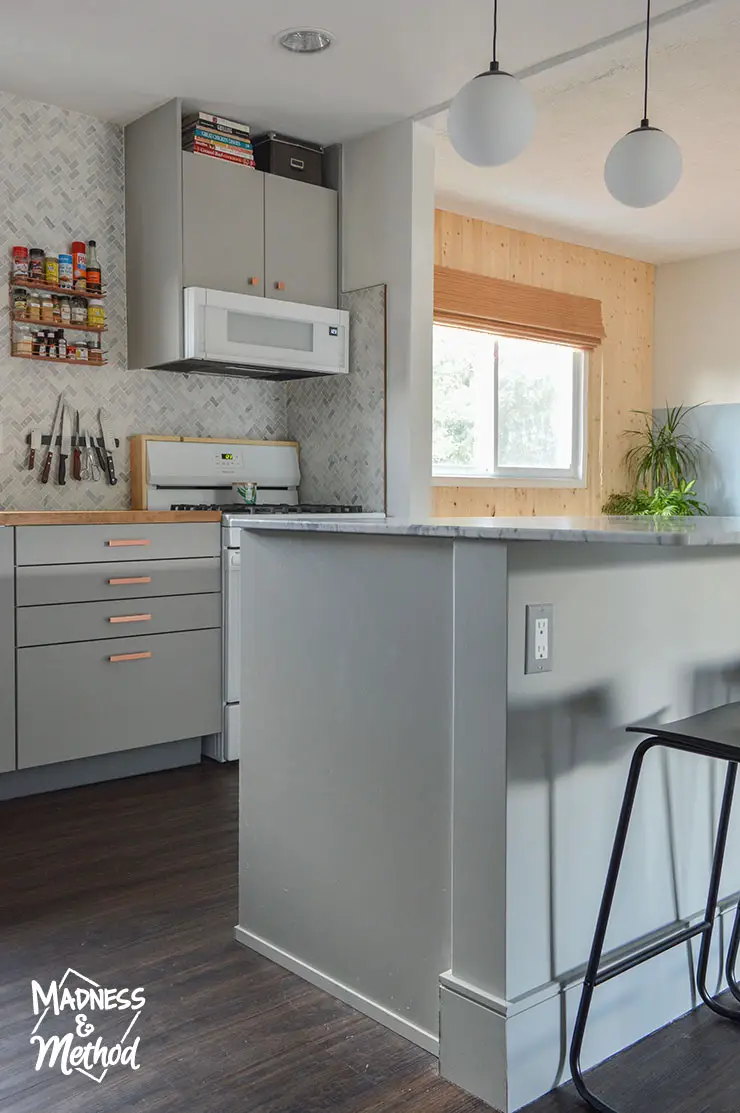
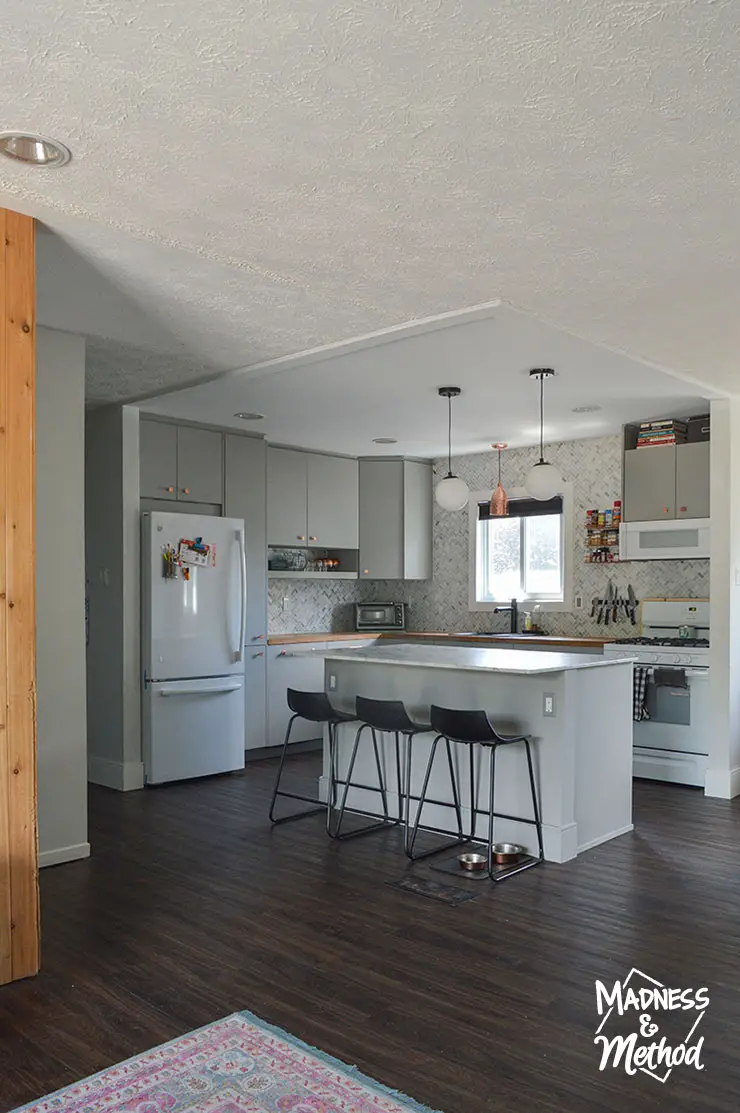
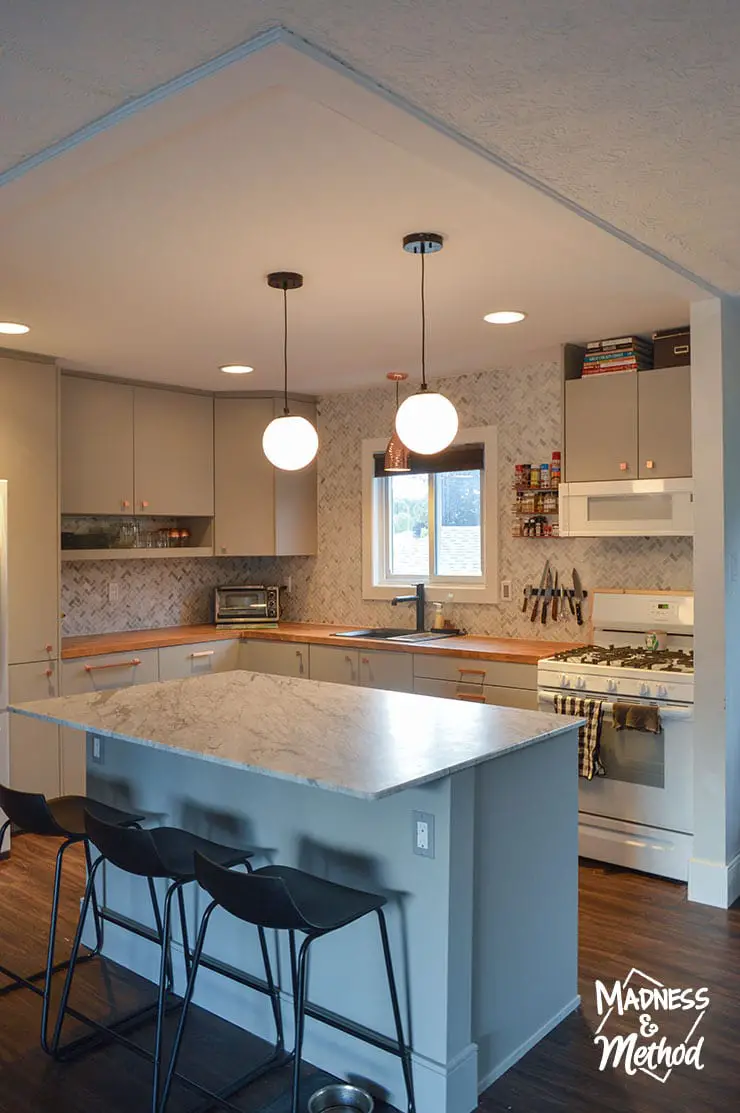
The biggest change was definitely removing the two walls that blocked off the space.
This allowed us to add a standard size island (5′) and three stools.
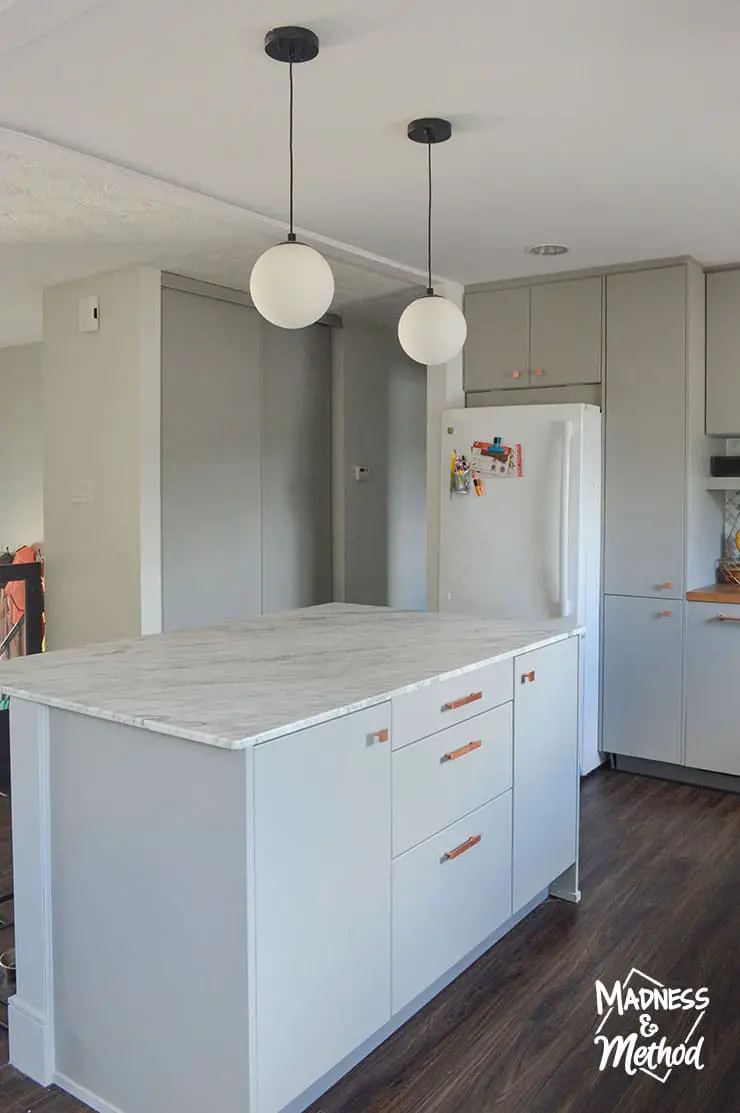
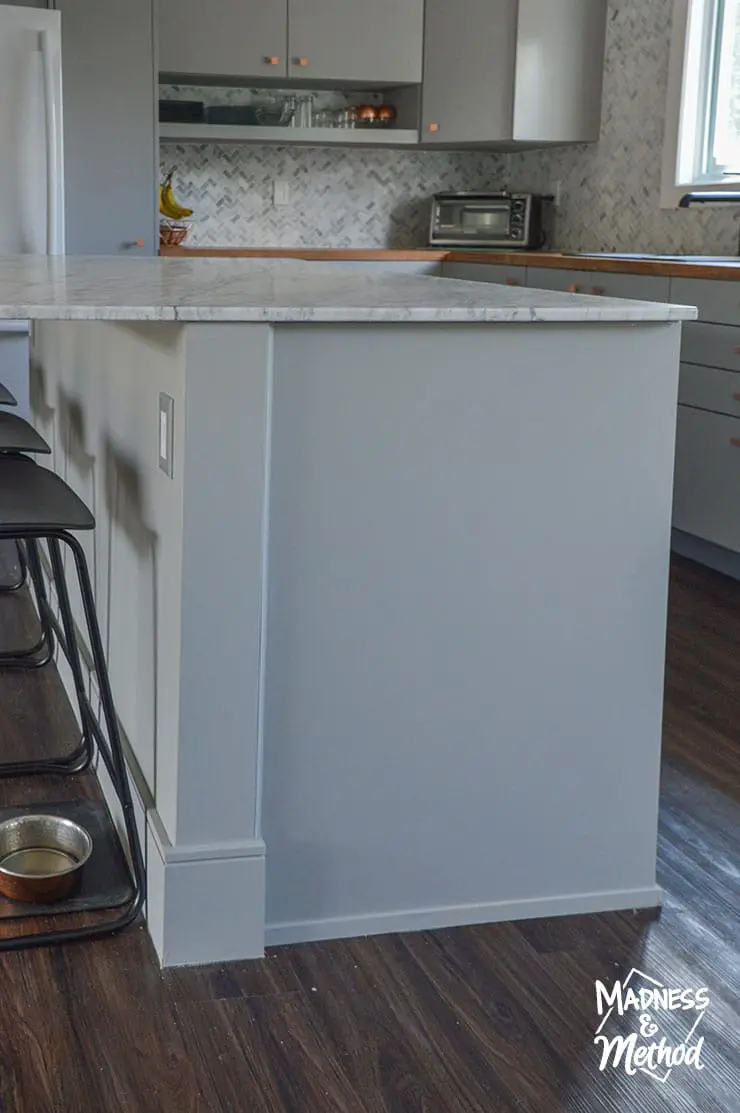
The island adds storage, but most importantly, a HUGE working surface!
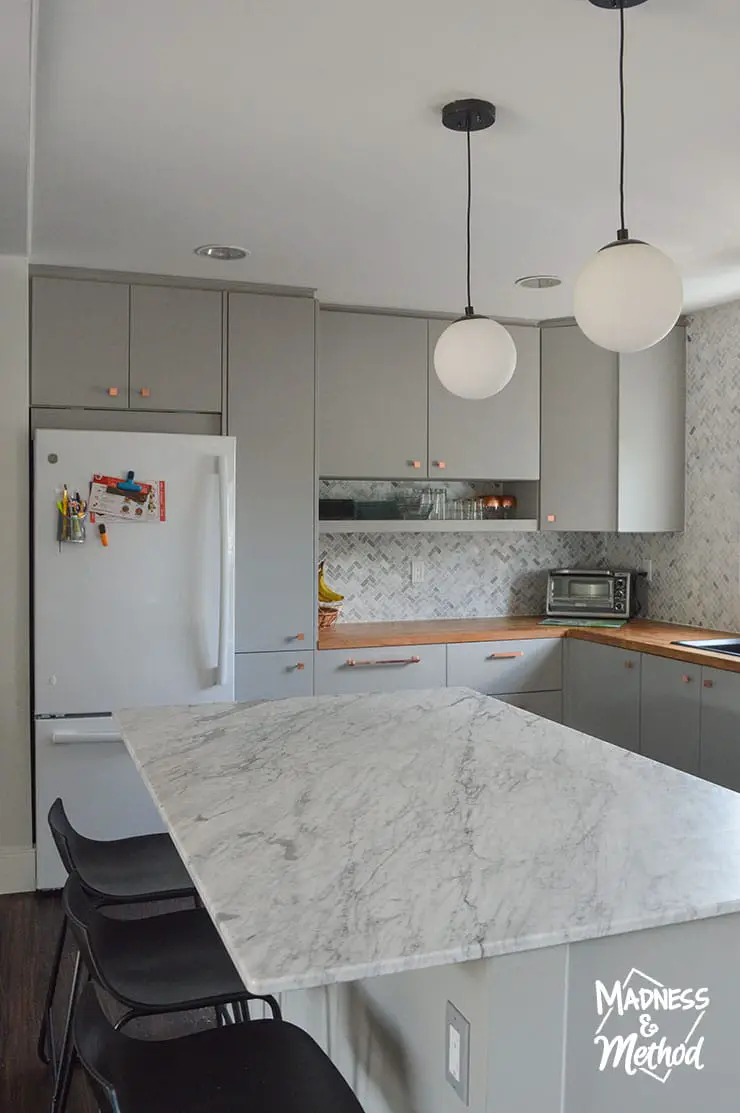
We relocated the old outlets into the island too. Waiting for the marble was one of our delays to have a fully functional kitchen, but I’m happy with the outcome :)
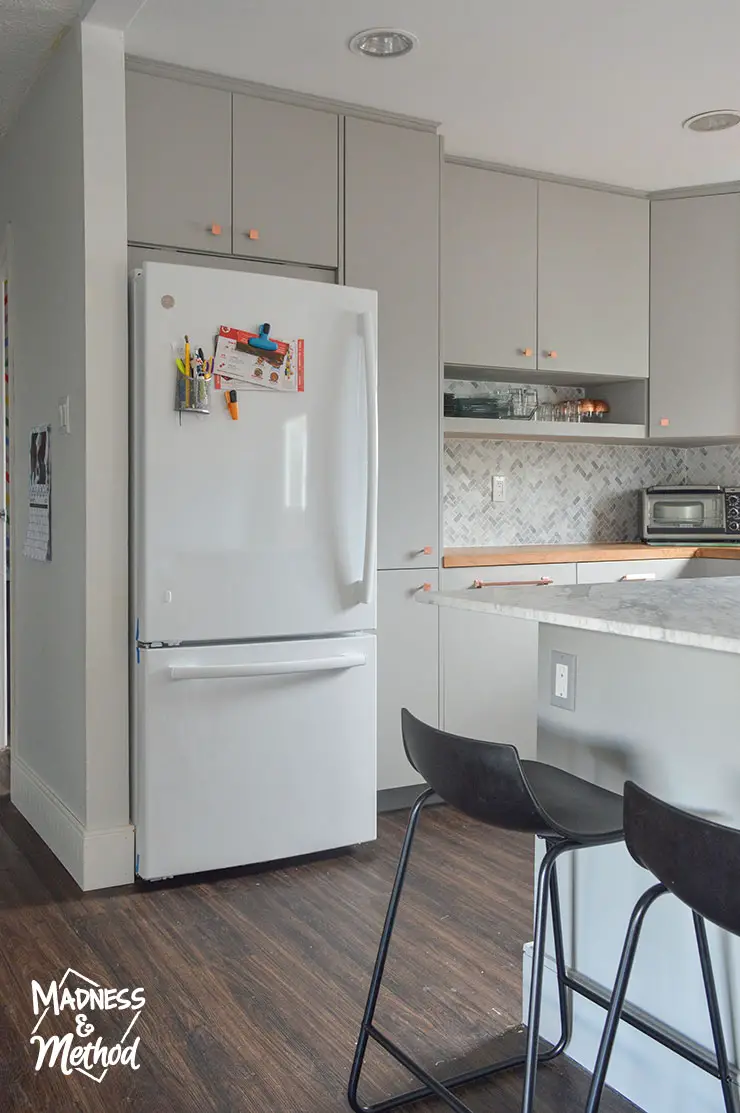
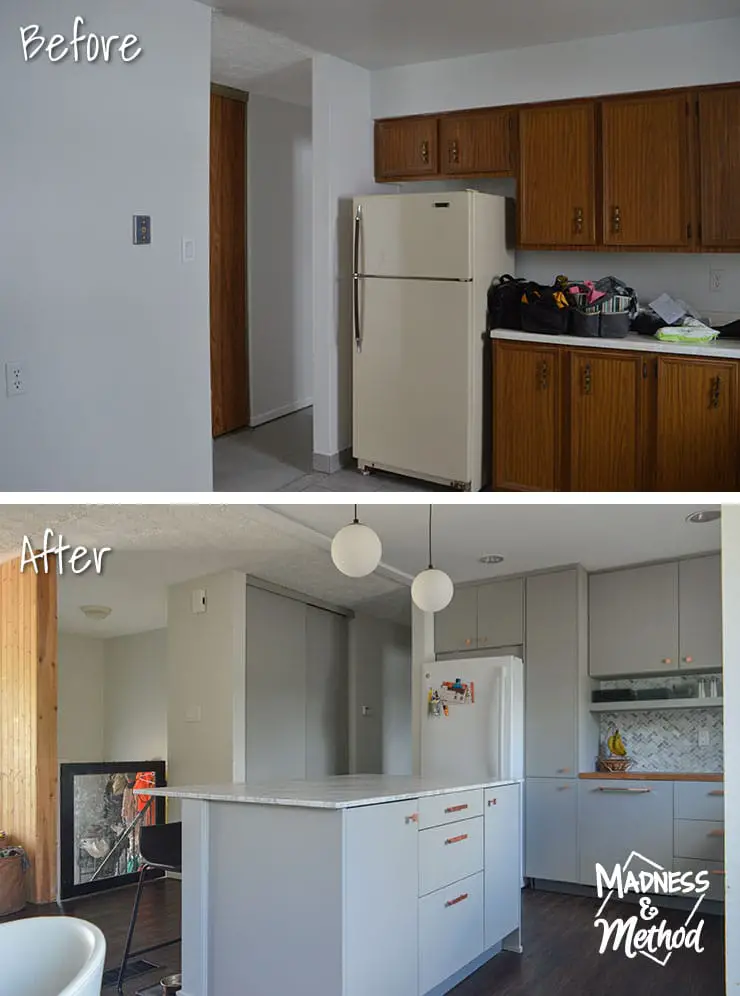
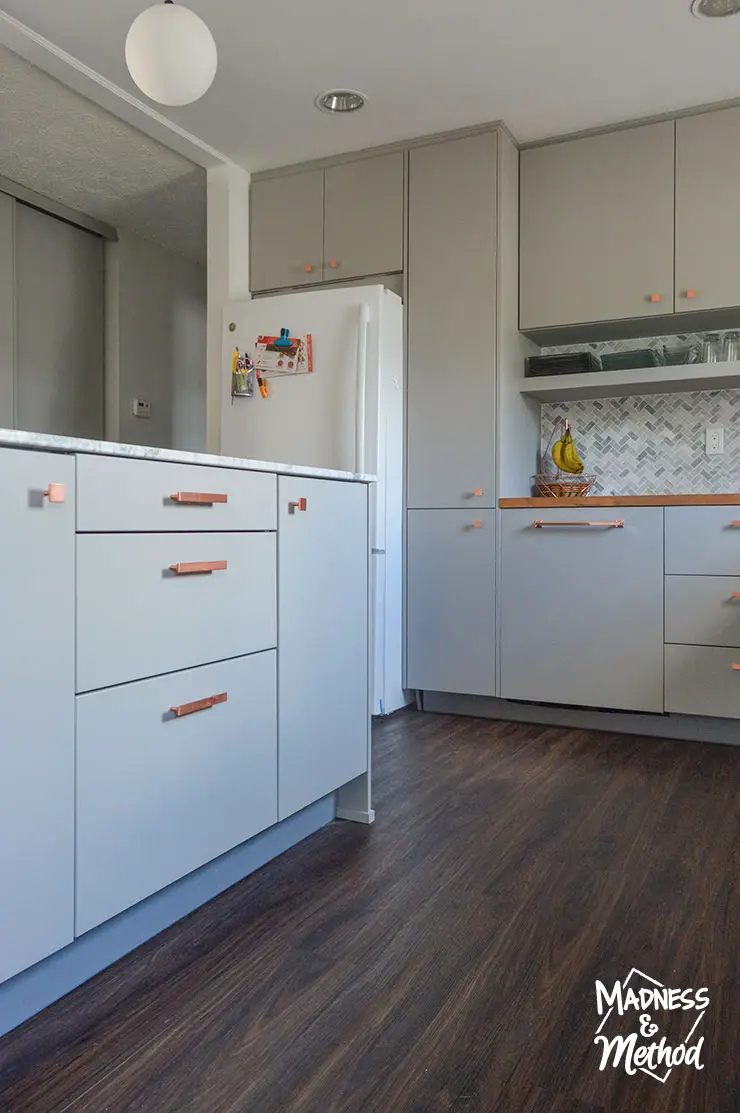
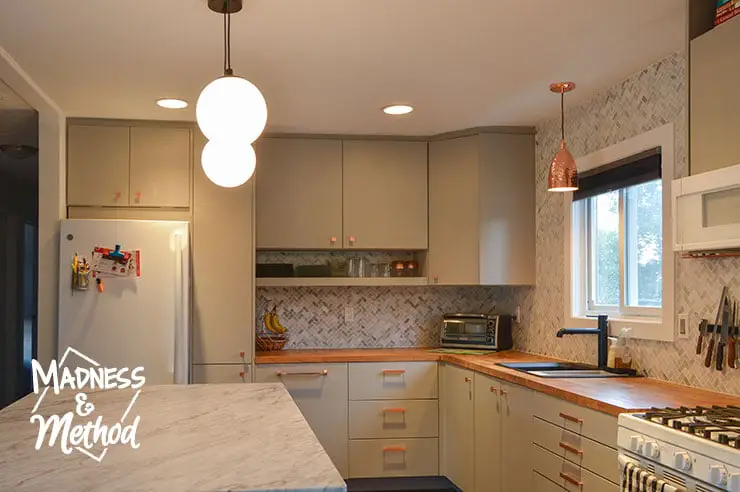
The old fridge was much smaller, and there was space all around it. Now, everything is tight (really tight), so there’s barely an inch to spare! (Really, we couldn’t get the baseboards all the way back, ha).
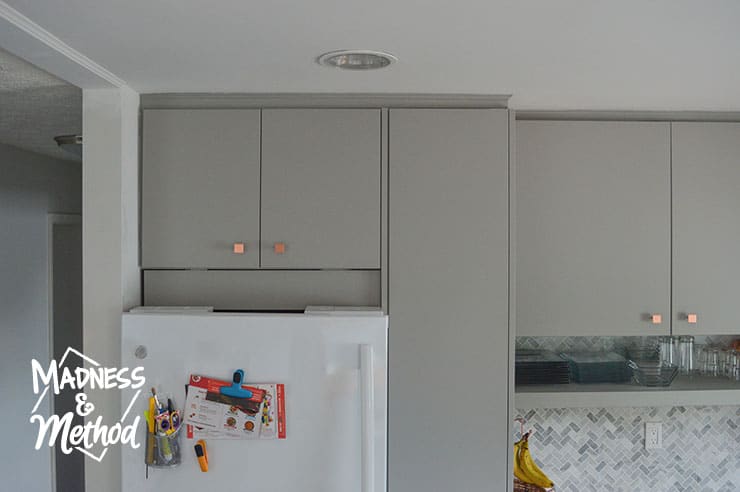
Above the fridge, I just stuck on an extra panel that we had. (WIth command strips, you can peak them a bit!). I can take it down if we need, or we can attach it permanently if we move the fridge out of the way. (Hence why I didn’t now, I couldn’t move it myself ha).
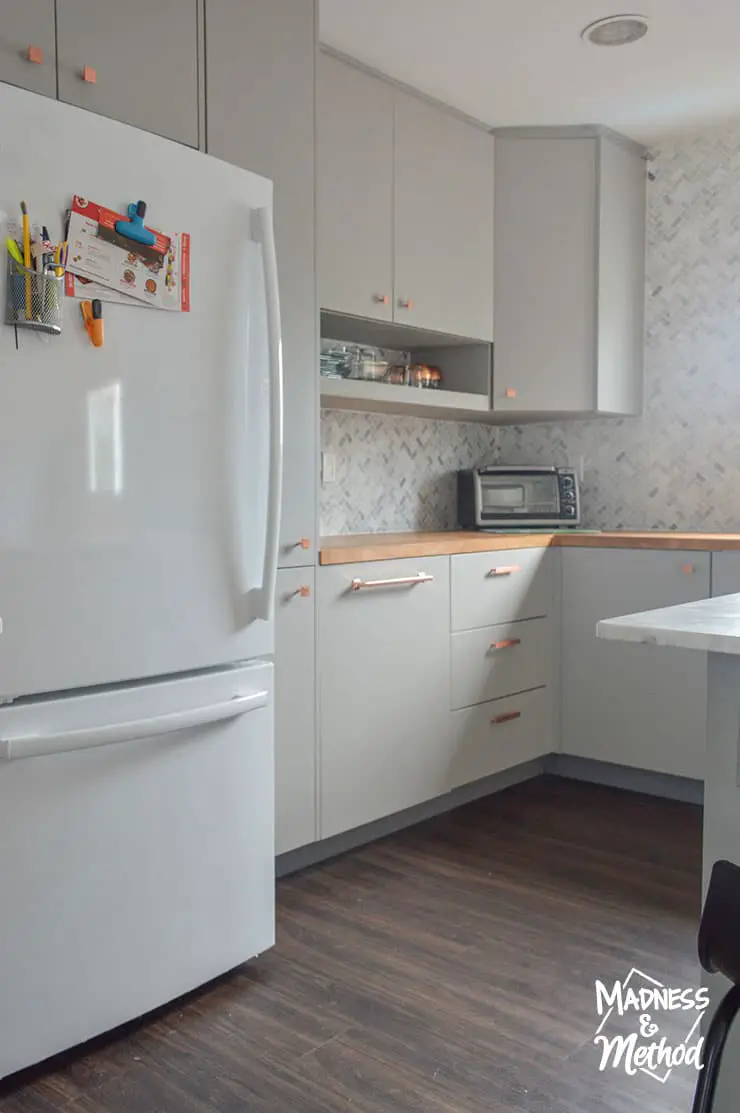
We’ve managed to keep our fridge (mostly) clear. I think I’ll bring our magnets to the cottage, or find somewhere else to put them.
Raised Ranch Kitchen Before and Afters
Don’t remember what the kitchen used to look like? Check these out!
We added the dark vinyl plank floors throughout the (bare) main level just before we moved in. But, most of the kitchen remained unchanged.
The walls blocking the room were opened up.
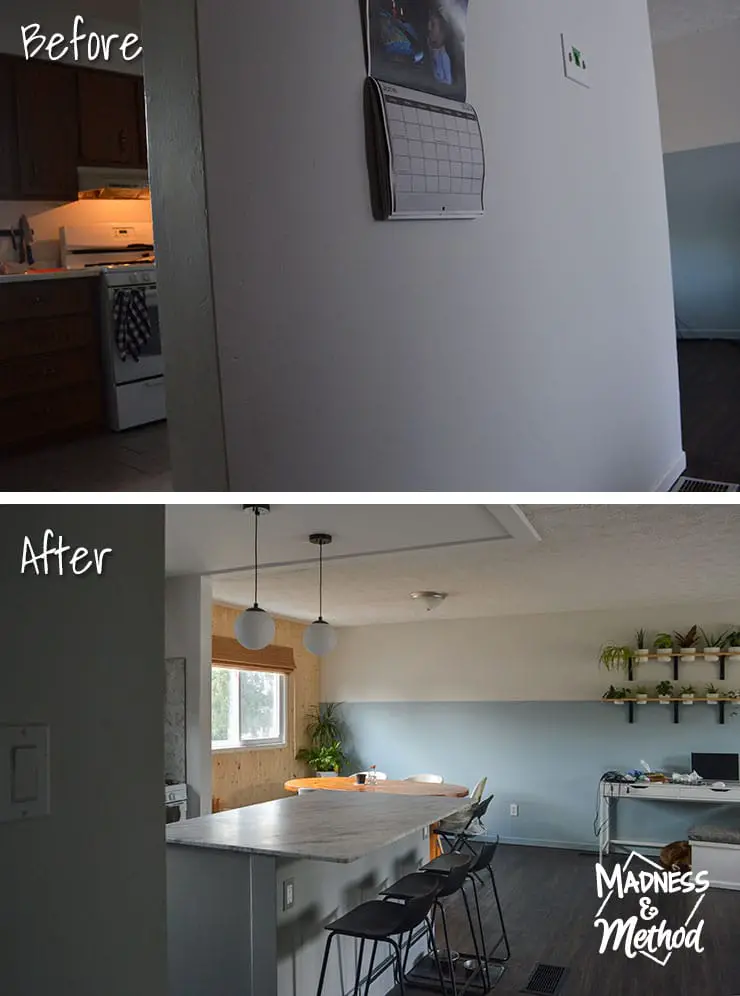
I didn’t have a good before photo of this view from the hallway. (I think Zachary took this one, ha). This was probably spot that gave the most “whoa” for us.
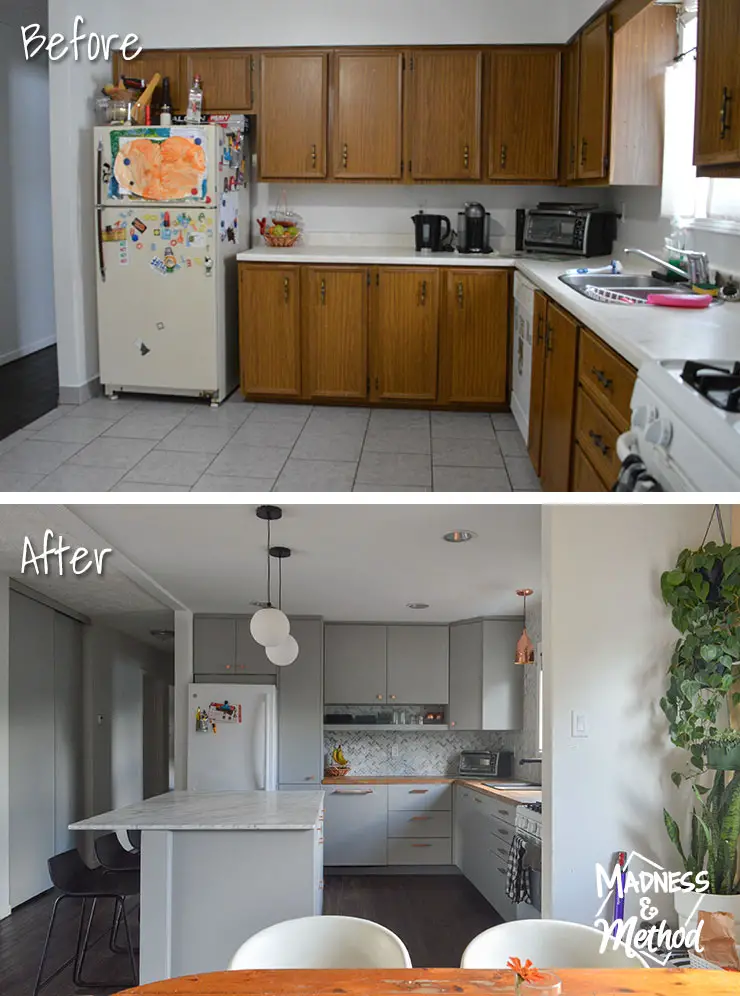
There was a small doorway from the hallway, and another one from the dining room side. The before photo above is from the view at the doorway, whereas the after is a bit further back. We kept a lot of the cabinetry/layout similar to how it was, but really maximized the storage.
The photo above shows how it’s completely open now. I love all the light throughout the main areas now!
Luckily, neither of these walls were support walls – so we didn’t have to add any posts/beams. I was planning on that in the design stage, so just picture the end of the island going up to the ceiling.
We were planning on reusing our oven. Unfortunately, it broke mid-renovation (seriously!).
Did I mention how much I like the island? While the before photo above shows a blank space (it was), we did add a shelf so we could store some overflow items.
Anyways, let’s get back to some more raised ranch kitchen reveal photos, okay!?
Photos of our Marble, Gray and Wood Kitchen
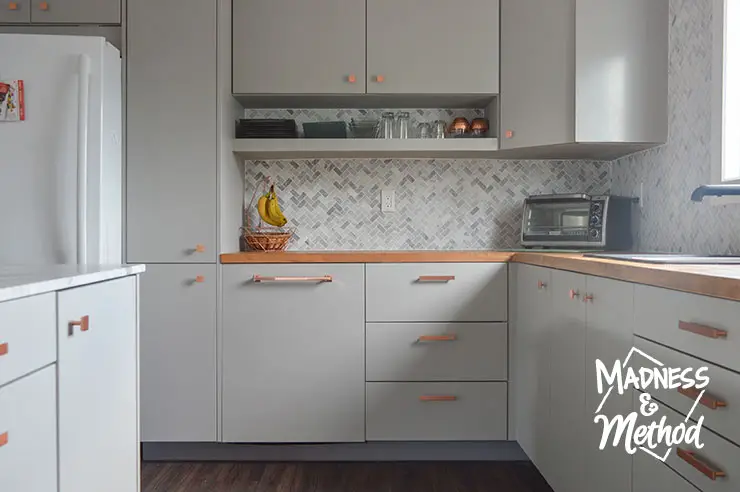
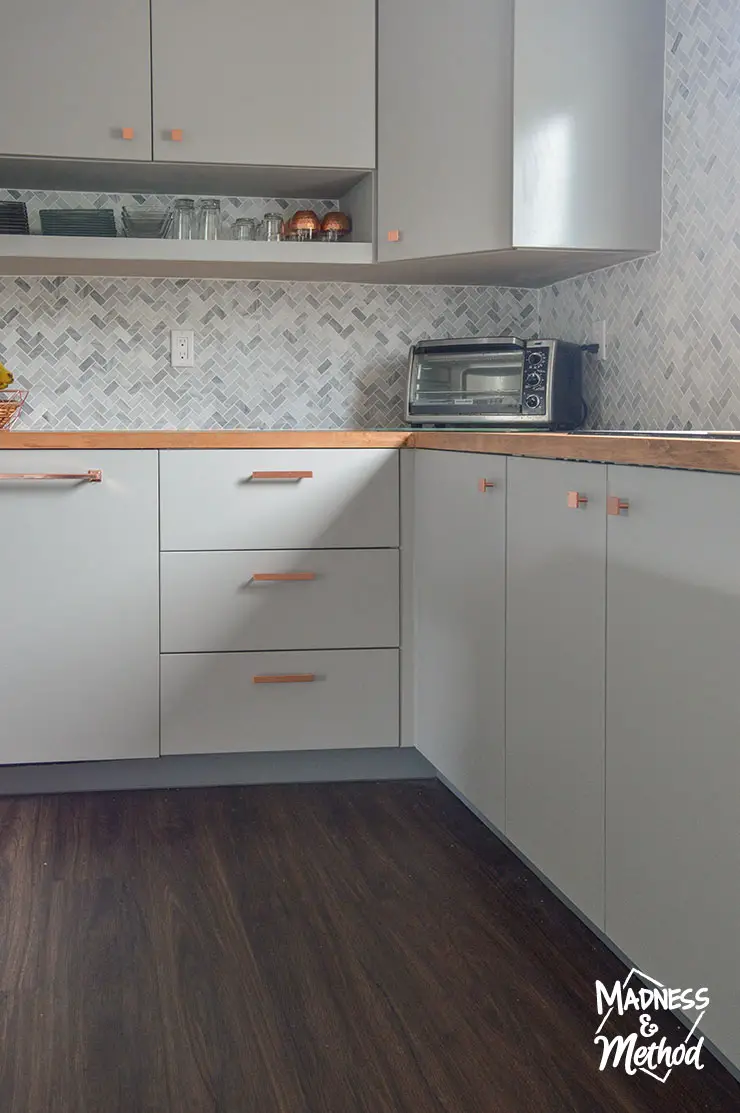
I believe we left off at the pantry…
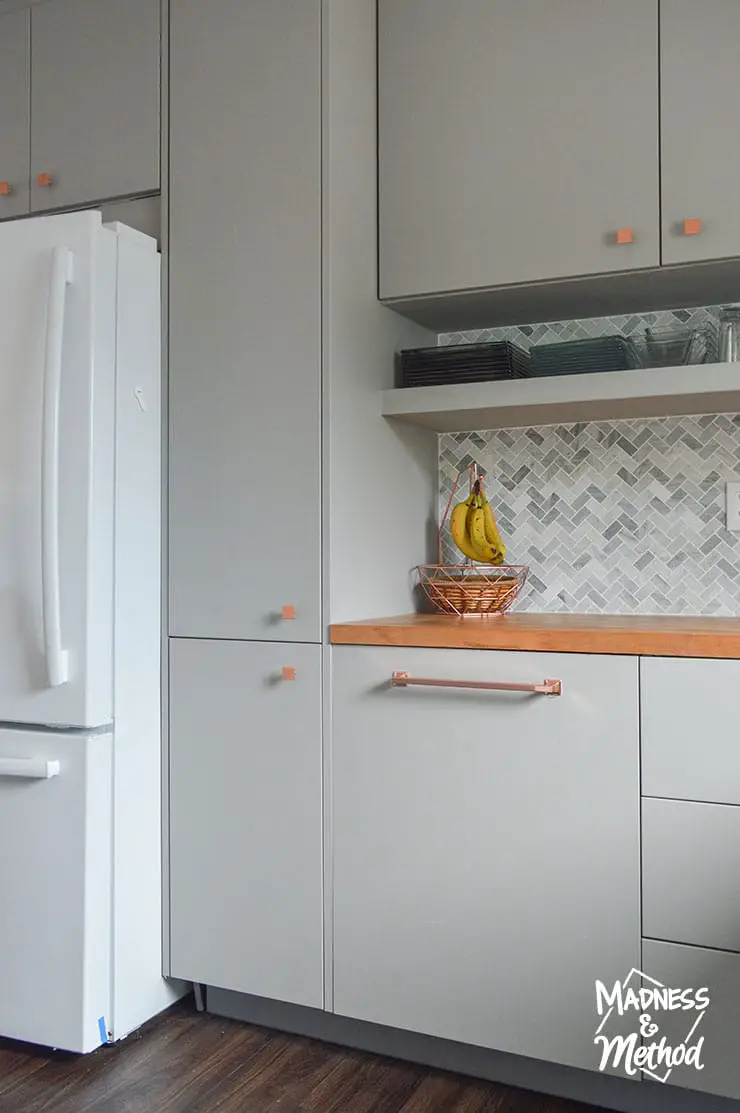
Speaking of which, I remember when I didn’t even have this in the design plans. We are in there ALL. THE. TIME – and I don’t think our kitchen would be the same without it.
The dishwasher is the cabinet door with the wide handle there. Technically, the copper is shiny compared to the matte ones for the doors and drawers, but I’m over it.
I thought about using the handle to hold a towel, but it’s fine.

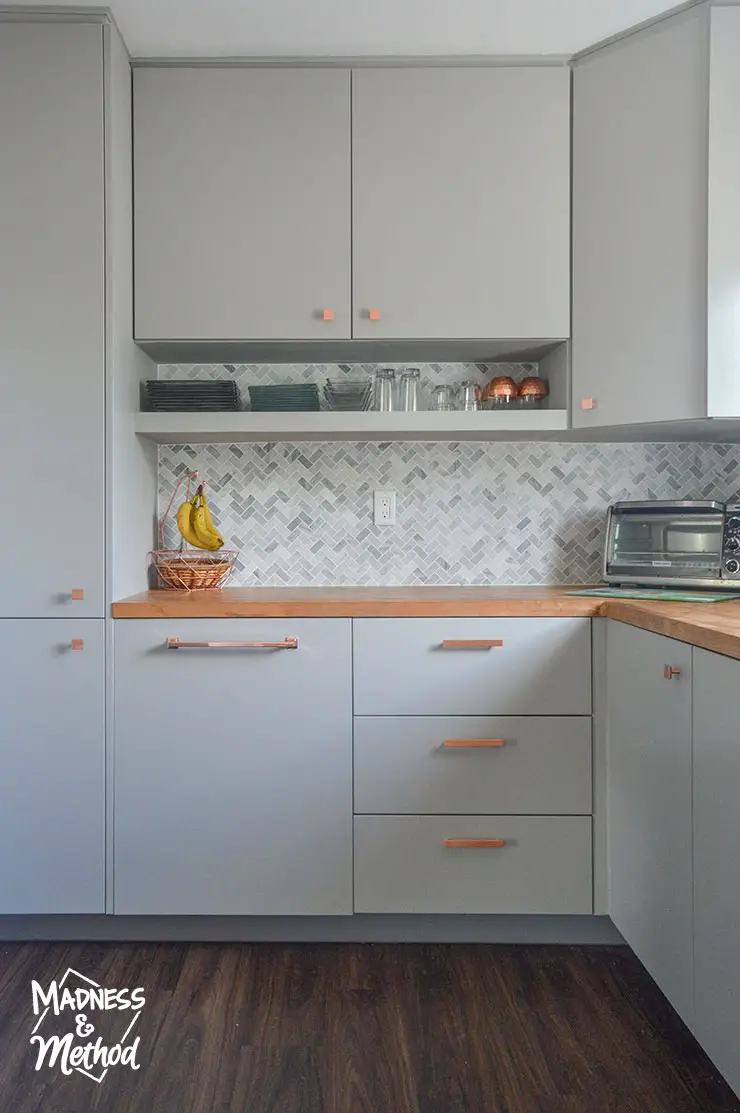
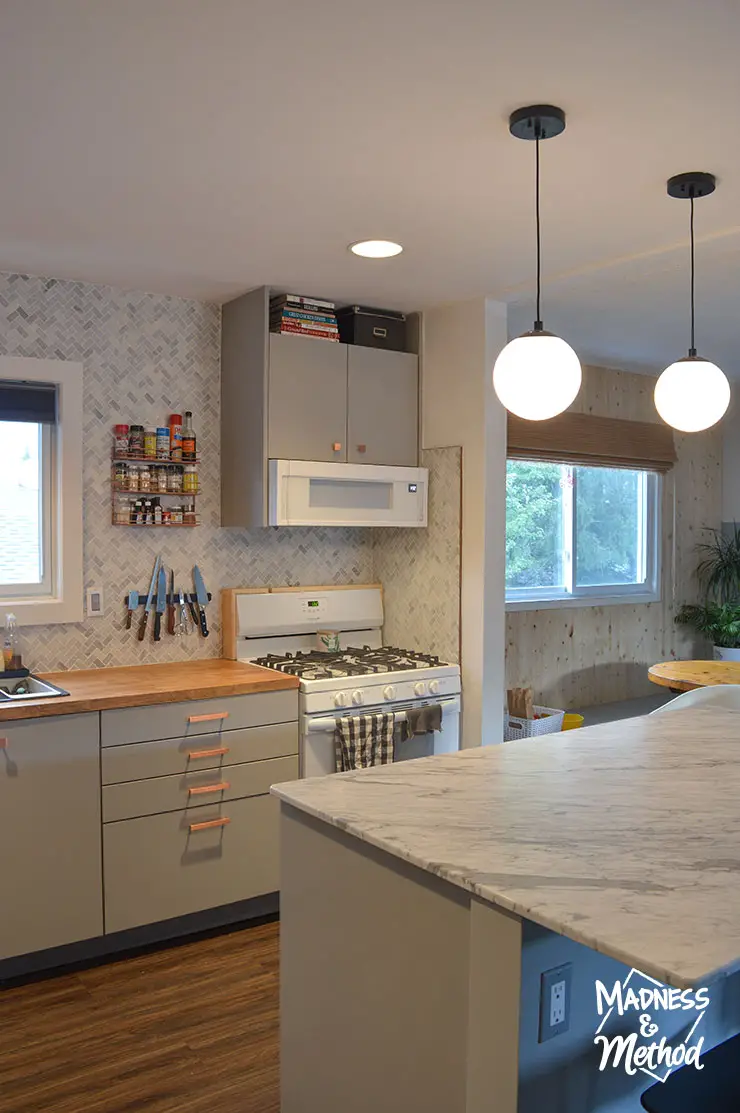
The photo above really shows off the different elements in the kitchen: gray, marble, wood and copper!
I really like the cabinet colour we chose. I think anything darker would have blended too much with the floors.
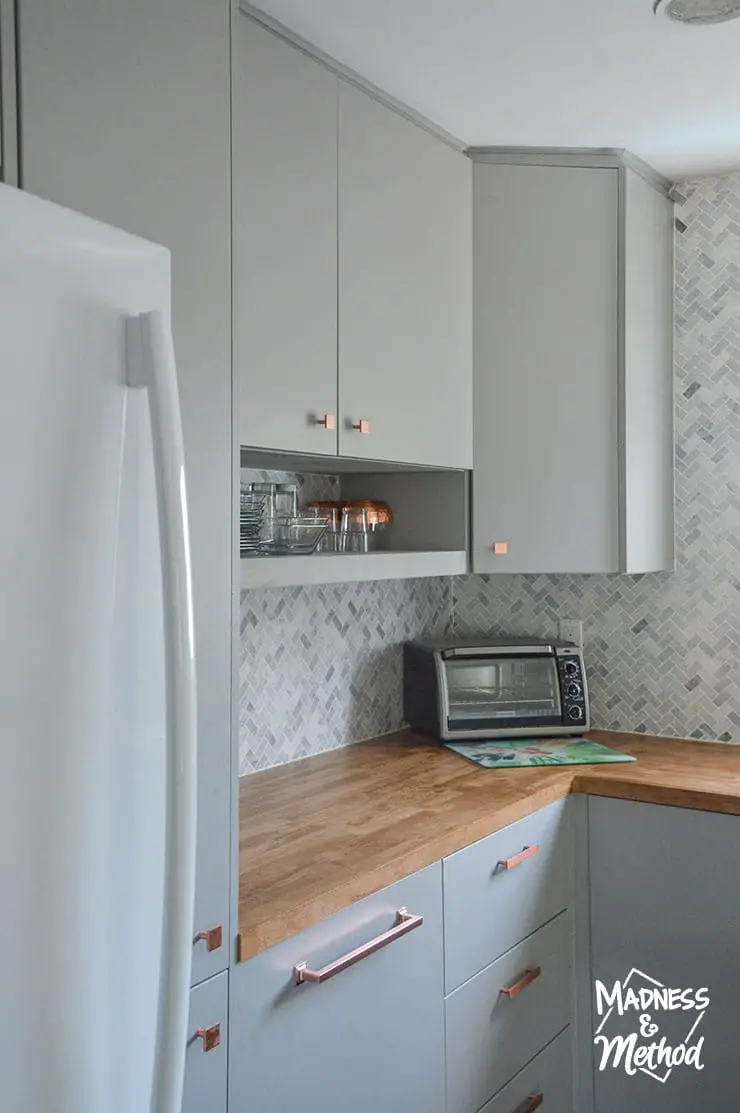
Remember the extra panel I added above the fridge? Technically, it’s supposed to go in this little sliver at the corner. We don’t have a table saw to cut it, so I just used two narrow trim pieces instead. Painting them to match blends it in perfectly, even though they’re not the same depth.
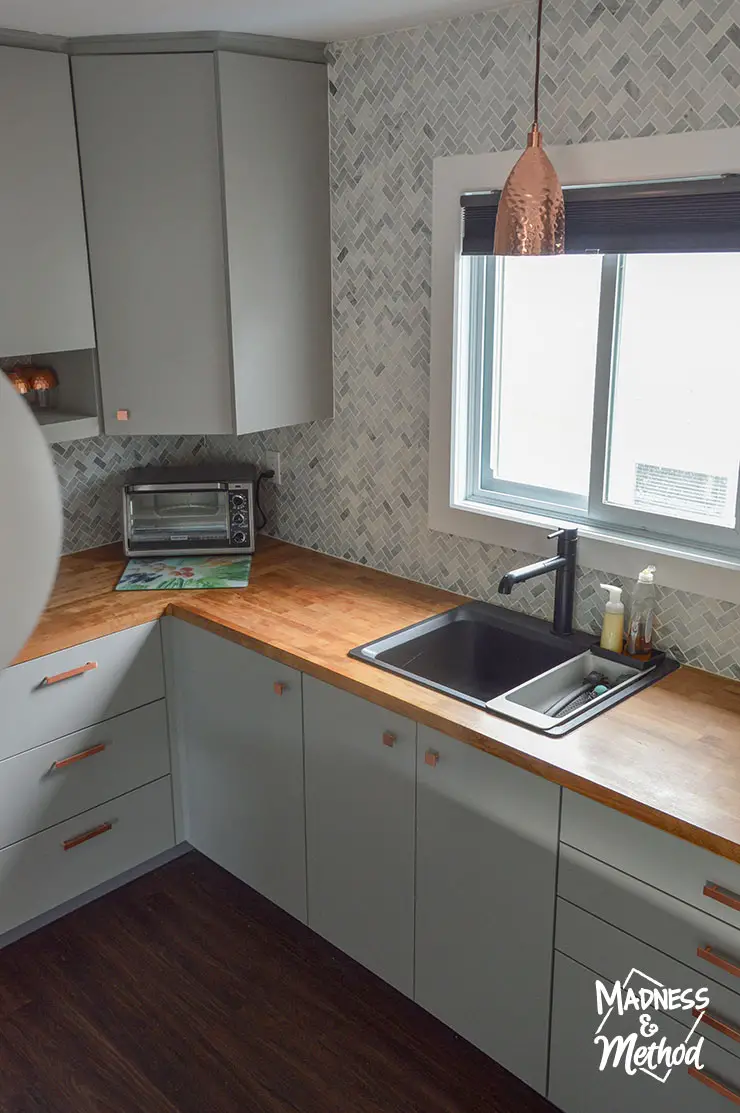
This is probably the best photo of the sink I had. The window was too bright/washed out – but you get the idea here. If you followed the renovation, you know that there was a sink debacle. The sink I wanted from Ikea was always back-ordered, I bought another one that was way too big, then found this one at Home Depot. The faucet? LOVE it!
The little Ikea caddy works great to hold our scrubbers (or small drying dishes), and I bring out this drying mat for large washes.
If you watched the kitchen renovation series on YouTube, you know that we stopped before the microhood was installed (and trim added everywhere). I still have to finish and upload those videos, but they’re coming!
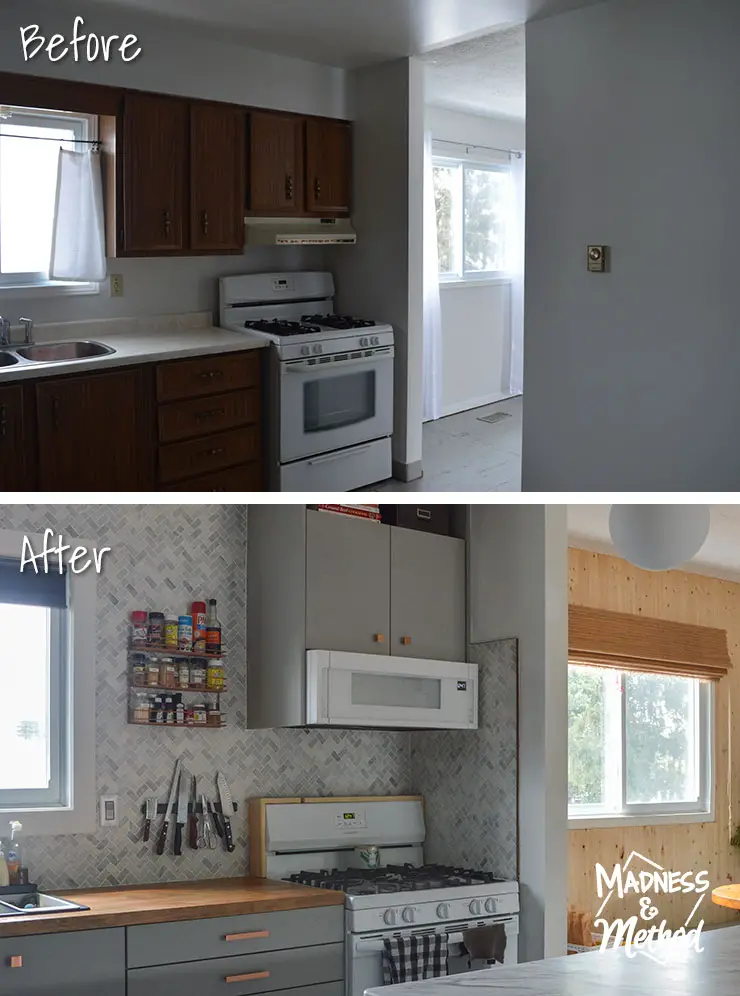
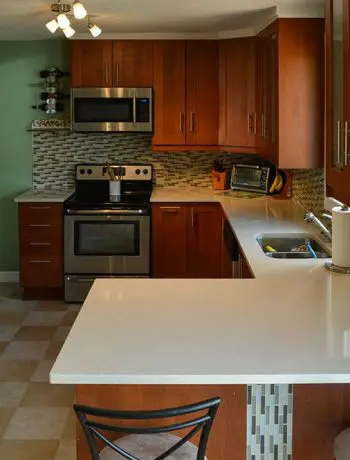
Oven Area
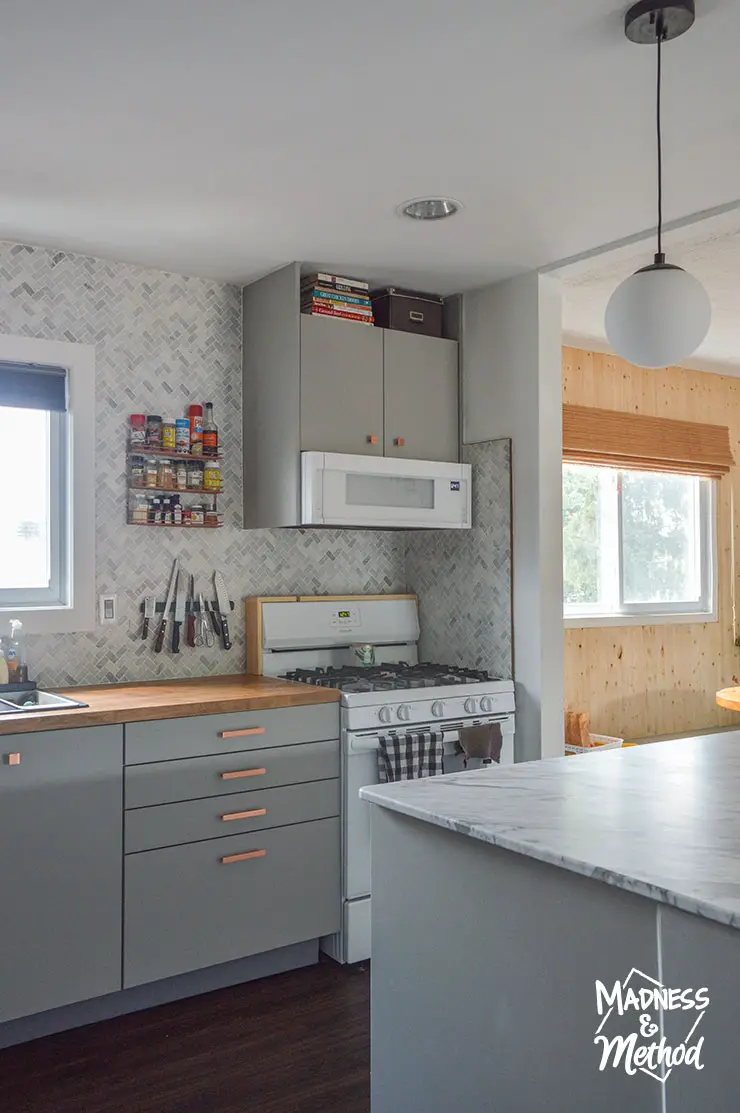
We ended up having the raised the exhaust hole by a few inches. Code-wise, we were good to leave the microhood at the lower spot… but it would have been insanely low. Like hit your head when cooking low.
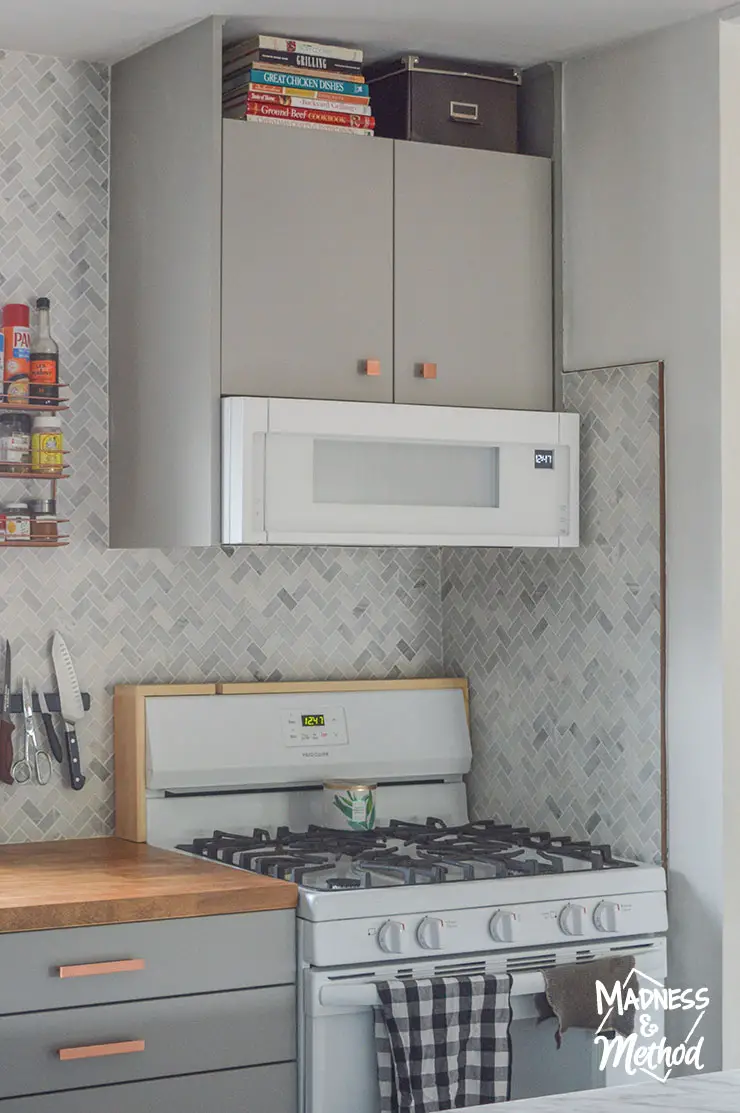
I’m much happier with this solution, and considering we used the same microhood at our rental apartment, I knew what I would like :)
I still do most of my prep in the same spot (to the left of the oven), but like that the island is nearby if needed.
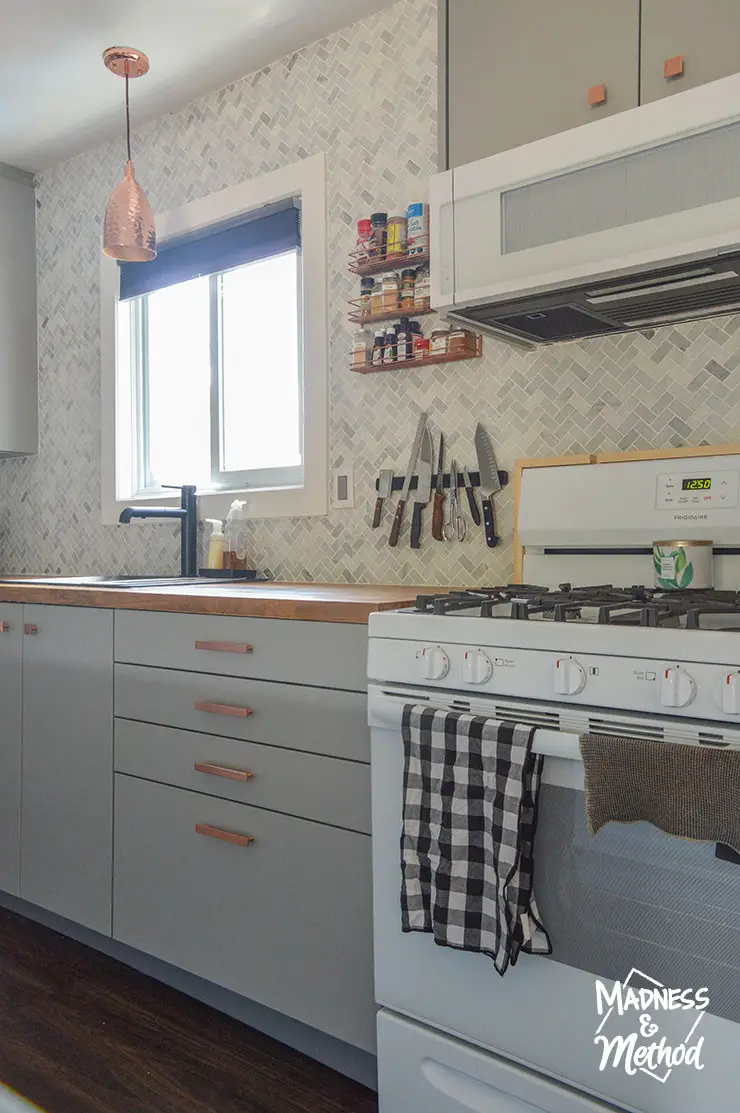
With the renovation, we removed the two upper cabinets that flanked the window. The husband was worried that we’d have a lot less storage, but there’s way more sunlight this way.
One of the things I recently added, is the little shelf above the oven. A week or so ago I dropped a bottle of Worcestershire sauce, it fell sideways, the cap flew off and it “glugged glugged glugged” down the back of the oven. We’re not supposed to move the gas oven a lot, but I really needed to clean that mess (and get my cap back).
The little notch in the shelf is to access the oven light button. We could use it for storage too I supposed, but it’s good as a blocker for now :)
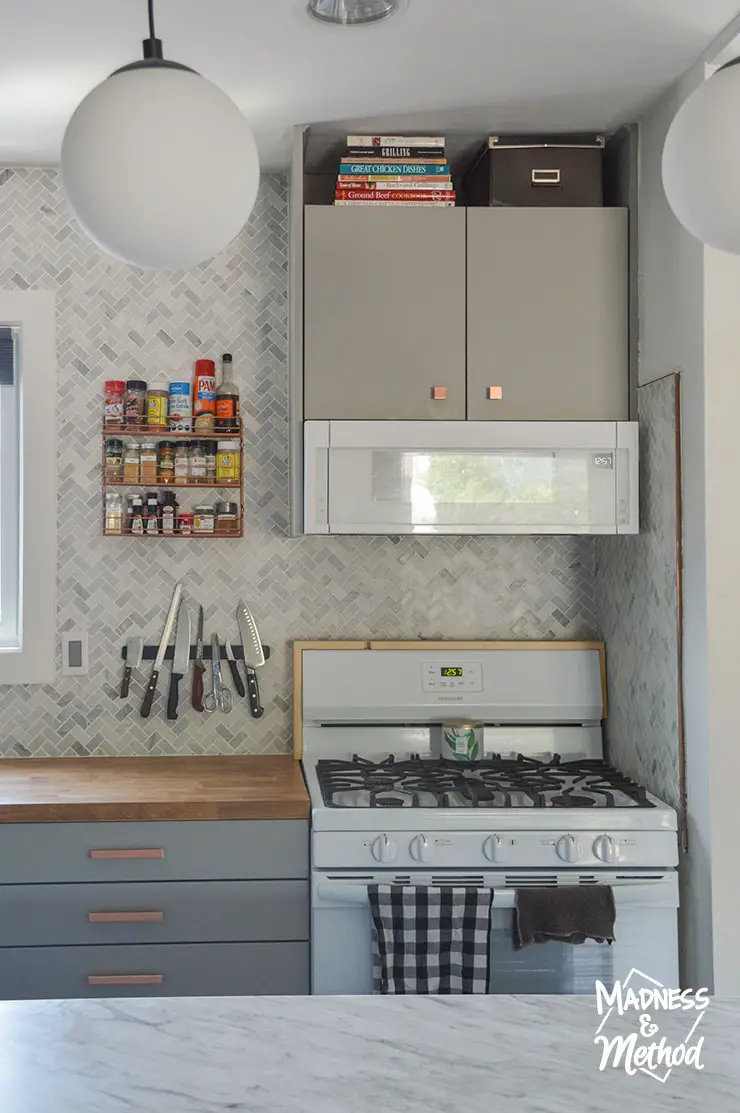
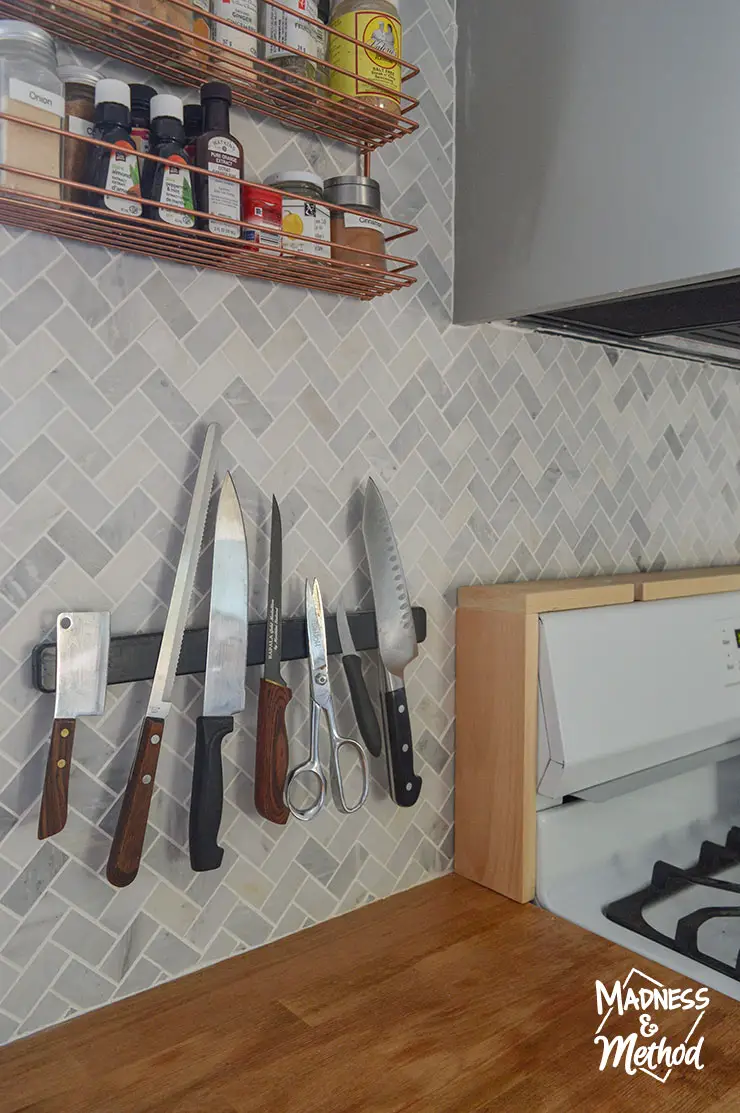
One thing I want to mention is the placement of the knife rack and storage shelf. We debated lining them up together, but instead opted to have them each centered (between the oven and switch, and between the microhood and window casing, respectively).
Having the spices near the oven and easily grabbable has been so useful!
Other Kitchen Renovation Things to Note
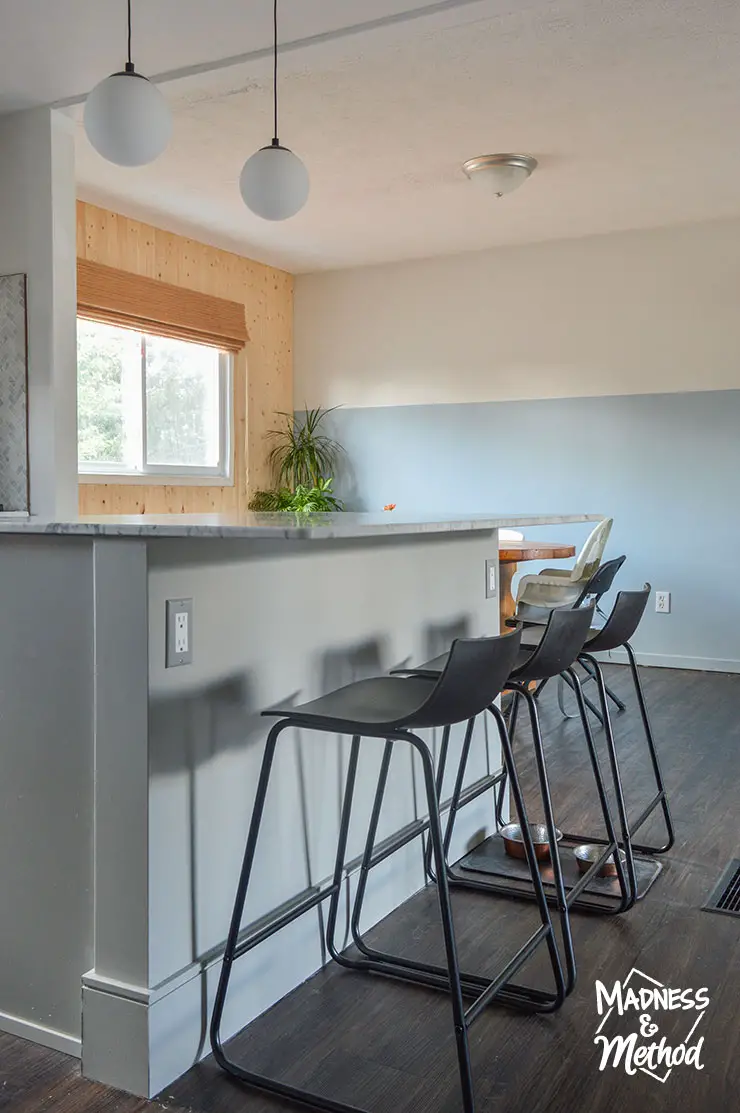
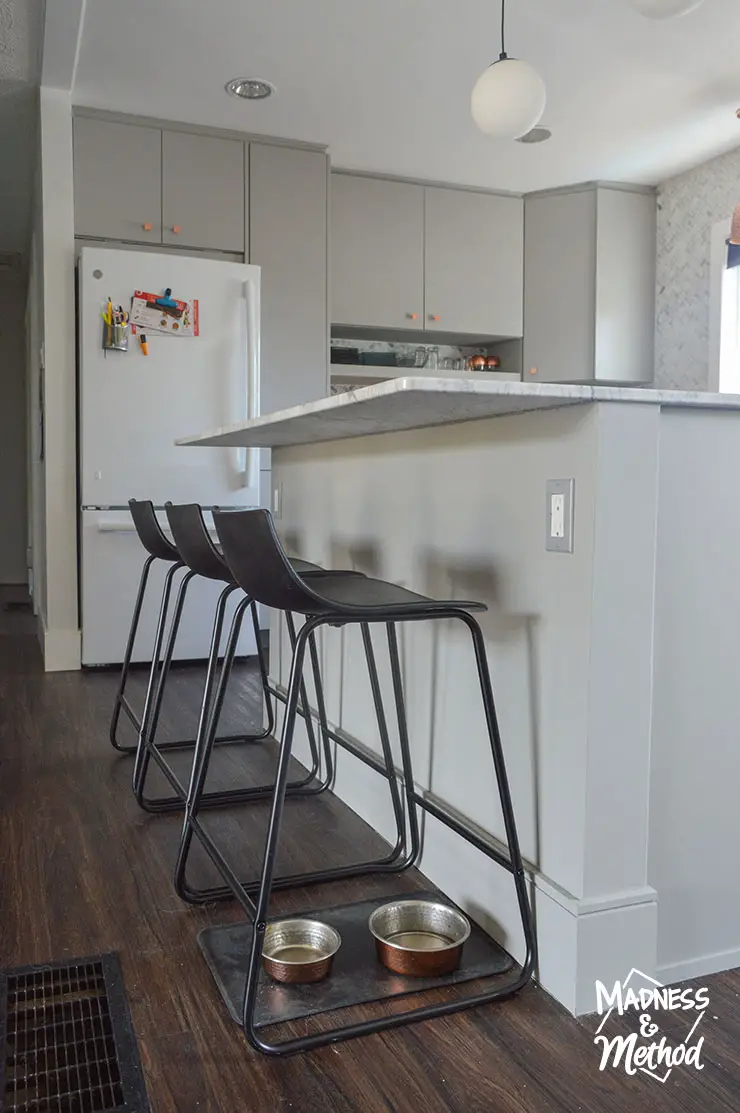
We’ve put the dog bowls below the stool. Zachary did mention that Félix always makes a mess when he climbs up, so we may change up the spot soon.
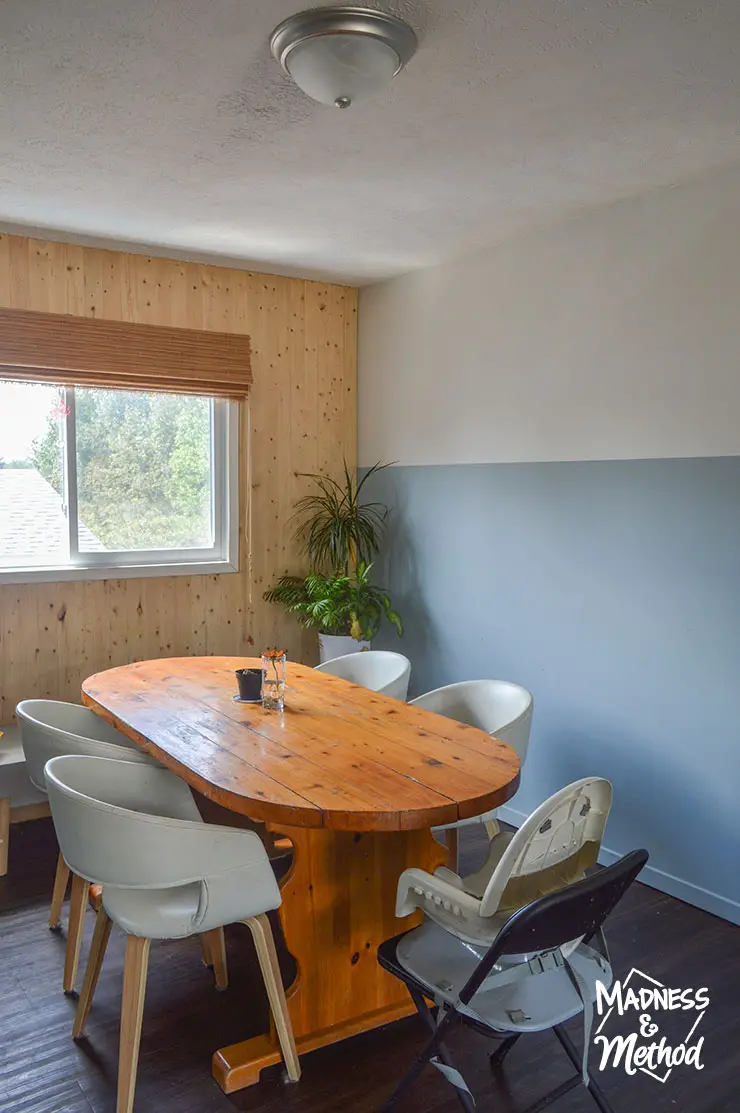
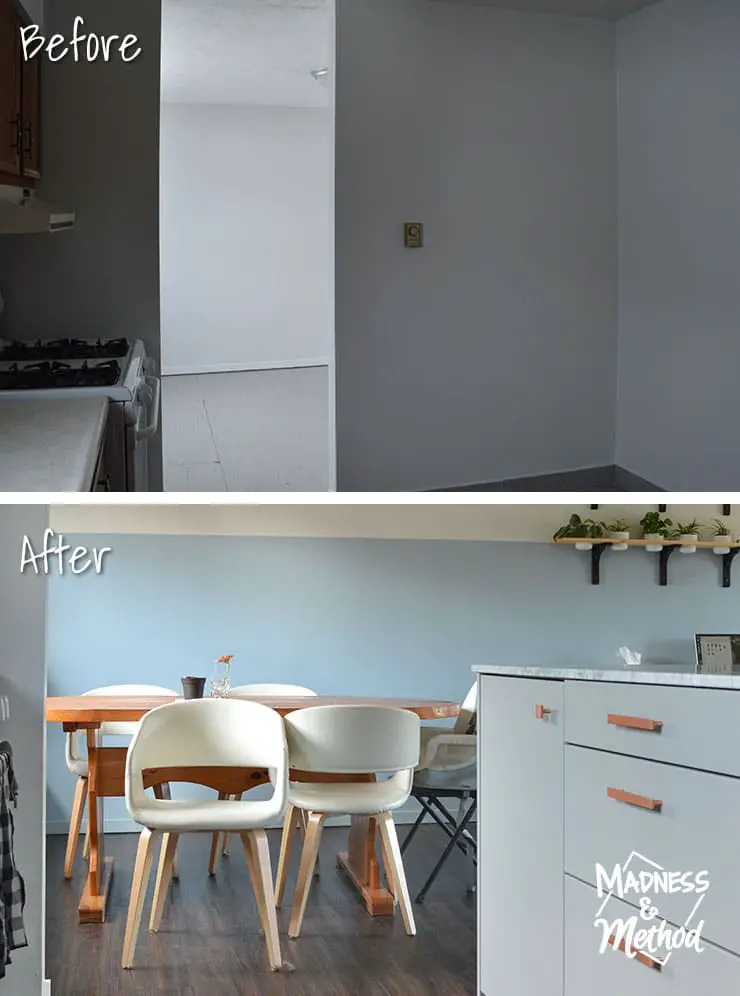
Speaking of Félix, he also refuses to sit in the booster (after making us ditch the highchair), so we’ll need to pick up two more dining chairs soon. I love that the dining room is no longer cramped and full of kitchen stuff :)
So, does the kitchen look like this all the time!? For the most part… yes! Right now, there is a huge bin of tomatoes on the counter (near the toaster oven). And the island will have various projects/stuff on it from time to time, but I do try to clear it off regularly.
Well, there may be more crumbs on the floor when I’m not taking photos :)
And if you look closely, there are few paints splotches I need to clean up. I mentioned that we waited on getting trim forever. (Literally, ordered back in MARCH and just received recently). In their defense, it was back-ordered for so long that when they did get it back in stock they just figured I didn’t need it anymore…
BUT! It’s those little finishing details that really make everything DONE.
I used the same cove moulding to trim out the ceiling flat pieces. Taking down the walls left an open gap dividing the flat drywall in the kitchen and textured ceiling everywhere else. It’s much easier and quicker to just trim it out, rather than a) patch the ceiling and texture everything to match, or b) patch the ceiling and scrape all the texture.
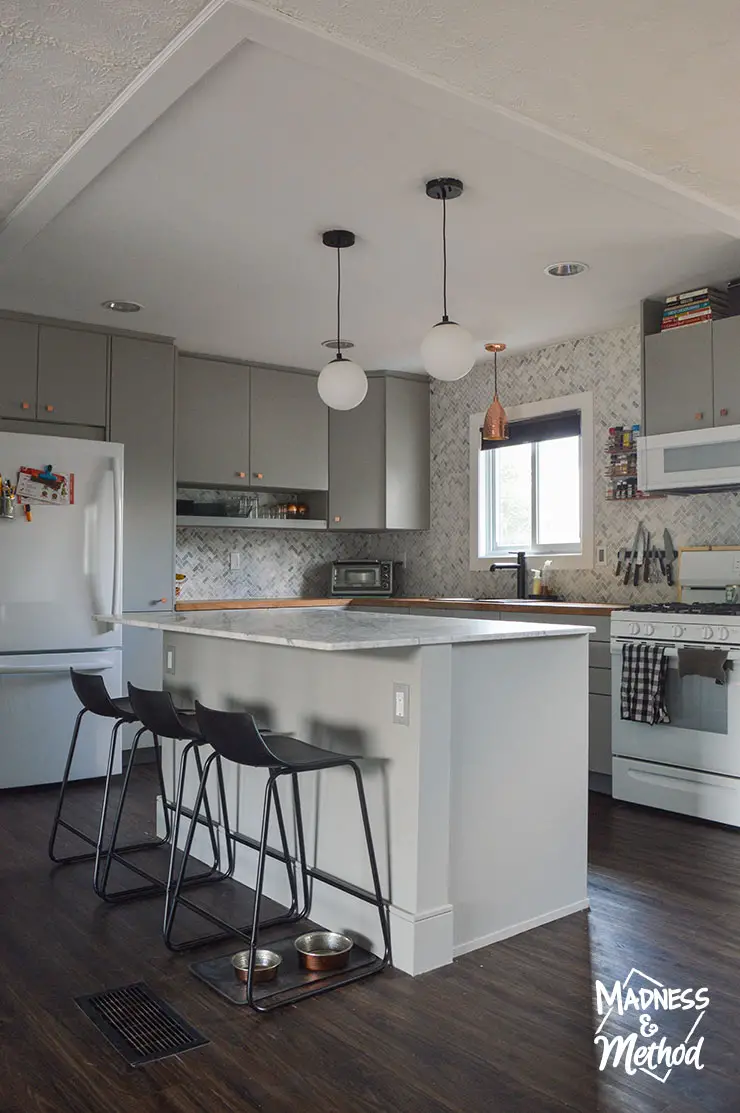
Ceiling Details / Lights
We did something similar (but super fun) in my brother’s kitchen with his faux coffered ceiling.
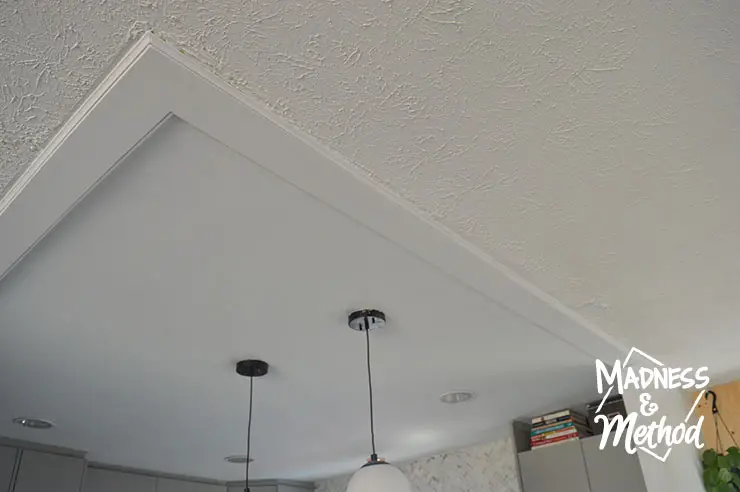
Here’s a close-up of the trim on the ceiling. I didn’t touch up any of the textured area (it was weird and patchy around the wall before), but I can always blend it in better if I want.
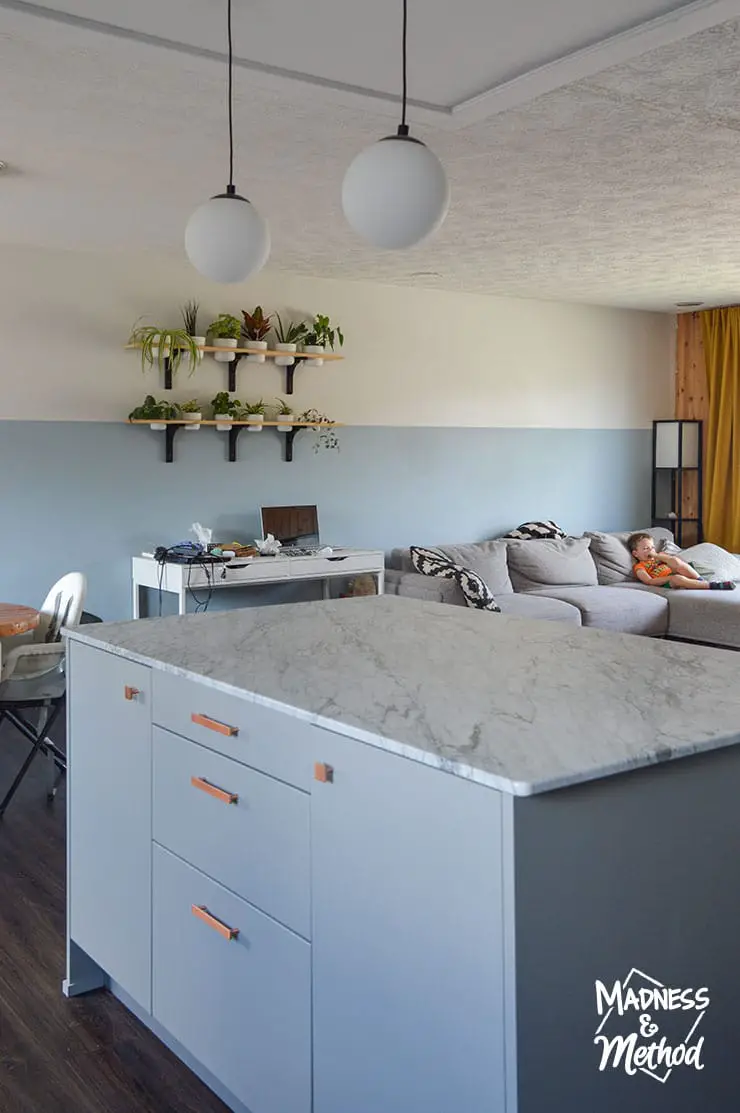
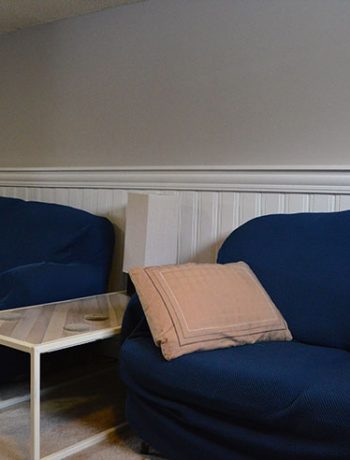
Looking back to our office/living room, you can see why I love the open concept here so much. It’s a lot easier to keep an eye on the kids while I’m in the kitchen. It’s also handy if we have a big group of people over, because we can use the island as additional seating/serving zone if we need.
And finally, here are a few photos with all the lights on. It was getting cloudy/overcast as I was taking the photos, but just pretend it’s nighttime, ha.
The light above the sink was existing (upgraded to this pendant), as well as one ceiling light (we used the same hole for the left globe island pendant).
Because we had so few wall cabinets, we opted out of doing under-cabinet lighting in this kitchen. Either way, having different zones of light helps to direct it where we need. I like that we can keep things on (or off).
Kitchen Sources
- Ikea Sektion Cabinets with Kitch fronts (in Haze)
- Wood Countertops (stained in a mix of pecan/pine?)
- Marble Backsplash Tile
- Fridge, Oven, Microhood
- Spice Storage Rack
- Black Faucet
- Black Sink
- Copper knobs and handles
- Globe pendants
- Copper pendant

I hope you enjoyed seeing all these photos of our raised ranch kitchen reveal! We certainly enjoyed the project, and I’m also happy that it’s done. There are a couple of little tweaks we might make (the open space above the microhood cabinet could be more “finished”), but I’m happy to scratch the kitchen project off the list.
Next, we need to do the entire cottage, so there’s another kitchen in my near future :)
You know, among other things, ha!
(Oh, and I just updated the raised ranch home tour page too!)

No Comments