
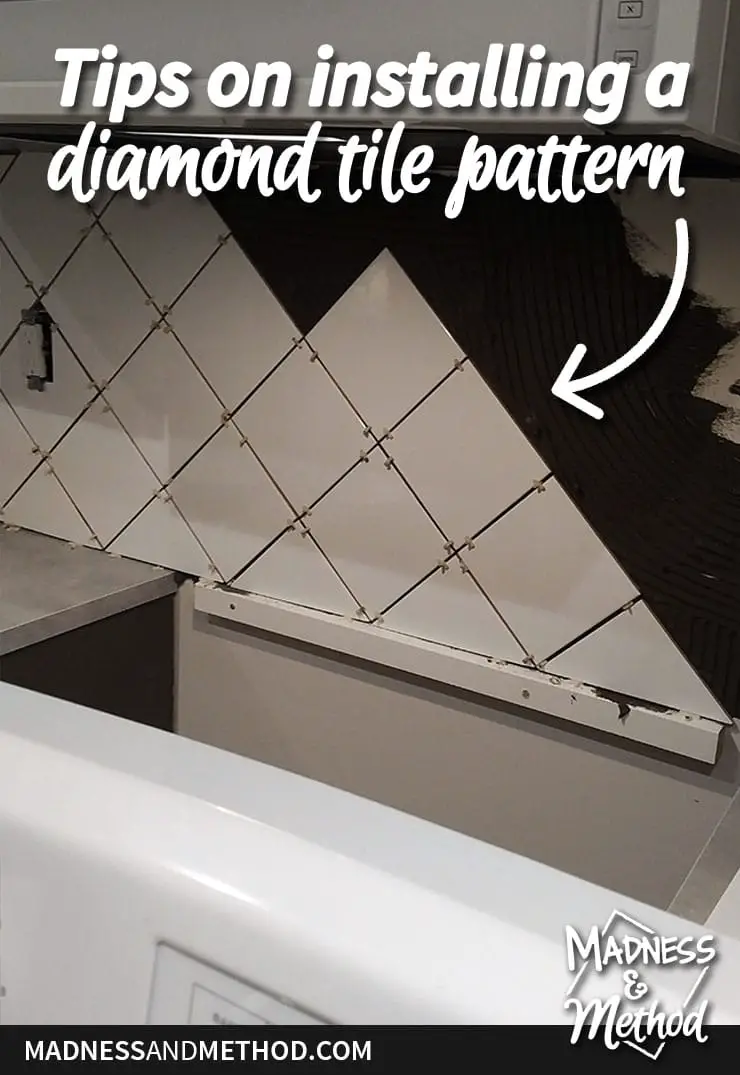
I’m finishing up the small details in our basement kitchen renovation, and I’ll soon be sharing the completed space! One of the bigger things we still had left to do (the kitchen has been usable for a while) was adding the backsplash! This was my first time with a diagonal pattern, so I’ve gathered some tips on installing a diamond tile pattern if you want to do something similar.
– Note: This post contains affiliate links. See more information about affiliates here. –
Yes, this is the infamous kitchen we tried completing as part of the Fall One Room Challenge last year. We were stuck waiting on a lot of trade-type stuff (plumbing, HVAC) and couldn’t get the room constructed in time to actually start the kitchen.
But thankfully those dark days are mostly behind us, and today they’ll be a few sneak peeks as to how it’s looking so far!
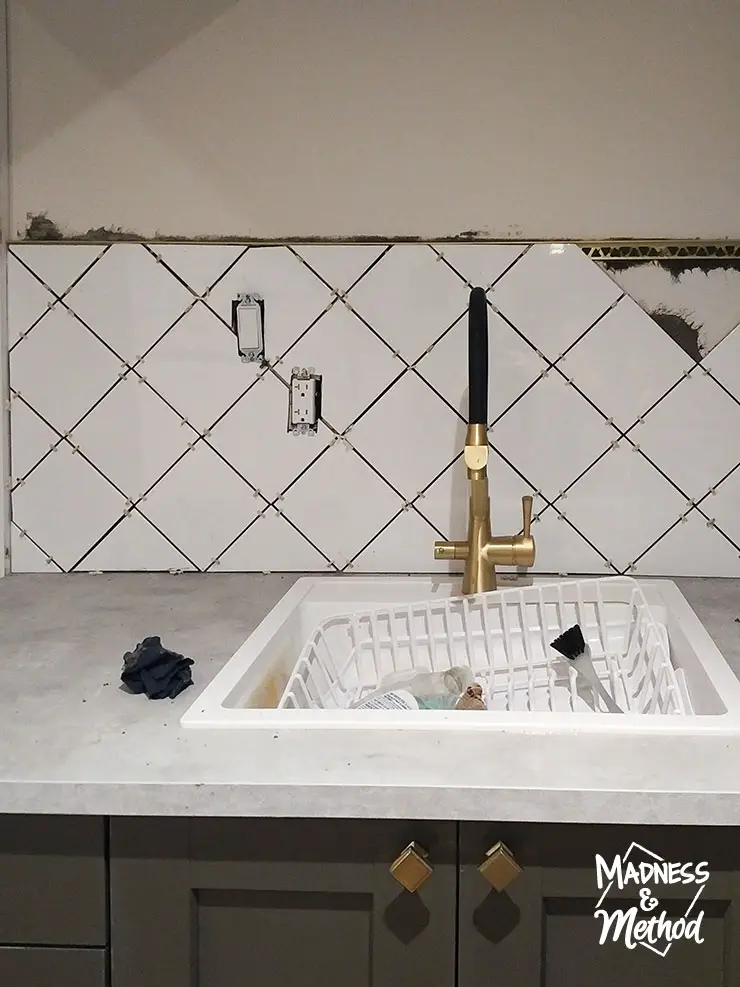
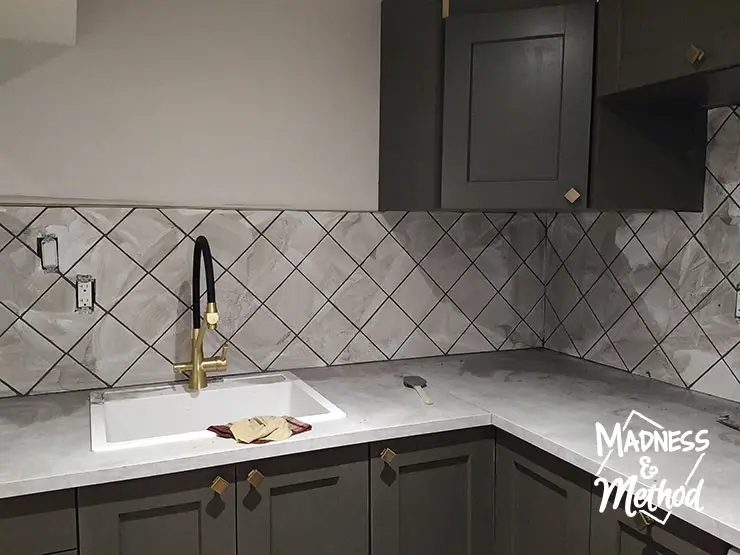
In my original kitchen design plan, I knew I was going to install regular white square tiles as the backsplash, but in a stacked diagonal way. I chose these glossy 6×6 tiles because I thought the scale would be nice (and less work than 4×4 tiles!).
Prepping Your Tile Workspace
I’ve written a lot of posts on tiling in the past (it’s kind of my thing), and the one thing I always stress is plan plan plan! Here are some other resources if you are interested:
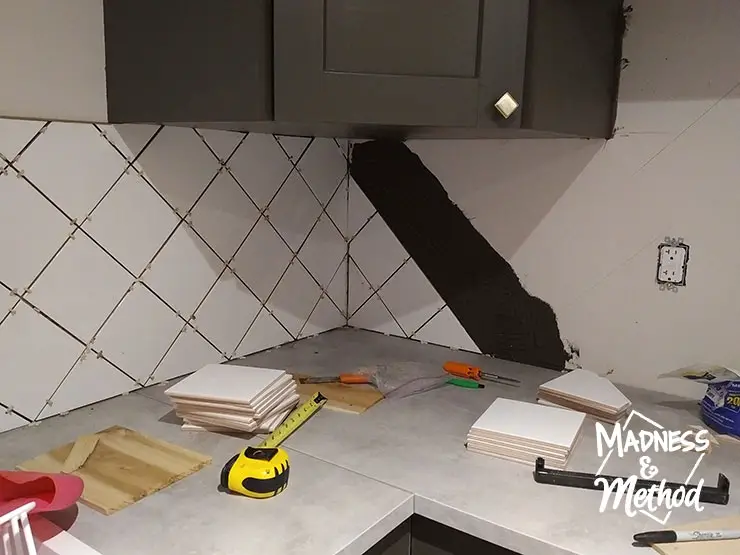
Anyways, we had two main areas to tile (one big continuous space, and the small nook that we count as our pantry zone).
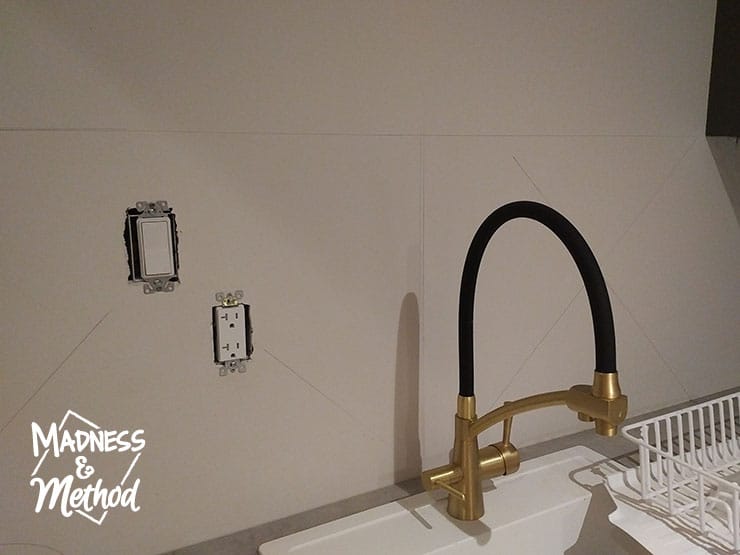
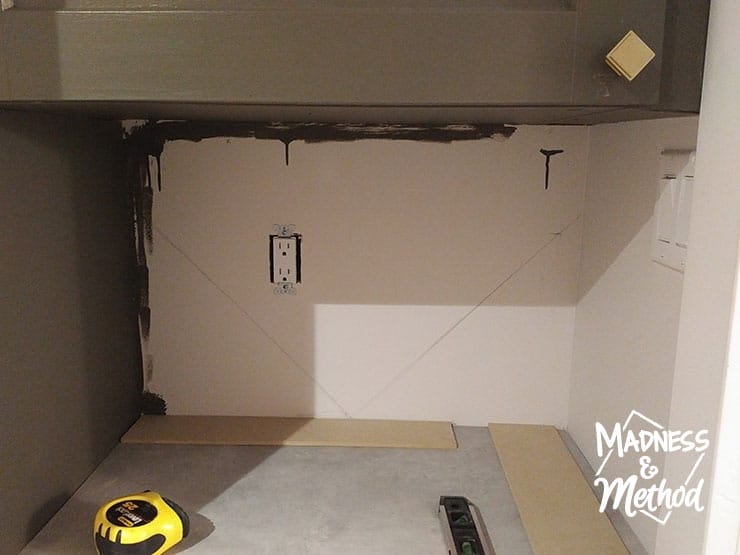
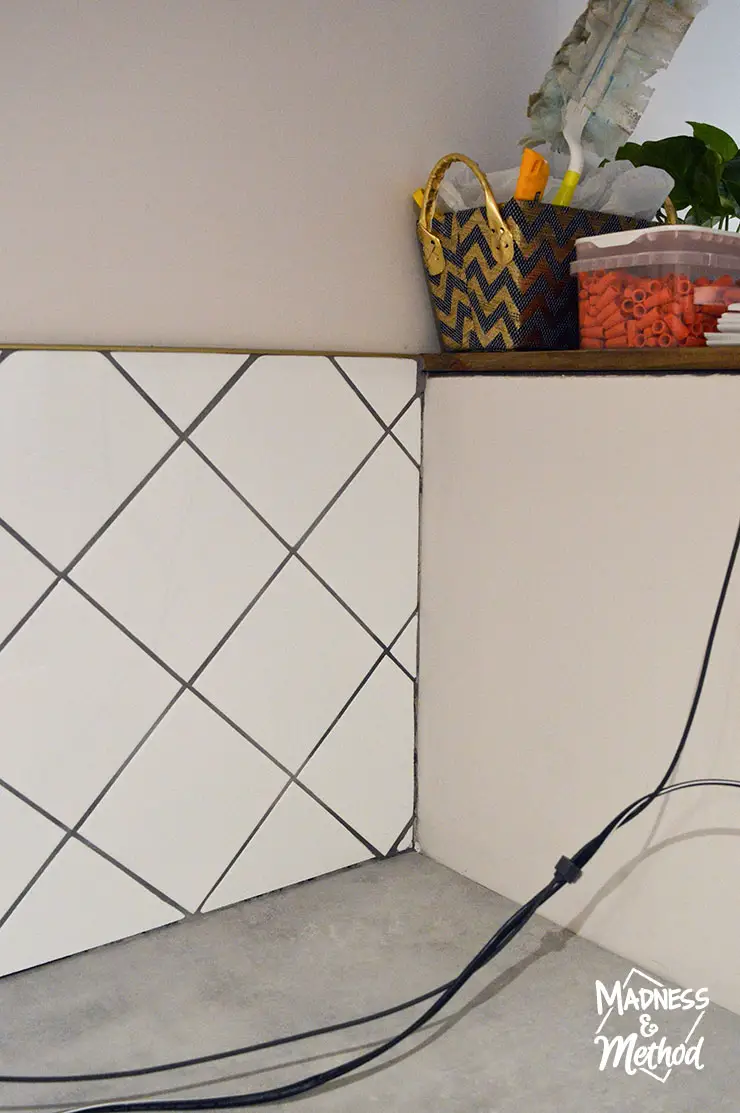
Always determine your starting position first. For the little nook, I knew I wanted the tiles centered on the wall; and for the kitchen, I knew I wanted the tiles perfectly lined up with the faucet. I marked the starting line with a pencil, and also drew additional lines on the diagonal AND one at the top where the tiles would be stopping.
The little nook was completed one evening, and I finished the rest of the tiles over the next day or so. I knew I wanted the bottom layer (where the countertop is) to be perfect half tiles, so it was pretty easy to get a bunch of those cut and ready to go.
Tiling Tools Required
- Mortar/thinset (possibly a mixing attachment and drill)
- Tiles (these are the ones I used)
- Notched trowel (per the size you need for your tiles)
- Spacers (per the size you want/need, I used 3/16″)
- Tile cutters (we use Brutus for straight cuts, and a wetsaw for more intricate ones, plus a nipper tool for close cuts)
- Optional: Edging for tiles
- Grout and grout float (in your colour of choice) and possibly a sealer
- Measuring tools: level, measuring tape, pencil, possibly chalk line
- Cleaning supplies: rags and sponges (and vacuum/broom).
Working in about 4-foot sections, I could get enough tiles installed for the amount of mortar I mixed. Every few rows I would re-check the level of the tiles (using the 45º section of our little level) and adjust if needed.
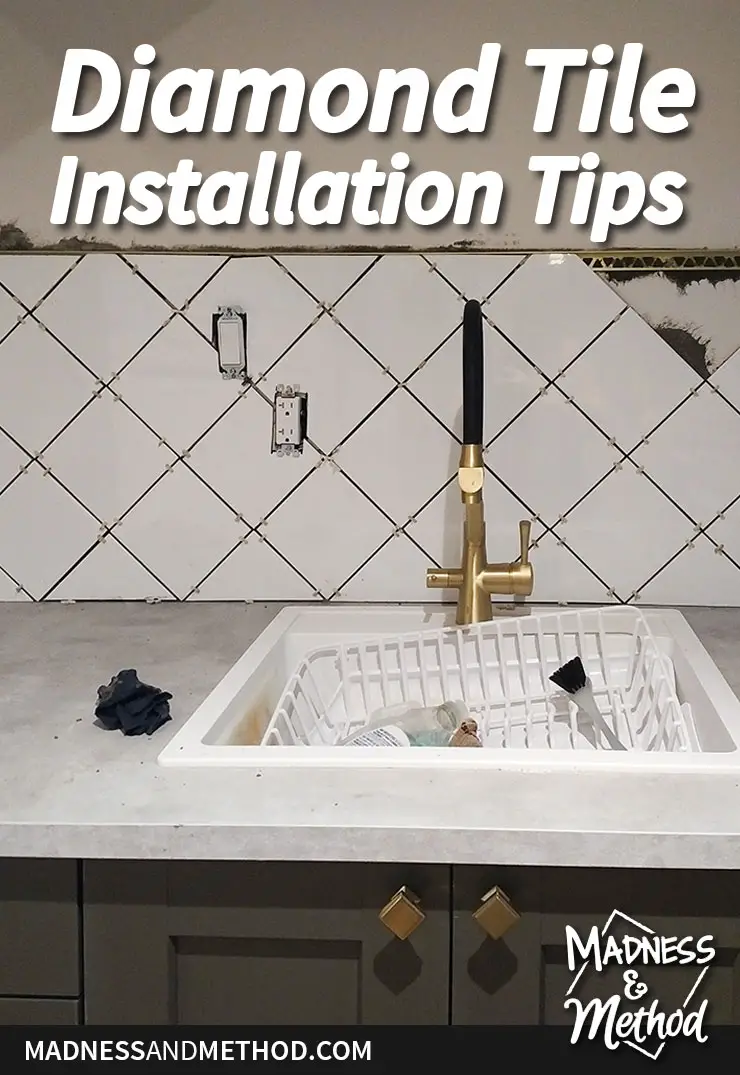
Tips on Installing a Diagonal Tile Pattern
Everything I’ve written above could be applied to any tiling job, but there were a few things I encountered doing my diamond pattern than I hadn’t faced before.
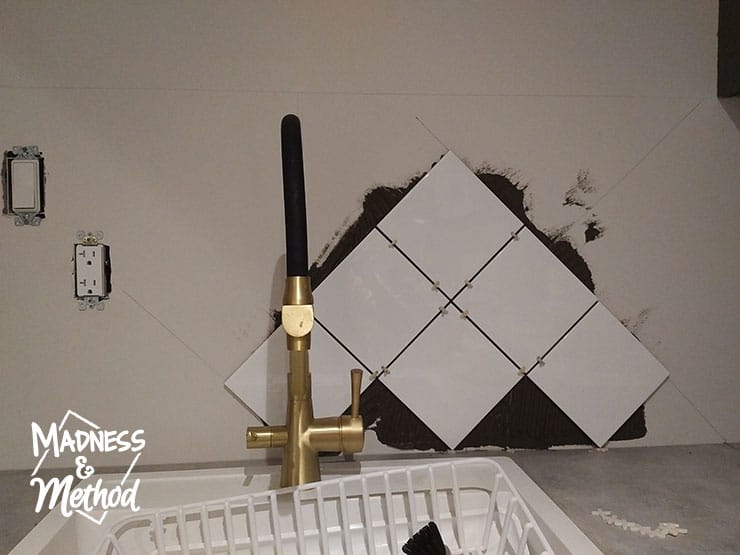
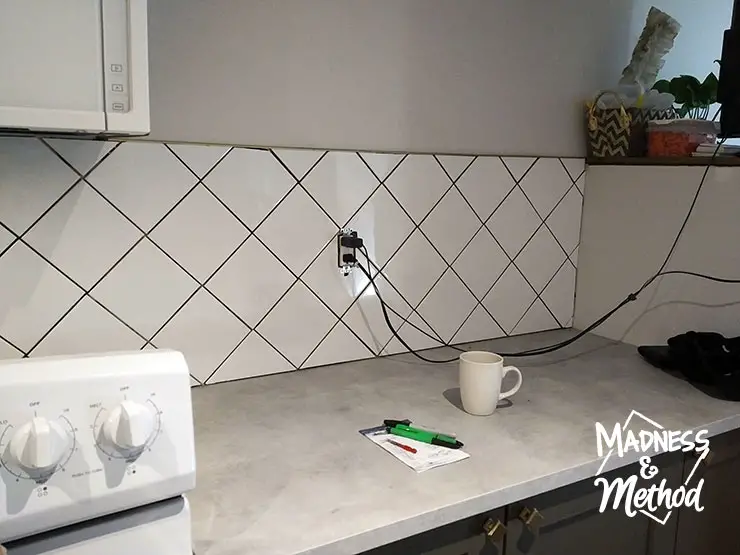
If you look back to one of the first photos I shared, I was originally installing the tiles in a bottom-up manner. I found it very tricky to get the rows lined up nicely this way, and felt it was much better to install a diagonal row all at once (seen in the photo above).
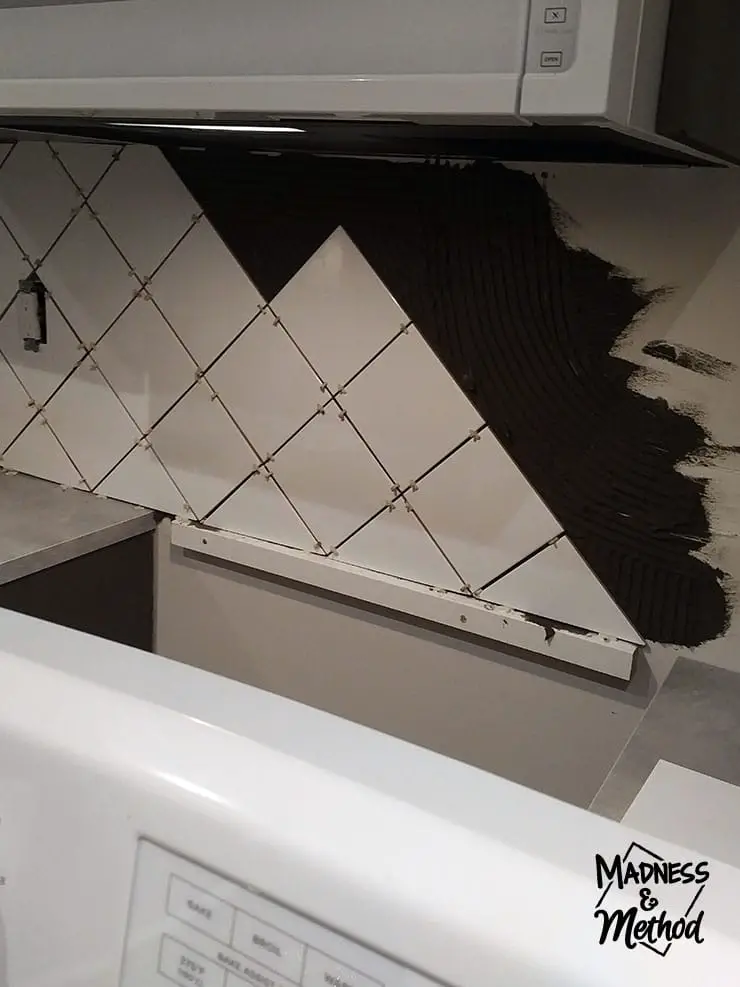
We also installed a temporary wooden block behind our oven space. In the past, I’ve just kept the rows pretty even when doing a backsplash, but these tiles were much heavier and I was worried they would slip down. This also double-ensured that the lines would be perfect across one countertop to the other.
The biggest issue I encountered with the diamond/diagonal pattern that I’ve never faced in the past, was extra gravity! I don’t mean that I was installing them on another planet or anything, but the way the tile spacers are installed, there was still room for error of the tiles slipping down straight.
A lot of my corners are tighter than I would have wanted, and eventually, I started adding an extra (bigger) spacer in those sections to try to combat that issue.
Finishing Your Diagonal Tiles
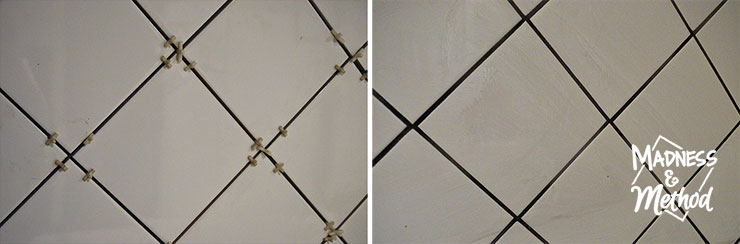
If I would have used white grout (remember, less contrast between the grout and tiles hides some flaws!), it would be less noticeable. The photo above is of the tiles before the grout was installed, but it ended up being pretty similar!
Grouting will take a lot less time than installing the tiles, but don’t forget to clean out the tiles thoroughly before you start! While grouting itself is not a long process, you do have to go back regularly to clean the haze and mess that’s left behind (so don’t to get your first grout on late at night and go to bed!).
Once all the grout haze has been cleaned, you’ll want to caulk all the seams. You always want to caulk where your tiles change dimensional planes (so think the edge of counters, the edge where walls intersect, etc). The photo above was taken before I caulked, so you can see some of the spaces that will be filled in.
You’ll also probably need to seal your grout (some don’t require a sealer), but that will happen after a bit of time.
Even if you’re not doing the same diamonds that I did, these tips on installing a diamond tile pattern can still come in handy for similar patterns (ie: herringbone!). And of course, if you’re doing a diagonal pattern on a floor, you definitely won’t have the gravity issues that I did!
There are a few small paint touchups to finish AND I still need to get the shelf installed properly… but other than that… the kitchen is pretty much done!
Which of course means that I’ll be sharing it very soon :)

No Comments