
It’s the second week of our kitchen renovation, and normally I’d like to be a bit further along… but alas we still don’t have a real floor or walls up yet! To be fair, it’s like the third month of the entire rental renovation and technically any progress forward is good – but I know the Husband is really itching to get this thing over with! Since we don’t have too much new to show, I figured it would be a great opportunity to share the basement kitchen design plans, so let’s dive in :)
– Note: This post contains affiliate links. See more information about affiliates here. –
Just a quick reminder that we are trying to complete this kitchen as one of the linking participants for the One Room Challenge. You can check out my past ORC projects here, and although this is my first ORC kitchen, I have completed two kitchen renovations in the past, including our more traditional style kitchen and my brother’s budget white kitchen.
Last week I shared the layout of the kitchen and talked about how it’s going to be located in a 2 bedroom basement apartment. We’re planning on living in it half the time, doing short-term rentals when we’re not there (and renting out the main level full-time). But before we can move into this space, we actually have to finish it!
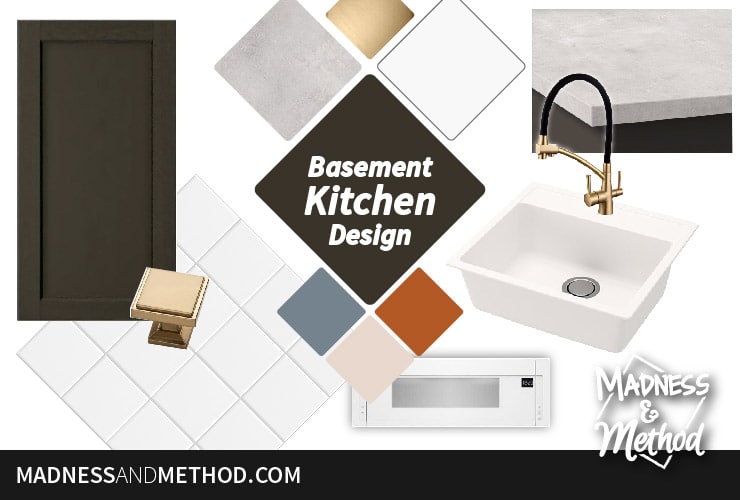
Ready to see the design plans!?
(And I’ll go into detail about how/why I chose these elements, so if you want to get the quickie progress – scroll down to the video).
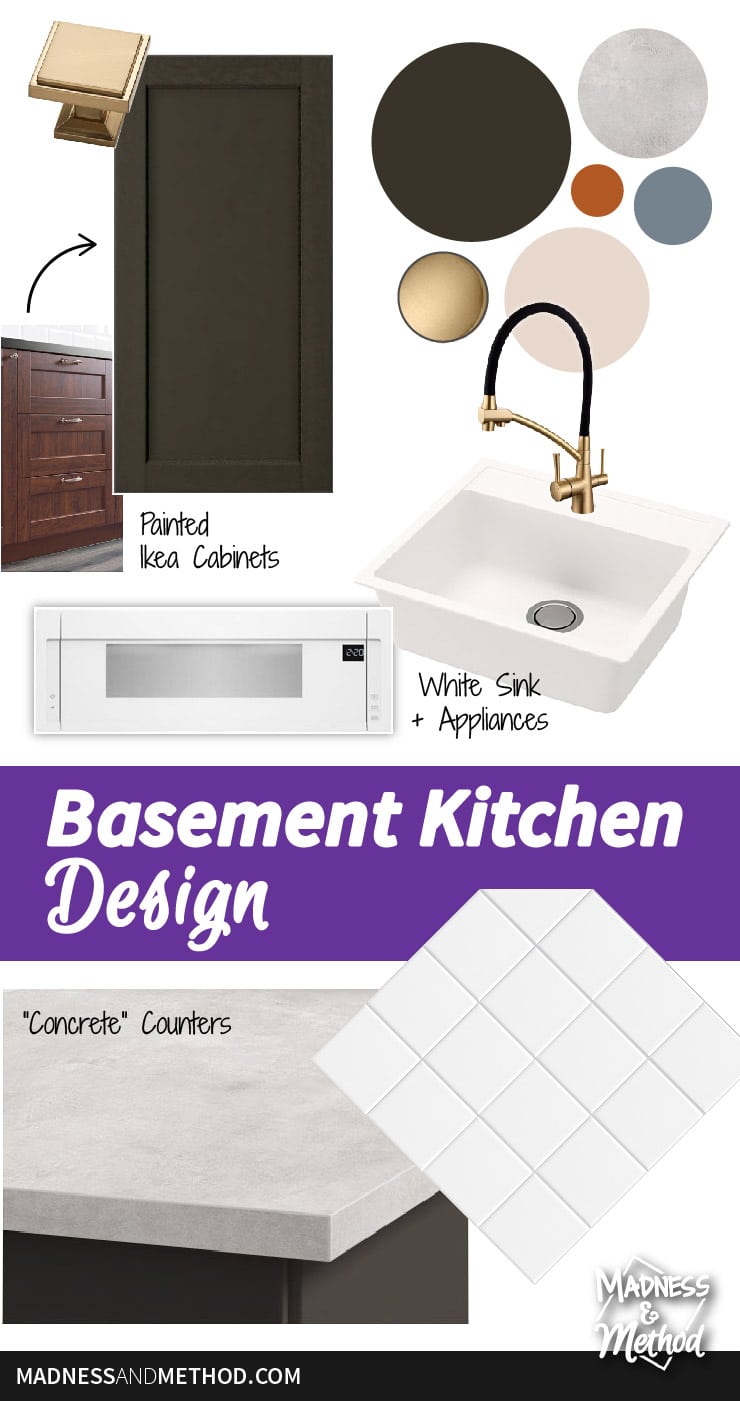
Hardware:
It might seem weird to choose your hardware first, but once I saw these Classic Square Knobs in Champagne Bronze, I was sold! I worked with Liberty Hardware on our nursery dresser makeover and they were open to collaborating again and I’m super excited :) I’m actually going to be installing them diagonally (like little diamonds instead of squares) – so it should be a fun/different feature.
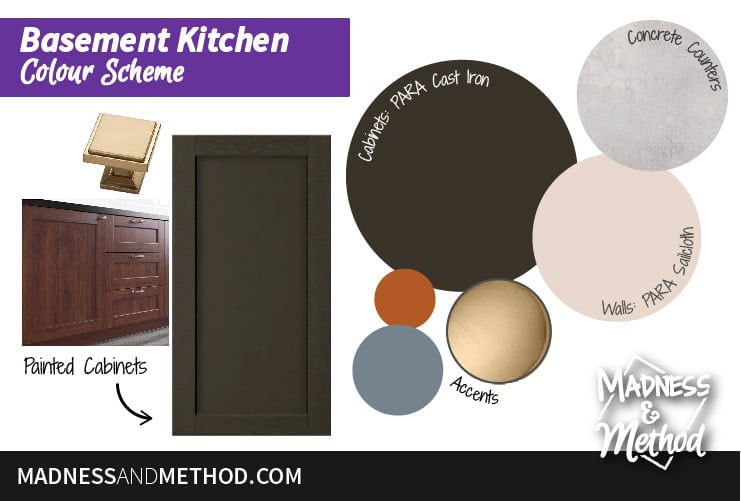
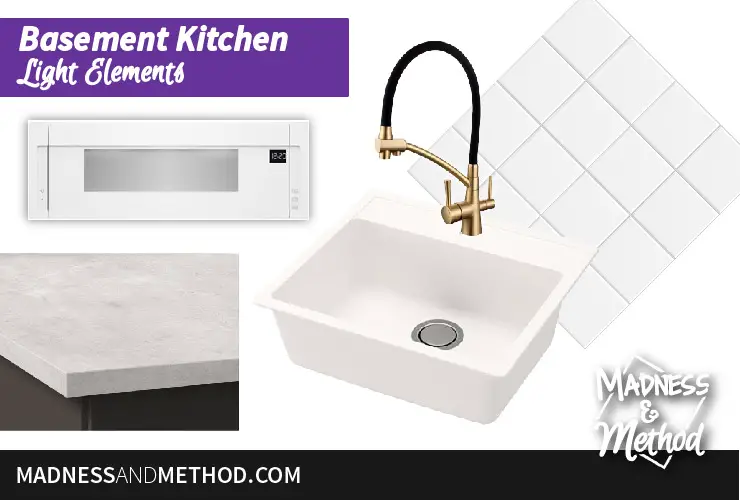
Colour Scheme:
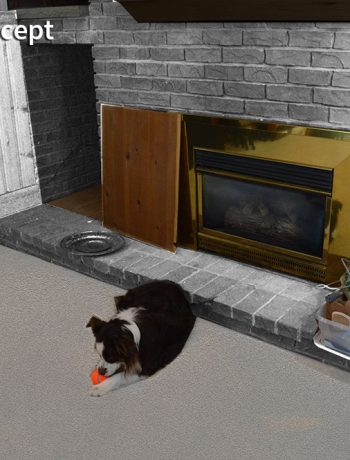
I came up with a colour scheme for our rental renovation a few months ago, so I’ll be repurposing some of the same colours in the kitchen. I wanted to go with dark cabinets and knew that they had to be painted to match our colour scheme (you can actually see the colour in our family Halloween photos). I know that it may seem a bit risky to go with such a dark colour in a basement (since we won’t really have any natural light in the kitchen at all) but I think all the light elements will help balance it out.
Cabinets:
I love Ikea, and I knew that we would definitely be using their cabinets again for this kitchen. I was hoping to get some custom shaker doors made by Semihandmade, but things uncovered during the demolition of the basement made me alter the layout and they require a big lead-time so I missed the cut-off in order to get done on time. Which means that I’ll be buying brand new cabinets and painting them. I know I know, sounds crazy! But I can’t really stand the thought of not matching the exact colour I want, so I found these Edserum cabinets (in the shaker style I like!) and they’re actually a) one of the cheaper cabinet styles, and b) already close to the colour – so I may just be lazy and paint the outside…
Counters:
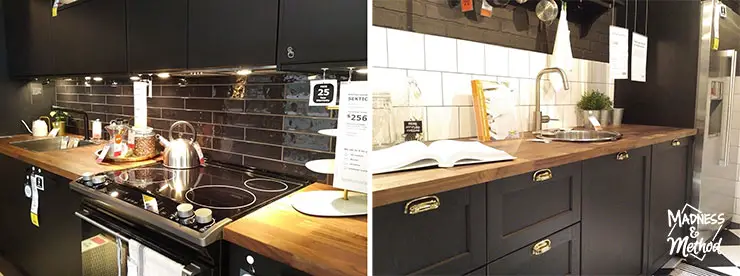
The counters actually took a lot longer to decide on than the first three things. The main thing we knew was that they had to be c-h-e-a-p, so that eliminated all quartz/granites/etc. I was strongly considering a butcher block, and visited Ikea a couple of times to check out the options in person (once when I was on vacation in Winnipeg, and another when I was in Ottawa).
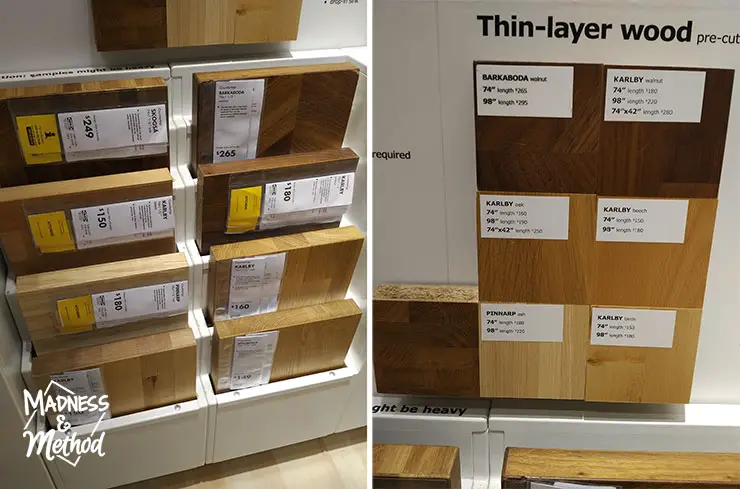
They have both a fake wood option (basically just a wood veneer on top of particle board) or a full wood counter. While I don’t have it on the design plan, the floors are going to be a wood-look vinyl, so it would be a bit tricky to try and get something to match the colouring when I didn’t have a sample on me (and we still need to order the floors… so who knows if I change my mind!).
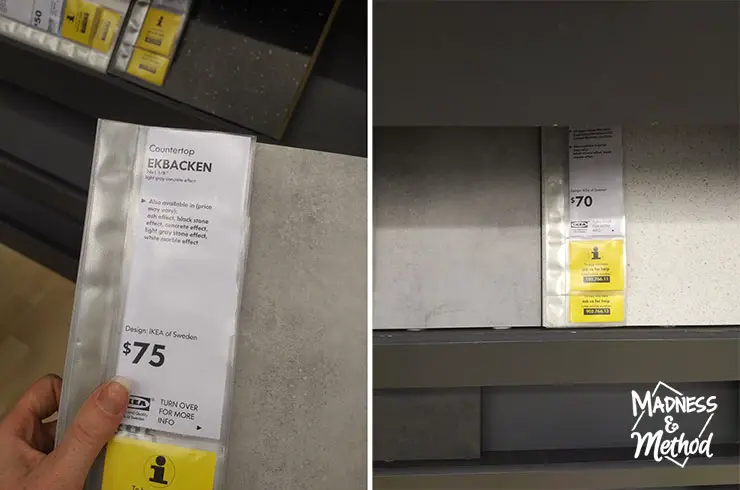
In the laminate, I was really considering the Saljan counters and thought it would be a nice light option. On my second trip to Ikea, I saw the Ekbacken light gray concrete-look counters, and I loved them! They’re a bit thinner than the regular laminates, but have sharper edges (which I prefer) and it’s actually ridge-y and bumpy to imitate an imperfect concrete. The Husband loved the price, “wait, it’s 75$ for the WHOLE counter?!” (we installed quartz before, so it was close to that price per foot!).
Sink:
Because we weren’t doing a stone counter, I knew we needed a drop-in sink. I want to try something new here and just get a single bowl (and I wanted a 24″ cabinet, so we were kind of limited too!). While stainless steel was the go-to choice, I also wanted to try something a bit different and decided on this white Hallviken sink, again from Ikea.
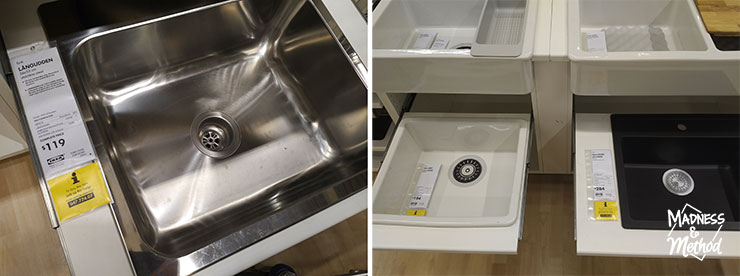
I didn’t actually see it in person, and I was debating between that one and the Havsen sink. In the end, I chose the Hallviken because it had the extra lip on the back (perfect for sponges/soaps) and I preferred the plastic-y feeling compared to the ceramic.
Faucet:
I knew I wanted another champagne bronze/gold element in the kitchen to match the hardware, so I set out to search for a faucet that would fit the bill. Actually, the faucet I really wanted was out of my budget for this kitchen, so I had to find something else. Requirements were that it had to be gold, but not shiny brass and a single hole installation. My wish list included a pull-down feature (but that was almost a necessity too) and it would be fun to try a sink with a joining thing (the horizontal bar) so I could have a good place for our washcloth!
I wasn’t 100% sold on this one and had a few saved on my wishlist, but then Jenny Komenda recommended the exact same one so I figured it must be good :) It’s this Gappo Gold one from Amazon, and although it’s hard to tell if the finish will match the hardware perfectly, the price was right!
Appliances:
This might sound weird, but once I decided that the sink was going to be white, I thought it would be fun to match the appliance to the sink! Normally they’re all stainless steel right, so it only made sense hahaha. Actually, it’s a bit better since white appliances are normally cheaper – and that’s exactly what our budget calls for :)
While I’m not sure which ones we’re going with yet, I do know that we need this short microhood to fit with the design with our 7′ ceilings. Do you think we need to match all the same brand, or mix and match as long as they’re all white?
Backsplash:
Okay, this was hands-down the hardest decision for the kitchen! I agonized over what to do for weeks, should it be traditional tile, a stick-on tile, something else, nothing at all? I’m all about regular tiles, and literally browsed every. single. option online, saving all the white or light grey tiles. There were a few square options in my favourites (either 4×4 or 6×6) and then I had an ah-ha moment that I would install them diagonally!
It would match the diamond handles and then I came up with the cute name “diamond in the rough kitchen” (because if that doesn’t describe this space, I don’t know what does!). A few days later I realized I did a diamond pattern in my brother’s bathroom for another ORC project, then when I was sharing this photo on Instagram I realized the mirror for that bathroom was diamond too! I don’t think we had any diamonds in our garage ORC project… or that would be just too weird.
Ummm, when I was adding the links to those projects, I saw that I also did a diamond wainscoting treatment before, and my logo is kind of diamond-y too. Is that my thing? I never really noticed it, but all the signs are pointing to diamonnndssss! In the past, I know I’ve mentioned that I much prefer square shapes over circles, and it might be some sort of diamond shreddie thing happening now…
Week 2 Video
If you skipped all my blabbing above, you can get the same basic idea here in this video:
And check out some of the photos where we are now:
Kitchen Progress
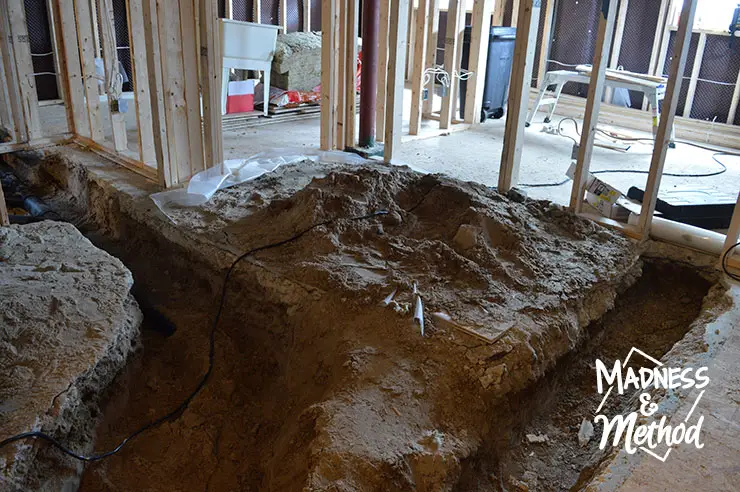
This is the “hallway” section of the kitchen, near the sink/fridge and where all the bedroom doors meet.
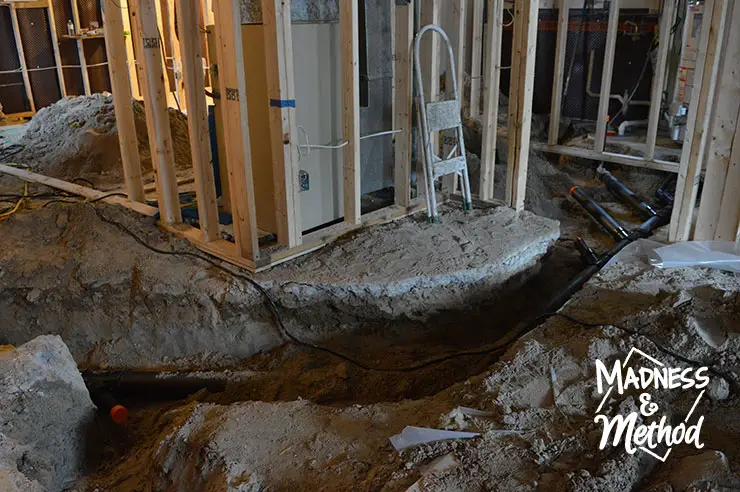
This is the view standing at the sink looking towards the fridge and bathroom.
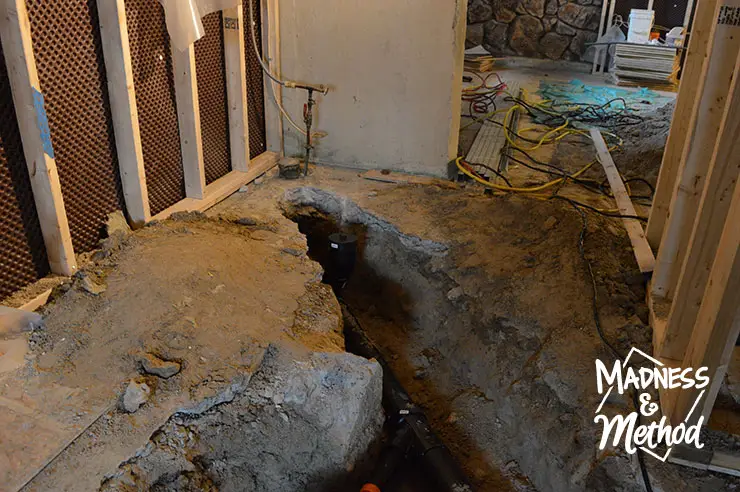
And looking back towards the wingwall and the main water line (which will be hidden by a cabinet).
What has been done so far
I’m told the plumbing should be completed tomorrow, then we’ll need an inspection for that before we can fill it back in and concreted over. Once all the dirt is cleared out, the subfloor will go back in place and we can buy the flooring and bring it down. We’re going to get the furnace switched out from electrical to gas, so hopefully, that can be done soon (and we need to get some ducts fixed so there’s heat down here – and install fire dampers too). I’ve ordered the kitchen pieces from Ikea and it should be delivered tomorrow as well (please send help since I’ll be organizing the boxes with two littles at my feet!); the faucet and microhood have also been ordered…
To-Do List
- Finish plumbing (sewer lines)
- Install floors: dirt/concrete, subfloors, vinyl floors
- HVAC + ductwork
- Plumb water lines (hot/cold)
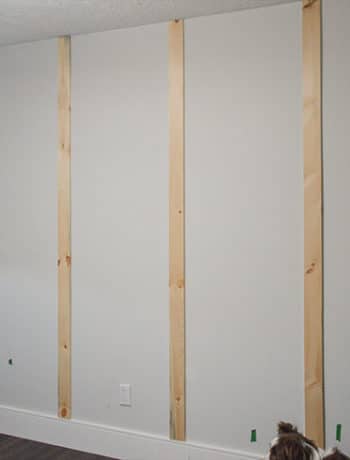
- Walls: insulation, vapour barrier, drywall
- Assemble cabinet boxes
- Paint door fronts + sides
- Install kitchen (cabinets, counters, sink, faucet)
- Appliances (fridge, micro-hood, oven, dishwasher)
- Backsplash
- Build and install shelves
- Bring in stuff
Thankfully we have contractors doing the bulk of the work, but the Husband will be installing all the water lines so maybe he can get that in this weekend. I might also start painting all my cabinet doors this weekend because I honestly have no idea what I’ll share next week unless I get something done!
I normally like to plan my ORC projects out so I can work on everything the entire time and have good things to show… but we may just be installed everything the last two weeks, so wish us luck!
Hopefully you like this “Diamond in the Rough” basement kitchen design and can get a good sense of where we are headed. You can always check out my Rental Renovation Pinterest Board for some ideas of things that inspired me in this space (and the whole rental renovation too).
 |
Basement Kitchen Week 1: Layout Week 2: Design Week 3: ? |
Don’t forget to check out all the other One Room Challenge designers + bloggers as they also tackle a space in 6 weeks! Let me know if anyone is struggling to get things done each week, and send me all the help!


4 Comments
Ashlea
October 11, 2018 at 11:47 amWOW! This looks like a huge project. Yes- you are literally in the trenches! We too are tackling a kitchen reno. Looking forward to seeing how yours unfolds- all the best that things run smoothly for you!
Nicole
October 12, 2018 at 2:06 pmHa, I don’t think things will be running smoothly for us – BUT we will eventttualllly have a completed kitchen/basement, so there’s hope. I’m excited to see your kitchen too!
Camille Thomson
October 11, 2018 at 5:51 pmLove your inspiration board! I think it will turn out great! We are ORC twins because we are both attempting a kitchen renovation! I’m feeling a little bit crazy! I hope you make a lot of progress this week!
Nicole
October 12, 2018 at 2:10 pmOh my goodness, you are so much farther along in your kitchen and I LOVE the design plan for your space too. I think you’ll be able to finish and have a great space :)