
I have another fun photo reveal for you today! This time, I’m sharing our camp bathroom update – aka how I painted and wallpapered the walls. Okay, we also swapped out the sink and faucet… but other than that, this was a quick makeover that packs a big punch :)
– Note: This post contains affiliate links. See more information about affiliates here. –
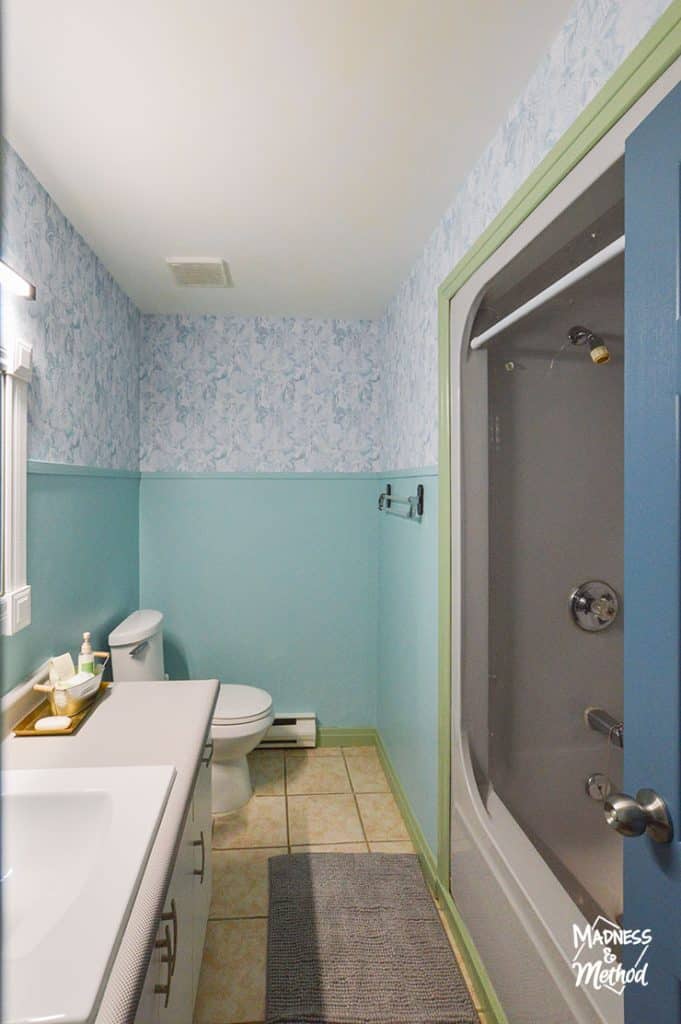
Alright, before we get to all the details of the bathroom – let’s look at where we started in this space.
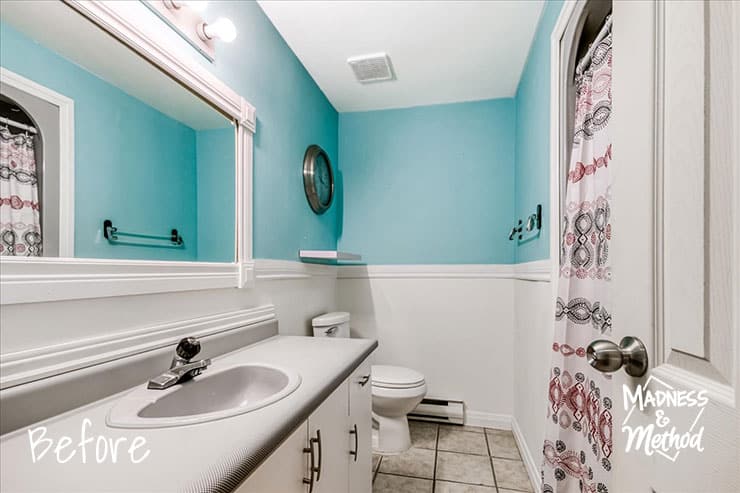
The bathroom before had bold teal walls on the top half, and white painted walls and trim on the bottom half.
There was also an excessive amount of trim that was just installed loosely around the vanity counter. (And baseboards used on the walls as a divider between the colours.)
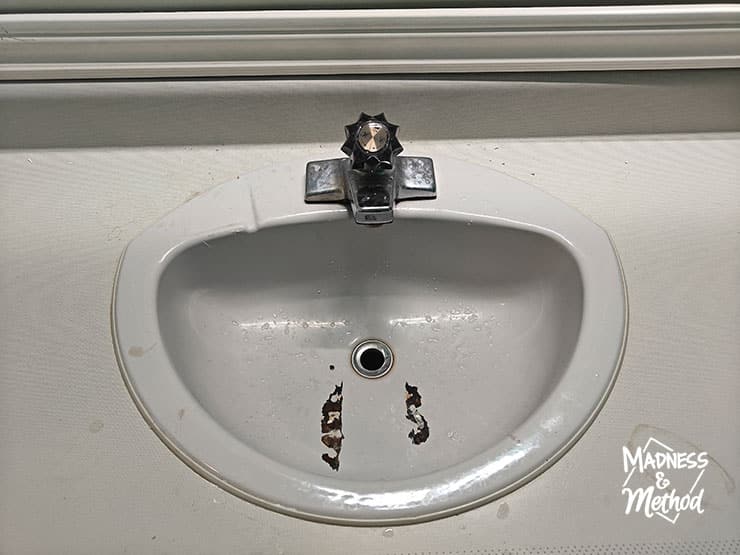
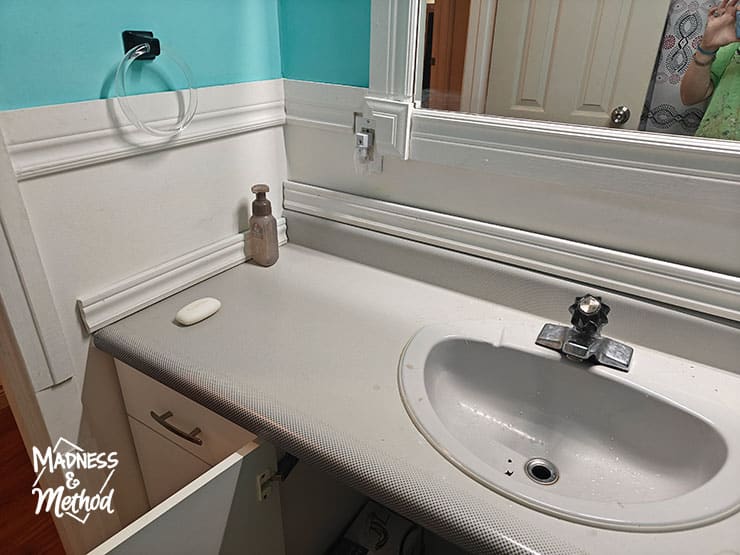
And the sink? While it was cool that it was grey-on-grey with the counters, there was a damaged paint section and a leak underneath. Was the sink plumbing leaking? The faucet intake valves? Or was water seeping through the rusted sections?
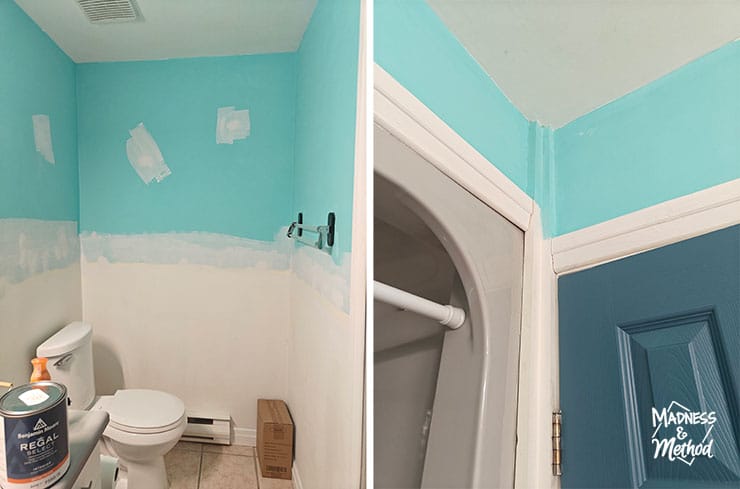
The Husband replaced the plumbing and the light fixture (goodbye Hollywood vanity light!). Then I got to work removing the excess trim, patching, sanding and priming everything. Oh, the image on the top left shows the weird trim section in the corner. It was half painted white/blue before. And while I did originally paint it the new wall colour, I changed my mind and painted it green to match the rest of the trim.
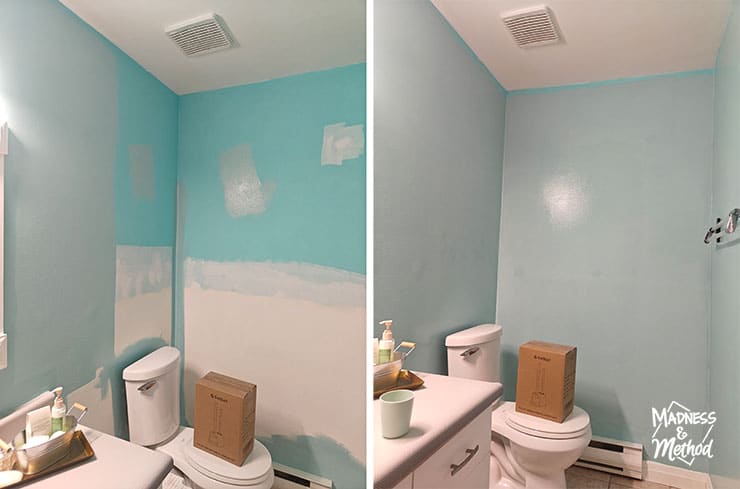
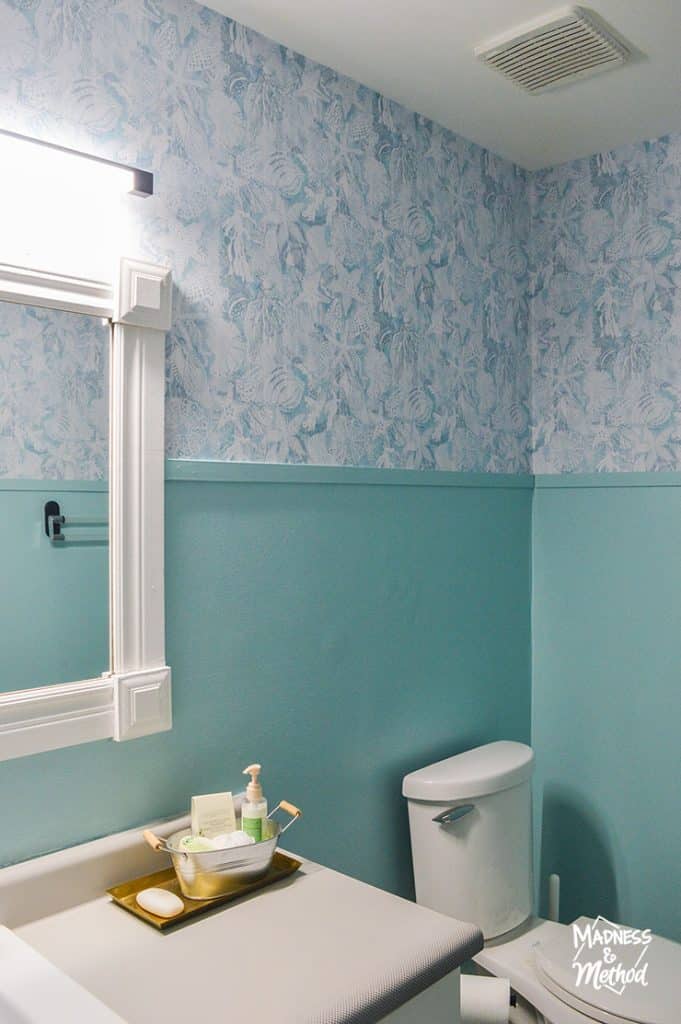
The new paint colour I chose (Waterfall by Benjamin Moore) was pretty similar to the original colour. A bit lighter and not as bright, plus it matches perfectly with one of the tones from the wallpaper. (Also, we debated calling this Waterfalls Camp – so the paint name was a definite choice decider for me, ha).
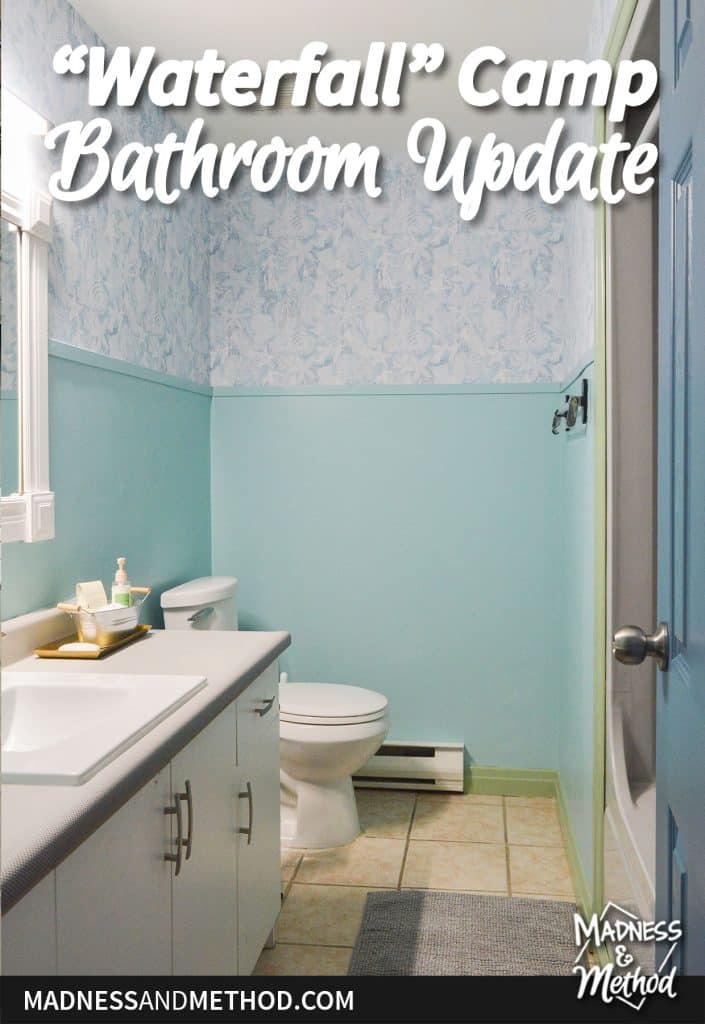
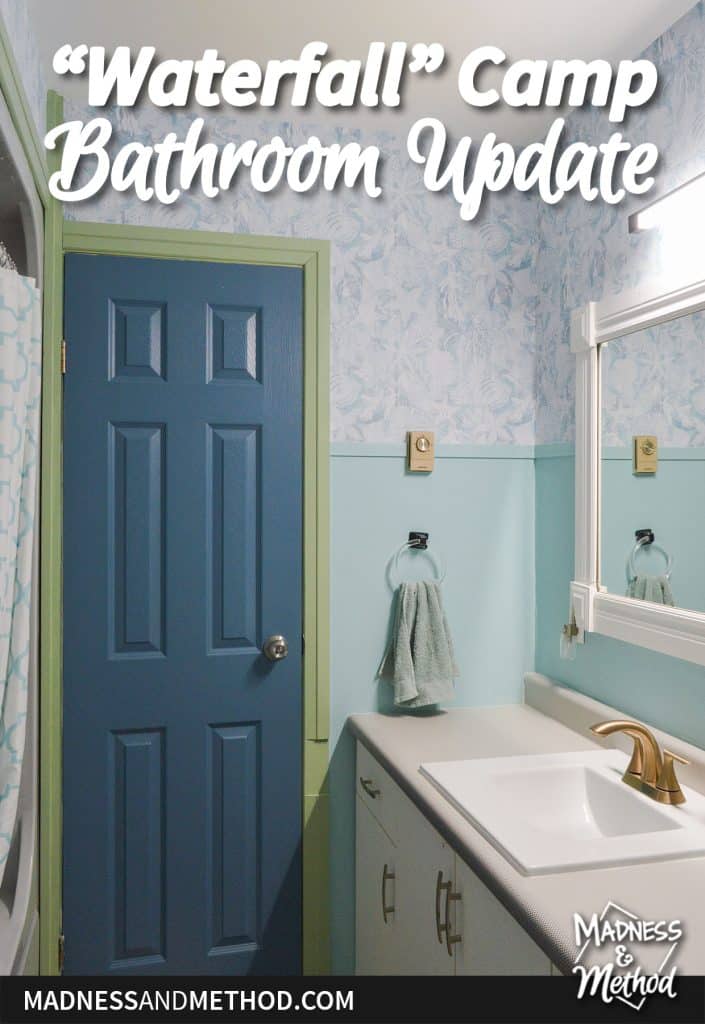
Camp Bathroom Reveal

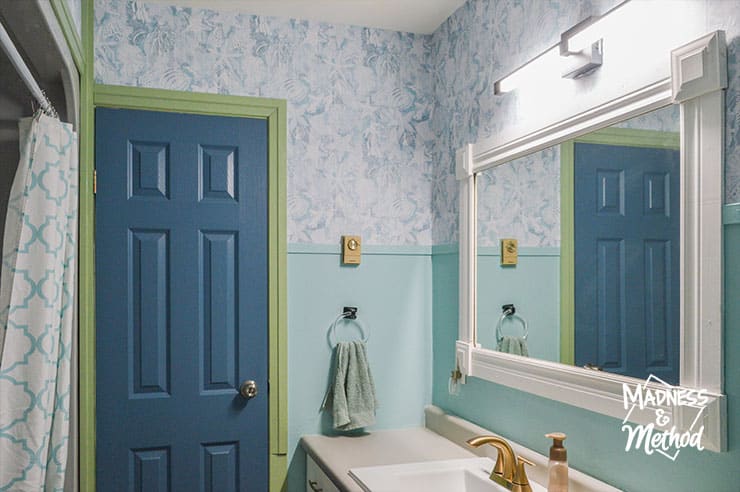
And here’s the new space!
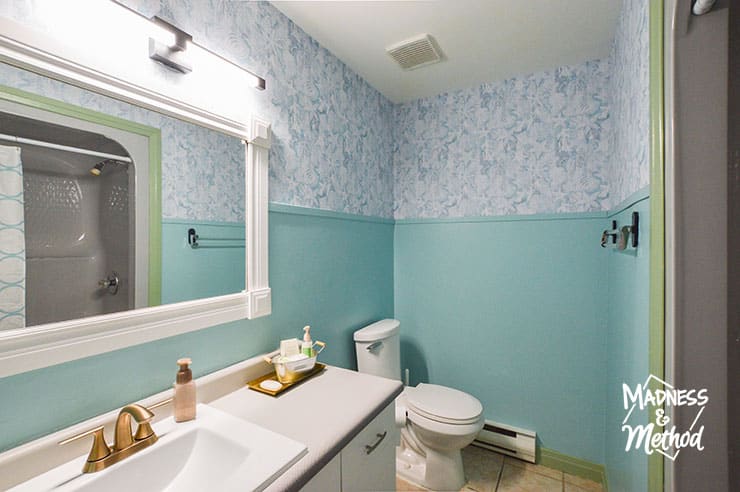
Like I mentioned, we replaced the sink, added a gold faucet and an LED light. Other than painting and wallpaper, everything else is the same in this space.
The little gold tray on the vanity will most likely be filled with other items. Since this will be an Airbnb rental, I’m thinking some facecloths so they are easy to find.
Oh, there also used to be a floating shelf and clock above the toilet, but I’ve kept them out in favour of simplicity. Not really pictured, but I also got a new toilet paper holder since the one attached to the vanity was broken. Oh, and toilet brush cleaner and plunger. You know, practical things :)
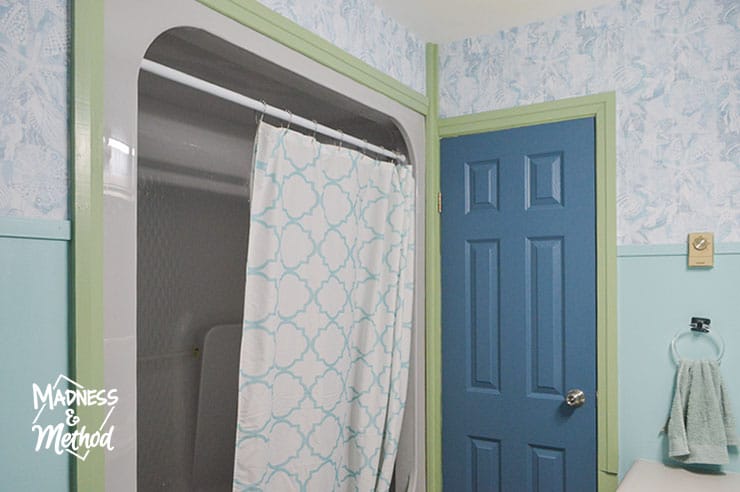
On the other side of the room, the blue painted door really pops in this space. Fun fact: I found that matching shower curtain in one of the vanity drawers. It goes great with the updated space!
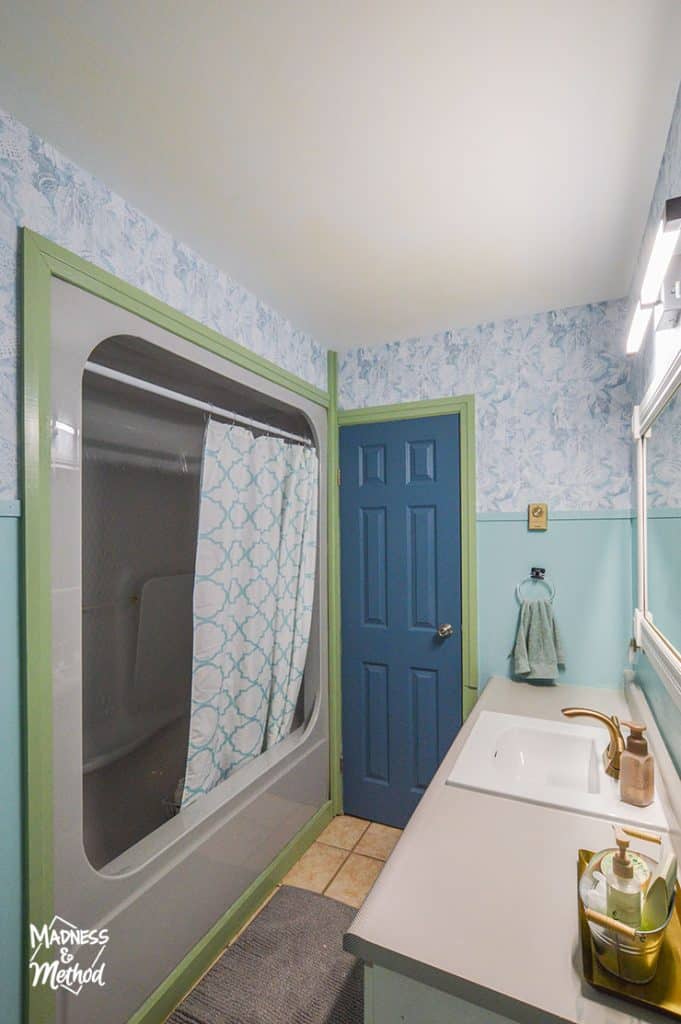
And remember when I was talking about that trim piece in the corner of the room? See how I painted it green here. It definitely goes with all the trim so it makes sense. Plus, having that divider gives the wallpaper a good area to terminate.
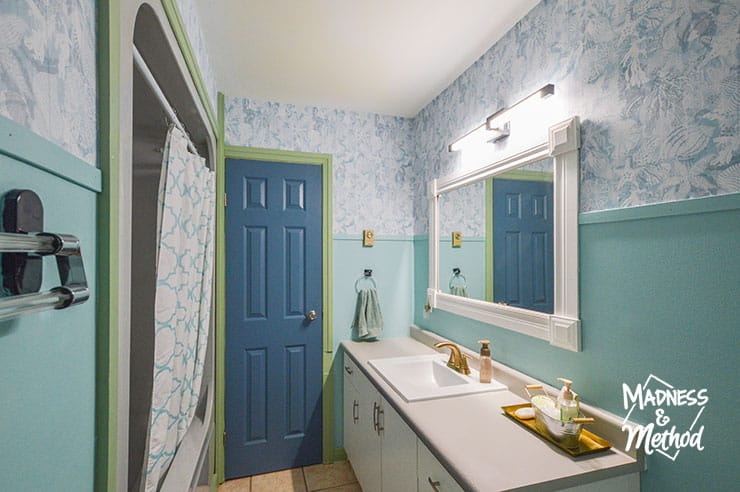
To separate the wallpaper and the bottom half of the walls, we added a small PVC trim piece. One part of the wall is really bowed/wavy, so I knew I needed something more flexible.
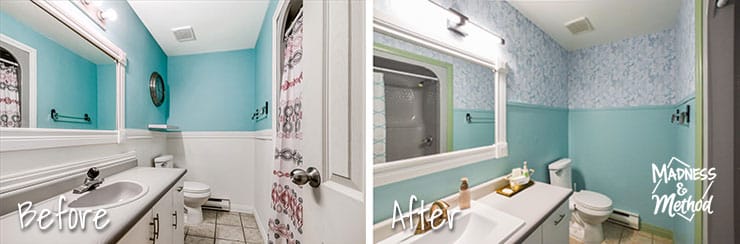
Here’s a before and after comparison of our camp bathroom update! Again, nothing super dramatic, but the fresh paint and wallpaper really liven up the space. A non-leaking sink is a bonus, ha.
This is the main bathroom at the camp, and I’ve kept the other one (attached to the hotel room) a similar style. Aka I painted in the toilet/tub room the same Waterfall colour, and installed the wallpaper as an accent wall behind the open vanity area.
🛍️ Shop This Room
- Coastal Cottage Wallpaper (Amazon.com)
- Toilet Paper Holder
- Toilet Brush and Plunger
- Gold Two Handle Faucet
- White Sink (the same we used at our house!)
- LED Light
- Paint Colours: Waterfall (walls), Seedling (trim) and Schooner (door)
Still to do in this room: figure out how best to store/display the shower bottles. I also want to add wallpaper to the bottom of the drawers!
We have a few more small updates to do around the camp, then I’ll be photographing and sharing the rest of the rooms soon. Make sure to follow me on Instagram for some great behind-the-scenes :)

No Comments