
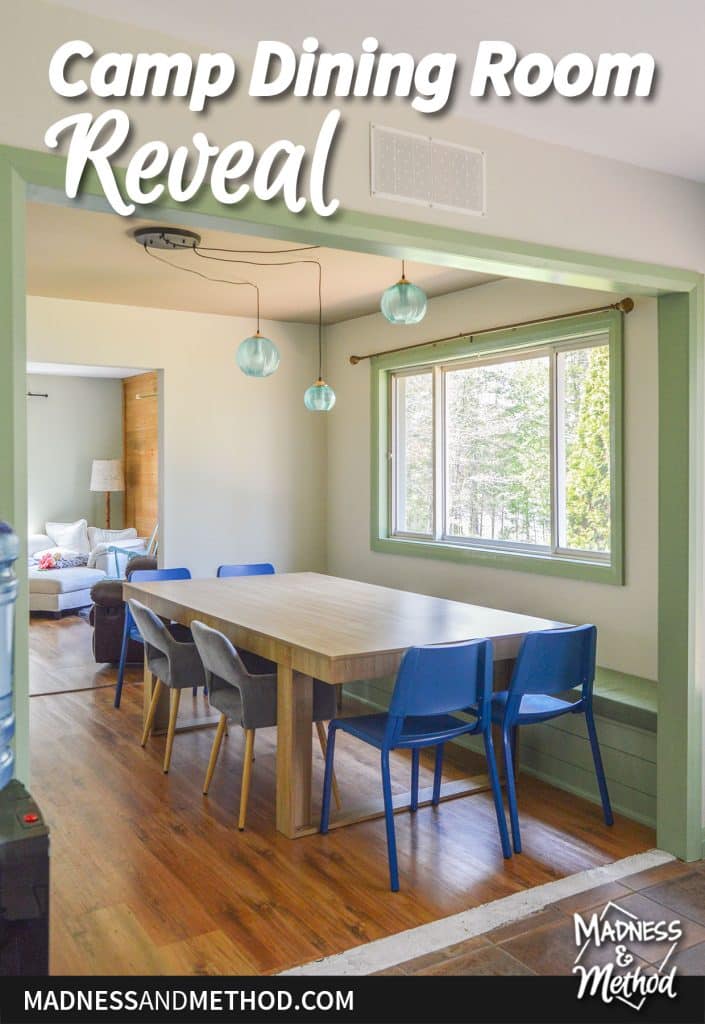
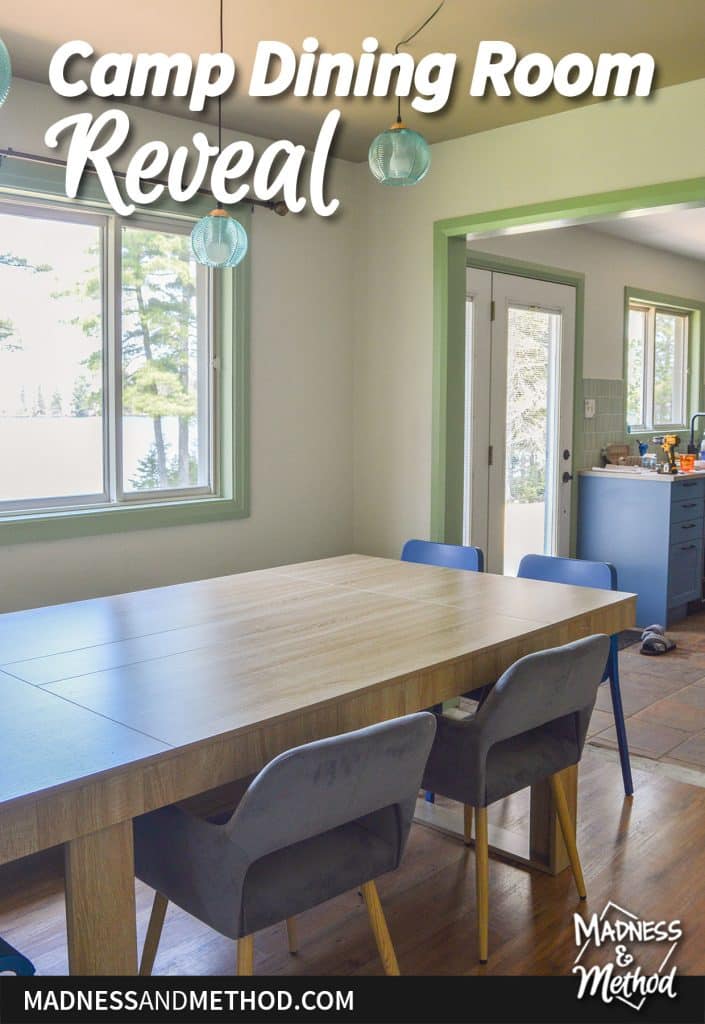
Ready to see photos of the dining room!? Last time I shared all about the construction of the built-in dining room bench, so it makes sense to post some photos of the rest of the space. Check out the camp dining room reveal and let me know what you think!
– Note: This post contains affiliate links. See more information about affiliates here. –
While the majority of the work for this room happened way at the start of the renovation; the final pieces of furniture really pull it together.
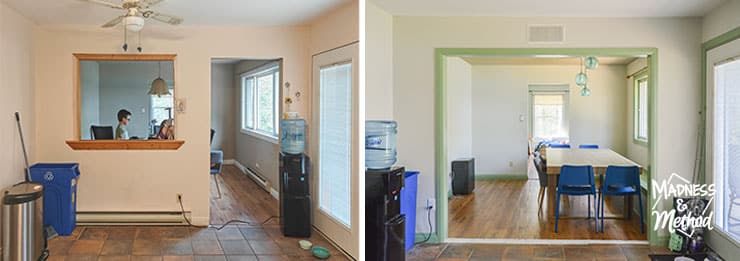
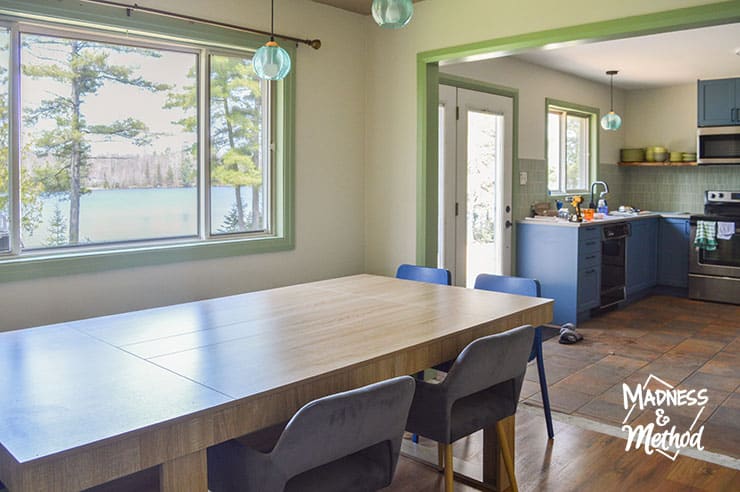
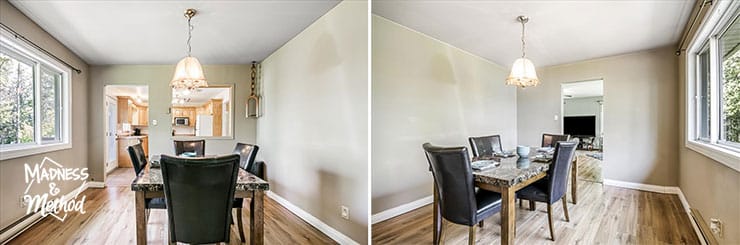
The photos above show a great reminder of where we started, and where we ended up! To catch up, we removed most of the wall that separated the kitchen and the dining room. Here is a short video on YouTube that shows how that went!
And here we are now :)
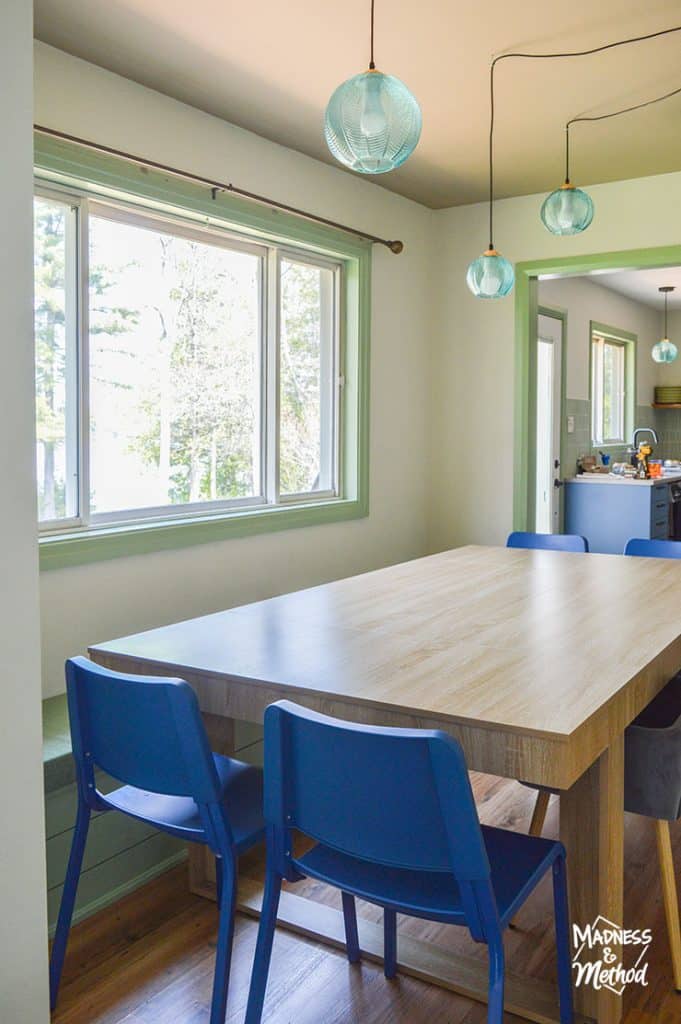
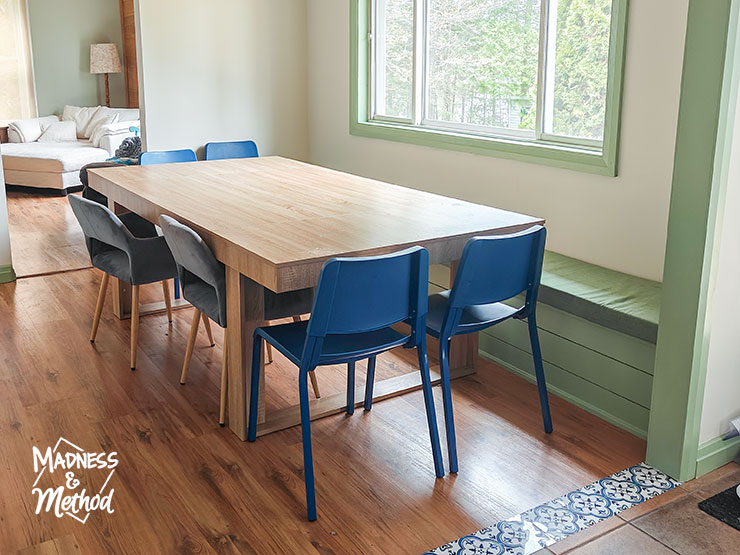
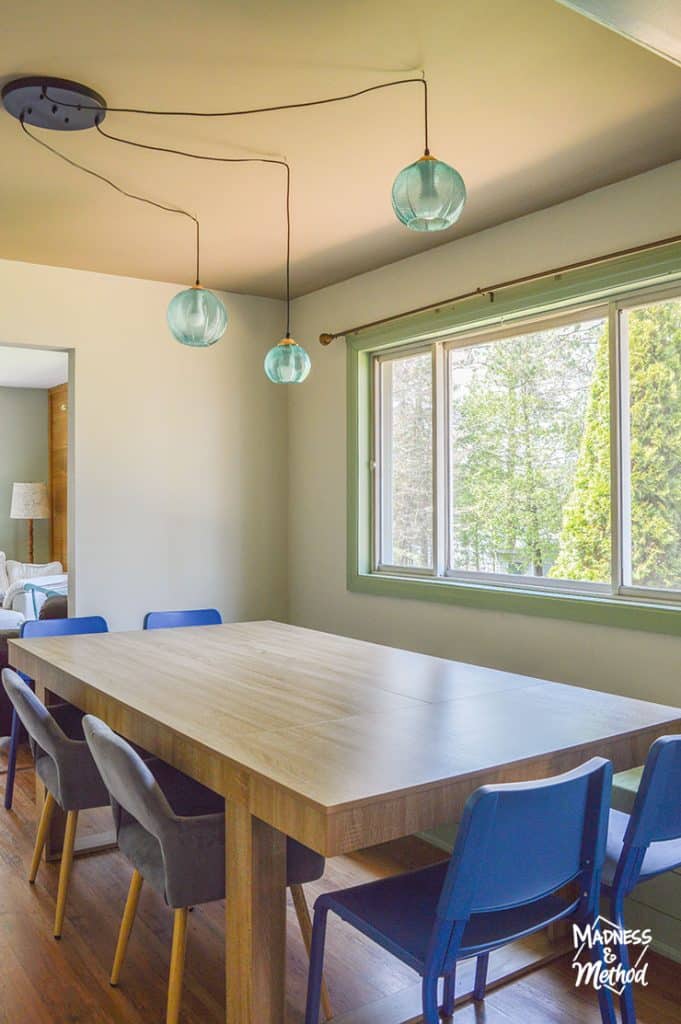
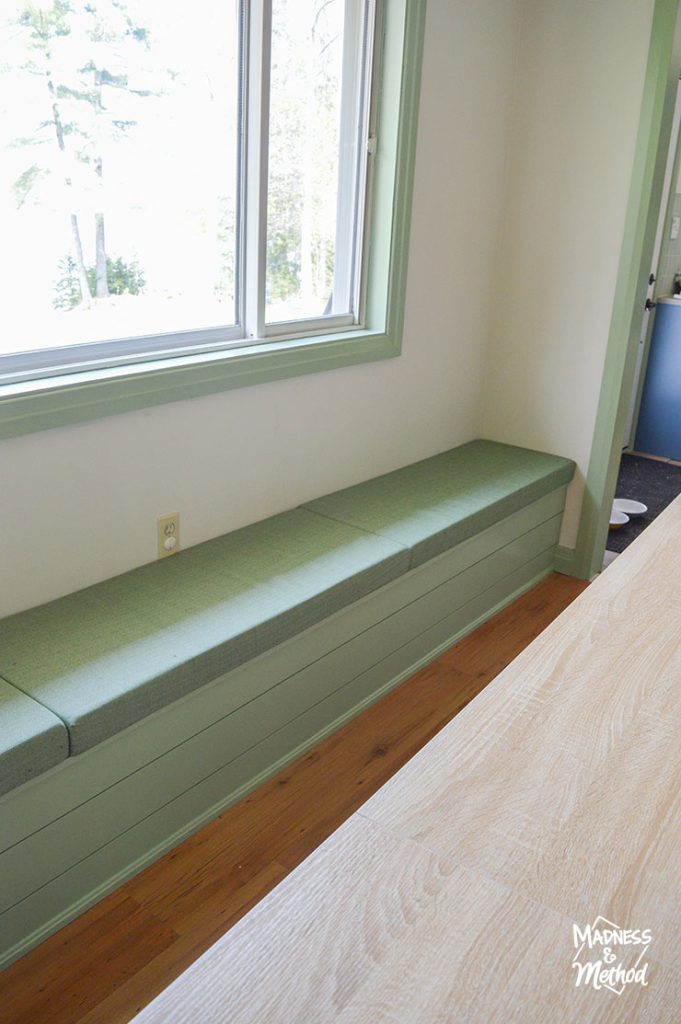
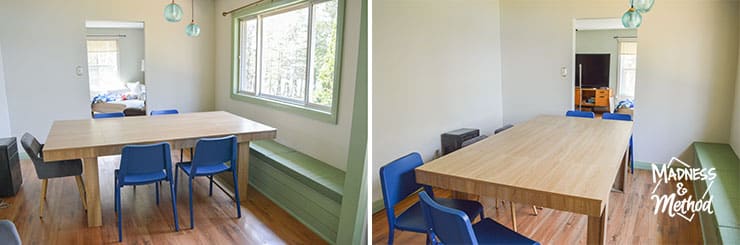
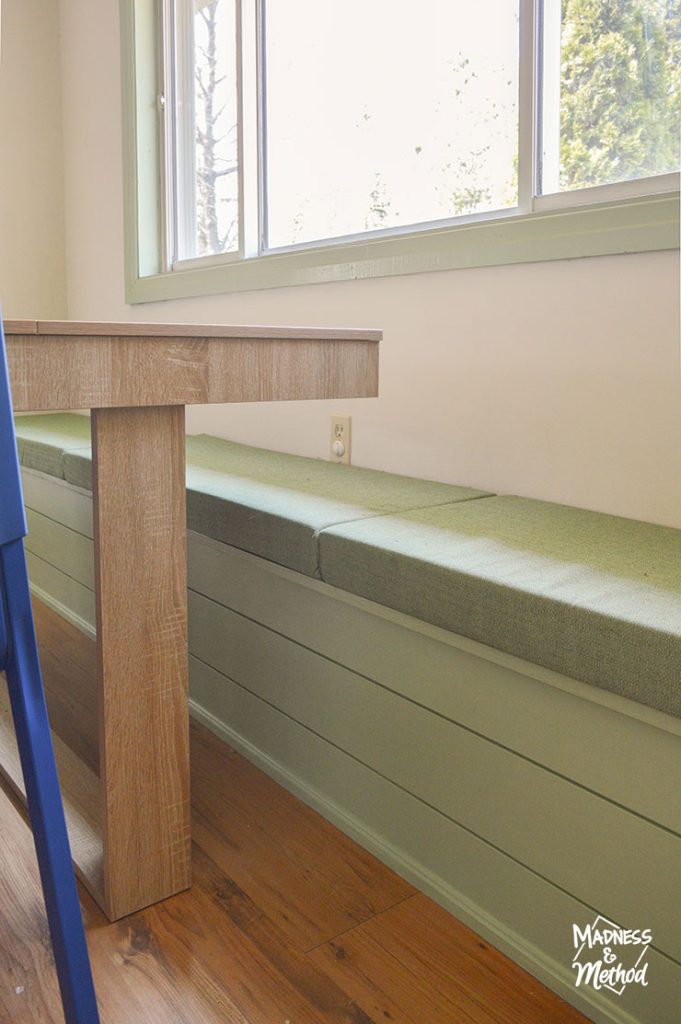
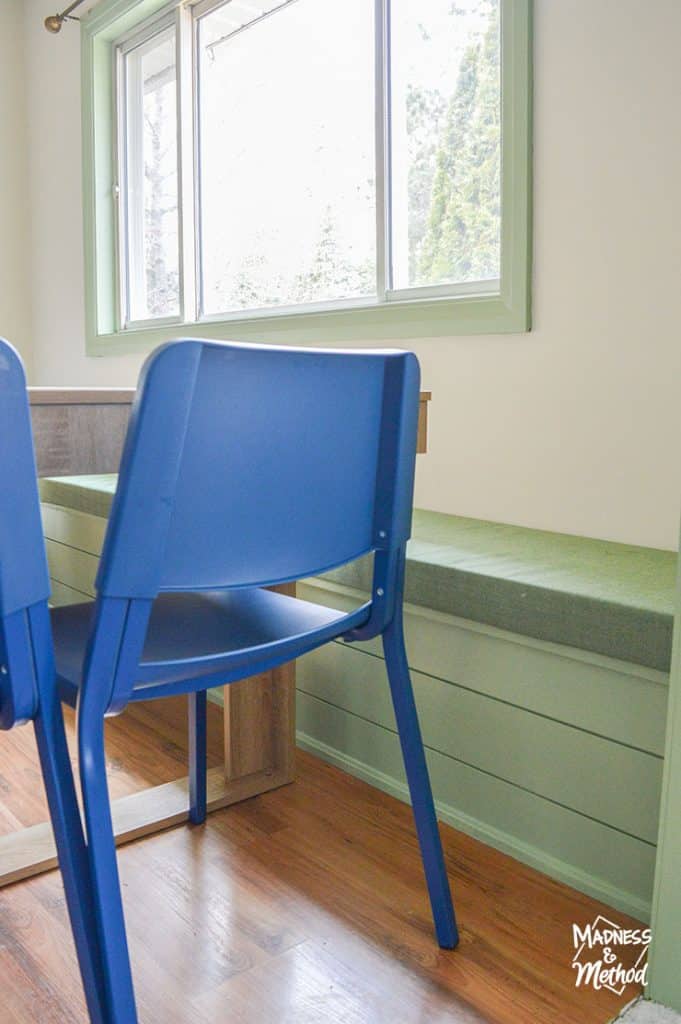
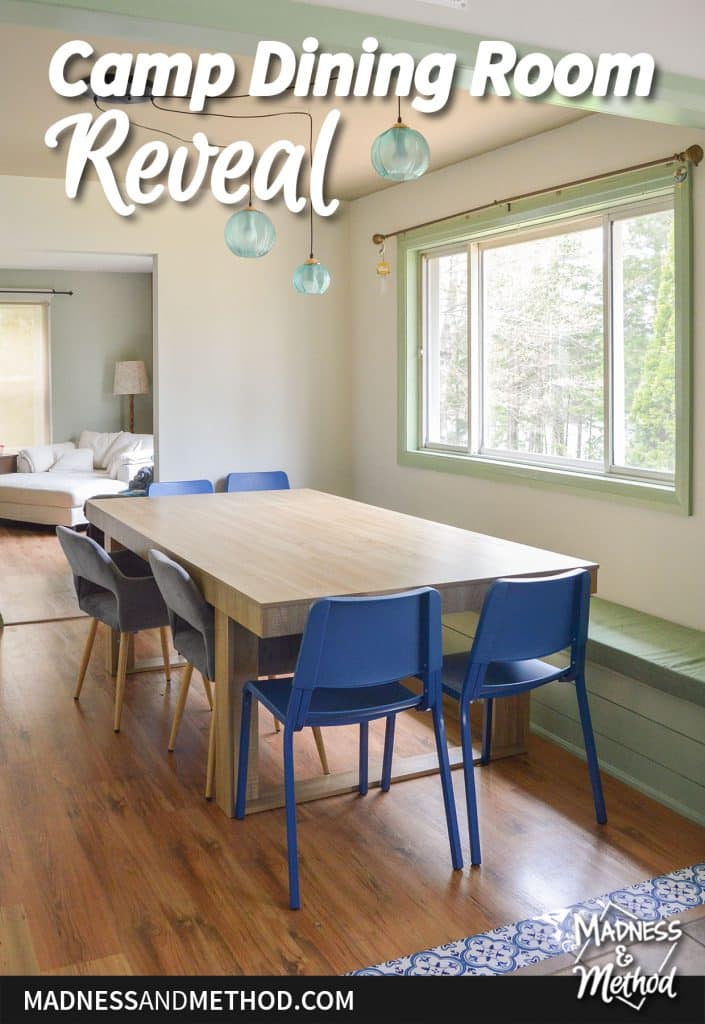
All of the trim in this room (including the built-in bench) was painted green – aka Seedling by Benjamin Moore. The walls are November Rain (also BM), and I kept the ceiling as-is. PS: yes this hanging light has been swagged over the table to avoid anyone hitting their heads.
The blue dining chairs new are from Ikea, and go great with our blue kitchen (there’s a sneak peek above!). The two grey fabric chairs I got secondhand.
We have the new table pushed up against the bench, and I anticipate 2-3 people sitting there.
Because of the new bench, the table is no longer centered in the room. I really, really wanted to open up a part of that wall to let the light pour into the hallway. Unfortunately, I’m 90% certain that it’s a support wall, so even doing a passthrough/hole wouldn’t be easy. Butttttt we could totally do a between-the-studs opening (like this) or even add shelves for storage (like this).
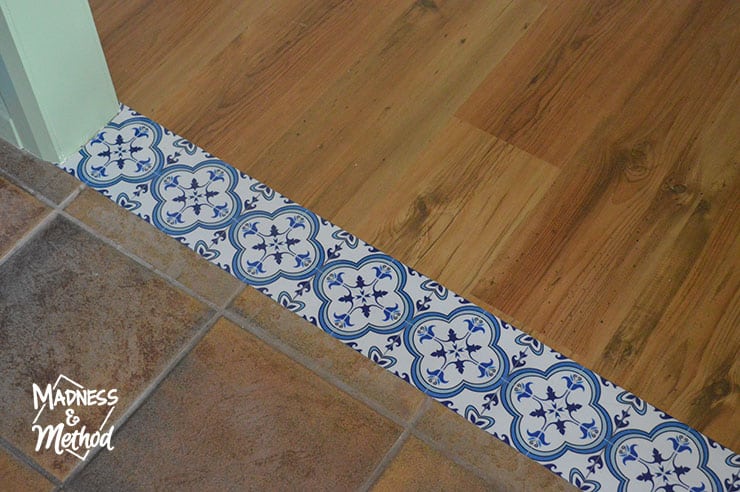
Fixing the Floor Gap
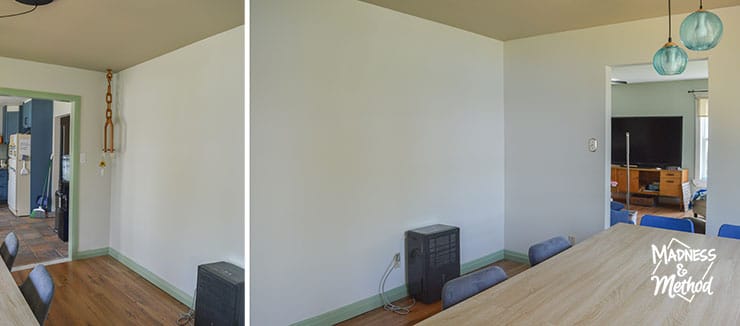
Remember when we removed the wall? (See photos/video link above). Yeah, well we were left with a really janky opening.
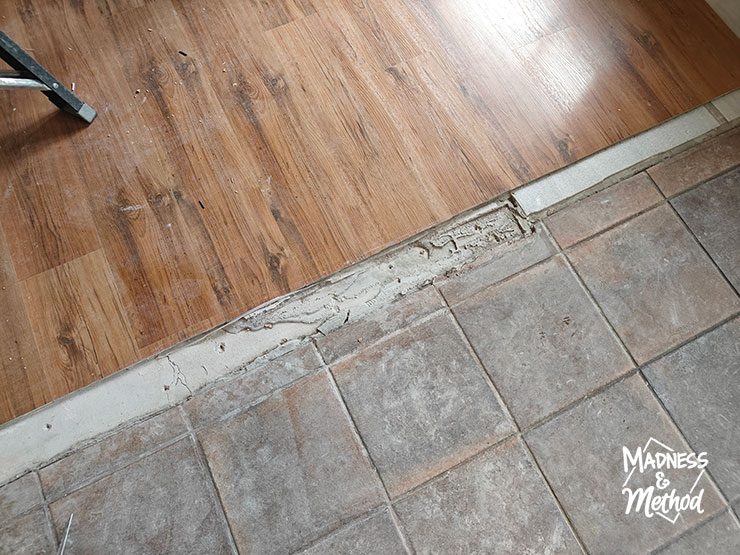
The width of the gap wasn’t the same all the way across, and one section had weird bumps from a past self-leveler. I chiseled out as much as that as I could, but we really needed something to hide the gap.
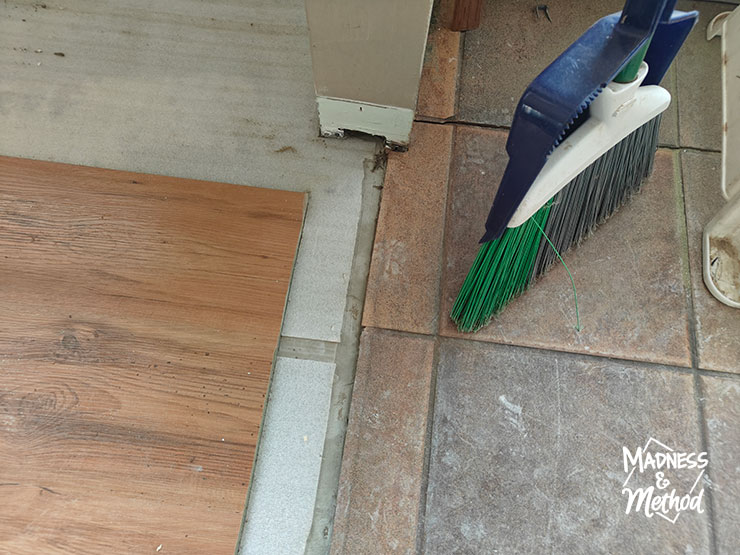
Replacing the kitchen tiles or the laminate in the dining room wasn’t in the budget/time-scope. We could have added a wood piece to fill in the gap, but the mangled tiles would have still been visible.
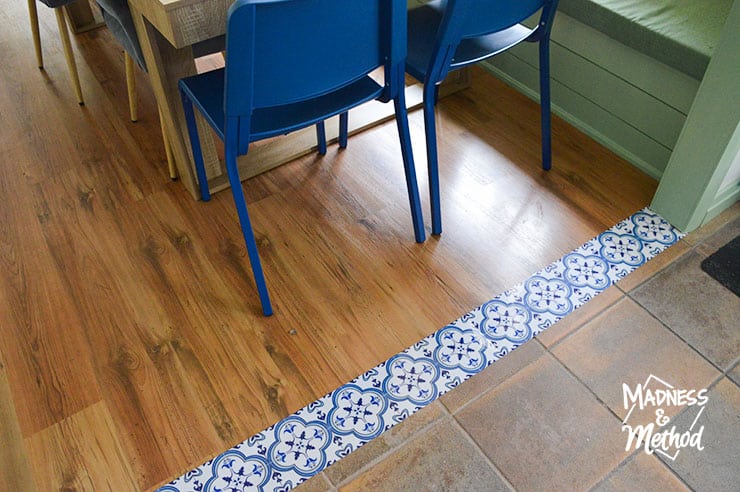
The best solution? Fill up the gap, then cover everything with some peel-and-stick tiles.
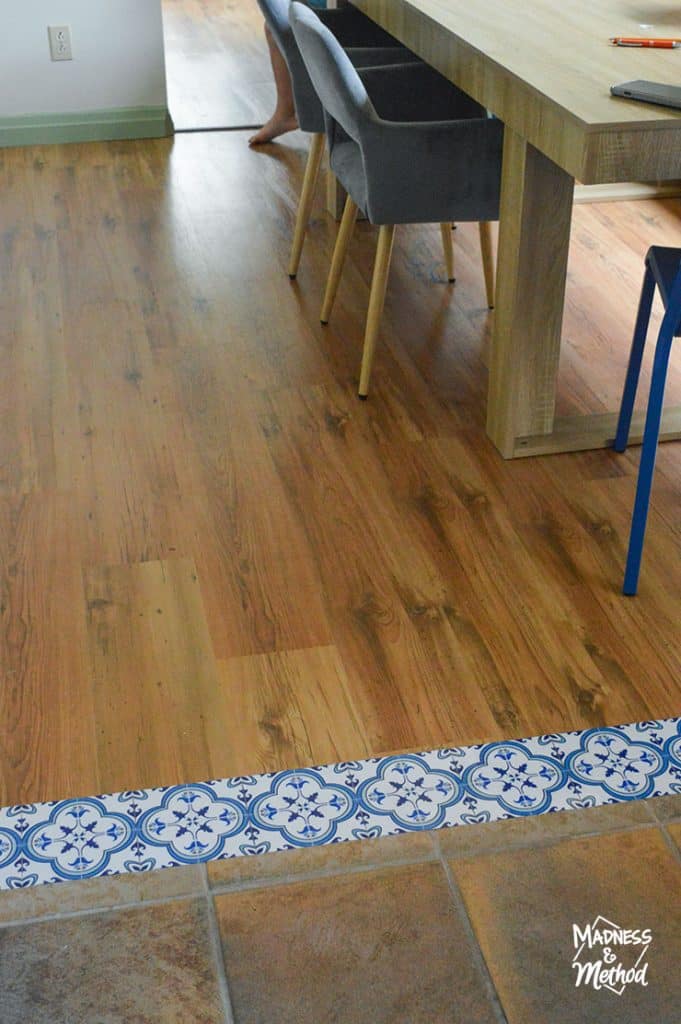
They are almost seamless, just a small ridge as high as the sticker is thick.
Here is a video showing the whole process a bit better if you want to see!

It’s hard to see in all the photos, but the stickers are super reflective/glossy.
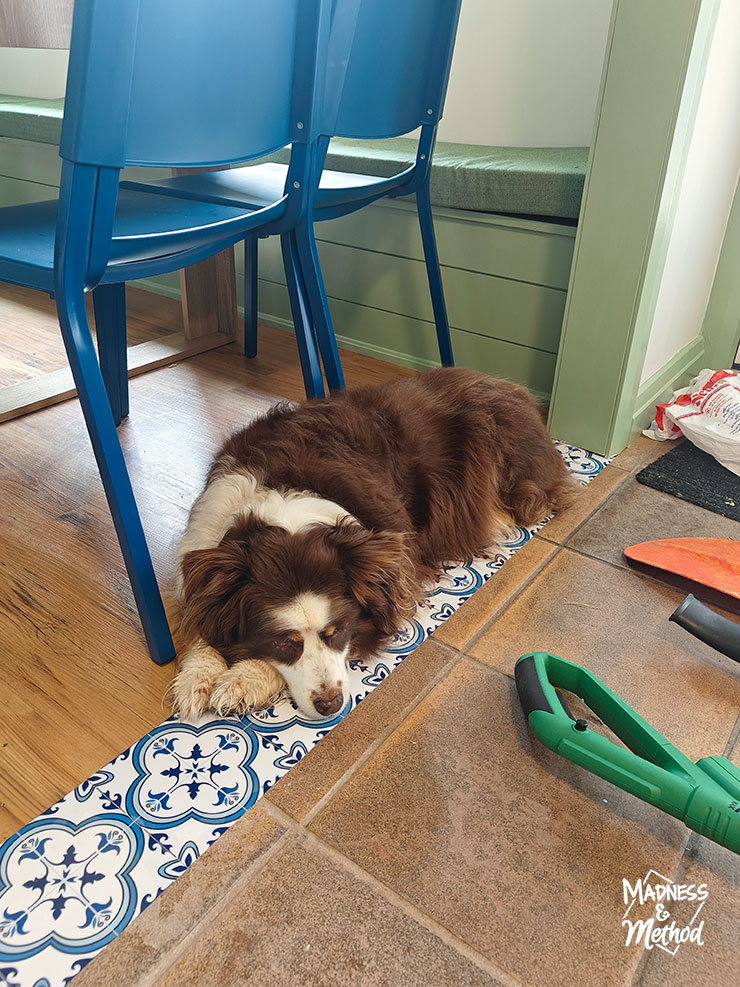
The kids/dog wasted no time walking all over them – so at least I know they can handle light traffic.
How they fare long-term is anyone’s guess. We may end up using stronger glue to hold them down, and I’ll keep you updated on how they look in the next few months.
Dining Room Reveal
Half the photos I took for this post are from before we put the stickers on, so just ignore that part, ha.
Another thing I did was explore the dining table placement…
Like… what if it was the other way? Or, what does it look like in the middle of the room!? Honestly, the table is super big, but I still think the way we have it is the best for walking around. It does leave that space on the left side of the room that’s kind of empty… but we could always put up a little shelf/stool seating. (Aka when we open up the wall!)
While I was really hoping to find a secondhand table, the constraints of what I needed were really specific. The old table was too small at 60×38″; and I wanted something that was between 84 and 90″ wide. In the end, this “conference table” fit the bill, but we’ll see how it lasts over the years since it’s not a solid wood top. As in, if someone stands on it, it would definitely break.
Should people stand on it? No, definitely not. Have my kids climbed a table before… ugh probably…
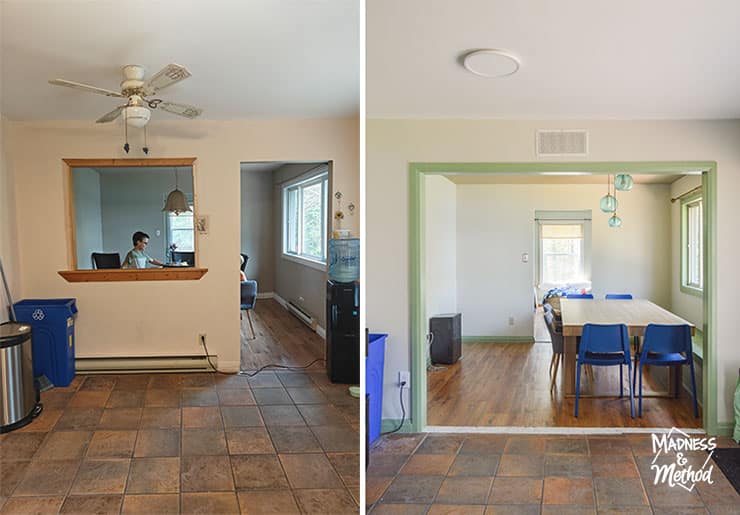
And here’s a reminder of what the wall/dining room looked like before. And the after with the open wall! Not sure if you can tell, but we did build the little right wall out a bit so it could accommodate the bench.
And yes, it may look off to have two chairs on the ends of the table with two on the long-side, but that’s all that fit between the table legs. One of the children set it up like that, and I was like… well that works!
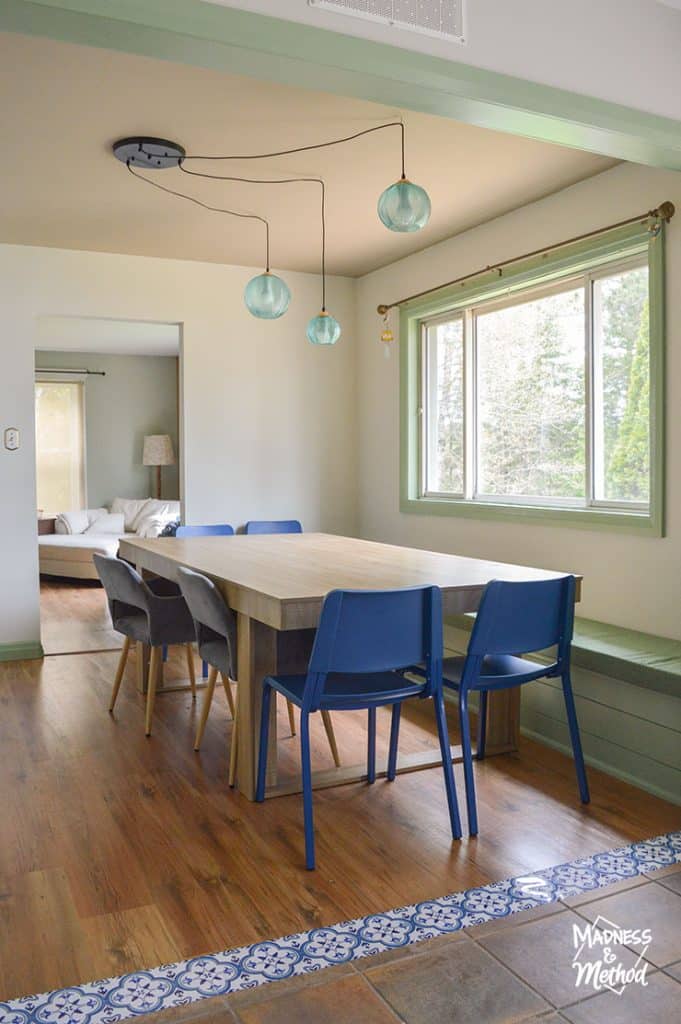
I kind of love how big the table is (it’s super wide at 47″) – which gives us lots of puzzle (and eating) space. My only qualm is the leg placement, so if we ever need a new table, we’d probably make something ourselves to fit perfectly here.
What do you think of this camp dining room reveal!? In case you didn’t read about our built-in bench, here were the real before photos of this room:
Remember, I kept the ceiling the same colour that it was. Not sure how the real-estate photos show a white ceiling, but it was the exact same colour as the walls. OH! And I have a plant for that wood hanger, so that will be a fun addition :)
🛍️ Shop This Room
- Hanging Dining Light
- Dining bench cushion (see the DIY steps here)
- Blue dining chairs
- Dining/conference table
- Paint Colours: November Rain (Walls), Seedling (Green Bench + Trim)
Next time I should be sharing the kitchen renovation photos – so come back soon :)

No Comments