
While I wanted to format the nursery renovation into a 6 weeks series of posts, I, of course had a BUNCH more projects to share with you for this room. I’ll probably be talking about different things for another month or so, and today is all about our diamond wainscoting wall treatment. This was certainly the largest/longest component we completed in the new nursery, so I’m about to share a LOT of pictures and all the DIY steps so you can recreate this look in your own home!
– Thanks to Metrie for providing all the finishing trim pieces for this space; and PARA who provided the paint. This post may contain affiliate links. See here for more information on affiliates. –
If you remember from the design plans I shared, I was originally debating on 5 different wainscoting wall treatment ideas using mouldings from the Metrie Fashion Forward Collection. (A lot of the elements were the same from when we renovated our basement, so I knew how they would look and function).

Image First Appeared in Deep Teal Nursery Plans
Anyways, with the Husband’s input, I decided on going with the diamond pattern and further mocked up the measurements for the room so I could order the correct amount of finishing products from Metrie.
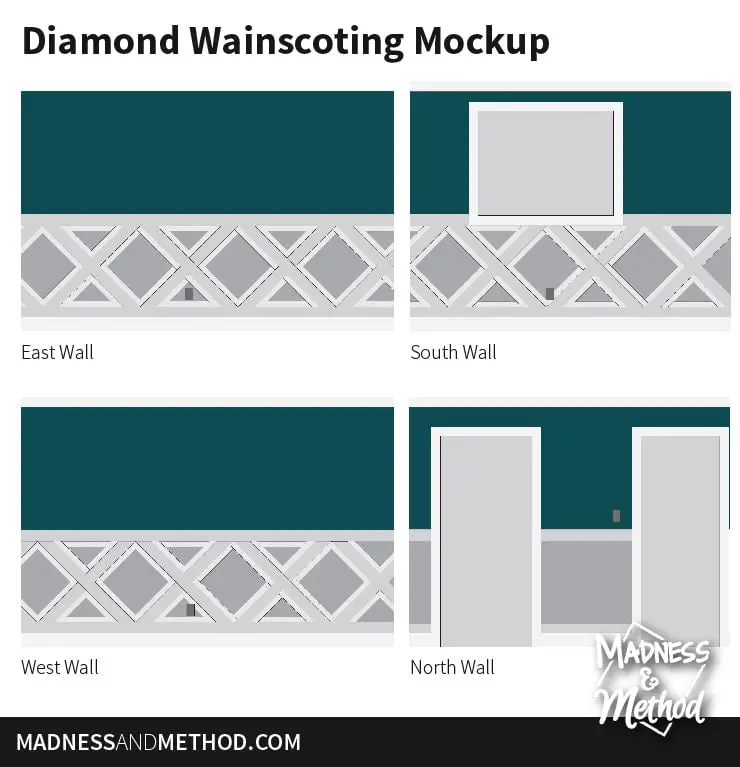
I made to-scale drawings of the space (including where all the outlets were) so that I could use it as a reference point on where to start the pattern. I decided to start on the East wall (which is the one to the left of the door when you walk in) and work my way around from there. For the space in between the doors on the North wall, I knew I wanted either the diamond or the x-shape to be perfectly centered in there, and would figure that out afterwards.
Finishing Pieces Used:
- Fashion Forward Scene II 5 1/2″ MDF Baseboards
- Fashion Forward Scene I 2 3/4″ MDF Casings
- Fashion Forward 4-1/4″ Fingerjoint Poplar Chair Rail
- 4-1/2″ MDF Stile/Rail
- Fashion Forward 2″ Fingerjoint Poplar Applied Moulding
- (And also the Fashion Forward Scene II 1-1/8″ MDF Panel Mould that I used for the flat door makeovers)
If you’ll be completing a similar wainscoting treatment, you’ll probably also need the following tools/products:
Materials Required:
- Level
- Chalk line
- Stud finder
- Nail gun + nails (we used different lengths)
- Measuring tape
- Drywall compound
- Caulking
- Mitre saw (and possibly Jigsaw)
- Primer + paint to finish
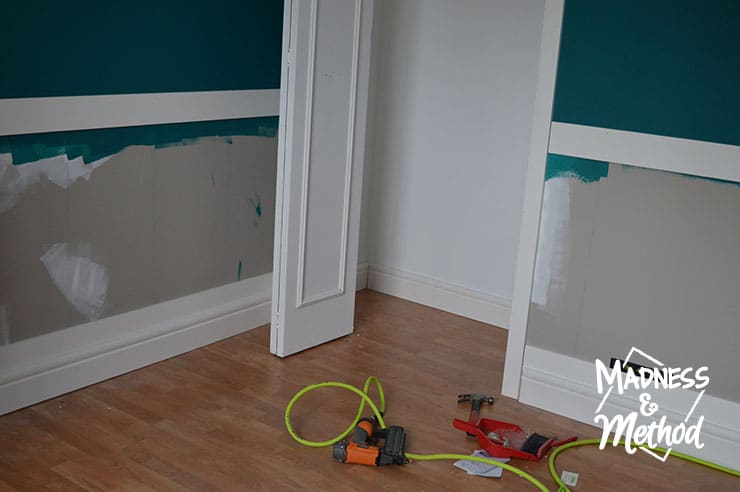
Because I had put so much planning into this diamond wainscoting wall treatment, I had determined the order of the steps to take for installation. The first real thing I did (besides removing all the old trim pieces) was to mark the studs with some chalk line. We definitely wanted to install our wainscoting securely, and this way I didn’t have to walk around with the stud finder to nail in every piece.
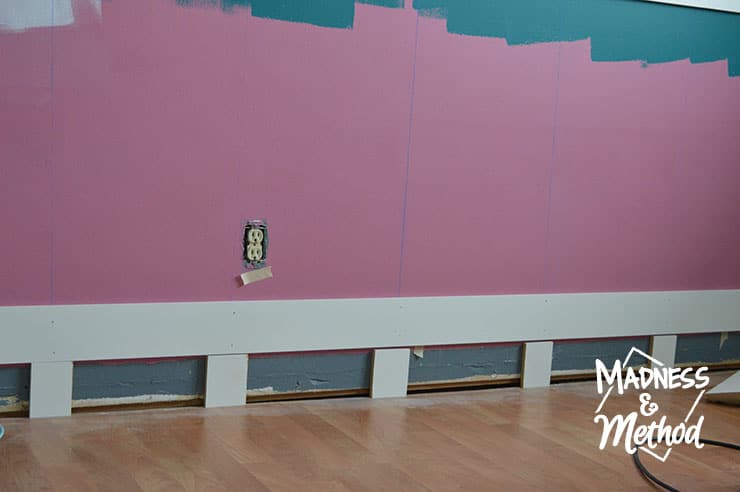
After we installed the casings along the doors and window, it was time to work on the diamond wainscoting! First up was adding the flat stiles along the bottom of the walls (in front of the baseboards) and at the centerline (where the chair rails would sit). I was originally hoping to stack two stiles on top of each other, but unfortunately, our floors aren’t very level, so we decided to cut little pieces and use those to hold the base pieces in place. The Husband said we should just line everything up with the ground BUT THAT IS INCORRECT!
Whenever you’re installing trim (or flooring, whatever) you want your pieces to be lined up to a true level or else the entire room will be wonky. You can always accommodate a larger or smaller gap in a few areas, but you wouldn’t be able to easily hide a completely off-kilter space. Know what I mean?
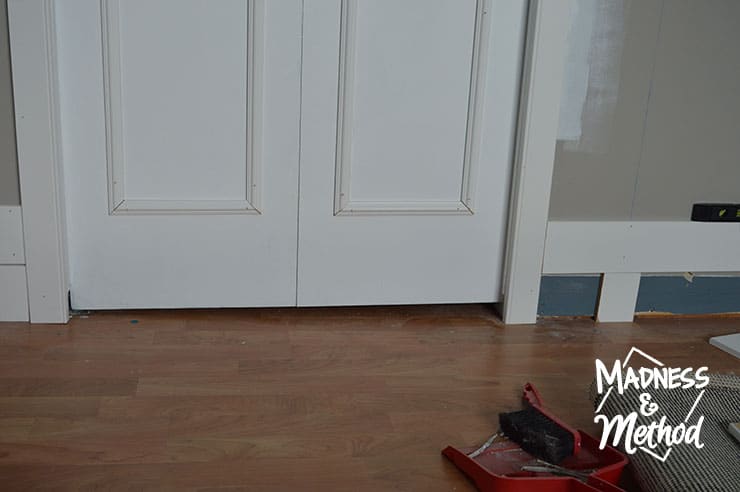
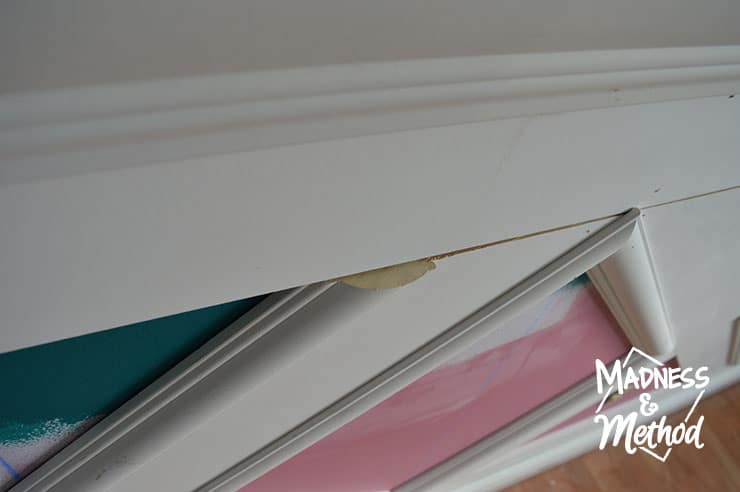
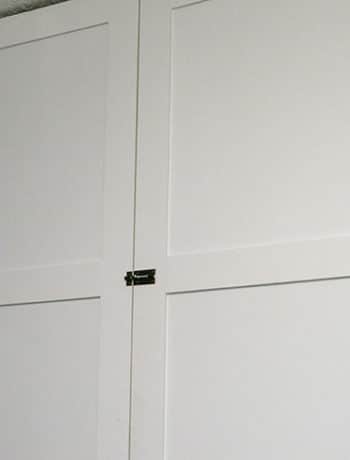
When I talked about our upgraded flat doors, I mentioned that they weren’t level in the room. Here you can see how much the bottom gap is off, and by having all your trim pieces level, you only have that one thing that isn’t perfect.
The next step was adding the baseboard across the bottom pieces of the flat stiles (and also into the closet). I made sure that they were taller than the stile pieces (so there wouldn’t be any visible seams) and we also checked the level on all of those pieces before we nailed them in.
I wasn’t 100% sure what height I wanted the top pieces of the wainscoting, so before we even installed the horizontal stiles, I brought some smaller cut pieces in to see what looked best around the window. I was worried that we would have to cut a notch out so that the chair rails would line up nicely (I didn’t want a super huge overhang) but in the end, it looked great with just the bottom overlapping.
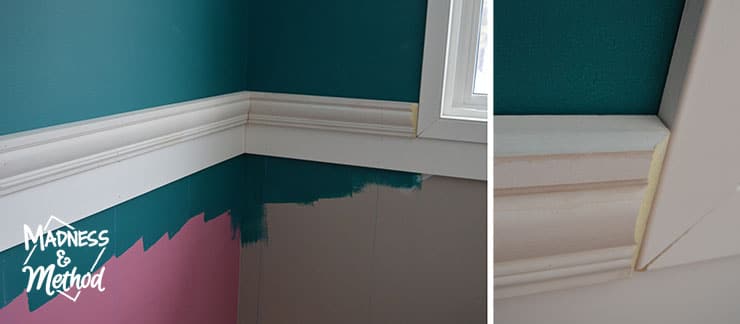
Another thing we made sure to do (because the chair rail pieces were much thicker) was to cut a little chamfer corner out to match the depth of the casings. I did the same thing in our basement, but I never really mentioned it then. Basically it creates a smooth transition between pieces so you don’t have a big notch sticking out (and you avoid walking into the piece sticking out, ha!).
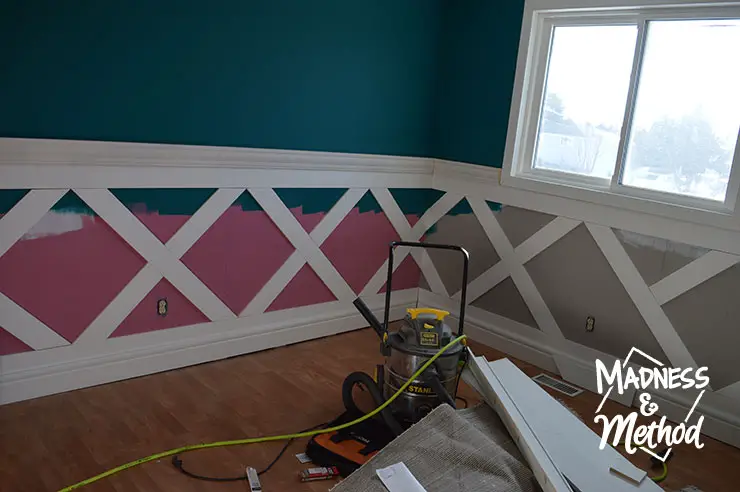
The Husband helped me cut and install all the long pieces around the room, but once that was done, it was all up to me to create the beautiful diamond pattern. Ha, I actually screwed up the first piece I installed because I just eyeballed it (I wanted it centered over the outlet).

It was easier to do once I had my small pieces cut, then, of course, I checked to make sure everything was level and nailed the pieces into place. From there, I continued adding the flat pieces on the East wall and eventually made my way around the room (over a few days!).
One thing I do wish I had planned/done differently was to install vertical pieces in all the corners. While I don’t think that the full 4-1/2 would have looked good, perhaps cutting those widths in half would have been better visually.

This could have saved me some cutting headaches and helped avoid imperfections since the pieces would have just butted up against a flat section (rather than me trying to figure out the angles around the corner), which didn’t line up perfectly.
Lesson learned for next time!
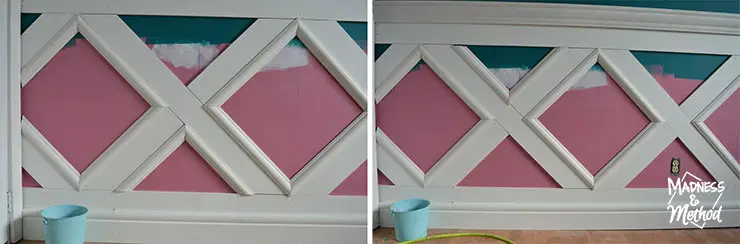
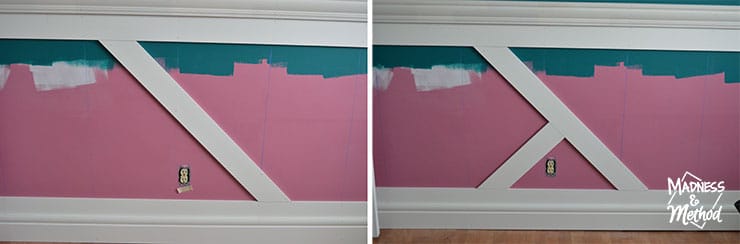
Once all my flat stiles were installed, I had some details to add to the diamond shapes using the applied moulding pieces. Like the chair rails, they have little edges cut out so that they fit perfectly on the 1/2″ stiles. I cut all the big diamond shapes and was also planning on filling in the half-diamonds too. However, once I cut a couple of test pieces, I realized I wasn’t so keen on the look, especially on the top sections.
It would have obviously been best if I could have wrapped the pieces around the holes completely (like with the big diamonds), but the angle would have been nearly impossible to cut. This left an obvious flat edge that would have really stuck out at the top, and while we could have chamfered it as well, I didn’t think that would look right at all!
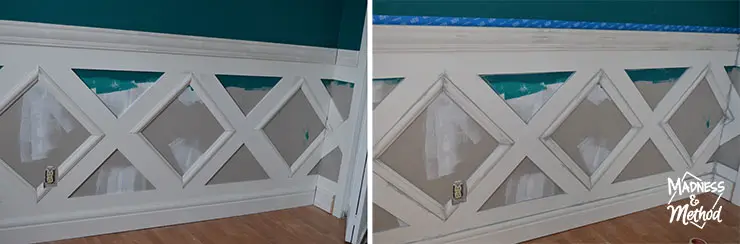
In the end, I left the half-diamonds with the “bare” edges, and after completely installing all the applied moulding pieces, went in and patched the seams and nail holes with drywall compound. Once that was dried and sanded, I caulked all the inside seams and along the areas where different profiles met. Ha, I accidentally bought the grey caulking (so you can really see it in the photo above on the right), but I knew I would be priming it (then painting it grey anyways) so wasn’t too worried.
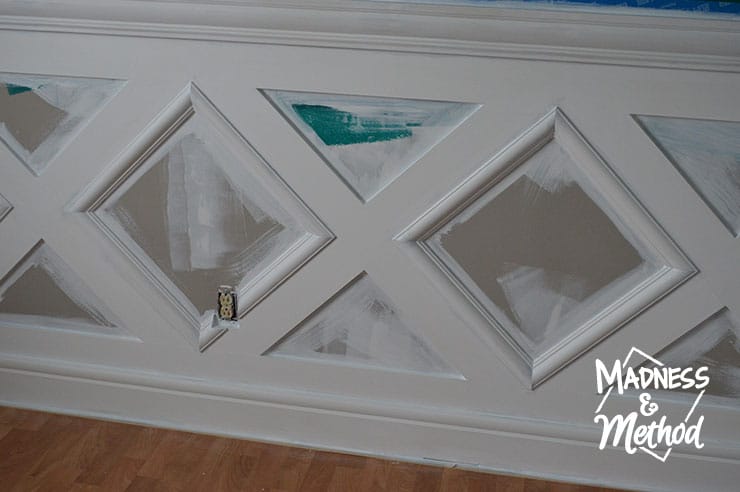
From there I primed all the caulking and drywall compound, and was excited that I was in the finishing stretch on this diamond wainscoting wall treatment project! (Not sure if you can tell how laborious this project was, but just giving you a clue, it took me several hours, over several weeks to get everything done). Each small step would take me a good solid 2 hours (since I worked mostly during Zachary’s nap times!) and the caulking alone was 2 hours per tube x 4 tubes!
Thankfully we had a babysitter come in the first weekend (so the Husband and I could work together and knock out the large pieces), but most of this was completed on the weekends whenever I could sneak some time in.
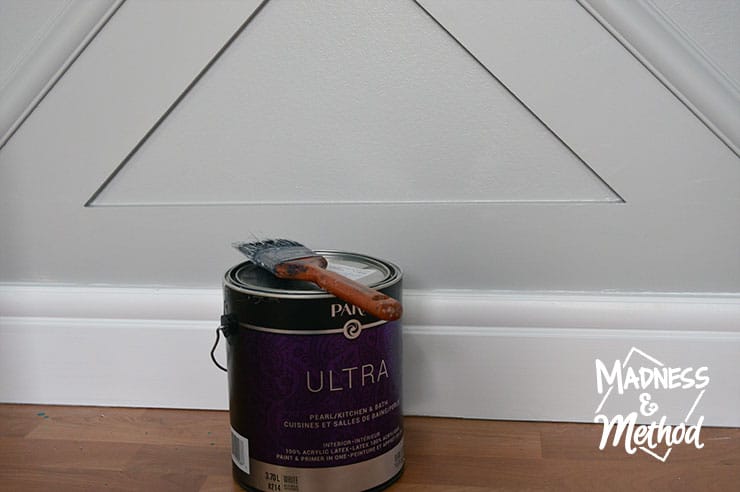
FINALLY, we got to the painting, and I did about 2.5 coats of PARA’s Livingsten Grey on the main diamond wainscoting, and then a few coats of the pure white gloss paint for the baseboards and casings.
Ha, most of the painting I tried doing at night when the little one was sleeping (since it was quiet and his room is right next door), but I would realize the next morning that I missed a bunch of spots!
Diamond Wainscoting Wall Treatment Photos:
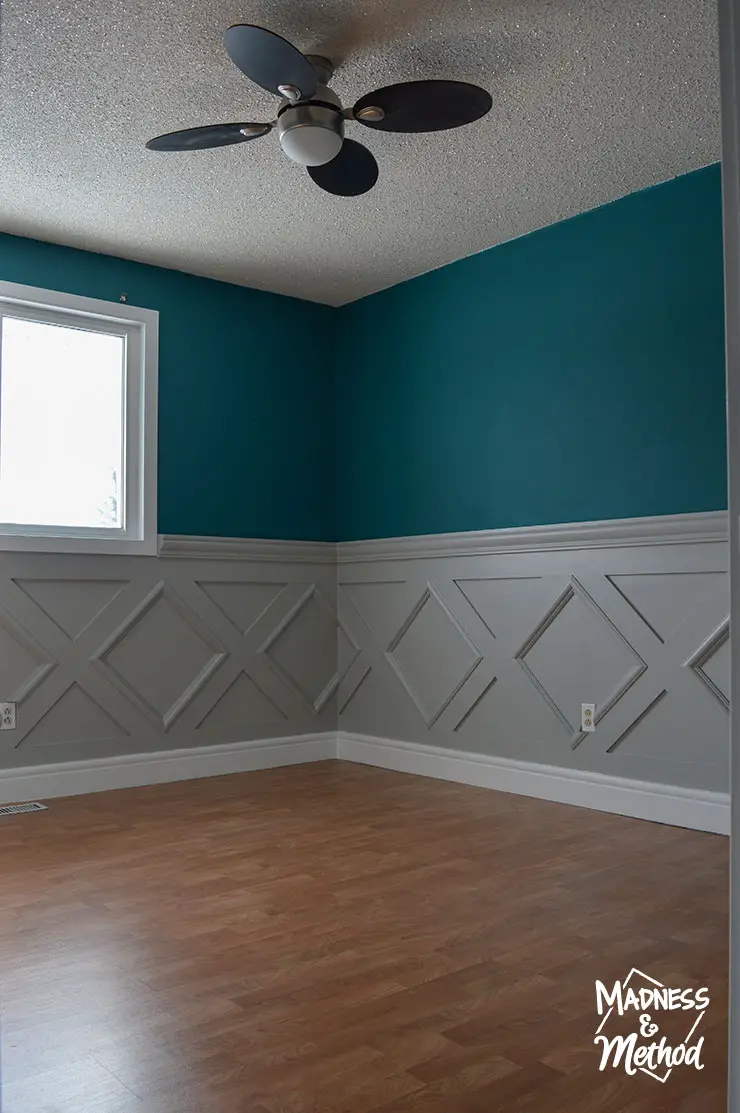
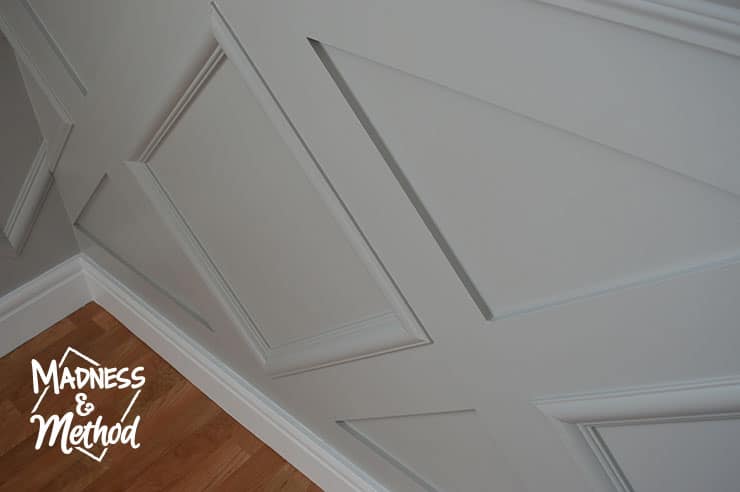
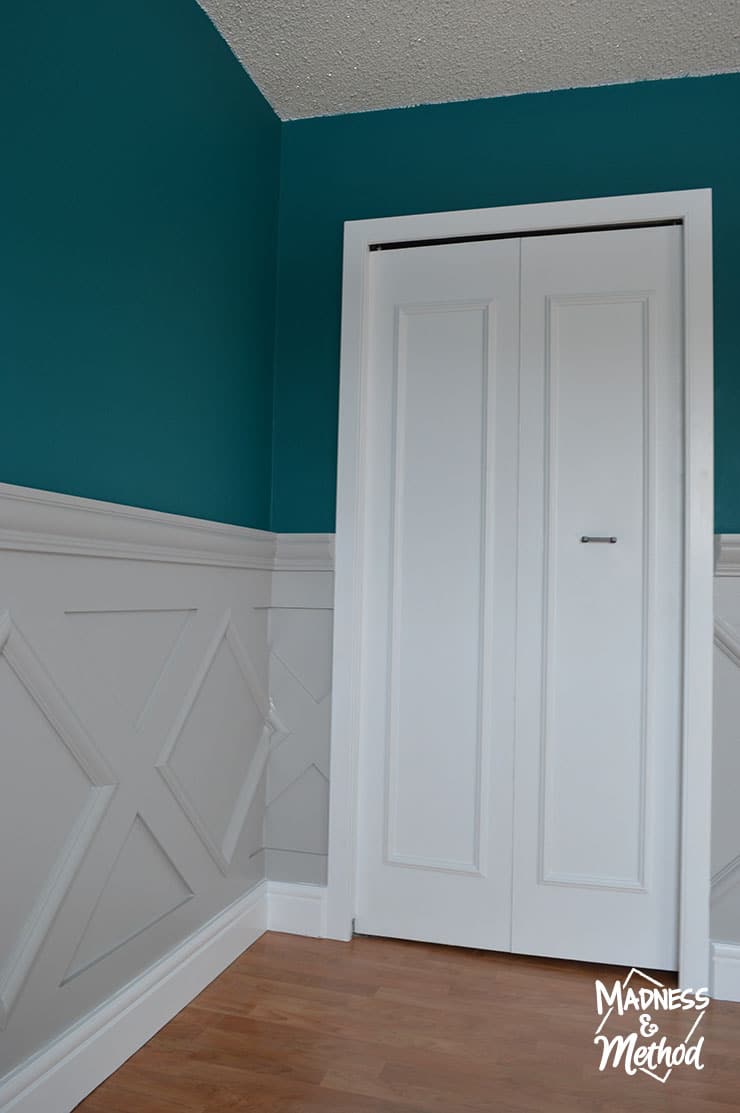
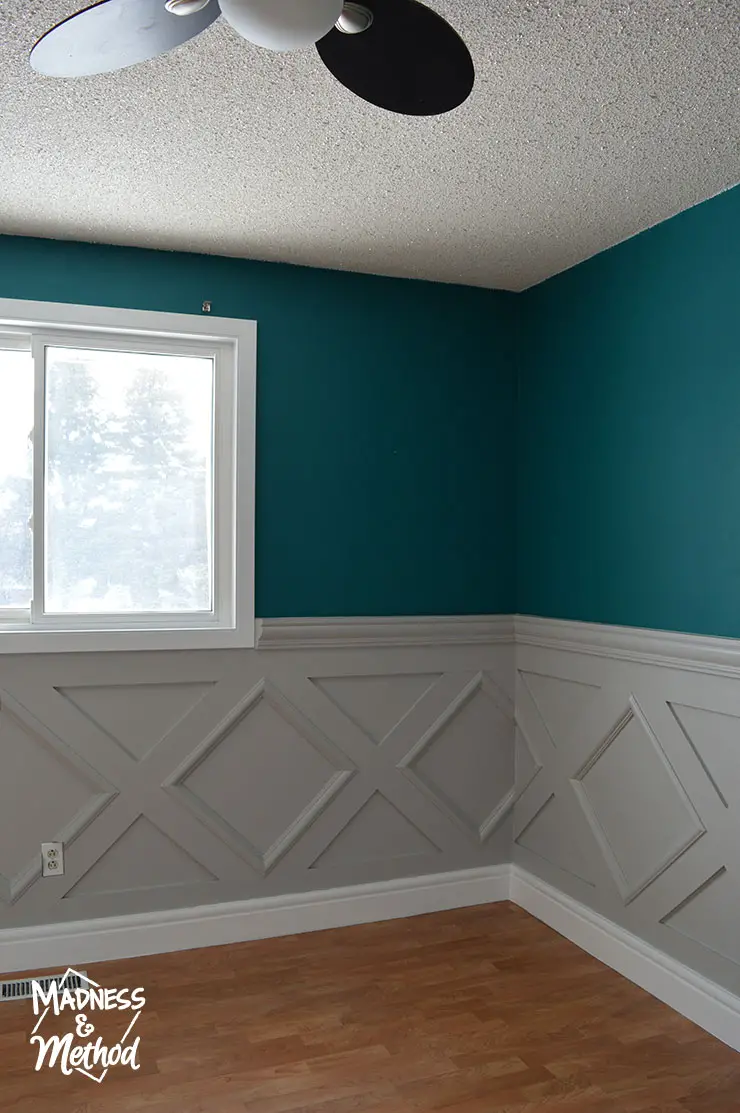
And here’s how everything looks from the door, once I was finally able to clear out the room (including washing the paint + muck off the floors). We also figured out how to flip the ceiling fan blades over to the other side, so now it’s all black and looks much better!

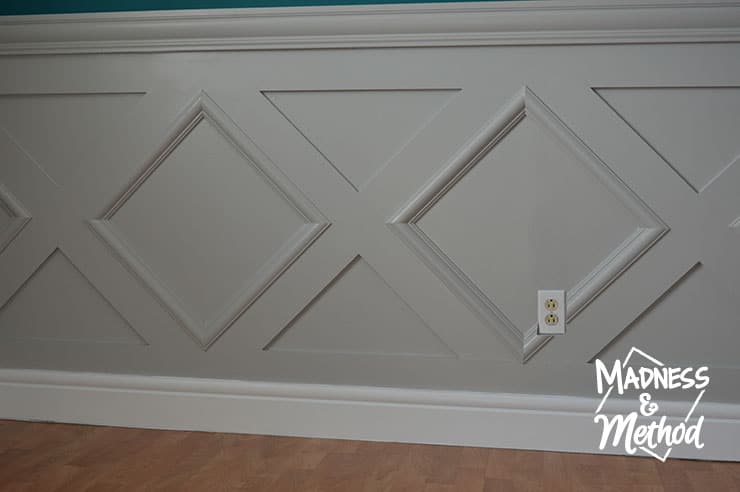
Starting on the left/East wall, I’ll go around the room so you can see every single section. Remember how the floors were super un-level on this side? I do still have a bit of a gap to fill in here, but everything else has been nicely finished (I just ran out of caulk!).
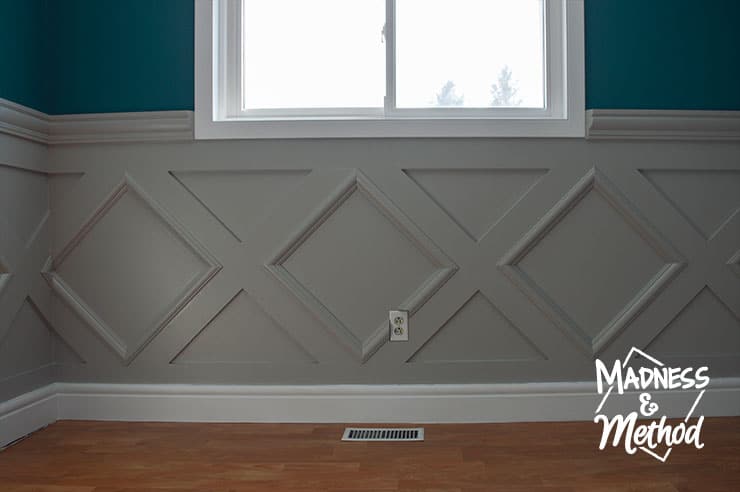
We only had one outlet on each long wall, and unfortunately I did have to notch out the trim pieces to fit around the covers. Once I determined what the size had to be, it was actually a quick cut or two with the jigsaw, and I think it looks pretty good!
(Well, minus the fact that the outlets are beige and white!)
Now that all the furniture is in the room, you can’t see as much of the wainscoting compared to when it was empty – so that’s why I want to share all these pictures, ha!
Plus, you know I spent so much time, so definitely need to show it off :)
When I shared the door makeovers at the start of the project, I didn’t want to give too much away for the wainscoting (and we weren’t even close to being done). Now you can see how everything works together and looks much more cohesive and “fancy” compared to before.
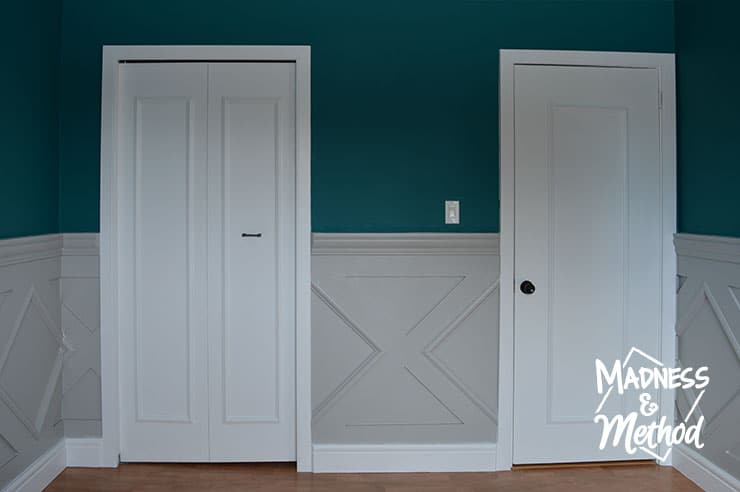
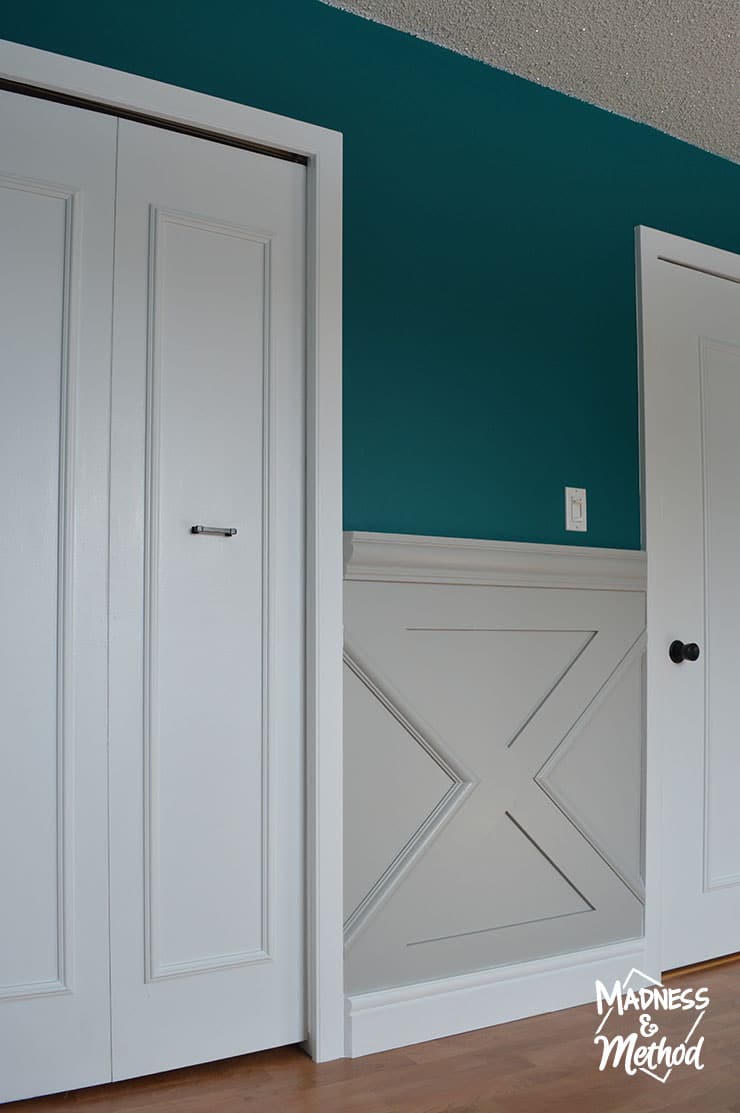
For the small section in between the doors, I went with the centered X since I just happened to have a diagonal piece cutout that fit perfectly already. The flat edges of the applied mouldings actually fit nicely in between the thicker casings, and I didn’t have to do any chamfering to make smooth transition areas.
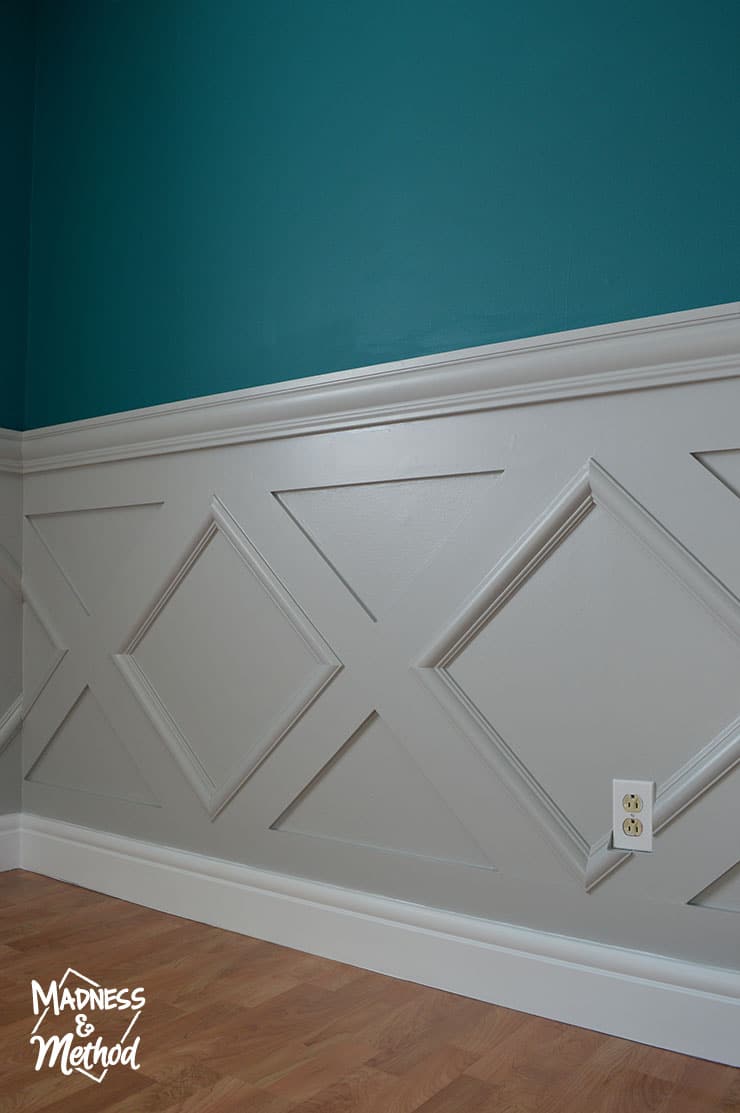
I had planned to always keep the casings and baseboards white (since I like that classic style) but wasn’t sure how it would look with the gray wainscoting. I’ve seen some great examples of all-gray (or all whatever) wainscoting online, but in the end, I do think it’s pretty sharp, and I’m happy I went with the contrast!
When I painted 3 of the walls gray in this room, I was thinking that any future homeowners might not like my original full/bold colour choices. Now, technically half the room is still a neutral gray, but I do get such a great impact with the PARA Jasper Park teal colour on the top half. While I don’t see myself ever painting it, I could technically still change up the top colour to get a completely different look in here.
I hope all the steps I shared for our diamond wainscoting wall treatment help if you’re planning on doing something similar in your own home! Just remember to have vertical pieces in the corners so you don’t have to deal with weird angles, mark your studs ahead of time, and make sure everything is a true level (and not just lined up with the ground).
I already mentioned that it was a time-consuming project, but it adds so much to the space and makes the 10×12 sized room look larger (and of course, fancier!). And you know I’m already planning a bunch more similar projects, so you’ll have to stay tuned for other great ones in the future :)

1 Comment
10 Ways To Make Your Dining Room Look Amazing – DIY Home Sweet Home
July 6, 2020 at 12:14 pm[…] Diy your own stunning wainscoting wall treatment. Madness & Method […]