

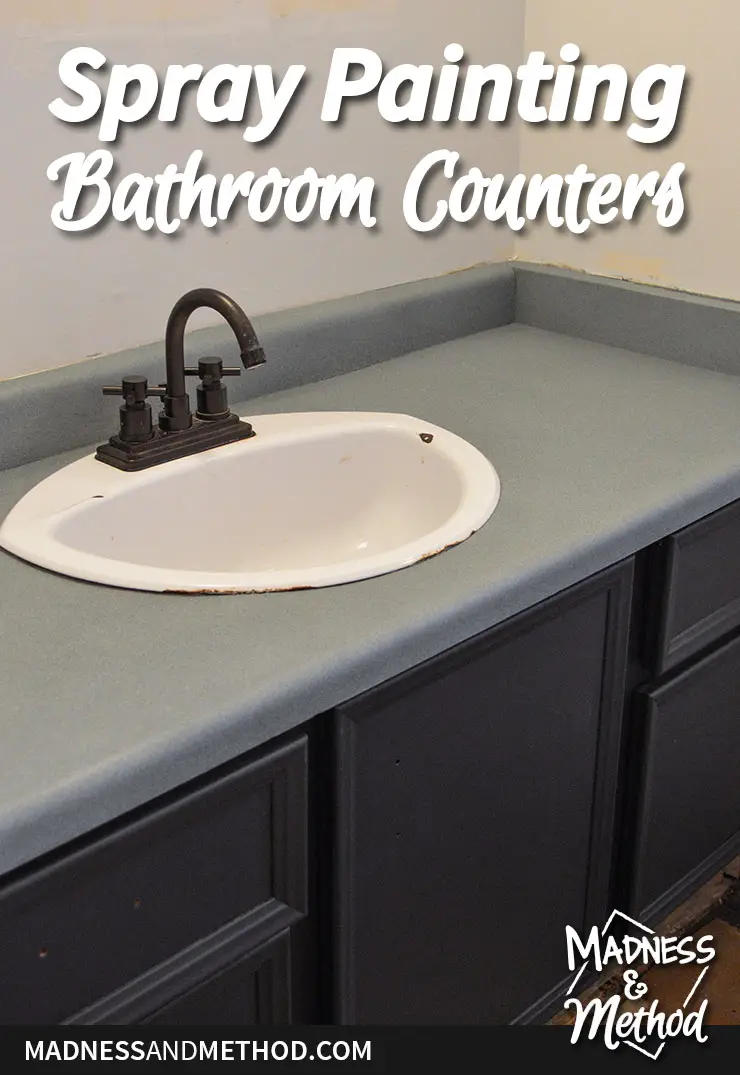
Have you ever done something and it didn’t quite turn out as you expected? BUT you learned things and were excited to try again? Well, that’s exactly what happened to me when I tried spray painting bathroom counters once (for my brother’s budget bathroom makeover). A couple of months ago I had revisited the room to see how it held up 3 years later because I was itching to try spray painting our bathroom counters too! So, let me chat about how I did things differently this time!
– Note: This post contains affiliate links. See more information about affiliates here. –
But first, a recap: we’re just over the halfway point for the Fall One Room Challenge. Go back to week one to read the white and rainbow bathroom plans, then check out the floor removal post and last week’s update about painting bathroom shower tiles. Basically, the theme of this bathroom makeover is to use what you have, but paint it all!
I am going to list all the steps (and I have a video that you can watch below) that goes over everything in detail. You can always watch the video on YouTube here too.
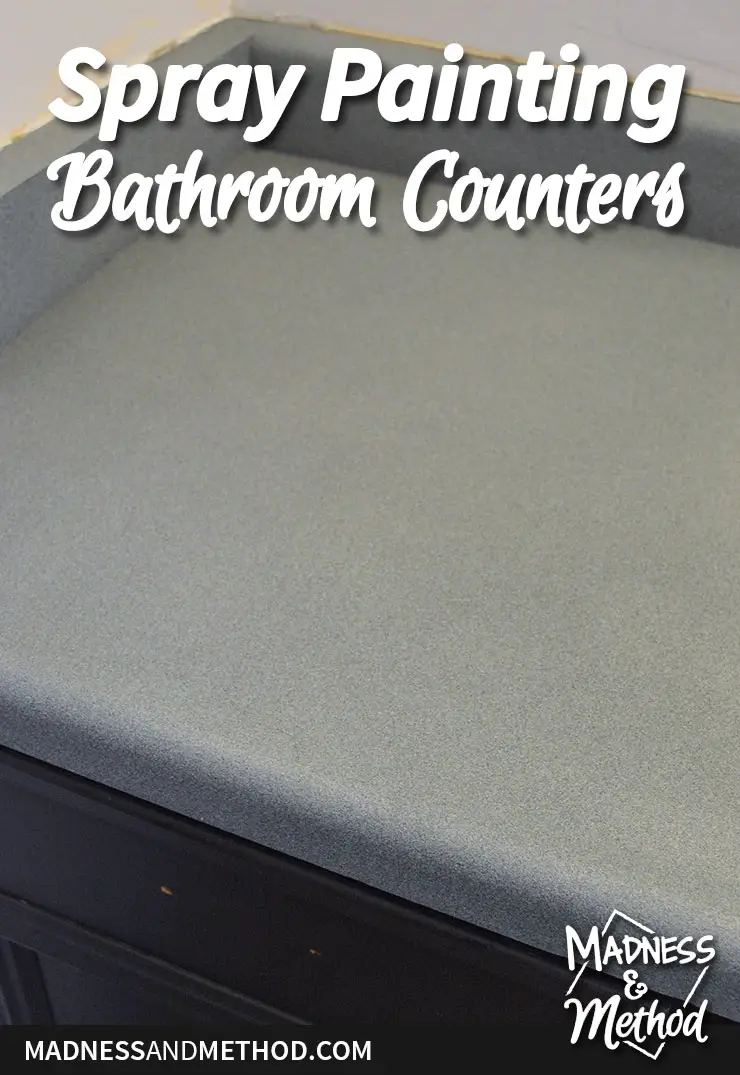
BUT I won’t really know how this spray painting method (2.0 we’ll call it) will turn out until we use the counters for a few months/years. So far, so good, but this bathroom hasn’t been getting as much regular use since it’s still a mini construction zone
Materials Needed for Spray Painting Counters
- Caulk removal tool (similar one here) or a utility knife
- TSP (gloves, rags, sponges, etc)
- Strong primer/paint in a similar colour to the desired countertop (I used Floorguard Floor and Porch paint in Dove Gray)
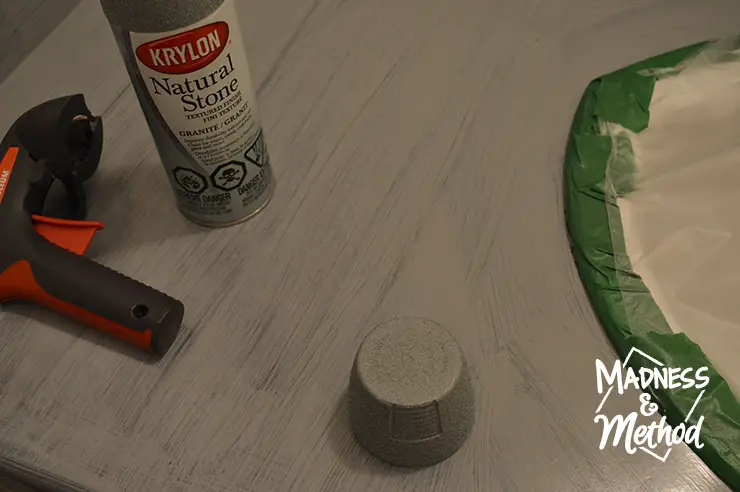
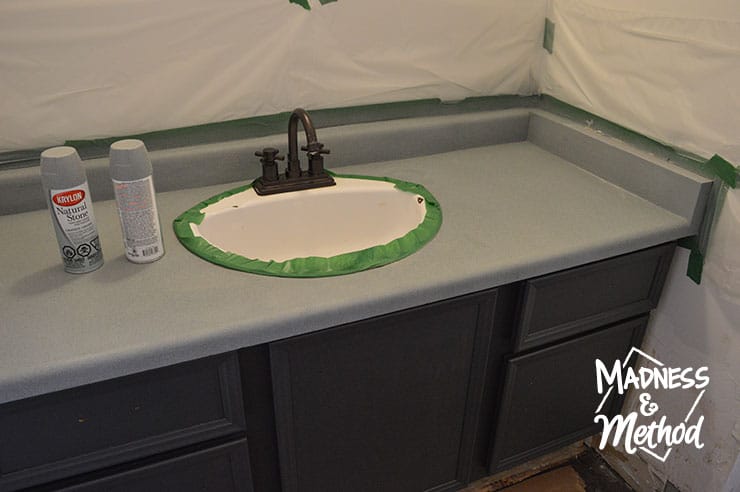
- A few cans of Krylon Natural Stone in Granite *similar (or whatever colour you want)
- Satin Polycrylic (or whatever finish you want)
- Misc. painting supplies like brushes, tape, Press and Seal, cardboard, caulk, etc.
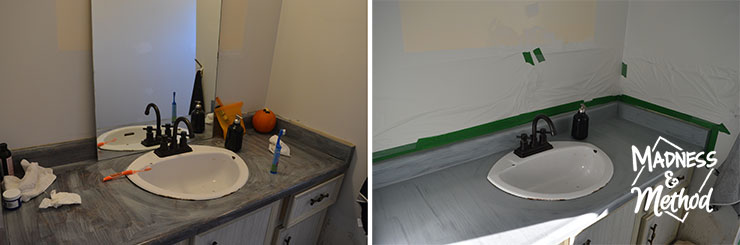
Before we get to the steps, let me remind you what we were working with:
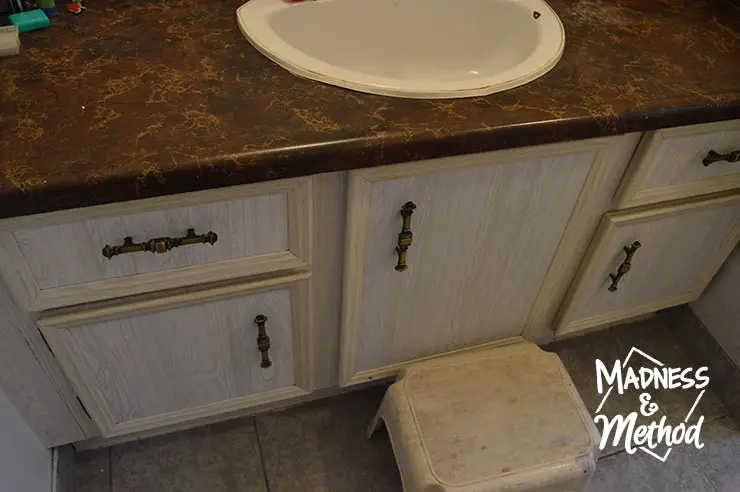
A wide, single-sink vanity with dark brown faux-marble countertops and off-white doors/drawers.

It’s not my favourite for storage/looks, but we’d been using it just fine for a few months and it would have been way too expensive to replace.
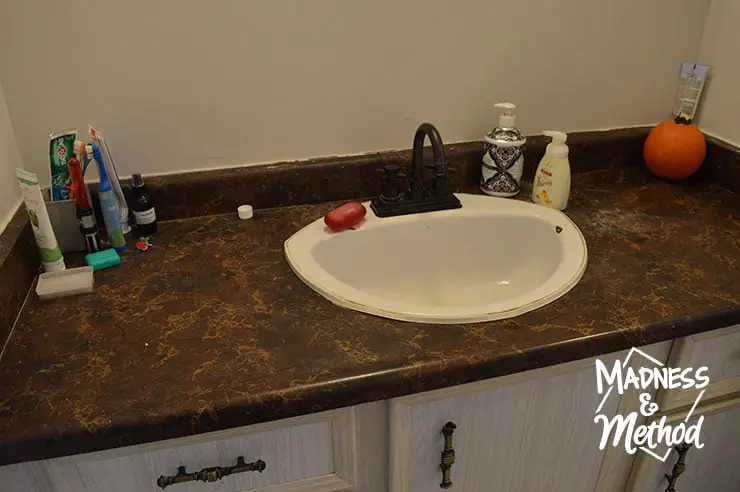
The countertop was in rough shape (there were some weird missing colour spots), so I knew we wouldn’t be losing anything if we painted them!
Step 1: Prep + Clean
First thing you’ll need to do is remove any caulk or sealers on your bathroom counters. You’ll also want to give everything a good scrub using a water/TSP mixture (follow the directions on the box).
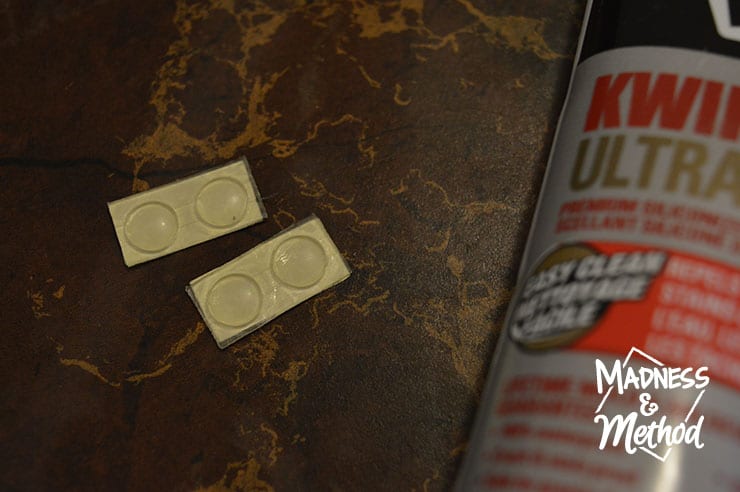
There was a rubbery seal thing around the counter that was in rough shape. The counter was a bit loose after I took it out. I think it was supposed to be a soft buffer so that the sink wasn’t resting directly on the counter. I had some cabinet door stickers that I sat underneath it, then glued around to stick it in place.

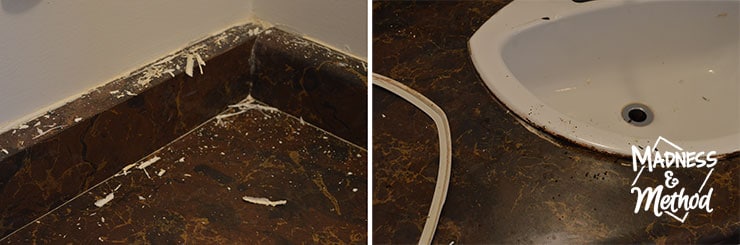
NOTE: If there are any areas that need to be patched/filled in – do it NOW. (I had to go back and do it later, and it was an extra few steps I could have avoided). We had the cover on the sides break off when I was cleaning them. I glued one back on, but the other broke so I left it off.
Step 2: Prime/Base Coat
The paint wasn’t mixed well the first time, as it seemed extra clear/wet the first coat. I made sure to mix it a lot better the second time, and it worked better.
I chose the colour because it’s what I had already AND it was an almost perfect match for the Natural Stone spray paint colour I chose.
NOTE: Make sure your base coat is perfectly covered. I did find that I could see a few of the bigger lines through the first coat of spray paint – so just do a nice coverage to avoid that. (You know, mix it properly both times, ha!).
Step 3: Spray Paint
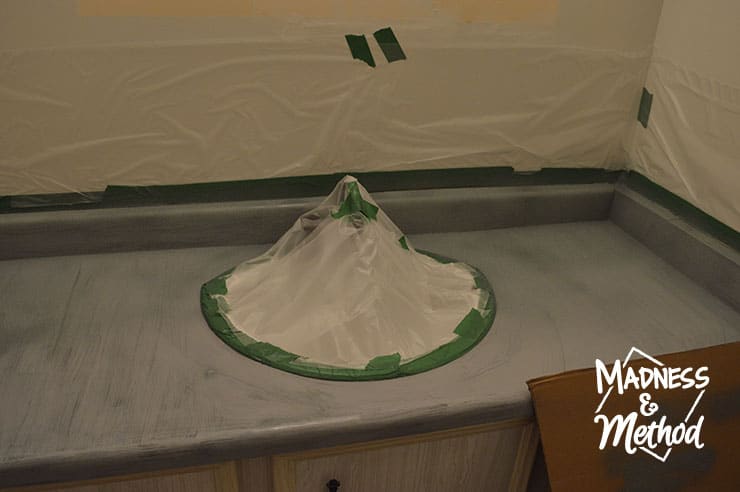
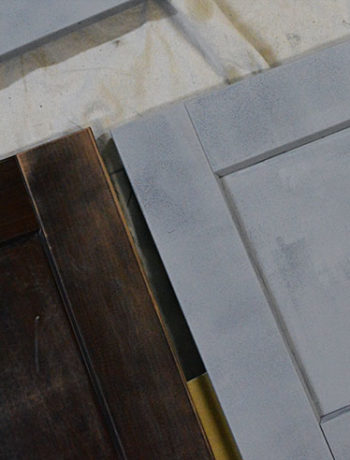
Before you spray paint, you’ll want to make sure the surrounding area is covered from overspray. I use Glad Press and Seal and painters tape (the video shows/explains it a bit better). And, I hold a piece of cardboard when I paint the front lip and move it as I go.
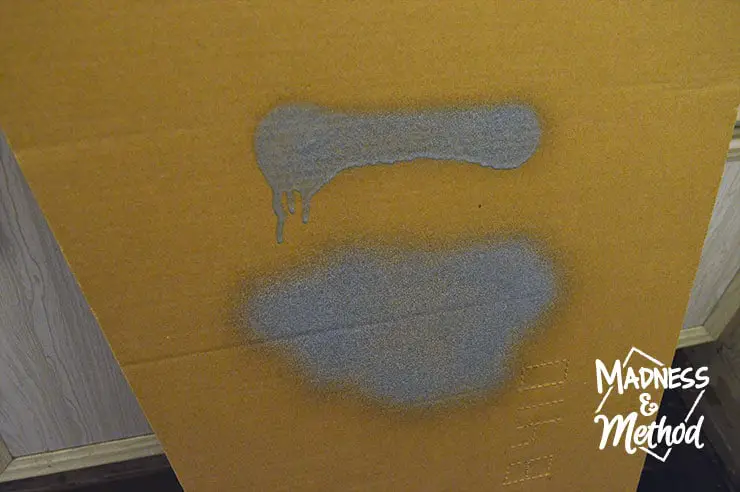
I also used that same cardboard to test my spray paint before I shot it towards the counters. The first line (top) I was too close and slow, whereas the bottom section had better motion as I was spraying.
In the video, you’ll see that I had a LOT of issues spraying with the textured spray this time around. I definitely did not run into those issues the first time, so I was not having a good time. Luckily, the Husband figured out that we had to periodically remove the trigger whenever it would clog up. (I also mentioned using one of these spray gun holders, but it did not work well for this project).
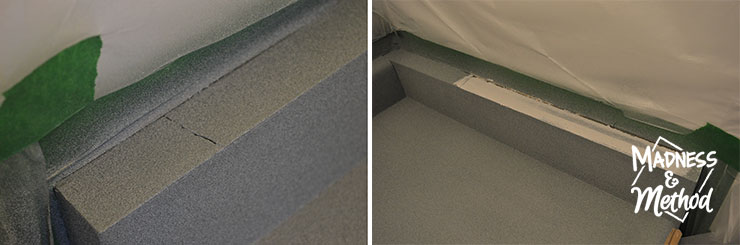
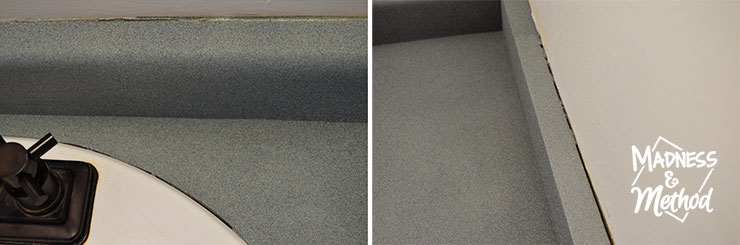
The photos above show the two areas I had to go back and re-patch afterwards. The texture was too small/thin to cover the cracks. I just used drywall patch, but you should use something stronger if you have these issues :) (Probably wood filler?). I had to go back and repaint them, then respray everything again too.
In the meantime, I also painted the vanity itself too! I used this Fusion Ash paint and I’m hoping it lasts really well too (I’ve painted cabinets before, so I’m always looking for different/better ways).
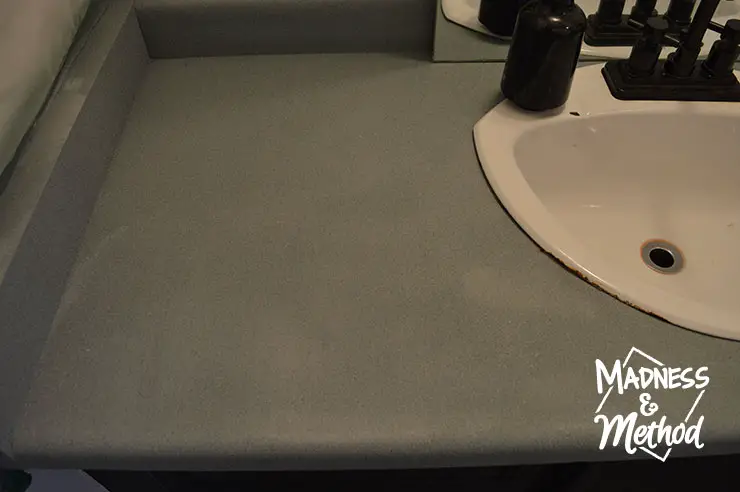
Oh, and see that one lighter area near the sink in the photo above? That’s what happens when you spray too much/too close (like the “bad” part of my cardboard test). I thought it would dry the same, but it was pretty noticeable.
Once all my patches were dry and ready for paint again, I re-taped the sink (we had left the walls covered) and gave everything a final coat. The spray paint says it covers 6 square feet, but I used just about two cans to do this counter. It would have been less if I didn’t have to redo the patched spots AND if I would have primed/painted the base coat perfectly.
Step 4: Clear Coat
Once the spray paint had dried for more than 24 hours, I gave everything a thick coat of Satin Polycrylic. I did a second coat only on the main counter area, but mostly because I had run out of Poly, ha!
It took a lot longer than the recommended 2 hours dry time, but I think it’s because I had really glopped it on.
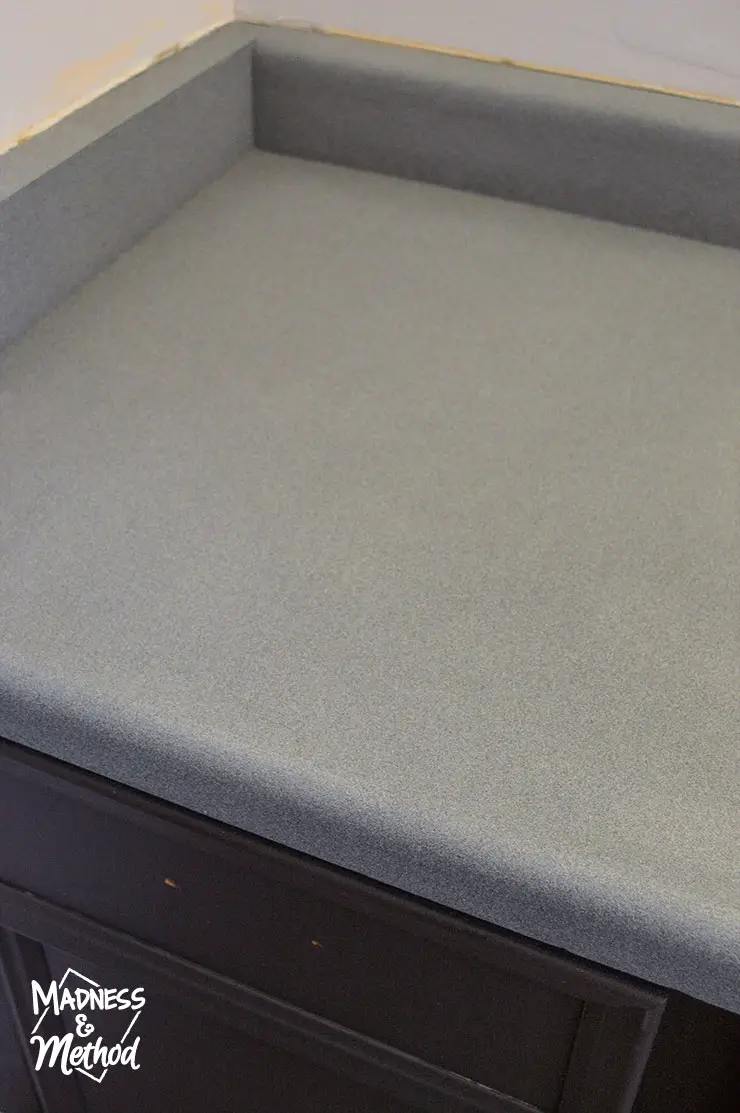
We still need to caulk around the edges of the countertop (and fix the holes/chips in the sink), but the spray-painted counters look good!
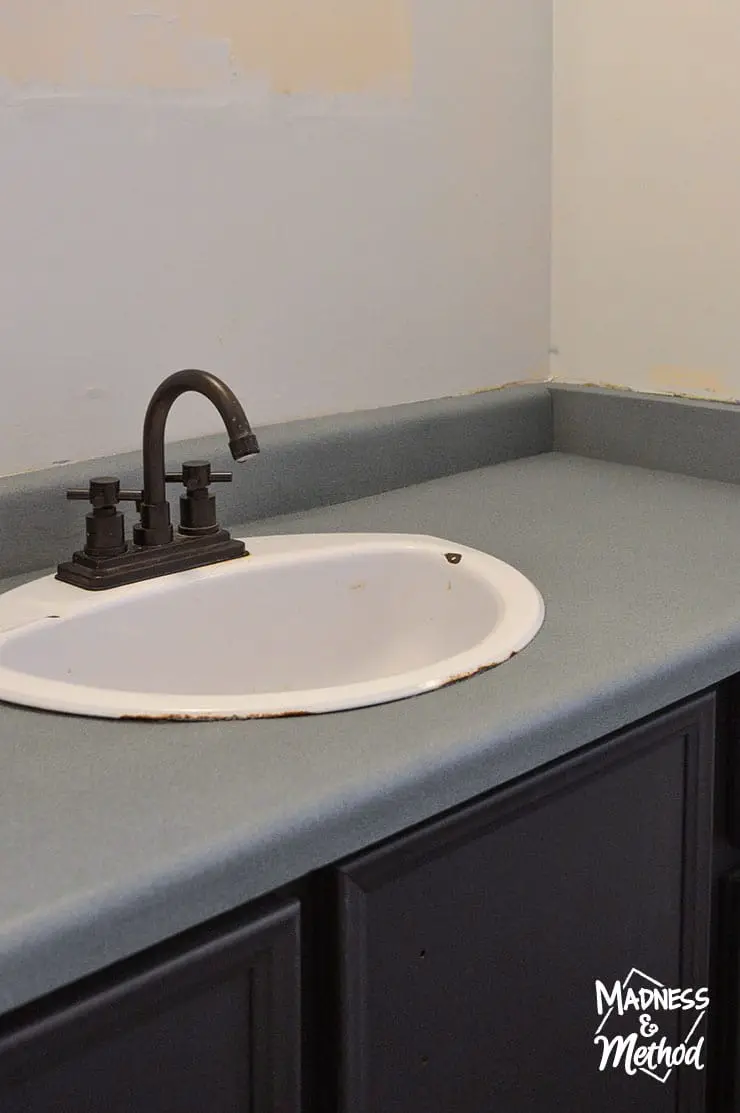
Oh, and I also need to paint the walls, but that’s coming soon I hope.
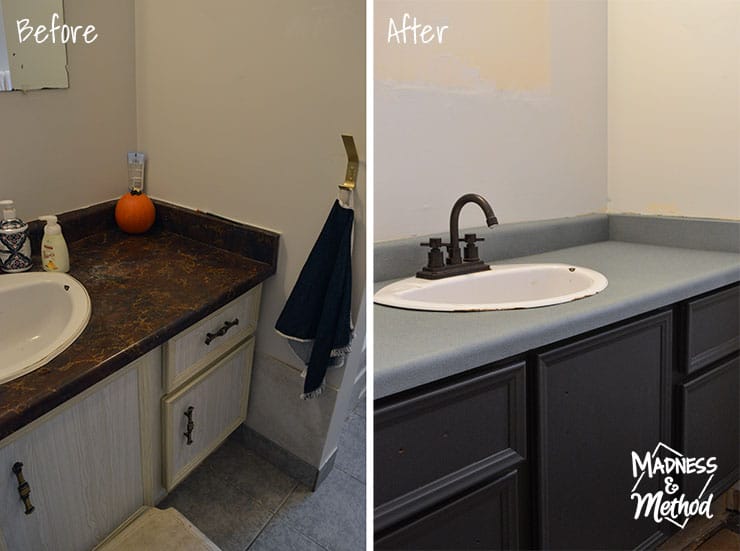
Here’s a before and after comparison of the vanity and counter! I put the vanity hardware up after, so pretend there are handles…
Spray Painting Bathroom Counters Video
Check out the video above to see all the steps in action! If it’s not loading for whatever reason, you can click this link to see it on YouTube. Might as well subscribe while you’re there too :)
Oh, and of course you can follow me on Instagram to see the bathroom progress as I go.
About the One Room Challenge
Make sure to visit the One Room Challenge website to follow all the linking participants and featured designers!

Follow our Rainbow Bathroom Progress
- White & Rainbow Bathroom Plans (Week 1)
- Bathroom Floor Demo (Week 2)
- Painting Bathroom Tiles (Week 3)
Tasks Completed this Week
- Finished bathroom counters
- Painted bathroom vanity
- Installed vanity hardware
- Cut and painted accent wall trim
Tasks Started/Ongoing
- Will sand patches and paint the ceiling today
- Need another coat on the yellow trim pieces
- Tried scratching paint off of towel bars, will spray paint instead…
I need to get going with the rest of the bathroom makeover. I’ve really been avoiding sanding the wall patches, but that’s the plan for today (and paint the ceiling). I’ll then have to patch the rough spots again, then prime and paint them. I plan to mix a custom colour for the walls with paint we have, so hopefully, that turns out well.
OH!!!! And I managed to find some Tub and Tile paint that I had my mom pick up on her drive over to visit us. So now I have to pick a weekend to paint the tiles again, but it will most likely be after the challenge is over.
Okay, time to get to work :)

* This post was not sponsored, but I did have leftover Floorguard paint from a past sponsored project.
2 Comments
Jewel
November 3, 2020 at 5:42 amWOW Nicole! What a fun concept. Glad to hear that it worked so well!
Nicole
November 3, 2020 at 9:51 amLet’s hope it lasts a long time :)