
As we continue work on the basement update, I figured it would make sense that I break down the different tasks and go through them in detail. Today I’ll be talking about how to DIY drywall fixes, ie: patching different holes that you may encounter. There won’t be many pretty pictures, but they’ll be some helpful tips :)
– Note: This post contains affiliate links. See more information about affiliates here –
There are several situations where you can get holes in your drywall, and I’ll try and talk about different types of holes and ways to fix them. Keep in mind, I’m no professional drywaller… but I have done my fair share of both fixing drywall, and I’ve even put up and installed new drywall too.
Materials you may need:
- Drywall Compound
- Trowel *
- Pieces of Drywall
- Drywall Screws
- Drill
- Drywall Tape (paper kind, mesh kind)
- Drywall Patches
- Hammer
- Measuring Tape
- Utility Knife
- Drywall Knife
- Small Bucket
- Spatula / Mixing thing
- Caulking
- Sanding block
- Primer
- Dust Masks, Safety Glasses, etc.
* I have a few different size trowels depending on what I am patching, but if you’re just starting out a 3″ size would be good!
Maybe you have patches and/or holes that came with the house you bought?
Or you removed some decorative fixtures like curtains, a painting or shelves?

Heck, you could be like us and turn a simple task of removing a piece of trim into a full-on demolition.
But wherever and however the missing drywall came to be, you’ll need to know the best way for patching different holes! Here are a few holes you may encounter:
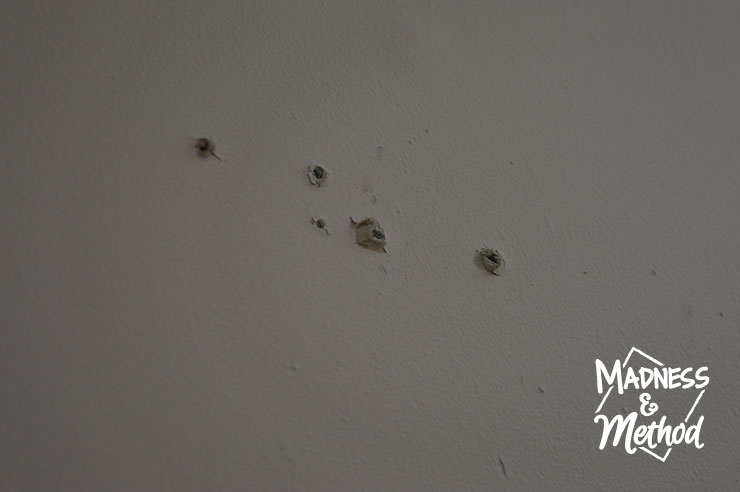
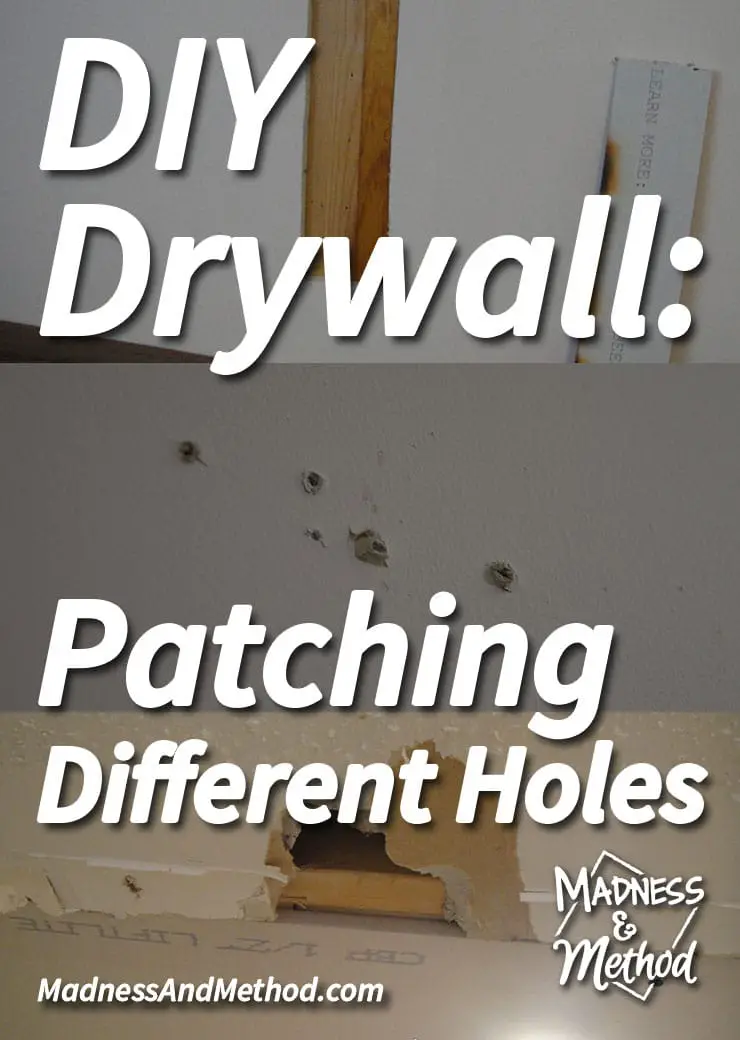
DIY Drywall: Coin Sized Holes
These holes are typically larger than your average screw or nail, and we had one in our upstairs hallway behind the thermostat (it was moved to a new location). Normally, you would just cover your smaller holes with drywall compound, but when you’re dealing with larger, coin-sized holes, sometimes it’s a bit trickier. Some issues I’ve run into in the past have been that it’s hard for the compound to adhere to the hole (it slips out as I go across), you need to do several coats (taking extra time) or even that the first coat “falls” out of the hole towards the room (extra sanding required).
Solution: Fill the back of the hole with some caulking and let that dry first. That way your drywall compound has something to adhere to and it won’t fall towards you.
DIY Drywall: Extruded Holes
These usually appear after you’ve removed a screw from the wall; it rips out some of the drywall paper, causing the holes to extrude into the room. You could always patch these holes as normal, but because they bump out, your newly patched area will come forward more, and it’s harder to disguise the fix. (Picture a little hill on your wall).
Solution: “Punch” these holes so that they go back into the drywall. Using a larger dowel (or other sturdy object), carefully hammer the old holes so that they are inset into the wall. The Husband also mentioned that you could drill a larger hole, but then you’d have to do the first fix above.
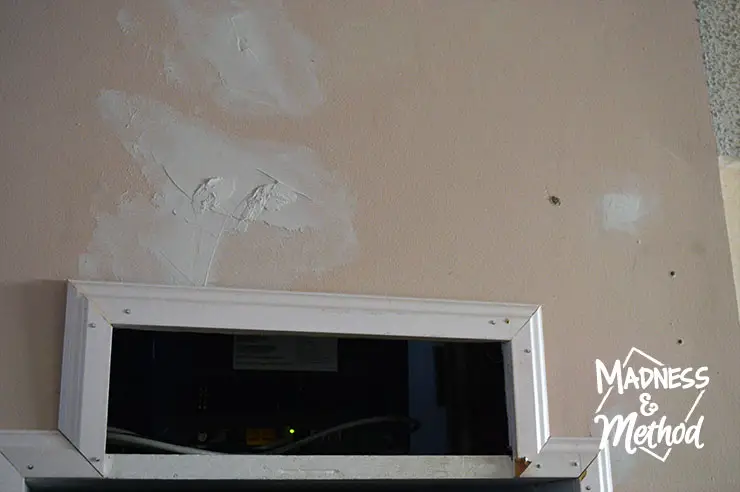
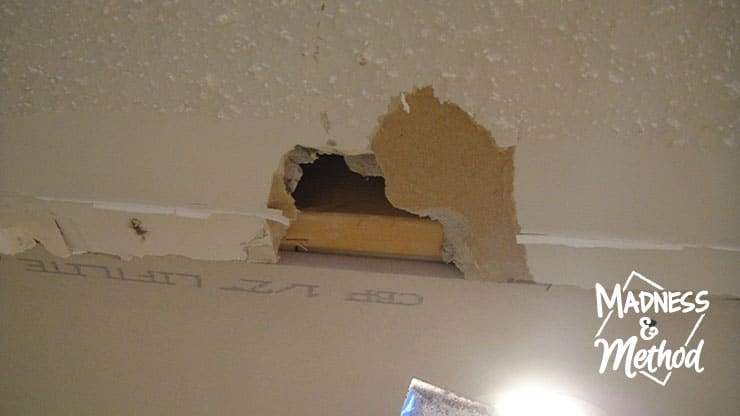
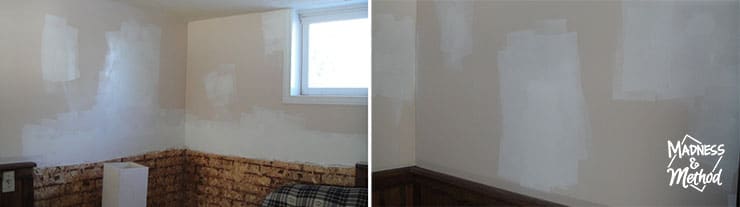
DIY Drywall: Larger, Geometric Holes
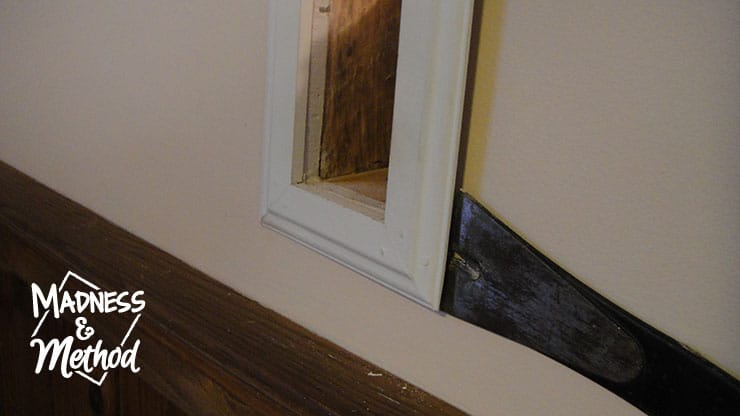
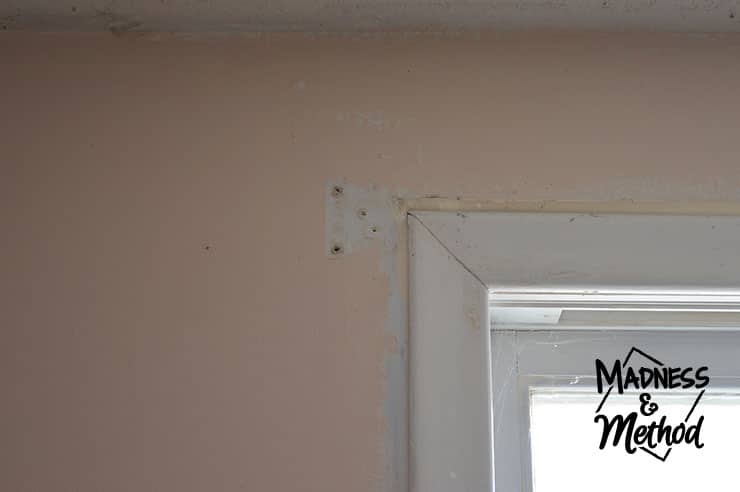
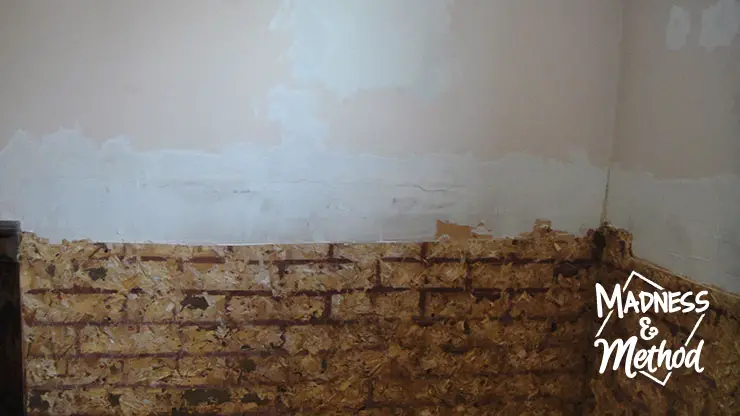
Our basement came equipped with a hole fit for an Xbox, but once we got rid of the system, we no longer needed the shelf/hole. I started by removing the trim surround, and then examined the hole.
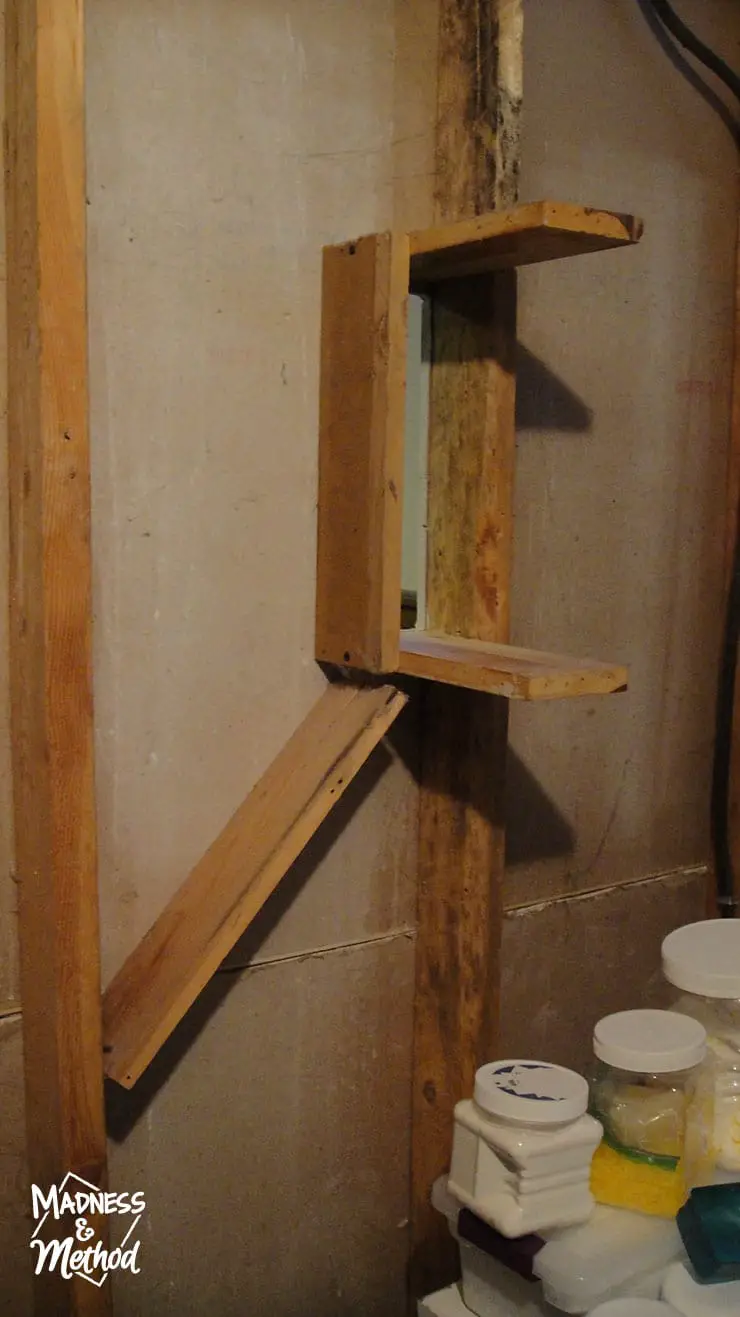
The shelf actually goes into our laundry room space, and there was a lot of wood that I also removed. (We’re hoping to finish this room in the future).
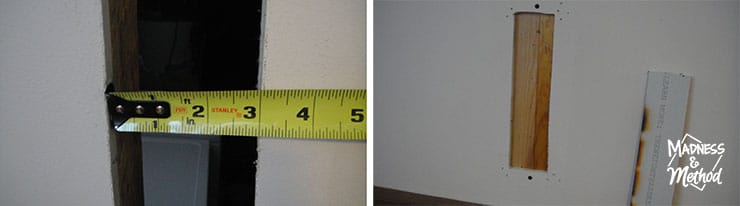
You’ll want to measure the hole that needs to be filled, and cut another piece of drywall to fit the area. If your hole is in front of a stud, you can simply screw the new piece of drywall in there. If not, you’ll need to attach a piece of wood as a backing piece, so that you have something for your new piece to attach to. (I was able to use one of the random pieces of wood from the shelf.)
If you can’t access the room behind the hole (which is most likely the case) you’ll want your piece of wood to be a bit skinnier than the hole. That way, you can get your fingers behind it to hold it in place as you screw it into the wall.
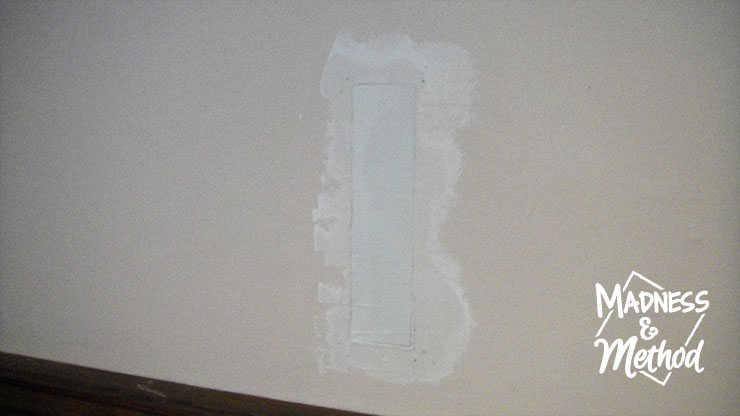
Then, you’ll patch around the seams and the screws :) (You can use drywall tape if you want, but if my seams are small, I prefer to just fill it with the compound).
Remember: it’s better to cut your piece a bit smaller, than a bit too big! And make sure the drywall pieces are the same thickness :)
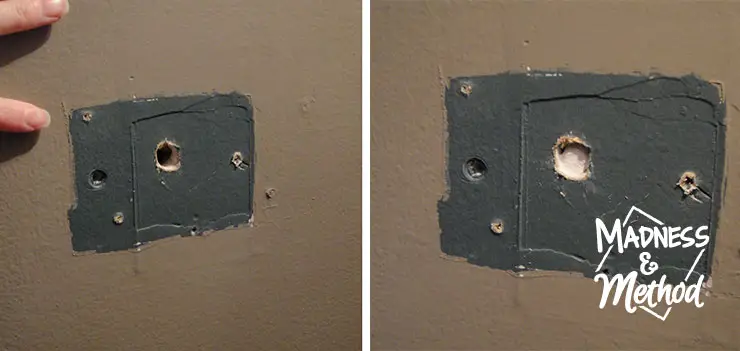
DIY Drywall: Irregular Sized Holes
Sometimes you have to patch weird shapes, and it would be nearly impossible to match them perfectly with a new piece of drywall. The ideal solution? You should cut the hole larger so that it is a rectangle/square size and follow the steps from the fix above.
But there are some situations where that might be difficult, and/or more cumbersome in the long run. (Although I would almost always prefer to use a piece of drywall).
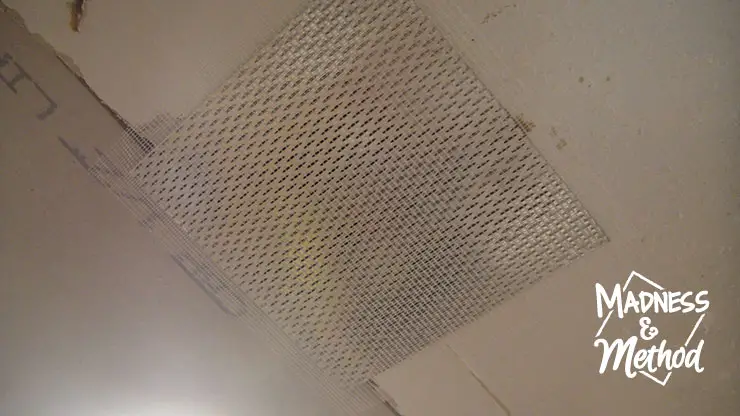
Solution: Use a mesh drywall patch that is a few inches larger than the hole. These stick to the wall and you patch them with your drywall compound as you would any other surface.
DIY Drywall: Tips on Using Patching Tape
Okay, I’m about to share with you my super-secret drywall taping method. It’s super messy, but it gets the job done nicely.
You see, professionals have a fancy machine that goops up the drywall tape so they can put it up quickly. Me? Well, I’ve got a bucket… and my hands…
Let me explain:

First, I measure the lengths of drywall tape I’ll need (I mean the paper drywall tape here). Then I’ll scoop out a portion of drywall compound into a bucket.
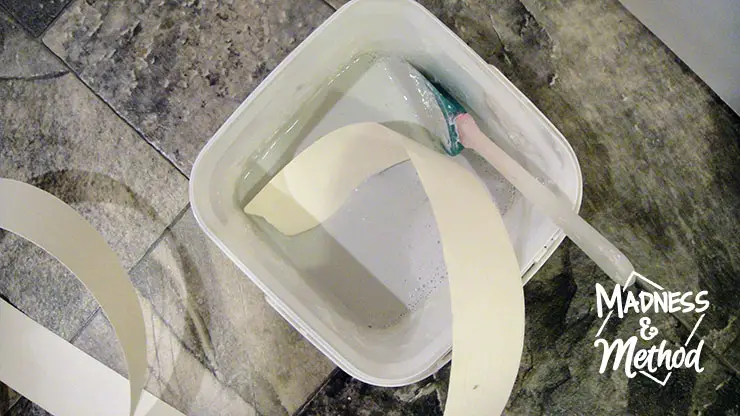
Then I add water to the compound and mix it up evenly so that it’s more liquidy, but still goopey. Maybe a 2:1 mixture of drywall compound vs. water. I then take a piece of the drywall tape and dip it into the watered down compound and use my fingers to make sure it’s completely coated. I squish the excess goop off in between my index and middle finger in a v-shape (being careful not to get a paper cut – it has happened) then squish it onto the wall, using my hands to spread a nice coat of the watery mixture on the top.
Think about when you had to do papier mâché with the pieces of newspaper and the flour paste. It’s literally the exact same method, you want both the front and the back to be coated with the goop, and you smooth everything with your hands!
You see, I’ve read countless articles / watched many videos on how to apply drywall tape. And no matter how many times I’ve tried to do it the “proper” way (compound on the wall, wet the tape, stick the tape, spread compound on top), I’ve always gotten areas that come up. But once I came up with this super-secret method, it’s been smooth sailing :)
Of course, like I mentioned, it is pretty messy; and it does get trickier (and messier) the longer the pieces of tape are.
What about the mesh drywall tape, can’t I use that instead?
The mesh drywall tape is self-adhesive, so you can skip a bunch of steps and just stick it on. BUT I’ve found that it’s harder to cover after (on flat walls), and I’d rather spend the time to use the paper tape. I do prefer to use the mesh tape on inside corners, because there’s more compound that go in those areas! (Or, even to tape up large seams that are just too small for a patch or a new piece).
DIY Drywall: Final Tips

I said it at the start of the post, and I’ll say it again – I’m not a professional drywaller. But I am kind of a perfectionist, so I always try and make sure my walls are nice and smooth, and I certainly don’t want them looking too “DIY”. (On another note, I’ve heard people use that as a negative – but I think I need to make it my mission to prove them wrong!).
Anyways, for small imperfections, you can usually get by with one coat. Just remember to let the compound dry completely (usually around 24 hours) and then sand it smooth.
Caution: when you sand the drywall, there will be LOTS of messy dust floating around. Move or cover any furniture nearby, and make sure to wear at least a dust mask (and safety glasses too if you’re doing the ceiling!).
There are some places that I’ve done as many as 4-5 coats… but I may be a bit too much of a perfectionist in those areas; and just remember that each coat you add, adds another day to your timeline! (Aka why it took me twice as long to do the walls in the bathroom).
When your patches are all smooth, remember to give them a coat of primer (I would suggest to roll it on if possible – to match the wall texture) and then you can relax :)
Just kidding, now you probably need to paint (unless you like the crazy primer sections?).
I’ve shared so many DIY drywall tips about patching different holes that I’ve gathered over the years, and I know there are so many that I haven’t mentioned either. Just remember that your first or second time may not be the best looking thing, so maybe you can start in a more hidden area? I know I look at some of my earlier patches and want to redo them (literally, I’ve told the Husband I want to take down a wall in the bathroom just so I can make it smoother).
But it’s always handy to gain some patching skills yourself!

Shop This Post:

No Comments