It’s a New Year, and I’m excited to kick it off by finally working on updating our basement! Last winter I showed a tour of how our basement looks and wrote about all the things I wanted to fix. I’ve figured out a colour scheme (and given myself some deadlines) and will be discussing the basement update plans with you today :)
– Note: This post contains affiliate links. See more information about affiliates here –
First up, I’ll go through some more recent images and point out the problem areas I would like to address, and then I’ll be talking about the design direction for the space.
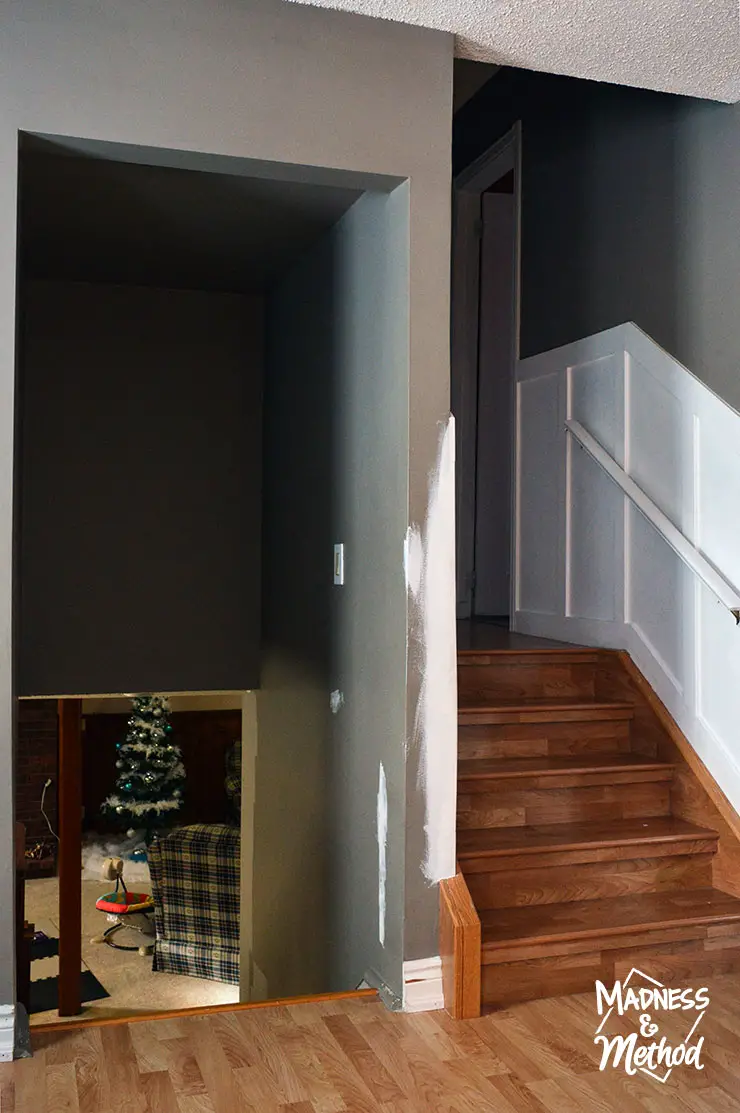
Last spring I added a board and batten wall treatment to our upstairs hallway, and I want to continue the look going into the basement. I’ll also be painting this area with light walls to match the rest of the basement, so it should be much brighter!
Update: Board and batten added to staircase; basement completely painted.
There’s a support pole in the room (you can see it in the first photo) and the trim along the top has been broken since we moved in. I just threw the extra pieces away and will be adding something new instead. I also can’t decide if I’ll paint the pole white (to match the panelling) or black (for something different).
What do you think?
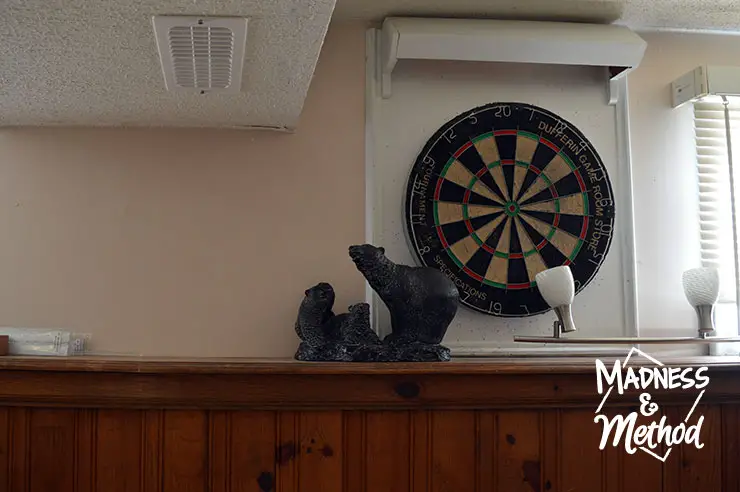
I complained about this (unused) dart board in my first basement tour, and I’ve finally taken it down! We also had some other stuff on that top ledge that I donated as part of my Naughty or Nice advent calendar last month. Those lights were purchased forever ago and need to be installed too :)
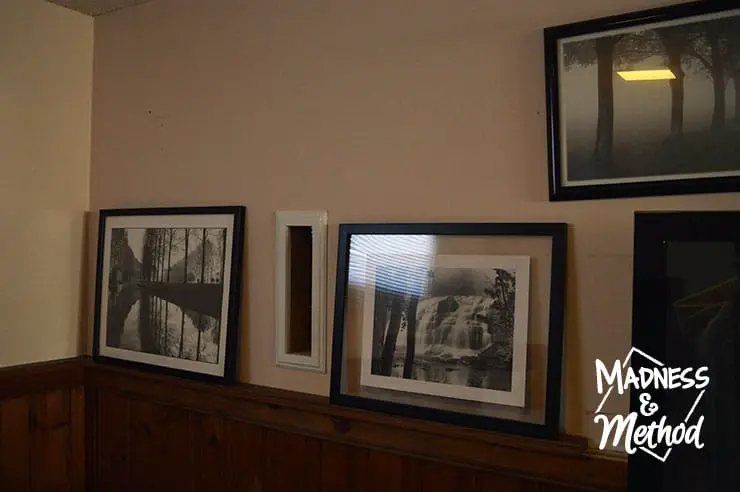
The bears and these photos had been on the mantel for years, but I took them all down when I decorated the mantel for Christmas. I’ve since donated them all (minus the bears) and I just took down the Christmas décor too. We got rid of the Xbox, so that hole will be patched (stay tuned for the blog post next week!).
When we added the half-bathroom to our basement as part of the 2016 Spring One Room Challenge, we never actually finished the outside of the room. The trim around the door needs to be re-added, and the whole area could use some paint and finishing!
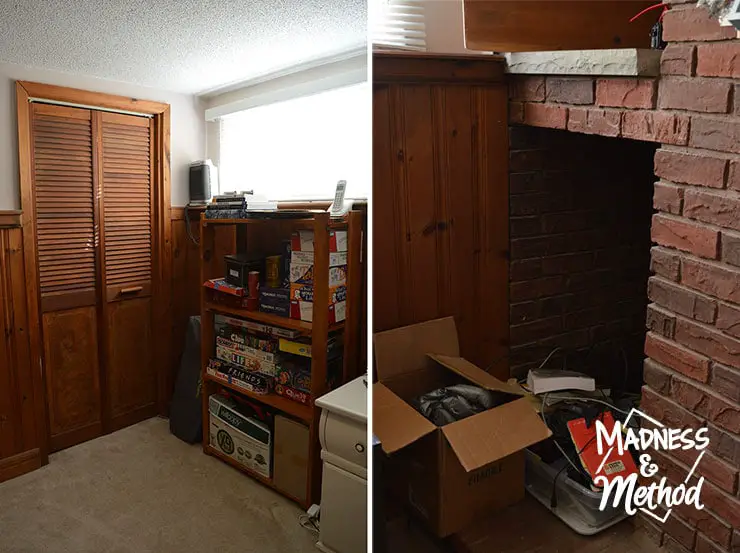
I’ve tried to get rid of as many unused things as possible, and one area I want to tackle is our board game shelf. We have a hole next to the fireplace (where there used to be a mini fridge) and I’m thinking of making a custom shelf to fit the space.
Update: Custom Board Game Shelf
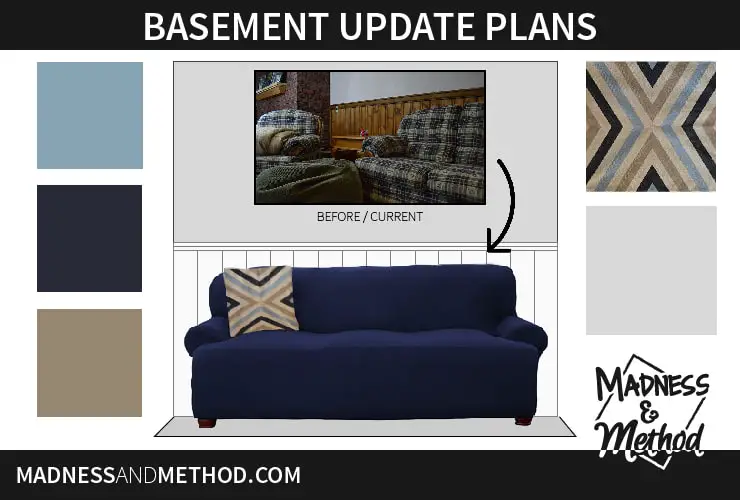
Basement Update Plans
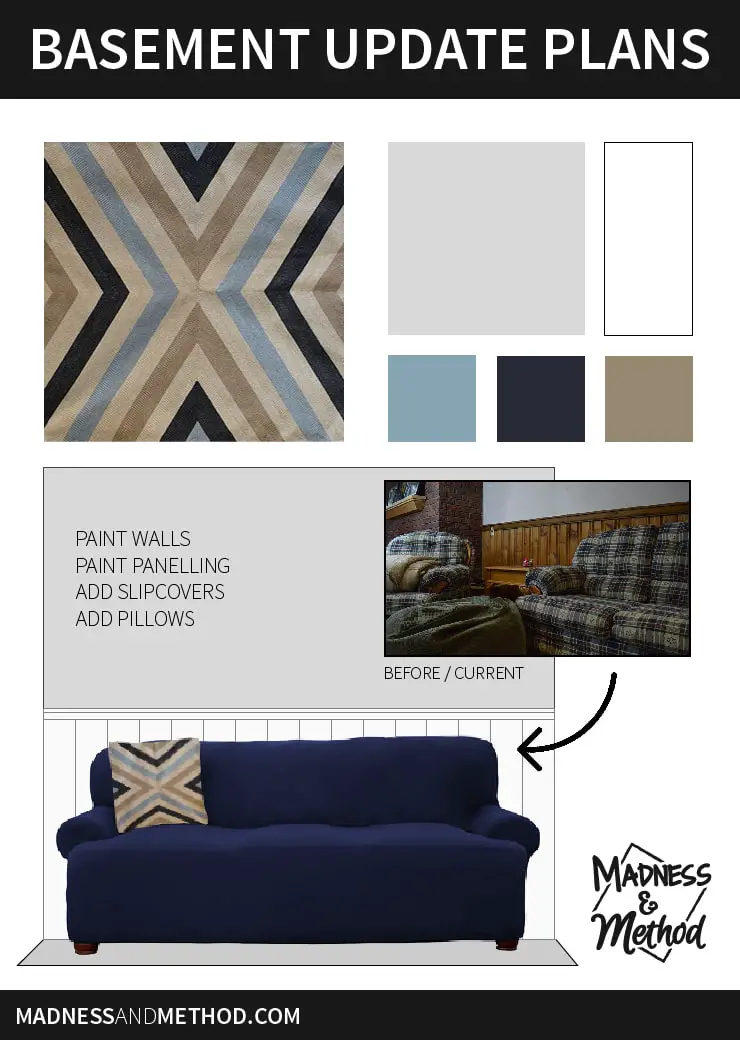
I did update the media centre in the basement (you can see the before pictures here) and I knew that I wanted the Fusion Champness Blue paint to be one of my accent colours in the space.
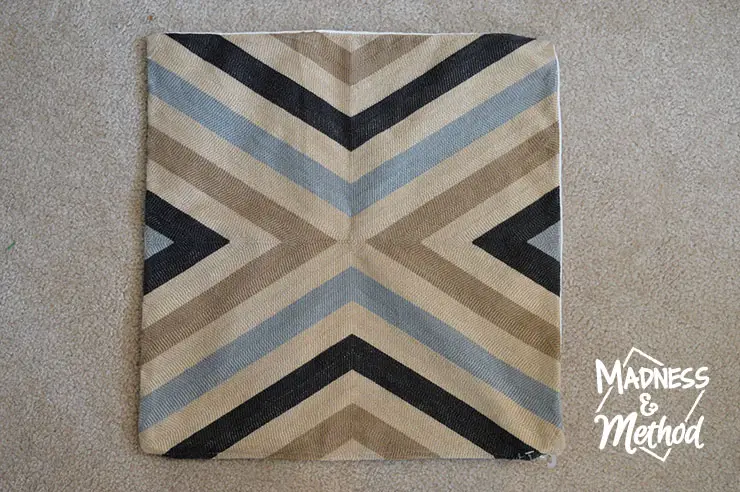
When I was at the fabric store getting my faux fur tree skirt cut, I saw this pillowcase cover and I knew I had to have it to use in the basement. The light blue was the exact same as Fusion Champness, and the beiges would go perfectly with the blankets and pillows I already had in the basement. Furthermore, the dark stripes (a dark navy) influenced the design decision for the sofas!
I’m not getting new furniture, but I do want to get slipcovers for the ones we already have. I was literally saving ALL the options that fit on our couches, but I didn’t really want to get something off-white or beige (or red or whatever else). Our couches have some navy in them already, so it’s like it was meant to be :)
The walls will be painted a light gray (the leftovers from the Husband’s office actually) and I’ve settled on painting the panelling a bright white. Other than that, I also have to paint the fireplace… and figure out how to fix the panelling where we destroyed some bricks…
Update: Slipcovers added, tongue and groove panelling added and brick fireplace painted.
(A bit of demo)
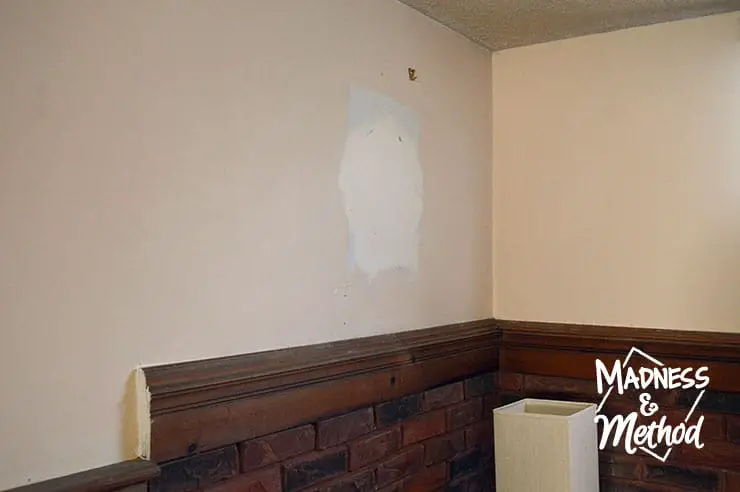
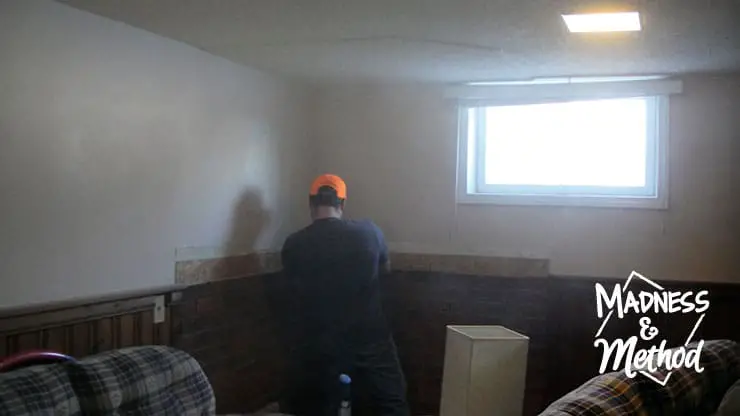
I never liked the uneven trim atop the bricks in the corner of our living area and I knew I wanted to remove it to streamline the panelling. I was planning on painting the bricks white, and everything would match and be fine.
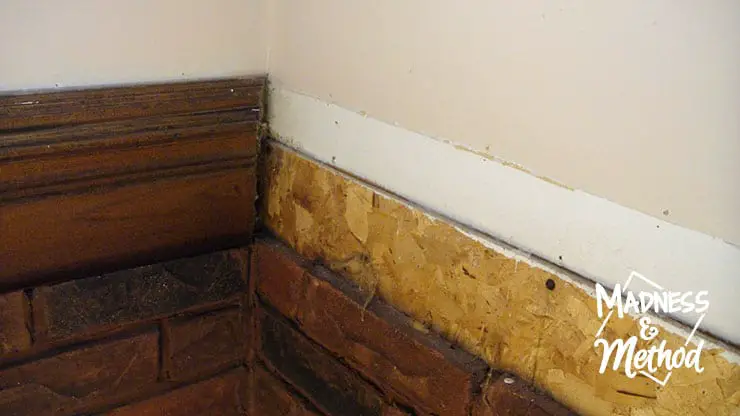
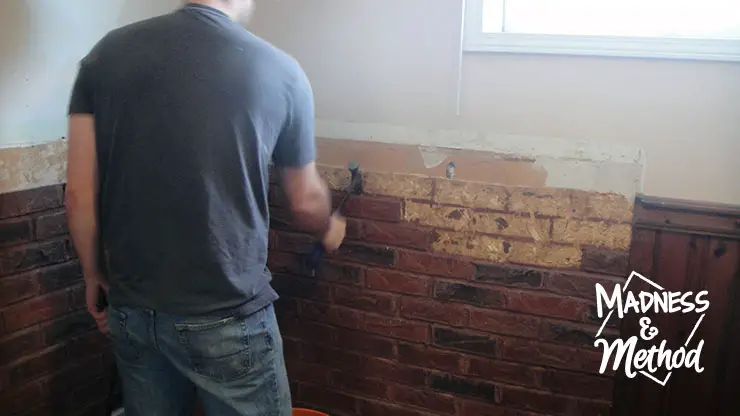
Unfortunately, when I removed the trim, there was a layer of aspenite (chip board) underneath… and it went behind the bricks too!
I waited for the Husband to come home so he could help me carefully cut along the edge of the bricks to remove the wood. It made SUCH a dusty mess in our basement (and clearly I should have moved the furniture!).
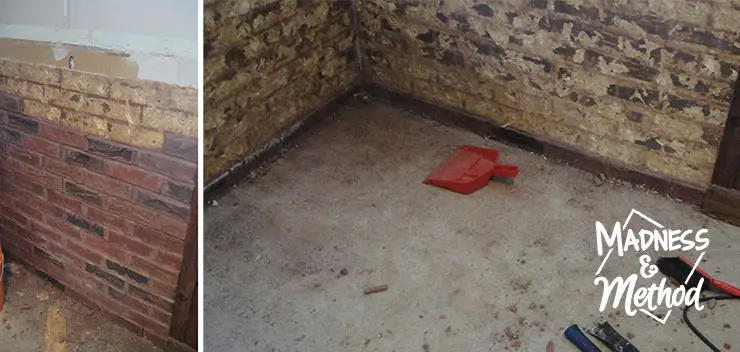
But then the Husband commented that he hated this brick area since it didn’t match the rest of the basement, and decided it would be easier to REMOVE all the bricks rather than cut the wood straight across.
They were only little brick slivers (maybe 1/3 the size of a normal brick) and came off pretty quickly. However it probably took me longer to clean the dust and brick chunks than it did to take them down! (Our carpet is now perma-stained red in some areas no matter how much I vacuumed.)
And, now I have to install some panelling pieces to match the rest of the basement… but I guess it will be more cohesive now?
Are you planning on updating any spaces in your home this year? I think the basement will take me a few months (seriously… there’s SO much panelling to be painted) but then everything will be nice, bright and clean :)
Maybe you have a dark and outdated area – and these basement update plans may work perfectly for your space too.
Let’s bring everything into the New Year together!





No Comments