
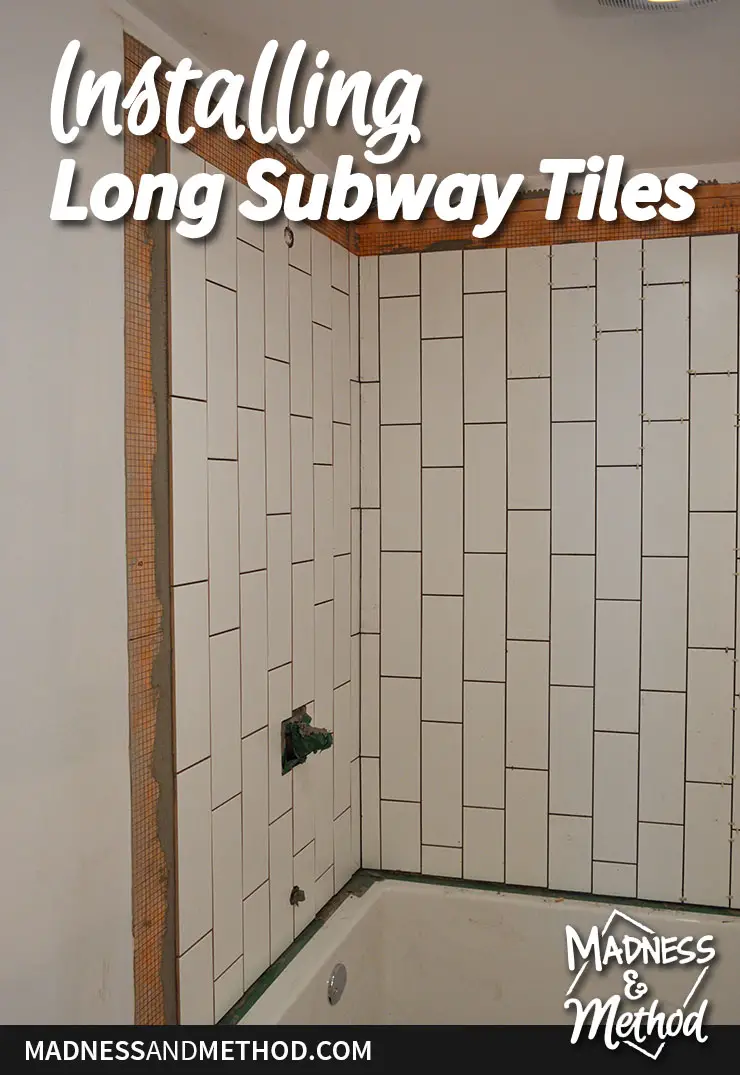
I know I say this every time, but I LOVE tiling! I have so many projects under my belt: from our main bathroom, kitchen, basement bathroom, and many more! Either way, it’s hard to believe that this was my first time installing long subway tiles, and I think I was able to come up with a fun pattern, and it’s looking good!
– This post may contain affiliate links, and Aspect Peel & Stick metal Mini Subway tiles in Champagne were provided. See more information about sponsored posts and affiliates here –
In order to “finish” the basement at the rental renovation (and by finish, I mean pass our final inspections) we need to have the plumbing completed. In order to have the plumbing completed, the bathtub needed to be tiled and grouted. And that’s where I come in! Although, trying to tile a bathtub around the schedule of two littles is nearly impossible… but let me show you how I did!
(Check out the before tour of the basement, the apartment layout plans, and the drywalled basement space to catch up).
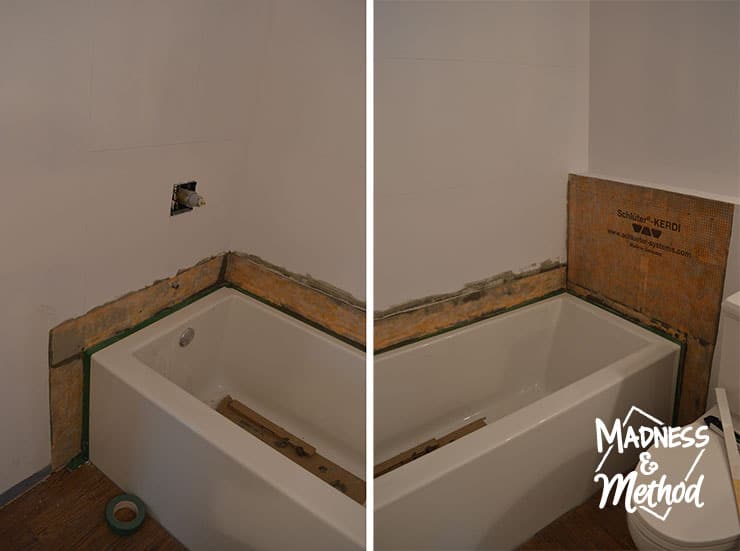
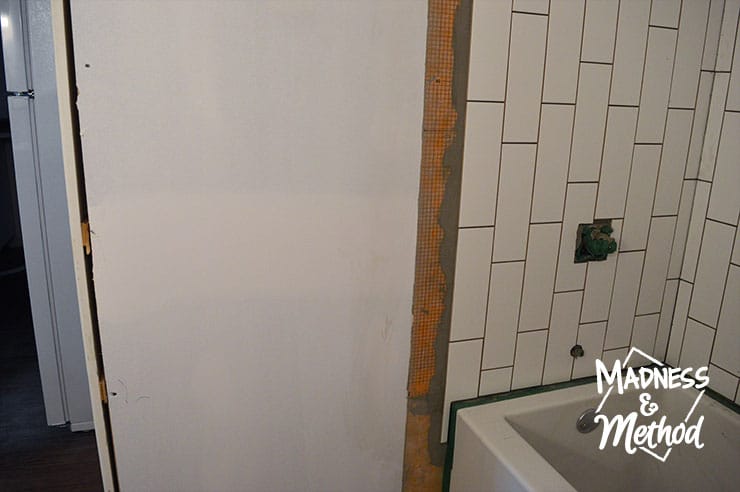
The first step was waterproofing the surrounding area. When we tiled the bathroom at our main home, we had used cement board in the tub/shower, but this time it was drywall. It was also my first time installing the Schluter-Kerdi system, and it was relatively painless since there are so many videos on their website.
Determining Your Tile Pattern
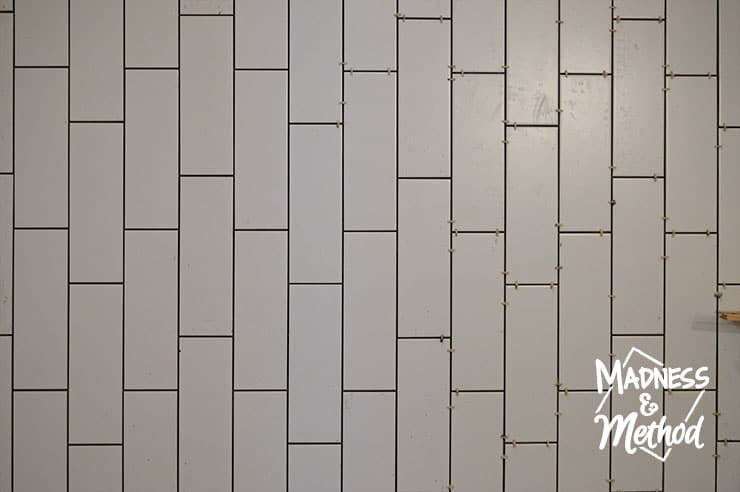
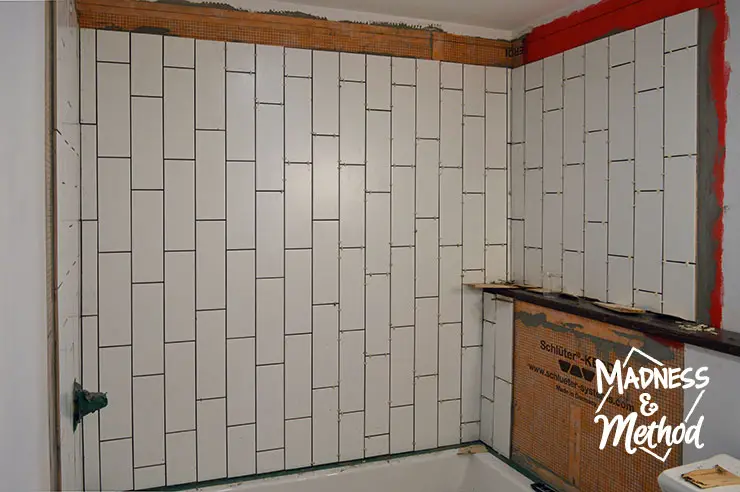
I knew that I wanted to do long subway tiles in this bathroom, placed vertically so that they would help make the ceilings look taller. After doing to-scale mockups of some various tile sizes, I figured out that a 3×12 tile would be the best size. The 2x8s would have been too small (not to mention a lot more work to install!) and I had seen some 4x16s in person and thought that they were too large for this small space.

However, after looking online for months – I soon realized that plain 3×12 subway tiles were nearly impossible to find! I had found some 4x12s and decided that it was a good compromise.
While I’ve installed some regular 3×6 subway tiles in the subway pattern, I knew that a subway pattern might look a bit off for the longer tiles. When I was doing my scale mockups, I had determined a good pattern (not too random, not too linear) and decided to go with that!
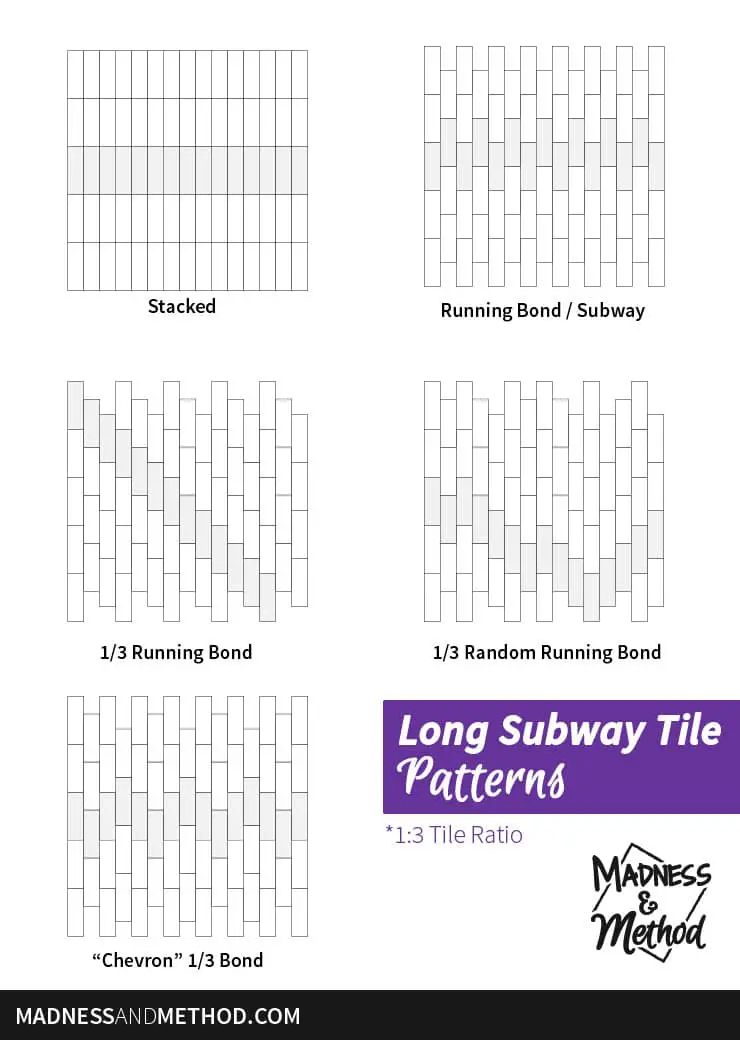
It’s the “chevron” pattern in the graphic above. The 1/3″ running bond just looked like a waterfall to me, and I knew that a random pattern wouldn’t do at all. Remember, any of the patterns can be installed horizontally (which I think is a more normal way), and there are also herringbone patterns (that I didn’t want to attempt this time!).
Determining Your Starting Area
Where do you start your tile pattern? I think most people would just assume to start on the long wall and make sure the tiles were centered nicely. That would be correct for most applications (you don’t want to start in a corner willy-nilly!); but I knew that I wanted my tiles to line up nicely with the plumbing. I hate when the tiles are skewed from the faucets!
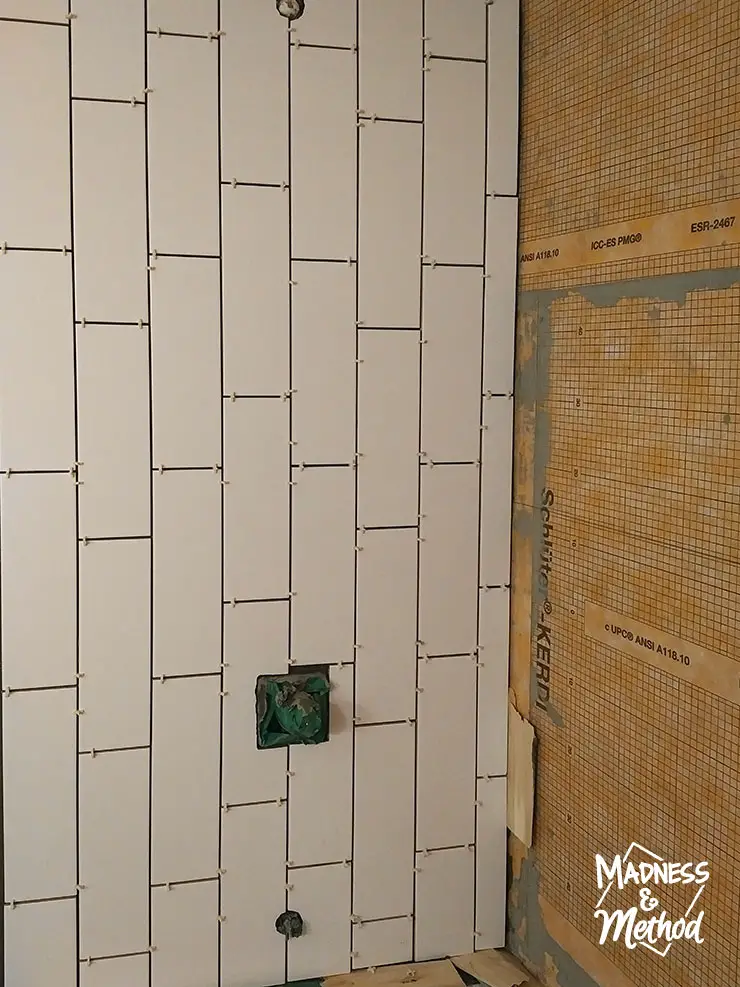
For us, that meant that we could do a tile perfectly centered with the plumbing lines, or put the grout lines in the centre. Since it’s way easier to cut a notch out of a tile than a hole, we went with the centered grout :)
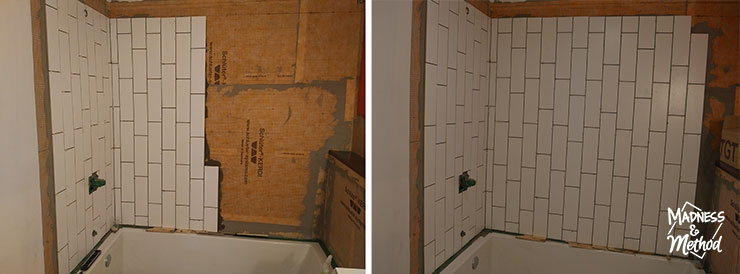
While the Husband and I did the first wall together (with someone watching the littles!), I was tasked with finishing the rest of the shower when I had time. I could mix up a batch of thinset, install a few rows and clean everything up in about an hour.
I only screwed up my pattern once, but thankfully the Husband realized it almost right after :)
I also did the paint-on RedGard in the area above the ledge.
In the meantime, I had also cut a piece of cedar to size and stained it to match the wood-look vinyl floors (plus a few coats of poly!). We sloped it towards the bathtub, glued it in place and held it down with a few boxes of tiles.
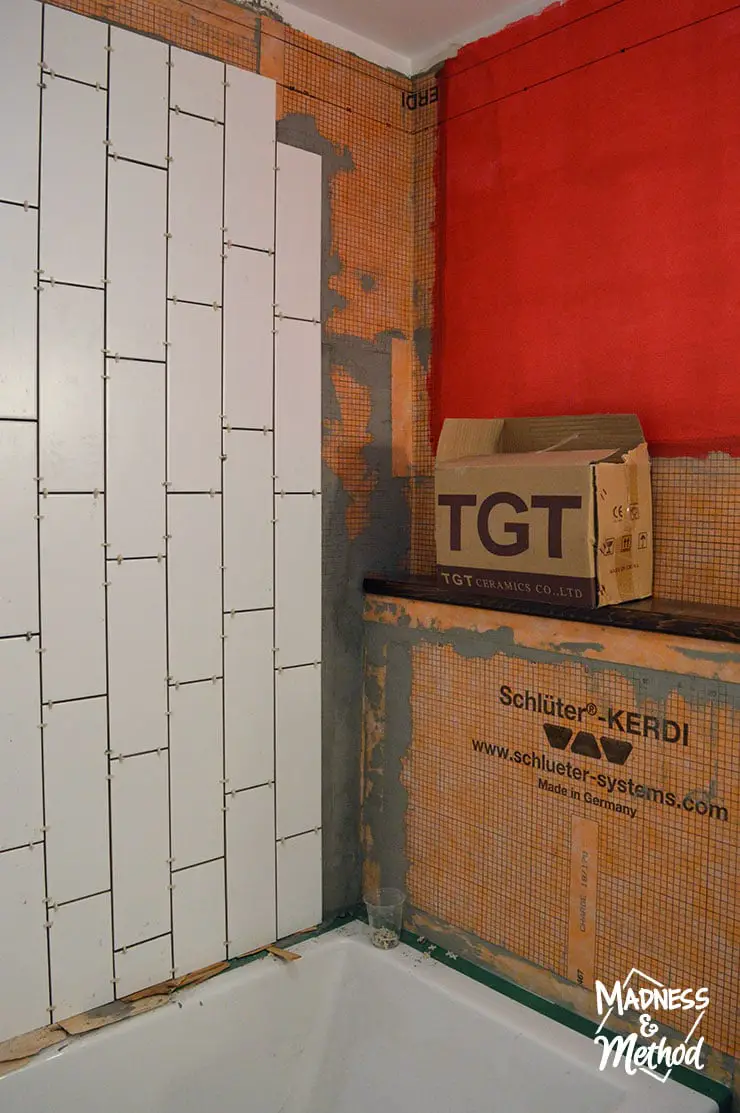
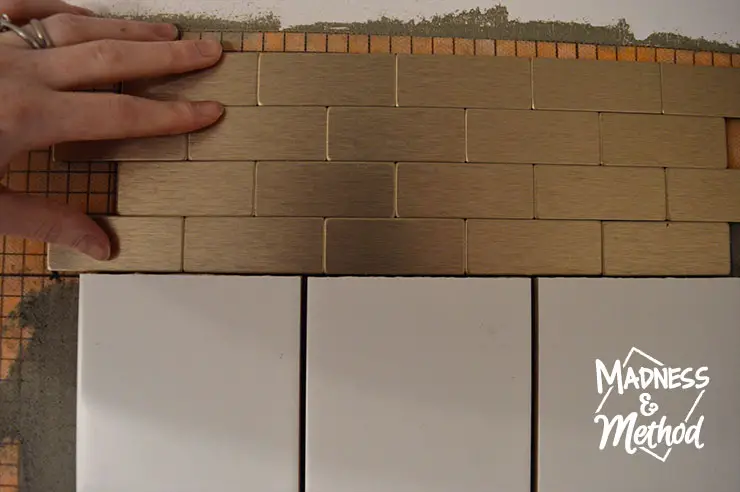
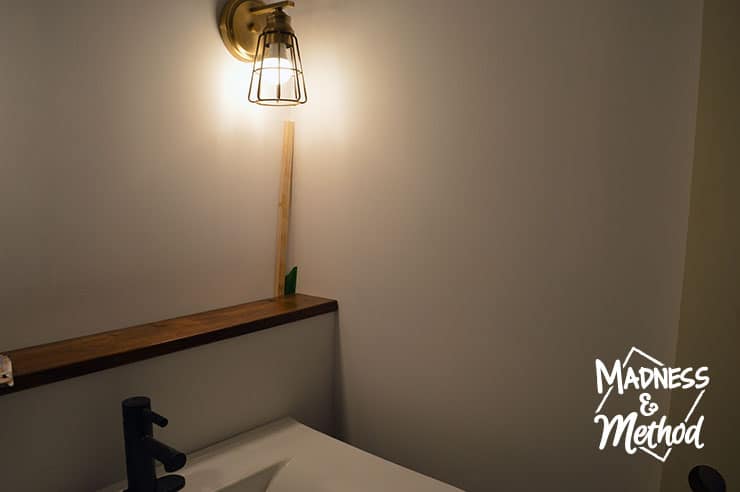
Not sure if you noticed in the photo above, but I marked some level lines along the top portion of the shower. If you saw my glam bathroom moodboard, then you know that I was planning on adding a band of gold tiles along the top.
Adding a Glam Tile Border!
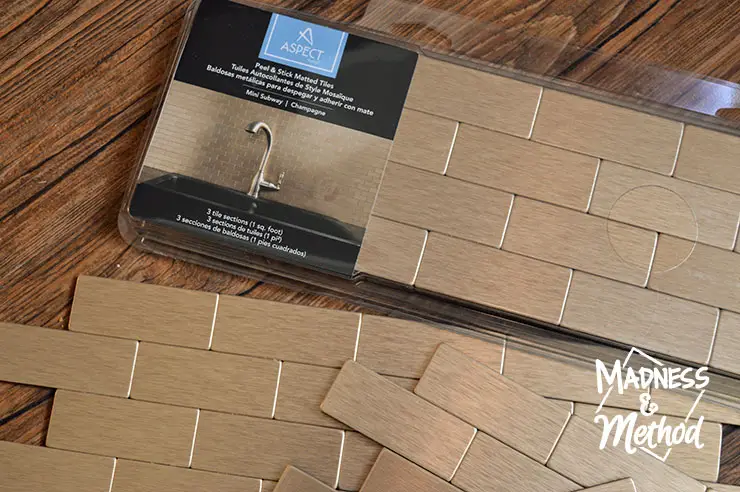
Aspect sent me their Aspect Peel & Stick metal Mini Subway tiles in Champagne, and I am really excited to get them installed! You can purchase any Aspect Tiles from DIY Decor Store, or I’ve linked the exact same Mini Subway Champagne tiles here from Amazon, or here from Amazon for a full 15 sqft kit.
I would have liked to have a huge area for my metal tiles to really add up the glam factor, but unfortunately, with the low ceilings, we were limited to how high we put our showerhead.
I’m going to fit a 6″ border along the top (so 1.5 of the Mini Subway pack or 6 little rows). They will be installed after the long subway tiles are completed and grouted – and I’ll be using an adhesive (rather than the peel and stick) because it’s a more humid area.
Aspect Tiles are not recommended for a shower area, but in most shower/tub applications, the surround ends just above the showerhead and it’s usually drywalled above, so I figured I would be okay!
Where to End your Tiles?
The Kerdi waterproofing band goes about 5″ past the edge of the bathtub, so I’ll definitely be installing my tiles to cover that area. Here is where we are currently:
I’m just waiting on my tile transition pieces to do the last row, (and finish the final wall too). I think I may also extend the bottom tiles behind the toilet and vanity.
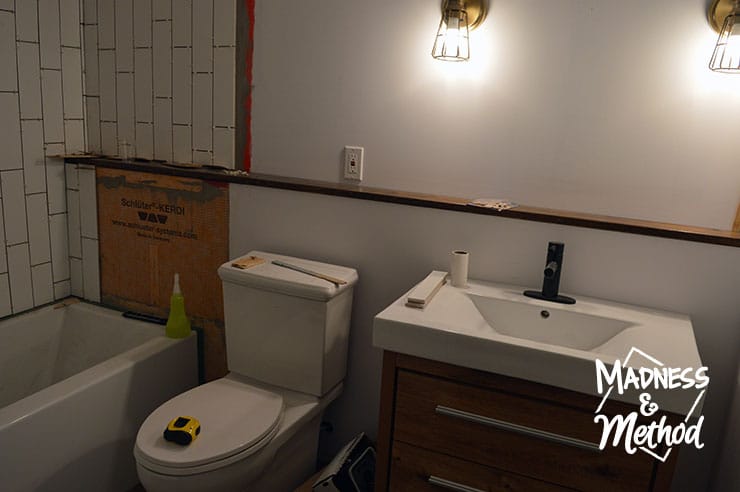
I have plenty of tiles and figured that it will just be easier to keep this area clean that way. Besides, I’ve already splashed behind the sink faucet when I was washing my hands… so it definitely should be protected there!
I’ll most likely continue the tiles just on the bottom wall and leave the top portion (and the last wall) as a regular surface. Adding the ledge was definitely a good idea because it adds just a bit of storage space in this room that doesn’t have too much.
And I’m still undecided if I’ll end the tiles in one straight row (to cover the orange band), or do another half wall (or even full wall!) in this area.
Maybe I’ll finish behind the toilet/sink, then see how many tiles I have left?
Installing long subway tiles was a fun new tile shape to work with, and I’d love to try them out another time (maybe in a herringbone pattern!?). The entrance in the upstairs at the rental renovation was another long tile, and I’ve liked lining up on the 1/3″ for a change. Although, I still have to do a stacked pattern somewhere, and it seems like it would be a really modern, contemporary space! Okay, yes, I am probably a little too tile-obsessed :)
Either way, once all the tiles are done, we’ll be grouting everything white so that it blends in more. I really want the Aspect Peel and Stick Mini Subway Tiles in Champagne to pop in the space, so am trying to diminish any contrast with the grout.
I was hoping to have a completed bathroom to show off next week, but the tiling has taken a bit longer (and I’m still waiting on my transitions to come in). At least it will give me a bit of time to figure out the mirror, so stay tuned!

No Comments