
EEEEK I’m crazy happy with how these floors turned out :) And I know I probably said that for the countertop and the cabinet… but I kind of knew those were going to be amazing (ha!). The idea to do DIY painted floors was something I was worried about (would it be how I pictured it in my head?) and I’m glad to say that they look great! I’ll also be doing a big recap of ALL the tasks for my bro’s budget bathroom project, so hopefully we can get this renovation wrapped up soon.
– Note: This post contains affiliate links. See more information about affiliates here. –
We’re in the home stretch (week 5 out of 6!) for the One Room Challenge. Here’s a quick look-back:
Week 1: Design Plan | Week 2: Demo | Week 3: Counters | Week 4: Cabinet
I’ve been sharing this bathroom makeover with a BUNCH of other linking bloggers on Calling it Home, and the finish line is so closeeeee… but so far because I have SO much left to finish (complete list at the bottom of the post).
But let’s forget about that for a bit and talk about something I did get done: the DIY painted floors!
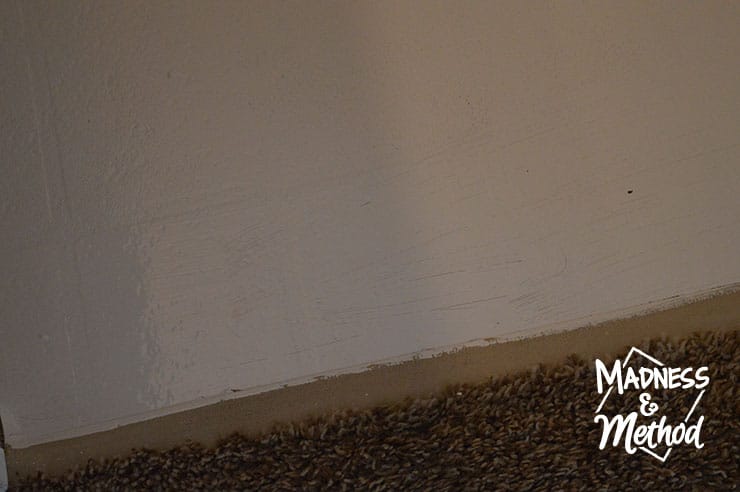
The floors in my brother’s bathroom were… fine…
(Okay, I wanted to say ugly, but I didn’t want to upset anyone who willingly chose these floors). They were in good condition (no holes, no weird scratches, nothing peeling up) and I was hoping I could spruce them up a bit with paint AND somehow maybe make them look like tile?
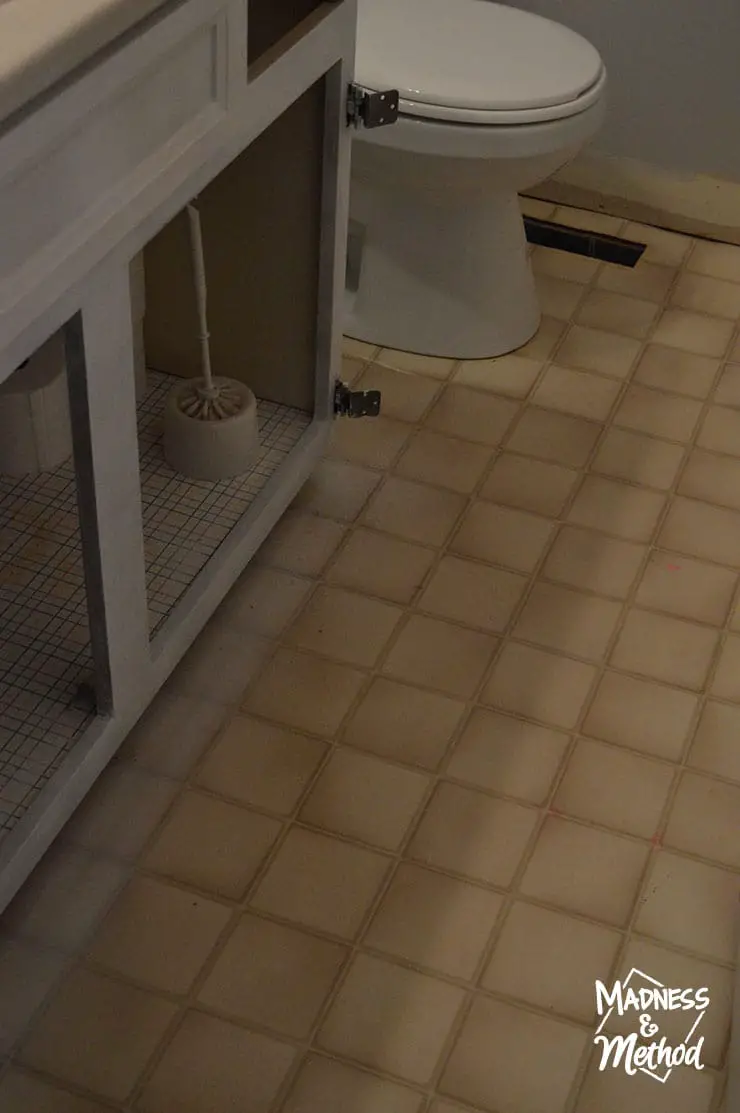
Normally the floors don’t have a white spray paint haze on them. I added that when I painted the vanity cabinet haha!
They are a solid sheet of linoleum/vinyl, and each little square in the pattern is just over 4″ wide. My original idea was to spray paint them… but thank goodness I was steered away from that route because it was going to be SO much harder (not to mention the fumes I would have to endure…).
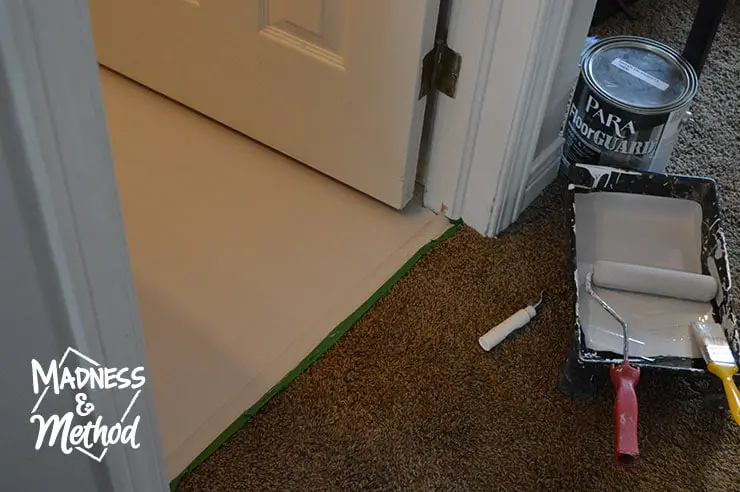
I stumbled on this post about painting your floors with specialized Para Paint from Heather in Heels, and a lightbulb went off in my head.
I reached out to Para to see if I could use their Floorguard Porch and Floor paint for this project, and they happily agreed! They also provided all the paint for the walls too… yippee :)
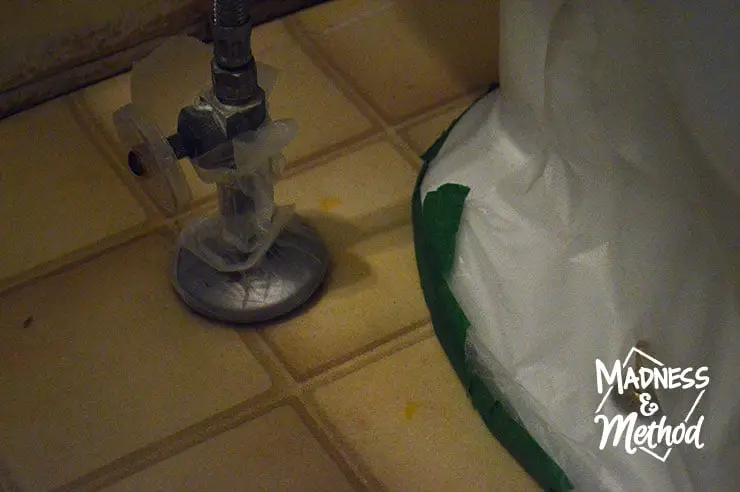
Following the instructions on the can of paint, I gave the floors a good cleaning with TSP. I also busted out my handy press and seal and wrapped (and taped) the things that would be staying. I originally wanted to have the toilet out of the room but we had to replace the original one and we didn’t want to take it out (again).
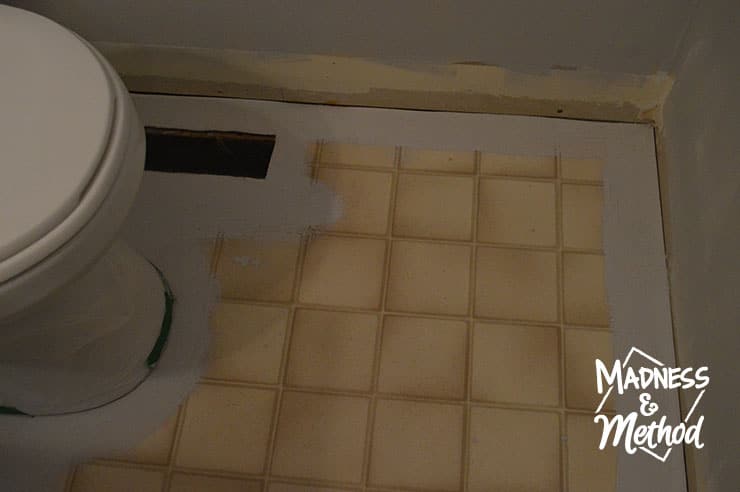
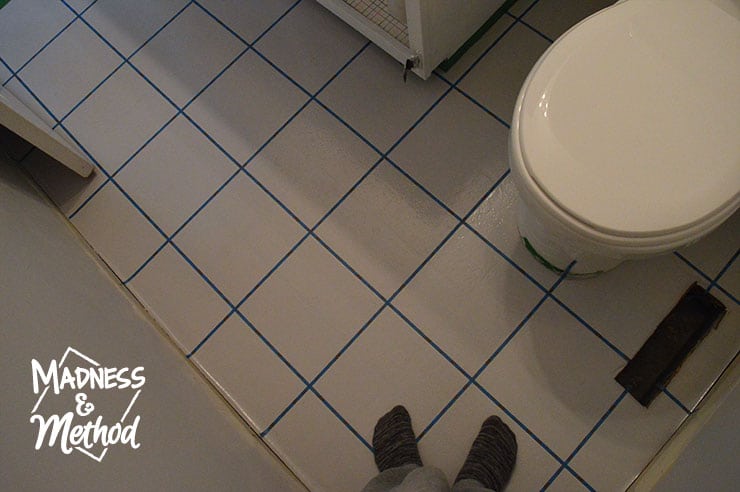
I started in the far corner and brushed the edges. You’re supposed to leave a wet edge while you’re painting, so I quickly rolled the centre before I went too far. The paint went on really smoothly and you could almost get away with one coat.
I wanted to share this photo (above) to show the coverage after one coat. There were a few brush marks, but all the rolled parts looked fine. I also wanted to mention that you can still make out the bumps/ridges from the original pattern (which came in handy for us) AND point out some “dust” that got on my surface.
You can literally not clean the floors enough, so if you’re doing DIY painted floors – make sure to have a sweeper/napkin/rag handy to pick up wayward specks.
My Papa saw this small area before I closed the door and said it looked so much better already (compared to the “urine coloured floor” from before). His words, not mine!
I closed the door and waited patiently… Although they dry to the touch in less than an hour, you should avoid foot traffic for at least 24 hours.
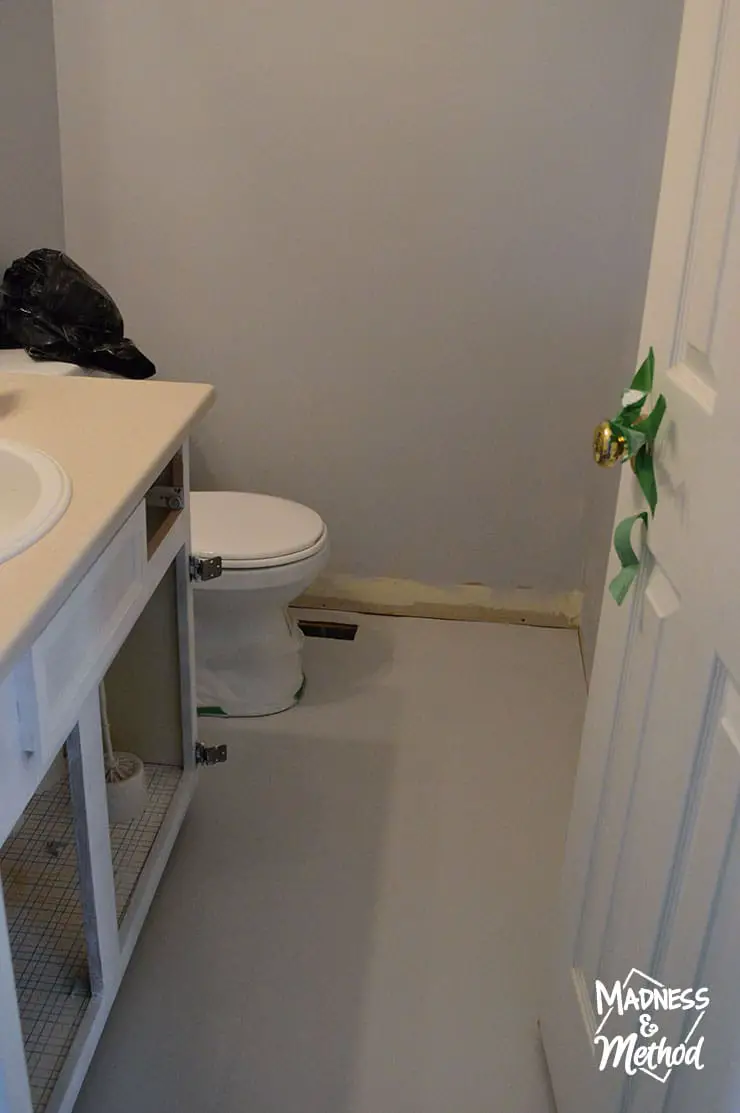
Once I was able to get back in, I liked how it looked already! I got this base coat tinted to match the walls (Silhouette) and it would be the colour of my fake “grout”.
Again, if you’re going with one colour, you would do a second coat, but I was going to be doing a cool pattern so I left it as is. (We also painted the countertops at this point, so you’ll see them magically transform at the end of this post).
Oh, and now my Papa was saying that it looked a little too sterile having everything match at this point.
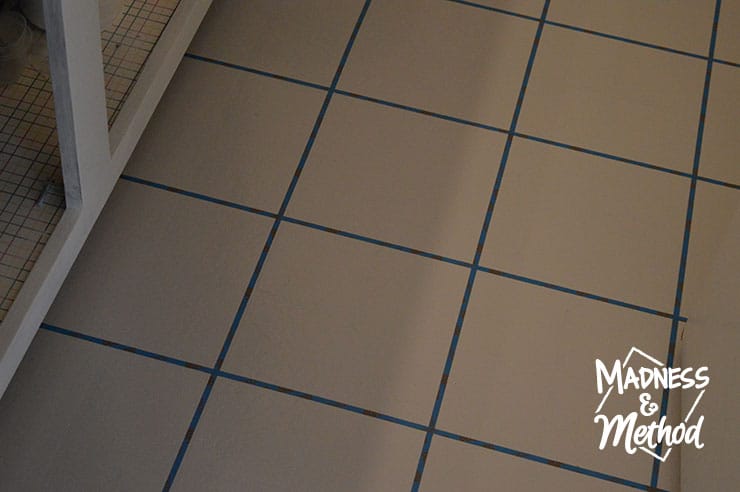
But I had a plan! We carefully taped off some large squares using the original floor ridges as our distance guide (we skipped every other ridge). I was originally going to measure them out, and was happy to skip a step.
I was really excited with how it was shaping out, and was looking forward to going with a larger scale square.
My brother decided to go with a darker floor after he had seen the painted countertops (it was my first pick too, I thought it would be a nice contrast). Either way, I had some Para Floorguard in Dove Gray (medium) and Uniform (dark), because I wasn’t sure what “pattern” I would go with.
Now came the tricky part.

I used a random box is the garage as my “test” piece and got my dad to help me choose a pattern. I was planning on using this fancy roller I had (from my teenage bedroom) but for the life of me I couldn’t find it.
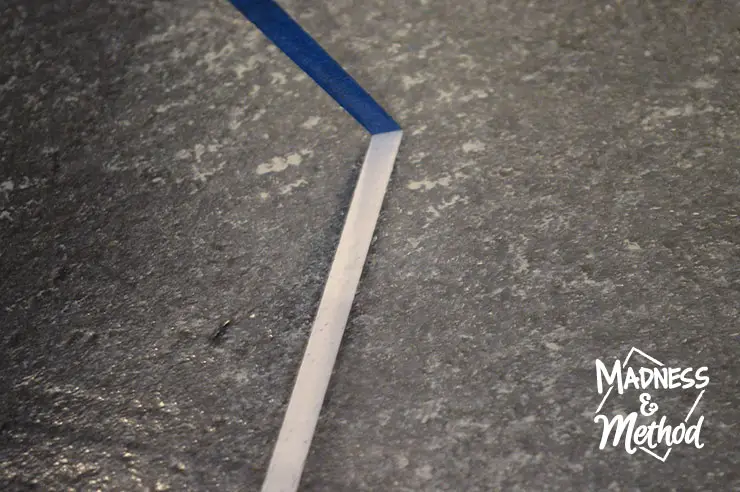
DIY Tip: See the tape that is up the wall? If you’re doing DIY painted floors, make sure to use long pieces of tape like that. So much easier to find and peel off once you’re done!
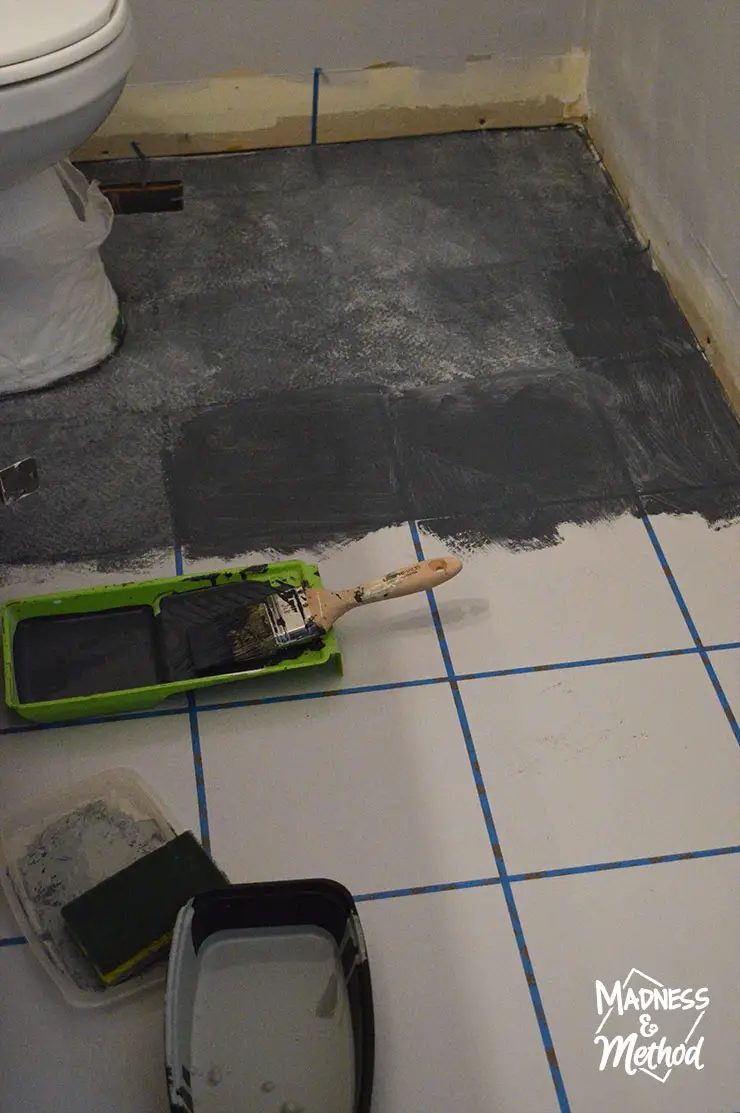
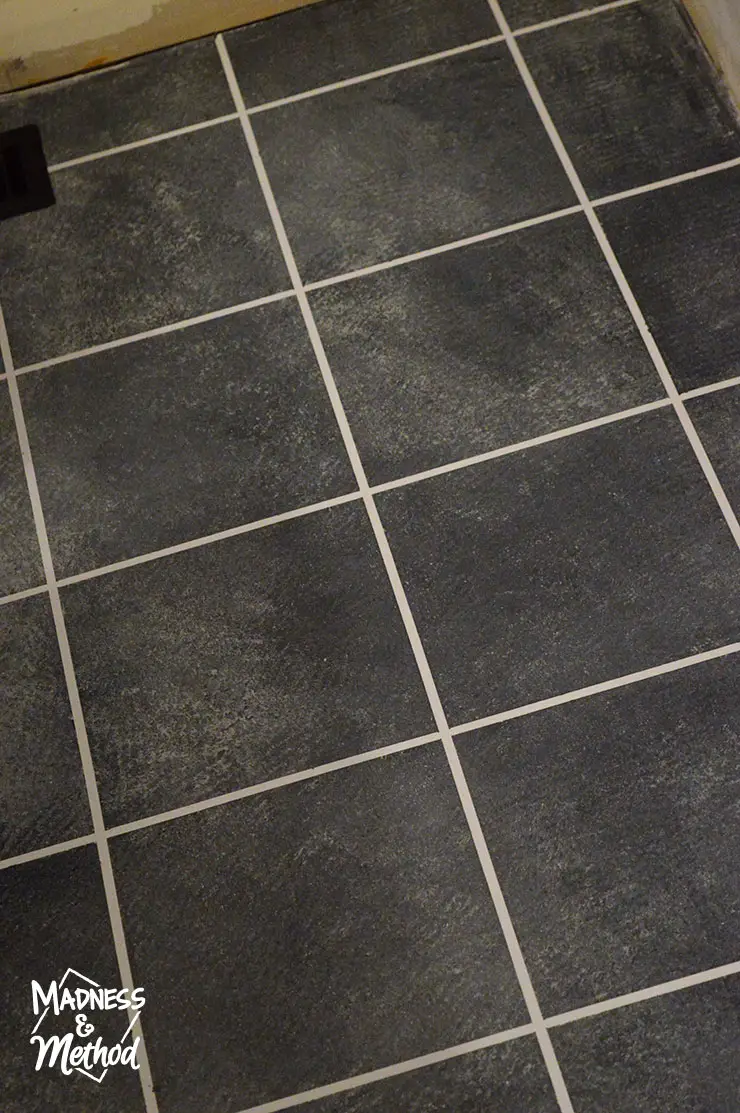
Anyways, the technique I used for the DIY painted floors was to brush on the dark colour (Uniform) in a couple of the squares, and then I would sponge in the medium colour (Dove Gray) with a regular kitchen sponge (as in, I totally stole this sponge from my brother’s kitchen. An unopened one though haha!).

I found that working in a two square zone was a good sized area, because anything larger and I wouldn’t have as much “playtime” to get the pattern looking good before the paint started drying too much. I also tried to “randomize” the two squares I would do, so it wouldn’t be too linear (does that make sense?).
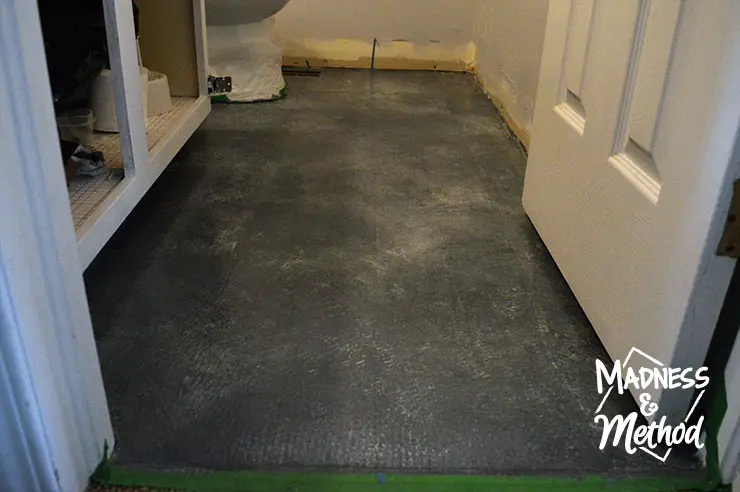
Finally, I reached the end of the room, and hoped that it would turn out okay.
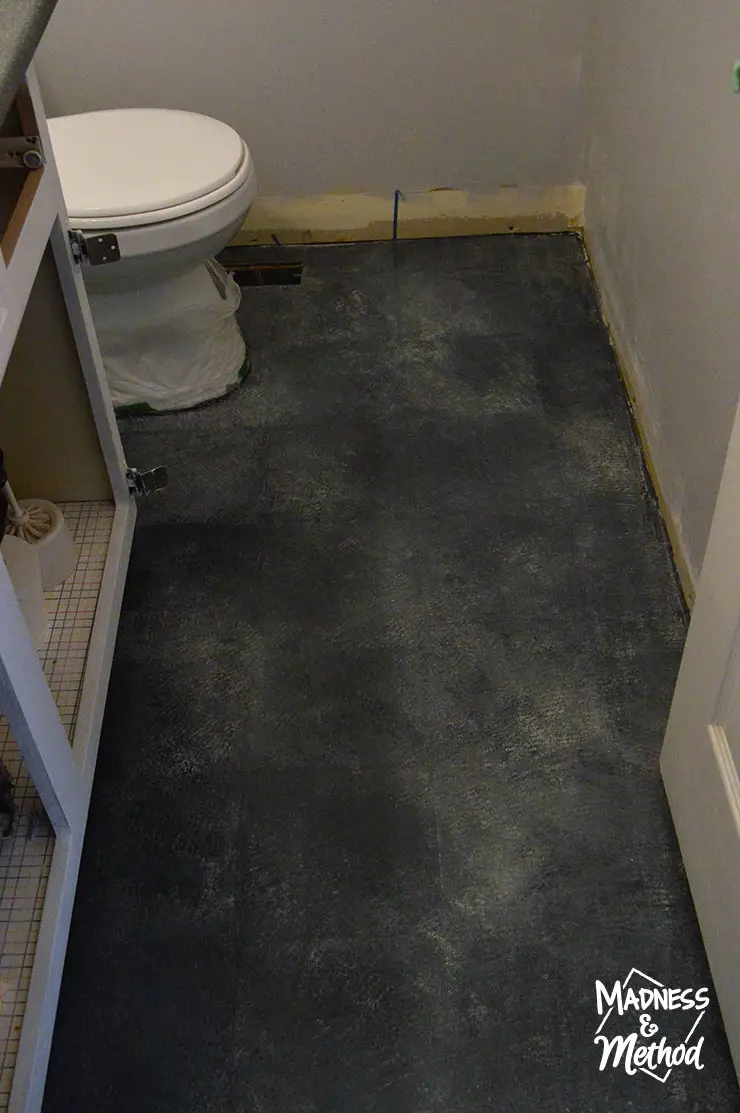
I tried to play up the square shapes with my sponging technique, but you could just as easily ignore the tape and do whatever pattern you wanted across the whole floor.
After waiting for it to dry, it was time for the moment of truth.
Spoiler: I only waited 12+ hours because I had to drive back home and needed to get these pictures haha! But after taking them, I closed the door and made everyone else wait the allotted time (I mean, I hope they did because I had a note up and everything!).
But yes, moment of truth!
(I expect you to be singing The Final Countdown right now…)
The tape came up smooth…
(Dun dun da dun…)
AND THE FLOORS LOOK AMAZING!!!
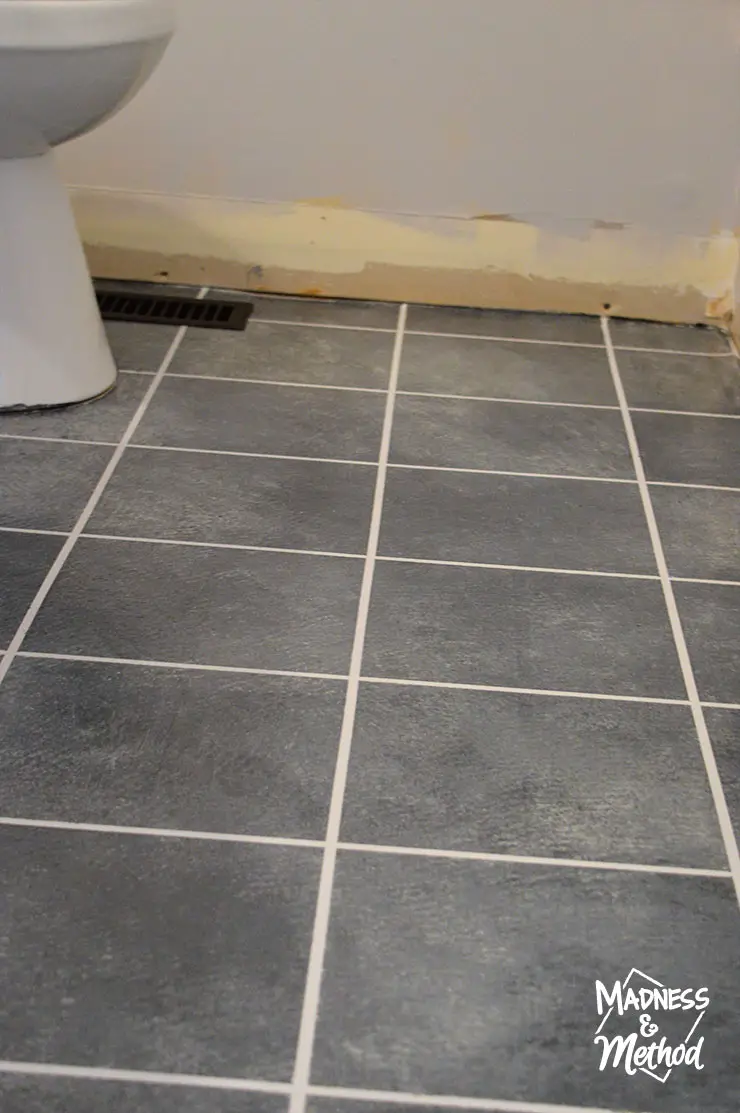
These DIY painted floors are looking mighty sharp! There were a couple spots under the tape that I will touch up, and I need to clean the edge of the toilet (how did that paint get there…).
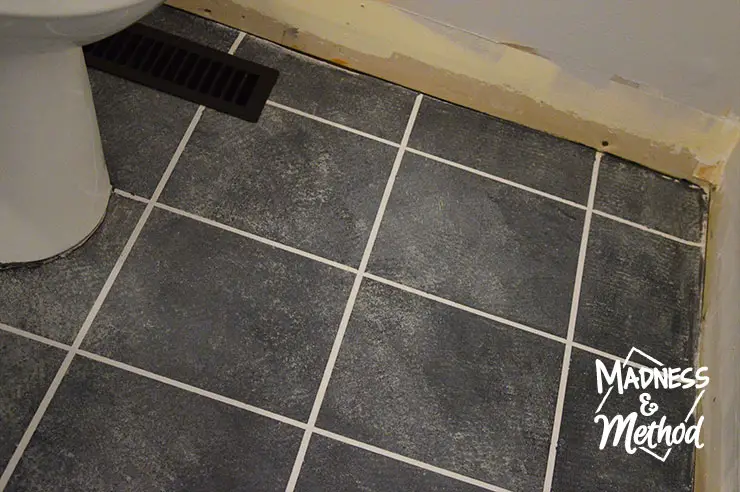
I even cleared the old rusty brown register with CLR and sprayed it with Krylon’s Dual Superbond in Satin Black (you can buy a similar one here).
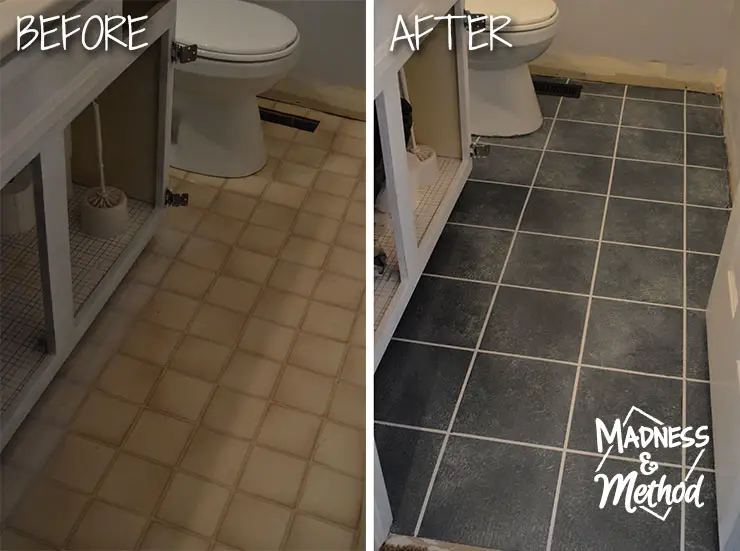
But seriously, LOOK at the difference!
The larger scale “tiles” make the bathroom feel much bigger, and the dark colour contrasts nicely with the rest of the space (as opposed to all being one shade of beige).
In fact, we could probably call this room done as it’s infinitely better than it was before.
Unfortunately, we still have the big to-do list:
Remove toilet paper roll + towel rackRemove cabinet above toiletPatch, sand + prime holesRemove baseboards- Paint walls gray (need to do a second coat)
Remove toiletClean floorsPaint floors grayFancy floor paint- Cut + install baseboards (cut, not installed yet)
- Tape wall pattern
- Paint wall pattern
Remove cabinet lips/wood piecesInstall cabinet framing piecesPatch, sand and caulk pieces- Paint cabinet (almost done)
- Install cabinet hardware
- Remove old faucet
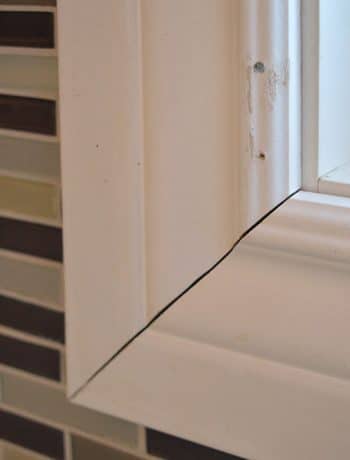
- Cut + install mirror frame (built, needs to be installed)
Paint countertop (& clear coat seal)Clean and paint register- Install new faucet
- Install towel ring
- Install new light fixture (waiting to come in)
- Paint touch-ups
- Put up print (bought prints, and hopefully frames by now)
- Added: Install GFCI
- Removed: Take down mirror / put mirror back up (it’s glued on)
- Removed: Paint toilet / reinstall toilet (replaced toilet completely)
I actually pre-scheduled this post because I was planning to be at my brother’s house (getting all these things done) today. So technically, this list was accurate a few days ago, but I’m really hoping we’ve scratched a few more items off the list by now!
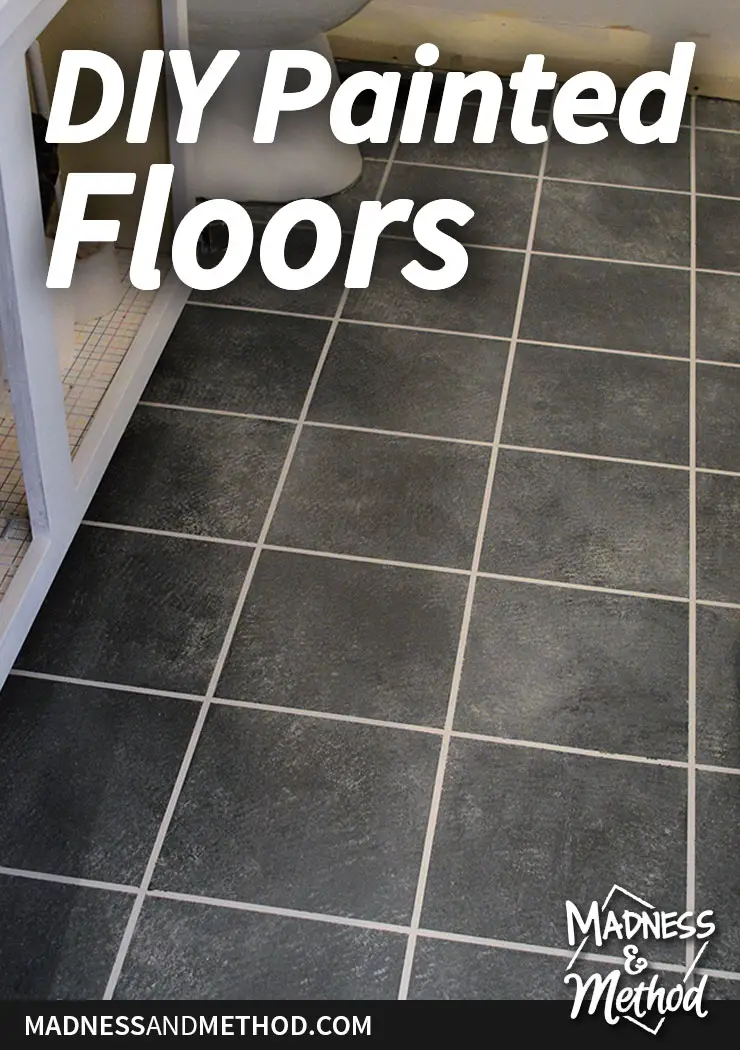
Nevertheless, these DIY painted floors look so much better than before, and because I used Floorguard paint (for porches and floors) they’ll last a long time too. At quick glance, they do look like ceramic tiles, but when you’re in the room – you can obviously feel that they are not. Actually, they kind of just look like a cool linoleum floor pattern, and you probably wouldn’t know they were painted.
Unless you read this of course :)
I’m hoping to have a completed room to show-off next week, but in the meantime you can check out the other linking participants and the featured One Room Challenge bloggers.

This Project Has Been Sponsored By:
![]()
![]()
![]()
![]()

10 Comments
Heather
May 2, 2017 at 4:24 pmthis looks SO great! can’t wait to see the finished room.
Nicole
May 4, 2017 at 10:41 amYour purple floors definitely inspired me (purple is my favourite colour too!) – I’m happy they turned out :)
Wanda | From House To Home
May 4, 2017 at 1:33 amOMG!! The floor looks amazing!! That’s definitely something I will keep in mind for a future reno project! I can’t wait to see the whole room pulled together next week :)
Nicole
May 4, 2017 at 10:45 amWe’ve got a lot accomplished so far… just doing the last details (and waiting for the light) – I’m really liking these floors though!
CoCo
May 4, 2017 at 9:19 pmThis is crazy, Nicole! They don’t even look like the same floors. Wow, you’ve totally rocked this challenge. They look amazing. I can’t wait to see the reveal next week. I’m so excited for you, hugs, CoCo
Nicole
May 7, 2017 at 2:56 pmYour painted floors look great too! I don’t think I would have the patience to wait for the stencil :)
Angela @ Simply Beautiful By Angela
May 8, 2017 at 9:23 amWhat an amazing difference! I am truly amazing with how these turned out :)
Nicole
May 8, 2017 at 11:45 amThey completely transform the space, and it was so easy to do :)
Bre
May 8, 2017 at 9:34 pmWOW! Holy moly – I was actually nervous / excited / anxious to read through this and see the finished product! It looks SO MUCH BETTER! You really did a fab job with this. Cannot wait to see it all done later this week!!
Nicole
May 9, 2017 at 10:03 amHa, when I was doing it I definitely got some weird looks at my brother’s house – but it turned out great :)