
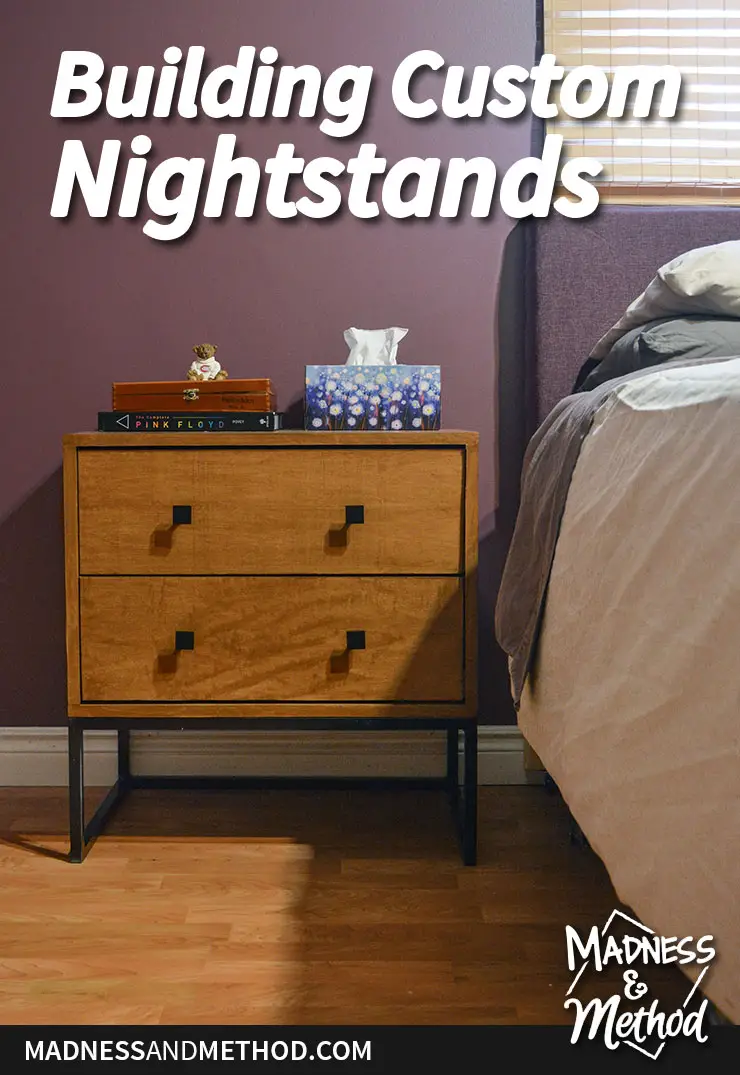
I feel like I worked and worked and worked on trying to finish these nightstands on time… but alas I am still not done :( I figured it would be better to share what I have completed, and I’ll most likely update the images when I have them done 100%. Read all about building custom nightstands!
– Note: This post contains affiliate links. See more information about affiliates here. –
Some backstory: I’m completing two master bedroom makeovers as a linking participant in the Spring One Room Challenge hosted by Linda of Calling it Home. In the second week, I painted a secondhand dresser for our basement bedroom, and last week I finished the paint pour marble nightstands (again for the basement bedroom).
This week I am focusing my attention to our main master bedroom and I was hoping to have completed building the custom nightstands… but ya…
(Update: Nightstands have been completed with full details below!)
Now, I might have briefly mentioned this in the Week One design plans, but my nightstand inspiration is McGee and Co’s Double Owen Nightstands. I’ve been “roughing it” using a folding tv table as a nightstand for the past year or so (I sold mine when I sold our guest bed before the nursery makeover).
Over the last year, I’ve been slowly eyeing nightstands and saving any that caught my eye. I was looking for something with a drawer, an open (preferably metal) base and the plan was that they would be our forever nightstands, something that we purposefully bought and loved.
When I saw the Owen double nightstands, I fell hard. These were it! But… there were a few teensy little issues. One, they were a bit wider than I was looking for (I’d been surviving with a tv table, after all, I didn’t need to double the surface). Two, they don’t ship these to Canada at all… and three, the price was a bit higher than I was planning on spending.
Let’s blame being in Canada the most okay :)
Anyways! Being a strong, confident woman (I always think of the episode of friends with the audio tapes when I say that btw!), I figured I could build my own Owen nightstand, a no-wen nightstand if you will… and here’s how it went.
Building Custom Nightstands
I might also mention that I’ve had the design plans for these nightstands since November. I was just waiting for my garage to be cleared of our last One Room Challenge project, and I was going to build them in the New Year. But let’s be honest, the main reason I added our main master bedroom to this ORC was so I could actually have an excuse to get to them :)
Materials Used:
- 4×8′ Sheet of 3/4″ Maple Plywood
- 4×8′ Sheet of 1/2″ Melamine (didn’t use a full sheet)
- Metal bases painted black (mine were made with 3/4″ solid)
- Roll of Birch Edge Banding and Roll of Melamine Edge Banding
- Edge Banding Trimmer and clothes iron
- Drill and screwdriver
- Circular saw and Kreg RipCut
- Kreg Jig with 1-1/4″ screws and 1″ screws
- 14″ Soft-Close Drawer Slides
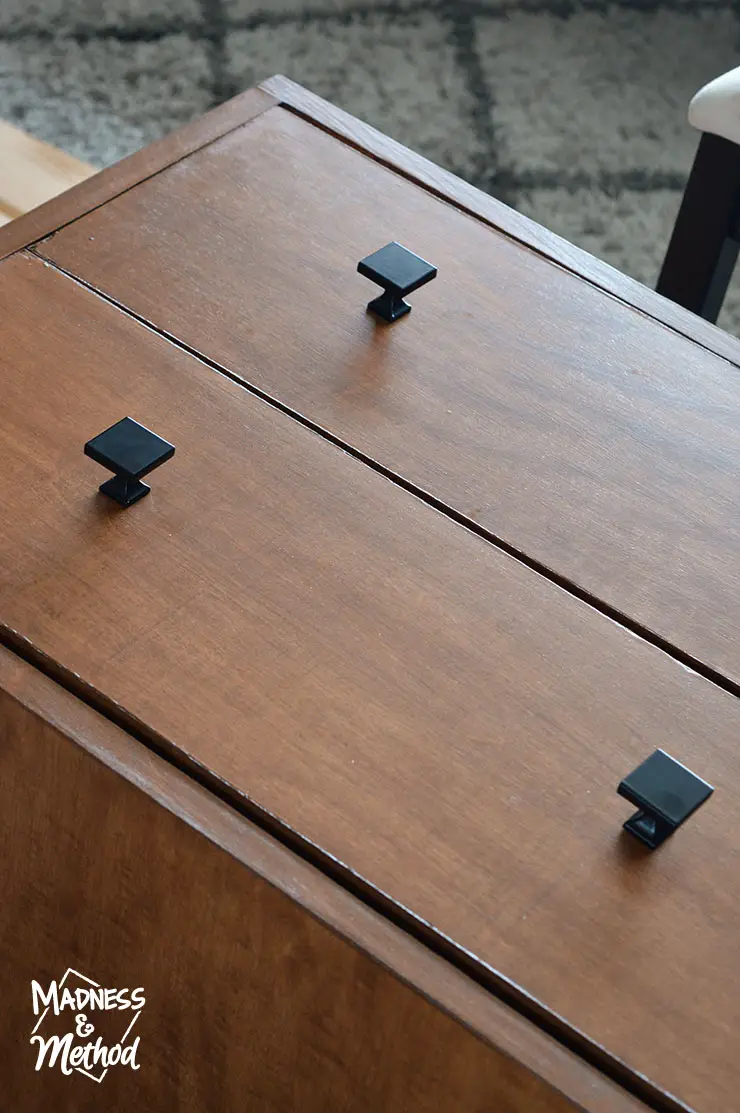
- Black square knobs
- Stain in colour of choice (I tested a lot and chose water-based Colonial Pine)
- Polyurethane in Satin
- Other tools (utility knife, scissors, measuring tape, pencil, level etc.)
- Other supplies (wood glue, paintbrushes, rags, caulking, screws etc.)
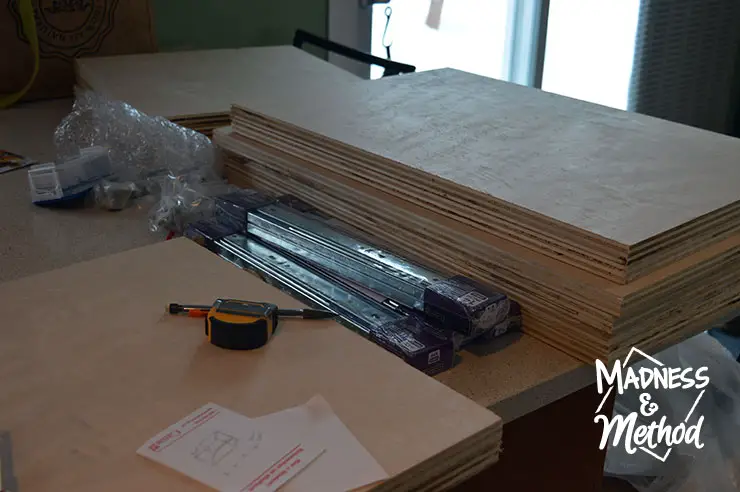
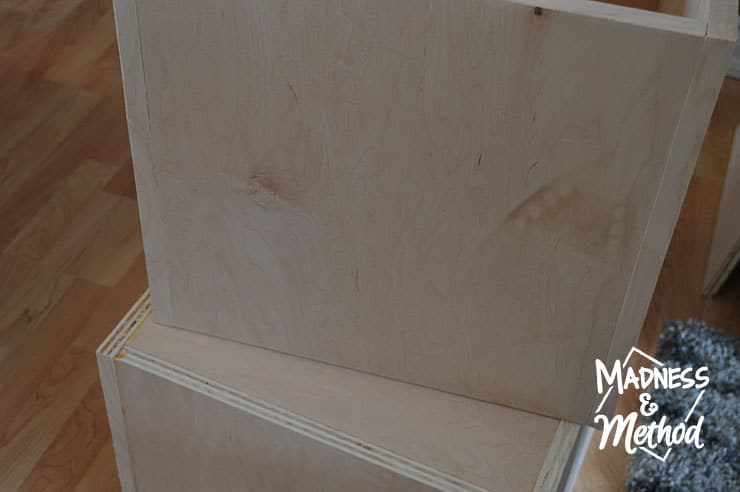
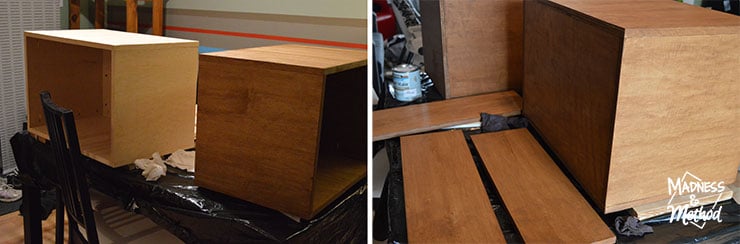
I determined that I could get two nightstands boxes/exteriors including the drawer fronts out of one piece of nice 4’x8′ plywood. I had most of the pieces cut right in-store (mostly because I was alone and couldn’t unload the 4×8 by myself at home, but also because it was raining that day!). I then cut the rest of the pieces at home with the Kreg RipCut.
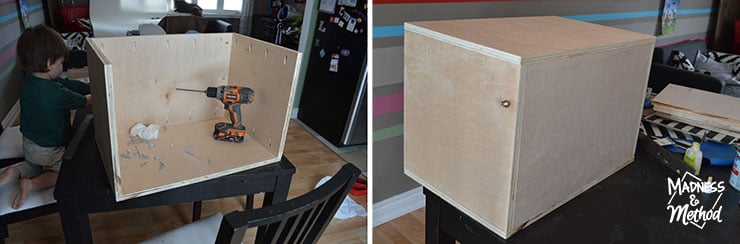
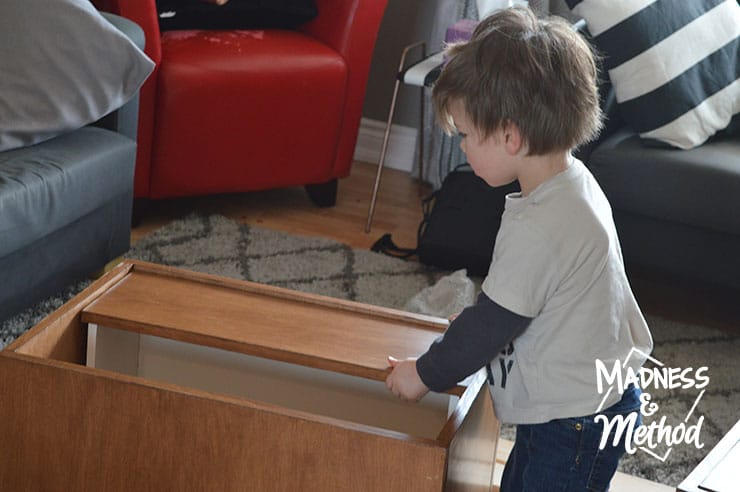
Then I screwed a gazillion pocket holes and built the shells (with my little helper who at first passed me all the screws… but later threw them all over and ran away…). I usually try to build things at the kitchen table, so you’ll see the random house messes throughout this post :)
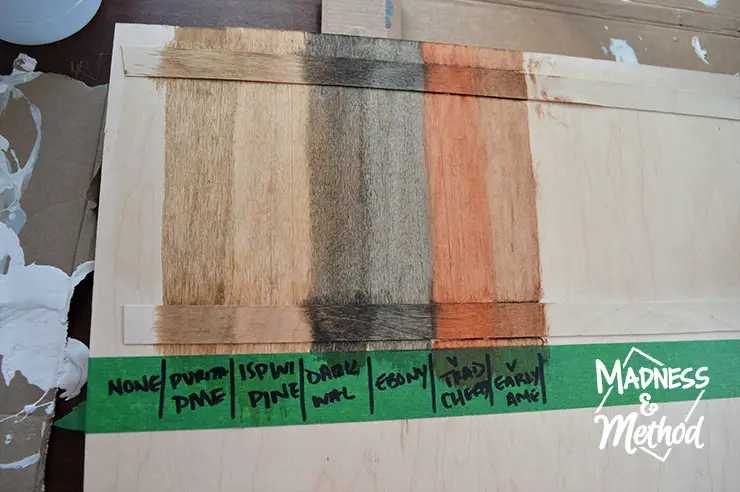
I had one leftover piece of maple plywood, so I glued two strips of edge banding (one that I conditioned, and the other that I didn’t) to test stain colours. These are all the stains that I already had, and while I liked the Early American the most (the Puritan Pine second), I didn’t like the gel application as much (and only had a small container).

So fast forward to the long weekend – I had to wait until Saturday morning for the stores to open, then went two separate times to 3 stores to get more samples. (I should also mention that our kitchen sink wasn’t draining properly and we needed plumbing stuff ASAP).
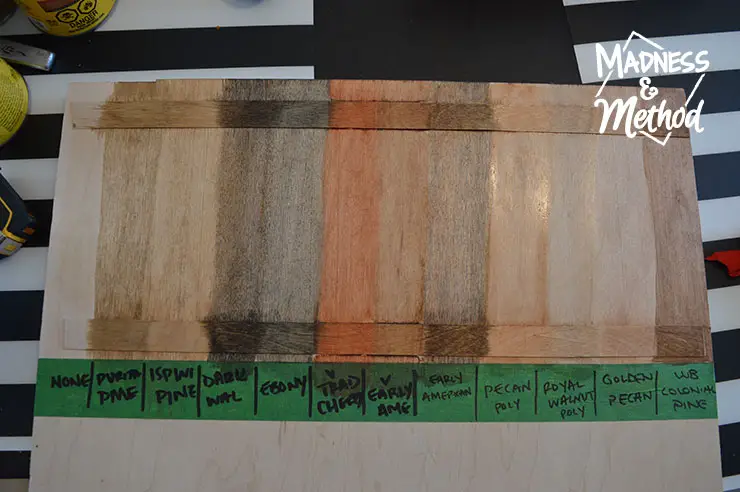
I shared a more in-depth decision process on my Insta Stories, but basically, I decided to go with Minwax’s Water-Based Colonial Pine. It was a well-educated guess that it would work since it had to be mixed in store and the only samples they had were the ones online (but I had a lot of things to compare to by this point!). I think it’s the most similar to the medium brown I was going for, and I really preferred the water cleanup (and less smell!).
Oh, I should note that while I do like the light colour of the original Owen nightstands – I didn’t think that it would mesh well with our light-oaky-ish laminate floors.
Ha, good thing I picked a darker colour too because rookie over here left the hot iron on the wood while I was doing my edge banding :)
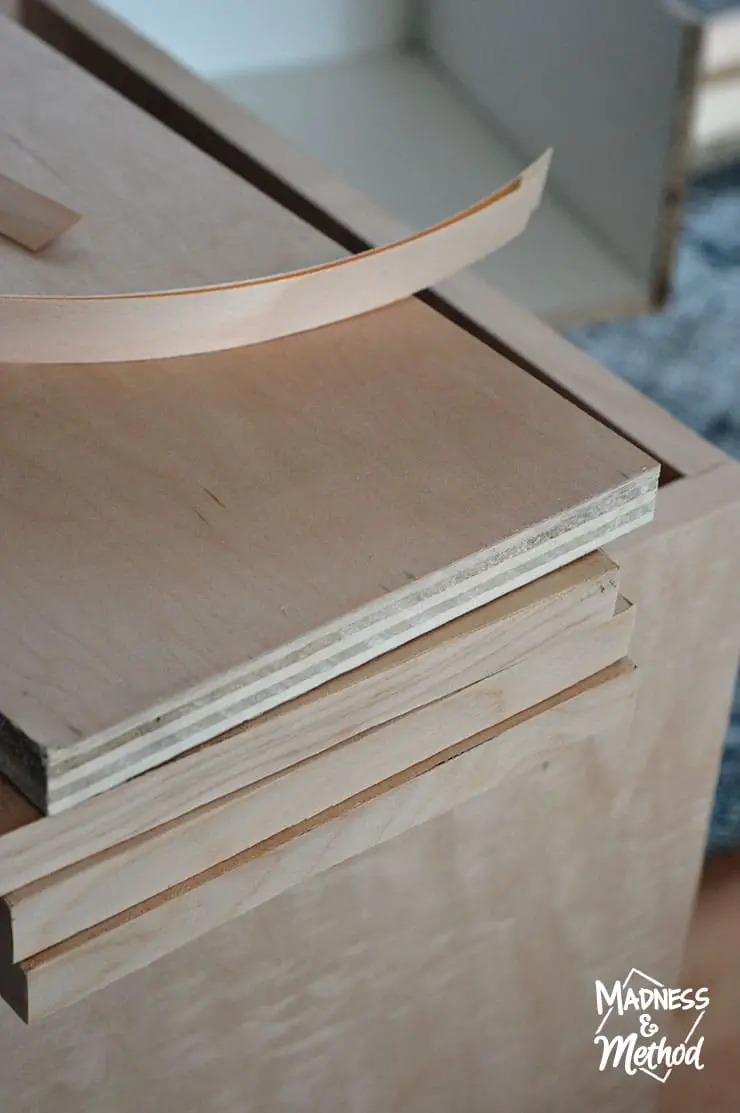
Speaking of which, the only edge banding that they had in store that was close to the maple plywood I chose was birch. Good thing they look pretty much the same and take stain the same!
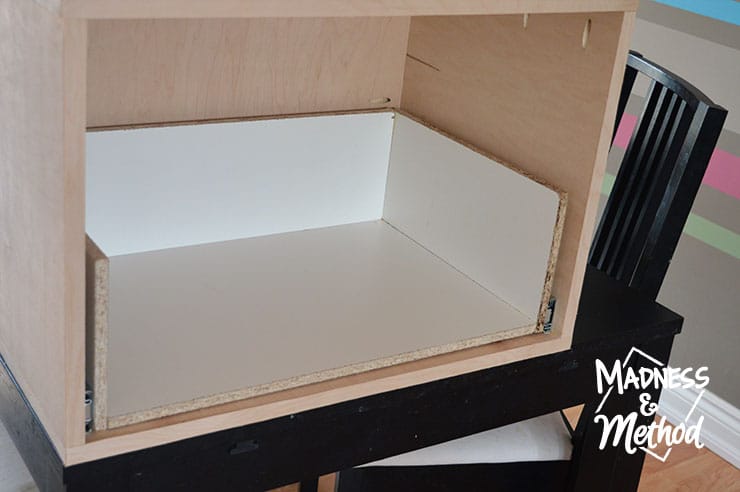
For the drawers, I knew I wanted to make them from 1/2″ material to lighten up the overall weight of the nightstands. I bought some basic melamine and got to work building those on the weekend (after making sure that they would fit with the drawer slides I bought).
I did two coats of stain on the outside, followed by 3 coats of satin polyurethane (only one coat of each on the inside). This took a while because of dry time, but I really liked how they turned out :)
Current Nightstand Progress
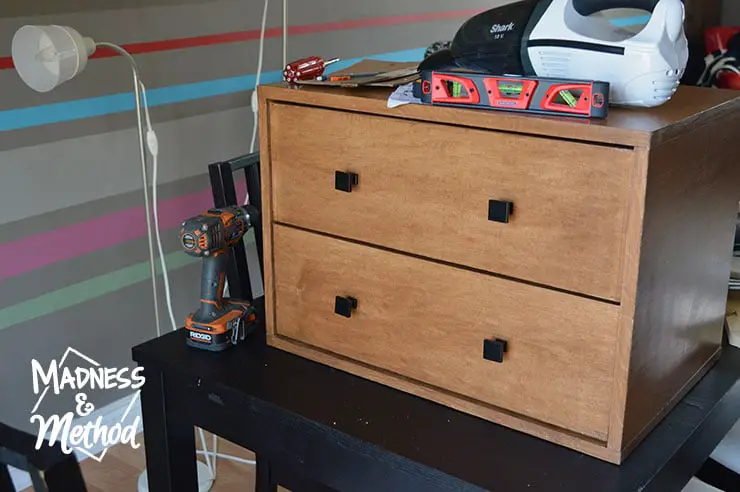
I managed to install the drawer fronts onto the drawers and install the slides on them – but still have to install the slides in the boxes.
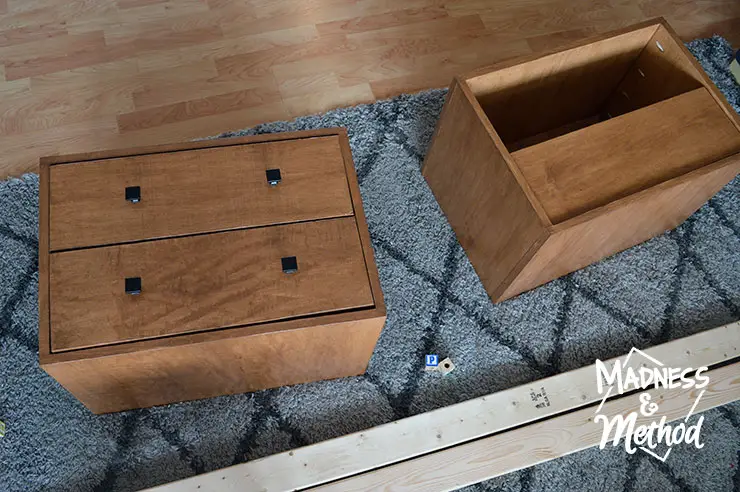
This is pretty much what it’s going to look like when I’m done (plus a base!) – I literally just stuck the knobs on without installing them for these photos :)
And the missing drawer? Ya, I accidentally cut one too short (blame the holiday rush!) and need to Frankenstein a piece onto it but didn’t have my big clamps.
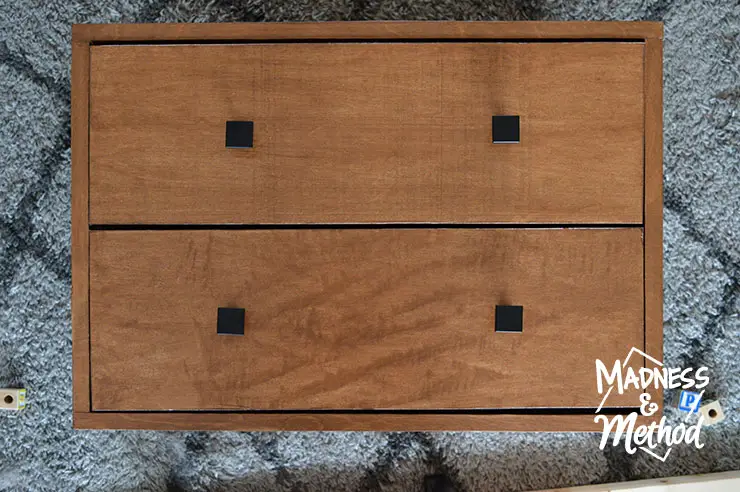
The spacing between the drawers will be a bit more even than this, but I think I was able to recreate the Owen nightstands pretty well! And considering this was my first proper, nice furniture build (unless you count the wonky game shelf), it’s not too shabby…
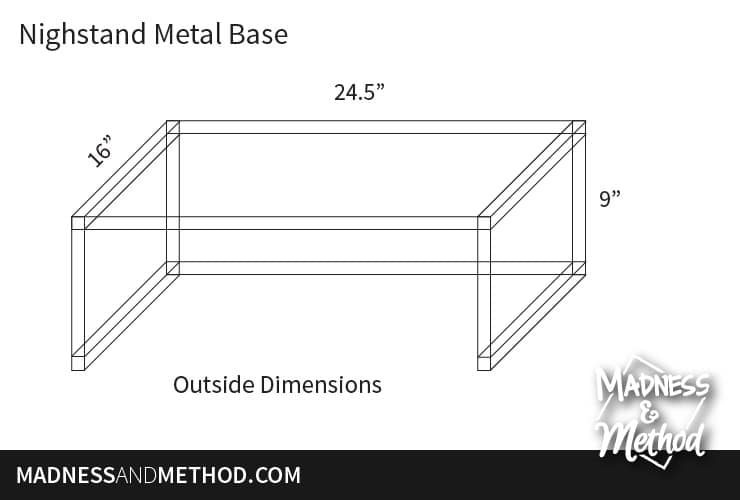
Oh, and I’ll also be slightly altering the metal base so that I have an open front. Figured it would be easier to sweep or vacuum under there. But let’s be honest, that would mean I would have to actually clean the bedroom (our current bedroom is like a dust bunny haven).
When I asked the Husband about the bases last week he was all like “mumble mumble Tuesday”, and I was like “Tuesday!? That’s too late for my blog post”. And he was like “no, two weeks!” – so ya, I knew that there would be a little hold up for the nightstands to be completed 100%, but I figured I would have had my parts done by now (ha!).
So let’s just basque in the glory of another almost finished project. I only have a few MORE hours of work left (including fixing the final drawer, staining it, sealing it, installing the hardware, installing the drawer slides proper AND installing the base that still needs to be built).
So I’ll be back in a few weeks to edit this post with final pictures (and I’ll make some Pinterest graphics then too). Oh, and maybe link all the stuff I used in case you’re planning on building your own custom nightstands too.
In the meantime, why don’t you check out the rest of the One Room Challenge participants to see how they’re doing. And follow our journey here too if you want to catch up:

Week 1: Two Master Bedroom Makeovers | Week 2: Painted and Stained Dresser | Week 3: Marble Pour Nightstands
I’m off to rest for a while because I have two little sick ones and I’m trying my hardest not to catch their little germs…
Completed Custom Nightstands
I’m back writing the rest of this post after the end of the One Room Challenge reveal, wherein I just finished the nightstands by the skin of my teeth :)
Let’s give a quick recap of what I had left to finish:
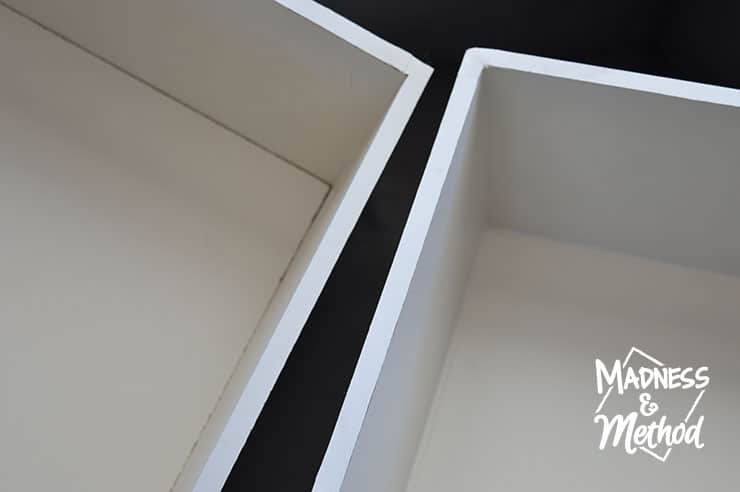
While I had the drawers assembled, I just had to finish them off by caulking the inside edges and adding melamine edge banding (and attaching them to the drawer fronts).
I also properly secured the knobs, although had to go and buy washers after since the bolts were just a bit too long. There was one drawer front that I cut too short – so I had to glue some skinny pieces of wood on the sides, and finished that one afterwards (it’s actually the drawer on the top in the picture above – and the one on my side of the room, so it’s almost not noticeable).
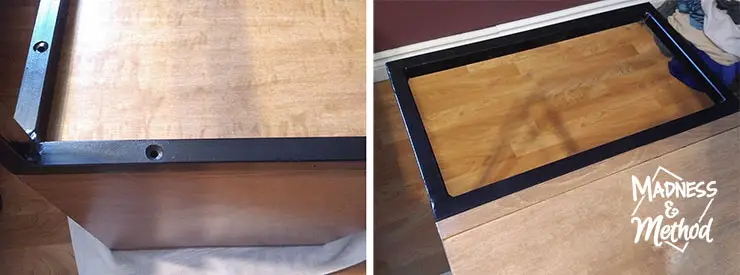
I received the metal bases from the Husband in the morning of reveal day, so I just threw my pieces on top since I didn’t have screws at the time. Don’t worry, they’ve since been secured (and the photo above shows how the screws are hidden in the metal if you were wondering!).
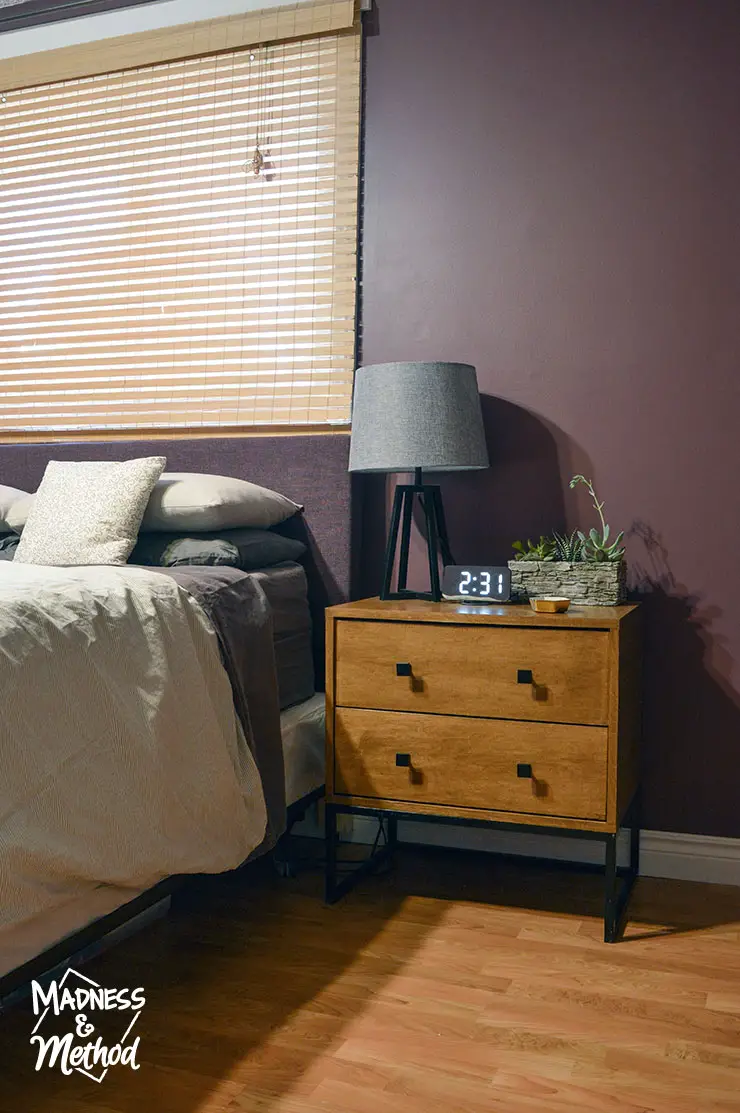
So now my metal and wood nightstands are finally complete – and they look good if I say so myself :) Like I mentioned earlier, I decided to omit the front base/bar so that I could more easily sweep/vacuum under the nightstands.
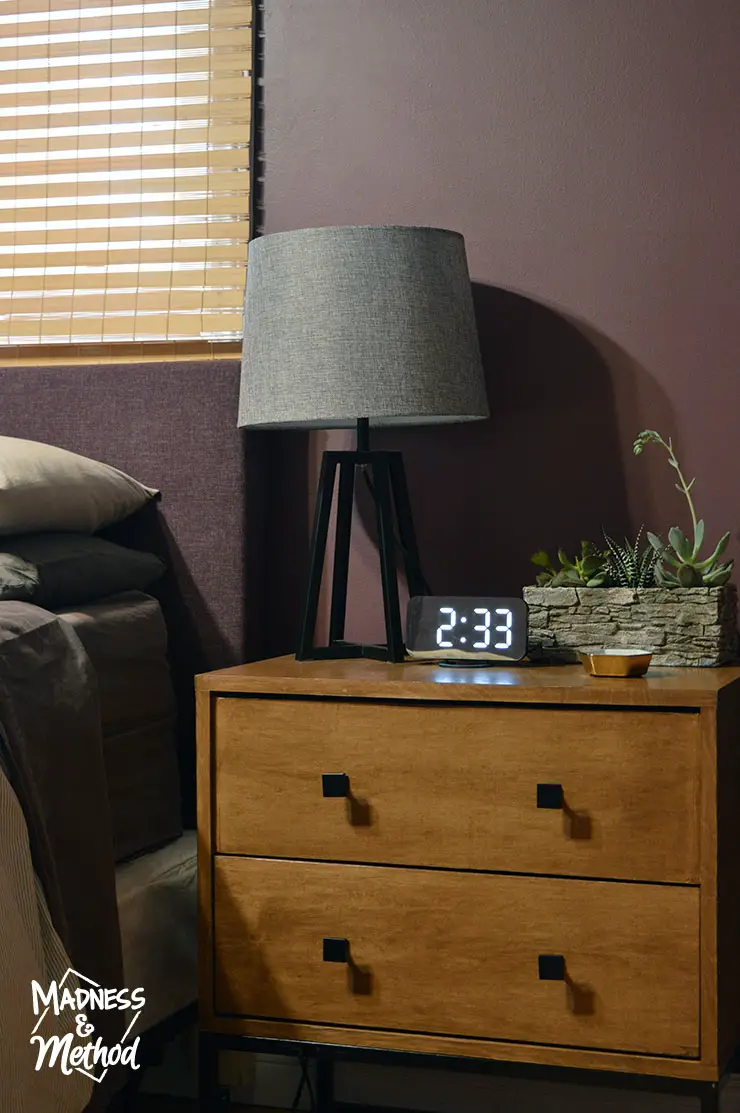
You can sort of see a bit of a stain discolouration on the top drawer (where the glue smeared on the sides I had to attach), but other than that, it looks pretty similar to the other drawers.
I’m just happy I’ve regained a bit of storage space (my pj/casual shirts are in the top, and my pj/workout pants are in the bottom).
I kind of just threw the Husband’s stuff into his side (I did do PJs/long johns on the bottom) so we’ll see if it ever gets organized :)
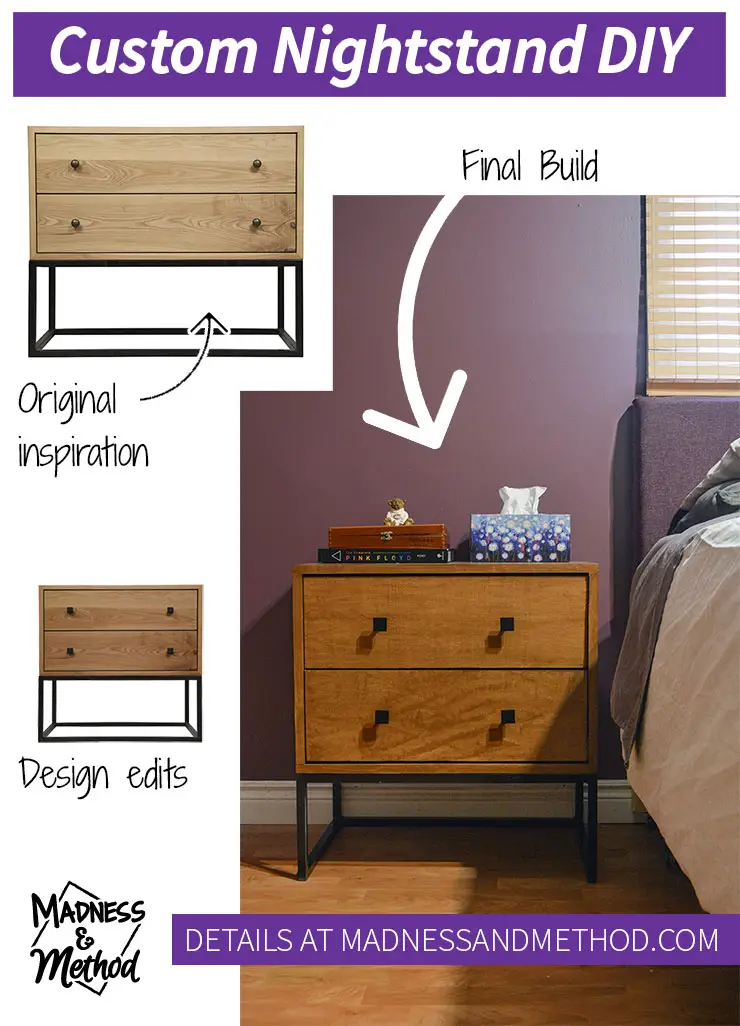
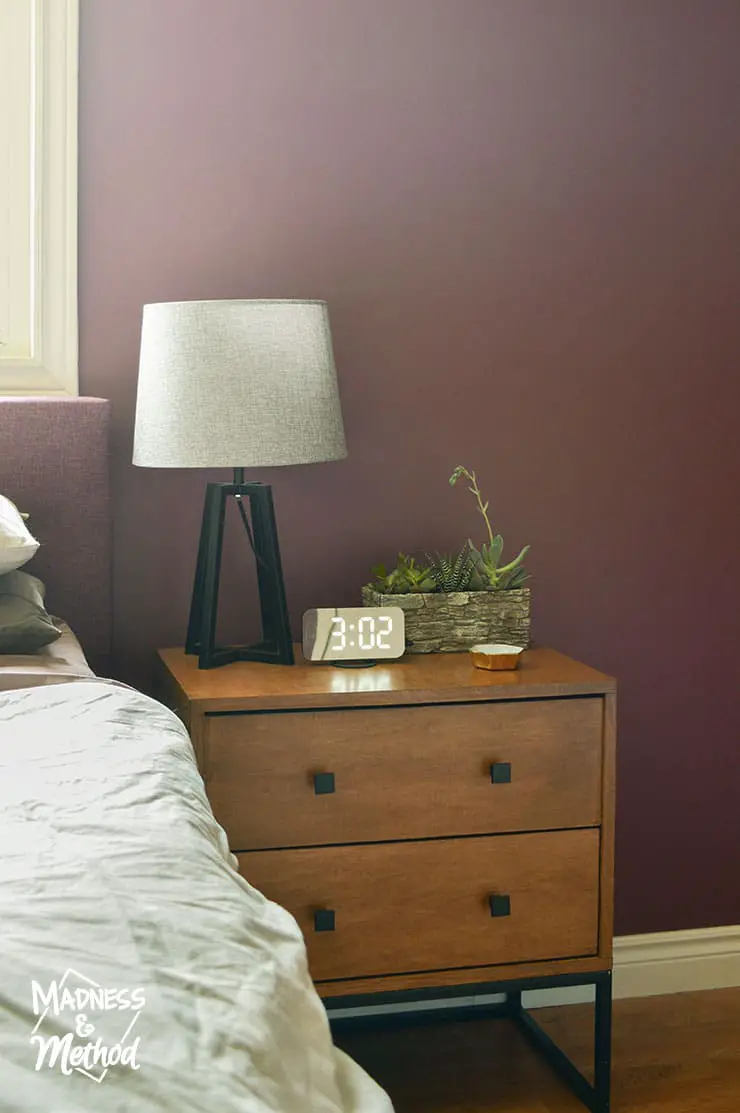
The graphic above shows the inspiration nightstand (reminder: McGee and Co’s Owen Double Nightstand) and the mockup version I created when I shared my moodboards in Week 1. I ended up going with a bit of darker stain than I had envisioned (I was originally thinking something grayer actually) and took out that bottom bar too, but it’s pretty close, right!?
Building custom nightstands took a lot longer than I was estimating, but I think they worked out in the end! Time will tell how they fare with regular use (I do find the drawers a bit sticky, but I think the slides had similar reviews) – but they are definitely solid units!


2 Comments
Nicole
April 26, 2019 at 2:48 pmWow! You are impressive! If I trusted myself with building my own I would have definitely gone this route. Great job friend!
Nicole
April 29, 2019 at 8:04 amHa thanks, still waiting on the bases – but they’re coming along :)