
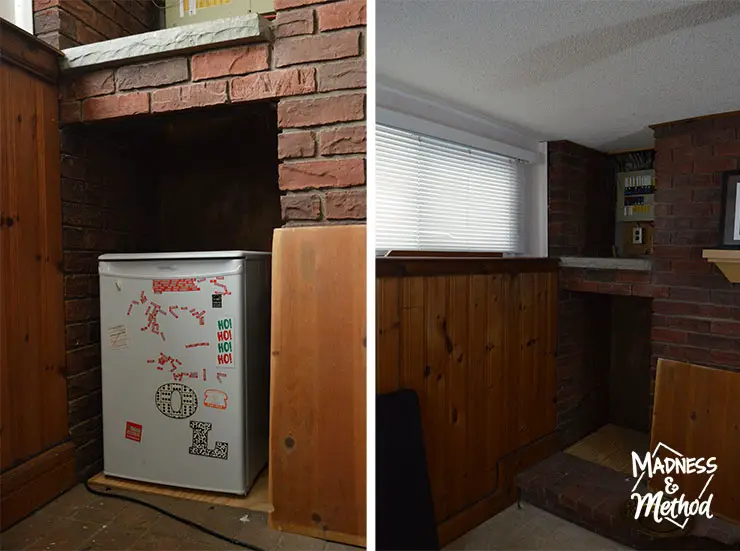
I’ve had the idea to turn the unused hole to the left of our fireplace into some sort of storage for a while now. At one point, I even suggested to the Husband that we could buy a wine fridge… but finding one that would fit perfectly would have been tough. Finally, I decided to build a custom game shelf so that I could eliminate the shelving unit in the basement and get just a little bit of floor space back. (Hopefully the Husband forgot about that wine fridge idea!).
– Note: This post contains affiliate links. See more information about affiliates here. –
Originally, the hole used to house our mini fridge way back when. I actually had to “build up” a base for it, which literally just involved a piece of wood and some cement blocks…
Although, the blocks and wood came with the house… so I’m guessing that’s what the previous homeowners did.

I avoided this hole like the plague, because it was always cobwebby and dark… so I assumed was a haven for spiders. That’s why I made the Husband paint the bricks in there, and thankfully it was brighter (and cleaner) for me to build my custom game shelf.
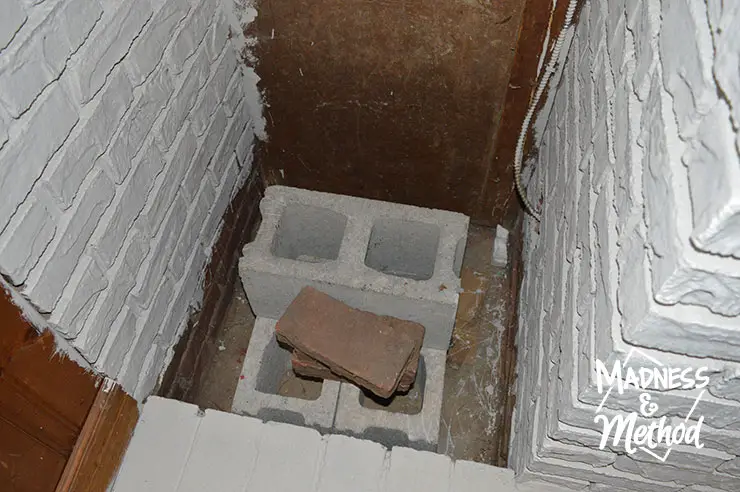
Here’s what it looks like with the flash on – notice the nice paint splotches on the ground? I told the Husband not to worry about the bottom or back, since I would be covering those up.
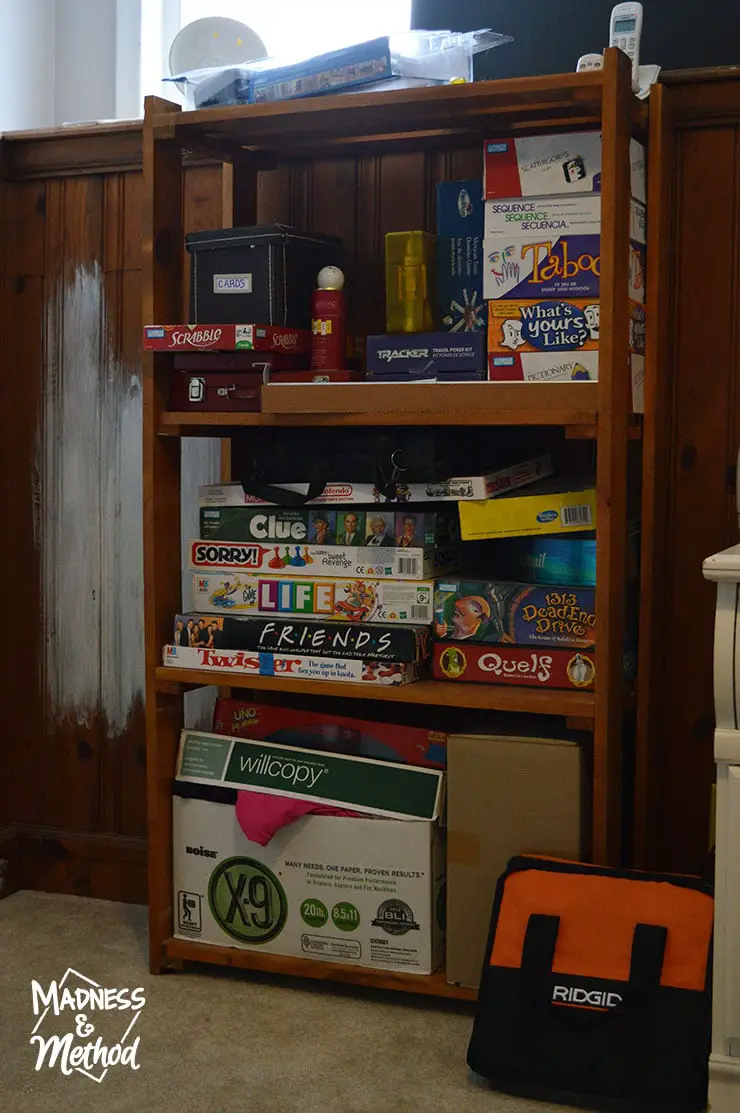
Essentially, I wanted to be able to move all the board games into this hole, and that way I could get rid of this shelf (we ended up just relocating it upstairs). Ignore the bag from the nail gun at the bottom, it was only there to block the mister from getting to the electrical cables. Oh, and the one box on the bottom is full of my old shirts (the remnants from when I had the quilt made).
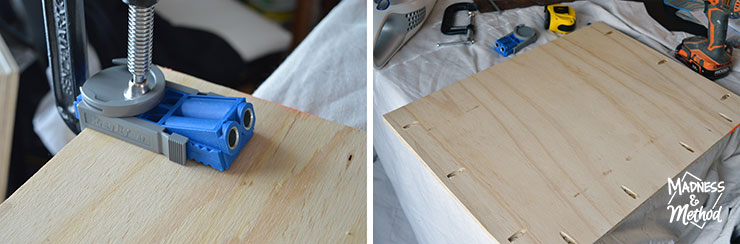
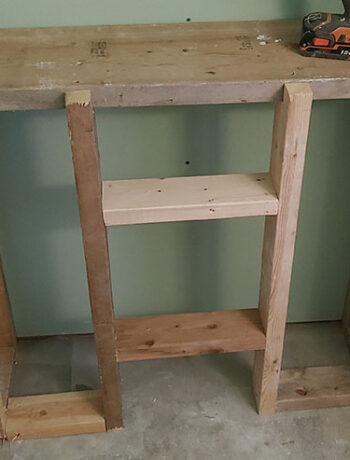
I took measurements of the hole and designed a custom game shelf that would fit in the space. We picked up a piece of 1/2 plywood and cut it to the sizes I needed. I even got to use my mini Kreg pocket hole jig for the first time… so it was very exciting!

When I was measuring the hole, I noticed that the space was super cold – so we also picked up a piece of insulation and I fit it along the back wall.
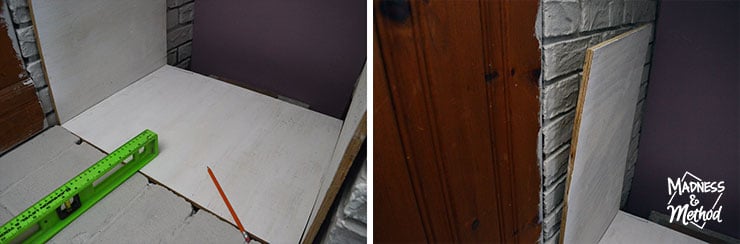
I actually did a test fit with a couple of pieces before I drilled the holes, and it was super tight. I had to go back and shave 1/4″ from the shelves so that it would fit (no big deal, but I’m definitely glad I figured this out before I built the whole custom game shelf). In hindsight, I should have cut off 1/2″ because my plywood sides ended up warping like crazy and it was WAY too tight when it was completed. Lesson learned…
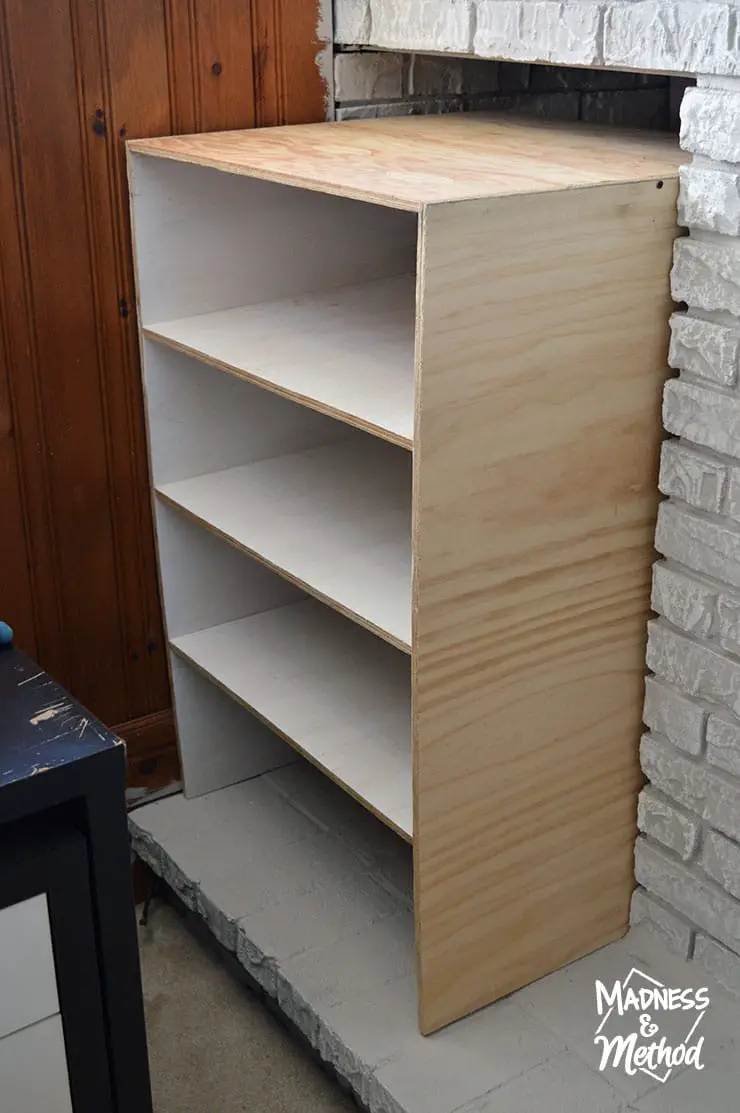
You can’t tell from this photo, but the 3 base shelves were only 18″ deep, and the top shelf was 24″ deep. There were some electrical cables that were in the way so I had to narrow the depth (and I needed the top shelf to reach all the way across just in case something fell behind!).
I was originally going to have a plywood back on the shelf, but because of the crazy warping, I wouldn’t have been able to get it to match up nicely. In the end, we used a piece of 1/8″ hardiboard, and it also makes the shelf a lot lighter. I did have to add a piece along the back of the top shelf so the hardiboard had something to adhere to.

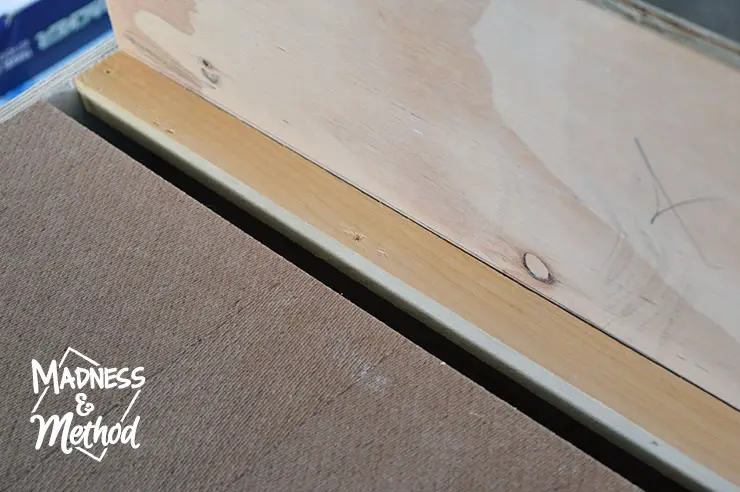
I didn’t mention it, but I had primed one side of all the pieces before I even assembled the shelf. It was only because I had some primer ready that I needed to get rid of, but it ended up being pretty convenient. I then gave everything a coat of the leftover Fusion Champness blue paint that I used on our stronger TV shelf. (Minus the bottoms and sides which would be hidden!).
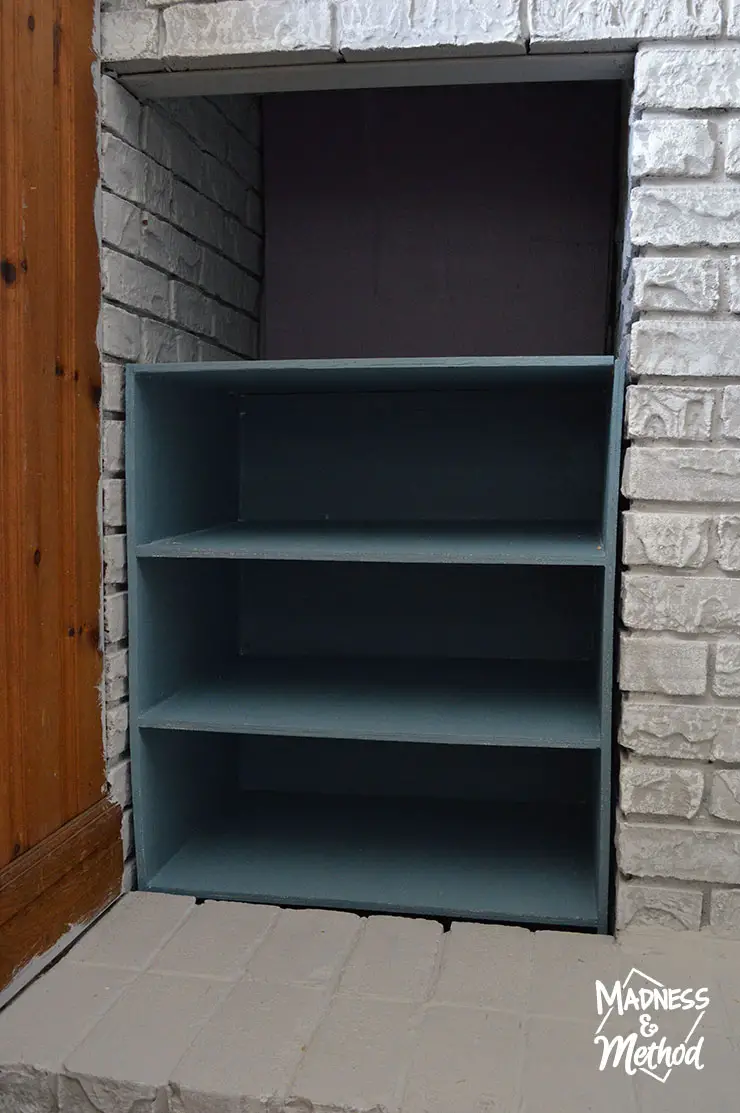
Remember how I mentioned that it was tight? When I did a second test fit of the assembled cabinet, it didn’t have the back piece so I think I had more give to move around. We literally had to hammer it into place – and even then, it’s kind of stuck where it is, and it’s not really where I designed it to go…
Oh, and we ended up breaking one of the pocket holed areas, so I had to go back and glue in a piece to hold the top shelf on.
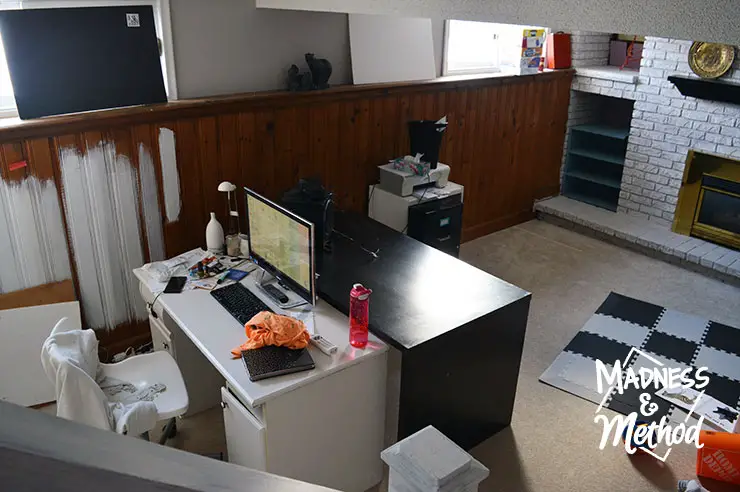
Thankfully (?) the Husband’s computer is in for repairs, so I was able to move his desk out of the way to install the custom game shelf. (When I was doing my test fits, I had to squeeze into such a tight spot). Oh, and I also needed the desks moved to prime the panelling, but more on that next week!
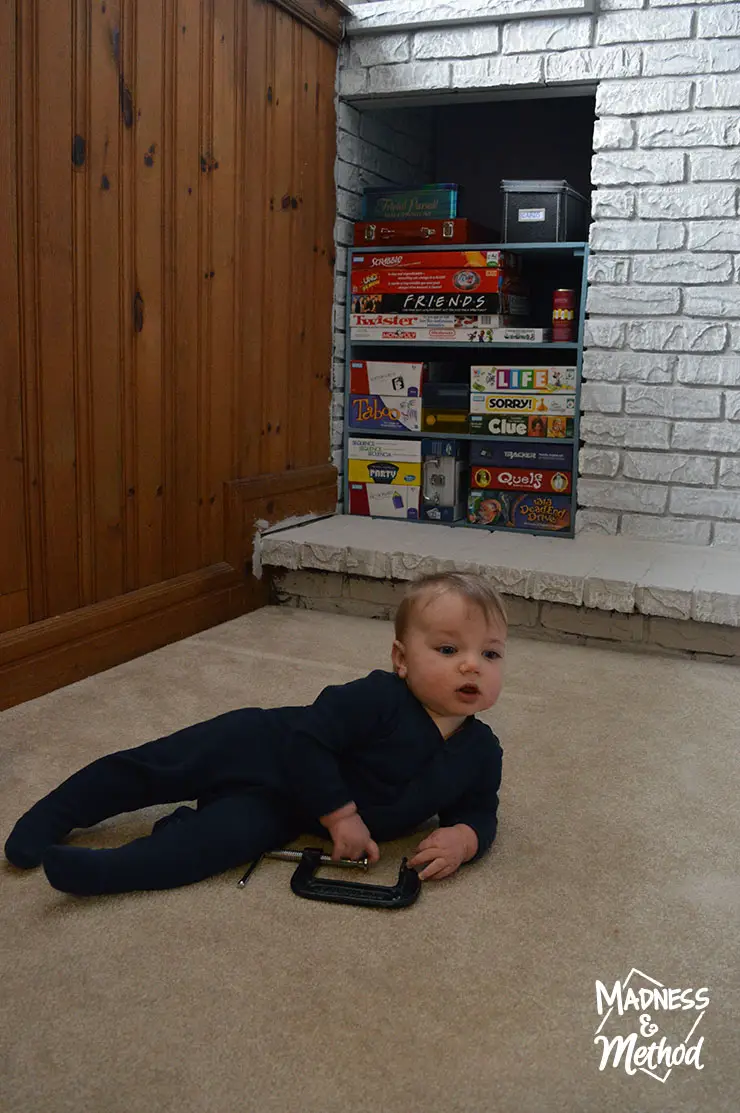
And here’s the little mister posing in front of the now-filled custom game shelf! Now that the desk is moved, I can go back and get the parts of the bricks (under the hearth) that I missed with paint :)
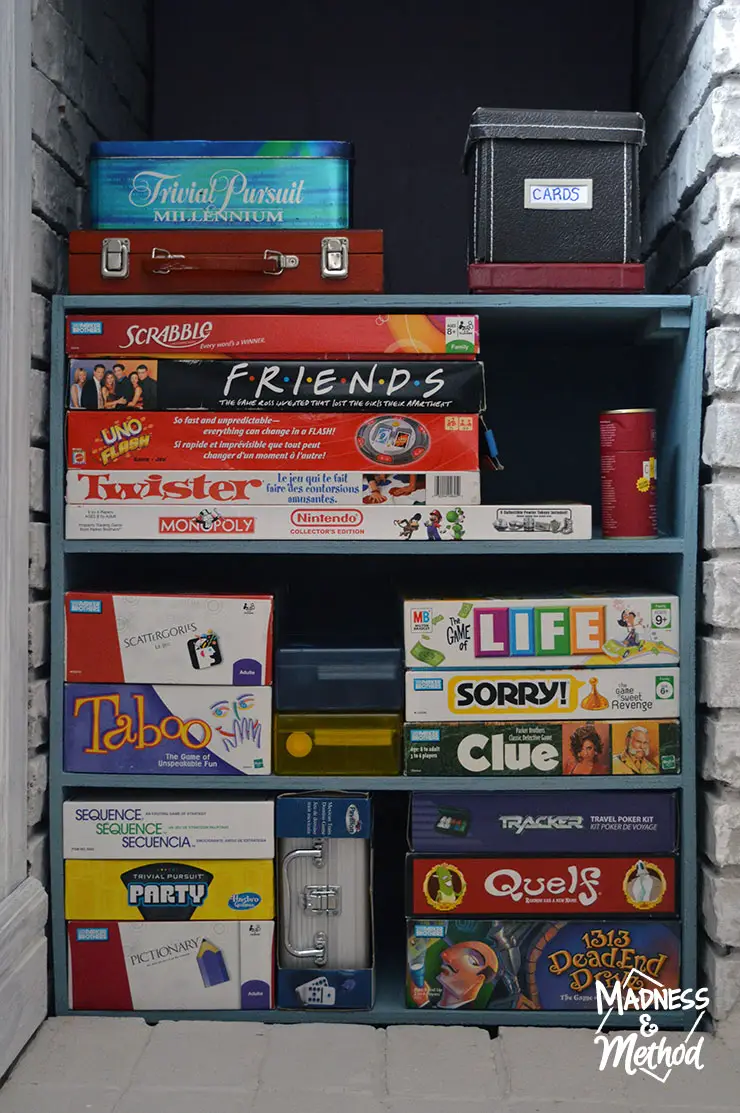
I kind of organized everything by size of box, and I did remove (and will be donating) a few of the games we didn’t use. I also lined them up to the front, but there’s still a lot of room on the back of the shelves. You can see how wonky the side shelf is on the right, and even the little gusset piece I had to add along the top. You can’t really tell from this angle, but there is a gap in the front (between the bricks and the wood) that I will need address.
The plan was to have the shelf butt up perfectly against the bricks. But remember the whole it’s hammered into place thing? Ya… it’s not moving anytime soon (also see how it’s not very level!?).
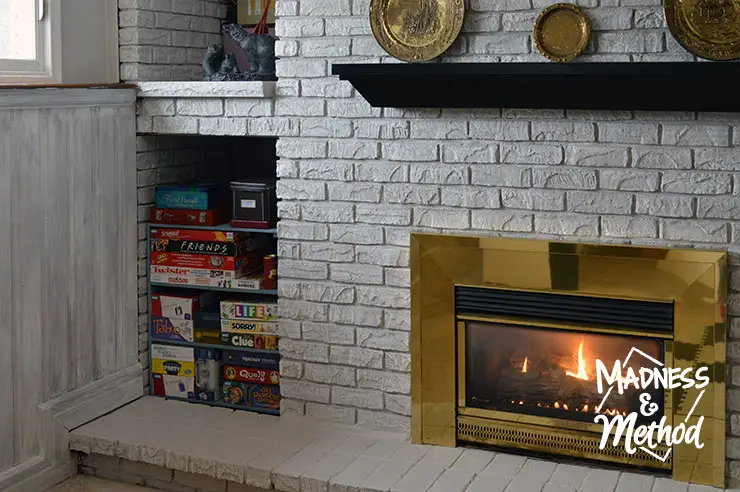
And wowee look at that – I got a coat of paint on the panelling too :) Things are starting to look different down here (scroll way up to the first picture to see the before) – and I’ll be excited once everything is finished.
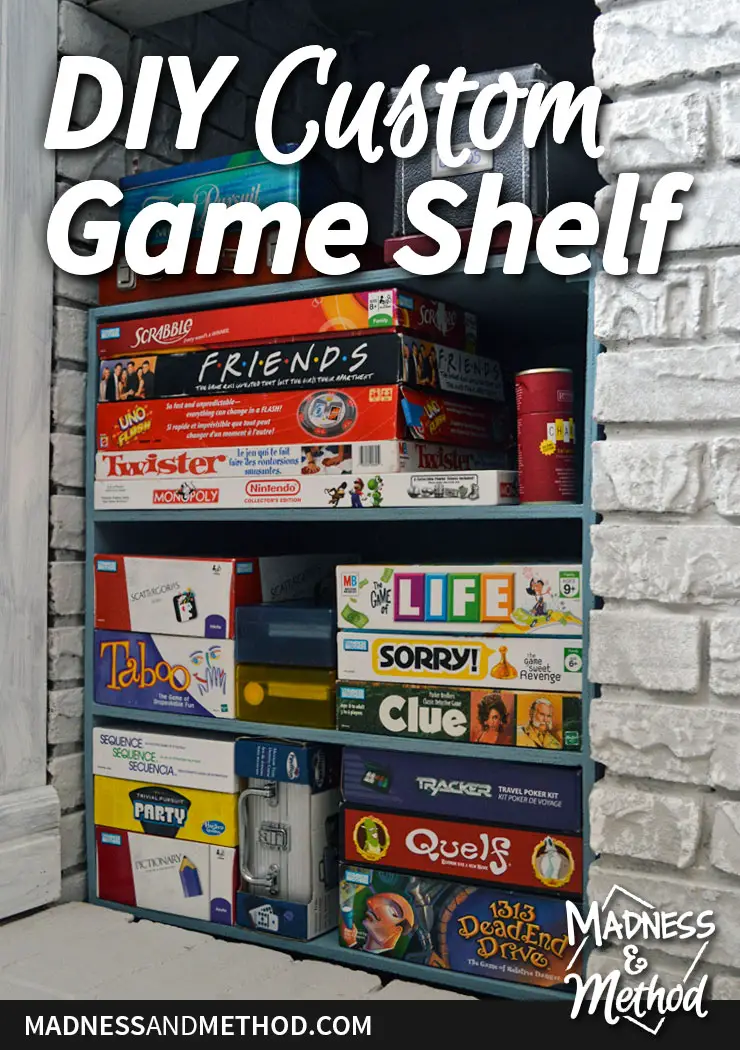
For now, I’m just glad I was able to maximize the unused space in our fireplace AND remove a shelving unit at the same time. This custom game shelf may not be the prettiest – but it gets the job done and I’m happy I took the plunge to build it myself!
Could this be a start to a larger-furniture building journey? Probably not… but at least I know how to make pocket holes now and will be making more in the future I’m sure :)

PS: I thought it would be fun to post a list of the different games we have, just in case you wanted to get something similar!
Shop This Post
8 Comments
Corinna - ADesignerAtHome
February 10, 2017 at 10:09 amYou have so many fun games! I love that you used this space for something so practical.
Nicole
February 10, 2017 at 10:51 amThanks Corinna :) It was just wasted space so I’m happy it worked out!
Lindi
February 10, 2017 at 12:26 pmSO smart to do custom shelving in there! Such a great use of space!
Nicole
February 11, 2017 at 12:00 pmI feel like we may even play the games more now too :)
Amanda
February 13, 2017 at 12:17 pmLooks great! What a smart storage solution!
Nicole
February 13, 2017 at 9:11 pmSo much better than an empty hole!
amy @ mylifefromhome
February 15, 2017 at 8:51 amGreat idea for that empty space!
Nicole
February 17, 2017 at 9:36 amThanks Amy :)