
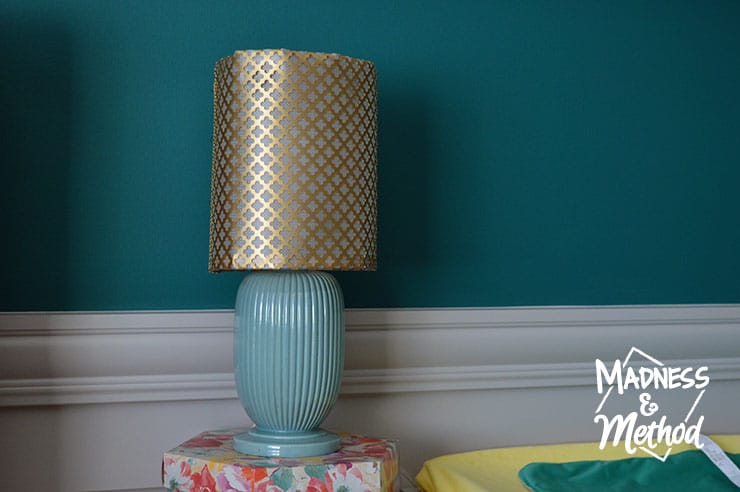
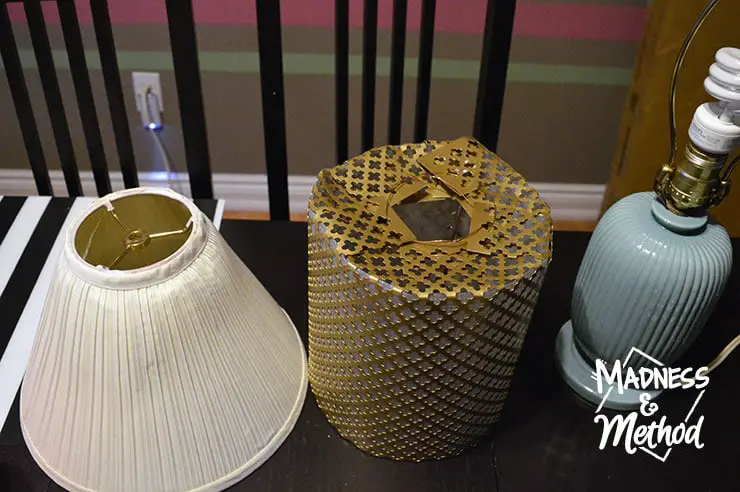
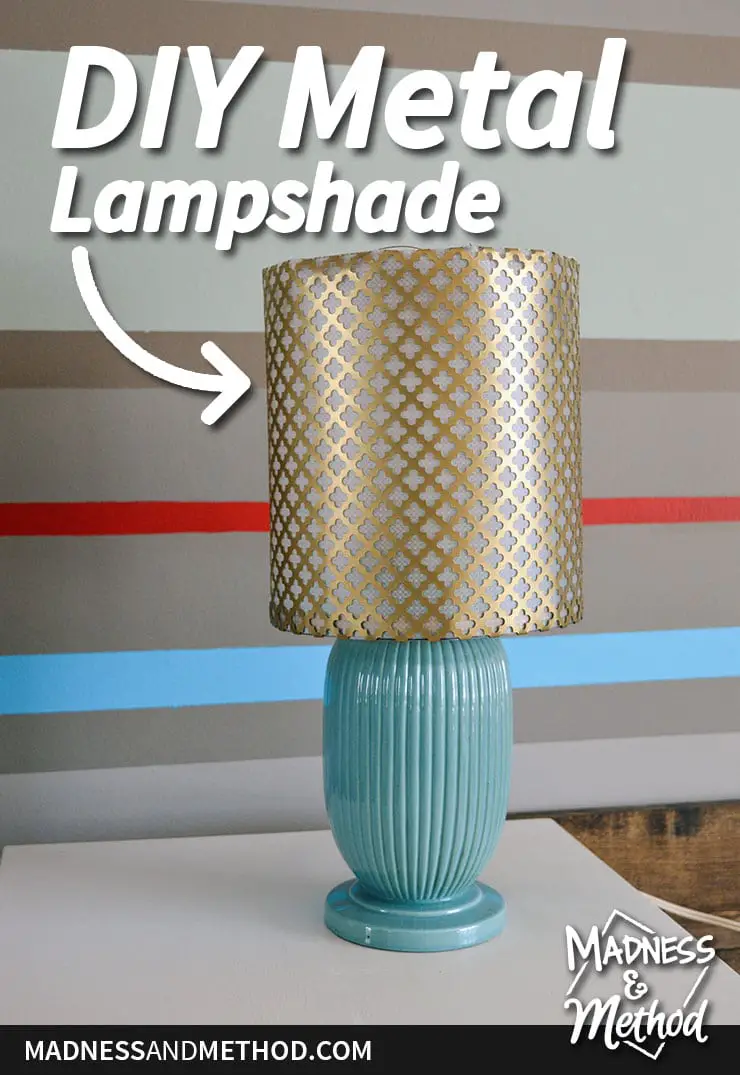
This was definitely one of those projects that I was winging it as I went along – but it actually turned out so good! Basically, I knew I wanted to keep the light turquoise lamp base that I had and use it in the new nursery, but the old lampshade had always been broken and wasn’t going to work out. I was able to come up with my own metal lampshade DIY… and today I’m sharing how you can make your own lampshade too!
– This post contains affiliate links. Click here for more information on affiliates. This post was not directly sponsored, however, I did receive free product after attending the Haven Conference –
I actually bought this turquoise lamp a few years ago at the thrift store. We needed something for the blue room/guest bedroom and I just loved the colour!
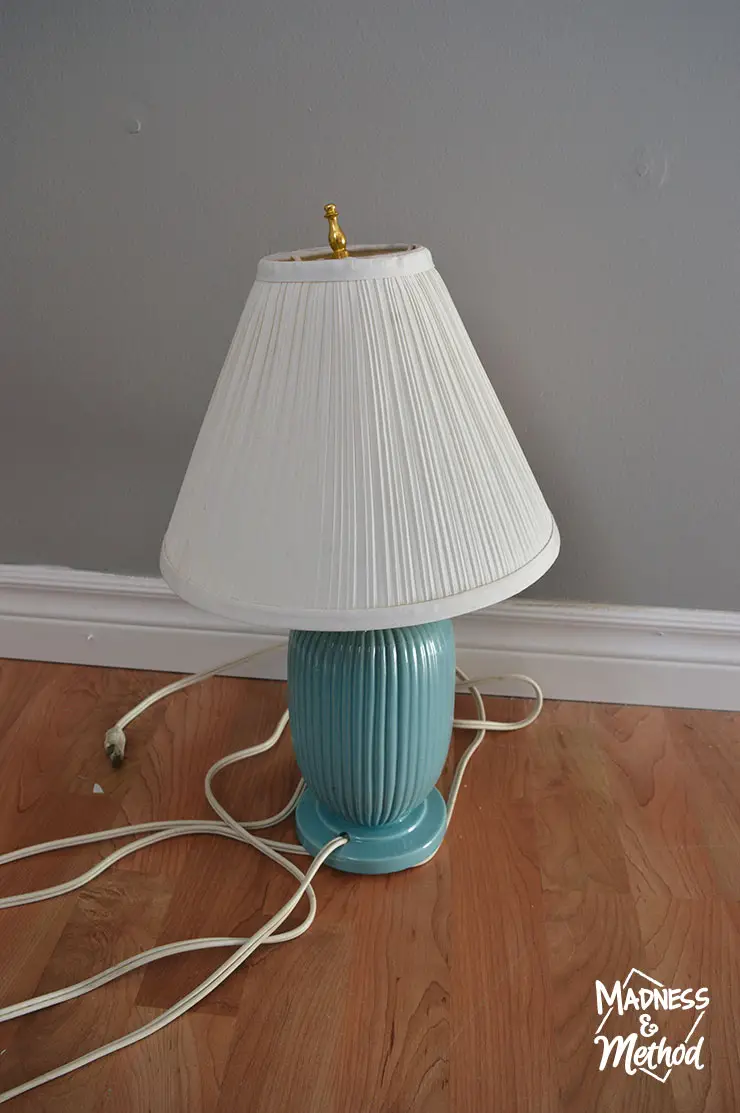
Originally I wasn’t planning on making my own metal lampshade, I thought I could easily swap out the current/broken shade for something else.
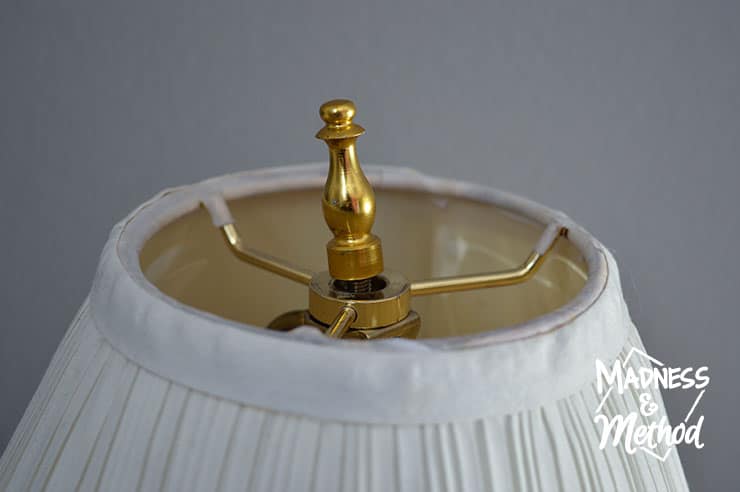
I didn’t take into account that all lampshades attach to the base in different ways (for example, our old one was screwed in at the top). Some have clips that hold onto the bulb, others are attached below the bulb, etc.
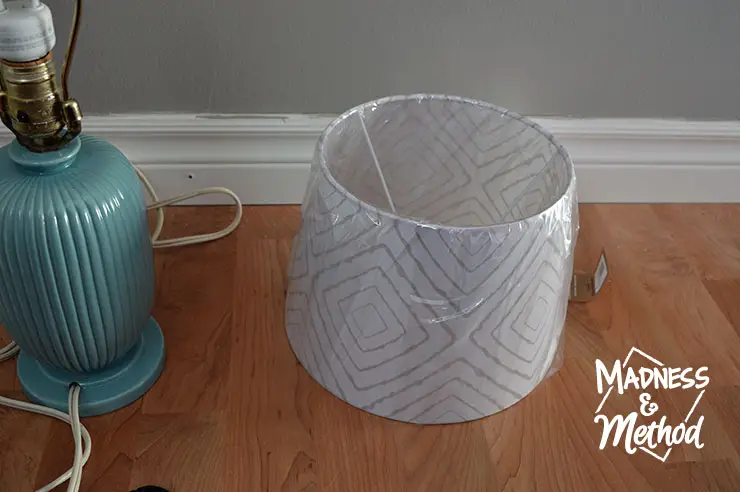
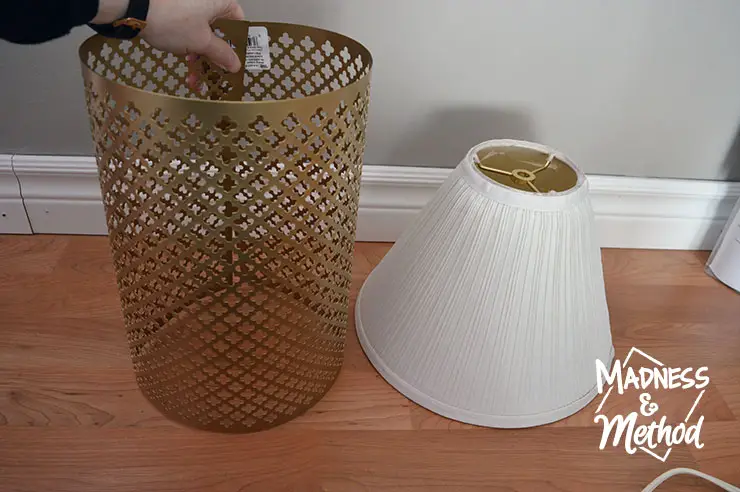
I purchased a new white and grey drum shaped lampshade and was really excited to use it in the room. I thought the diamond pattern would go really well with the wainscoting trim we were adding. Unfortunately, notice how the attachment arms go down into the lampshade?
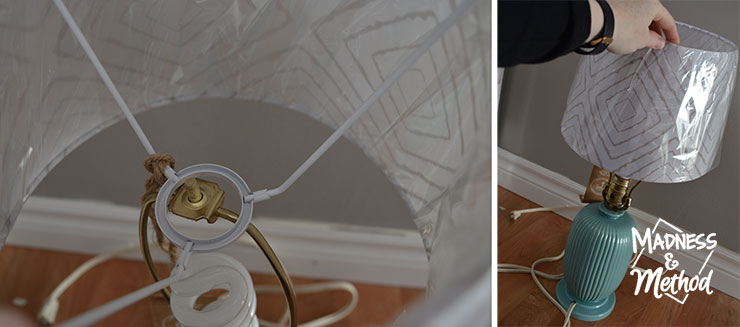
Ya, that caused it to float way above where the old lampshade used to sit and you could see half of the bulb peeking out below. I thought about just moving the attachment piece somehow (maybe taking it out and adding something else? Flipping it somehow?).
I actually thought about this lampshade for weeks (I bought it in early January) but couldn’t think of an easy solution.
In the meantime, I was also starting to clear out the old guest bedroom so we could turn it into the new nursery. In my craft area (under the bed) I had a box of metal sheets that I received from MD Building Products at the Haven Conference.
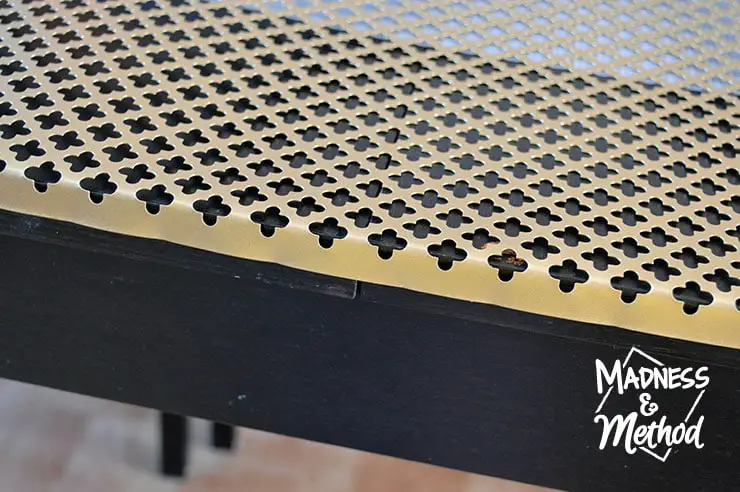
There were different colour/metal options and some that had perforated patterns (and some without). On a whim, I rolled out the brass perforated sheet, and it ended up making the perfect circumference for a metal lampshade!
Materials You May Need:
- Perforated Aluminum Sheet (see different options here)
- Semi-transparent non-adhesive Contact Paper
- Thin Gauge Wire (this is what I bought, but I would advise getting something thinner!)
- Tools: Scissors, Tin Snips, Metal Hole Punch
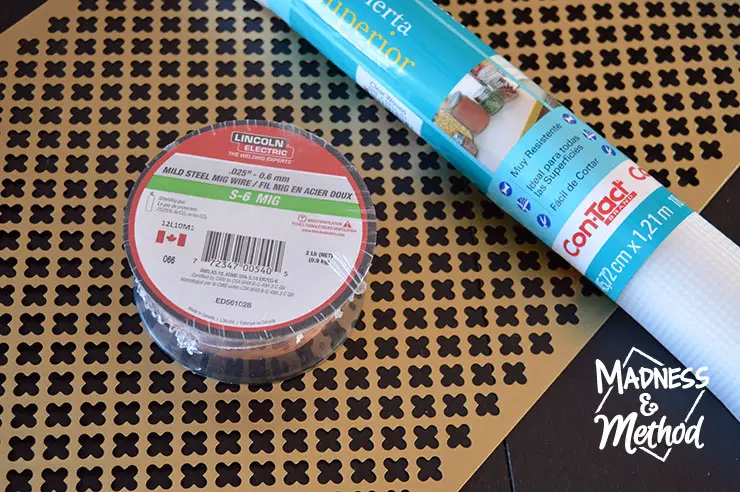
I just needed something semi-opaque to line the outside (and to figure out how to make a metal lampshade of course!). I ended up finding a roll of Contact Paper that is used for drawer liners (so it’s not sticky) and decided to also get some thin wire to attach the sides together.
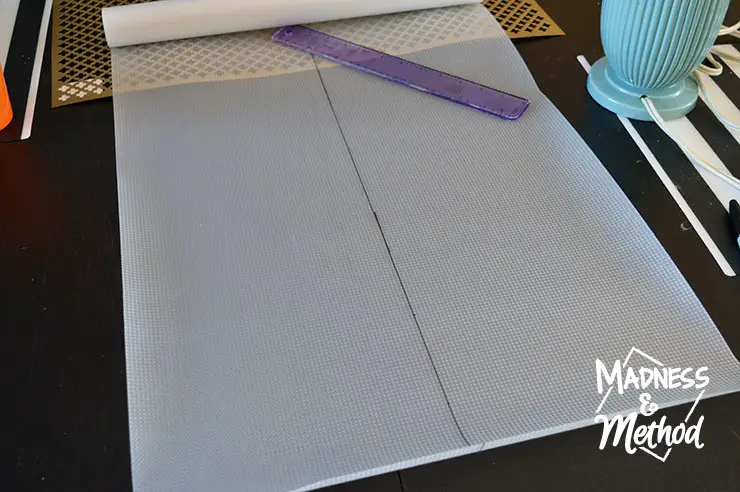
Since the contact paper was 18″ wide (and comparing the size of the old lampshade) I thought it would be easiest to cut it in half for a 9″ tall metal lampshade. The piece of brass metal from MD Building Products was 12″ x 24″ and I cut the length of the contact paper to about 24″.
From there, I bent a little lip on the metal sheet using the edge of my kitchen table. I needed something to hold the contact paper in place, and figured it would nicely tuck in there!
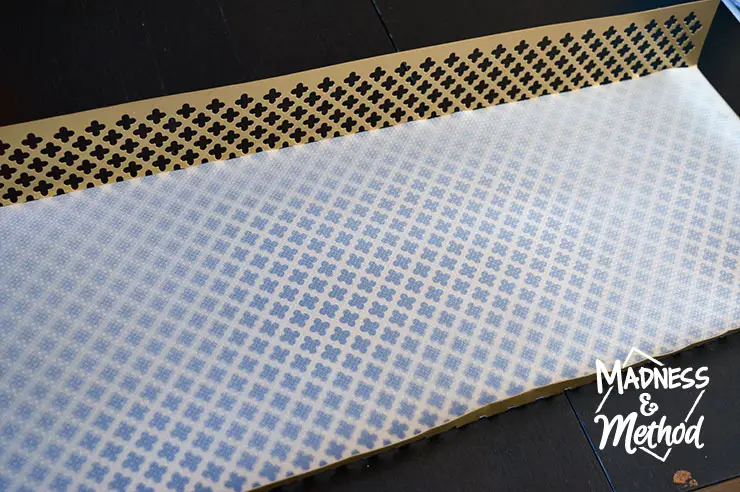
I then added the contact paper piece on top of the metal sheet and bent the top portion so that it would line up to match the height.
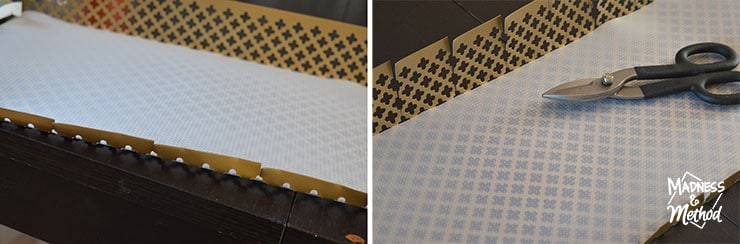
Using the metal snips/scissors that MD Building Products provided, I cut some notches out every few inches in the metal along the bottom and the top (making sure to stop at the contact paper section). This is because I would be forming the metal into a circle shape, and I wanted everything to fold in together smoothly.
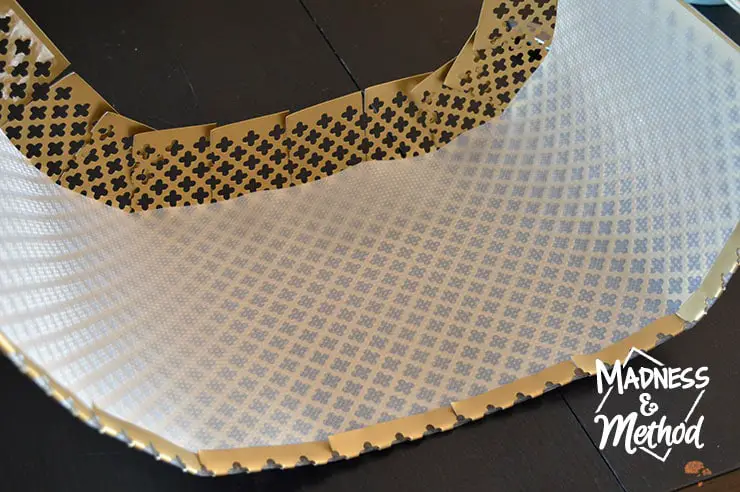
I also folded the small bottom lip up completely over the contact paper and it did a great job of holding it in place! (Notice how the top pieces are overlapping into each other, that’s why I cut the notches or it wouldn’t have formed nicely!).
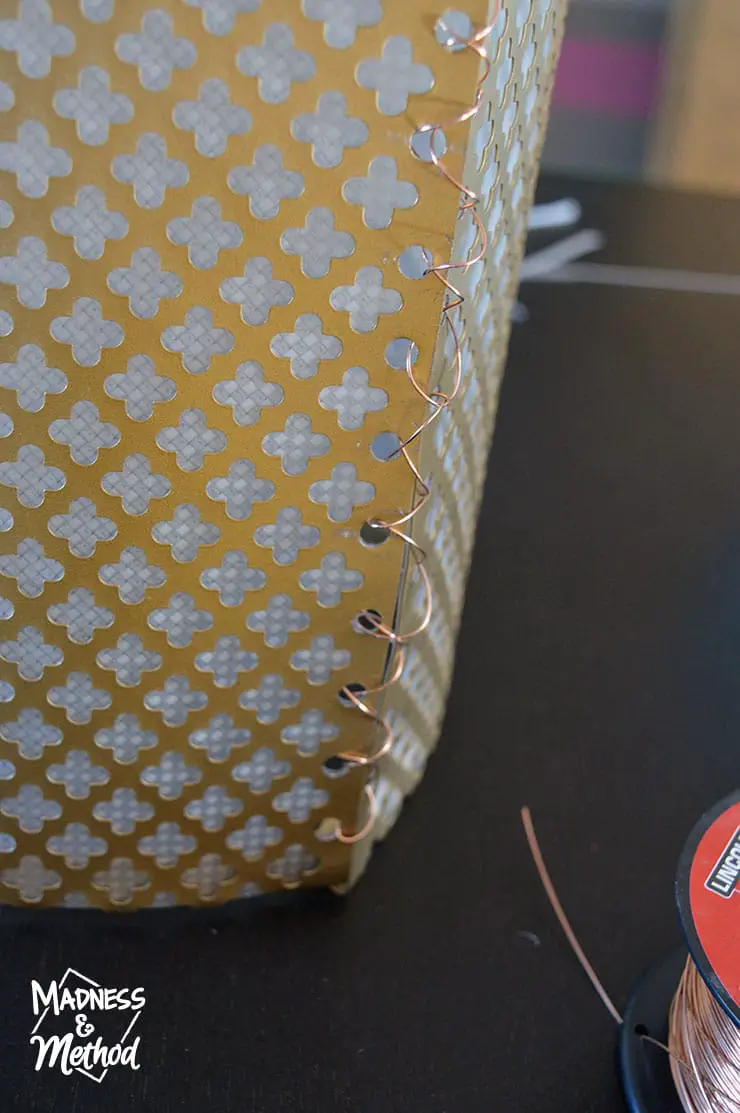
Even though the metal sheet was perforated already, I still decided to cut some holes on the edge so that there wouldn’t be any overlap when I tied it together. And, although I did buy the thinnest wire I could find, I still found that it was a bit tricky to manoeuver in and out of the holes. (I kind of wanted to use thin twist-tie wire, but where do you even buy a long length of that?).
Next came the tricky part of actually getting the metal lampshade to attach to the base of the lamp. I was kind of hoping it would just sit on the arms of the base (since I had a few inches of metal at the top) but I couldn’t get it to go to the centre and it kept wobbling to the sides.
Then a ta-da moment as I was eating dinner one night (because I still had everything on the table haha). I realized I could use the old lampshade attachment for this lamp! (The lampshade was broken anyways, so I just took the whole thing apart to salvage the metal ring).
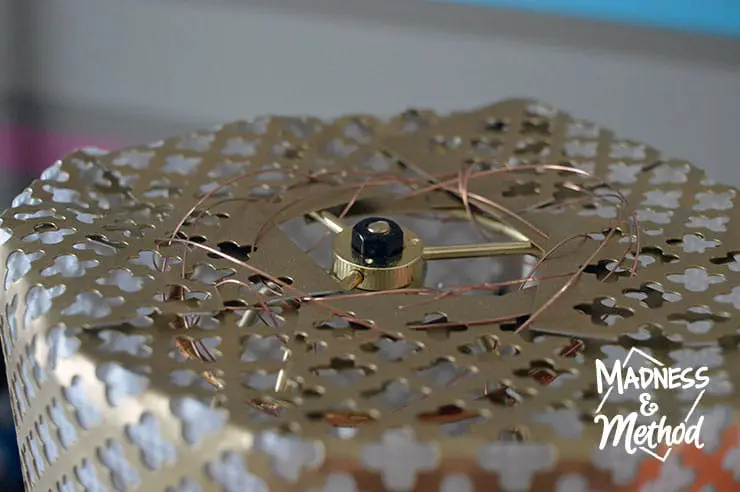
While it’s kind of rough looking (since I had to use my wire to attach everything again) it totally does the trick! Instead of adding the tall screw-in piece from before (seen in the first few photos), I just bought a little nut and coloured it black to hold everything in place.
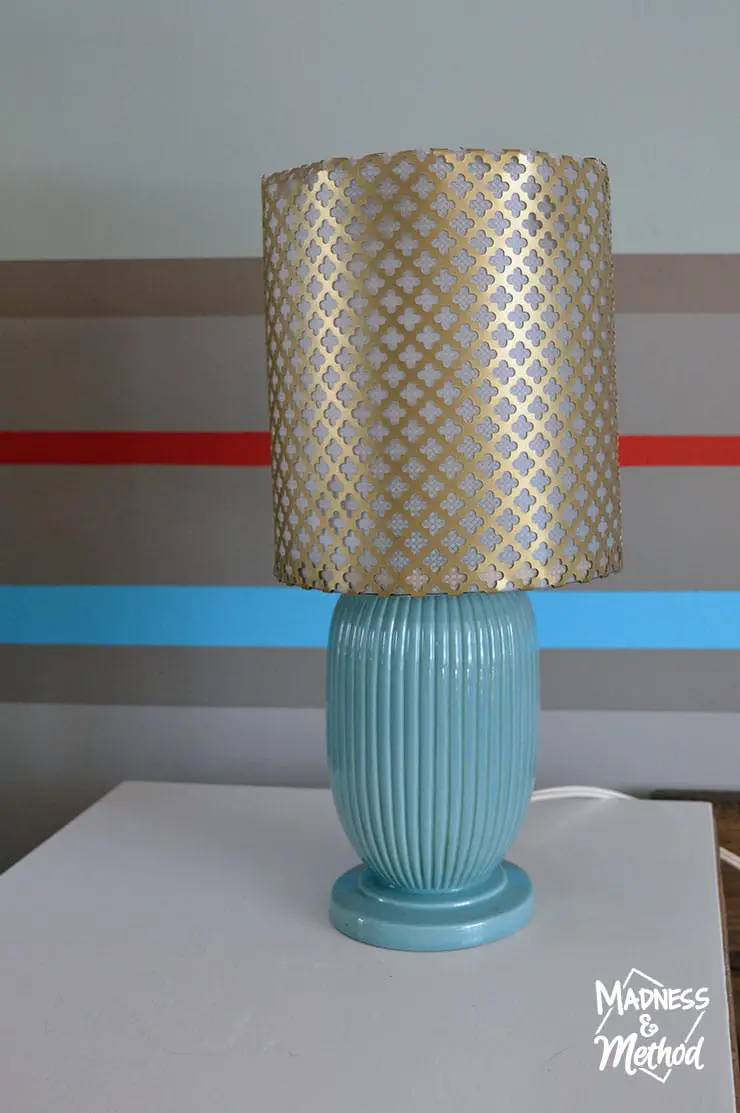
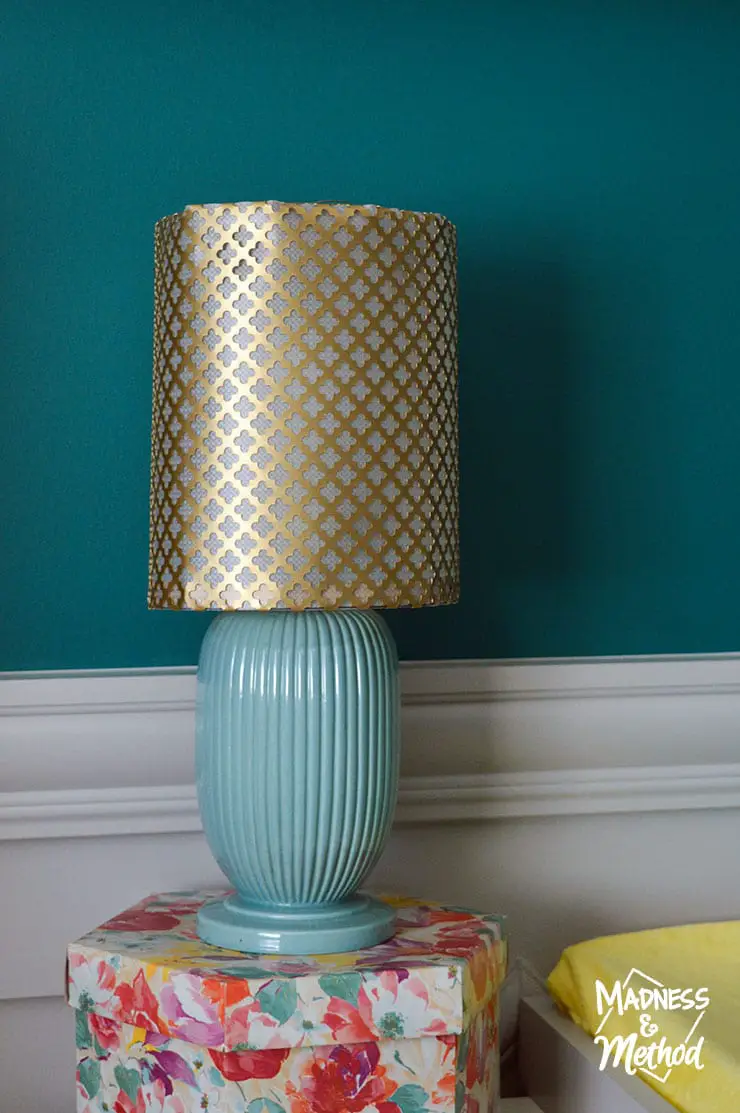
And the brass metal lampshade DIY looks SO good against the light turquoise base. Obviously, if you turned it around you would see the side that’s attached with wire, but we’ll just ignore that won’t we :)
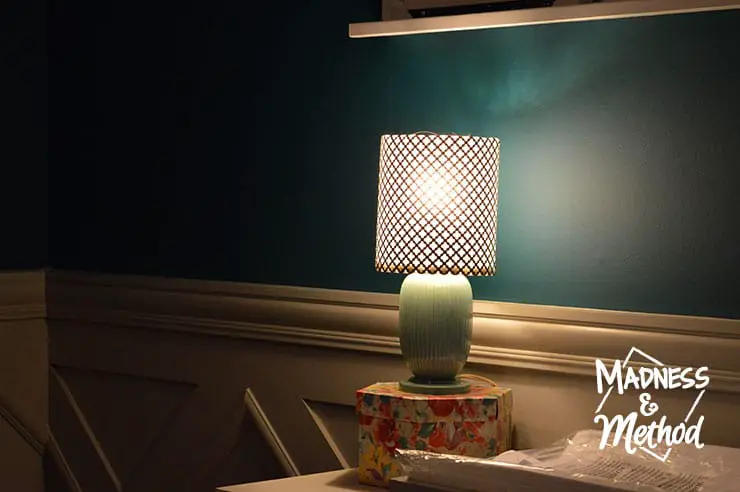
And here’s a picture showing how it works at night; the Contact Paper definitely does a great job at hiding the light bulb, while still letting a lot of light disperse through.
One day I may try and come up with a more permanent/better solution to attach the back and top together compared to the wire, but for now, it works great!
Either way, I really liked working on this metal lampshade DIY project, and I can definitely see myself using more thin metal sheets from MD Building Products in the future (luckily I have a few more!).
Now I need to come up with other fun applications for the metal sheets, but I figure I’ll have plenty of thinking opportunities when I’m nursing the baby :)


No Comments