
This is the story of a custom patio table that I built almost 100% by myself. A table that took over a year to make. A table that is not quite done yet, but pretty close – so that’s why I’m sharing it with you today. I’ll explain everything more in depth, so keep reading!
– Note: This post contains affiliate links. See more information about affiliates here –
I’ve hinted at this table DIY project in the posts about building our corner benches with brackets, our deck staining process, and maybe some other places as well. A forewarning: this table is VERY heavy to move, so if you’re planning on building one yourself, make sure you have a strong helper!
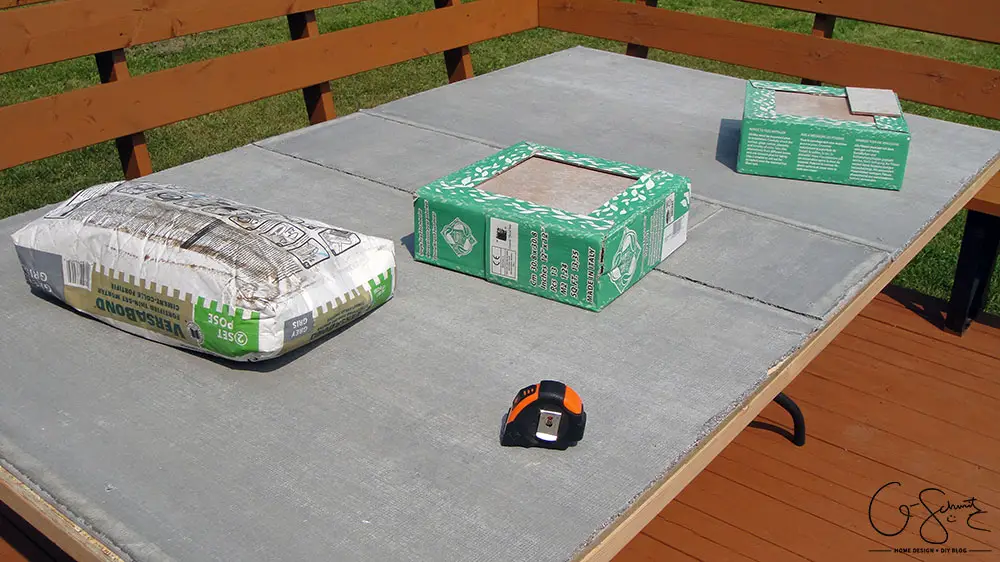
Materials Required
- Table Base
- Aspenite/Plywood
- Cement Boards
- Lumber (ie: 2x4s)
- Tiles
- Saw and/or Utility Knife
- Table Clamps
- Screws
- Thinset (for outdoors)
- Grout
- T-Square
- Measuring Tape
- Bucket
- Grouting Sponge
- Grout Float
- Optional: Hammer
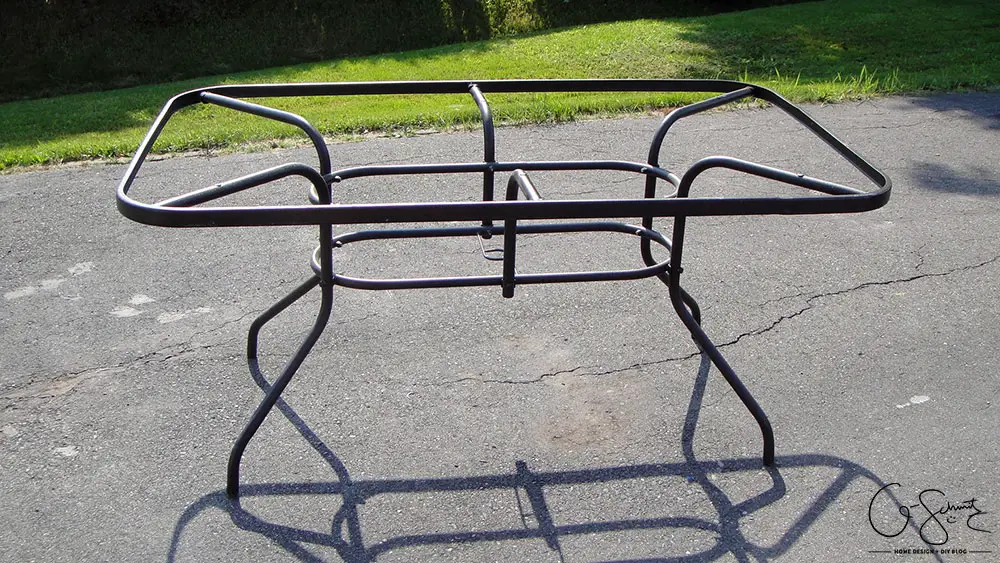
It all started when the Husband and his friend brought home this patio table stand one night last summer. They had found it at the end of someone’s driveway and were excited that I could put it to use somehow. Okay, there may have been some alcohol involved in their decision. But either way, we had this extra stand in our garage.
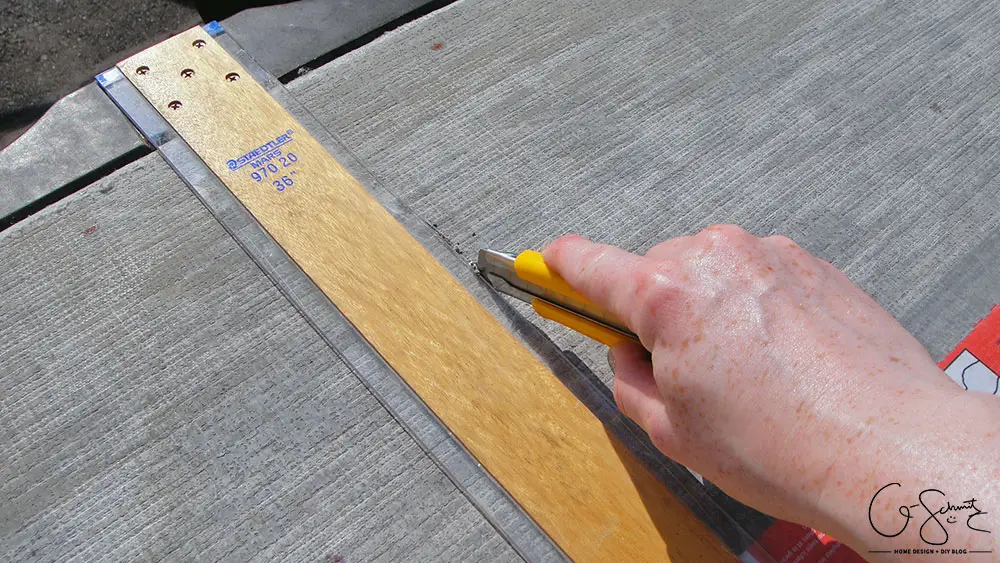
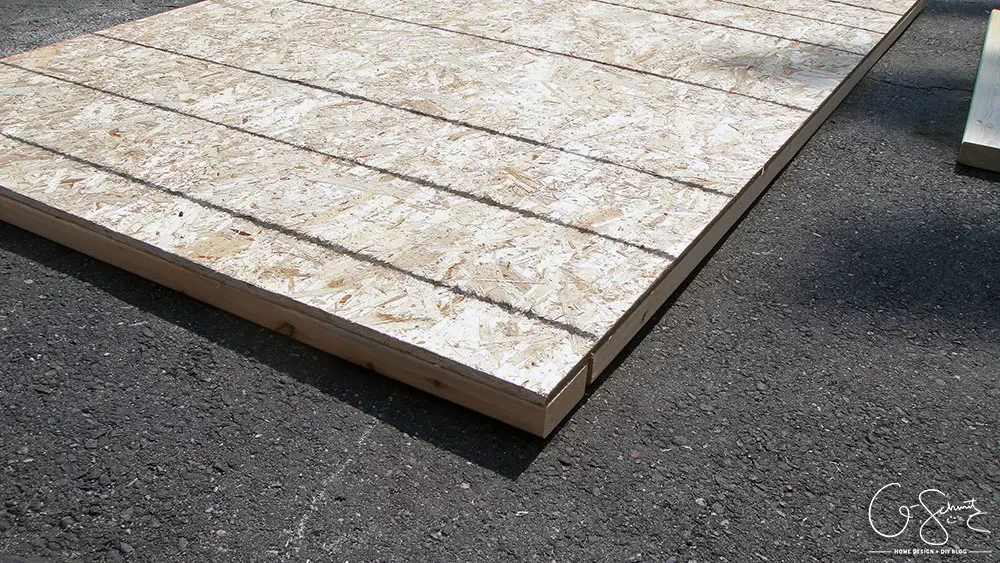
After picking up 2 sheets of cement board (they measure about 3′ x 5′), one 4′ x 8′ piece of aspenite/chip board and a few lengths of 2x4s, I was ready to begin working!
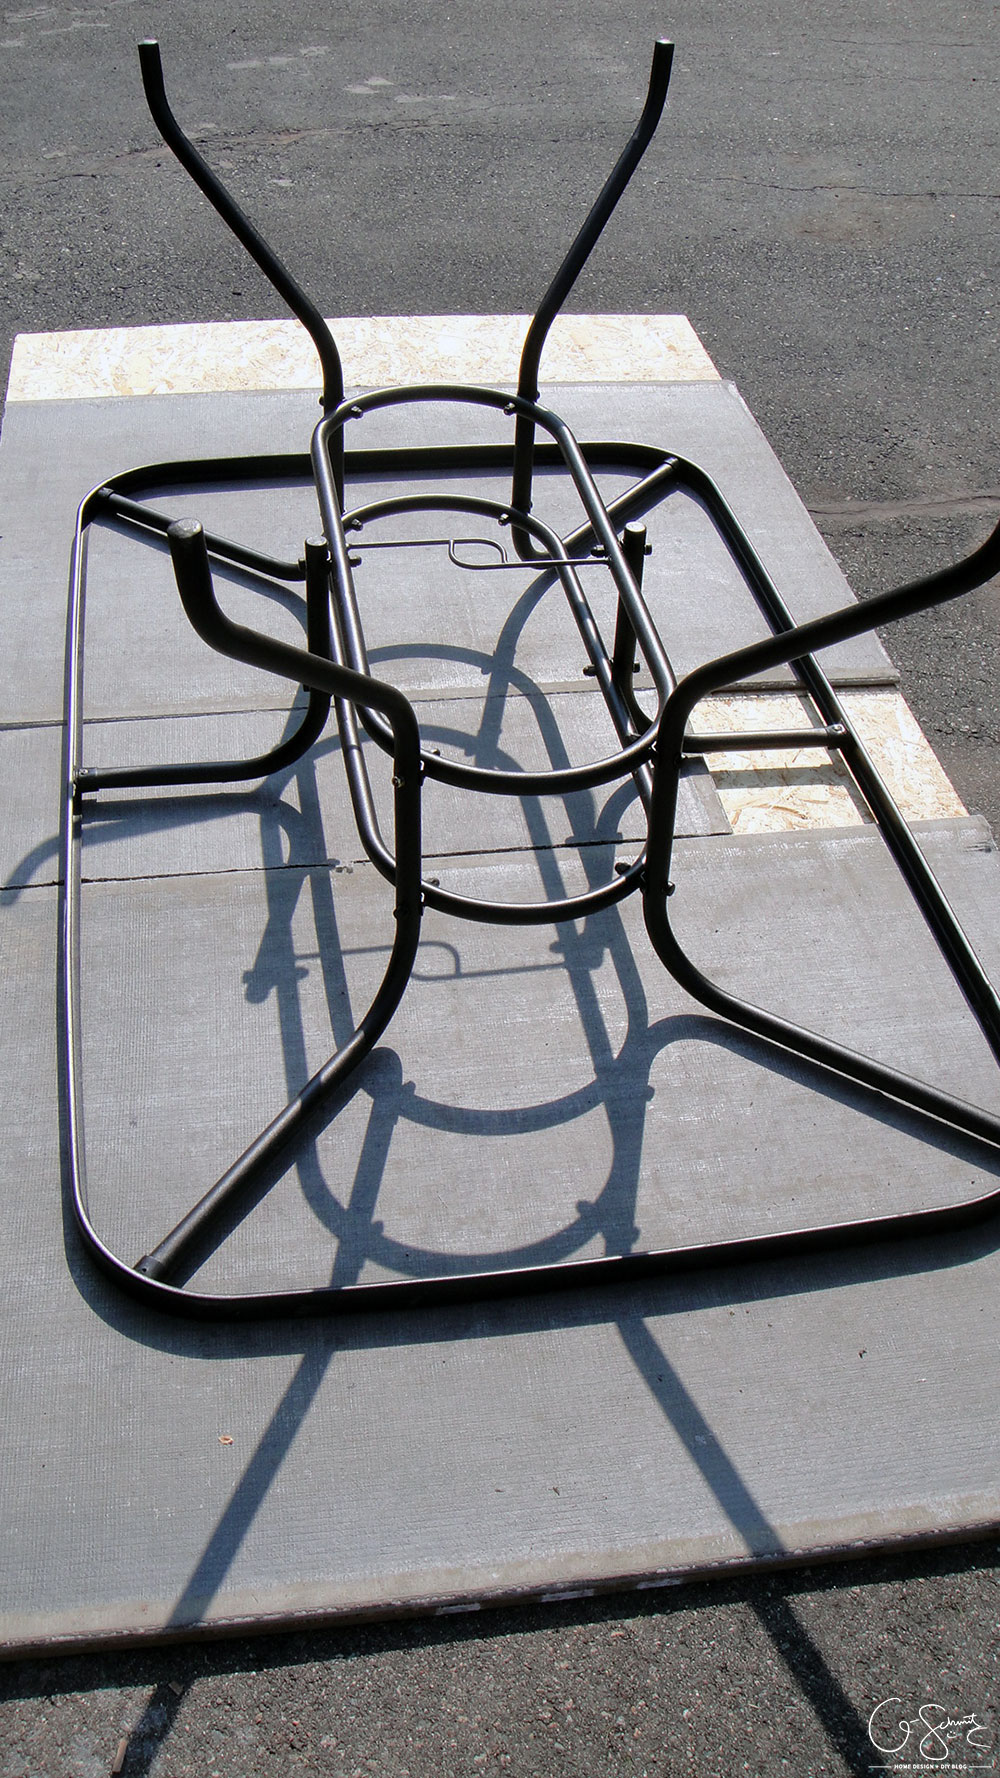
I cut the cement boards into 4′ sections, and then used the extra 1′ pieces to fill in the middle. I did have to cut off 1′ lengthwise from the wood piece, so my full table top was 4′ x 7′. I placed the table stand atop the cement boards, that way I could see how the size would look. (Yes I did fill in that last section with cement board in the photo above, don’t worry).
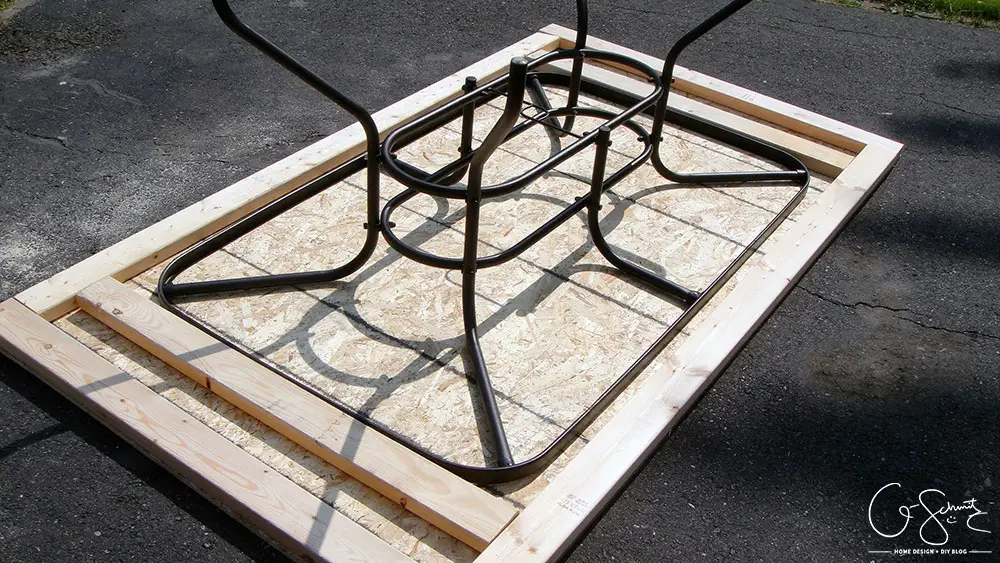
I then measured and cut some 2x4s to create a nice frame. The idea was that I would secure the stand to the top by “squeezing” it into position – basically, creating little slots for the metal frame to fit in to.
Now the tricky part was actually securing everything together. I had to flip everything the opposite way (2x4s on the bottom, then wood, then cement board) so that my screws would go through.
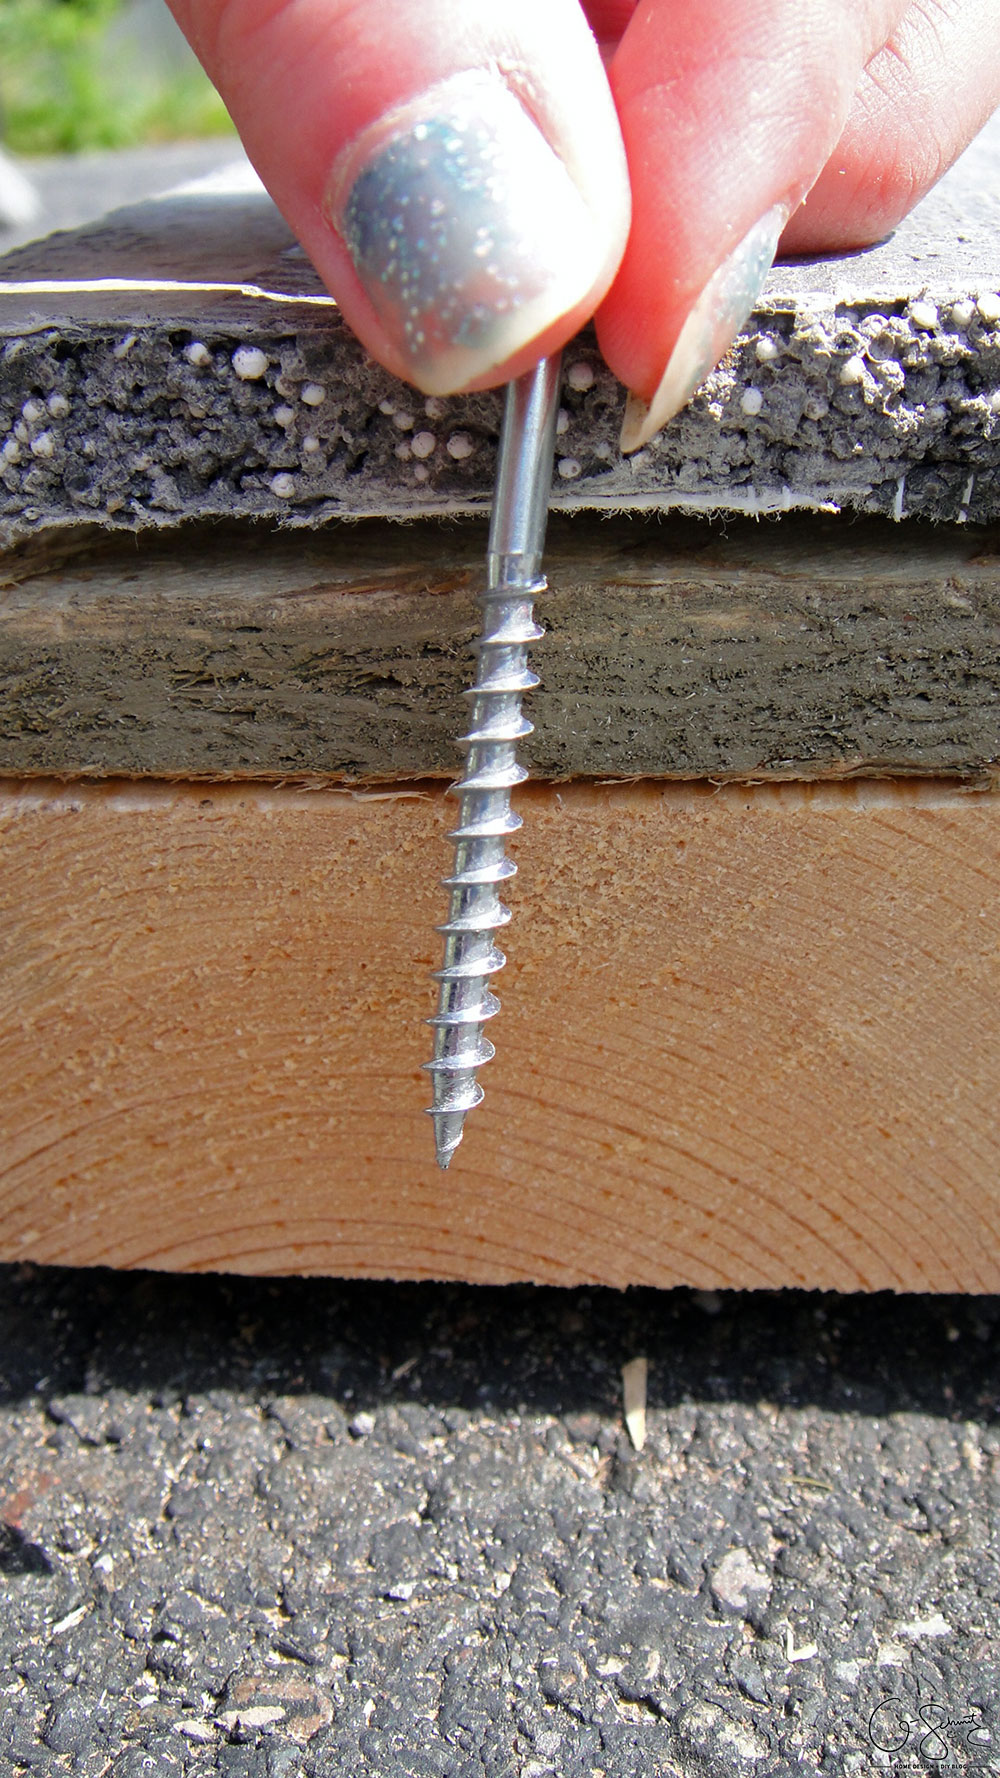
If I would have gone from bottom to top, then the screws wouldn’t have been able to grab onto the cement board. There were a lot of layers here!
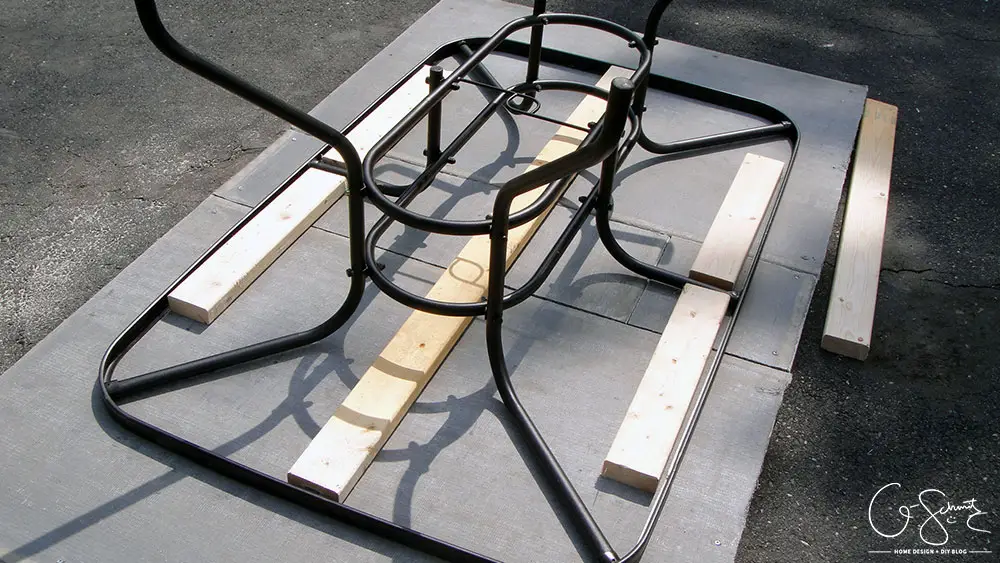
I then had to place the inner 2×4 sections under the tabletop. I did this by guess-timating where they would go using the stand as a reference.
By now I had realized that this table was going to be heavy, and I mean crazy heavy. I was going to surprise the Husband with a new table, but at this point I realized that I couldn’t even move it anymore! I had to call his family members to come and help me move it out of our driveway (thanks again!).
And so the tabletop sat like this… for almost a year! (And yes, the Husband did notice this humongo DIY project in the garage, so no more surprise).
Finishing the Table
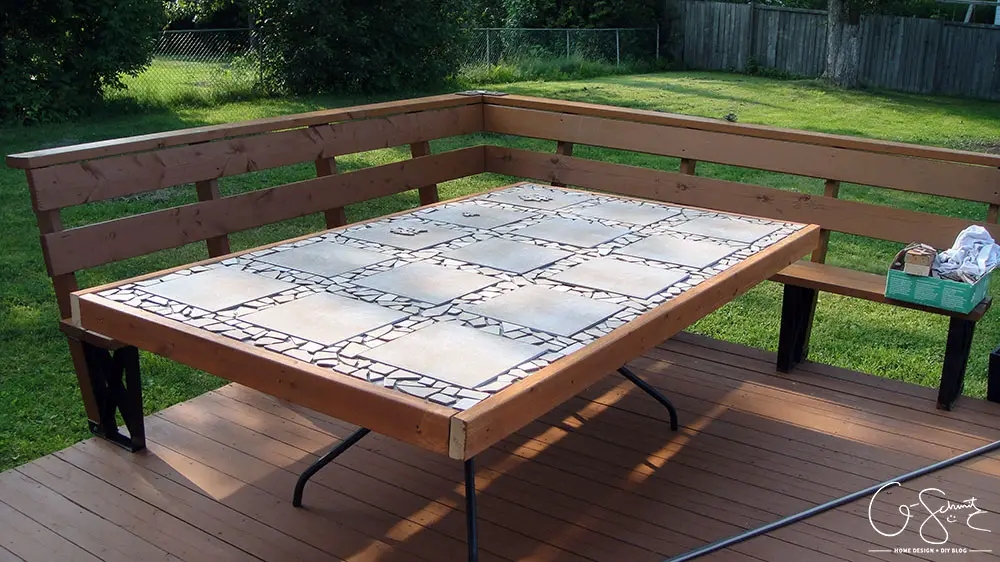
Flash forward to almost present day. I had the Husband lift the table onto the stand (with help of course), and I was worried that it wouldn’t take the weight of everything. Since I started this project, I knew I would be using leftover tiles from our kitchen and bathroom renovations, so I plopped them on the table, along with the bag of mortar, and made sure it didn’t fall over. So far so good.
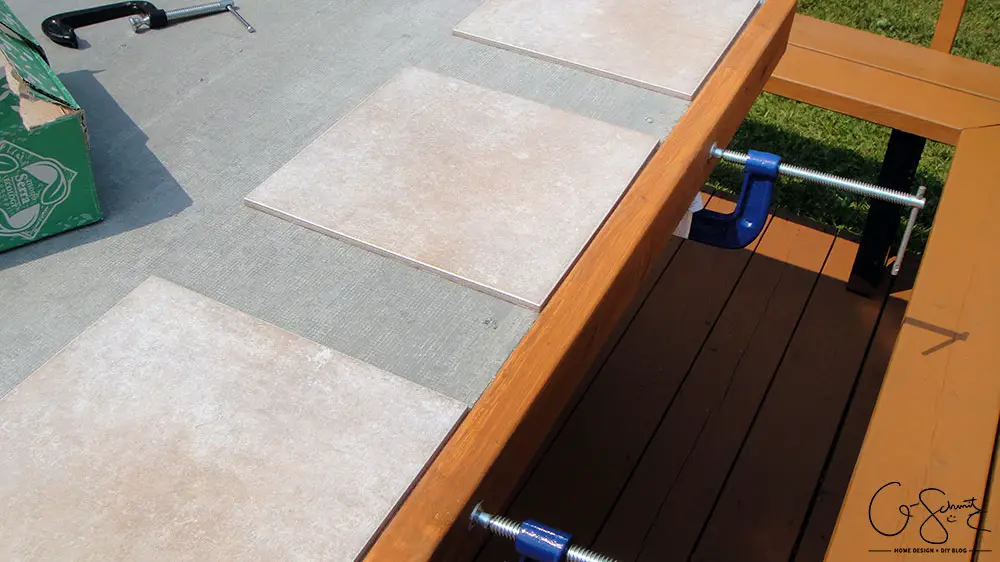
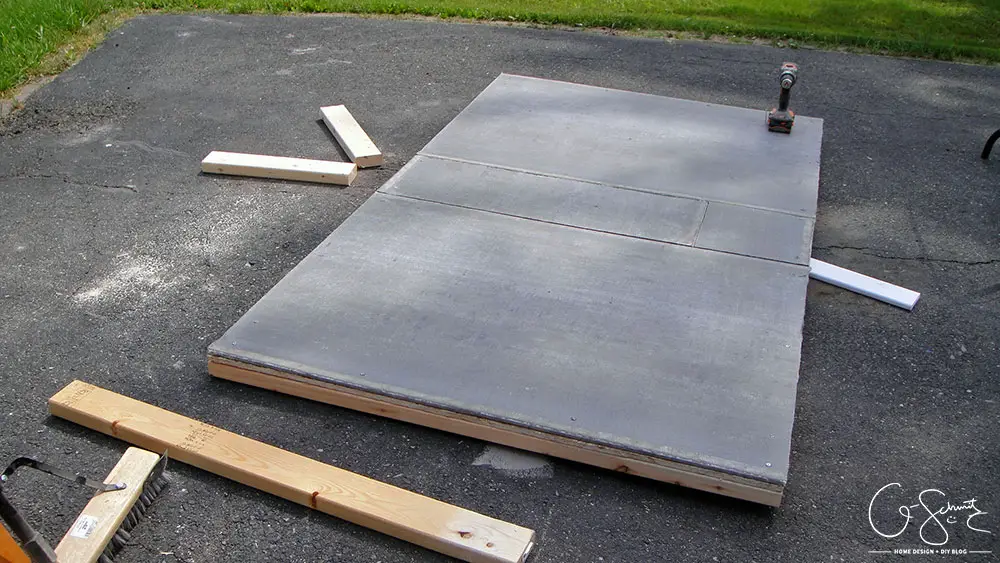
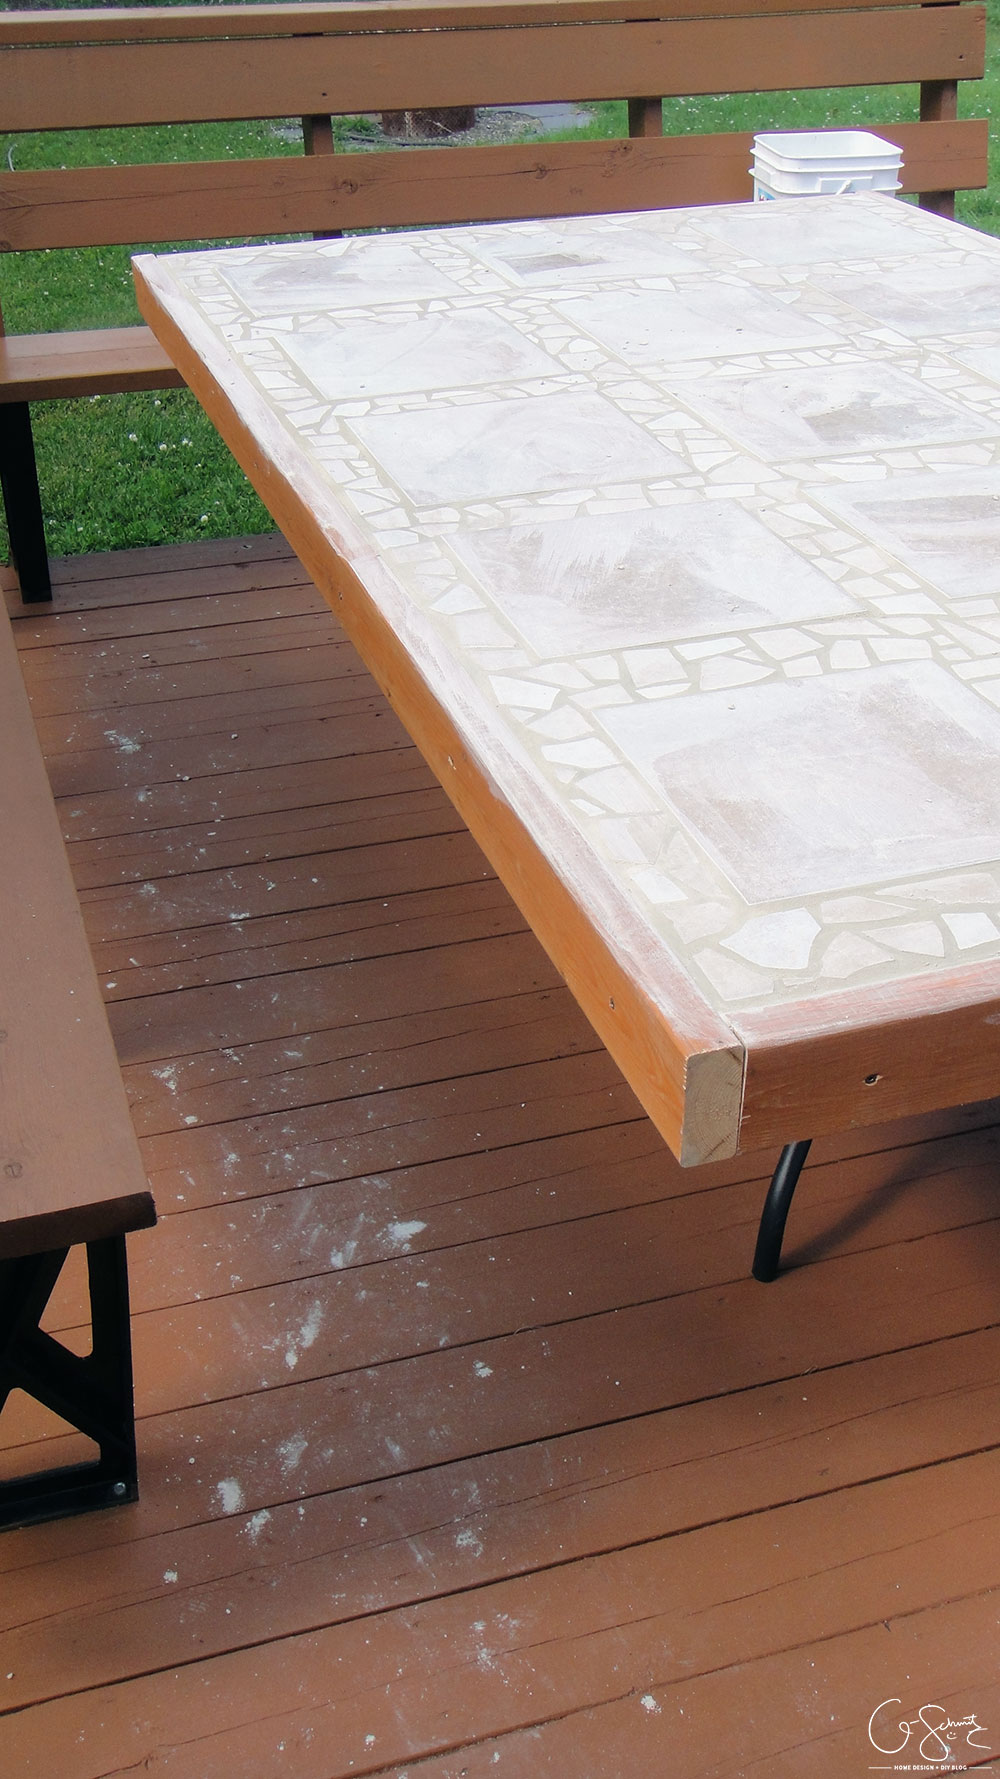
Last summer I had also quickly stained 3 lengths of the table, so that the tiles sat nicely in between (rather than doing a tile edge). Once they were aligned to the correct height, I put some clamps on and drilled them into position. This was a bit tricky to do by myself, since the one side would fall and then I would clamp the other side in again, adjust it again, and so on.
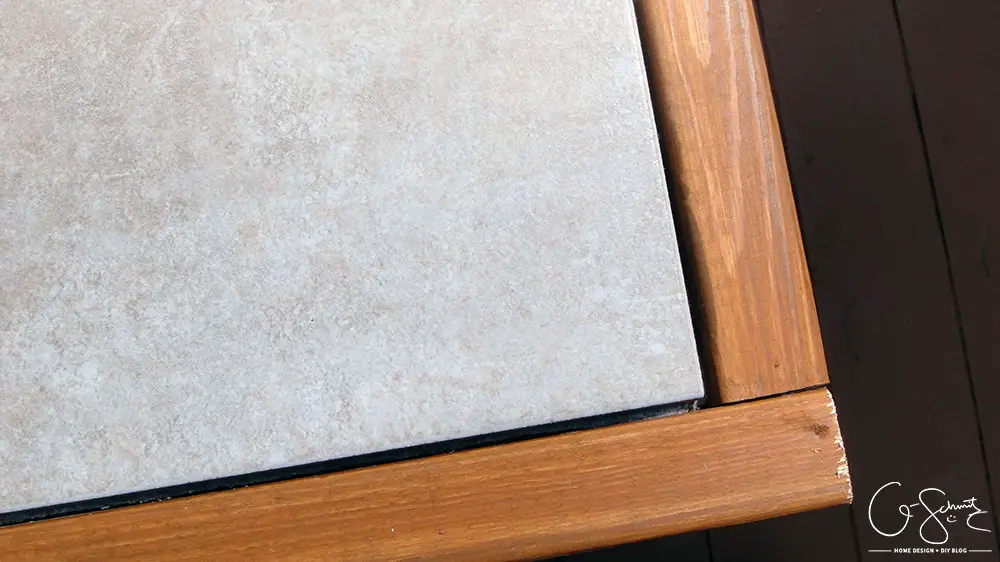
I cut one in 2×4 half for the short end. I then overlapped the long ends to create a straight corner. I would have preferred a nice mitered 45º angle, but that was impossible to do with an exactly 4′ side of table (because I didn’t want to use an extra length of 2×4 for no reason).
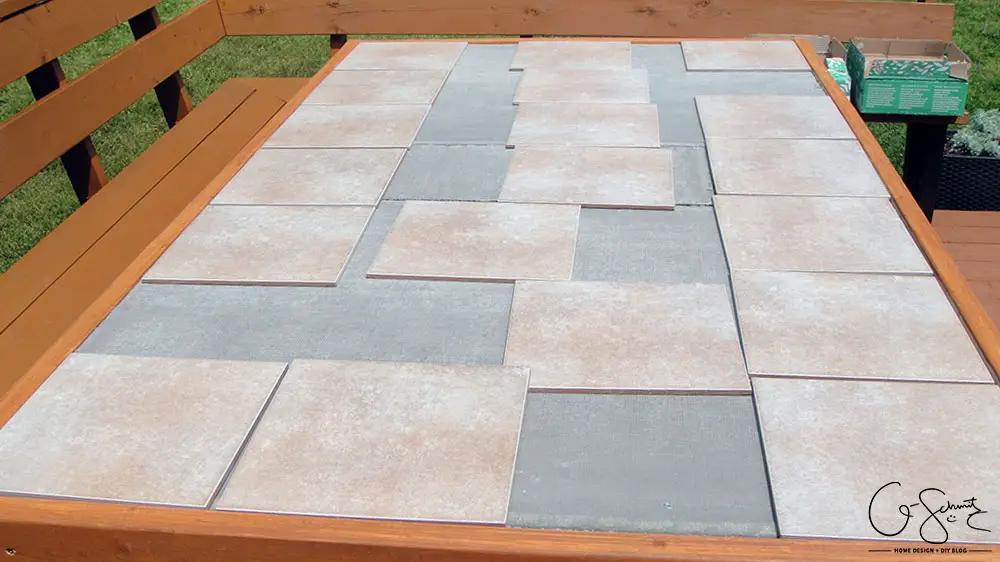
Because of the kitchen floor fiasco, I had purchased a few extra boxes of 12″ tiles (remember when I mentioned that at the start of the month) in hopes they would match. Thankfully I was able to use up a good portion on this custom patio table, but they weren’t lining up perfectly.
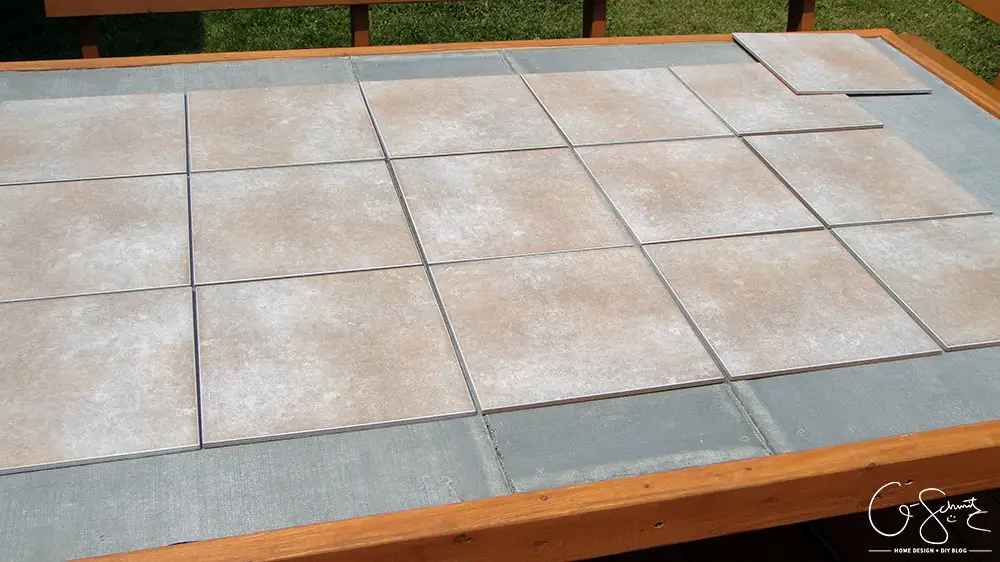
Had I planned out the dimensions properly in the initial building phase, I would have made the table large enough to accommodate full sized tiles. This would have been the easiest and quickest option. If you’re building your own table, I would suggest making the surface about 37″ wide x 74″ long to fit 18 tiles tiles… and you could also have mitered corners too!
But again, I had a plan! Being a “materials hoarder” (aka someone who keeps random building or craft supplies around the house in case you’ll need them); I had a bunch of off-cut or incorrectly sized tiles from our renovation projects.
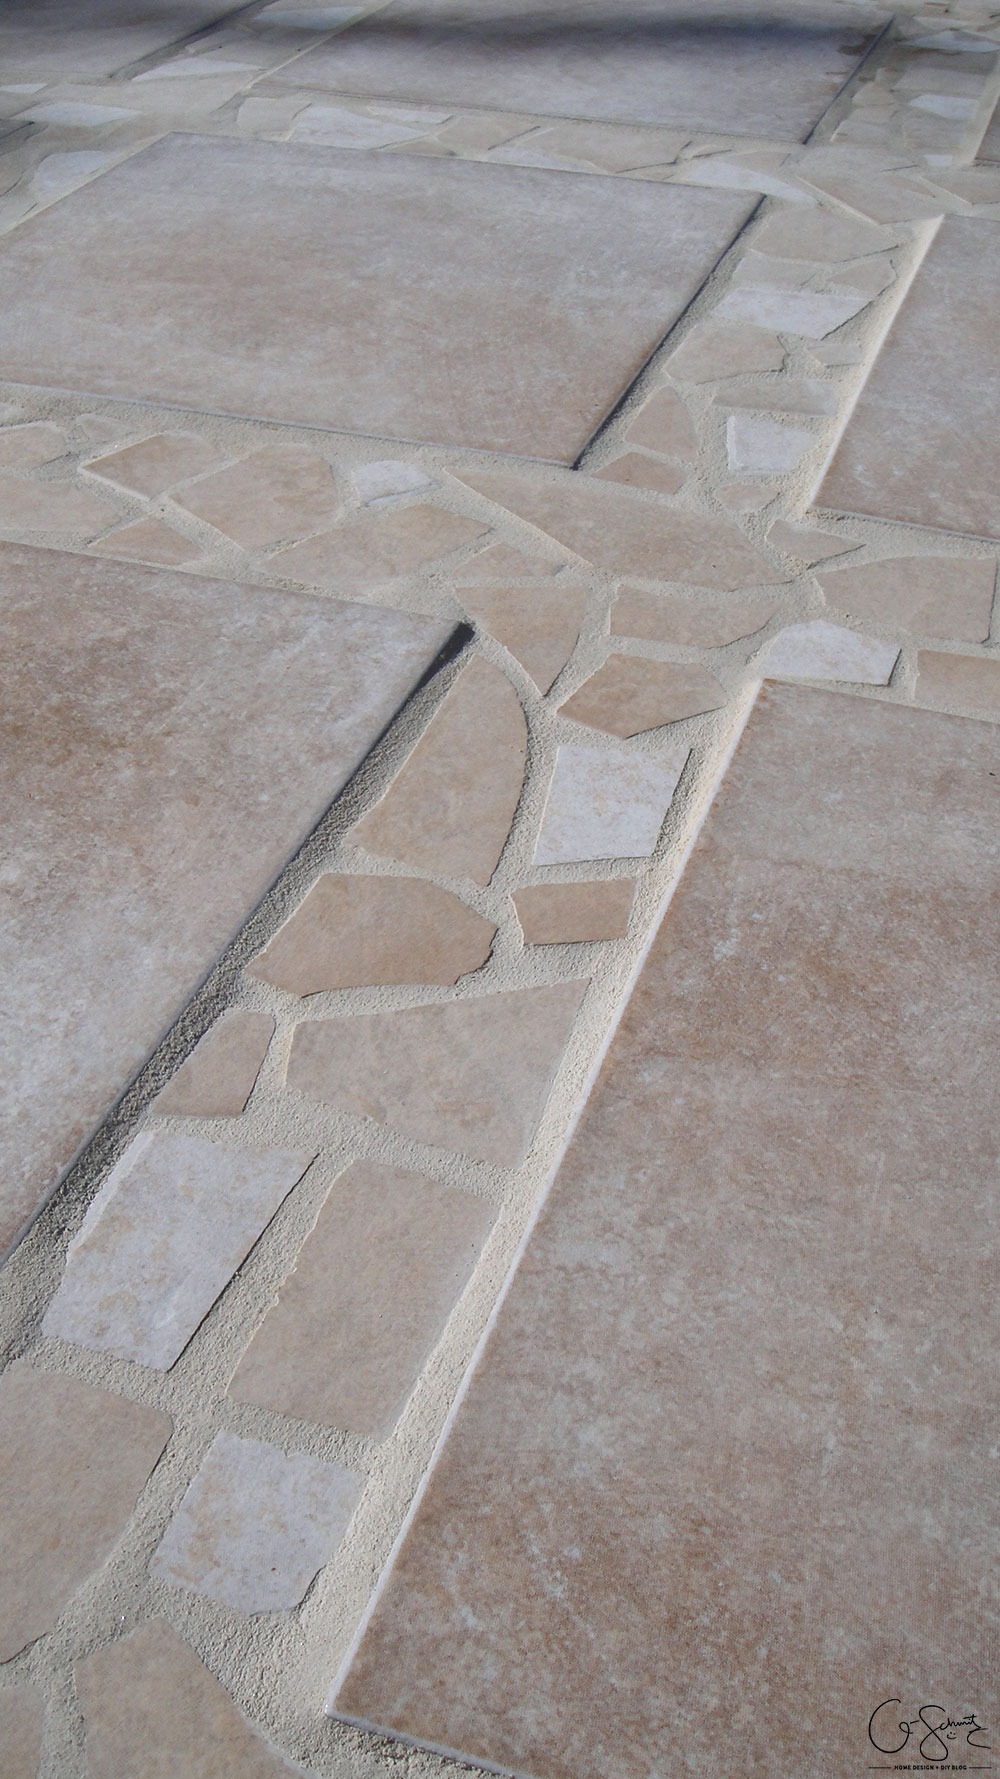
Once I decided that I wasn’t going to cut any full-sized tiles to fit the space, I spaced them out evenly on the table top, and would be doing a random mosaic design in between.
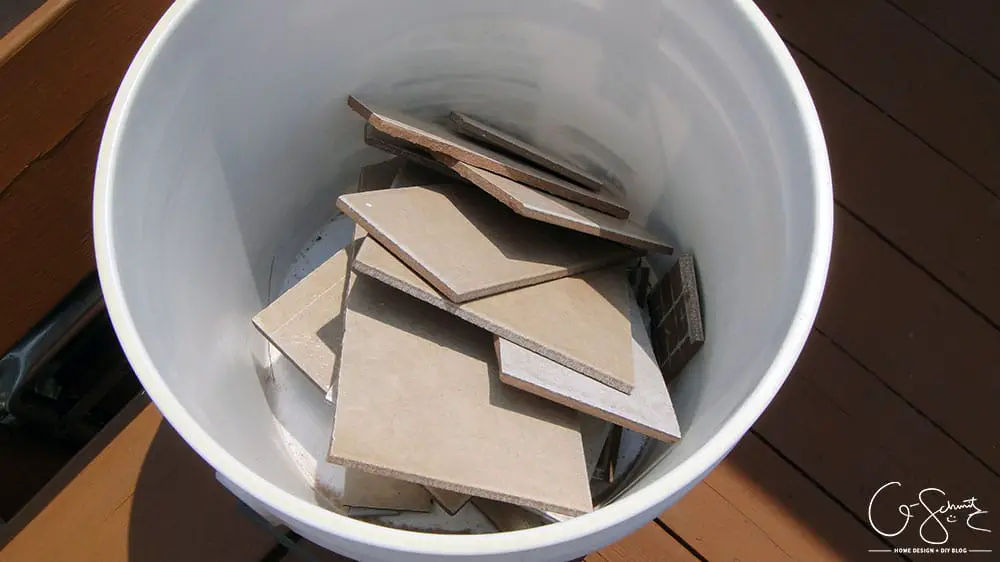
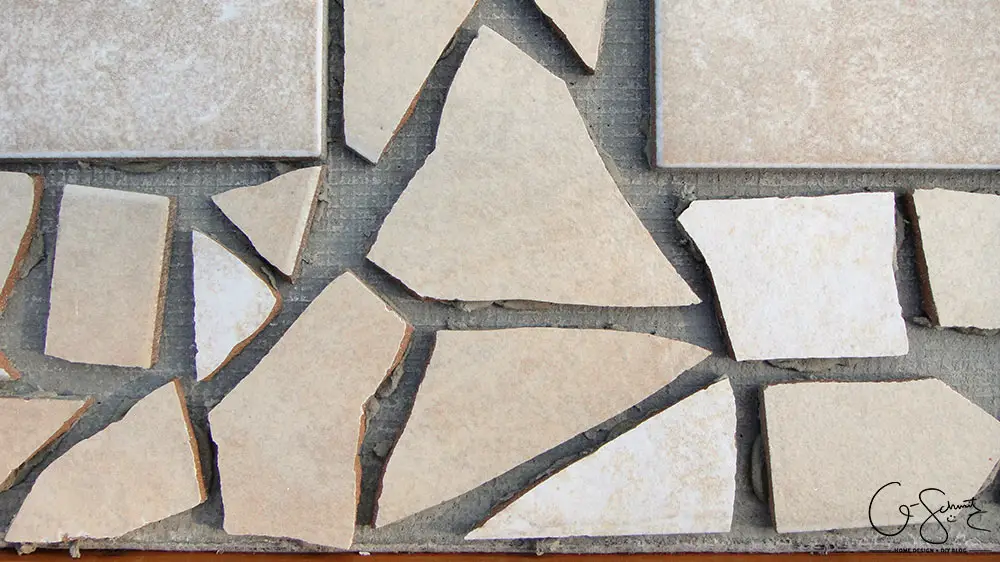
Most of the tiles were in a bucket, so I simply had to smash them down to smaller sizes using a hammer.
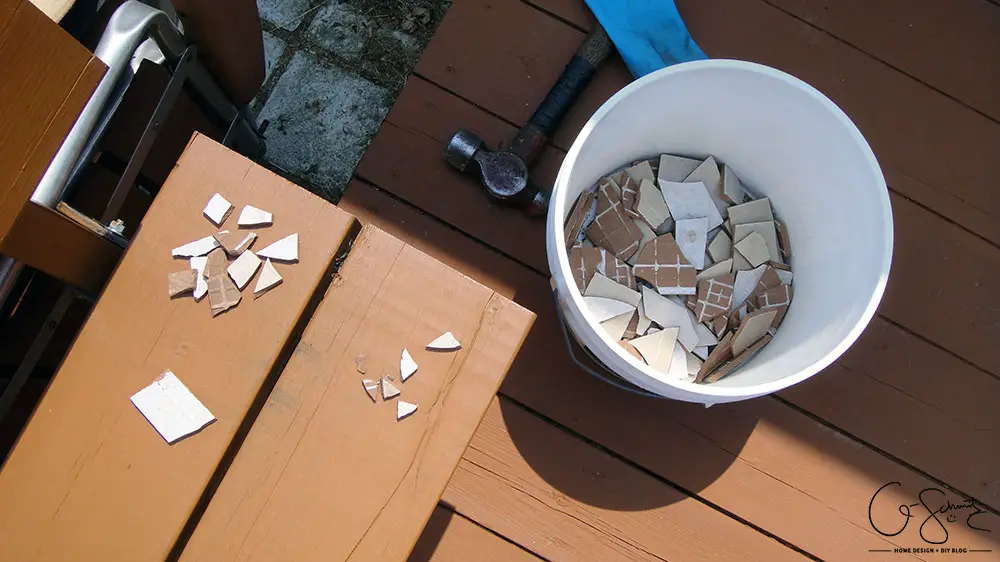
BE VERY CAUTIONS WHEN BREAKING TILES! I suggest wearing safety glasses and gloves that cover most of your arms, because broken tiles literally fly out like shards of glass. I did this same method in high school and one of the small pieces of tile had flown up (unbeknownst to me) into my hand. I bled all over my project before I realized it… it didn’t hurt, it was more of a mess than anything, and I wanted to avoid getting blood all over our newly stained deck.
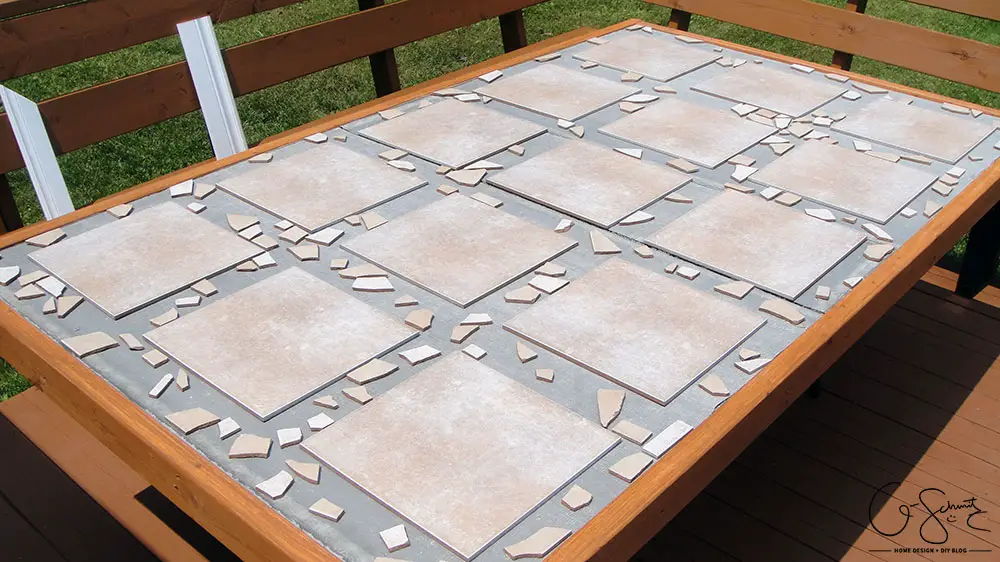
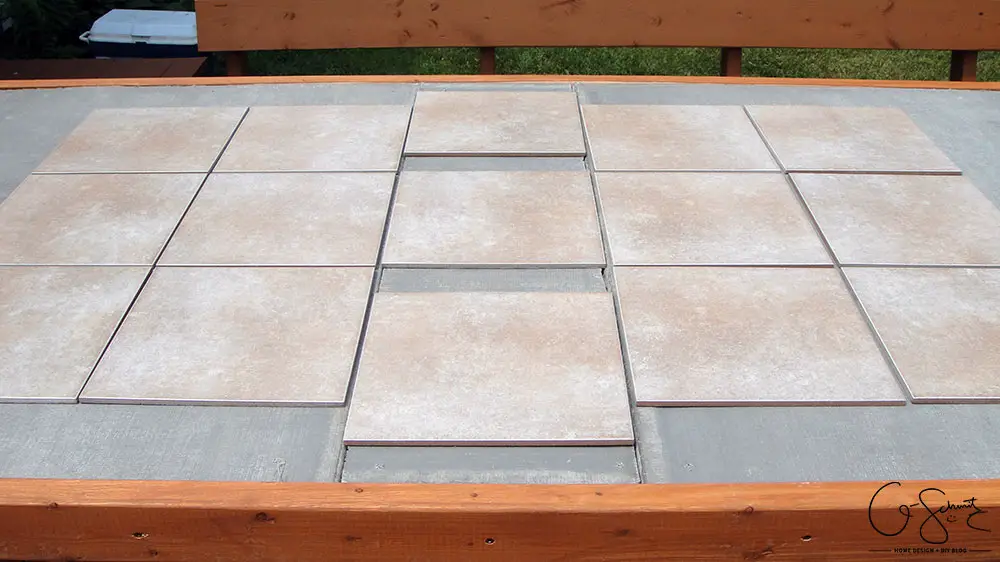
Okay back to the project. I would place some larger sized tiles out across the surface, making sure to alternate the colours evenly.
Oh look here are some more tiles.
And a bit more filled up…
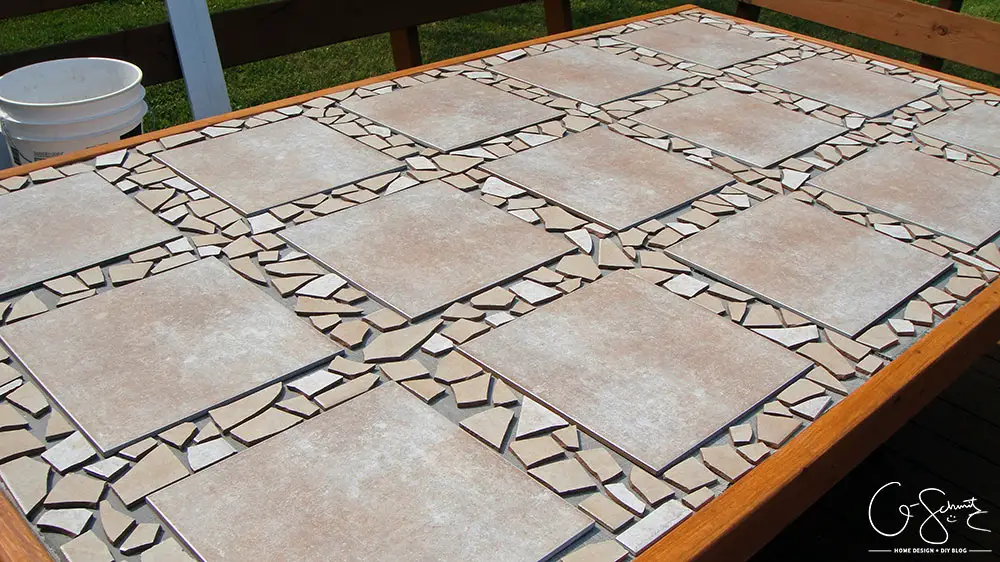
And again more tiles! Now, I have many pictures of the progress, because it took me HOURS to do all these, which is why I caution you to size your table for full-sized tiles (or at least smaller gaps for the mosaic pieces). And no, I’m not exaggerating by saying hours. I mean, I started working on Sunday morning at 10am, and I didn’t finish laying out the tiles until 6pm (with only a small lunch break). So, over 7 hours… and there were still some gaps that had to be filled, but I was exhausted at this point.
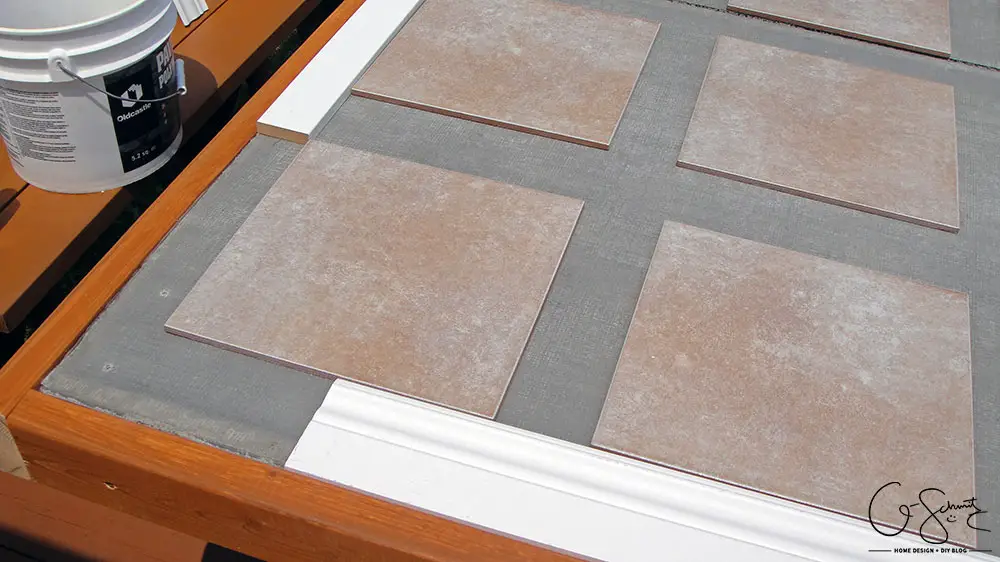
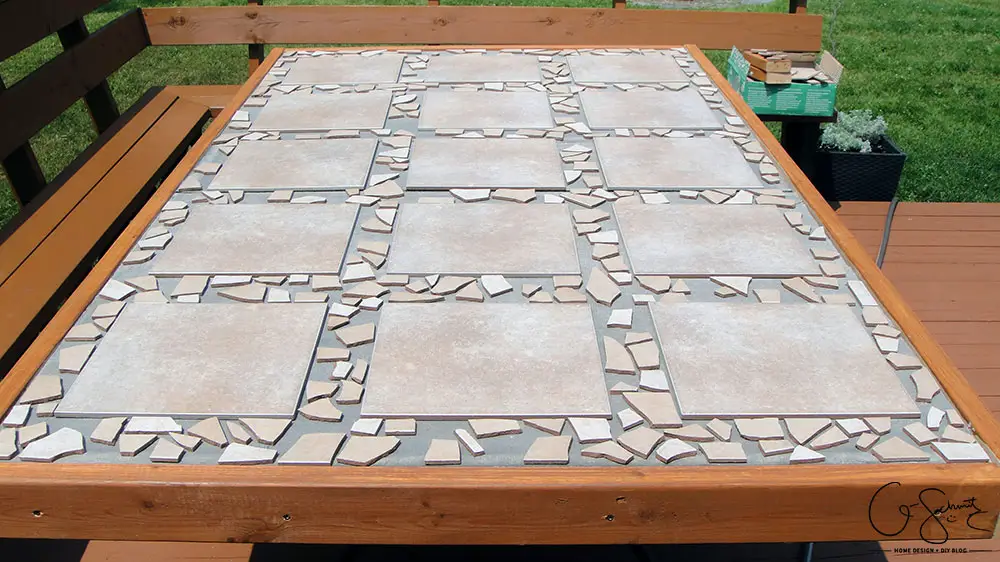
I was trying to finish this table in time for a party we were having, and because they were calling for rain on Tuesday, I at least wanted everything mortared in by Monday evening, so I could grout on Wednesday. However, because all these pieces were placed so nicely, I had to back-butter each INDIVIDUAL tile (meaning you lift the piece, then add mortar, then put it back in place; rather than just spreading your mortar around the entire surface and sticking the tiles down).
So Monday was another 5 hour night of work (after coming home from working all day of course), but I had to stop because it was getting too dark and the mosquitos were starting to bite :(
And no, I still wasn’t done sticking the tiles down.
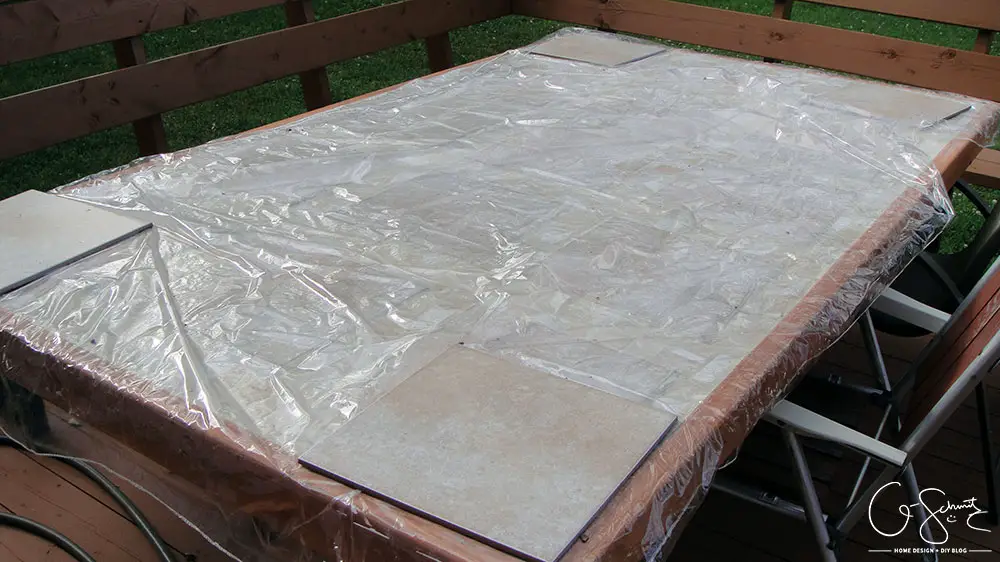
And yes, it did rain Tuesday, and Wednesday morning. I did cover the table to keep the rain off, but somehow the cover had opened a bit at one section. I soaked up as much moisture as I could, but I was worried that the mortar wouldn’t set properly there. (At least no one will be walking on the table!).
So thankfully it stopped raining sometime during the day on Wednesday, and I was able to air out the table for a few hours and then stick on the last few pieces (maybe the last 1/4 section). I also had a few small pieces aside (which you can see two photos above), so if there was a gap I had missed, I could fill it in as I went.
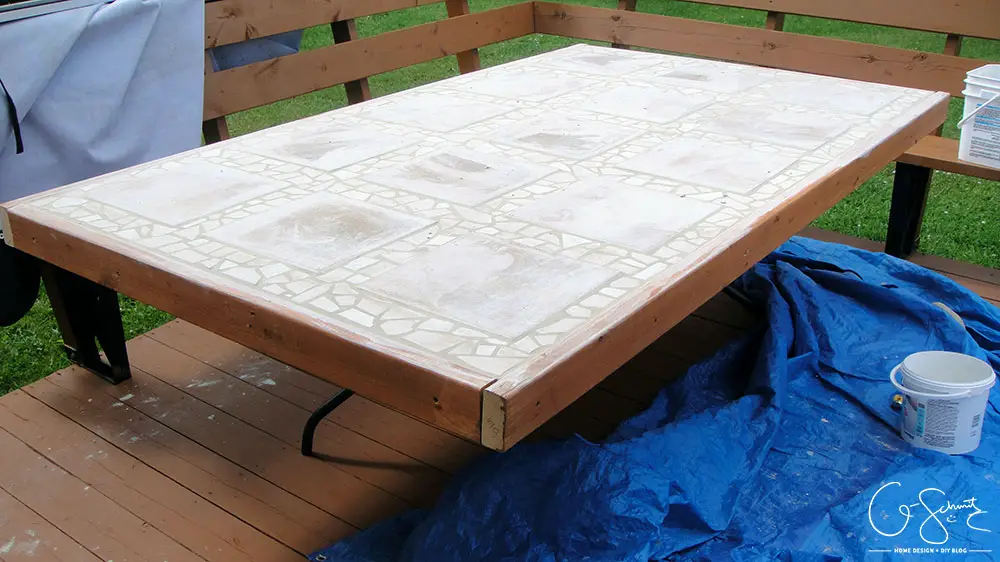
I grouted the table on Thursday (which is after the required 24-48 hours dry-time on the bag I had). I knew that grouting was a messy job, so I kept my tarp nearby to catch any messes I made.
But I think I forgot to move it to this side :) Oh well, a quick blast with the hose cleaned it right up before it had a chance to settle in too much. With grouting, you have to continually wipe the table down with clean water and a sponge. DIY/Pro Tip: make sure you plan to grout when you have a few hours of free time.
Did I mention I almost ran out of grout too? I was actually scraping the last bits I had into the final little section, but I was 90% sure I would have to buy more grout. Again, I used the leftovers we had from our renos, (which was over half a bag, maybe 3/4), but because there were lots of areas to fill from all the mosaic sections, it ate up a lot of product.
The grout had another 24-ish hours to cure until our party on Friday, but talk about a close call! In the end, I really like the mosaic pattern and I was able to make a completely custom patio table using lots of materials we already had. If I wasn’t saving our full tiles to replace some sections in the kitchen floor, I would not have had to buy any at all. Heck, I could have probably made the entire thing out of leftover broken pieces, but I think I would still be working on it today, and would probably be insane by now!
So there’s my super-duper custom patio table, which took roughly 20 hours to make (darn those mosaics!). Have I inspired you to start your own DIY table project? Haha, or maybe I’ve scared you away because of tedious nature of the tiling? Don’t worry, if I would have used full sized tiles instead, it would have taken less than 5 hours! Definitely a “labour of love”!
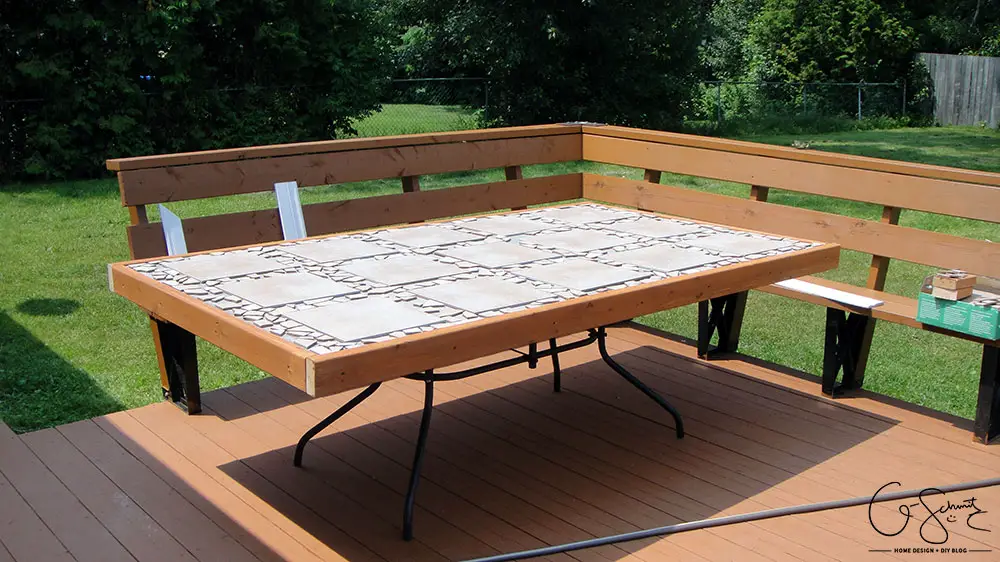
At the start of this post I mentioned that I wasn’t completely finished… basically all that’s left to do is seal the grout and add another coat of stain to the edge sections. I’ve been keeping the table covered in the meantime until I seal the grout, so hopefully I get to that soon!
Final Note: I finished this table in place because it would be (and is) super heavy to move. And I was planning on keeping it out all winter too, but because the stand isn’t the most secure (it wobbles a bit if you nudge the table) I’m scared that the weight of the snow might cause it to collapse, what do you think I should do?
Update: The table lasted one winter outdoors, but broke the next year :( Stay tuned for a follow-up
4 Comments
Dorene @ Seasonal Chapters
July 24, 2015 at 10:46 amHi Nicole,
I just found your blog because I was reading the updates people had written about Haven. I am a new blogger myself (just under 1 year) and was interested in learning what the Haven conference had to offer. Your comments about being hesitant to start a conversation made me smile as I can be a bit introverted as well, and could see myself being overwhelmed by being in the presence of so many great bloggers that I admire. Anyway, I wanted to take a moment to say that I have enjoyed browsing around your site and that I love how this project turned out!
Dorene @ Seasonal Chapters
Nicole
July 26, 2015 at 6:53 pmDorene, thanks for stopping in and I hope I inspired you to attend Haven next year!
Laura
March 15, 2017 at 8:02 amDo you feel it is 100% necessary to have cement board under the tiles?
Nicole
March 21, 2017 at 4:02 pmGood question Laura! The cement board definitely added a lot of weight, so if you were looking to have a lighter table, it might make sense to omit it. I was worried that water would seep through the grout and could potentially warp/damage the wood underneath. I think you can buy a “water barrier” brush-on thing, so you could use that for a similar effect