
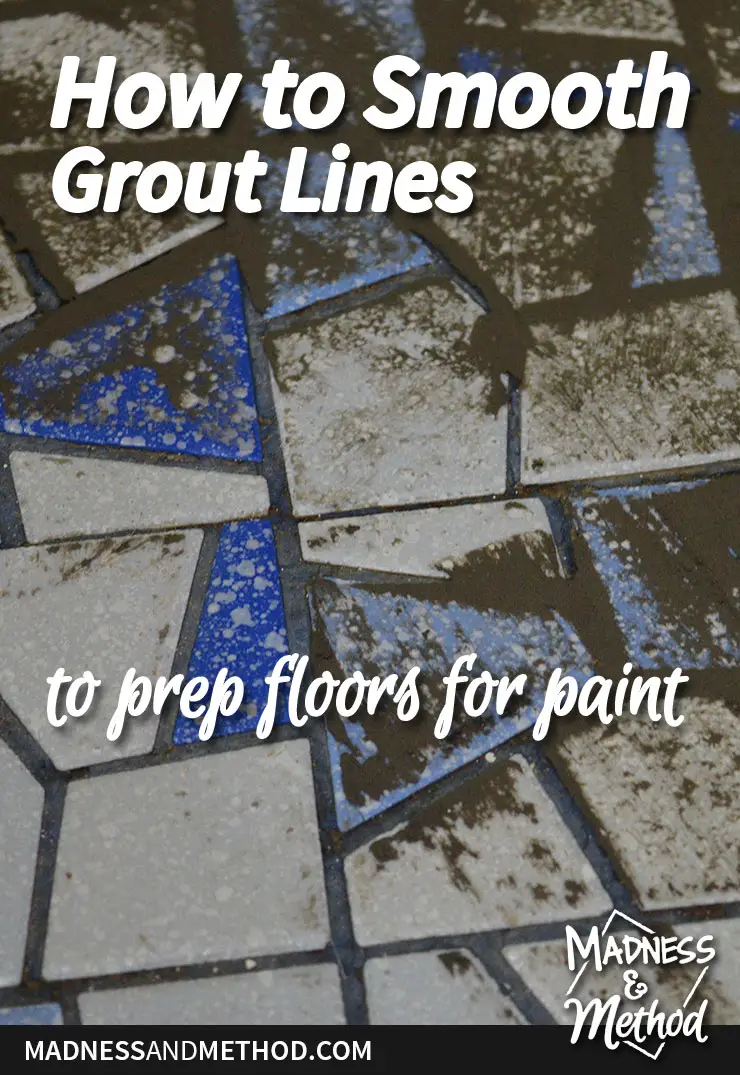
Since we’re now “going all out” on fancy-ing the upstairs of our rental home, one of the areas that needed a design refresh was definitely the bathroom floors. When we first toured the house, I had originally assumed they were some sort of linoleum/vinyl type of flooring, but later discovered they were actually tiles. Similar to the floors in my brother’s bathroom, I decided that I was going to paint them – however, the grout lines would be very noticeable. I came up with a hack on how to smooth grout lines, and I’m going to share with you the easy method!
– Note: This post contains affiliate links. See more information about affiliates here. –
Now, you may be wondering why a) someone would paint floors at all, or b) why getting rid of the grout lines would even matter. Painting floors is actually a pretty common, (easy and cheap!) way to update flooring that you may not be in love with. It’s obviously much simpler than removing it, and it can be great as either a temporary or permanent solution. You can browse Pinterest for lots of different floor painting tutorials (remember, I painted my brother’s linoleum floors to look like tile), but none of them really tackle what to do if you have grout lines that you want to hide.
Materials You May Need:
- Floor patch
- Trowel, sanding block, painters tape
- OR self-levelling concrete (see notes below)
Let me show you what I did to smooth the grout lines:
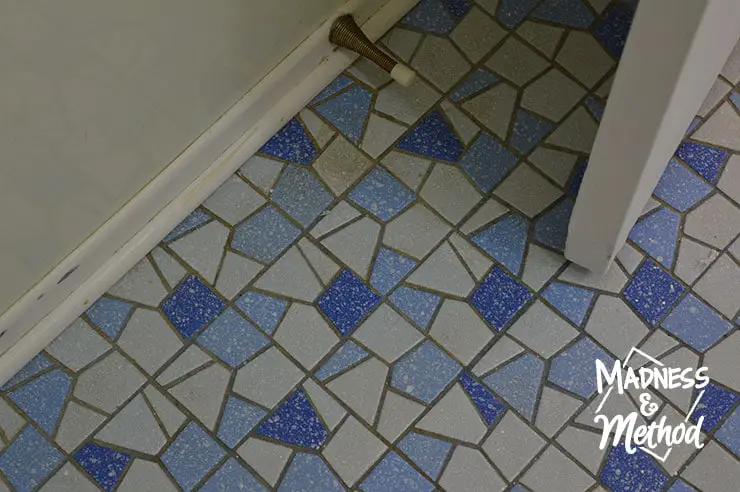
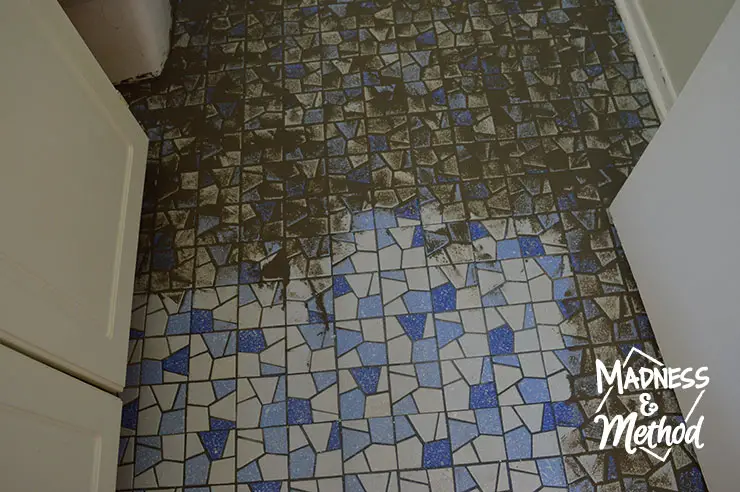
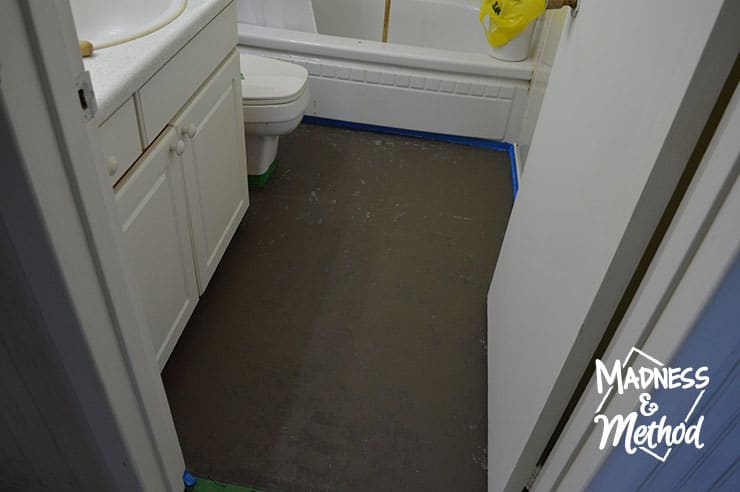
Okay, so the first thing I did was thoroughly clean the floors (see the area to the left of the door stop, that was what the floors looked like before!). This is when I discovered that they were, in fact, little tiles instead of one vinyl sheet, crazy right!?
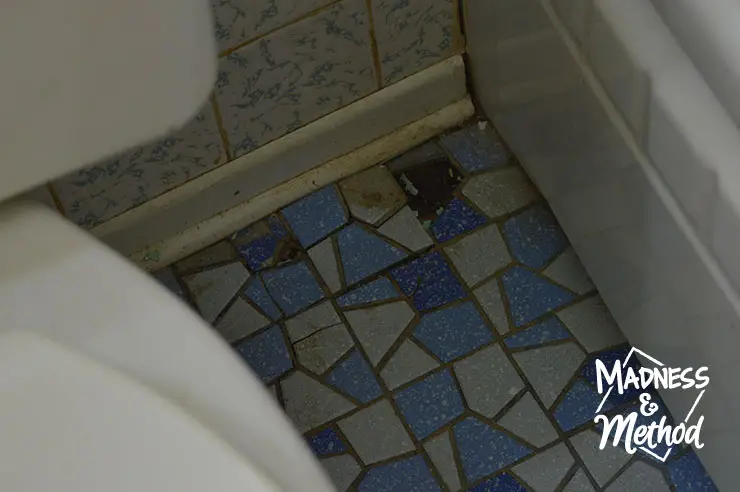
I had also noticed that there were some tiles that were missing and loose near the back of the toilet. The subfloor was pretty squishy in this area, and I’m hoping that it was just from the shower overspray (rather than a leaky toilet).
Eventually, our plan is to retile the hallway and bathroom when we do the upstairs kitchen (with the same tiles as the entryway), but that won’t be for another few years!
Anyways, I knew I wanted to fill in these holes and was originally just going to use some of the new grout when I was tiling. But again, we decided to give everything a bit of a refresh upstairs, so painting the floors became the new plan!
Besides, the Husband clearly got a little messy when he was painting the bathroom ceiling (which we had to do since it was cracking/peeling). So I either had to remove the paint from the floors, or just paint them!
Smooth Grout Line Options:
I thought of a couple of ways on how to smooth the grout lines (since I knew that the crazy little pattern would show through whatever paint/pattern I decided to do with):
- Re-grout them on top of the old grout
- Use a self-leveller to smooth them completely
- Use floor patch as a skim coat
From past experience, I knew that doing a thin coat of new grout on top of old grout would most likely result in flaking. Grout kind of needs to be thick/deep in order to harden properly, and I didn’t think it would work like I wanted it to. A self-levelling product would result in the smoothest surface (like the super slick floors we prepped in our basement), but it would also raise the height of the floor ever so slightly. It’s pretty wet too, so I wouldn’t have had as much control with the application; and was worried that it would create an extra layer that we would eventually have to remove when we do re-tile these floors.
If you’re looking for a more permanent solution and are not worried about the final height of the floors, I would definitely suggest the floor leveller!
But, if you want to hear about the 3rd option, check out what we actually did:
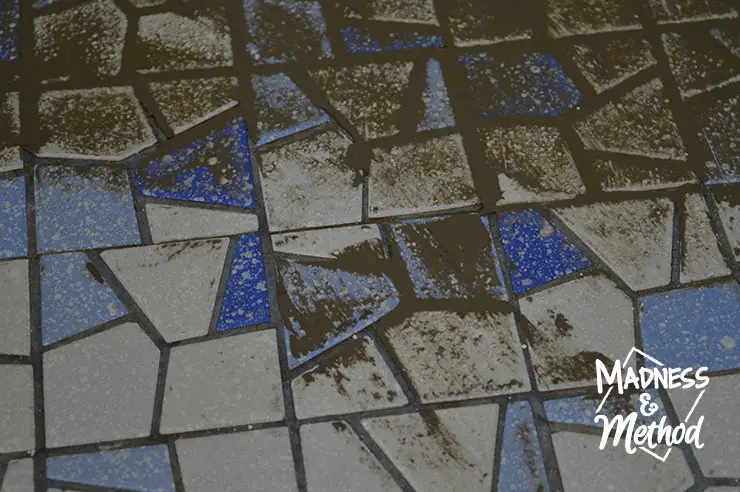
Since I had a huge bag of the floor patch and had worked with it before, I kind of knew what I was getting into. I mixed up a small amount and started applying it to the floors as if I was grouting them the first time. If you’ve ever grouted tiles, then it’s the same technique, only without the washing step.
If you’ve never grouted before, then it’s basically like you’re pushing the floor patch across the surface of the tiles so that it sticks in the grout lines. You’ll want to use a grout float and try to make sure the “grout” is even with the height of the tiles.
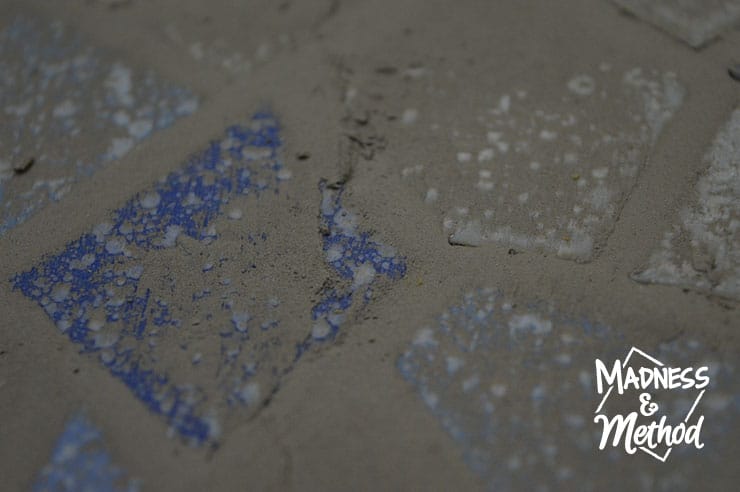
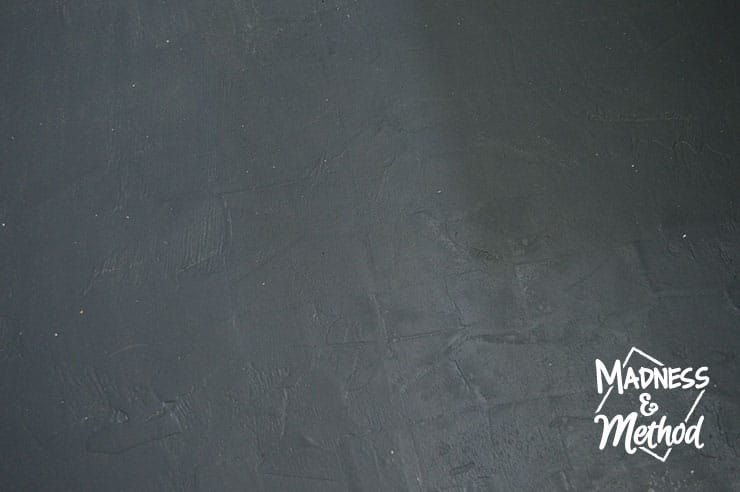
After the floor patch dried, I had gone back into the room to inspect my grout lines. There were unfortunately some areas that were a little raised, and I was worried that it would stay that way forever!
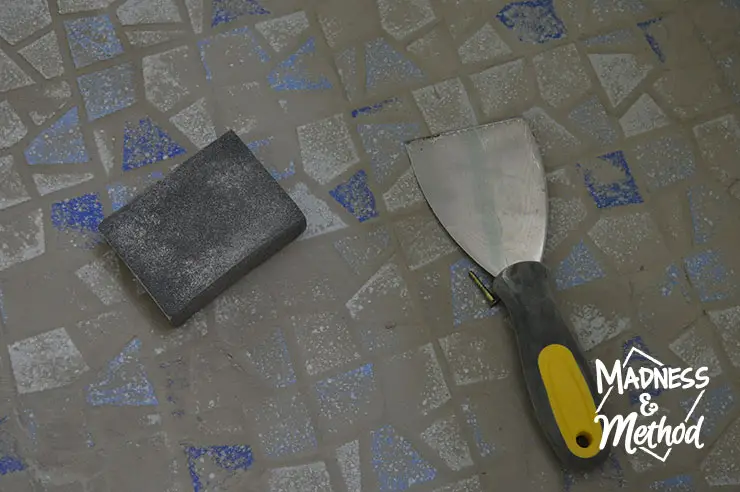
Being the handy person that I am :) I decided to try and smooth them out with a regular sanding sponge. It worked great! For any areas that were really thick, I was able to knock them down a bit with a regular drywall/utility trowel, then sanded everything evenly. It actually made the floors super smooth too (it was kind of rough feeling), and I just had to make sure all the dust was vacuumed before I painted.
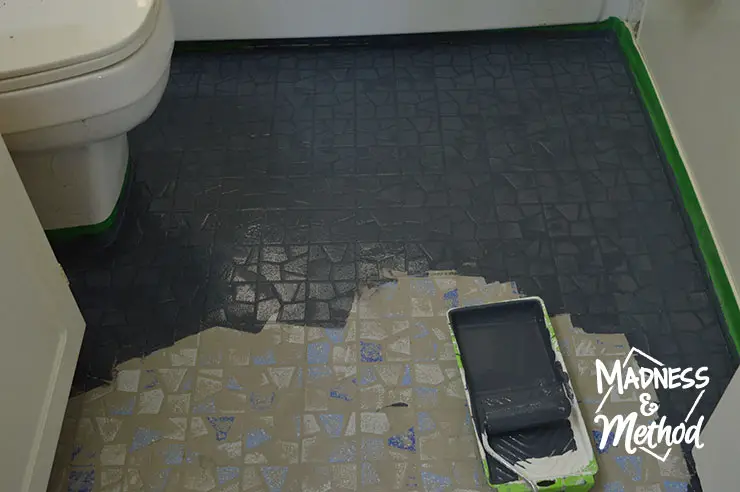
Moment of truth time! I rolled on a layer of my PARA Floorguard Paint (in Uniform, now called Gentrified 413F) and I realized I could still see the grout lines. Womp womp. At least the floors looked much better though right?!
(And I did accomplish my first/actual goal of covering up the big holes behind the toilet; and I did fill in the deep grout lines so that dirt and nasty bathroom gunk wouldn’t get trapped anymore).
Being the perfectionist that I am, I decided to do one more coat of the floor patch to smooth everything out. I went over the tiles a lot more this time (probably overkill, as you will see in the next photo), but I wanted to make sure the grout was as smooth as possible, because I wasn’t going to do it a third time.
And again, I sanded the areas that were bumped and tried to make sure everything was nice and level before I painted.
SO on went another coat of the Floorguard, and I am happy to report that a lot of the grout lines have disappeared! I do have some areas that have come up a bit (blame the extra thick layer I did and my rush to get the floors painted), but I’m hoping my cool paint pattern will hide it.
I hope I have given you some good tips on how to smooth grout lines if you want to prep your floors for paint! Hopefully, you’ll also have some realistic ideas on what to expect if you go with my method (and yes you can get them 100% smooth if you use the self-leveller).
Our floors are still just painted this one colour for now, but I am hoping to add a cool graphic pattern in the near future.
We have lots more projects to finish (I’m hoping the bedrooms are done soon so we can have a good space for when the littles are here), but for now, the painted floors are working a lot better since I’m not worried about the gross tiles that were there before.

8 Comments
Annette
July 31, 2018 at 7:54 pmEww. Those were filthy floors. Good luck with this Reno.
Louise aka Mommy
July 31, 2018 at 9:41 pmI kinda linked the look with the grout lines still showing – Can’t wait to see the final result
Annie Morales
April 12, 2020 at 2:30 pmCan this be done on a kitchen countertop? I want to paint my countertop but have deep grout that I want smooth?
Nicole
April 12, 2020 at 3:33 pmI think it would work for a counter too (although I haven’t double-checked the package application options). I’m guessing it’s for a temporary period since you’re planning on painting them?
Jan
June 29, 2020 at 12:33 pmCool! I have similar tile situation- though they had already been painted by someone and some is flaking because I don’t think they used primer or prepped well or added any type of sealant. I was glad to see you you could use the grout leveler over painted title! How has it held up?
Nicole
June 30, 2020 at 1:08 pmWe lived with the floors for just under a year (only part-time) and they were still great! Now that bathroom/house is being rented full-time, I’d have to wait and see when the tenant moves out…
Lisa
November 20, 2024 at 7:36 amWill this work for the large tiles on my fireplace face?
Nicole
November 21, 2024 at 1:39 pmI’ve never used planipatch on a vertical surface before, but I imagine that it might work. Good luck!