
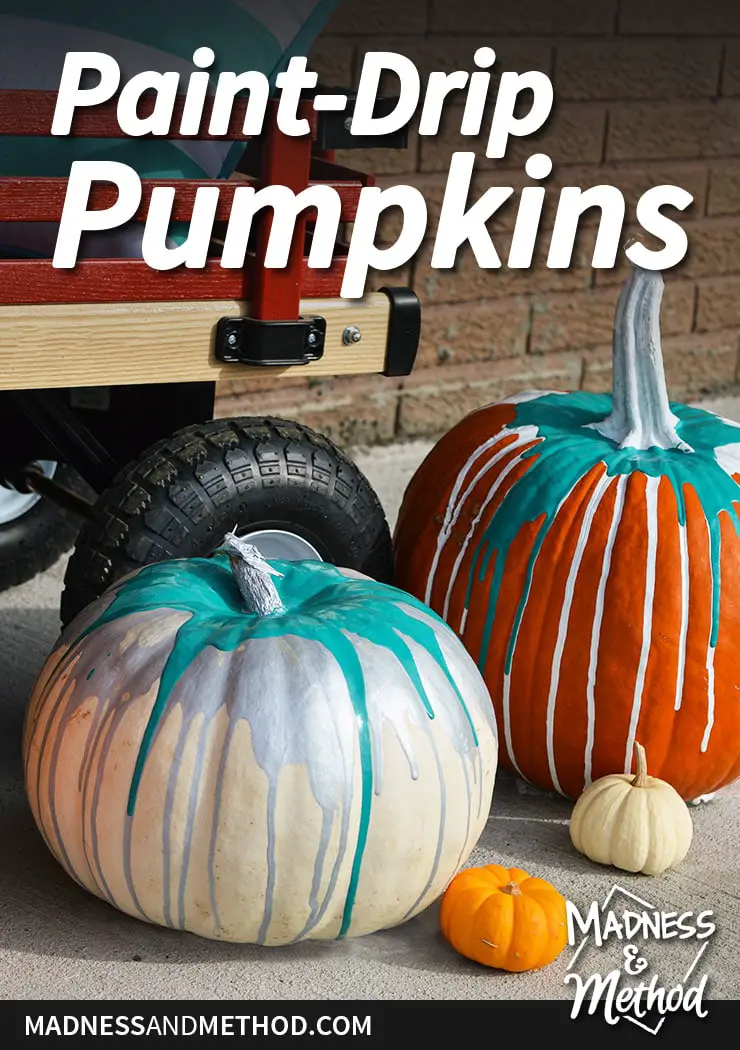
I shared so many fun Halloween projects last year, so I am fortunate that all I have to do is bring everything out from storage and set it back up, ha! This year, I did something a bit different with our pumpkins, and it involves spreading some paint all over them. Paint-drip pumpkins are certainly an easy project, but there are a few mistakes that I made that you might want to avoid! Read on for more info :)
Materials You May Need
- Pumpkins
- Paint (regular acrylic craft paint or water-based house paint)
- Plastic spoon(s)
- Small paintbrush
- Water (maybe)
Make sure to allow yourself plenty of dry-time for this project!
First things first, you’ll want to get yourself a pumpkin or two and give them a quick wipe-down. I like nice, even shaped pumpkins with a good stem – but you can totally pick whichever ones you like :) (Just remember if they have a really concave top, it might give a different look than if they have a peaked top).
Then, you’ll want to set them up on a covered work surface. I simply placed some newspapers down on my kitchen table, and thought that would be good. Don’t use newspapers. Your paint will likely drip and pool up under the pumpkins, and the newspapers will soak up the paint and stick to your pumpkins!
So maybe use a plastic tarp, or even tin-foil. Basically something that won’t absorb liquid!
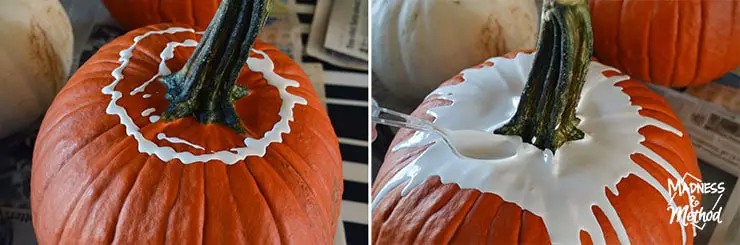
For my first layer of paint, I chose some plain ‘ole house paint and added it to the top of my pumpkins with a plastic spoon. The back of the spoon is great for spreading and pushing the paint around and it was super easy to control how much paint I wanted to be on my pumpkins this way.
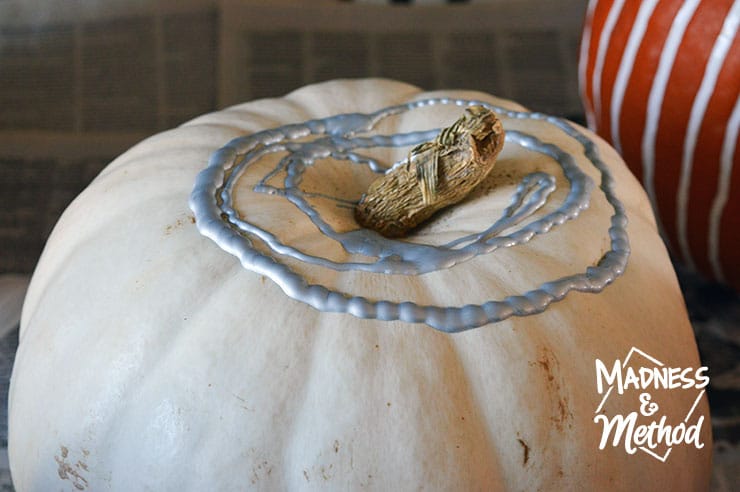
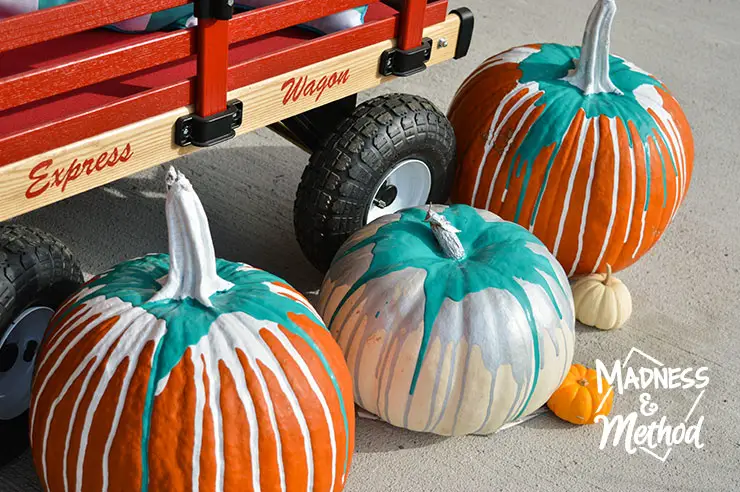
For my one white pumpkin, I decided to use some silver craft acrylic paint as my base layer. I just squeezed it out of the tube, but it was much thicker to work with compared to the house paint. I found that it didn’t drip well at all, so I had to use a paint brush and smear it around.
Then I had to spray some water on it to make it a bit more liquidy and goopy. (You know, to actually make the paint drip).
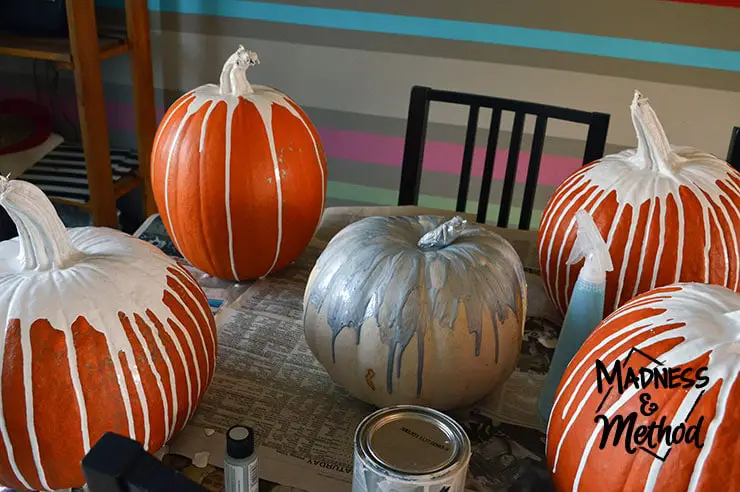
Once I had the first layer of paint on all my pumpkins, I had to let them dry overnight. I decided to do a layered paint-drip technique, compared to a marbled one.
If you wanted to do a marbled look, you would simply add your second colour of paint on top of the first one (while still wet), so that they would mix together and marble.
Oh, I also painted the stems white (and silver) using my paint brush and some of the extra paint that was pooling at the top concave part of the pumpkins.
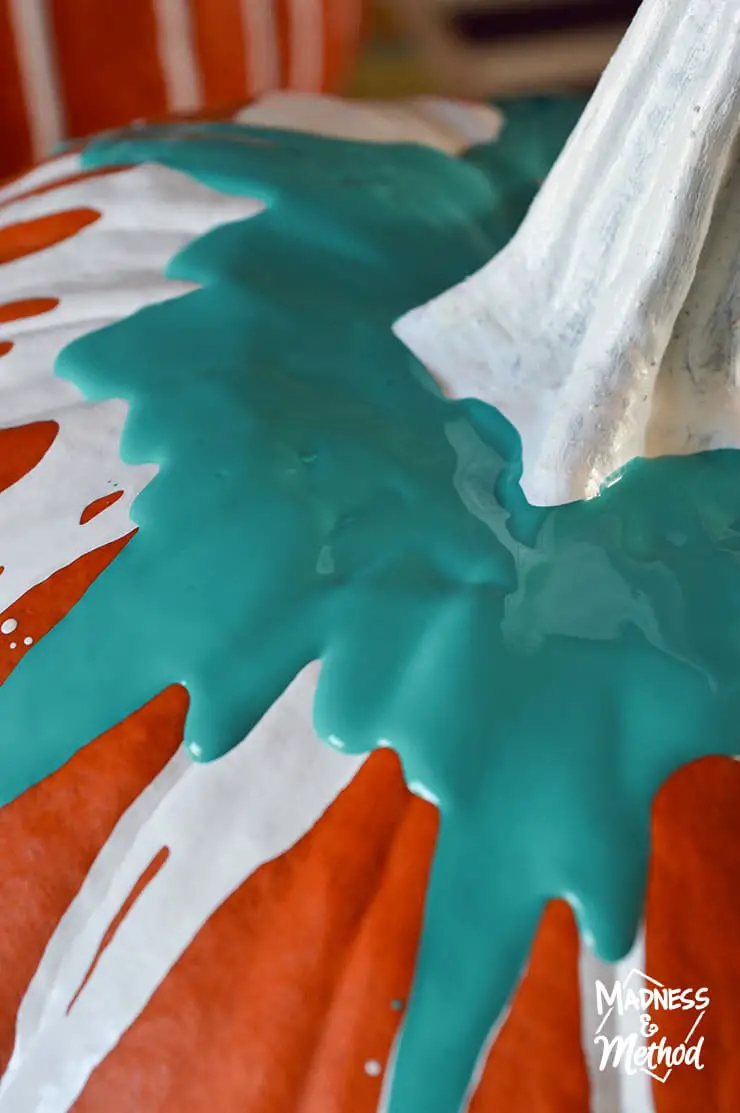
The next day, I used some teal paint (actually leftover Teal Waters by Para from my brother’s bathroom renovation). I like the idea of having a “teal” pumpkin to show that you have some non-food treats at your house, and figured that it would be a great contrasting colour next to the orange.
Then wait for my paint to dry again!
I was originally thinking of doing a combination of colours (maybe a bunch of metallic hues?) but decided to keep it simple this year.
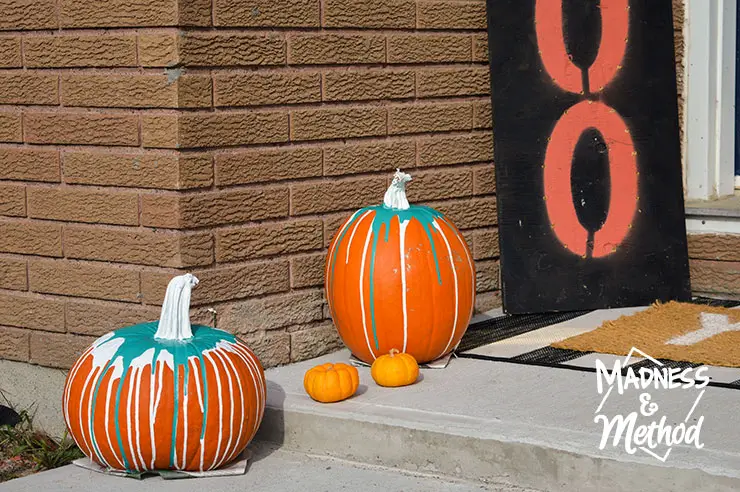
Finally, I was able to bring them outside to display on our front porch! Remember when I mentioned that some paint may pool at the base of your pumpkins? Ya, there were still some wet spots and I didn’t want to get paint on our new front porch, so I had to improvise and add a fresh piece of newspaper underneath.
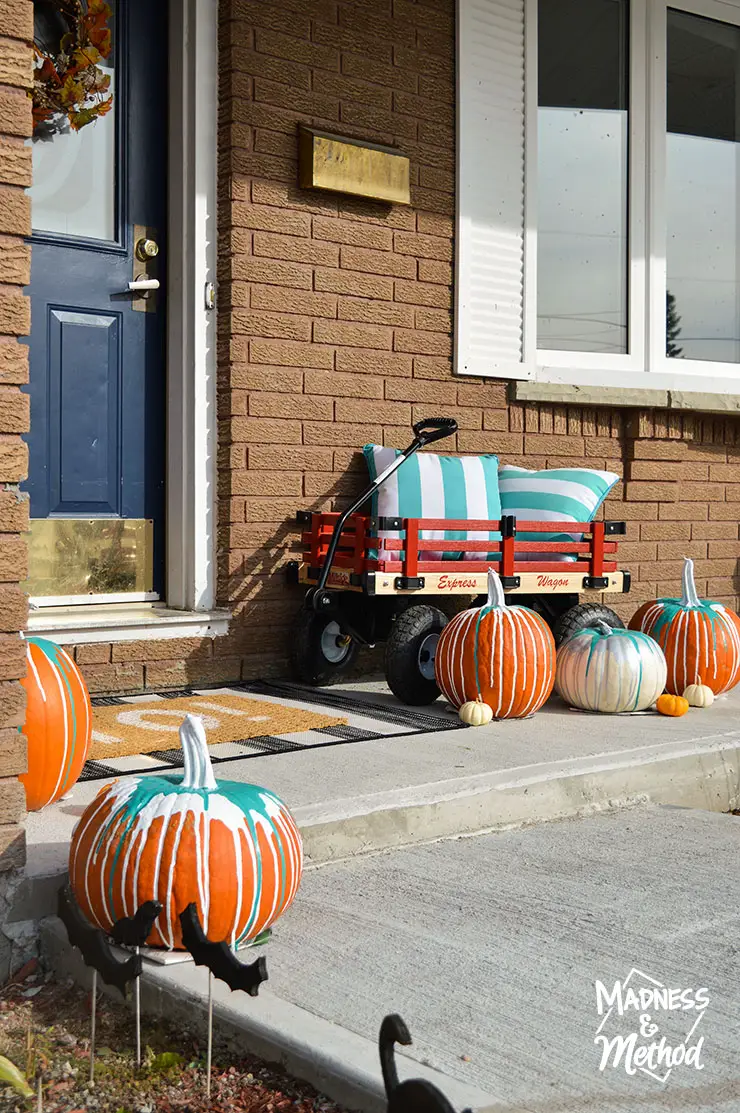
I then realized that the outdoor pillows in the backyard matched my pumpkins perfectly – so I brought them out front to add to my décor! Our wagon is normally parked in the garage, but because we’re in the middle of renovations in there, it’s been sitting out front here for a couple of weeks. Might as well put it to use :)
I also placed some little pumpkins around, and I was thinking of painting them completely – but they’ll probably stay bare.
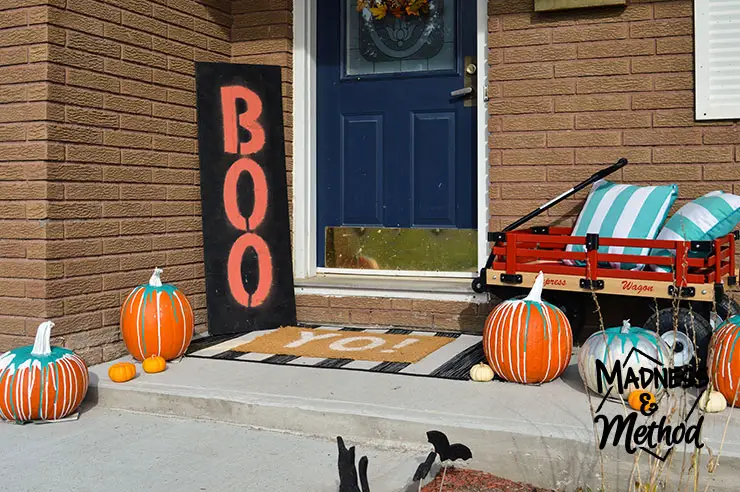
I took out some of our other décor like the boo sign (which I still have to hookup) and our Halloween silhouettes. I also need to add the ping pong balls to our lights again, but the gutters should probably get cleaned at the same time.
I swear we’ll get to it this year!
These paint-drip pumpkins are a bright and fun way to decorate for Halloween compared to going the traditional carving route. Just make sure to allocate enough dry-time before you need to bring them outside, and don’t use newspapers to cover your work surface! PS: this project can be super cost effective, since all you need to buy are the pumpkins!
Do you have pumpkins setup this year?
Let me know if you’re setup for your trick-or-treaters yet… Halloween is in 10 days!

No Comments