
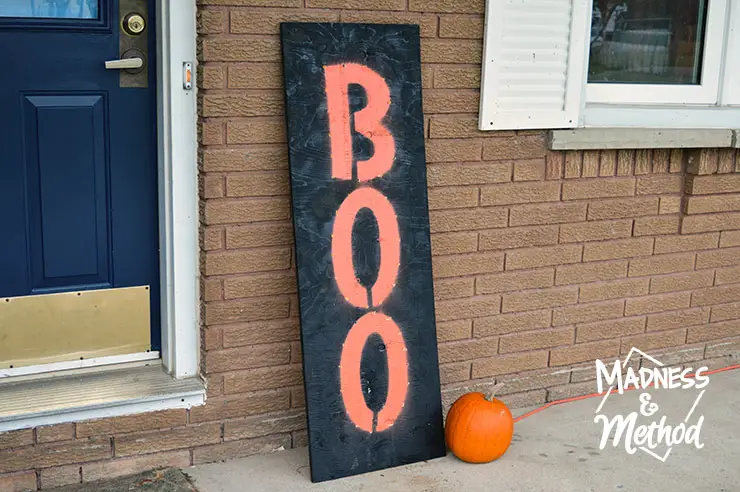
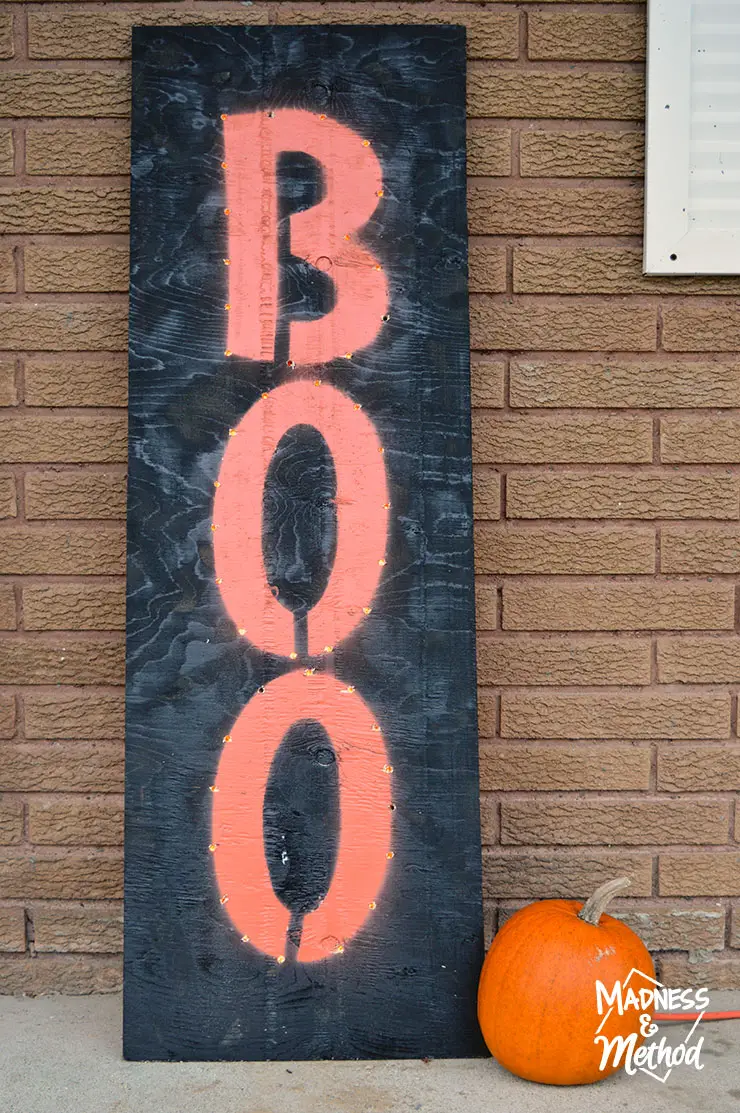
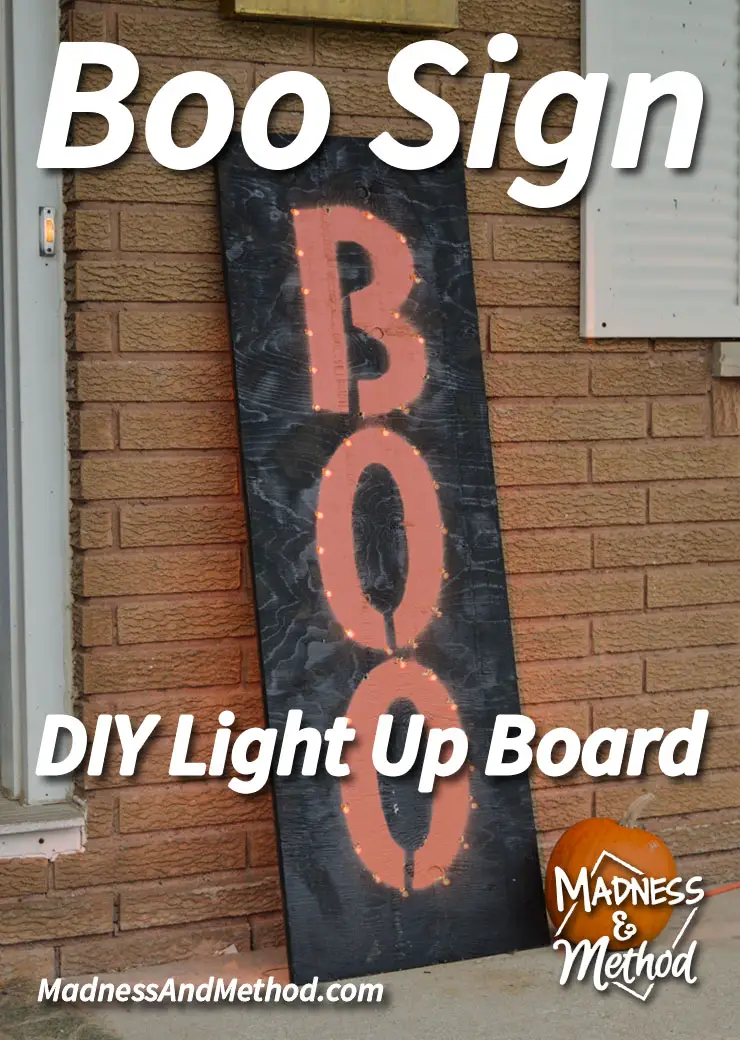
This is the last big project for my outdoor Halloween décor this year, a DIY light up board “Boo” sign! As usual, I wanted something that would look good in both the daytime and at night, and this large marquee-like sign is the perfect addition to our front porch. You can easily recreate this look with whatever word you want (or for whatever season) but I chose to write “Boo” because it was pretty simple and would have a nice impact from afar.
– Note: This post contains affiliate links. See more information about affiliates here –
Once again, I got some free spray paint from Krylon to use for this project; and I was very thankful for the quick dry time compared to regular paint (did I mention it’s starting to get real cold around here?). This is how it will turn out, so let’s get on with the process!
Now, I should mention that I wanted to make a nice big sign for our décor, and I just happened to have a scrap piece of 3/4″ plywood about 16″ x 48″ that was a good size. Okay wait, we were actually cleaning out the shed and I found some wood (that the Husband wanted me to get rid of) then decided to make the sign… minor details?
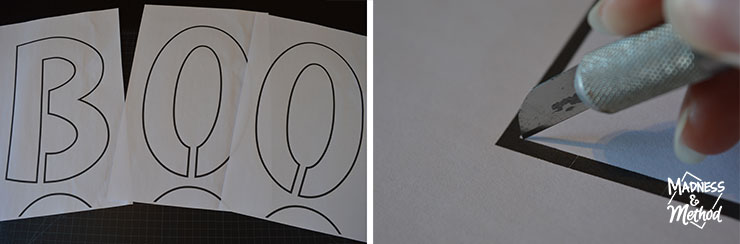
Knowing what my board dimensions were, I set out to design my layout on the computer to determine how large I wanted the letters. I got the Husband to print them on 11×17 papers at work (but you can probably print that size easily at Staples if you wanted). Then I cut-out the inside of the letters with an exacto knife.
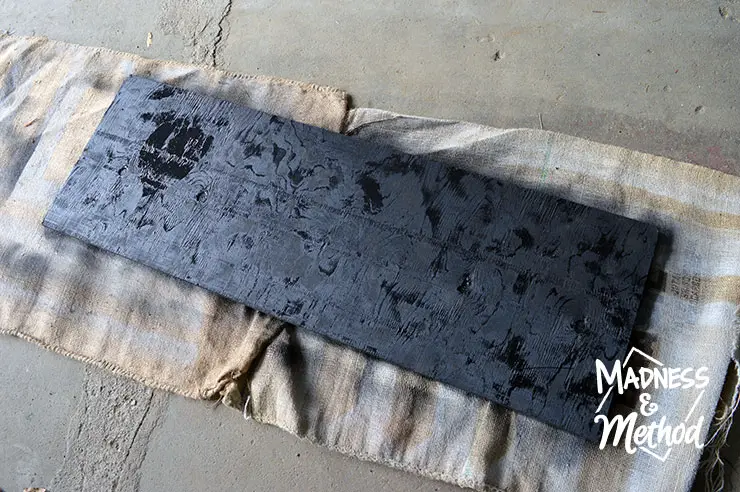
I used the rest of the black Krylon dual spray paint (buy similar paint here) from when I made my Halloween silhouettes, and I had just the perfect amount to cover the front and sides of my board. (Actually, you can see the board in the silhouettes post because I used it as the backing when I painted the creatures!).
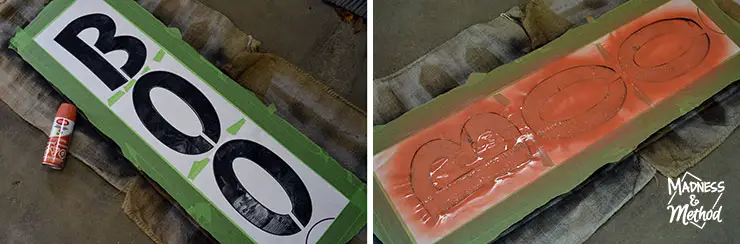
Once the black had dried thoroughly, I simply took the letters and taped them to the board, then did two coats of Krylon spray paint in Paprika Orange (here is a similar colour).
Stencil Spray Painting Tips
Now, I should mention my super-secret technique for getting crisp lines when you spray paint using a regular sheet of paper as a stencil. Actual stencils are thicker/heavier than paper and they don’t move as much when the aerosol blows around. The trick is to lightly wet the back side of the paper so that it adheres to the surface and forms a nice bond. You just spray paint as normal, wait for it to dry, and then remove the paper stencil and any paper pieces that may have gotten stuck.
However, this ONLY works if you are doing one coat of spray paint. Once you do more coats (I did 2 for this Boo sign) the paper gets all wonky when it dries, and there’s no longer a nice tight seal. Your best bet here is to try and spray paint as perpendicularly as possible (ie: straight down) so that the paint doesn’t sneak in behind the paper.
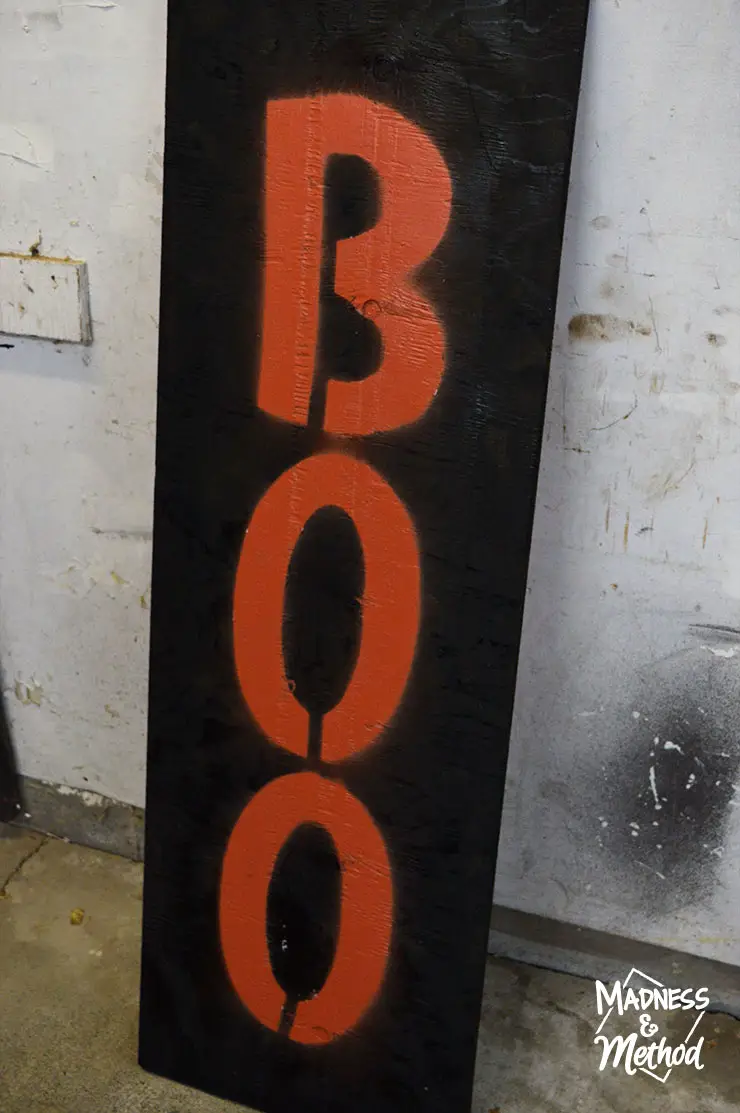
I did end up with a slight dusting around the edges because I had to do two coats, but it isn’t too noticeable from afar. Besides – my boo sign will be in the dark half the time haha!
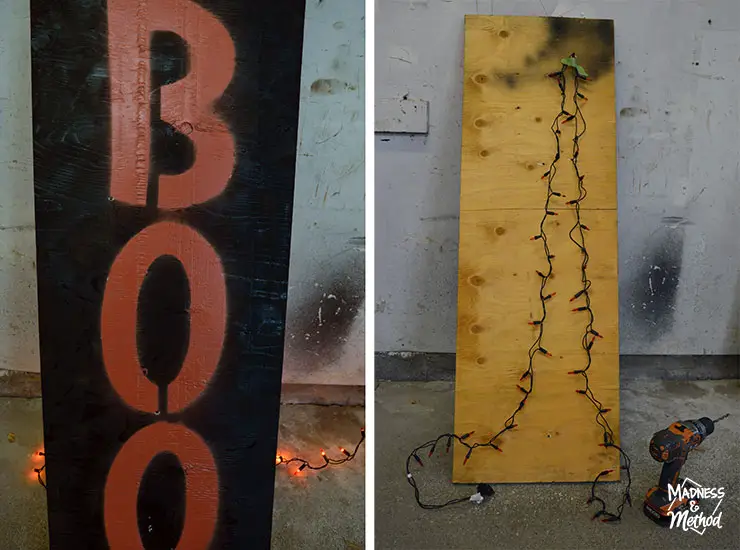
For the light up portion of my board, I started by drilling some guide holes at the tips of each letter. I decided that I would be plugging in my light up board at the bottom, so I folded my strand of orange lights in half, and worked my way down from the top.
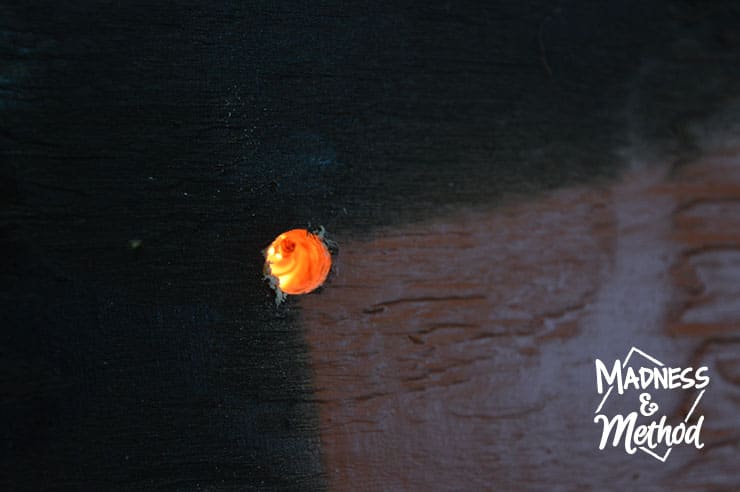
Knowing that each light bulb is 3/16″ wide, I used a 1/4″ drill bit so I would have some extra space in each hole. I was originally thinking of having the light bulbs stick out of the light up board, but then I thought it might be too easy to break the lights like that. (You know, we’d be getting a lot of door traffic on Halloween night and it’s just safer for them to be protected in the wood). So they just barely make it to the front of my 3/4″ thick board.
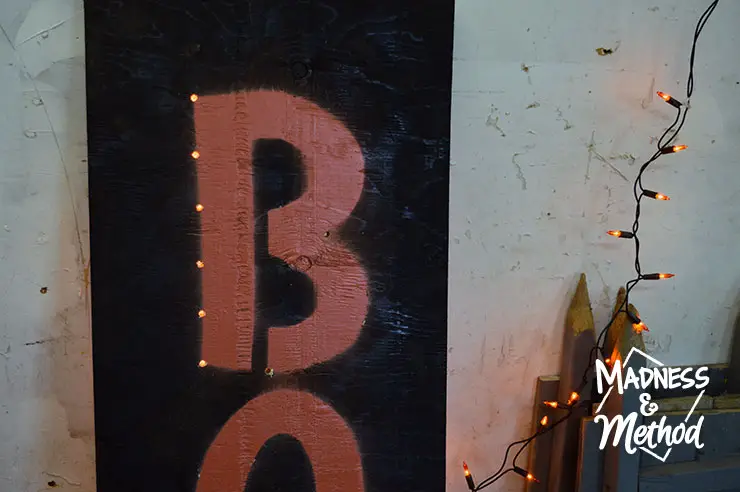
For my strand of lights, each bulb was just over 2″ away from the next, so I tried to space the holes out evenly along the outer edge of the letters.
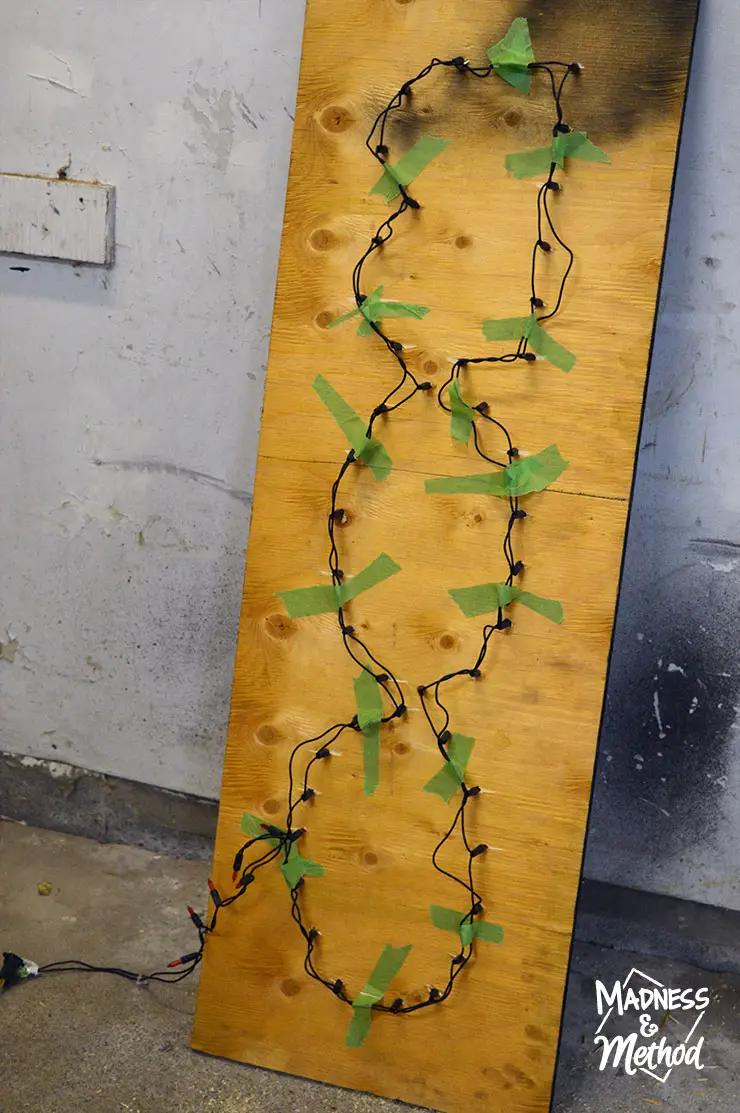
Every few bulbs or so I would stick on some painter’s tape to loosely secure the strand to the board (just so they wouldn’t fall out as I kept working or when I moved the sign). Some of my lightbulbs were duds, so I didn’t make a hole for every single one. That way I can just use the next light rather than replace the bulbs haha!
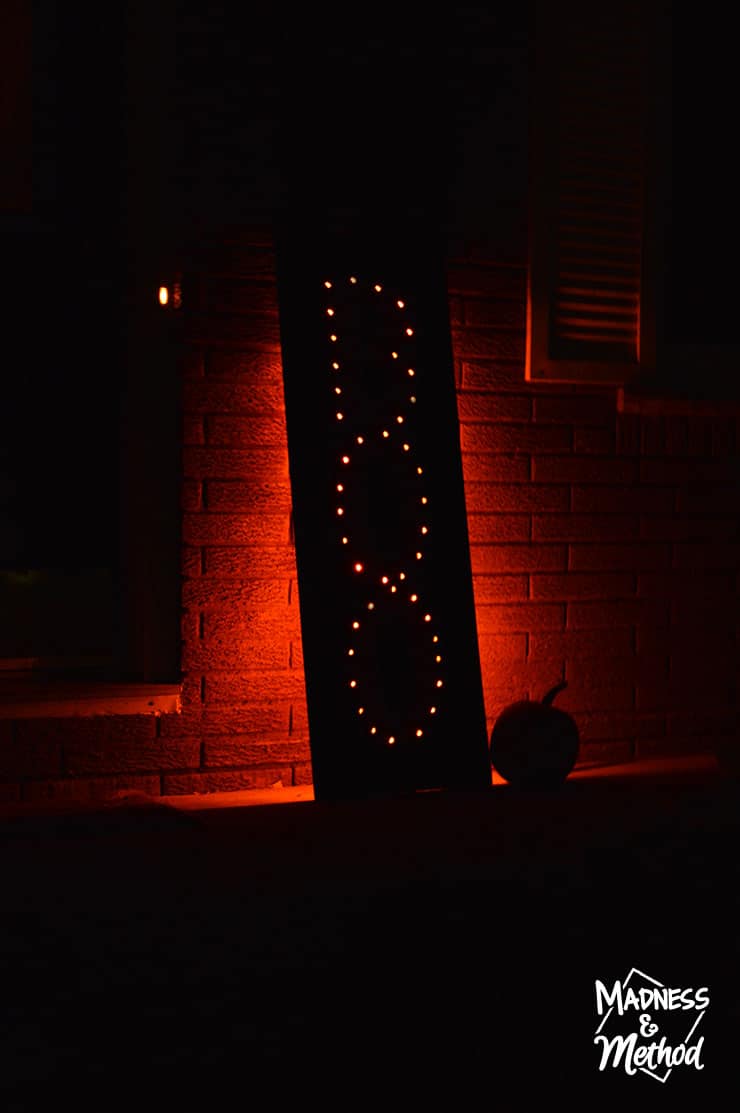
I put my DIY light up boo sign to the right of my door then ran an extension cord to the garage. Last year we had the lights plugged in to the inside of the house, but I don’t want to have a gap in my front door this year for drafts.
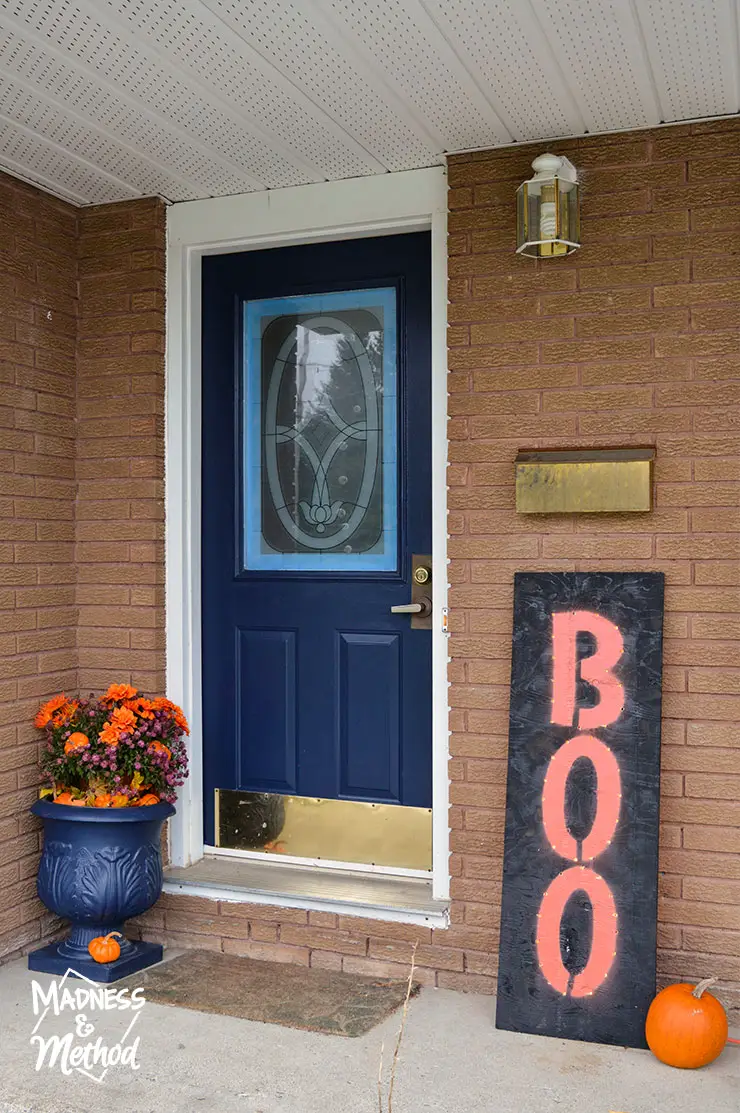
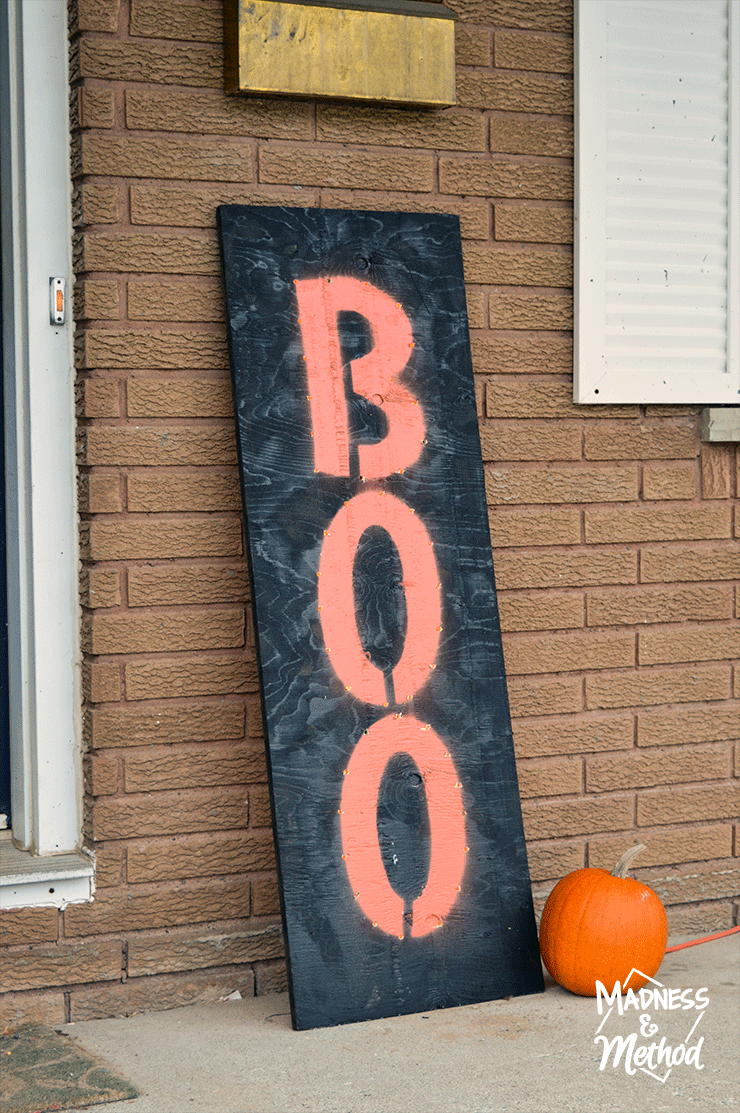
It just happens to fit nicely right below our mailbox, and our front door actually looks presentable (thanks to our festive planter too). So far I only have one pumpkin out, but I may pick up a few more this weekend.

The lights glow nice at nighttime too, and you can still read the letters “Boo” even though you can’t see the full orange paint.
I really like my DIY light up Boo sign and I’m excited to keep it “normal” all week, and then light it up on Halloween night! I love finding ways to incorporate more lighted décor on our porch, rather than relying on the porch light… because it’s just not as much fun :)
Technically I could even use the back of the board for something else, and would just have to drill some more holes for whatever that sign says. It could be interchangeable between different holidays/seasons, or even something else Halloween-y for next year to switch it up.
I’d just have to get a different set of coloured lights, or even use plain white ones and we’d be all set! Anyways, I’ll be sharing some more photos Tuesday of what everything looks like together, so please come back then for a nice recap of all my Halloween projects this year.
Thanks again to Krylon for sending free paint for this project :)
Are you looking to work with me in promoting your products or services? The Madness and Method Blog would love working with relevant/useful/appropriate businesses, please contact me to discuss ways we can coordinate and partner together.
Shop this Post


No Comments