
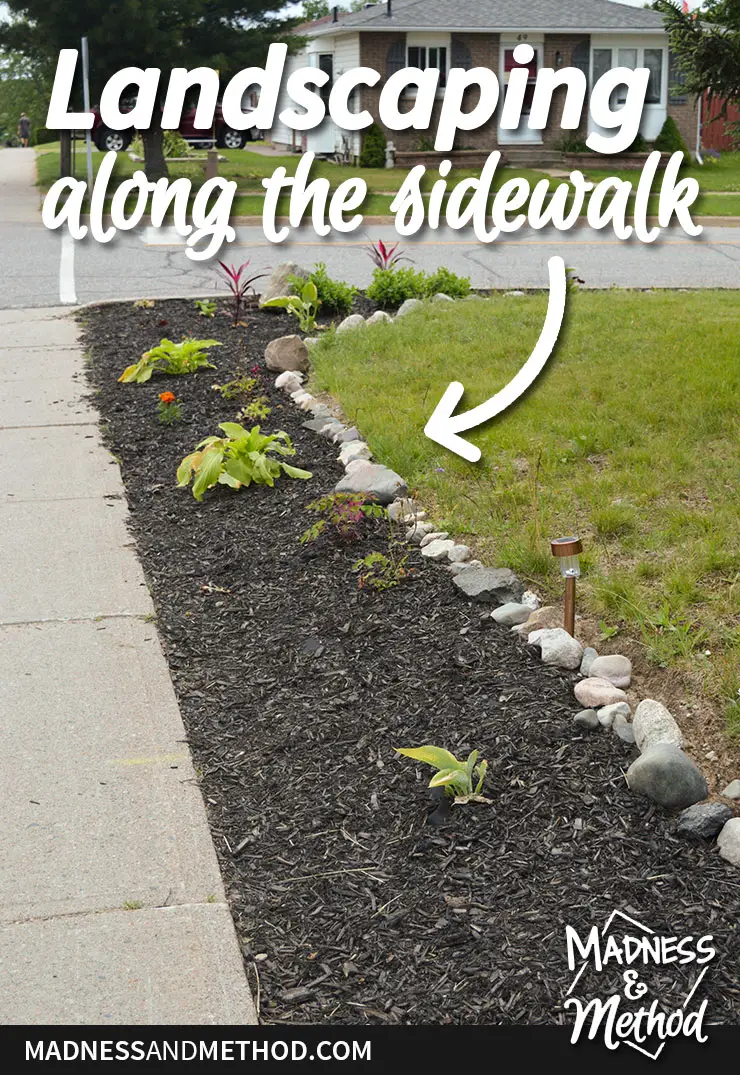
Remember last week when I shared our yard repair post construction? I’m back this week with an accompanying project that we completed around the same time. Check out our landscaping along the sidewalk, and make sure to follow my number one tip if you’re planning something similar!
– Note: This post contains affiliate links. See more information about affiliates here. –
Basically, we have two main sections that we tackled. I’ll go over how we prepped both areas, then chat about the first one and the second/bigger side.
Okay, before we begin, I figured it made sense to share this photo so you get a better sense of our yard:
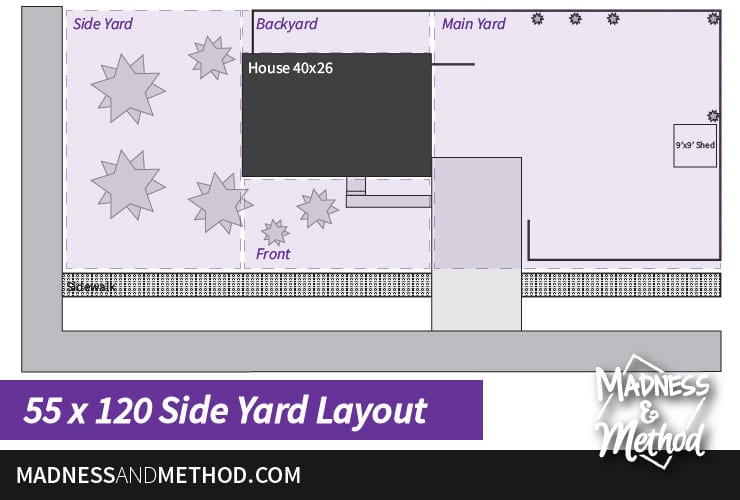
It was originally posted when I shared our garage design plans, and now there’s a garage (and no shed) in the main yard. We live on a corner lot where our yard is wider than deep. We have a sidewalk and a bus stop in front of our house, so it’s a bit busier than anywhere we’ve lived before.
The main reason I wanted to add some landscaping along the sidewalk was to STOP PEOPLE AND DOGS from walking in our yard. I get it, we have a dog too, and sometimes she veers off the sidewalk to pee in people’s grass. But with the corner lot, it seemed like we were getting a lot of people who would cut across the corner. And there’s not even a sidewalk on that side!
The worse was when I saw someone bring their dogs all the way to our little garden to sniff/pee. You can see the placement of our little garden a bit in this post, but it’s at least 30′ from the road. (There will be more photos below).
Prepping for Landscaping
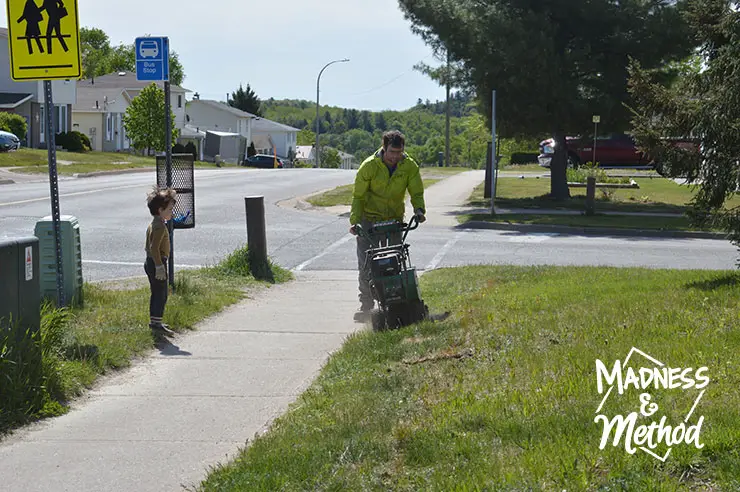
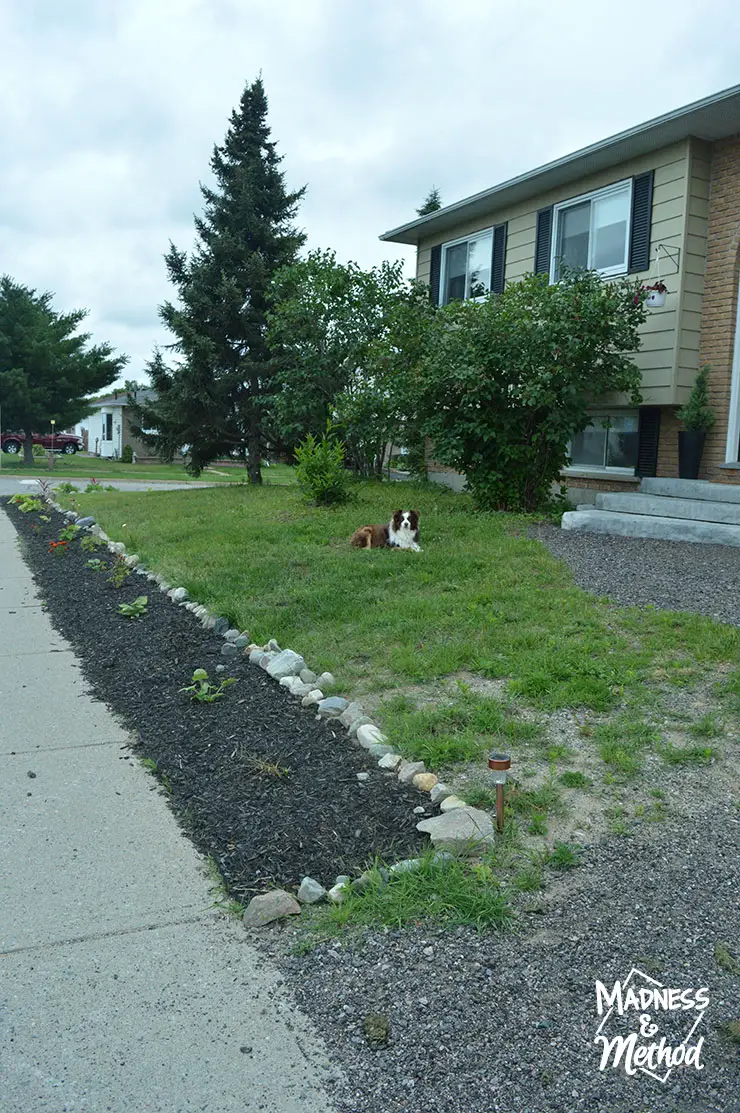
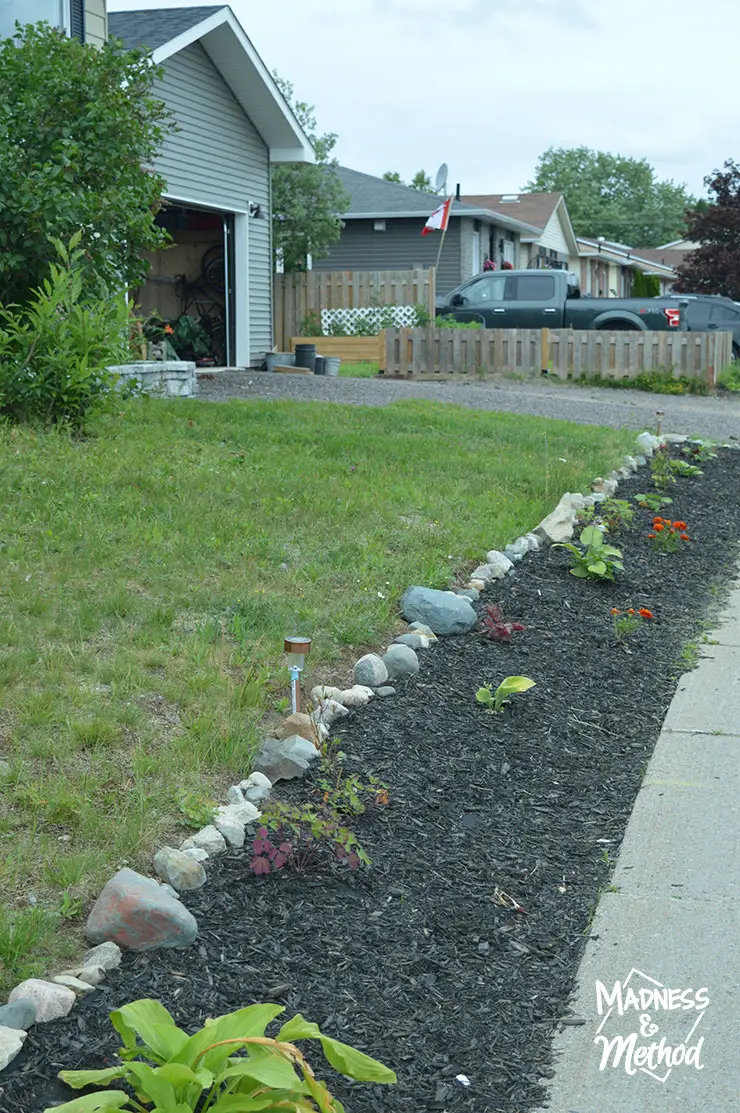
The photo above shows the angle of our yard in comparison to the street a bit more. The bus stop is right there, but there’s also a large boulevard (the name for the area in between the sidewalk and the road), so dogs have plenty of place to pee.
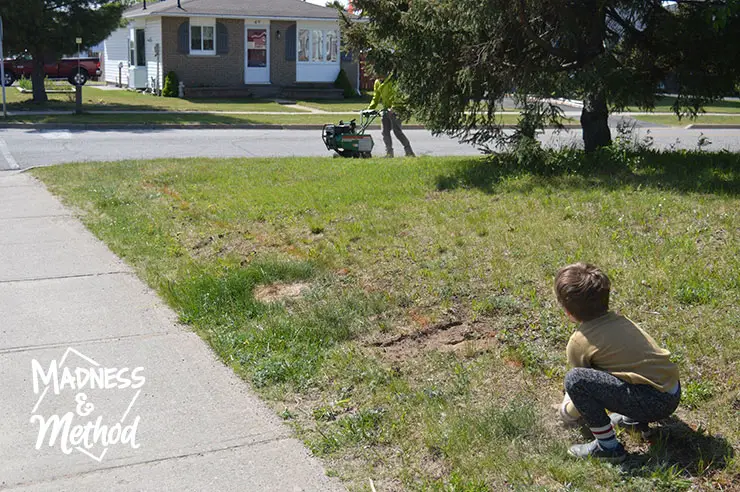
Anyways, we rented a sod remover and the Husband got to work taking a few rows of sod out along the sidewalk. It was a chilly late May day, when my Mom came up to help plant our gardens. At this point I had already chatted with the city to see if there were any bylaws/rules about landscaping near the sidewalk. I considered putting in a small fence, but you would have needed a permit for that. I wanted to wait and see how the landscaping “barrier” worked first.

We had used a sod remover before, essentially it just cuts the top layer of grass and dirt. Our yard here was more patchy, so it didn’t roll up as nicely as the last time.
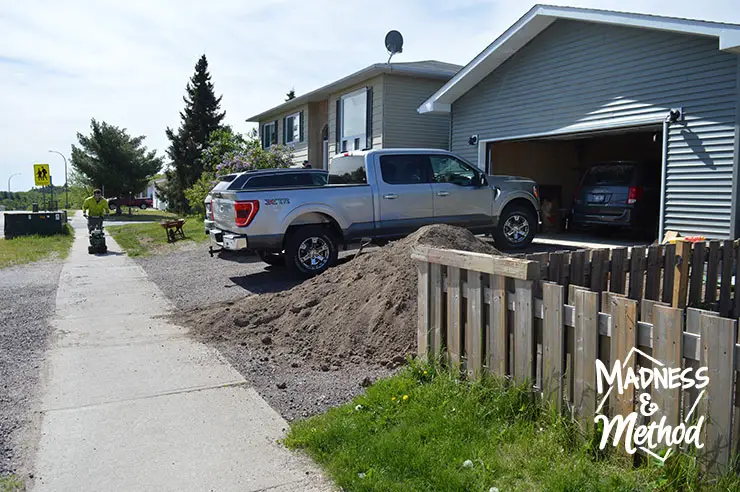
And remember when we had all that dirt delivered, ha? All of this landscaping happened within a weekend, so we were pretty busy!
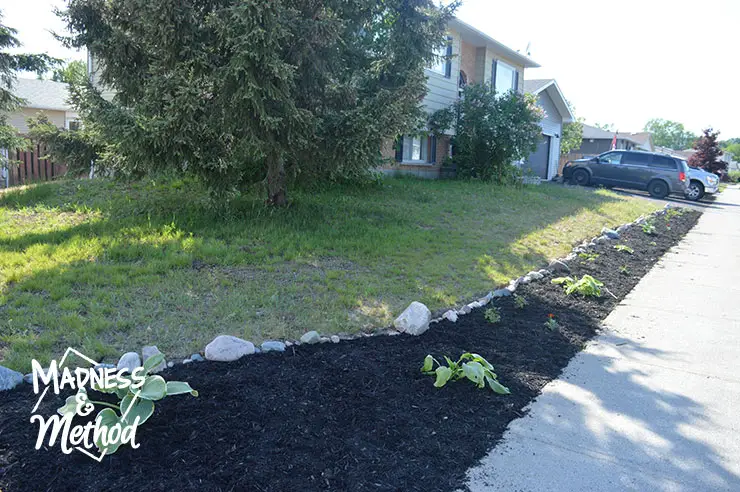
Landscaping Along the Sidewalk and Between Fence

In front of our main yard, we have a small area in between the fence and sidewalk. This was the nicest grass we had, but it was really sloped and awkward to cut.
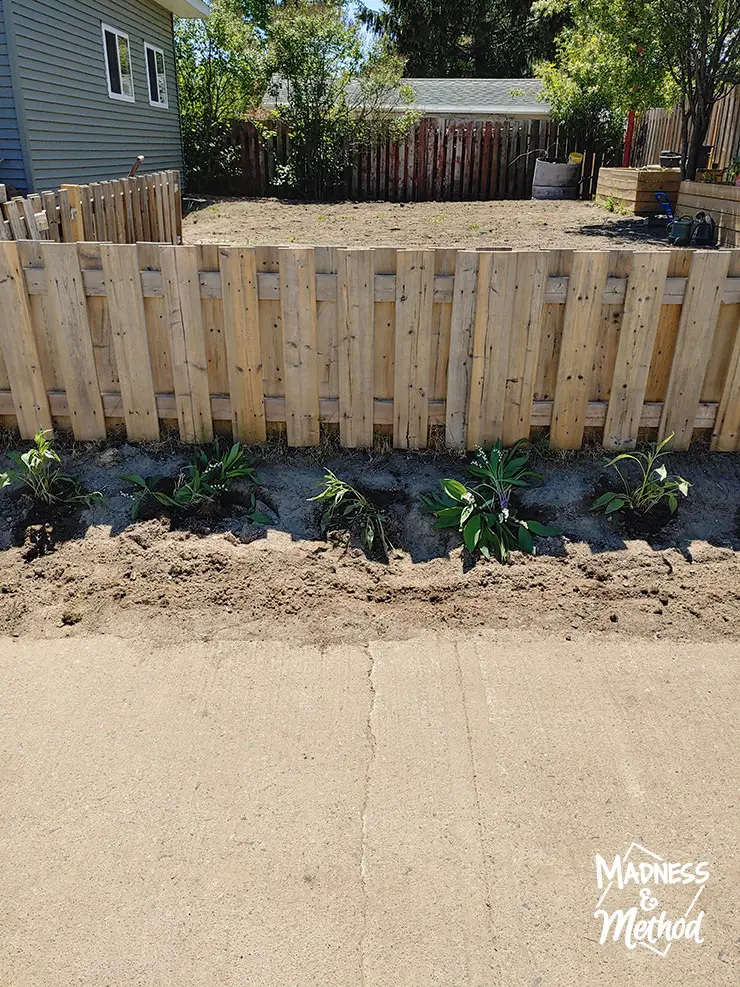
The photo above shows our dirt-covered yard too, ha. For the plants here, my mom had brought a few cuttings from back home, and I separated some lillies from our front door garden. We added some potting soil, compost and fertilizer for each hole we dug.
I also planted two rows of Blue Centurian flowers too? Zachary had to plant seeds for school, so I took all the little seeds we started. I added mulch to the back but kept the front open for the little seeds, but they didn’t make it…
My mom had come back in mid-June for Zachary’s birthday, and planted a few smaller flowers where I had my seedling rows.
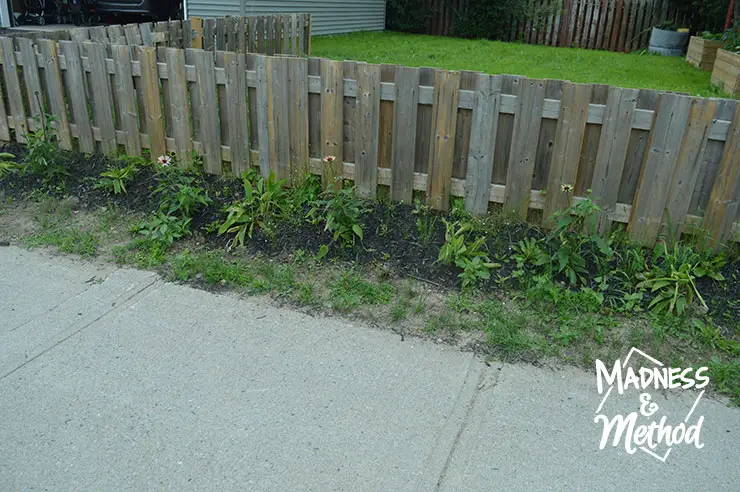
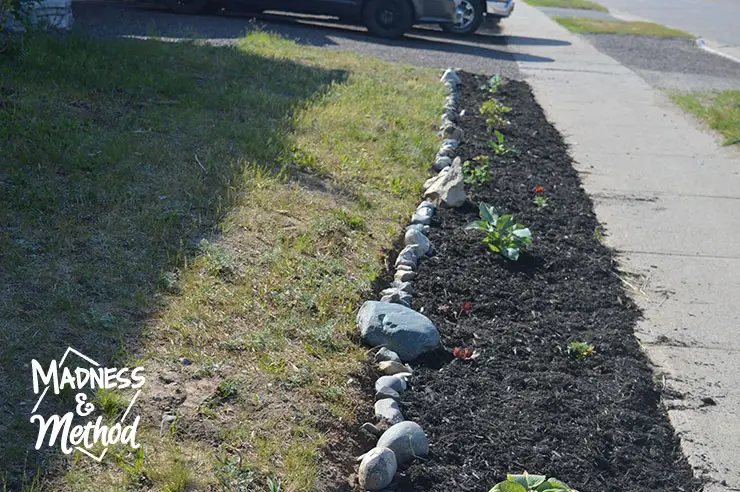
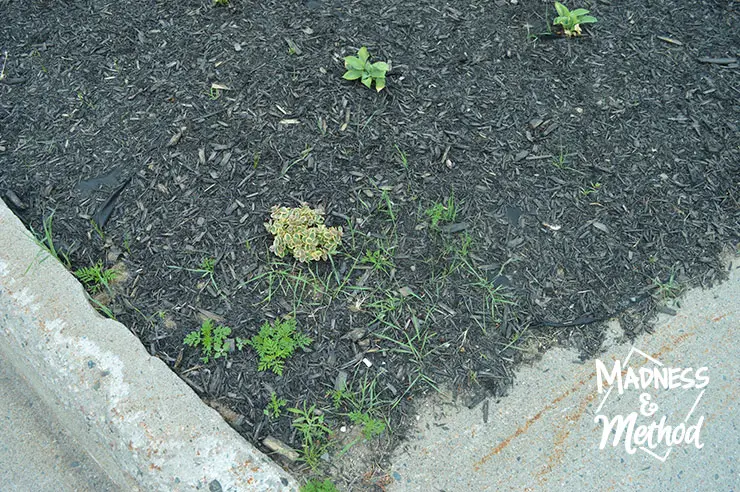
We got a LOT of weeds. The photo above was taken at the start of July, so just over a month after we had planted the garden. Some grass came back too…
I pulled as many as the weeds as I could, then added a bag of mulch along the front where it was missing.
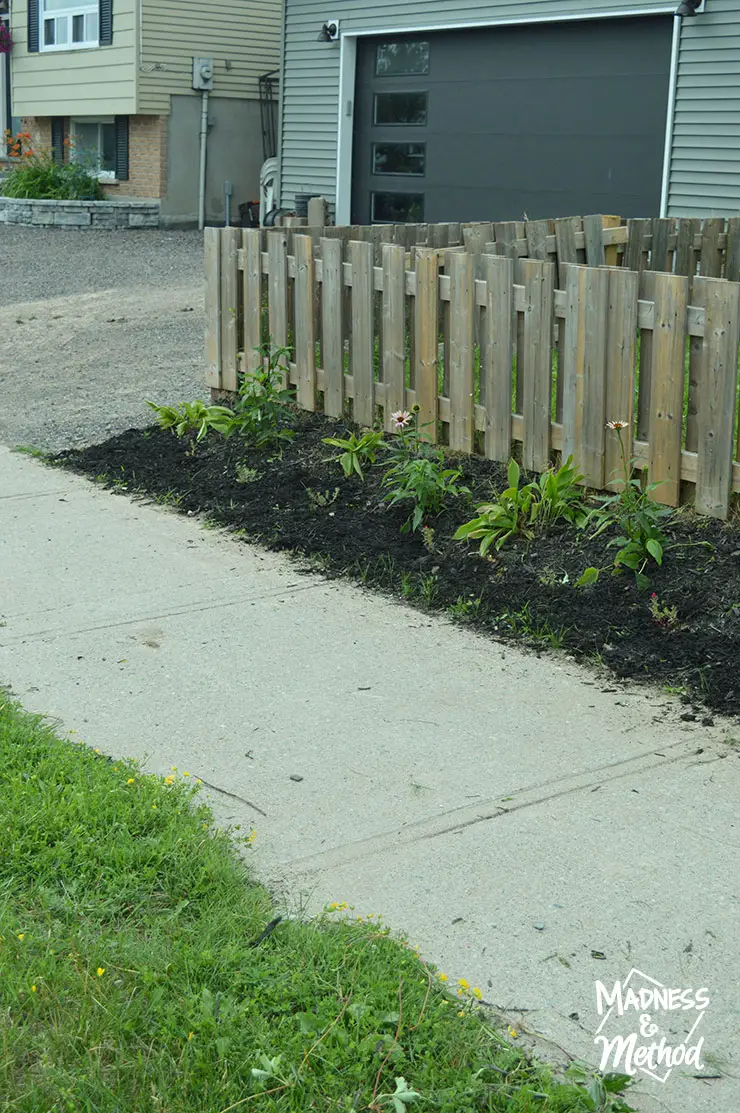
It did look better than the weeds/bare dirt, but guess what!? The weeds came back just a couple of weeks later…
I don’t have any recent photos, but just imagine the weeds from before, with a little bit of black mulch mixed in, ha. Good news though, the flowers grew taller and bloomed – so that was nice…
But that leaves me to NUMBER ONE TIP!
Always use landscape fabric, or be prepared to spend the rest of your life weeding!
Don’t believe me? Let’s check out the other side…
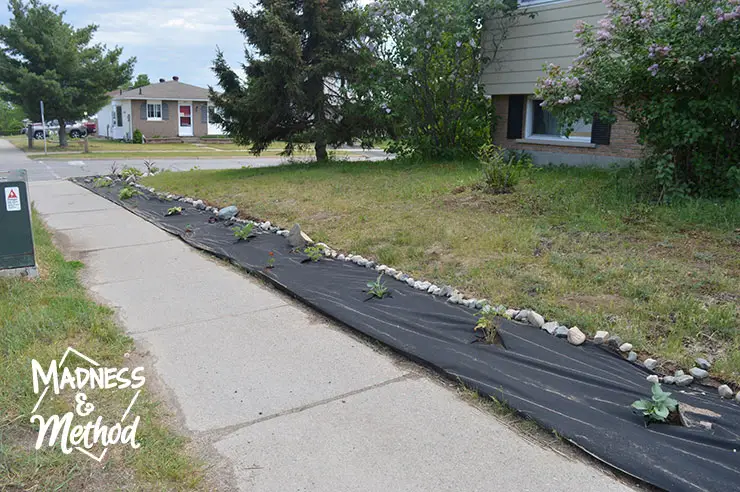
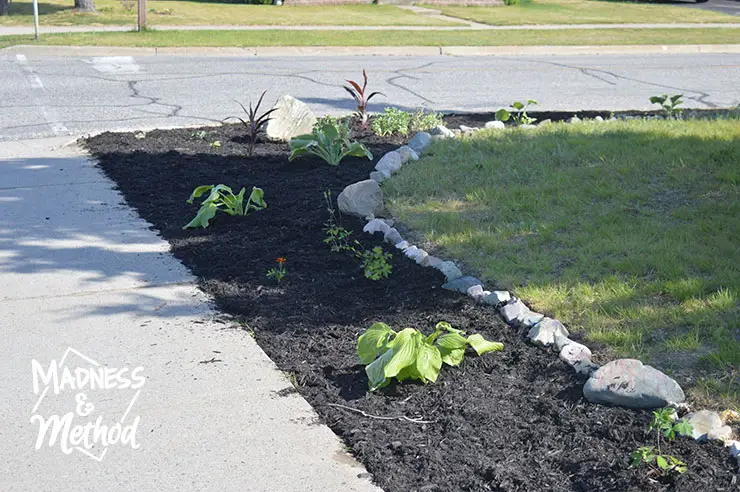
Landscaping Along the Sidewalk & Corner
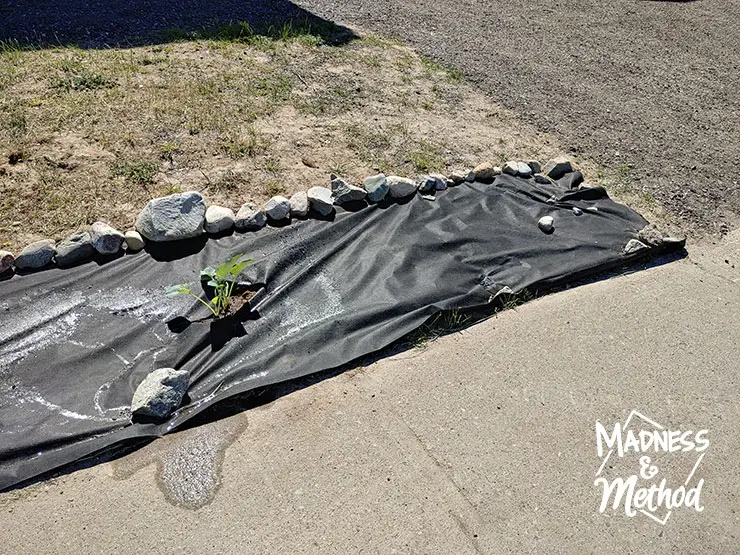
I had planned the width of the garden to match the first part between the fence. Luckily, it was around the width of one roll of landscape fabric, so it worked great!
The kids and I had been collecting rocks for the last little while. We used the rocks to create a border and hold down the fabric.
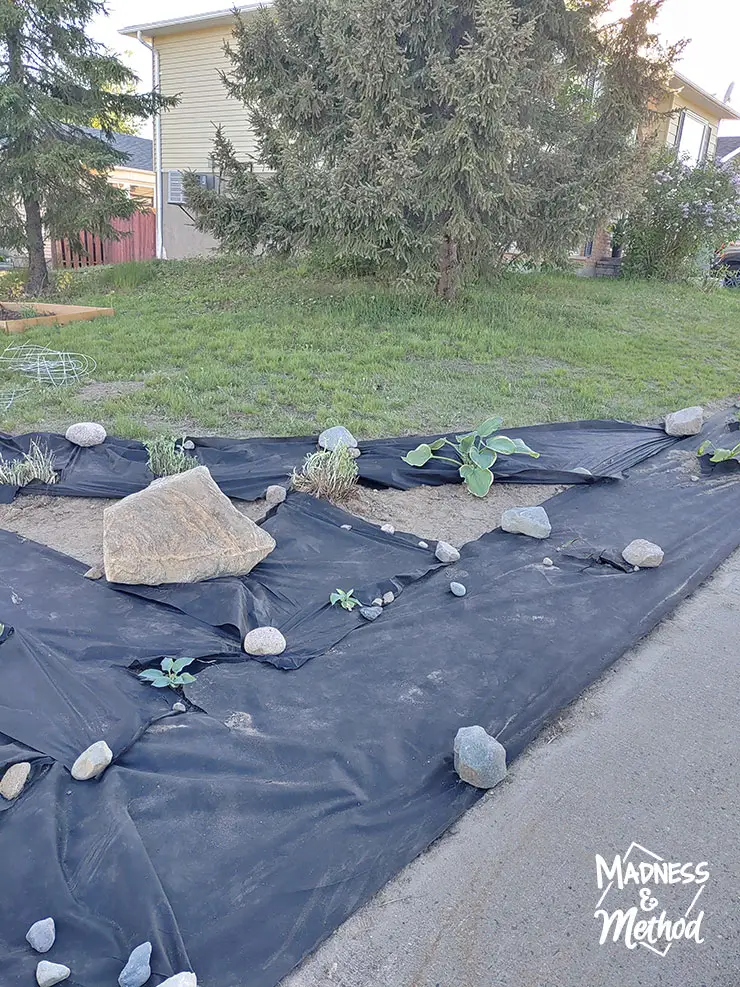
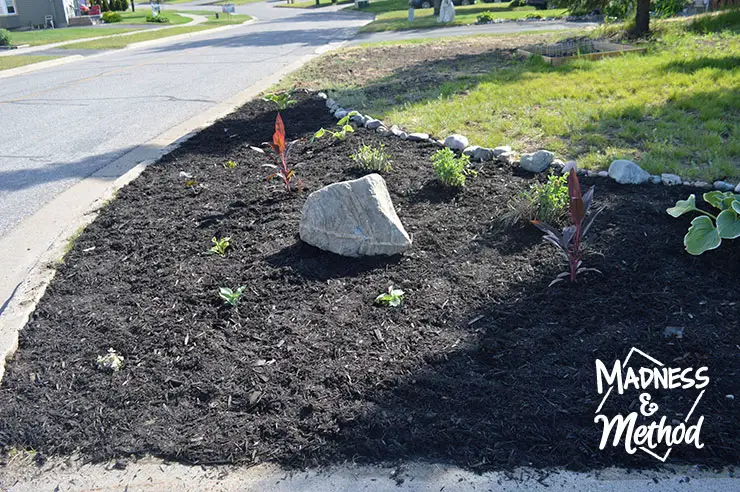
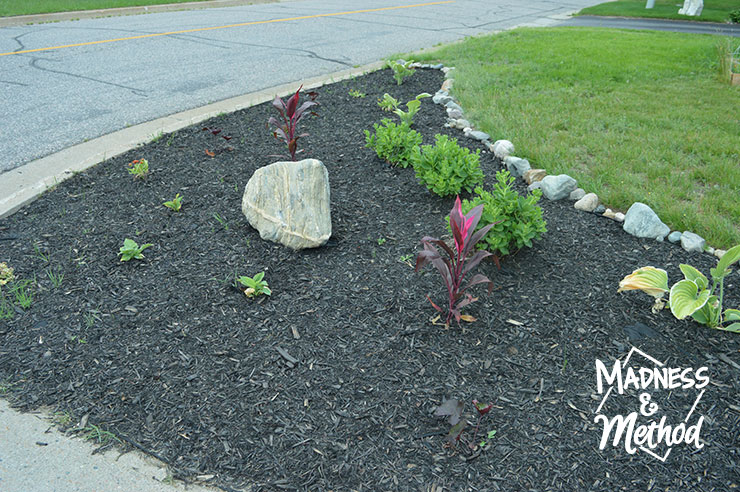
For the corner section, we went a bit wider and moved in a large rock. It was under the driveway where we built the garage. I think you can spot it near the gardens in this post? Anyways, the Husband and I ended up dragging it across the yard in an old snow shovel.
Up until this point, all of the plants we had added were extra cuttings from my parents’ yard. The three things behind the rock were from a plant I dug up at the rental house. (That was only like 1/4 of the plant, I just ran out of bags and when I went back, the rest was dug up, ha).
I bought a couple of annuals (the purple Cordylines/tall things near the rock). Then added a few more from the store. In the front corner, I took out the landscape fabric to put a ground-cover type plant. And I also eventually covered those weird triangle gaps near the rock.

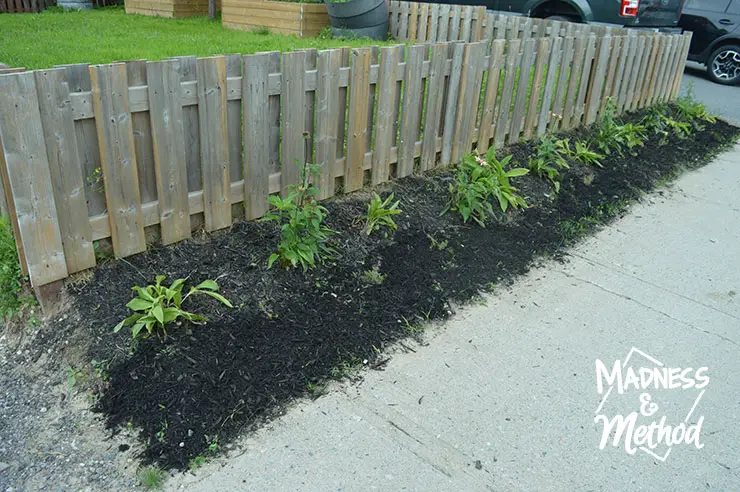
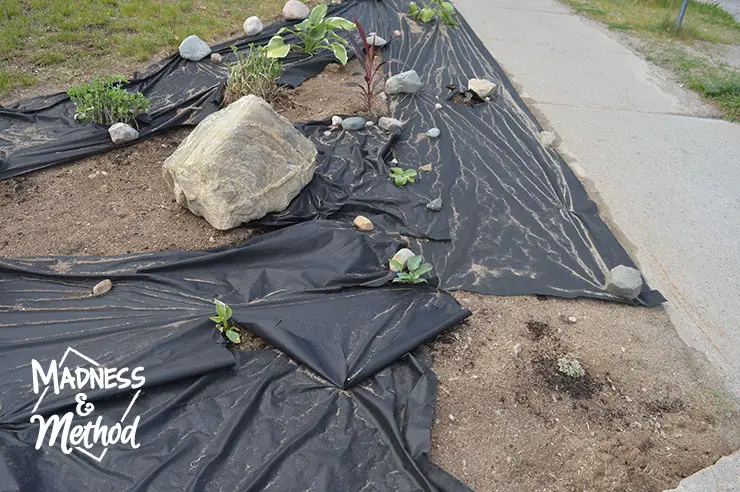
In the photo above, you can see how we ended the garden shape. We were using them to hold the landscape fabric down at this point. We did have to go out a couple more times to collect rocks, so now the border is complete.
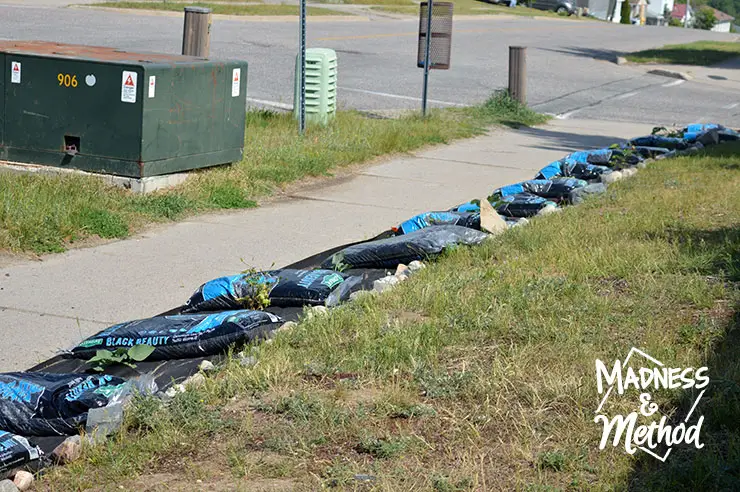
I bought a couple of packs of landscape fabric staples to replace the random rocks. They did a really good job holding the fabric down before we added mulch. We purchased 20 bags, then put them where we thought they would go, then opened and spread.
Landscaping Final Result
We ended up only using 18 bags of mulch for all the gardens. I chose black because it blends much nicer with the colour of the fabric, so would hide any missing parts. It’s also a nice contemporary style that I prefer :)
We watered the plants well for the first week or two so they’d establish nicely. I also added some fertilizer a few times too.
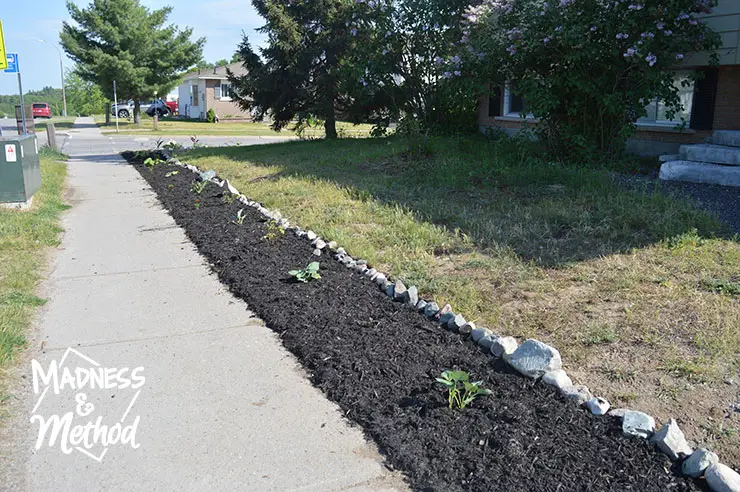
Everything looked very different, and a lot of people walked by and complimented the new look.
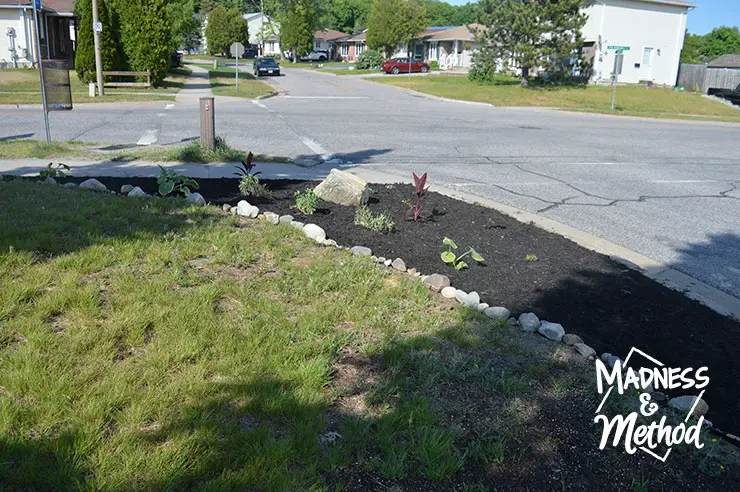
From the angle above, you can see more how our corner lot works. People should definitely avoid this area now :)
The idea is to wait and see how the plants grow before we add any others. I do want a more filled in a luscious look, but again, all landscaping takes time! (Or a lot of money, ha).
We had done all the planting/prepping in a weekend, and got the mulch the week after I think?
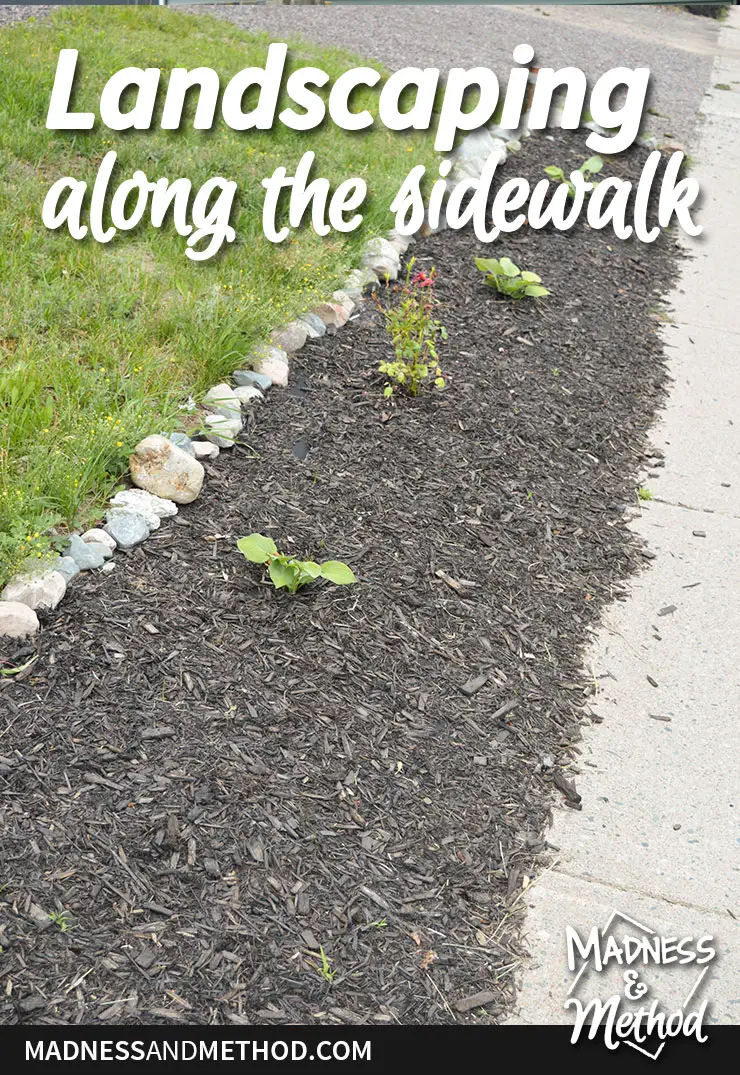
It’s technically not the straightest garden, but considering that our edging was found rocks, it’s okay. We did sweep the extra mulch off the sidewalk, but will wait to see how it looks after our first winter. (Aka lots of snow and the little plows going by).
Ready to see how it looks now (well, two weeks ago)?
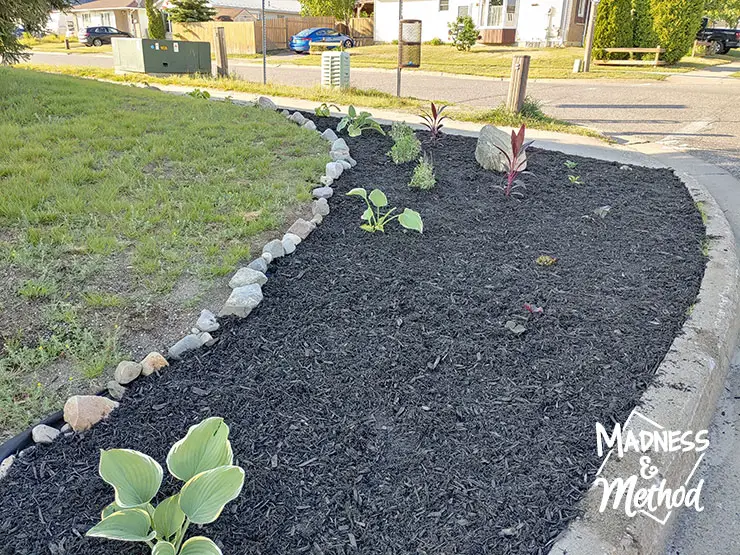
Landscaping Along the Sidewalk NOW (a month after)
And the fabric holds the weeds down so much better! I bought a couple of cheap solar lights, but I think only the one works. We still have to figure out what we’re going to do with the patch between the driveway and front walkway. I did plant one small ground cover there so it’s not all grass, but so far it looks meh.
Here’s a more close-up of the corner spot. See how nice the three bushes grew in? And notice the difference between the weeds on this side, vs the other one?
This front part where I had no fabric is really the worse section. My hope is that the little plant will spread into this whole corner. I may have to buy more, I always forget to look at the spread size, ha.
We also do get a few little grass/weed patches in the small edge along the sidewalk. It’s much easier to pull them when there are less, ha. Remember, I did use staples to hold down the fabric, but there is still a little bit of dirt they can get.
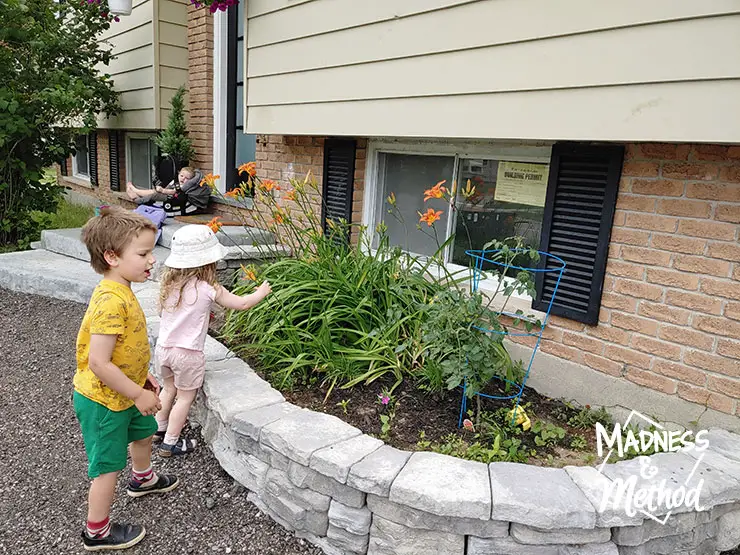
In other landscape news, here is photo showing the garden near the door. Last year, the garden was narrower/longer, but it got completely refigured when we fixed our driveway. I didn’t know how much would grow back here since it was a construction zone. We added a couple more things, including the kids favourite cherry tomato spot.
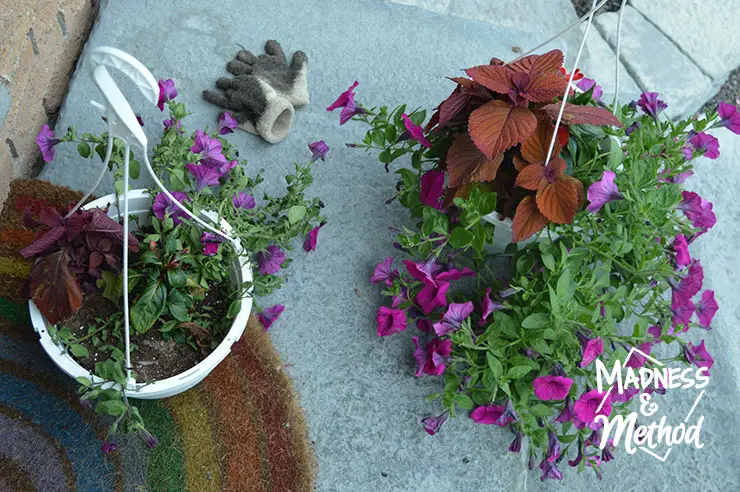
And finally, I made a couple of hanging planters but only one grew nicely. I tried swapping their positions, but I think the one is fully dead now.
Okay, I think that wraps up all the yard updates we’ve completed so far this summer. I really don’t think we’re going to get to much of anything else. The Husband has been busy working on the cottage, and it’s not always productive when I have three littles.
I did want to work on the backyard, so maybe I’ll share the plans for that soon. But ya, not happening ha!
Do you live along a sidewalk or on a corner lot? Hopefully this landscaping along the sidewalk post helped give you some ideas on things you can do. AND if you have any tips to share, send them my way too :)

2 Comments
Dani
December 5, 2021 at 10:33 pmNicole, I am in this exact situation right now. I live on a corner lot along two sidewalks with heavy foot and pet traffic. Many times I’ve walked outside to find someone up in my yard, or I find tiny dog poop. I recently put up a perimeter of garden stakes and caution tape to give the grass a chance. However, now that I see your idea, it makes me want to lean into it so that I feel frustrated less: add a mulch line closest to the sidewalk and add some hearty cheap plants to crate a barrier.
Nicole
December 7, 2021 at 5:03 pmIt’s so annoying, right!? I think that we’ll add some more plants next year so that it fills in more. Although, we have had some people let our dogs munch on our plants!