
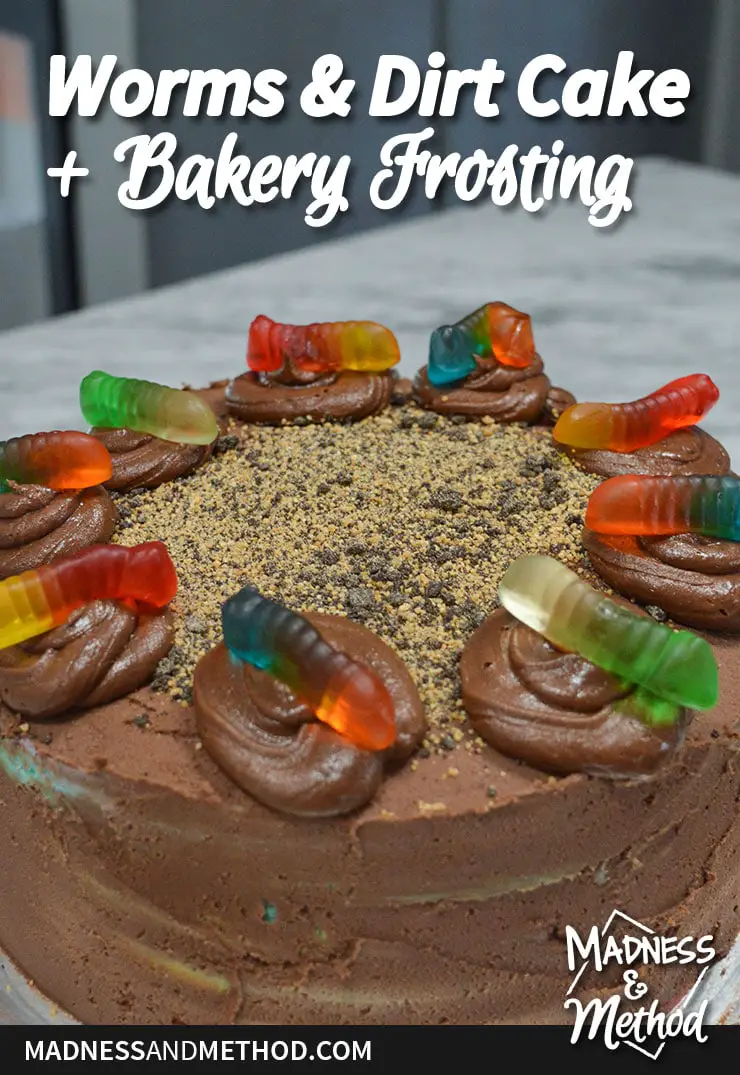
With all the excitement working on the kids’ shared bedroom, I’m posting Zachary’s birthday cake a bit later. He turned 5 a few weeks ago, and this year, his cake was a surprise. He knew that it was going to be chocolate, but that was it :) Here’s the “worms and dirt” cake with bakery frosting!
– Note: This post contains affiliate links. See more information about affiliates here. –
This was my first time attempting a bakery frosting, so I’ll share the outcome below. It’s not my recipe, but I got it from the Taste of Baking book. I definitely will not be using it for the next cake auction, it just didn’t smooth nicely. Possibly a variation of it for the naked rainbow cake, but we’ll see.
Anyways! Last year, Zachary had a construction cake, and he was perfectly fine with me doing the exact same thing. He did mention doing a garbage truck cake, but it’s pretty much the same thing. I switched it up this year and recreated his favourite dessert to order: worms and dirt!
If you’re unfamiliar with worms and dirt, it’s essentially chocolate pudding with oreo crumbs and gummy worms. Swiss Chalet has it as one of the options on the kid’s menu. I much prefer the brownie pops, but alas I never get to choose ha.
Cake Construction
I started out by making 3 8″ round cakes using this chocolate cake recipe. I don’t know if I’ve found “the one” when it comes to chocolate cakes, so send any recipes you like my way!
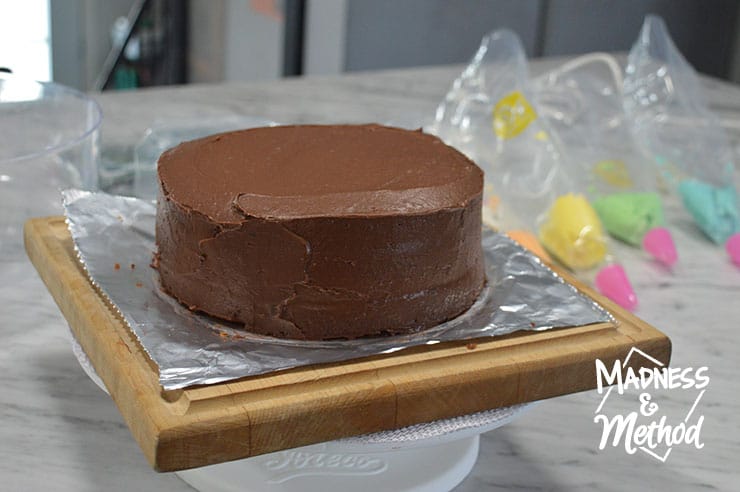
Then I made a semisweet Nutella ganache following this recipe (and adding a cup of Nutella). I frosted the layers and did my crumb coat with that. (Zachary has similar cake tastes to me, all chocolate, all decadent!).
I just realized that the bakery frosting recipe is online! Check out the exact recipe I used for bakery frosting by clicking here. (Although I used hazelnut extract instead of almond).
For this cake, I wanted to practice my stripes. But this time, with a rainbow pattern underneath. I made a half-batch of the bakery frosting. (Fun fact: this was the first time I’ve ever bought/used shortening).
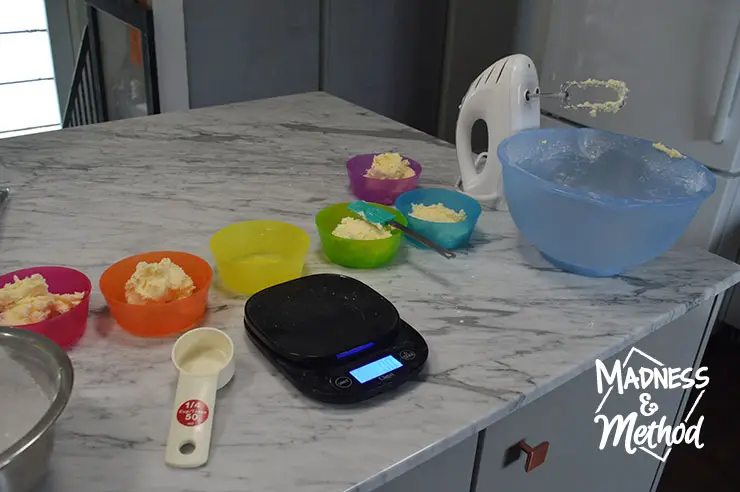
Similar to the last rainbow cake I made, I separated my frosting into 6 bowls. I added a few drops of colour to each and mixed them individually.
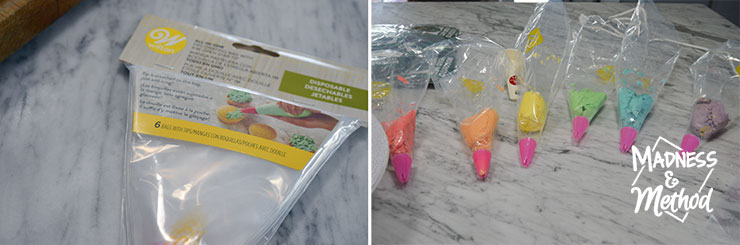
This time, I found this six-pack of frosting bags at the grocery store. That was perfect! I used a new bag for each colour, as opposed to washing my bag out every time. They were supposed to be disposable, but I washed them and will use them again another time. (Because I’m always making rainbow cakes, ha).
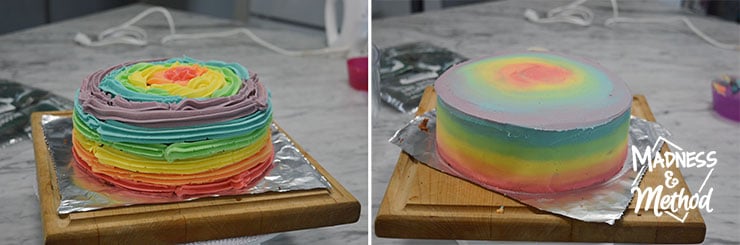
I continued the rainbow pattern on the top and smoothed everything out. In hindsight, I would not have that much frosting on the top – since it was really thick! (Ie: after I added my next layer).
Working with Bakery Frosting
I combed some stripes and put the cake in the freezer for a few minutes to set. There’s no photo of the stripes – but they weren’t super perfect at the time. I hadn’t done stripes in a bit so I hoped it was passable.
I mixed another half-batch of bakery frosting, but this time I added some cocoa powder to make it chocolatey. I took the cake out of the freezer, but it wasn’t hard at all. So put it back in for another few minutes.
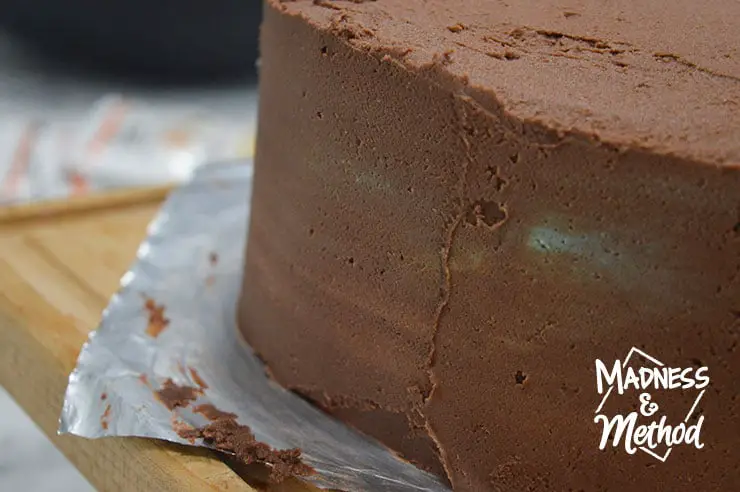
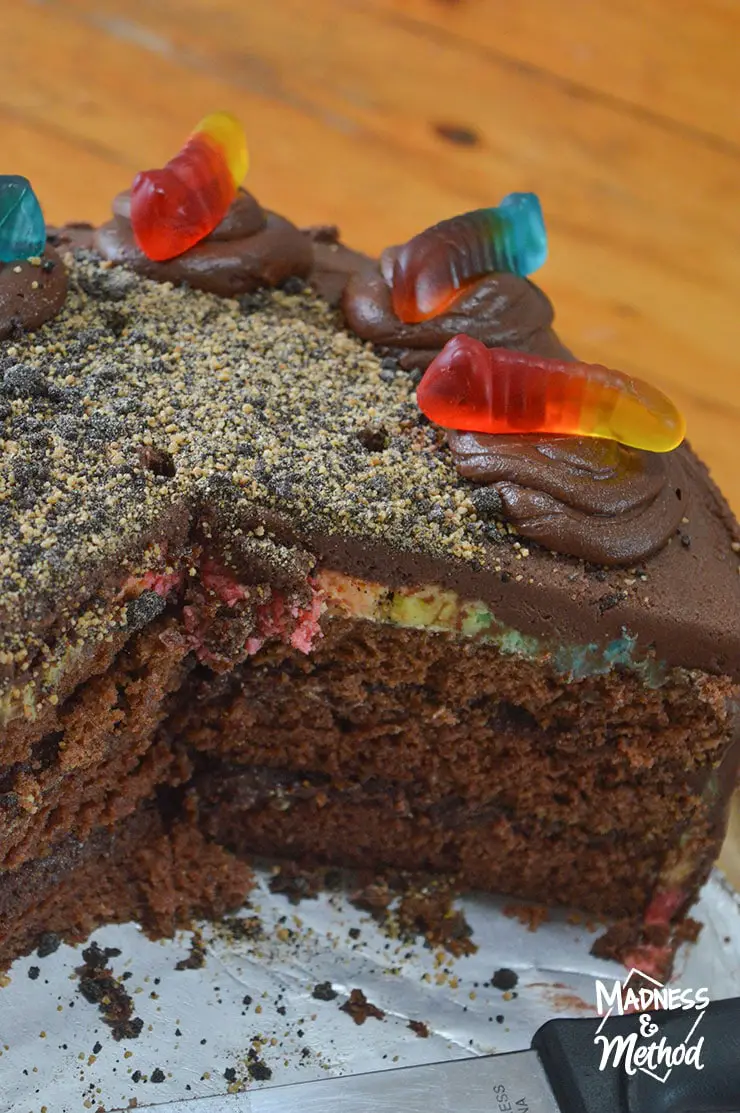
I didn’t have a lot of time left, so I took the cake out and added the chocolate over top. Once I tried smoothing the sides to reveal the stripes, I could see that it wasn’t going to work.
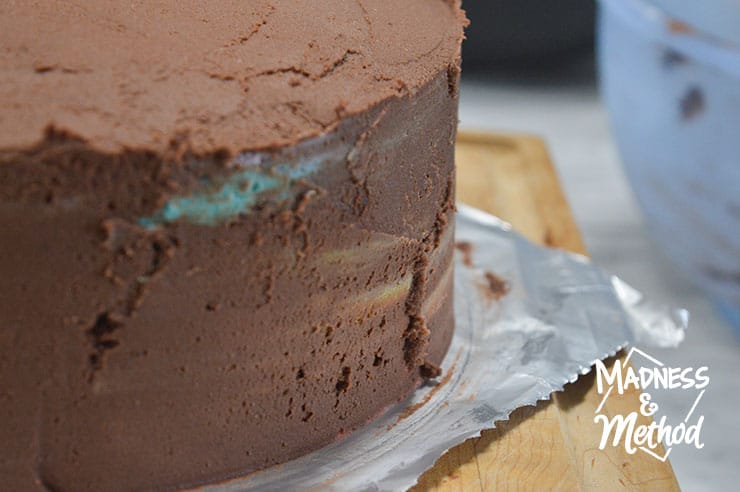
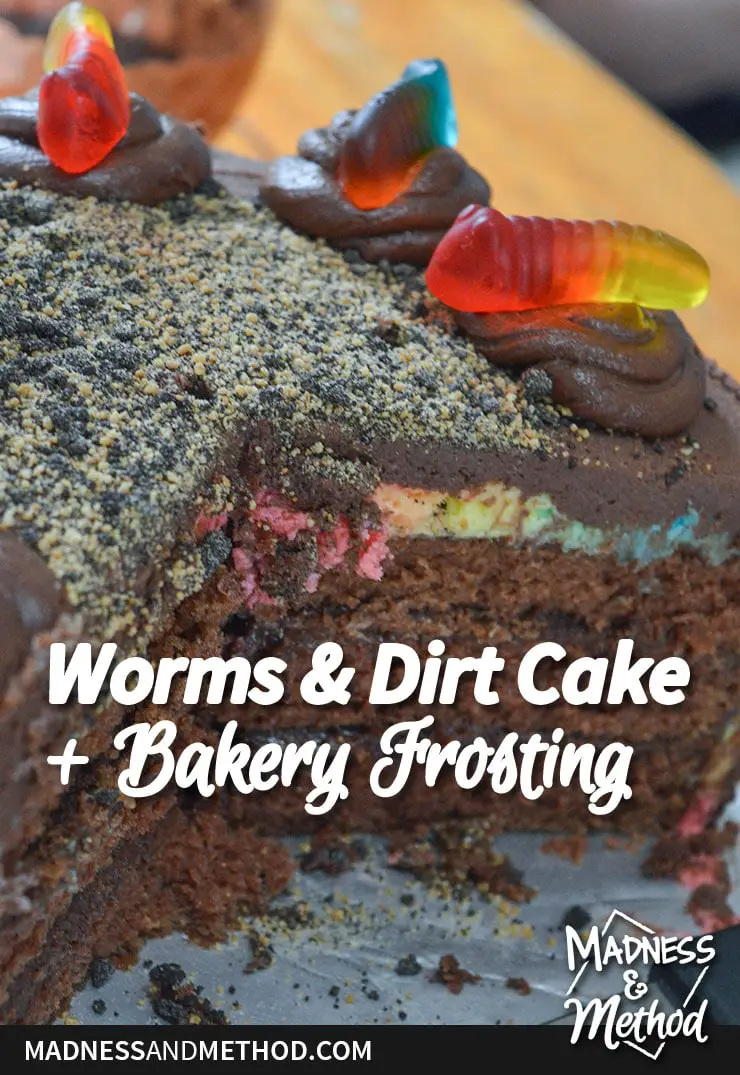
Because the base stripes hadn’t set, I couldn’t remove the chocolate layer without also taking off the colours. It was a big mess. AND the frosting wasn’t smooth like butter, but a more gritty texture (maybe the coffee whitener?).
Either way, I gave up that idea and forged ahead with the worms and dirt part of the cake.
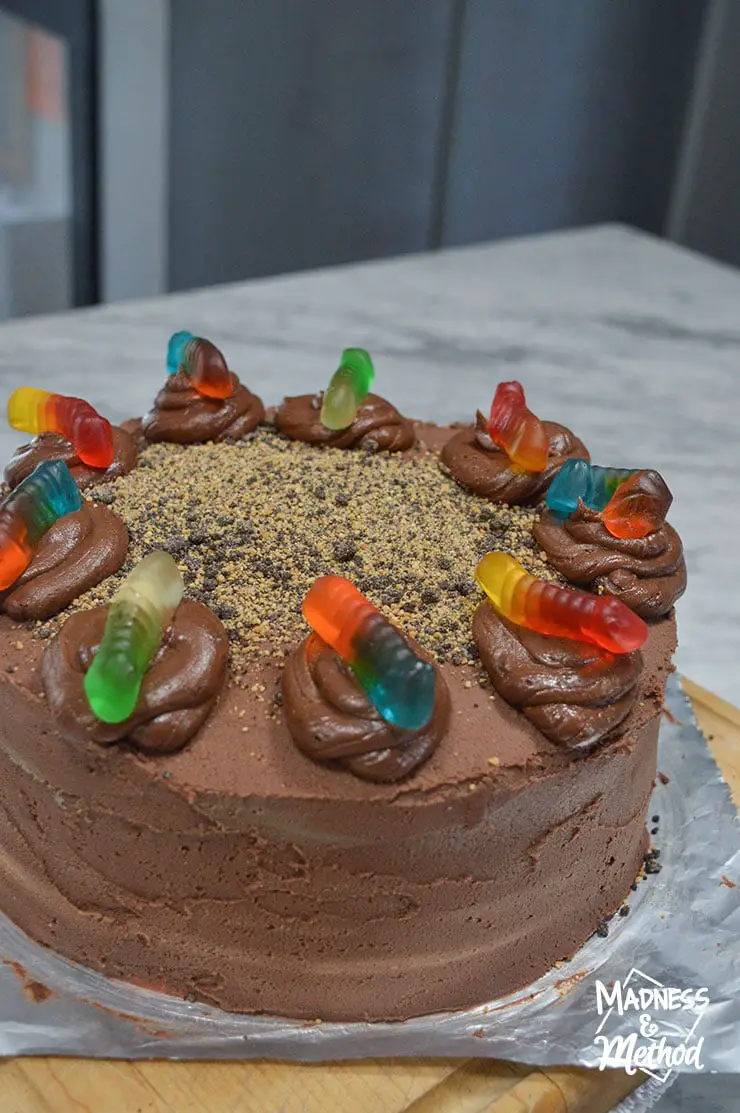
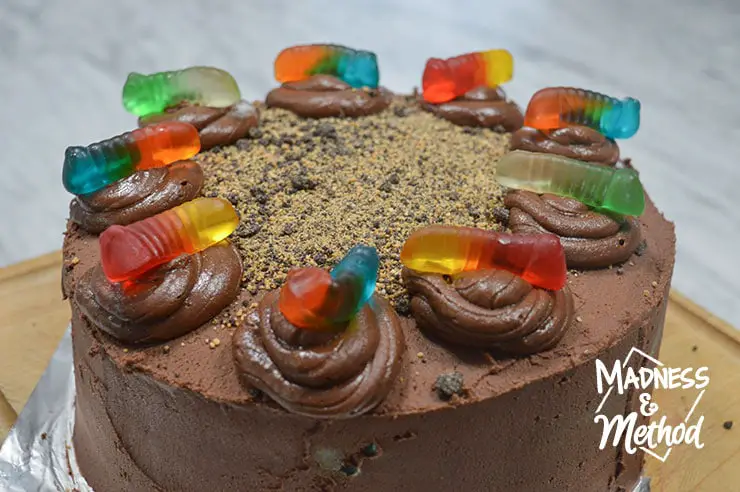
For the mounds, I mixed the leftover Nutella ganache and the chocolate frosting. They were more smoothed than piped nicely, but it didn’t matter that much. I put a little gummy worm on each pile, then sprinkled an oreo/graham cracker crumb in the centre.
It was actually crumbs I had leftover from his cake last year! Luckily, the husband just made a cheesecake and used the remaining crumbs for that, ha.
Worms and Dirt Cake Outcome
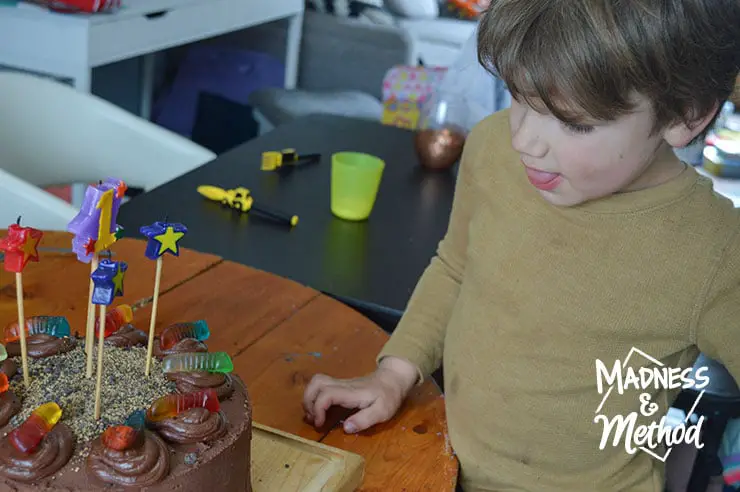
Either way, Zachary was really excited to see his worms and dirt cake. Thankfully I had extra gummy worms because everyone wanted more.
Imagine how cute the cake would have been with the stripes right!? I wanted the stripes to mimic the colours of the gummy worms, so there was a method to my madness of course. 😉

As you can see, the top icing was real thick with the rainbow and the chocolate. I also thought that it could be MORE hazelnutty, but that was just me.
Therefore, I think the next time I do a striped rainbow ombré, I’ll do the base stripes and top in white. Then I’ll pipe the stripes with the rainbow colours in between. It should be cleaner that way too, but also less on the top.
I hope you enjoyed reading about my attempt at a bakery frosting. I now know that I much prefer a butter base to do stripes, since the shortening just didn’t freeze. Oh, and hopefully it gave you a cute idea about doing a “worms and dirt” cake!
Now I have a different direction to try, so wish me luck :)


No Comments