
We have finally finished our basement bathroom. And I’m so thrilled to share these photos of our newest renovated space. Have you been following along? I hope you’re excited to see our white microcement bathroom reveal photos!
For a bit of a background, this project has been slow going for almost a year.
Since this is our second bathroom, we were never in a rush to get it completed right away. Even so, now that it’s done, I’m super happy :)
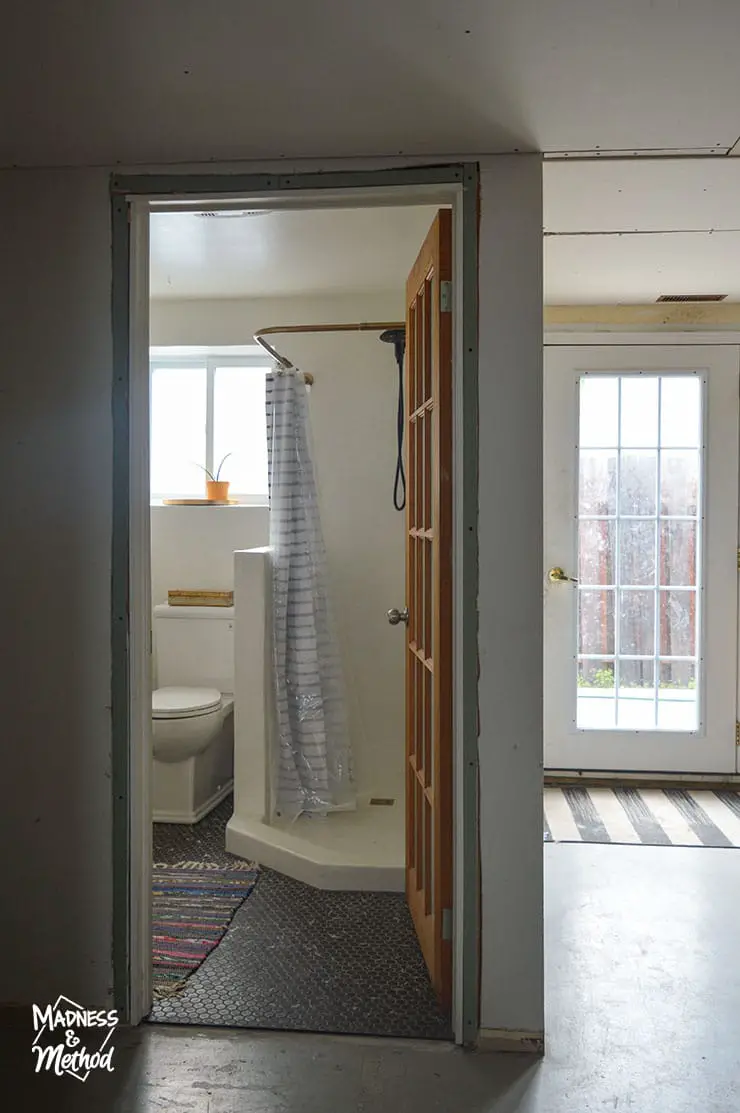
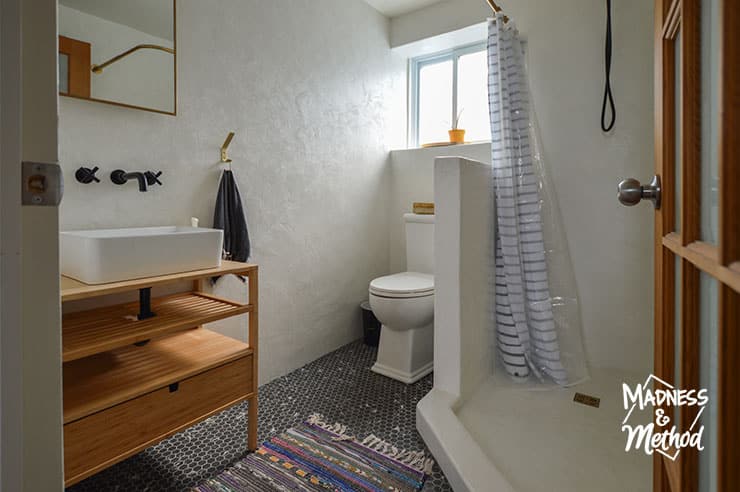
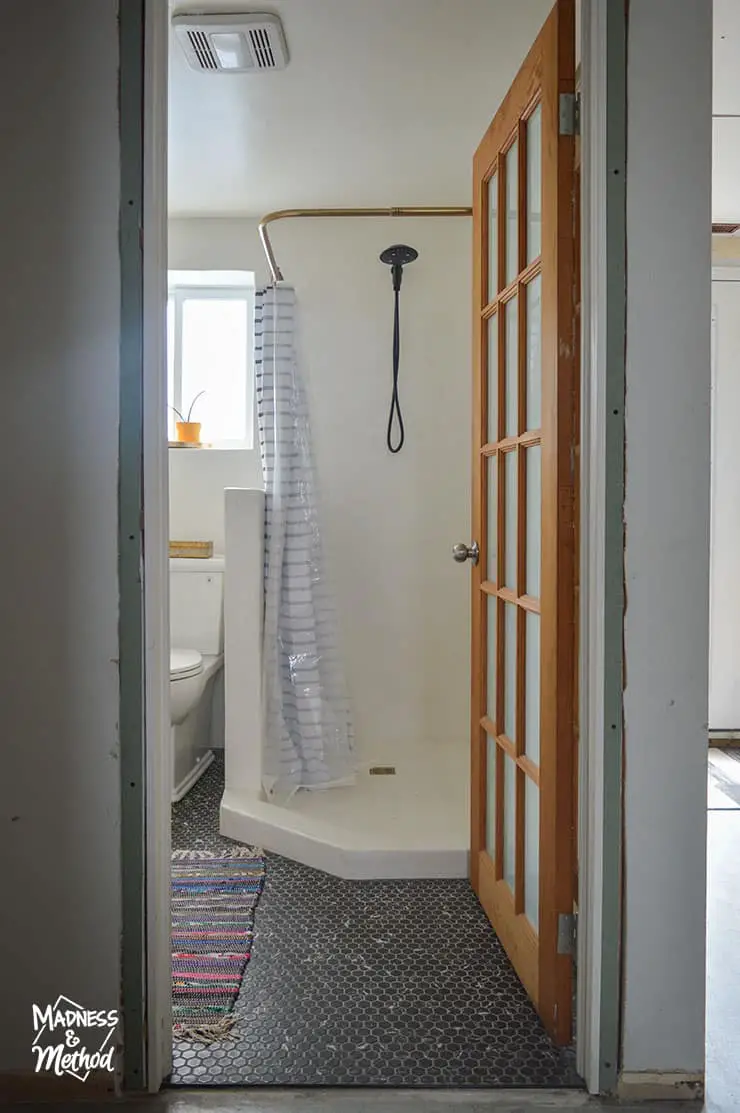
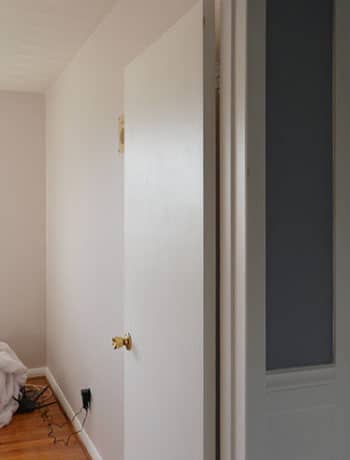
One of the bigger (initial) changes to the space was moving the location of the door. I wanted a bigger shower area, and even though the door takes up the same swing zone as before – you don’t step into the shower.
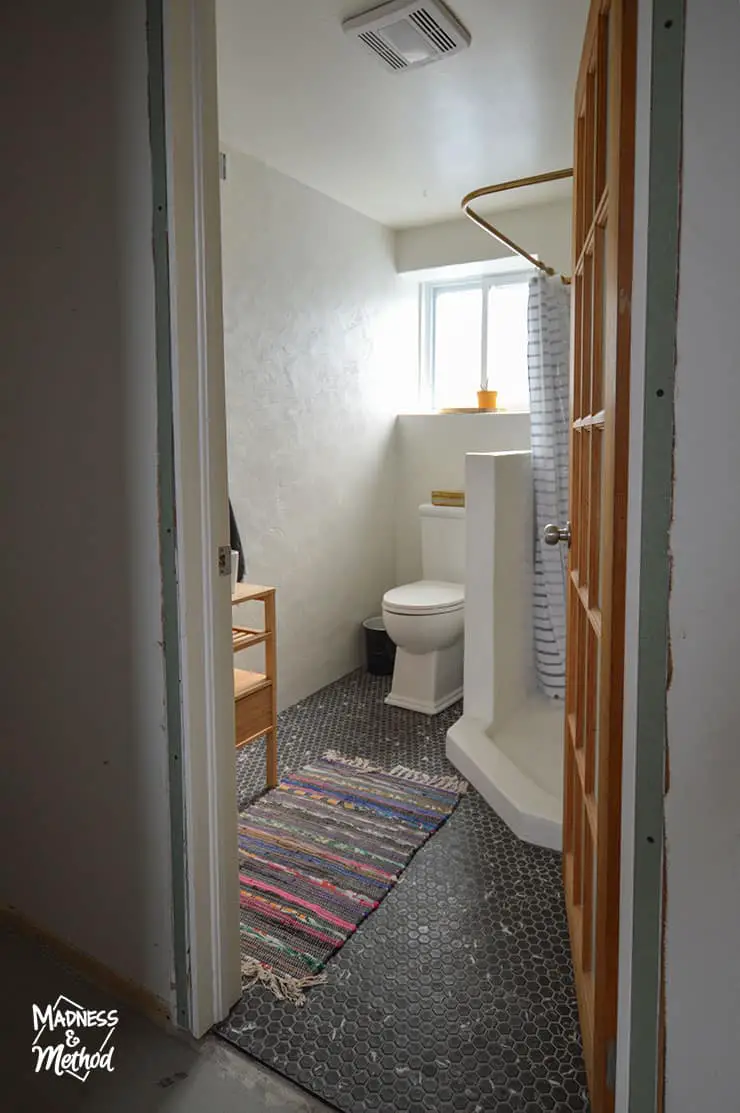
The location of the toilet, vanity and shower all stayed the same, but the walkthrough flow is much better this way.
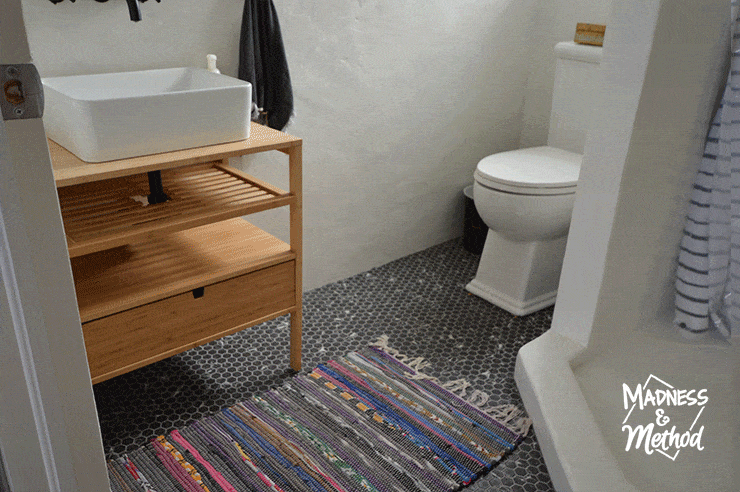
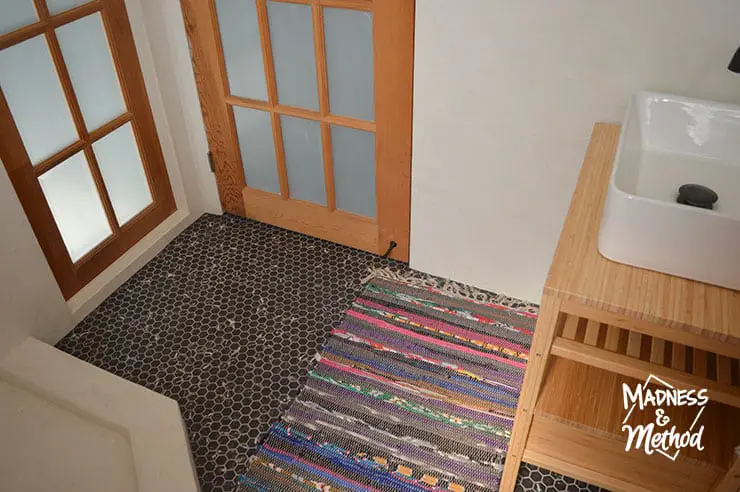
I have the rug on the ground for now, but my parents always pick it up when they’re done their showers so that it dries out.
As the people who use this bathroom the most (ie: guests) – I’m sure they’re much happier with this new space!
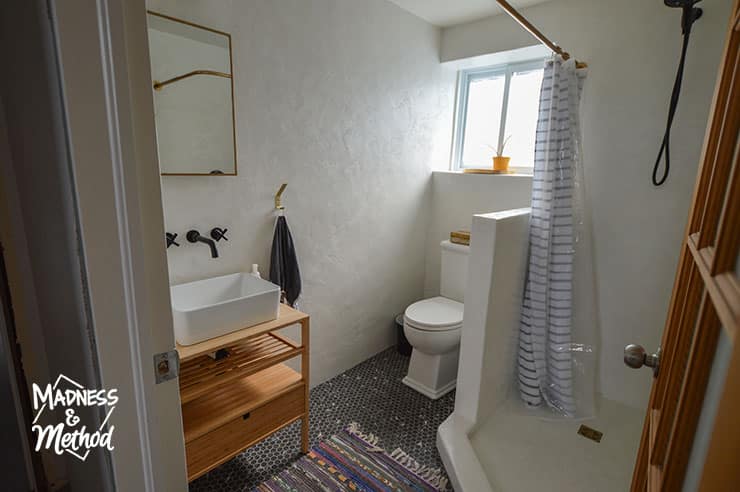
Taking out the old shower stall really opened up everything in here, and now it’s a light-filled clean and bright room.
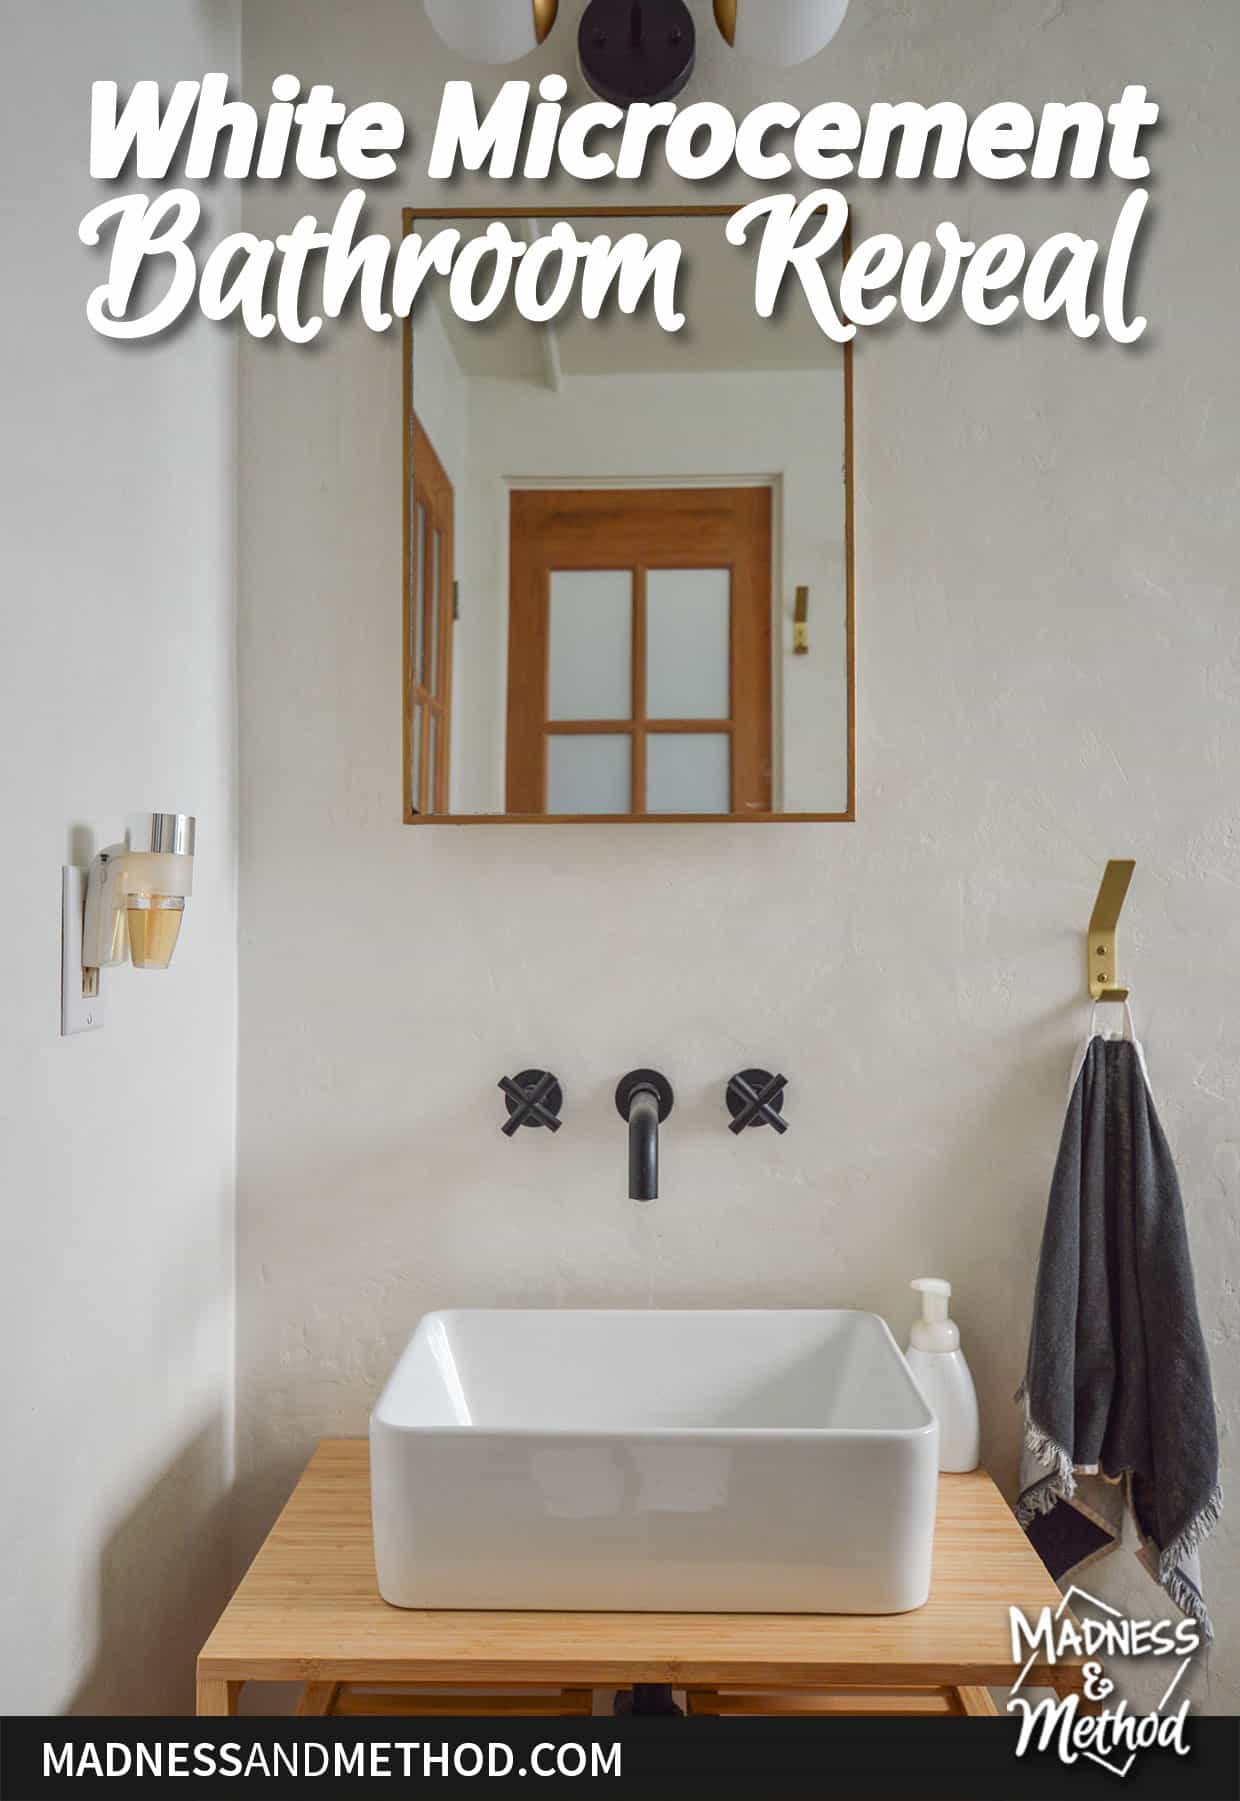
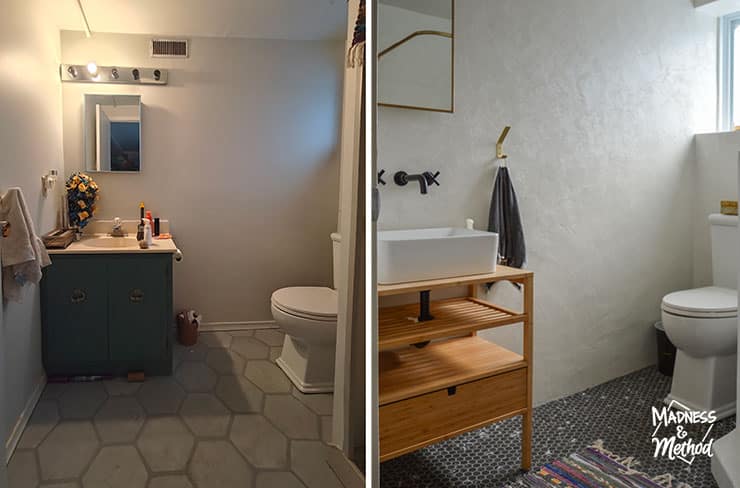
The biggest design change has been doing all the walls in a white microcement. The first microcement bathroom I did was pink, but I loved the walls so much I wanted to do it again. Plus, I had a bunch of leftover material :)
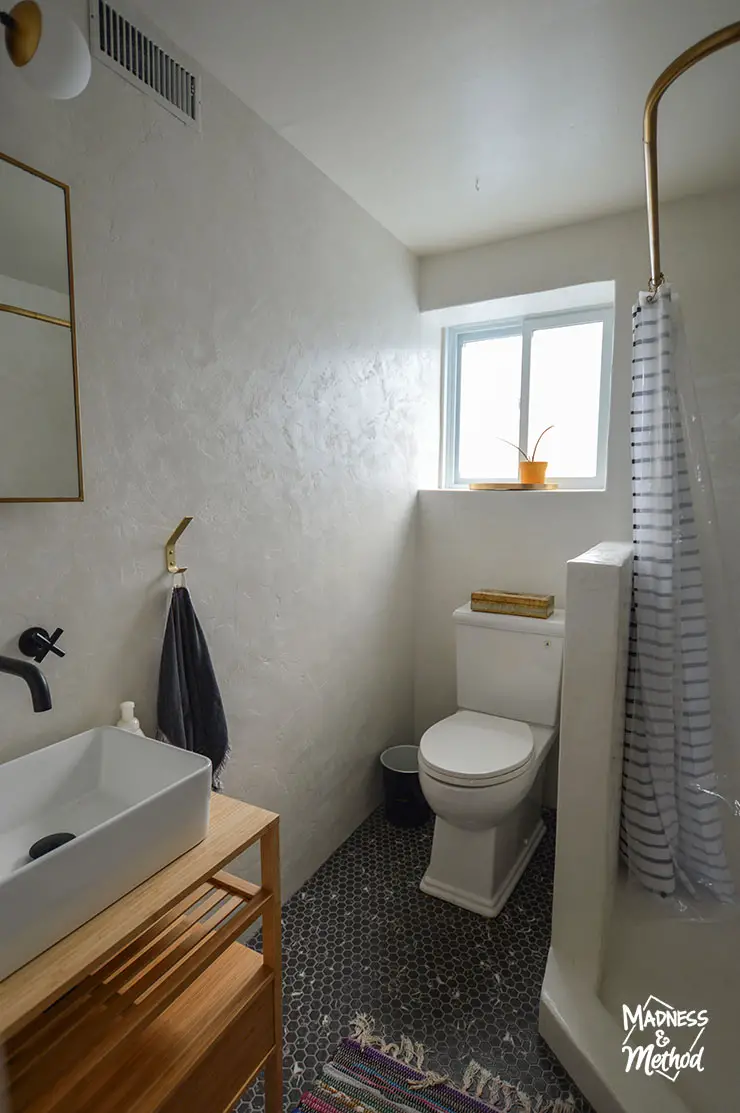
Microcement helped bring all the wall surfaces together. Fixing the weird window framing and doing the shower stall all in the same surface was also easier than figuring out where/how to do tiles.
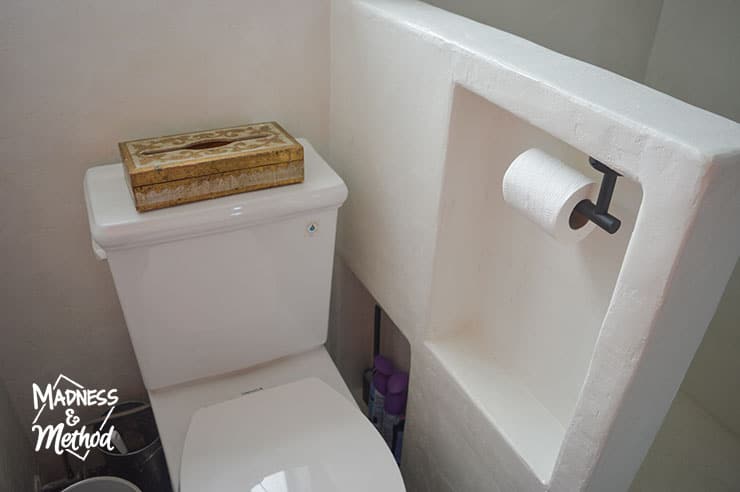
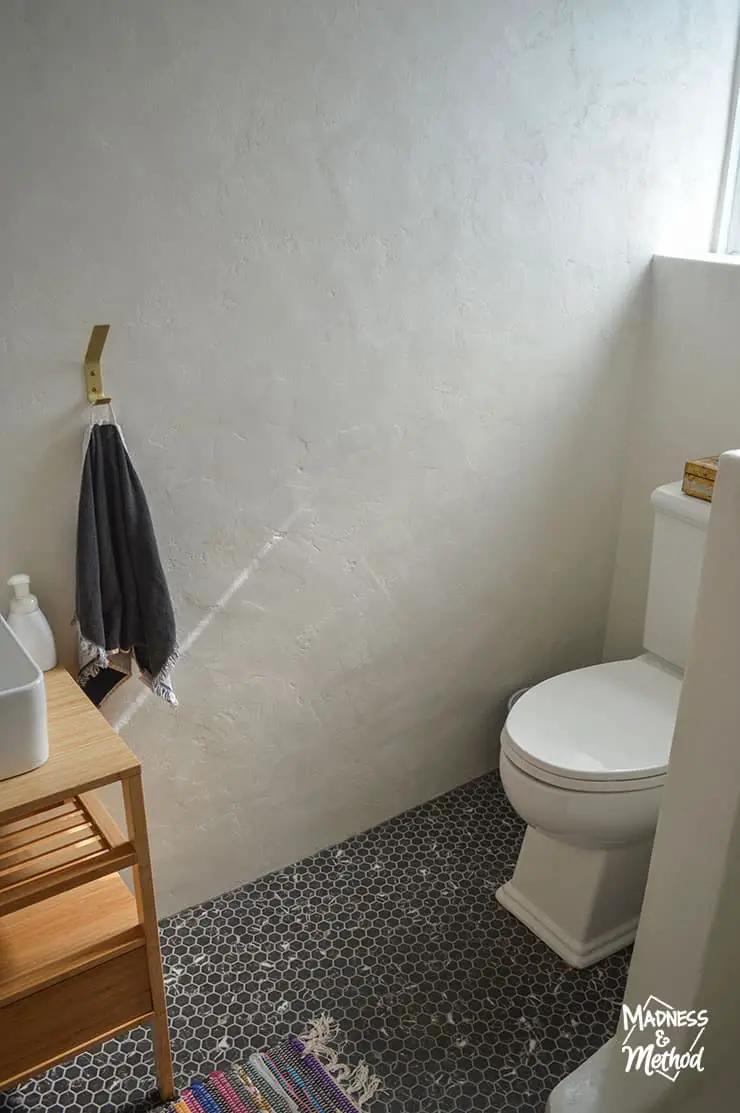
I also took the opportunity to make custom niches in the shower wall. Butttttttt I find the toilet a bit close and feel like I could have just made a flat wall. (Using the open/bigger space on the other side for the storage/TP).

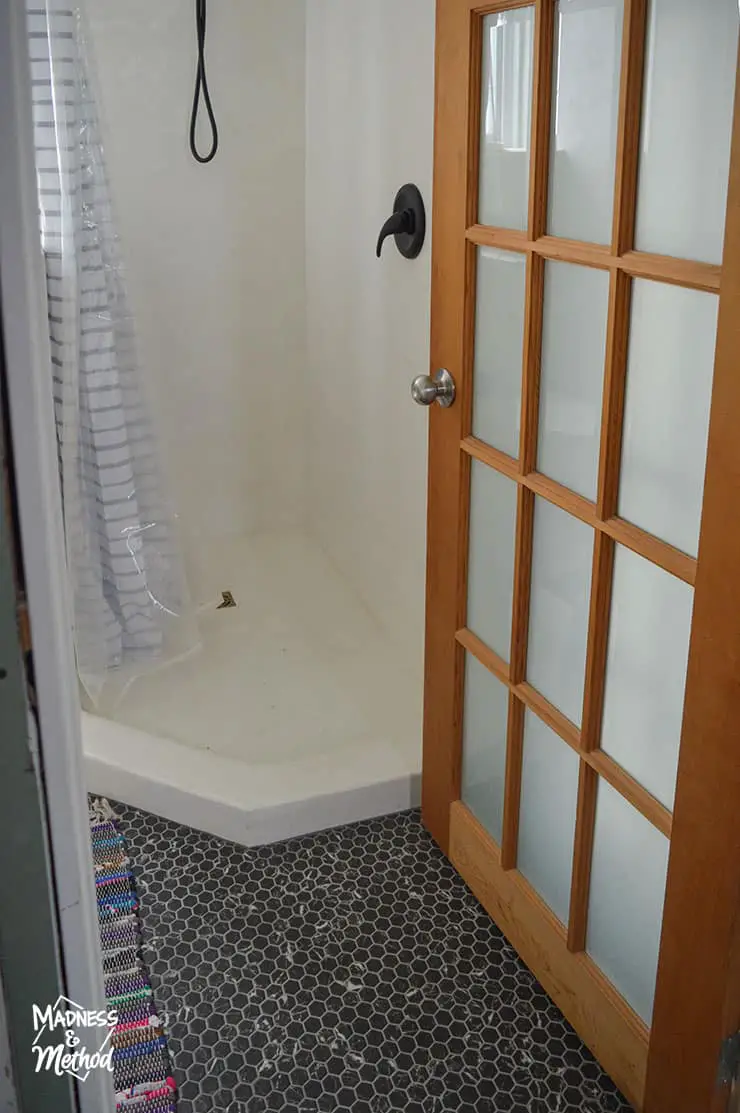
We debated having more open space on the toilet side, but it made the shower stall really tiny. (Like 24″ wide). It was similar to the size of the old shower – and I’m glad we went bigger in the shower. No one likes to hit the walls when they’re shampooing!
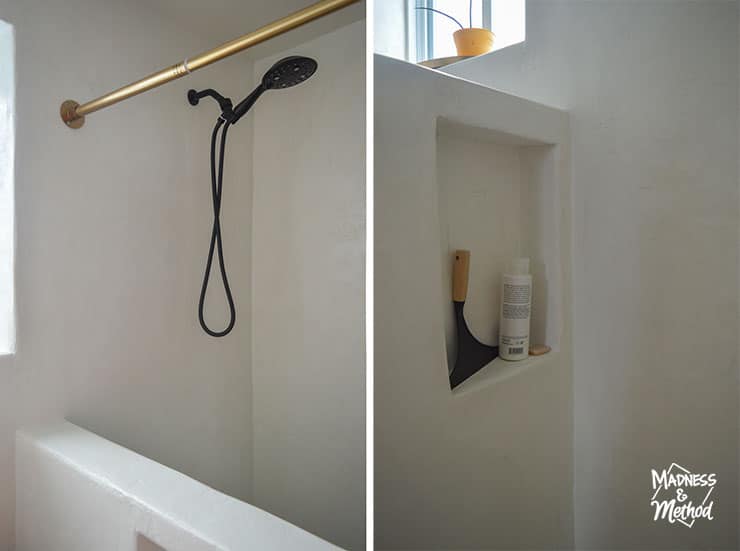
Other small changes involved moving the shower head to the back wall. Definitely better for our new shower layout! And I also added a small niche in the shower for shampoo/soap storage. Again, if I could go back – I might have made this niche a big bigger and omitted the TP one on the other side.
One thing we’ll probably add in the future is a small glass piece. Since we don’t use this shower that often, it’s not high on the priority list.
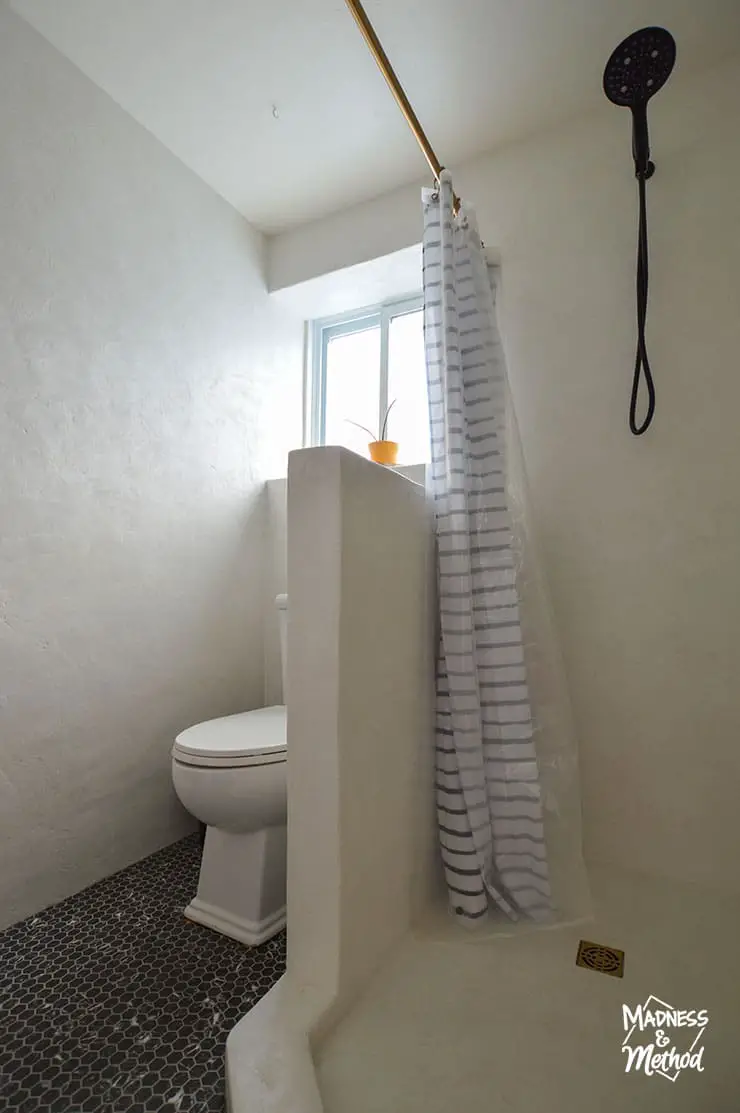
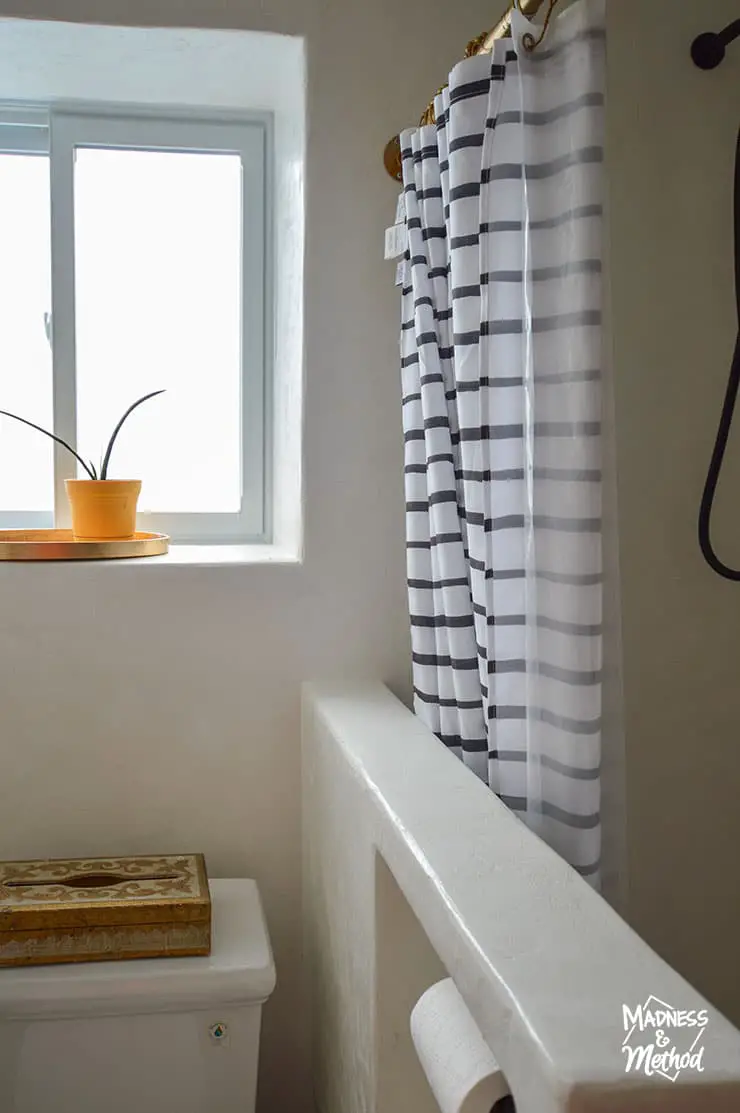
And while I did buy a white and black shower curtain, I find it’s a little too “stark” white for this room. We have a black one upstairs that I’ll probably swap down here. (I already bought a different one for upstairs).
Bathroom Sources
Let’s continue the tour of the bathroom!
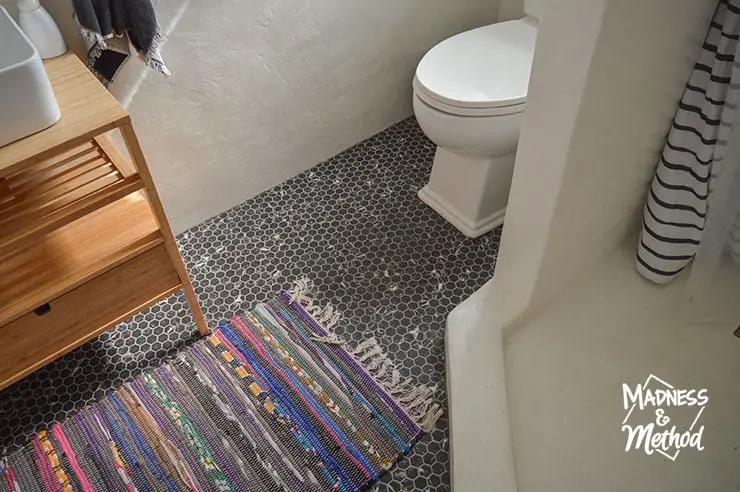
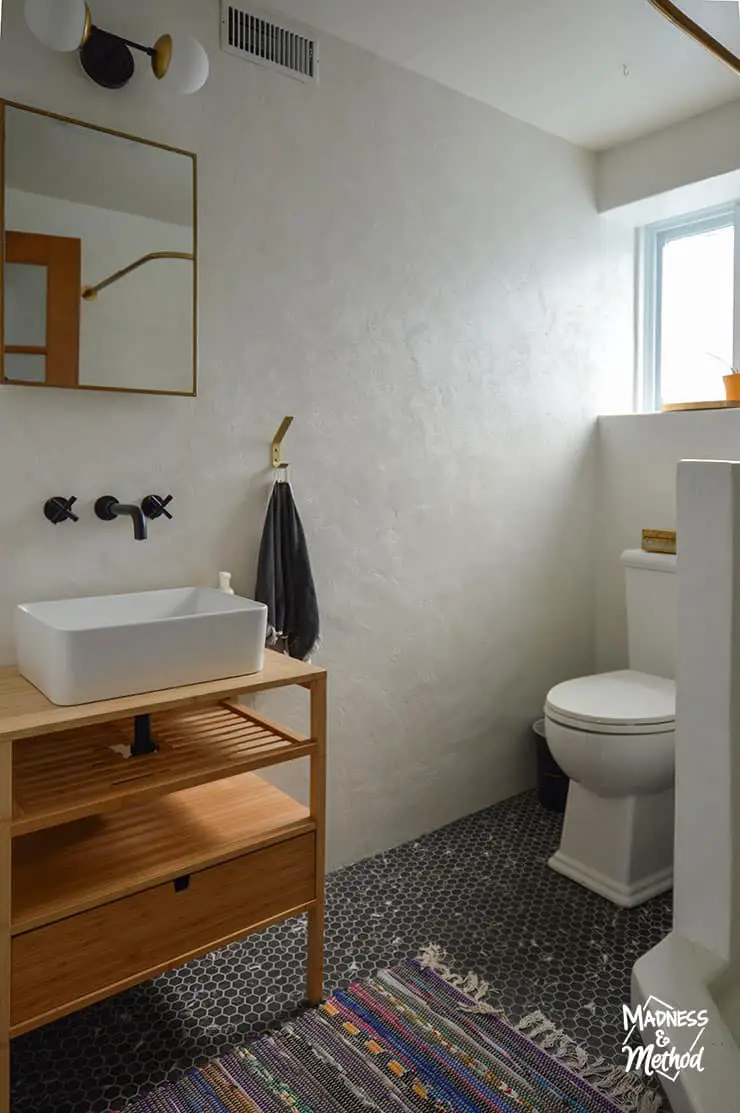
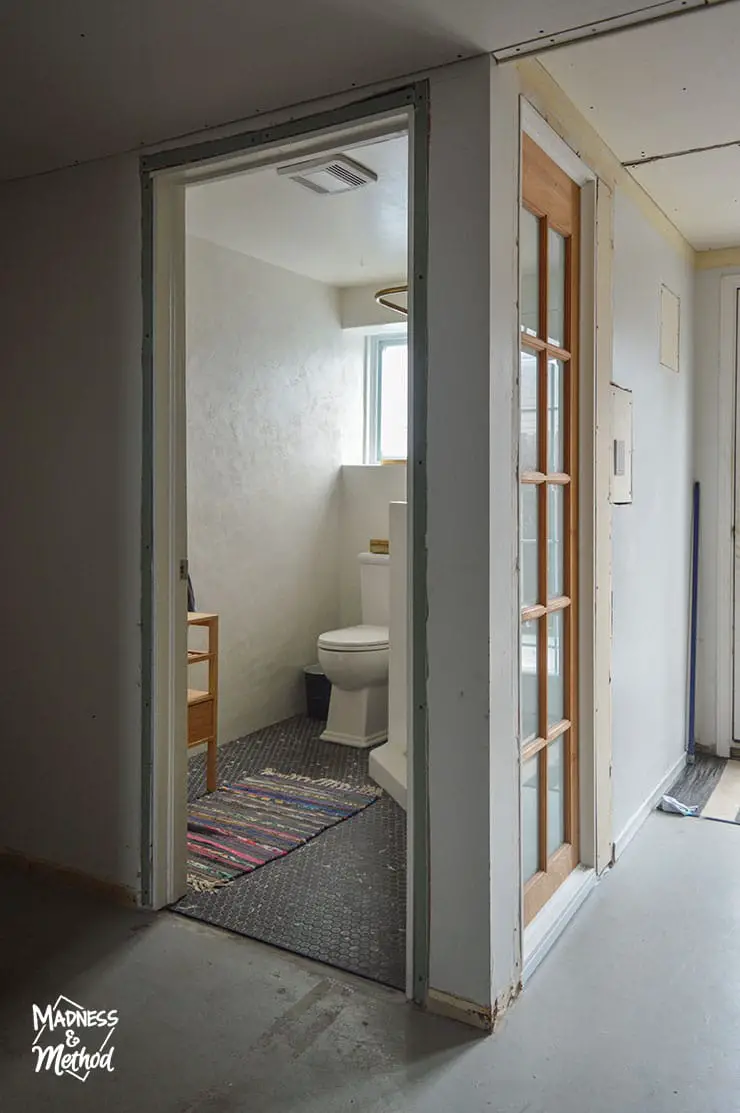
This bathroom is not humongous – measuring 7 x 5.5 feet, but opening up the shower (even though we made it much bigger!) tricks you in thinking there is more space.
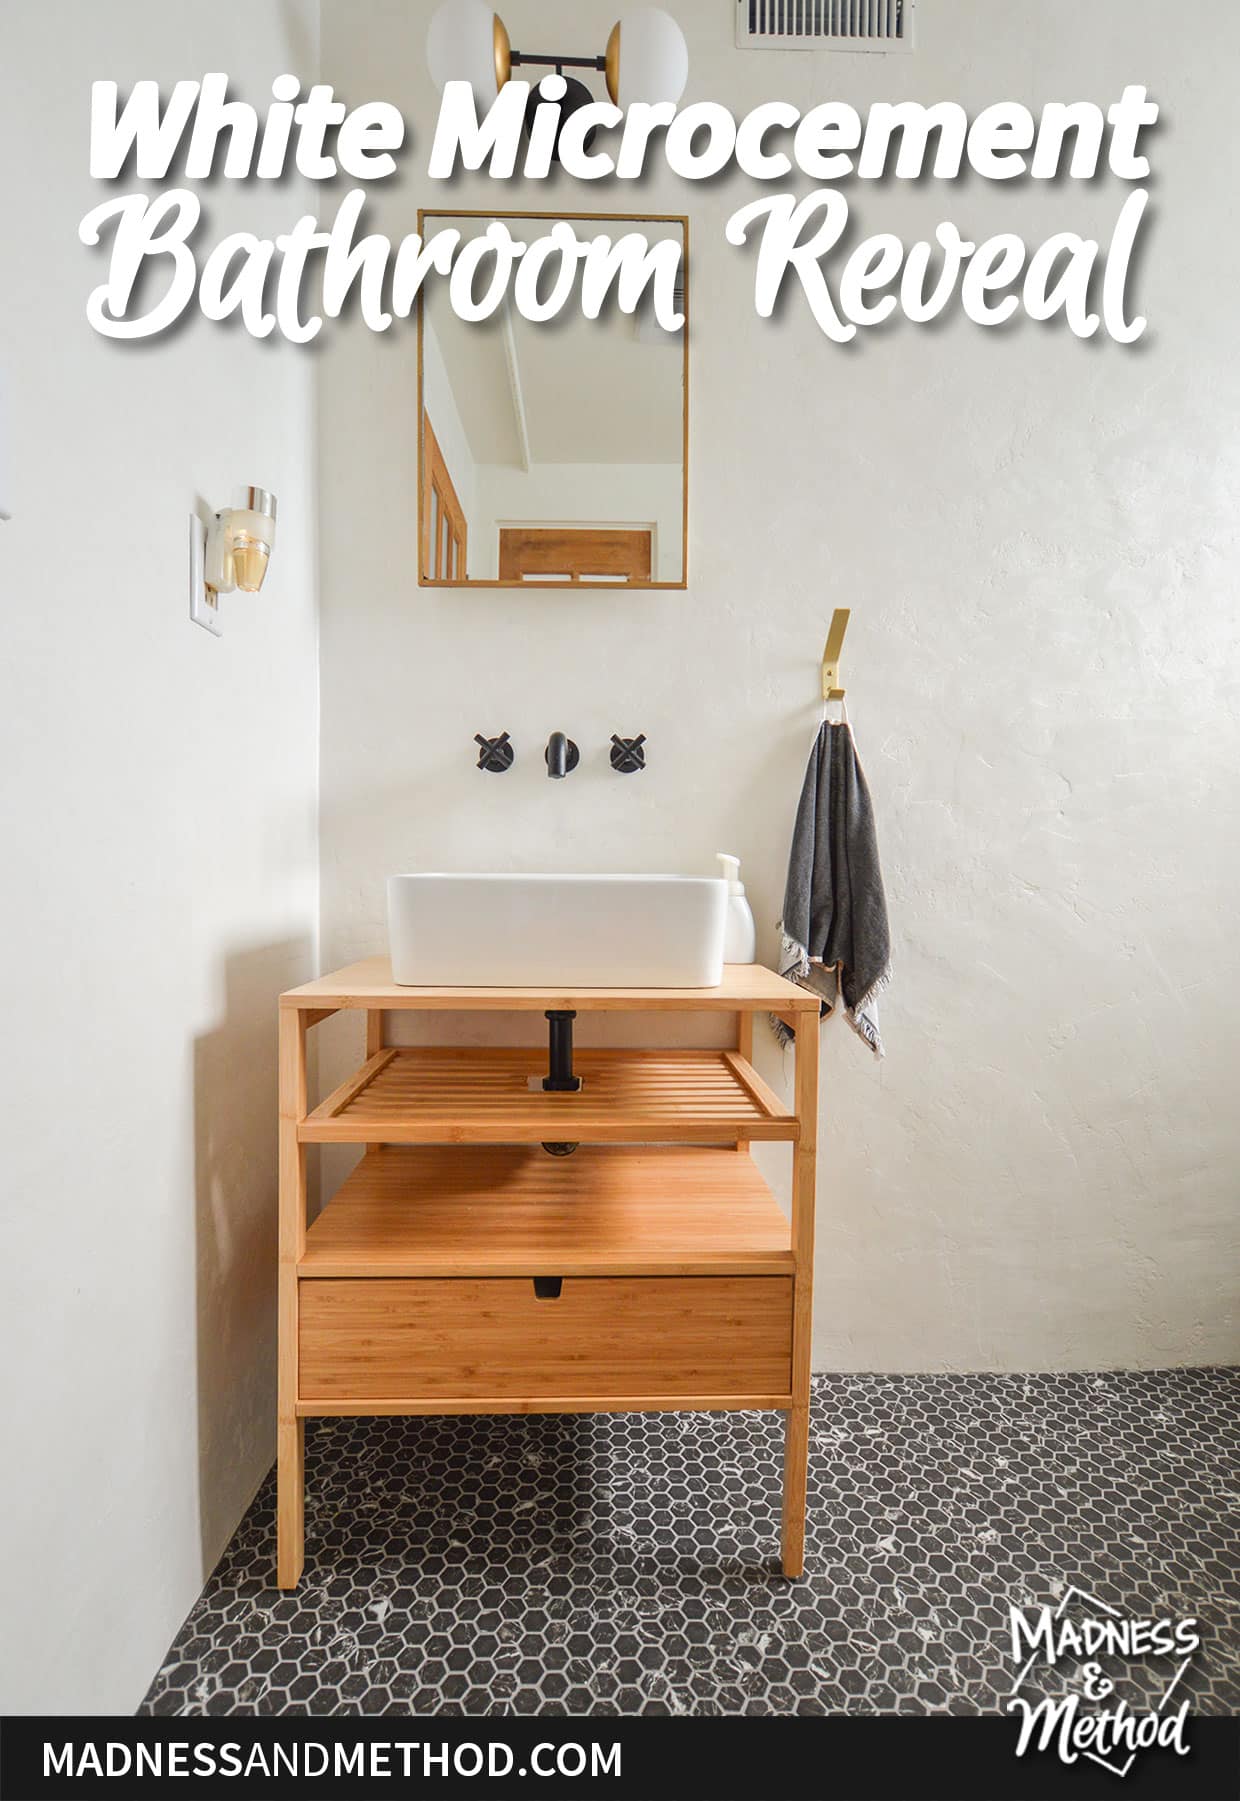
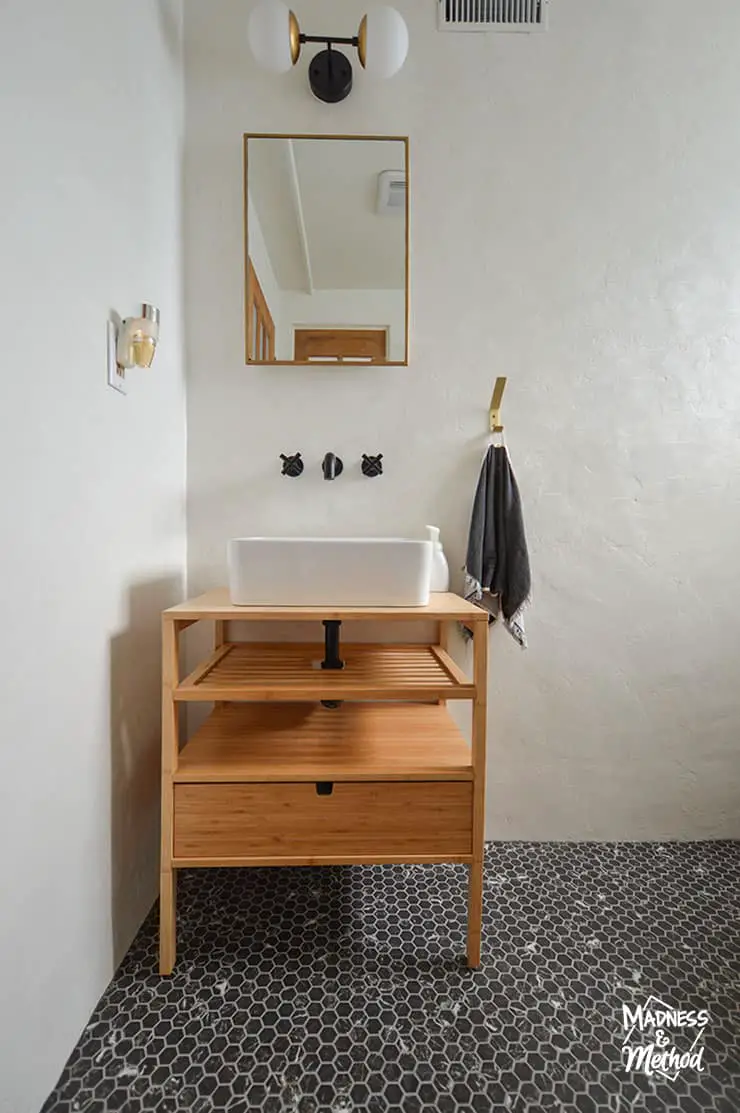 Another one of my favourite space-tricking-features is our open vanity! I had a whole blog post about non-traditional bathroom vanities and most feedback I got was for a “regular” closed vanity.
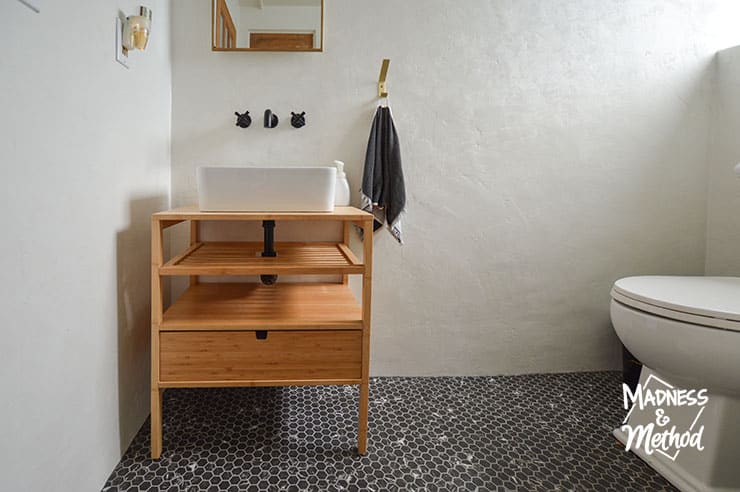
It’s smaller than our old vanity – but again we don’t really use this bathroom and didn’t need lots of storage. Although, that drawer does hold a LOT. And is currently 90% empty.
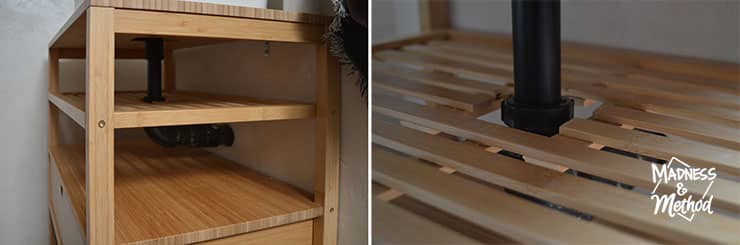
It did require some Ikea hacking (moving the shelf and the drawer location). Plus some cutting into the shelf and gluing other pieces so it would still hold.
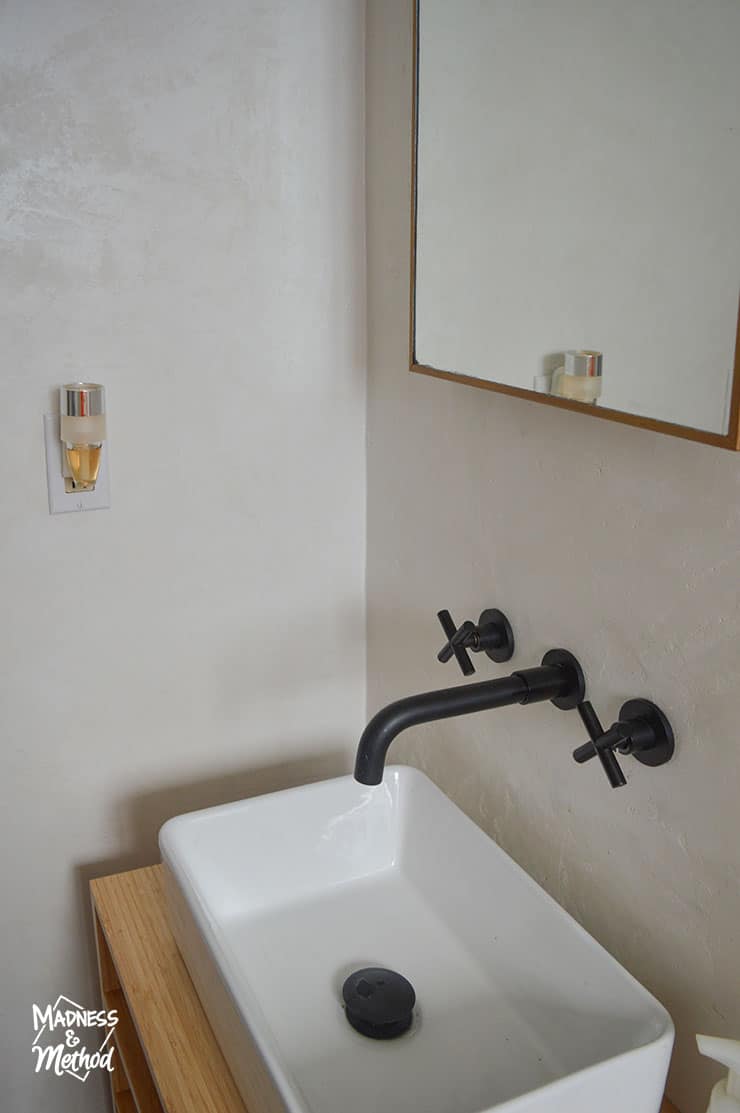
One of my favourite features in this bathroom is the wall-mounted faucet. I spotted it YEARS ago and saved the idea for this room. Because our mostly-unfinished laundry room is on the other side of this wall, install was actually pretty simple.
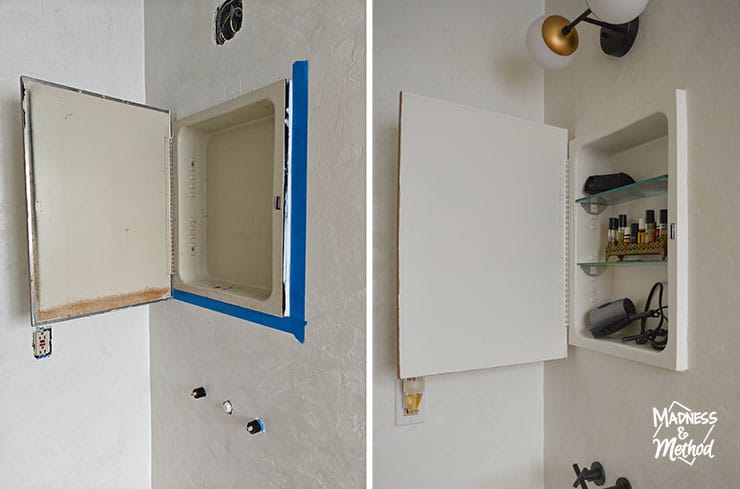
This wall-mount medicine cabinet is the same one we had before. We just flipped it upside down (so the door opened the other way) and then I painted the inside to match the walls.
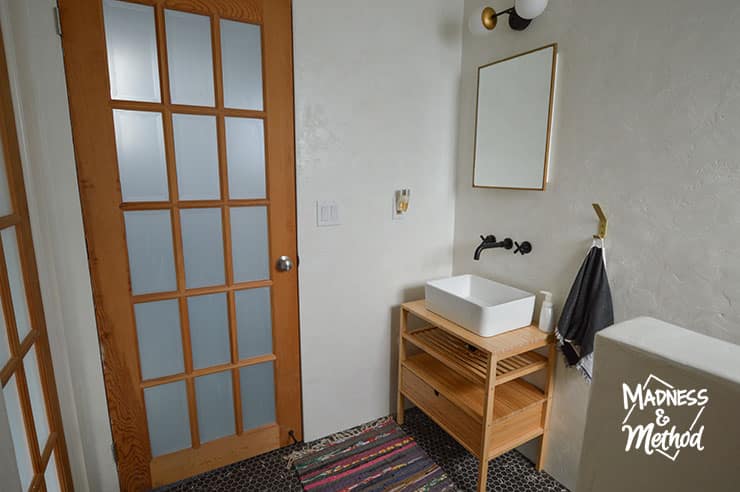
I also painted the edge (previously painted blue) and added some rub and buff to match the gold metallic of the light.
I know adding an interior window in this bathroom wasn’t everyone’s cup of tea… but I LOVE it so much. We’re planning on building our next house, and I want all. the. natural. light. Seriously, it’s tricky to come up with a floorplan when you want every room to have an exterior window.
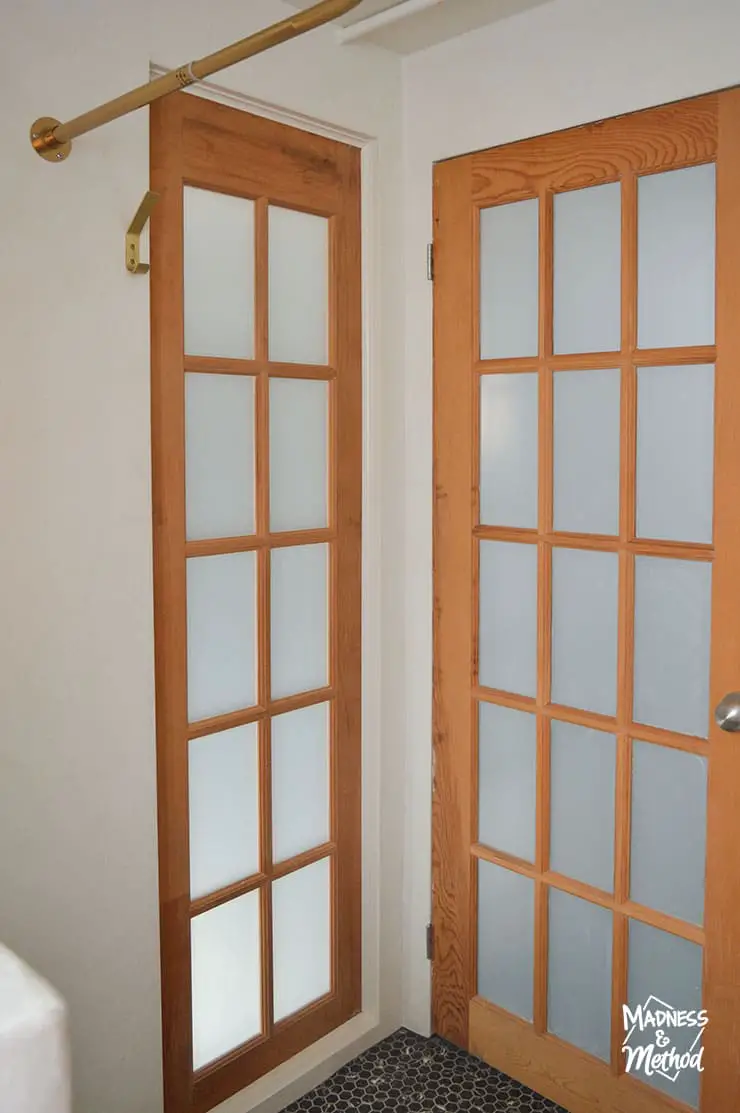
So unique!
If you remembered my post about installing the microcement, you’ll know the shower floor has some small cracks. As I said then, we’re ignoring it for the time being.
Either way – everything looks great from afar!
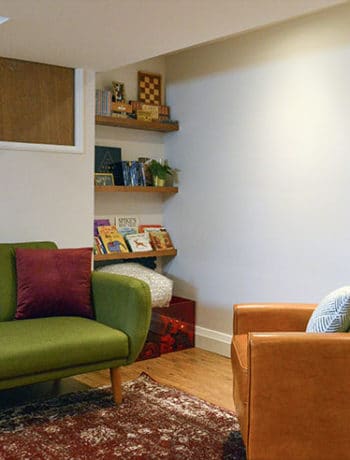
Now we just need to finish the rest of the living room :) Aka all the drywall mudding/patching, ha.
Bathroom Before & After Photos
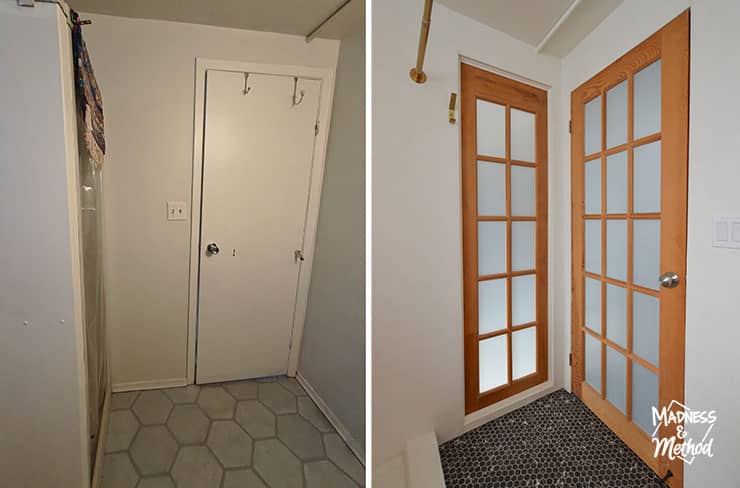
Do you remember what this bathroom looked like before? You can check out the original house tour here, and the completed phase-one photos here.

As I mentioned, one of the biggest changes we made was swapping the door location. Instead of completely closing in the old door location, I added a window!
From the inside of the bathroom, there’s now a light-filled corner where it used to be dark. (And the shower comes out into the room more).
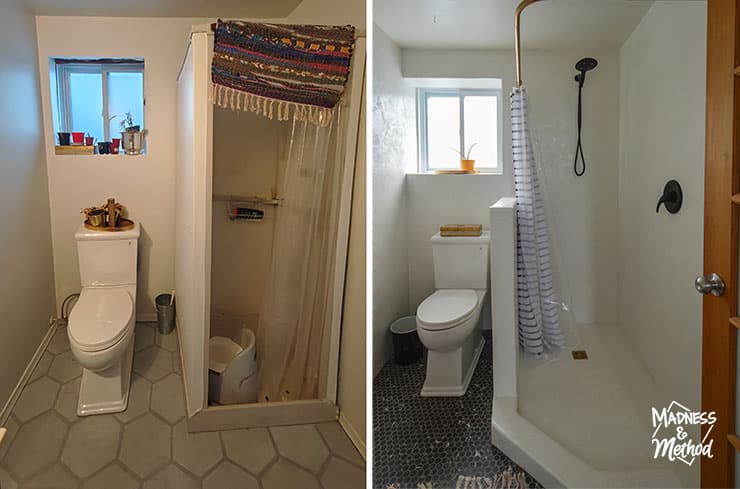
The view from the new doorway got a big upgrade. The old shower stall was literally hanging by a thread. (Okay, a few screws – but the wall between the toilet moved if you elbowed it). And that properly framed window? Where you don’t see exposed framing and insulation anymore? Chefs kiss!
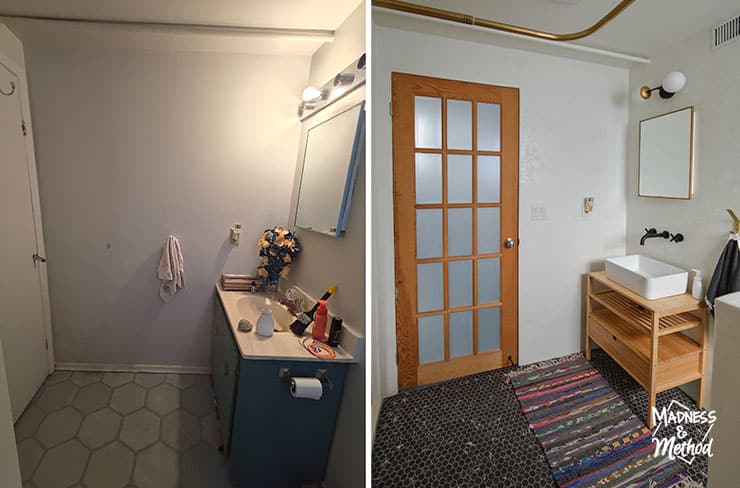
The photos above show the new door location a lot better. Technically the first view of the bathroom when you’re coming in isn’t my favourite (ie: a toilet). But it was a good sacrifice.
These before photos were taken at night, so it’s a bit darker than it is normally – but there are still so many great upgrades in this room, right!? (Oh, the photo below also shows the same view – but more vanity fronted. I wasn’t sure which one to use!)
(Also, can we all say a silent goodbye to my wedding bouquet that I saved all these years and finally threw out).
Hope you enjoyed all these photos of our white microcement bathroom reveal! I know I said we were done-done, but there is still the shower curtain to swap, the glass to possibly install, the shower floor to eventually repair… and I think silicone on the sink. (That one is a reminder to the Husband who doesn’t think it’s necessary, ha).
Looking for more posts about this bathroom renovation? Check out these links:
- Modern Microcement Bathroom Design
- Basement Bathroom Construction Progress
- Microcementing Bathroom Walls
- Non-Traditional Bathroom Vanities
- Install Frosted Window Film
- Miniature Hexagon Tile Floors


No Comments