

Ready for this rainbow bathroom reveal!? I’ve just completed my 8th One Room Challenge, and I’m super happy to have a beautiful (and fun) completed space. This white, black and rainbow bathroom probably sums up my décor personality, if a bathroom really can, ha! Either way, I know you’re excited to see this space – so let’s get to it.
– Note: This post contains affiliate links. See more information about affiliates here. –
I’ve made it to the finish for the Fall 2020 One Room Challenge! Catch back up with my white and rainbow bathroom plans here. In the second week, we removed the floors and installed a new toilet. During week 3 (and beyond), I painted the bathroom shower tiles. Week 4 was all about about the spray-painted counters 2.0 and last week I shared the painting (and colour) details.
(I’ve also been sharing as I go and created an Instagram Highlight for the project).
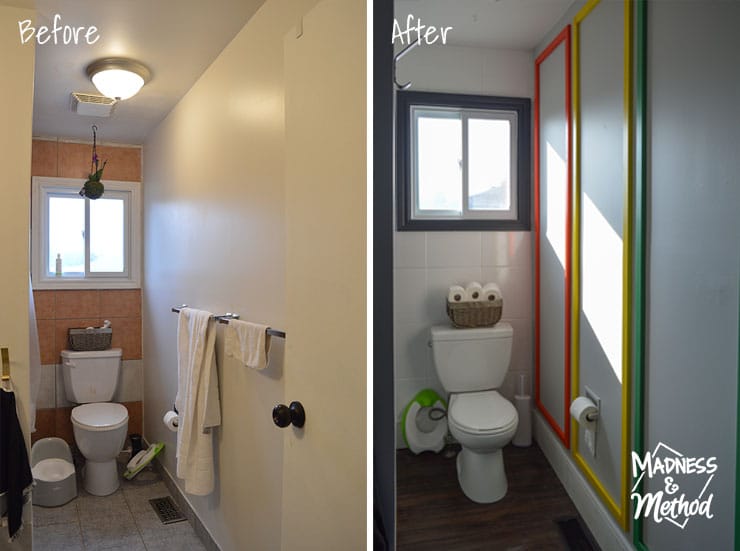
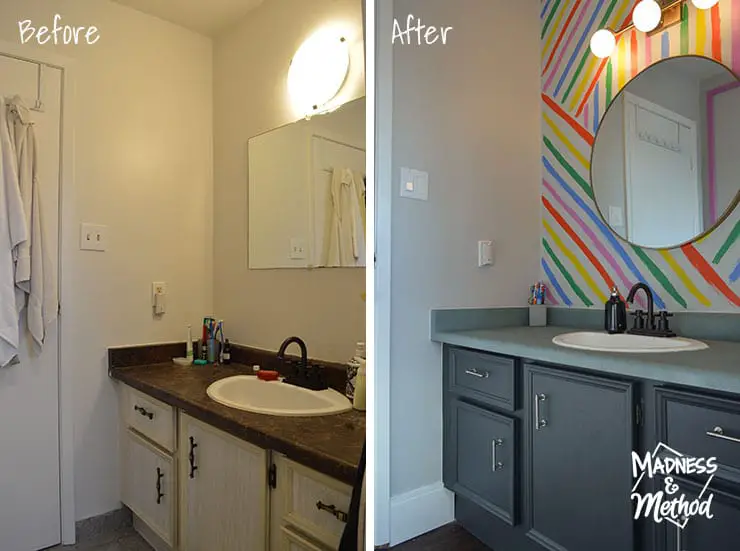
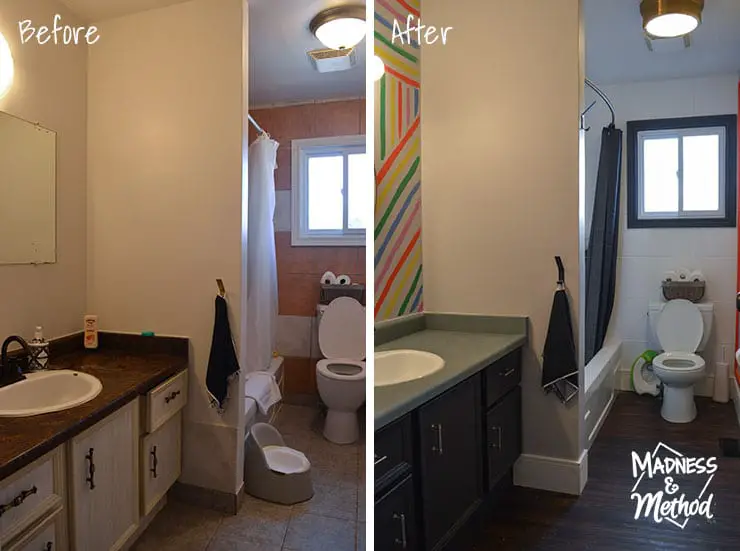
BUT! Before I can show you where we ended up, let’s see where we started:
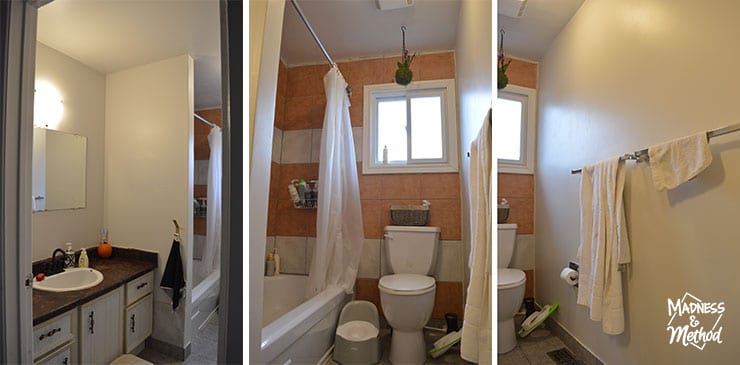
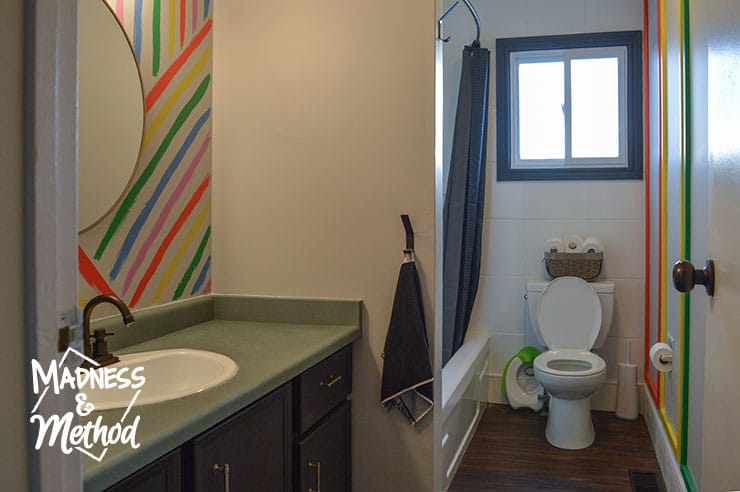
A functional space with an off-white vanity and brown counter, orange tiles in the tub, and grey tiles on the floor. Remember to check out week 1 for more before photos. This is the main bathroom in our raised ranch house (see the house before tour here), so it definitely gets a lot of use!
The design plan:

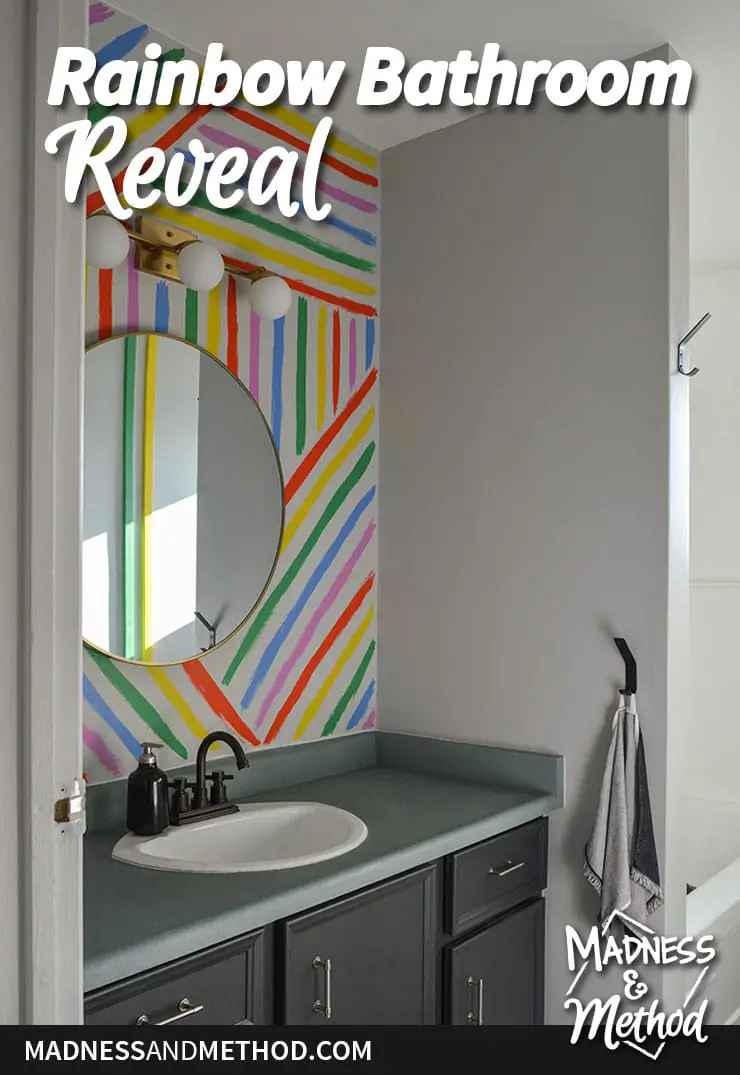
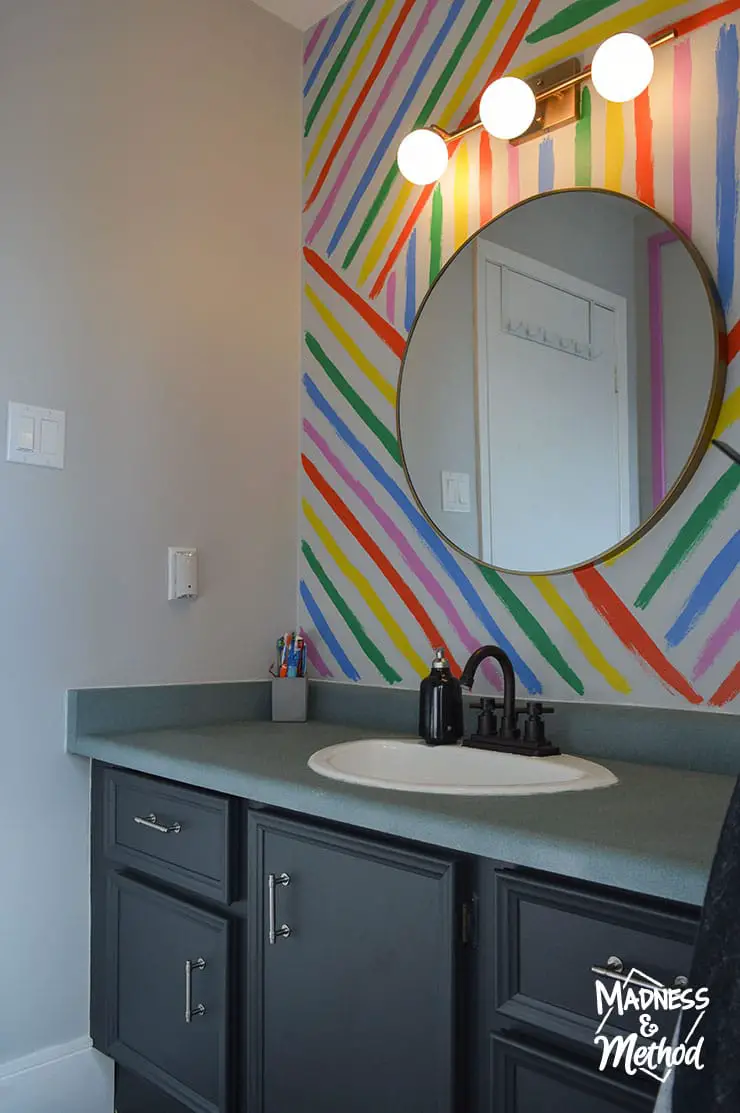
Here we are now:
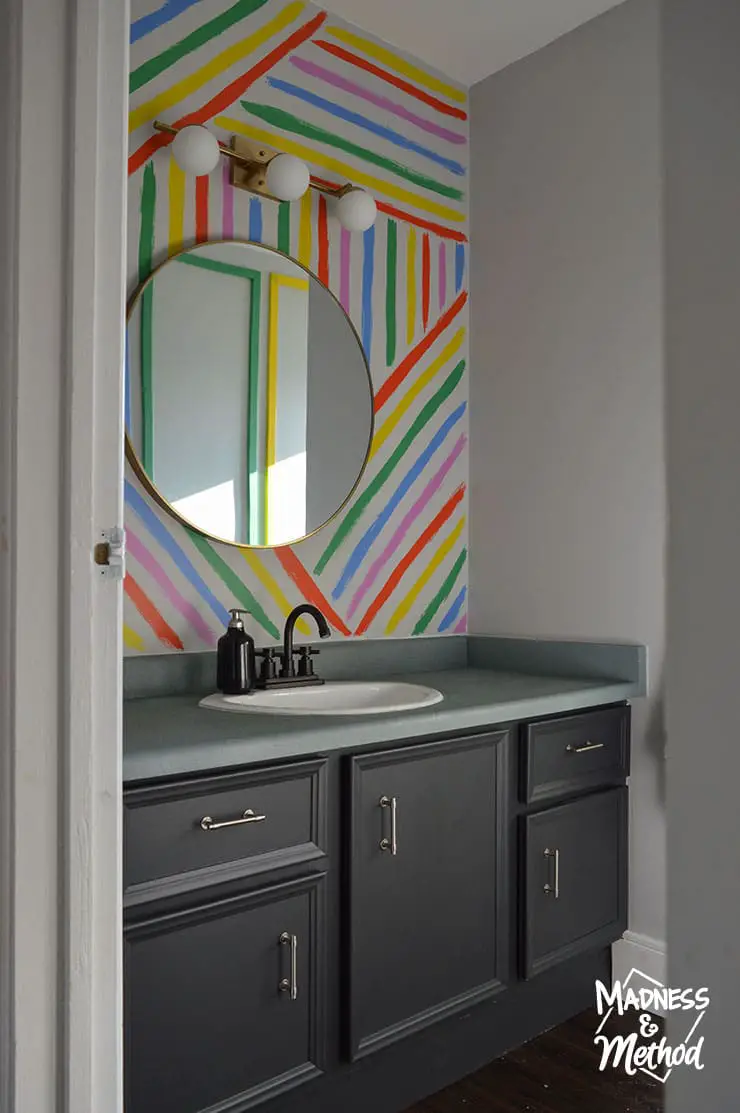
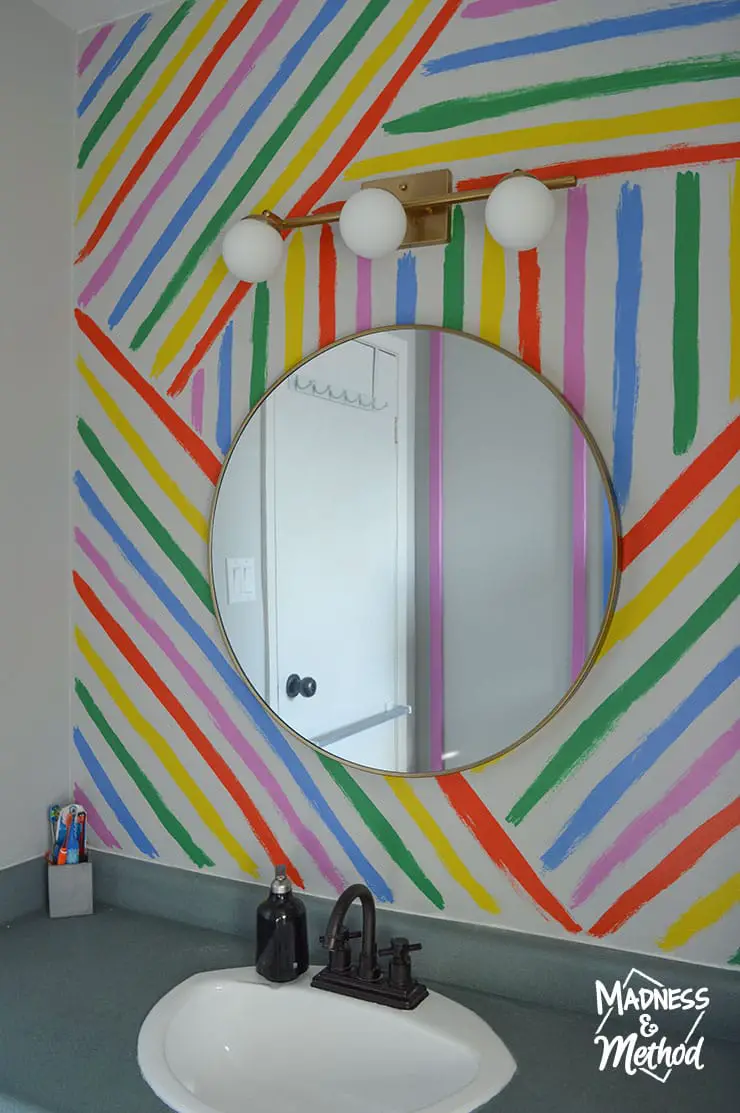
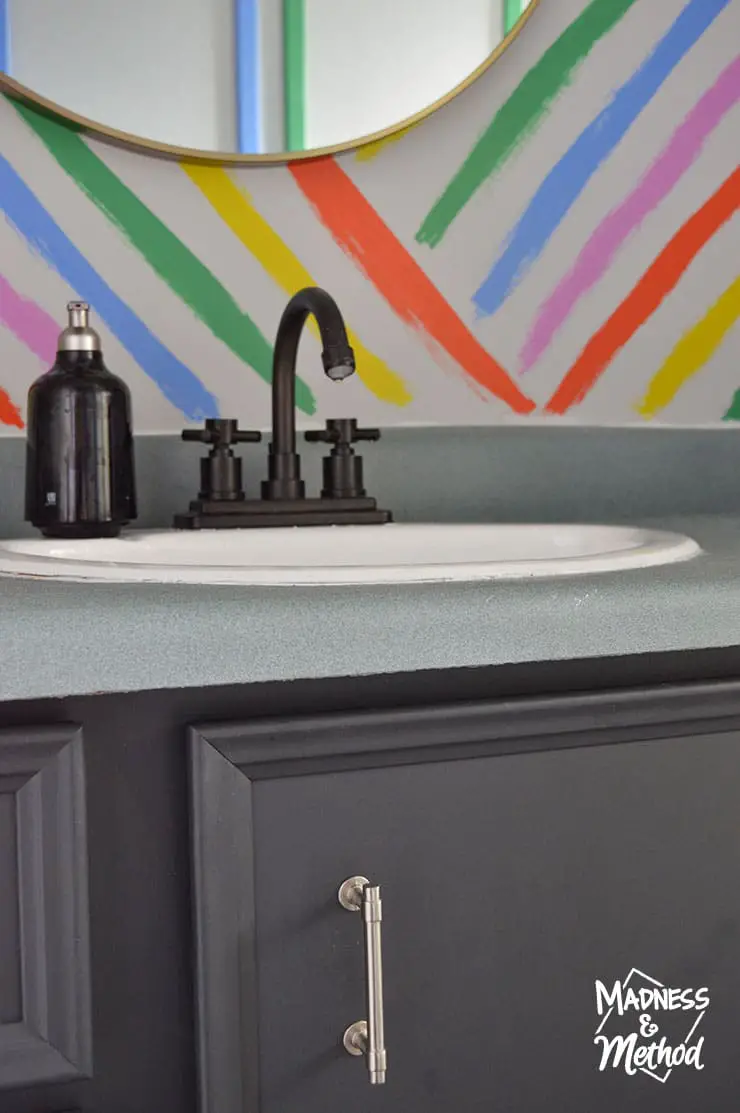
I painted everything (yes the vanity and countertops!). But I think the handpainted rainbow stripes are what you noticed first?
I took most of the vanity pictures yesterday when I had nice sunlight. Last night we just had to add the new shower rod and curtain, then the rest of the photos are from today. I tried to keep as natural/sun as possible, but know that the lights add a warm glow when they are on.
I still have a few small details to finish up. (Like painting the baseboards again, scraping paint off the floor… etc).
But otherwise, this room has been completely transformed!
Rainbow Bathroom Details: Shower Area
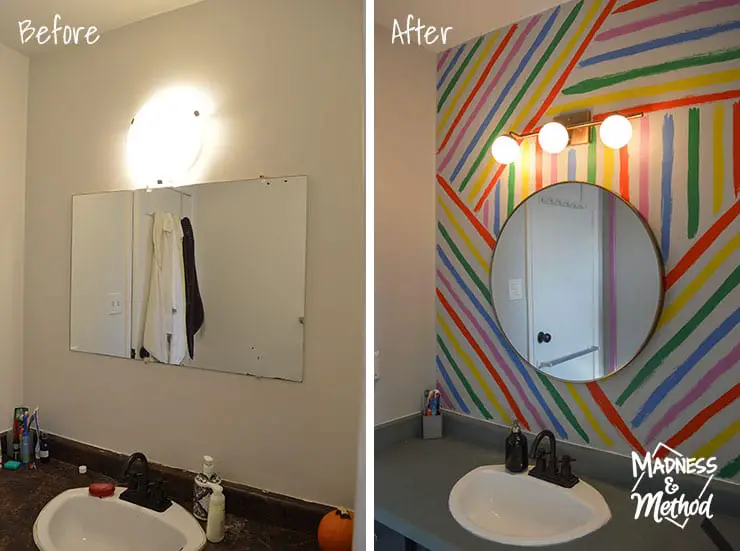
Remember the orange tiles we had before?
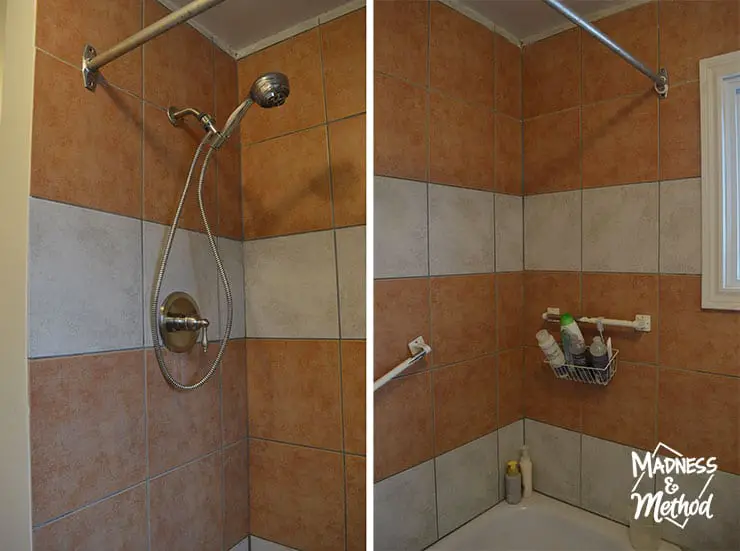
These were certainly a beast to try and paint over. I had to buy 3 kits of Tile and Tub paint to cover everything…
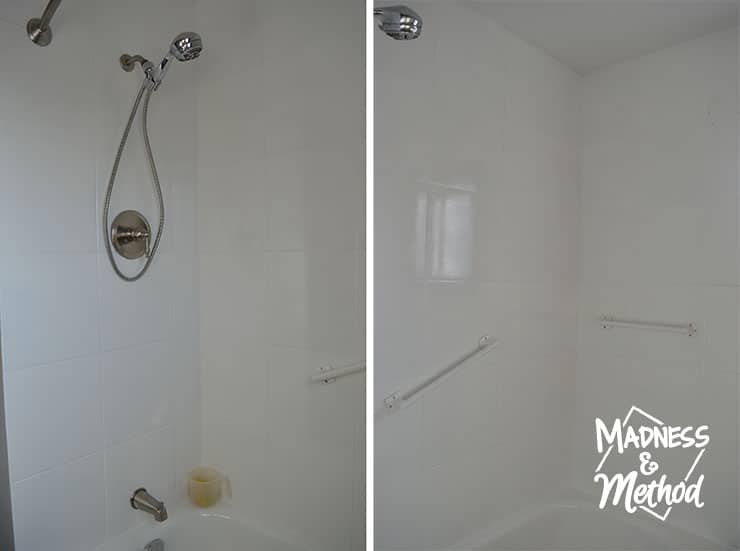
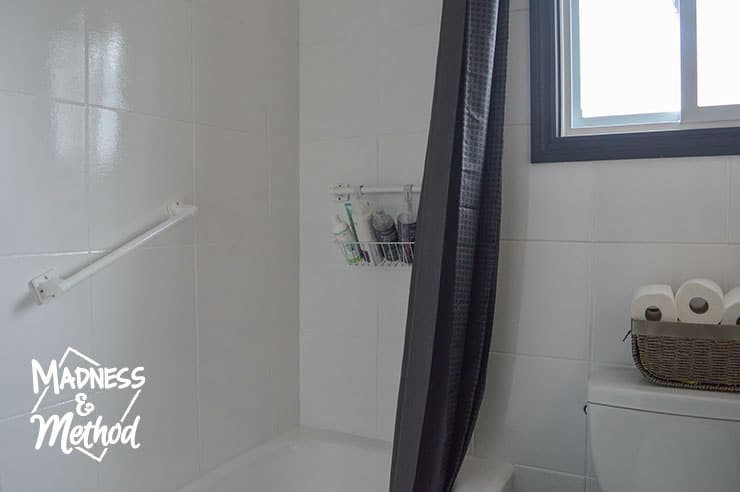
I still think I see a few brush marks/dark spots along the top two rows. But it looks bright and shiny everywhere else. I also painted the shower bars bright white to blend into the walls. (Wasn’t my first choice though).
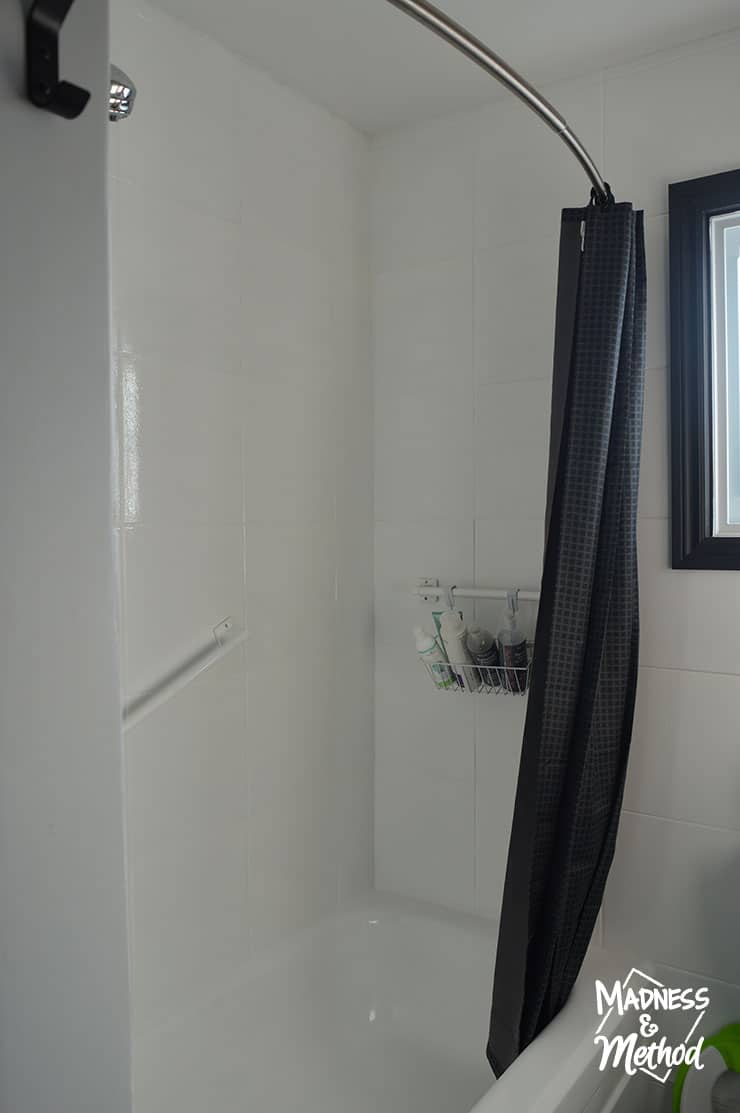
With three little children, I like to keep the soap/shampoo bottles out of the way. I use the horizontal bar to hold a basket of our stuff, and it was easier to keep them than try to patch and hide the holes.
I actually bought the dark shower curtain forever ago, but finally just hung it up last night. We also have a new curved shower rod, and I’m excited to take a shower in here again!
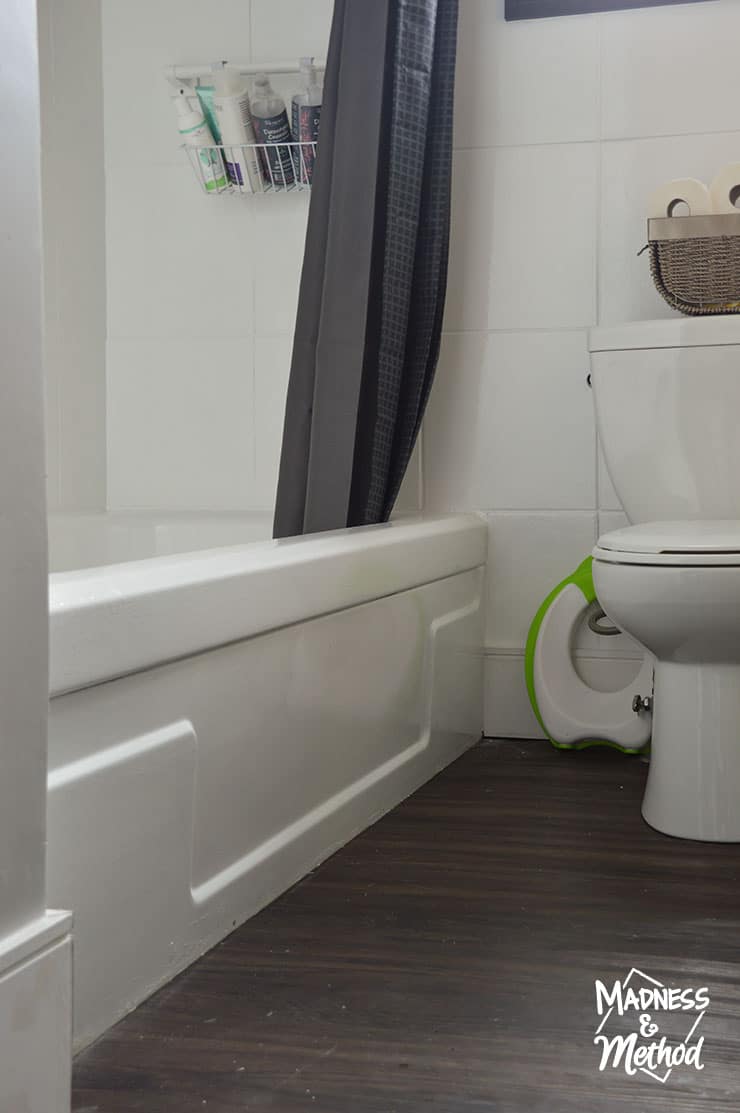
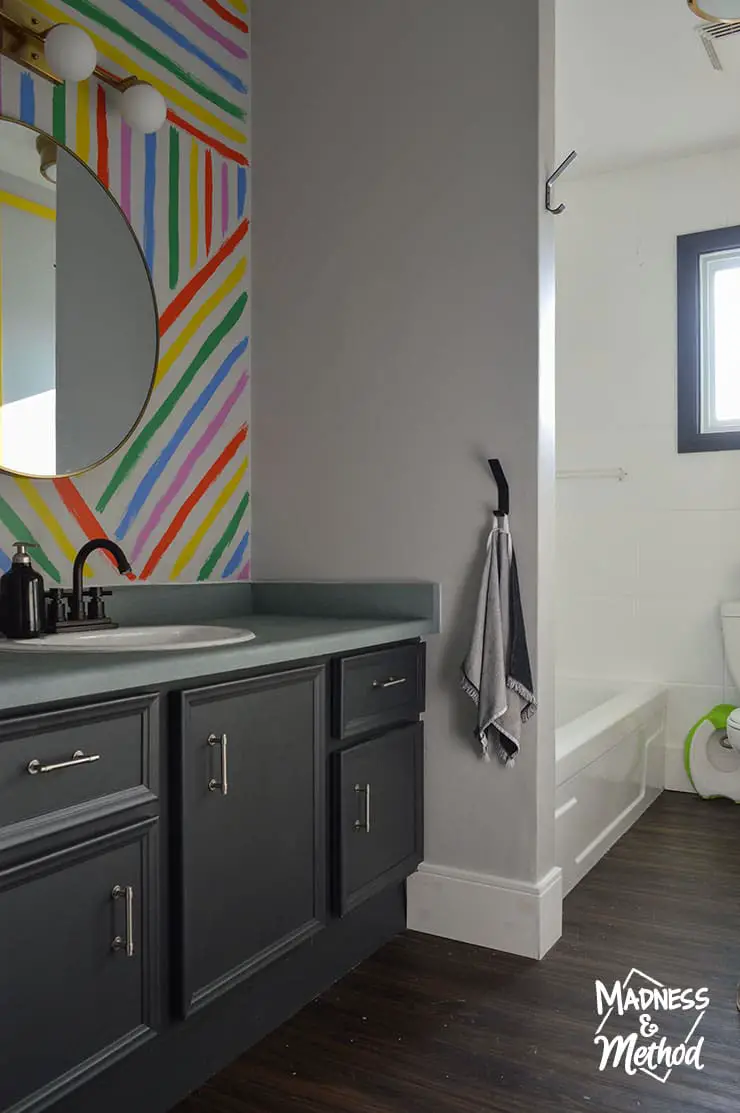
The painted shower tiles look sooooo much better, and I’m glad I went through the pain of painting them. We also removed the old floor tiles and brought in the vinyl plank we have throughout this level.
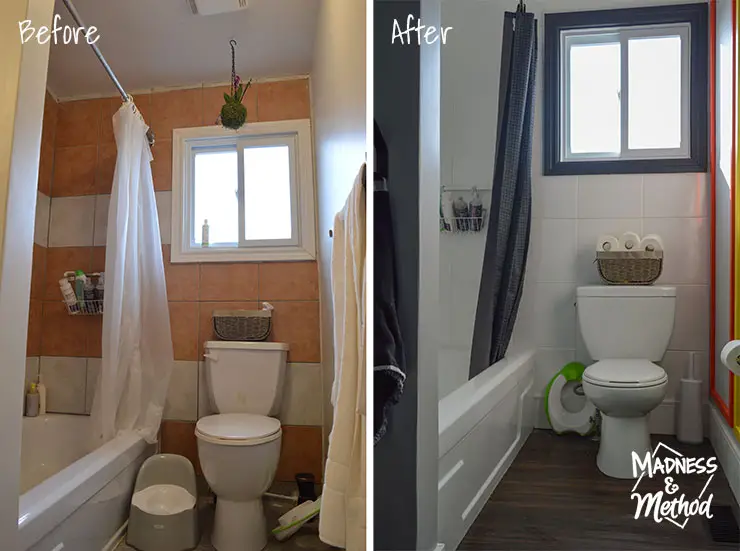
I mean, that before and after looks crazy right!? I like the black window casing too, a mid-project decision :) Oh, and the new toilet (the second one we had to buy) works much better. Albeit the lower height did take a little getting used to, ha!
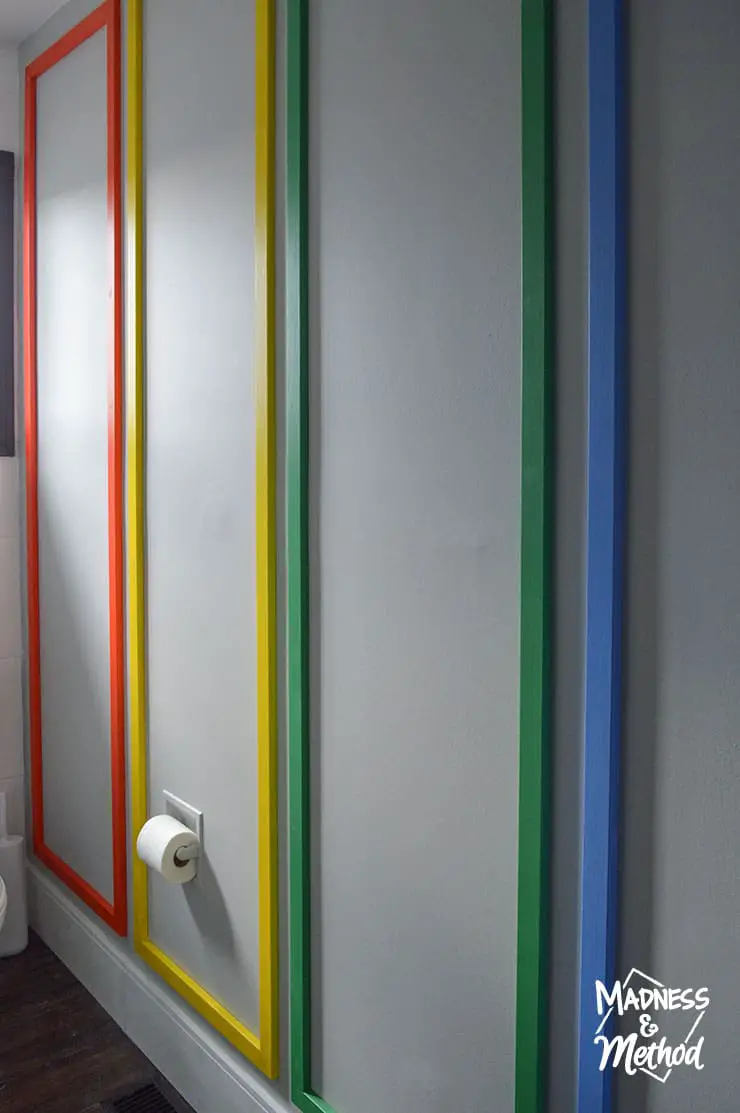
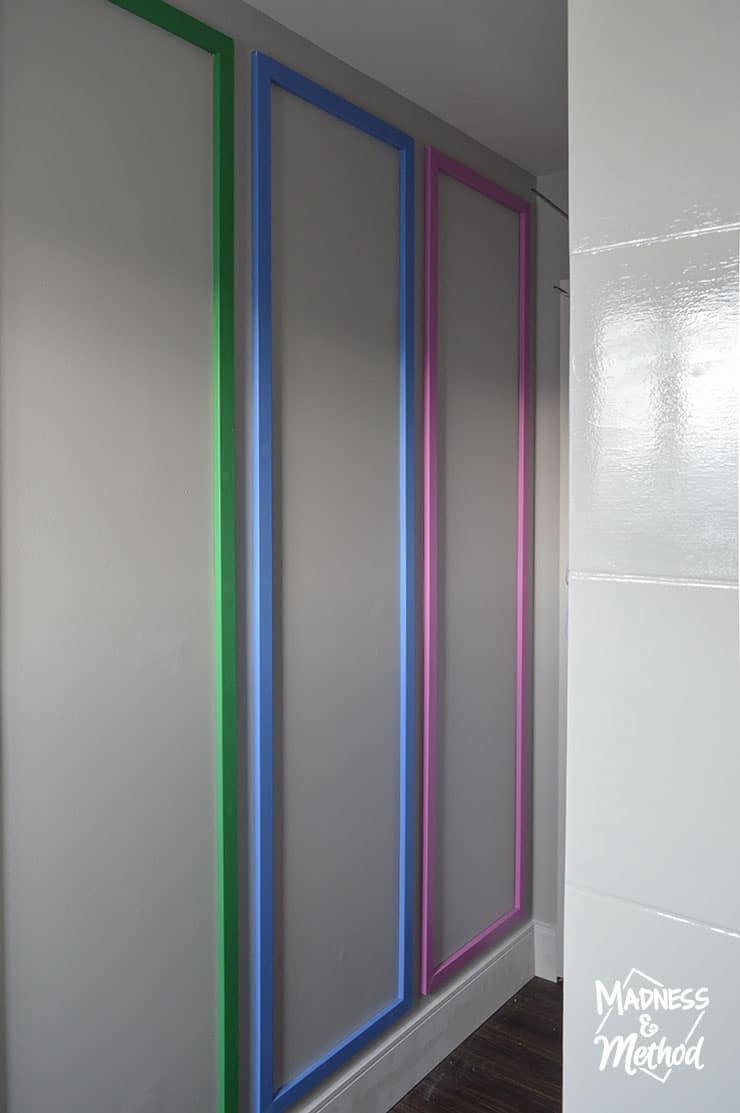
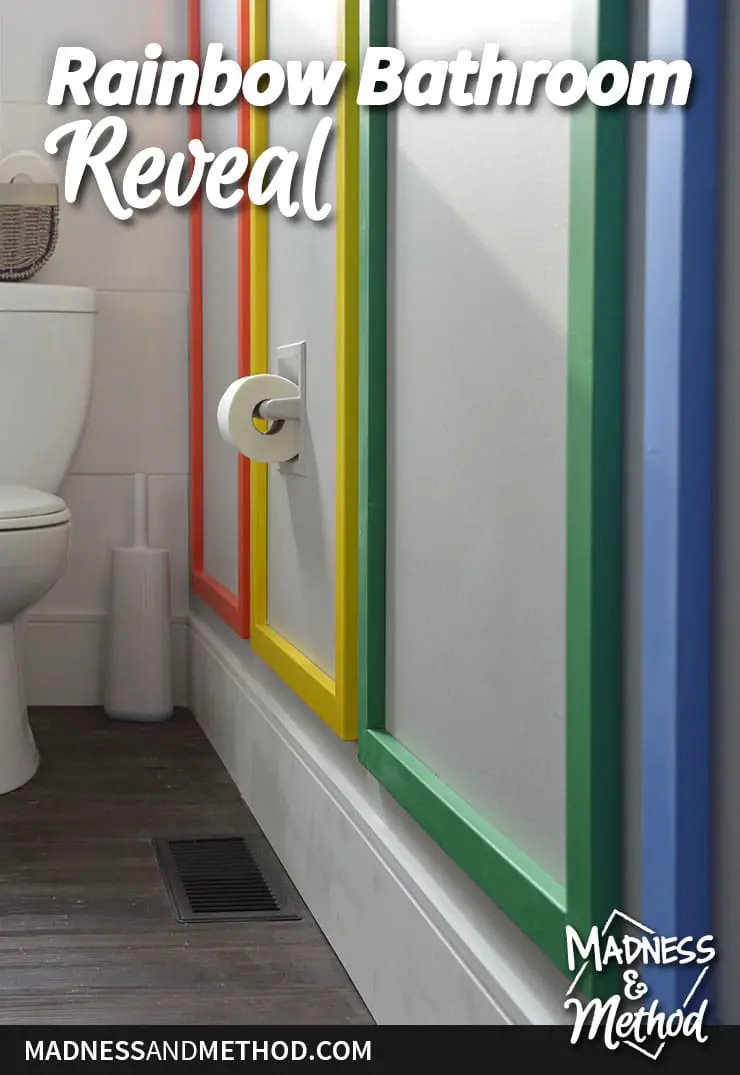
Rainbow Box Moulding
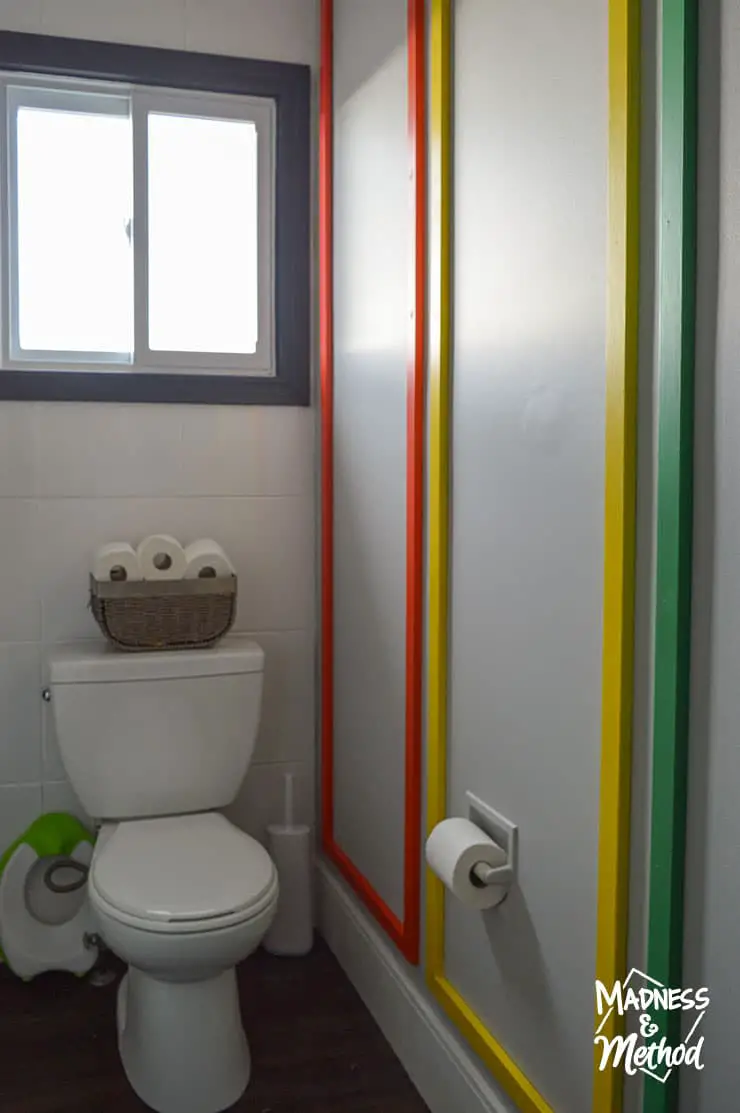
I added rainbow box moulding to bring some fun colours into this black and white space. The long wall was just begging for something – and I don’t think I’ve seen this before.
I chatted about the box moulding a bit last week, but essentially I just cut and painted the pieces before I installed them.
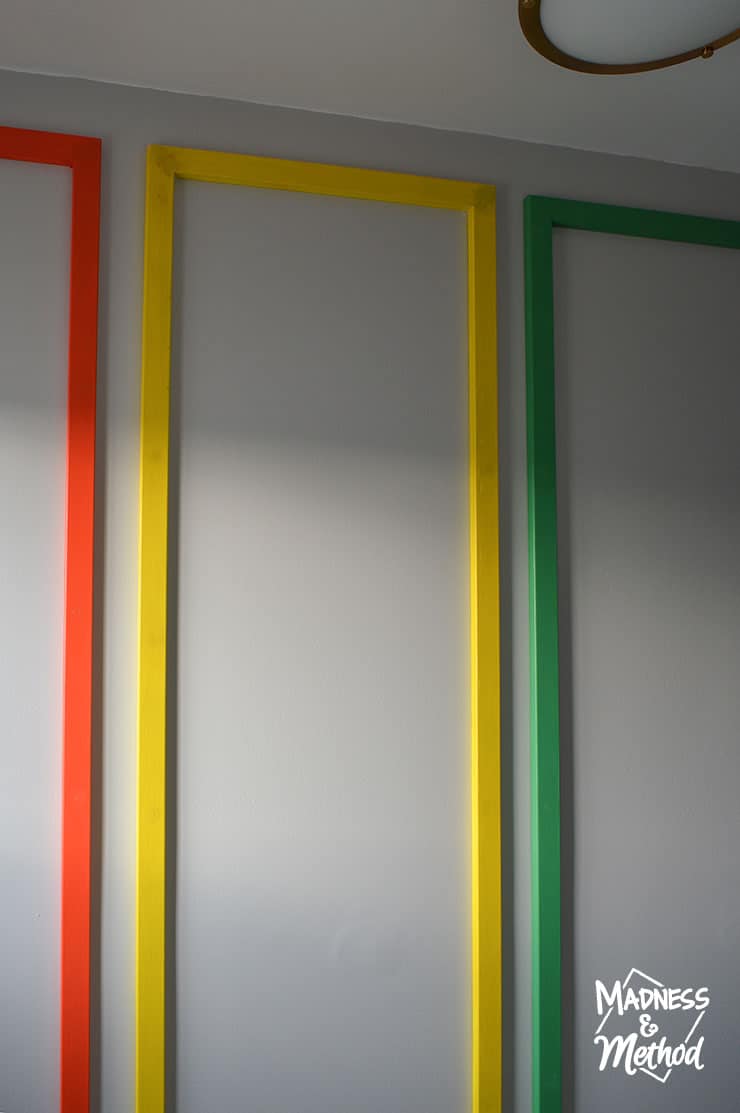
The yellow took a bunch more coats than the others, and I still need to go back and paint the wood filler a bit more.
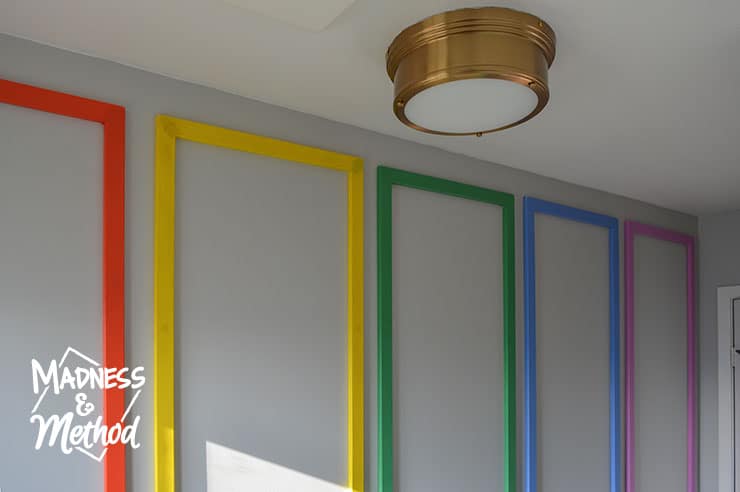
It was pretty tricky to take a photo of all the colours together, but here ya go! I also painted the ceiling white and added a new gold flush mount.
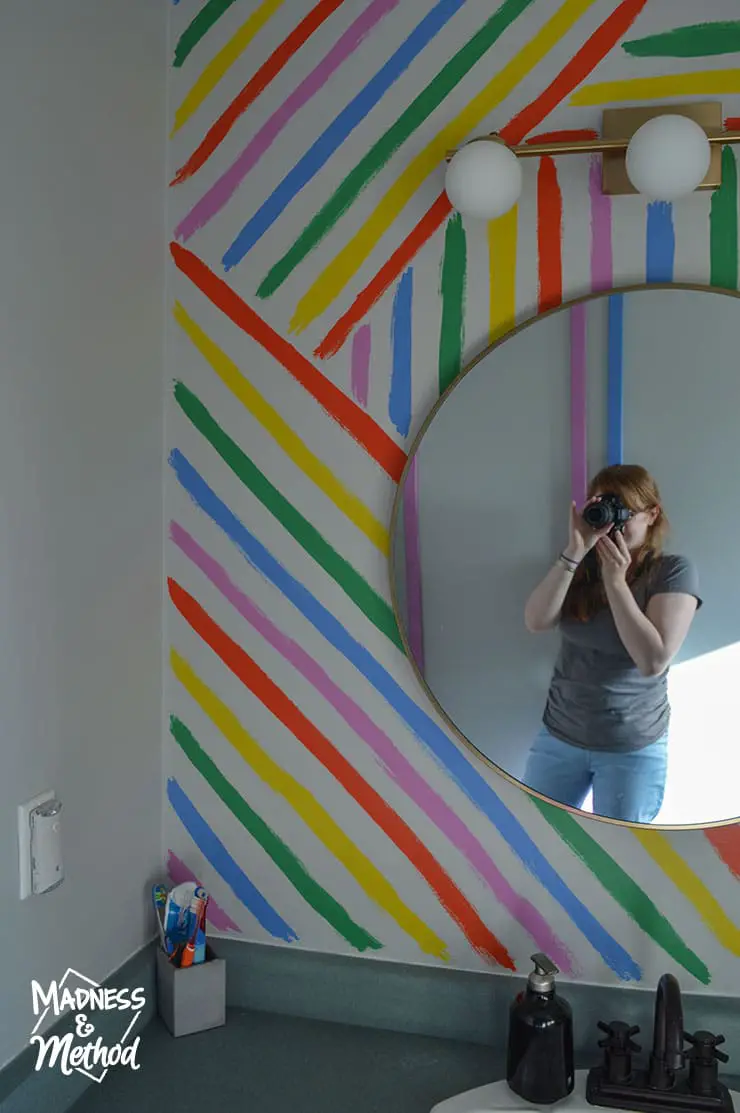
Handpainted Rainbow Striped Accent Wall
It’s the same brand as the vanity light, so I knew the colours would match. I was looking for a globe light for this area and lucked out with those two. I just had to buy a new bulb because one of them broke (I know!).
Okay, but seriously, it’s the exact same vanity and countertop! I painted it black and did my not-patented-but-crazy-painting-technique on the counters. Then just added new handles and it looks brand new.
I’ve noticed a lot of fellow One Room Challenge participants who add photos of themselves “styling” the room or otherwise using the space. Well, I figured that since it was a bathroom, you probably didn’t want a photo of it in use, ha!
I had noooo idea what kind of rainbow accent wall I wanted to do here. In the first week, I introduced a few options and created a poll too. Even though more people voted for “something” geometric, I knew it would be a lot quicker if I didn’t have to tape a lot, ha!
It was sort of inspired by the DIY pillowcase I painted, and I mapped out a few designs on the computer. I’ll have more details (and a video) about the process next week. I know the non-perfect stripes aren’t for everyone (the Husband was all like “it’s not done”, or “did Zachary do this”), but I think it’s “whimsical”.
(Aka the word everyone uses when they describe something “fun” and out there but not perfect, ha!).
Rainbow Bathroom Reveal
Okay, I have a bit more to share next week – so I’ll just leave a few miscellaneous photos around the room:
And hopefully, all those little tasks (like extra paint touch-ups) will be complete-complete too.
But I’m really happy with how it looks!
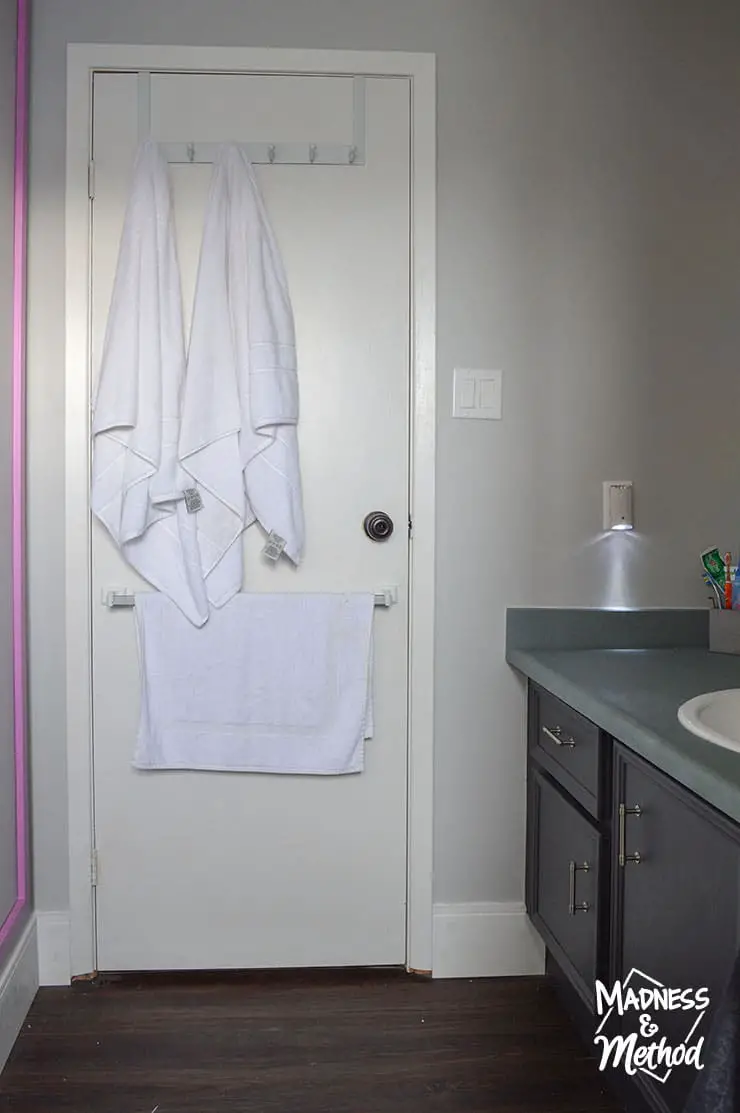
Oh, and I know I briefly mentioned in the first week, but the (old) towel bar we added to the door functions better – and we no longer run into it like when it was on the wall near the toilet.
One more before and after to share how the whole room works together:
The other little potty is sitting in the tub right now. I’d like only one in here (the seat), but I have a feeling we have to potty train Élise real soon. (And by that I mean, she’s due, but we tried a year ago and it was such a bad experience and I’ve been avoiding it ever since).
Make sure to stop back in next week to see that video, and possibly a budget breakdown? Either way, here are the items I used in the space:
Rainbow Bathroom Sources
- Vanity: Black Paint, Satin Nickel Pulls, Faucet
- Countertop painting tutorial here
- Similar mirror
- 3-bulb gold vanity light
- Gold ceiling flush mount
- Rustoleum Tub & Tile Refinishing Kit
- Shower faucets and bars existing
- New toilet and toilet brush
- Similar black towel hooks
- Curved shower rod
- Paint and rainbow colours used here
About the One Room Challenge
I’m so grateful to Linda from Calling it Home for creating the One Room Challenge! This season’s featured designers partnered with High Point Market to create virtual makeovers, and all the guest participants had to get their rooms finished amidst the pandemic.

Follow our Rainbow Bathroom Progress
- White & Rainbow Bathroom Plans (Week 1)
- Bathroom Floor Demo (Week 2)
- Painting Bathroom Tiles (Week 3)
- Spray Painting Bathroom Counters (Week 4)
- Bathroom Details + Painting (Week 5)
Past One Room Challenges:
- Spring 2016: Basement Half-Bathroom Addition
- Spring 2017: Bro’s Budget Bathroom
- Fall 2017: Garage Makeover
- Fall 2018: Basement Kitchen Renovation (which we didn’t complete until much later, you can check it out here)
- Spring 2019: Master Bedroom 1 AND Master Bedroom 2
- Fall 2019: Not-so-Neutral Nursery
- Spring 2020: New Master Bedroom
And, in case you forgot, here is what our to-do list looked like for the bathroom:
- Remove baseboards, old towel bars
- Demo tiles and subfloor layers
- Install new vinyl plank floors
- Install new toilet
- Remove and paint the shower bars (then reinstall later)
- Prep and paint the shower tiles (did this 3 separate times!)
- Install new shower rod and curtain
- Install new lights (ceiling and vanity)
- Swap light switches/outlet
- Prep and paint vanity (install new hardware)
- Patch, sand, prime and paint the walls
- Cut, paint and install accent trim and baseboards
- Prep, prime, paint and seal bathroom counters
- Paint wall mural
- Install new mirror and wall hooks
- Paint touch-ups
- Caulk/silicone as needed
- Scrape paint off floors (added)
I still have a few of the last items to finish, but otherwise, we are done!
Did this project meet your expectation for a white and rainbow bathroom? Either way, I think it’s a great space, and I’m excited to see how all the DIY painting lasts. (I’m looking at you countertops and shower tiles).
Ideally, everything would last perfectly until we’re ready to sell the house (a few years from now). Then I will most likely tone down the rainbow colours (ie paint over it).
I’ll keep you posted :)

8 Comments
Sylvia Schmitz
November 11, 2020 at 5:17 amWow I love the colours. So fun and yet so sophisticated.
Nicole
November 12, 2020 at 4:19 pmIt’s a rainbow bathroom, but not over-the-top :)
Lindsey Mahoney
November 12, 2020 at 2:41 pmThis is such a happy kids bathroom, love the rainbow theme!
Nicole
November 12, 2020 at 4:20 pmThanks!
Tracy
November 16, 2020 at 7:31 pmWhat a fun bathroom! I bet the kids love it.
Nicole
November 17, 2020 at 12:59 pmThey kept asking when it was time to paint the walls, I think they’re over it now, ha!
Stacy | Blake Hill House
November 30, 2020 at 10:45 amIt looks super cute, Nicole. I love the rainbow colors!
Nicole
December 1, 2020 at 4:38 pmThanks – it’s such a fun room :)