
We’re trudging along on our basement bathroom renovation and I am 90% certain I have all the elements picked out. (I wish we had 90% of the work done, ha!) Anyways, today I figured I’d share the plans for our modern microcement bathroom design! And of course, I’m settling the debate from last time about what vanity we’d pick.
– Note: This post contains affiliate links. See more information about affiliates here. –
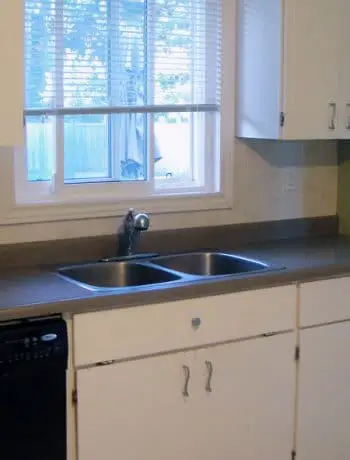
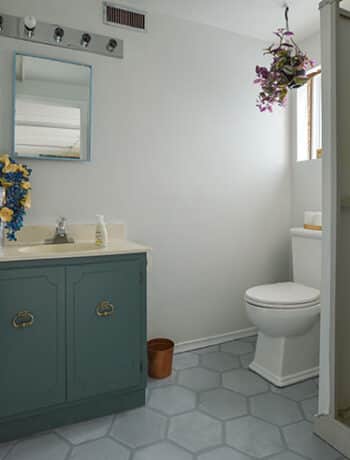
This is a full DIY project, and here are a couple of photos of where we started:
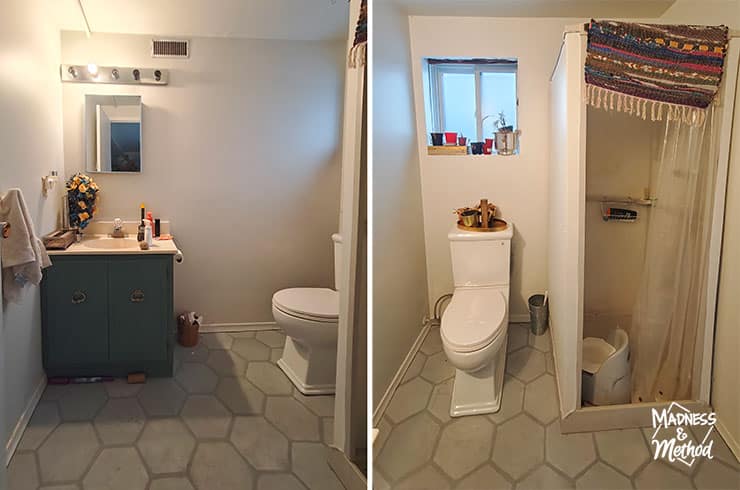
It’s a three-piece bathroom, meaning there’s a toilet, a sink and a shower. At around 5-1/2′ x 7′, it’s not a huge bathroom, but still big enough to fit what we need. It’s also the second bathroom in our house (the main one has a tub), so it’s used less often.
Layout-wise, I had wanted to make big changes! Like, move a wall (the one at the bottom) and give everything more space.
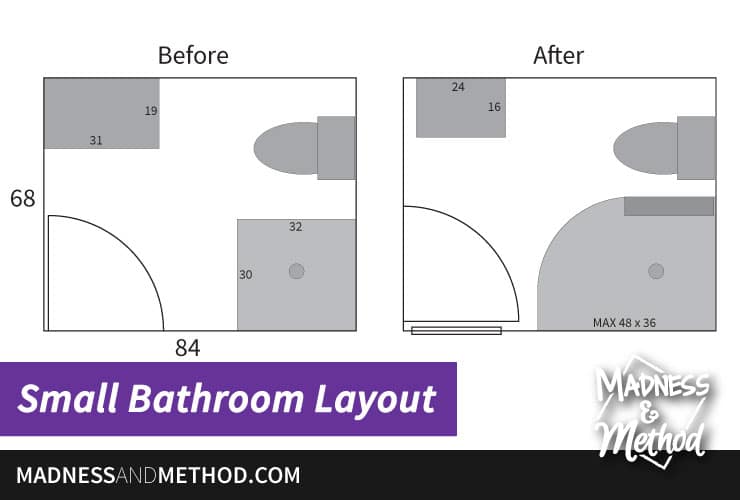
But the husband vetoed that idea early-on, and instead of moving a wall – I moved the location of the door! Technically we could have left the door in the exact same place since it doesn’t change the layout at all. BUT I wanted to maximize the flow to walk into the room AND take advantage of the bright light that comes in from the window.
The old shower stall was a wibbly-wobbly thing around 30×32. Taking it out opened the whole space, and I wanted to create a big open shower. While I looked at a bunch of pre-made shower stalls for corners that would have two glass walls – in the end, I thought it would be better to make something custom.
Why Choose Microcement?
Debating between tiling the walls, or doing microcement (similar to our cottage bathroom) – I went with option #2. For one thing, I already had leftover bags of microcement (taking up space!) and it makes working with tricky angles and edges a lot easier.
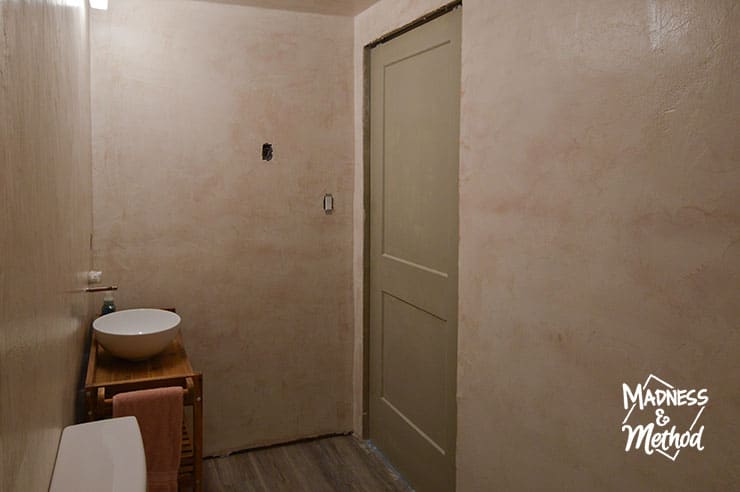
The photo above shows the microcement bathroom I already completed. There, I tinted the microcement to do a two-tone look on the walls. That was achieved by doing a darker layer first, then going in a thin layer on top in a lighter colour.
I thought about doing that here too, but I don’t have another tint colour, and didn’t want pink. (I was going to do light gray and white, but the microcement brand I have is not sold in Canada anymore!).
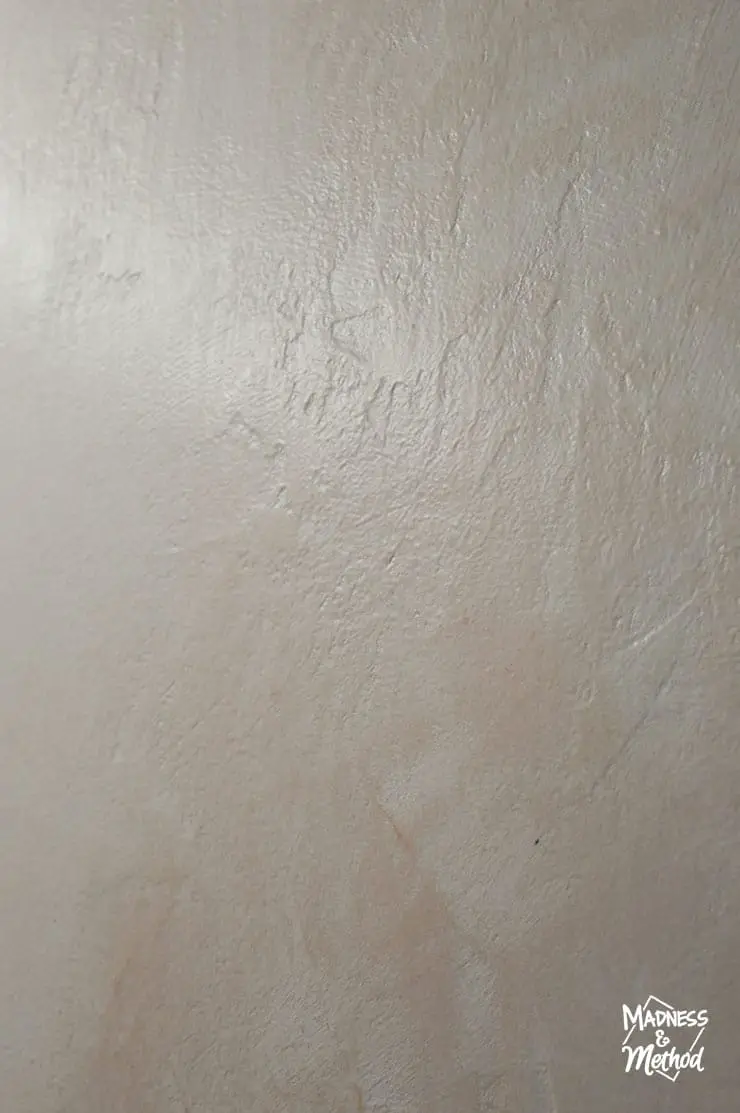
Up close, microcement walls have a varied texture. It’s very similar to stucco, and I’m sure there are plenty of different techniques/ways to do it. Once completed, you seal them with a clear coat to help repel water. It’s ideal for a bathroom!
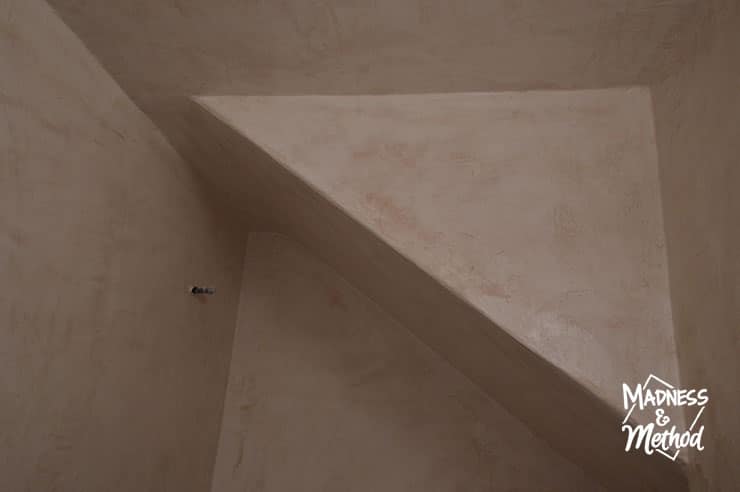
At the cottage, I also microcemented the ceiling and shower angled section. In this bathroom, I will not microcement the ceiling (so many muscles!), but I will do the shower floor.
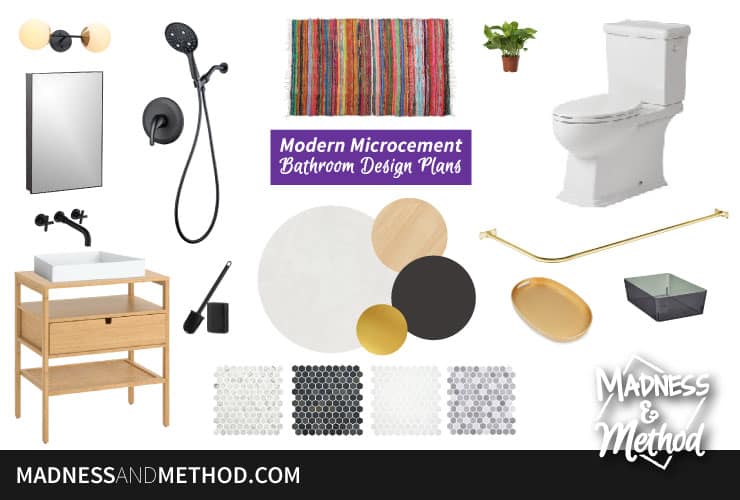
Ready to see the design plans!?
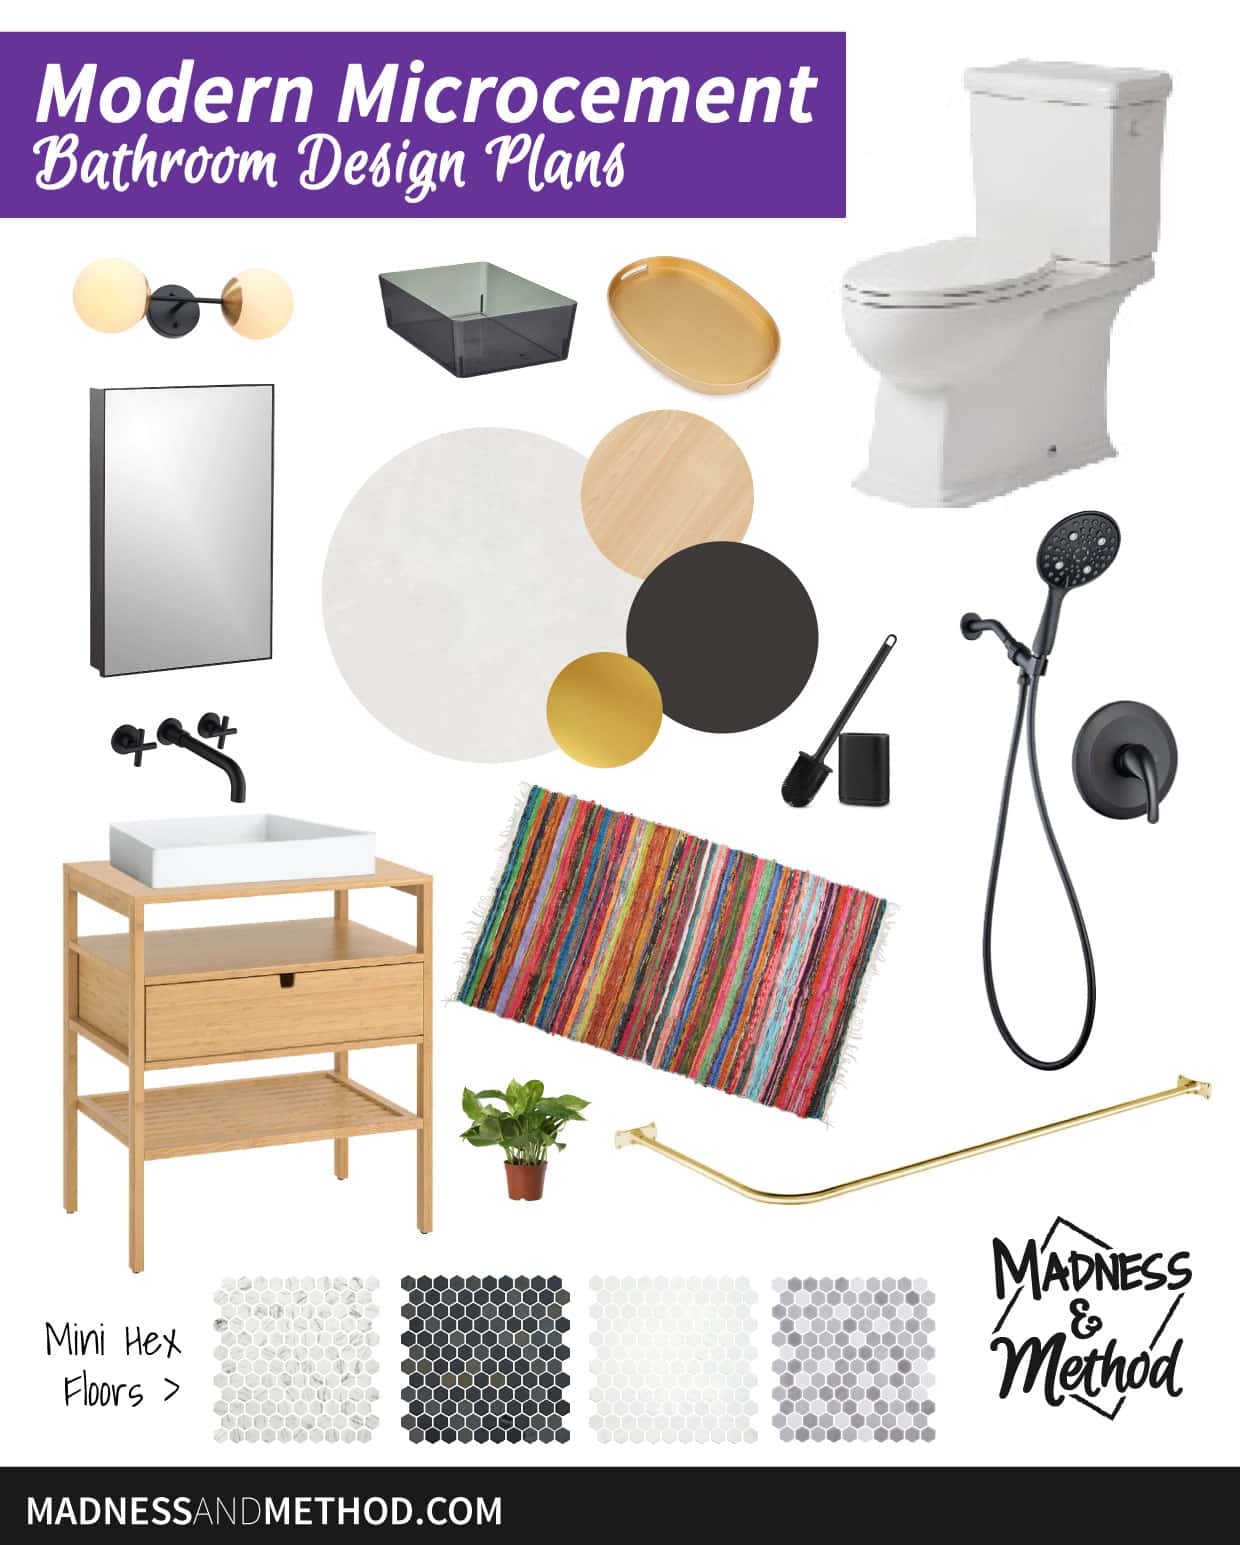
The biggest element of this modern microcement bathroom design will be the white microcement walls. The floors will be tiled with a small hexagon. The pattern is still TBD (see below for options!). The accent colours will be black, light wood, and gold. I’ve heard that matte black hardware is out – but I LOVE it still and it’s really the easiest to keep looking clean. The kids also heavily chose gold, lol.
PS: Chrome fixtures are the worst!
Some highlights:
- We’re going with the Nordkisa nightstand vanity, probably as-is
- Vessel sink
- Wall-mounted black faucet
- I think this light is similar to what I have already
- There is already an inset mirror in place
- I have a gold tray similar to this one
- Maybe we’ll get black baskets for the vanity
- I have a toilet brush like this already
- This is the shower fixture the kids chose
- We’ll have an L-shaped gold shower rod
- (Shower curtain TBD)
- And we’re reusing the same toilet we had
- Oh, and I also have a rag rug similar to this one
Flooring Choices
For the floors, I wanted to do a marble-look porcelain tile. Aka something that is hardy where the kids can walk/roll on without worrying about stains.
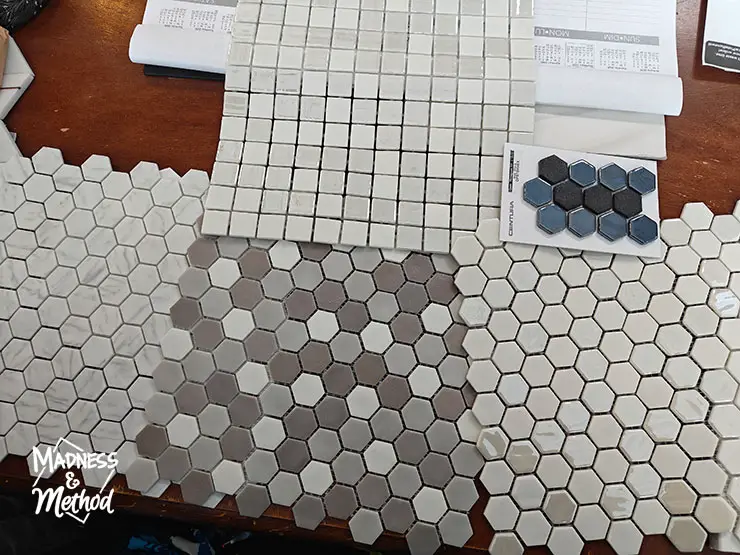
I picked up some samples, and the marble one was maybe a bit too white? But then the kids fell in love with black, which I don’t even remember choosing (ha) and now we are at a stand-still.
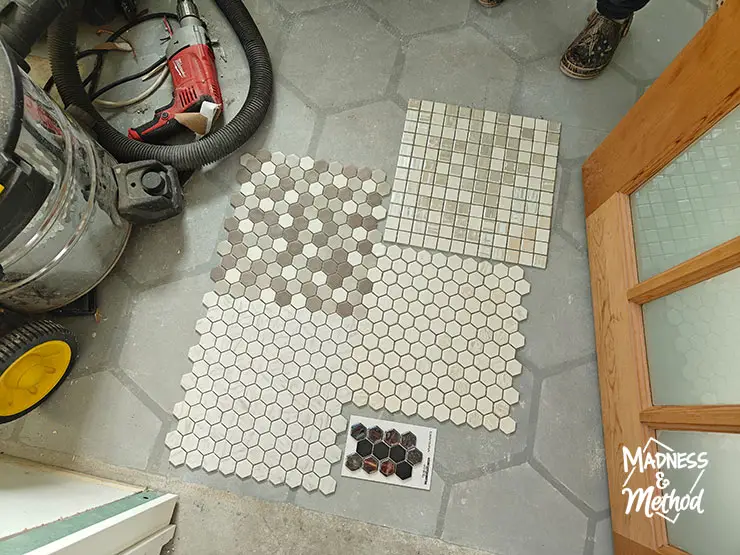
I think we’ll choose the floors once all the walls are done. That way I can tell what the tone of the white microcement will be, and go from there. (See how the ones on the right are a bit more yellow?)
I fell in love with the hex shape when I painted the floors in here. The small-scale hex is similar to a penny tile, but just a teensy bit bigger (and not round).
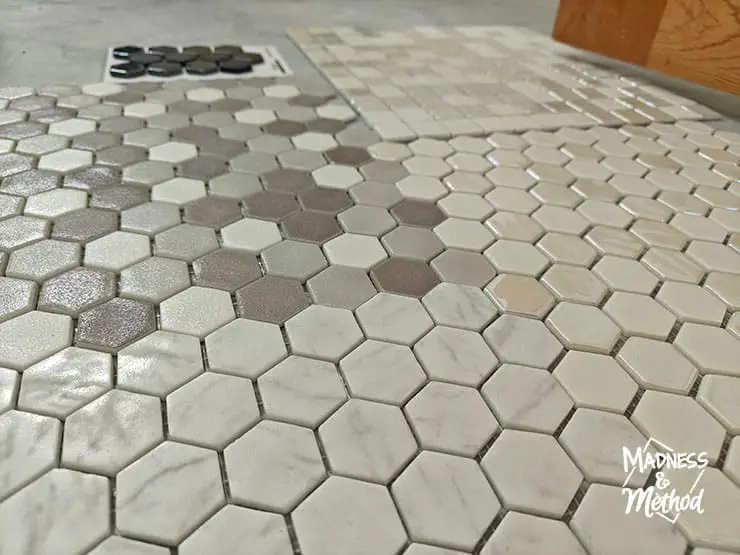
The tiles on the left are also more “grippy” if that makes sense. Which would be ideal for a floor!

And, for those upset about the bathroom vanity choice (most people liked #3!), would it change your opinion if I told you that this is the only vanity that will be in line with the mirror/light? The wider options would not have been centered, so could bother those perfectionists, ha.
Stay tuned for more bathroom updates!
And, make sure to follow on Instagram for some behind-the-scenes in Stories too.
Similar projects:
- Brother’s Black and White Primary Bathroom
- Glam Black and Gold Bathroom Moodboard
- Basement Bathroom Reveal’

Shop This Post 🛍️
Nordkisa Nightstand Vanity | Vessel sink | Wall-mounted black faucet | Similar Light | Gold tray | Black baskets | Toilet brush | Shower Fixture | L-shaped gold shower rod | Toilet | Rag Rug
No Comments