
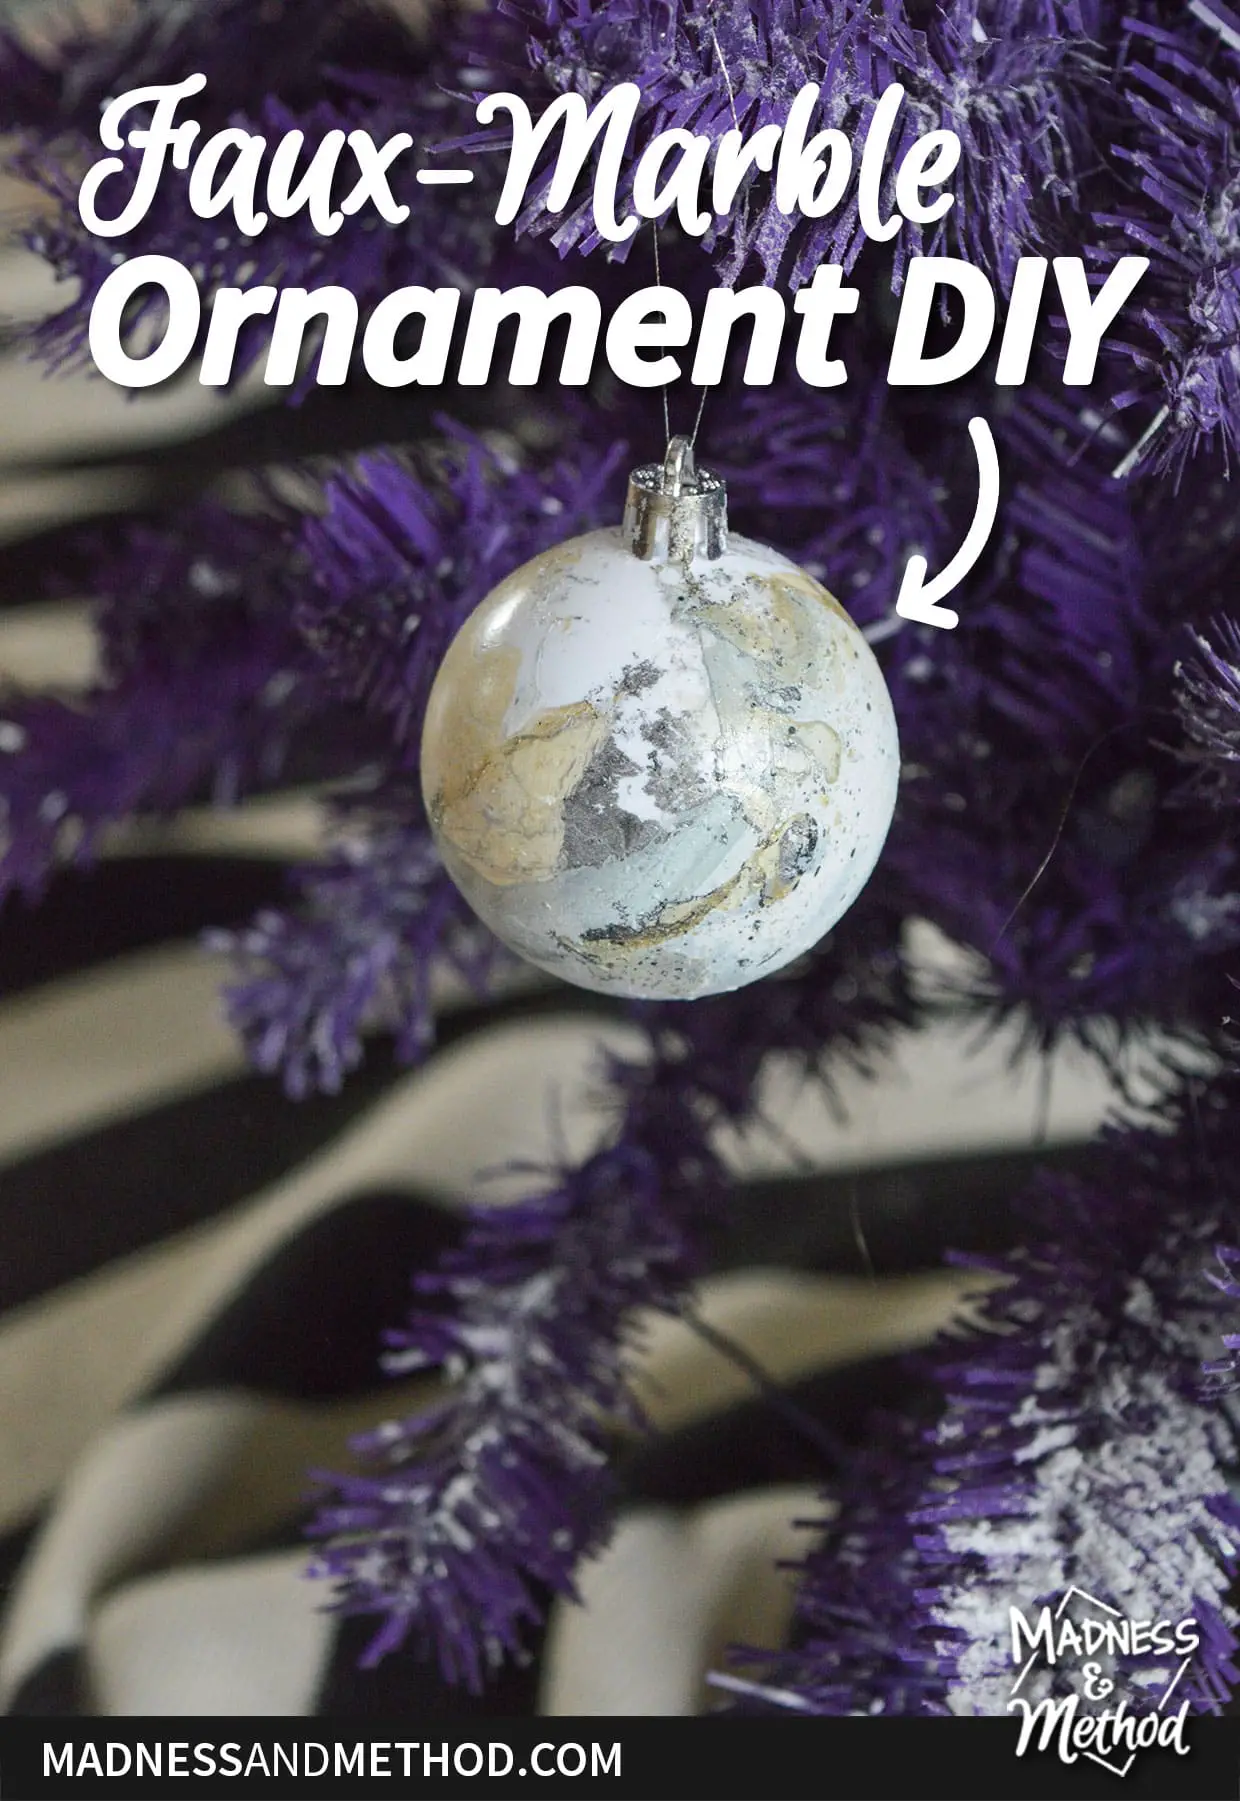
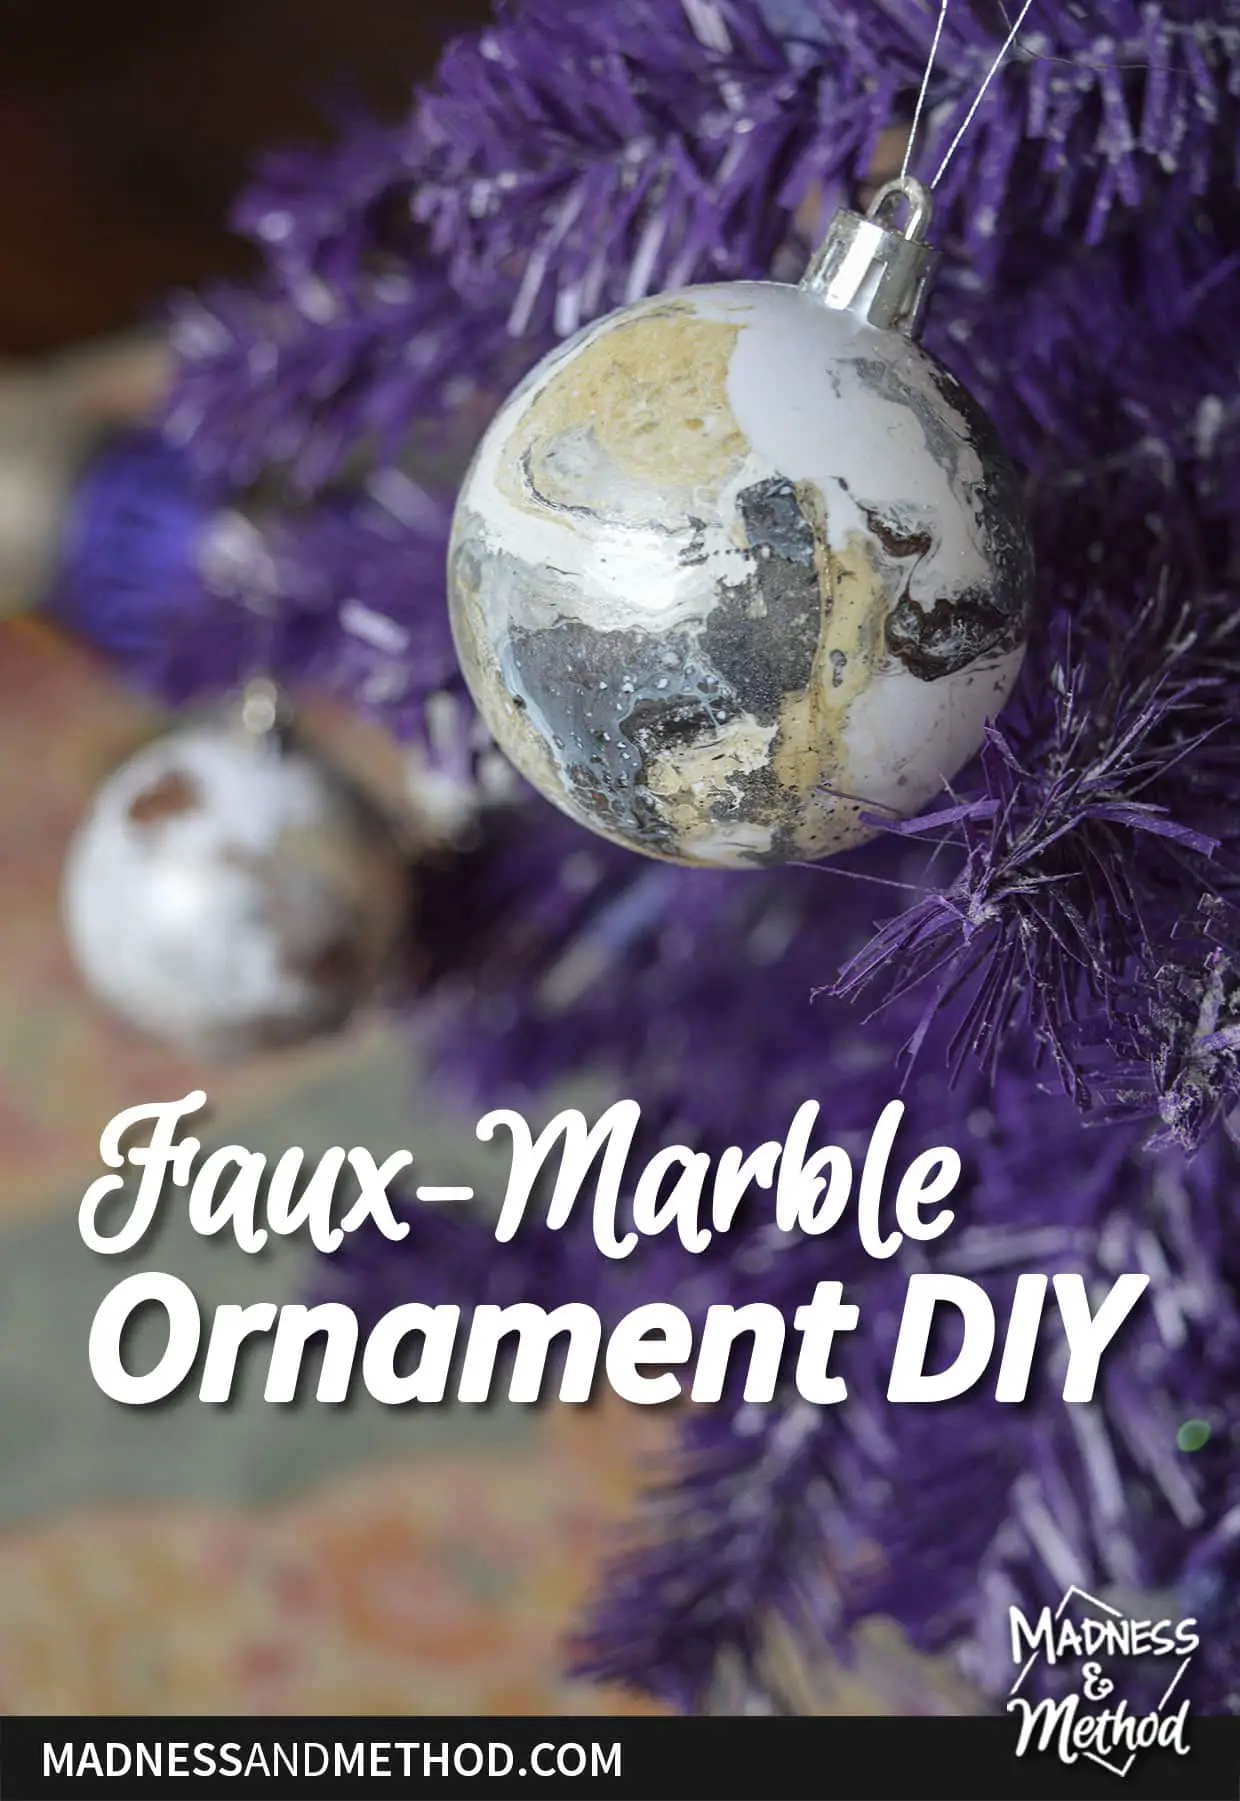
We’re continuing the Christmas in July theme with another ornament makeover! This time, a faux-marble ornament DIY inspired by some gorgeous balls I saw last year. This is a super quick project (it will take less than 15 minutes!) and you’ll create extremely unique marble-look ornaments. If you’ve ever wanted to try hydro-dipping, this is the project for you!
I fell in love with these china marble Christmas ornaments from CB2. They usually come back in stock around the holidays, but at 10$+ PER ball… they are a bit pricey. (Beautiful, but pricey). I knew I could make a knock-off version of the CB2 ornaments for a fraction of the cost.
I’ve thoroughly explored getting a marble look from paint, and I knew that doing a hydro dip would be the quickest and most realistic option. Here’s a video of me doing a faux-marble hydro dip on a vase – so essentially, I did the same thing!
What is hydro dipping!?
For those that don’t know (or didn’t click the video link above), hydro dipping involves painting the surface of the water and then dipping an object into it. The paint then transfers onto an object that comes into contact with the water.
What type of paint can you use for hydro dipping!?
You definitely want to use paint that sits on top of the water. Most water-based paints have a higher density than water and will sink down to the bottom (think acrylic craft paints, wall paints, etc). I used spray paint for my hydro dip since that’s what I’m used to. But you can also use nail polish or special hydro-dipping paint.
What colours should you use!?
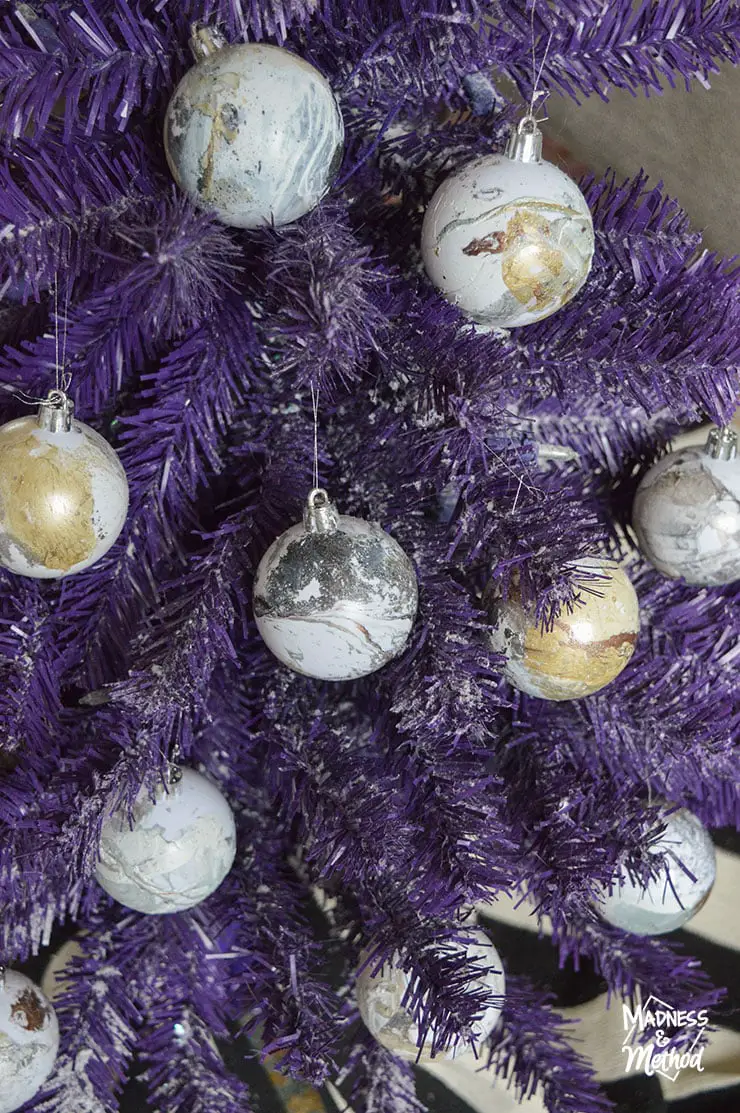
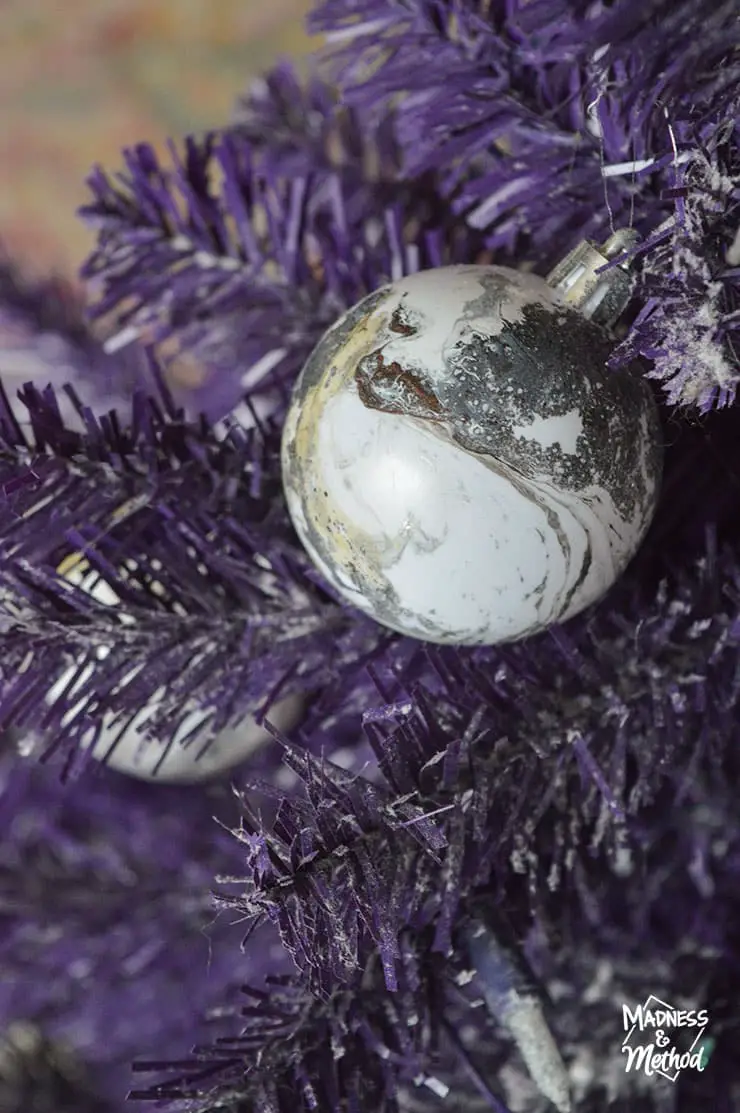
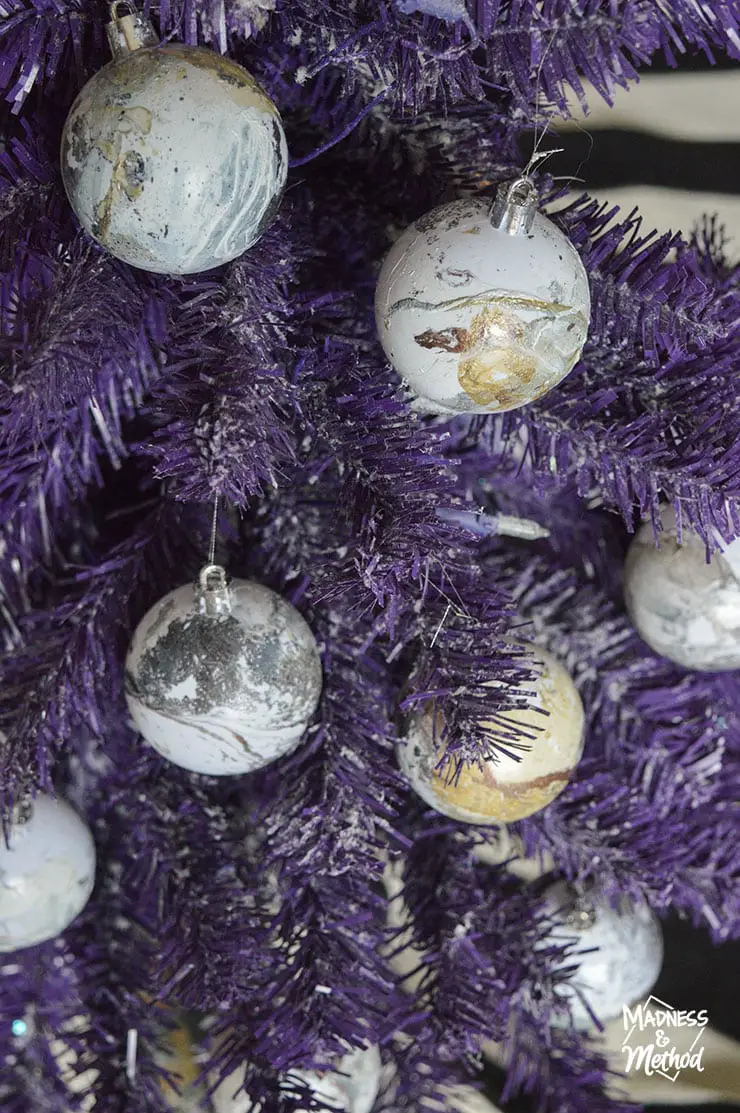
Use whatever colours you want to achieve your faux marble look! I used plain white Christmas balls and a combination of white paint, light grey, black, silver, gold and copper. You need such a minimal amount of spray paint, so feel free to use up any leftover cans you have.

Faux-Marble Ornament DIY
Ready to start this easy project? First, gather your supplies! As mentioned, you’ll need:
- Christmas ornament balls (or another object you plan to paint)
- Spray paint in the colours of your choice
- Old plastic tub (or container you don’t mind getting dirty)
- Water
- Rubber gloves
- Hangers/painters tape/hooks
- Suitable work area
Honestly, the most frustrating/difficult part of this project for me was dealing with the Christmas ball strings! It took longer to tie all the little strings than it did to complete this project.
AND some of the strings came undone after I tried to hang them. So my freshly painted balls went flying in my mulch/driveway rocks. Not cool…
Hydro Dip Step 1:
Add clean water to your container. It needs to be deep enough to fully submerge your item. Honestly, I could have used a smaller container – but this is my go-to so it was fine :)
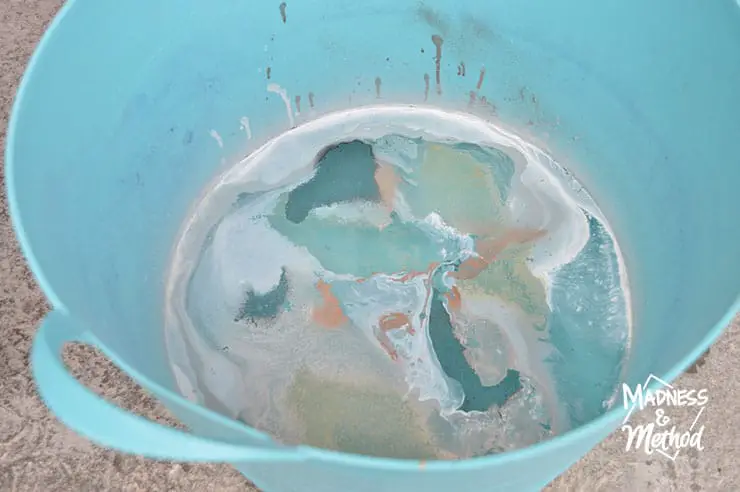
Hydro Dip Step 2:
Spray the surface of your water in the colours of your choice. I did a lot of white, then some smaller areas with black, grey, silver, gold and copper. You don’t have a lot of time to work with the paint before it hardens, so make sure to shake all your containers ahead of time, uncap them all and go quickly! You do not need to stir your paint to get the colours to mix.

Left: a ball that fell into mulch :( // Right: Thick goops from the hydro dipping
Hydro Dip Step 3:
Grab your ornament/object and dip it into the container of sprayed water. Twist and twirl it around, coming up in a different spot if you need to. I was able to get 2-3 balls done per spray before my paint hardened too much. If you find that your paint becomes hard, simply scrape it away and spray the surface again!
Have big goops of paint on your object that you want to remove? Do it quickly before it fully hardens. You can also squish the paint down while it’s drying.
Hydro Dip Step 4:
Let your objects dry before handling. Honestly, the paint is pretty dry after a few minutes, but follow the dry times on the spray paint just in case. If you have any big water bubbles stuck between the paint and the object, you can pop them with a little pin, or wait a few more minutes and then smooth them out with your hand. The paint will stay tacky until fully dry, so you can move it around a bit until then. If you have small bubbles, they will most likely evaporate as the paint dries.
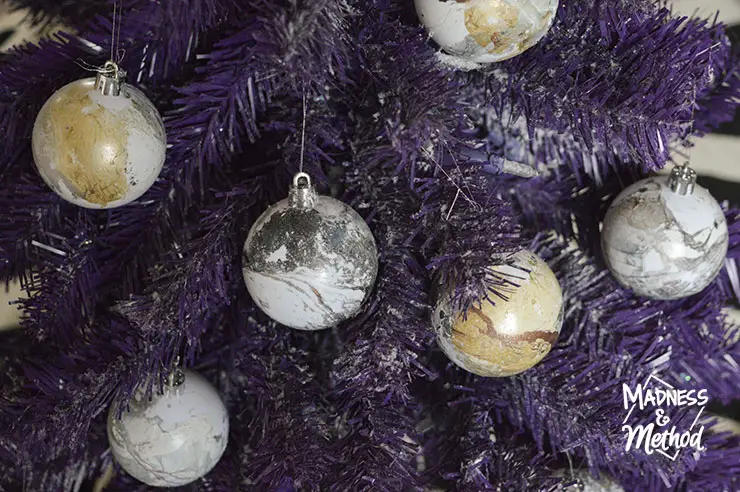
DIY Faux-Marble Ornament Results
I’m so happy with how my CB2-inspired marble ornaments turned out!
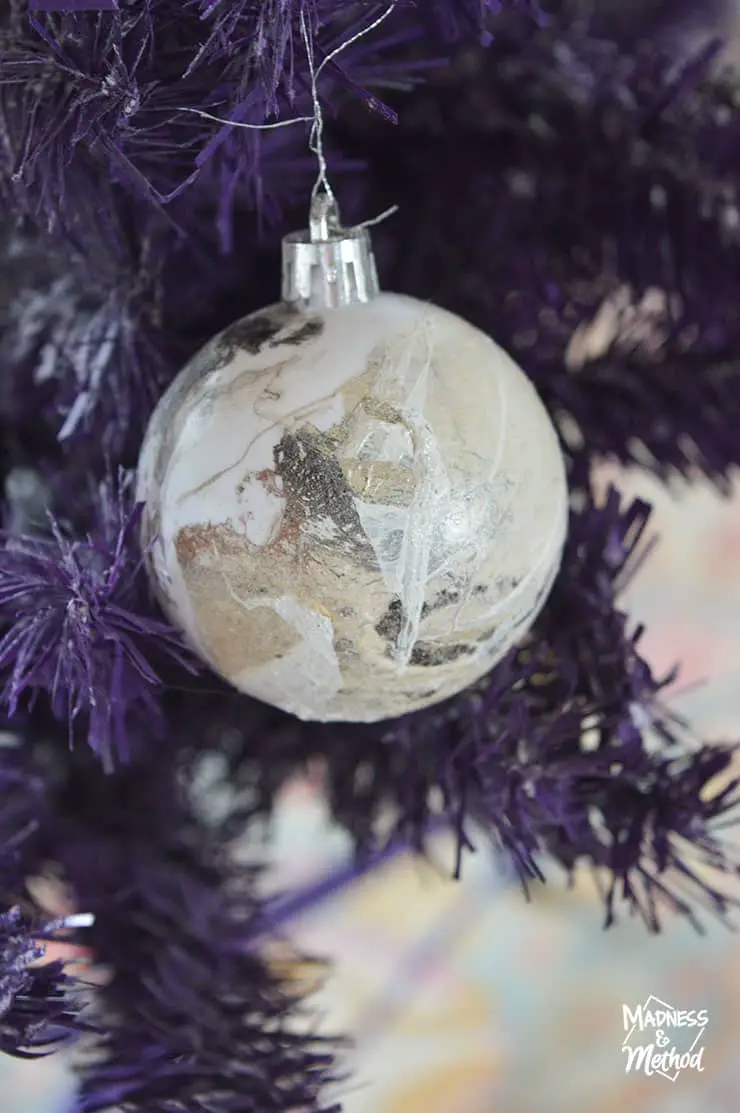

Each one is completely different, and they have the perfect amount of colouring on them. These, along with my new black glitter and spray-painted ornaments, will look so good on my black and white tree this year!
I’m still contemplating doing one more ornament DIY, but I think I’ll wait until I have everything up on the tree before I decide :) (You know, at regular Christmas time, ha!)
In the meantime, these are amazing!
Did you enjoy this faux-marble ornament DIY? What about hydro dipping? Would you try it out!? Or, would you attempt a hydro dip project on something else first? Remember, you can always experiment with something free to test our your technique/colours.
Looking online, there are other marble-look ornament projects that involve dripping paint into a clear ornament. That could totally work too – but you’d need to get the clear balls first. At least with this project, you can use balls you already have!
Related Projects


No Comments