
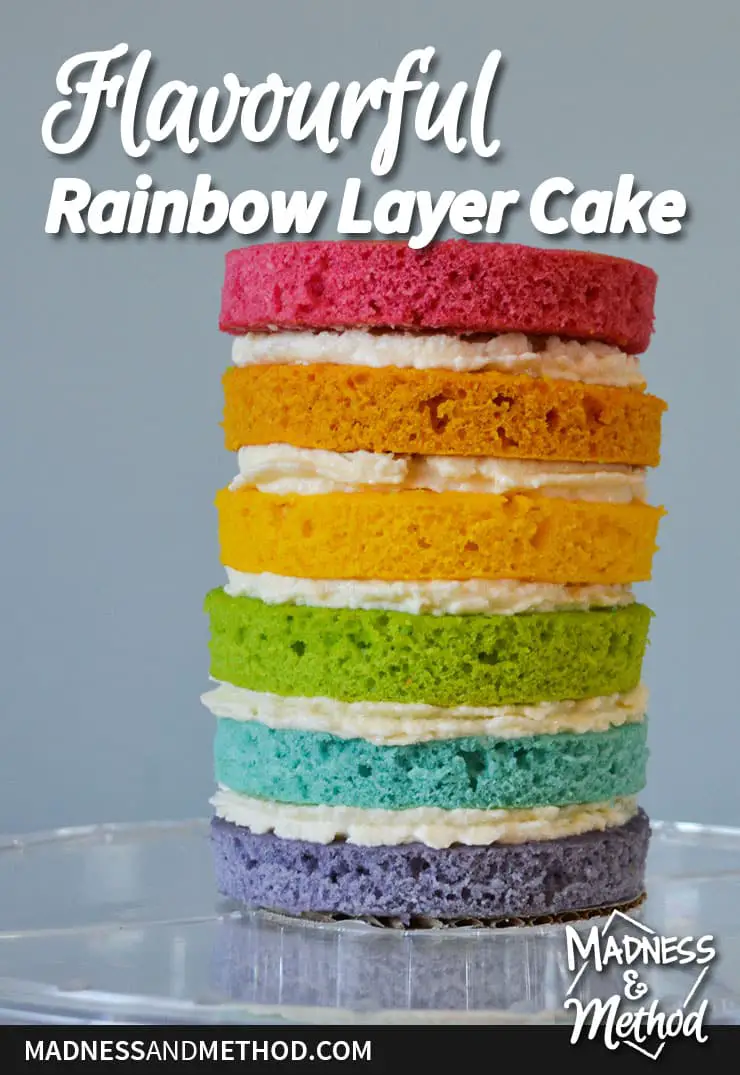
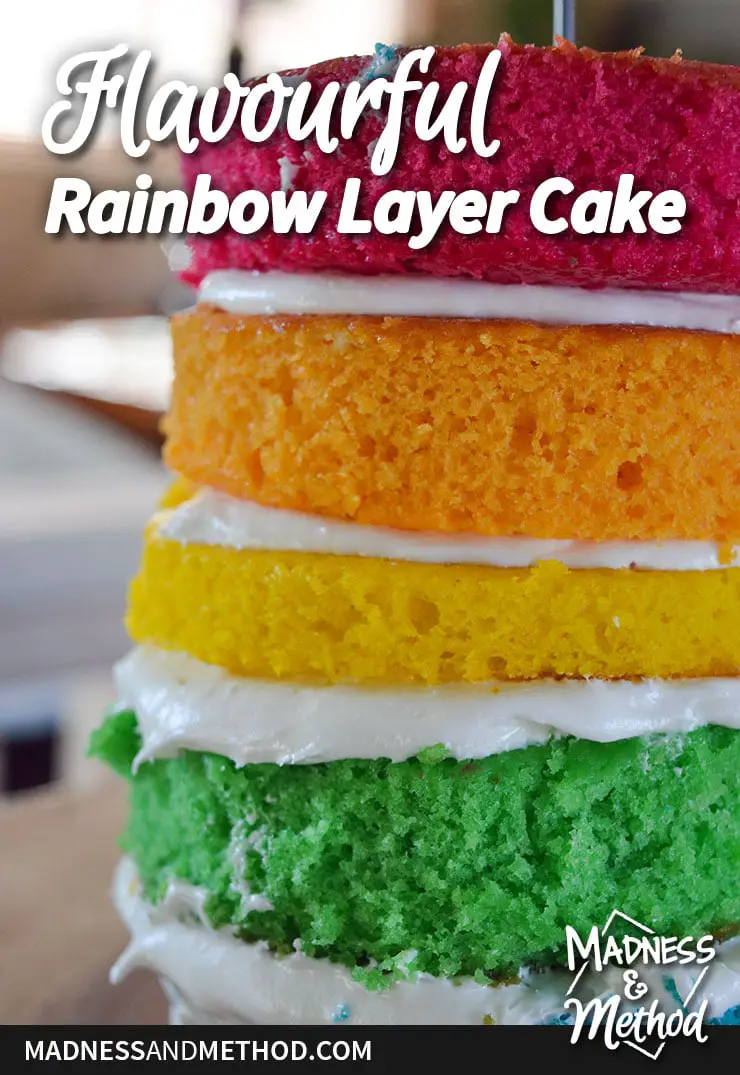
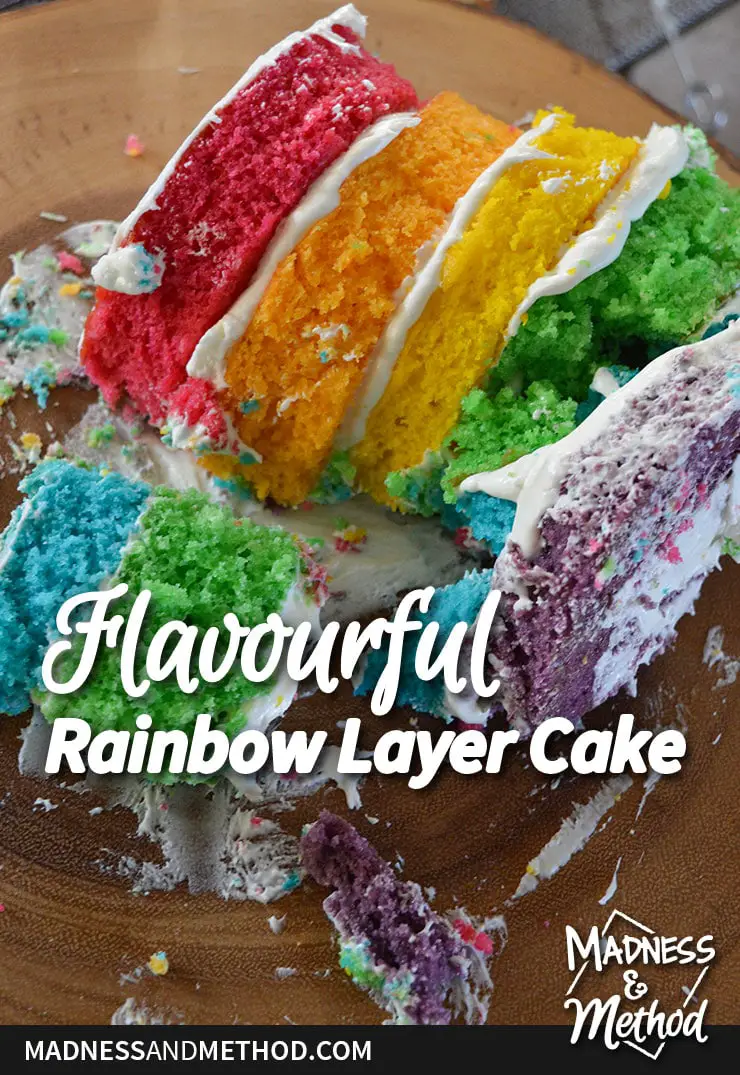
I’m back today with another cake recipe! This time, I attempted to do a flavourful rainbow cake with exposed sides. I definitely nailed the flavourful part, but the construction needed a LOT of work, ha! Either way, let me share this yummy cake recipe with you (along with some tips to make it better).
– Note: This post contains affiliate links. See more information about affiliates here. –
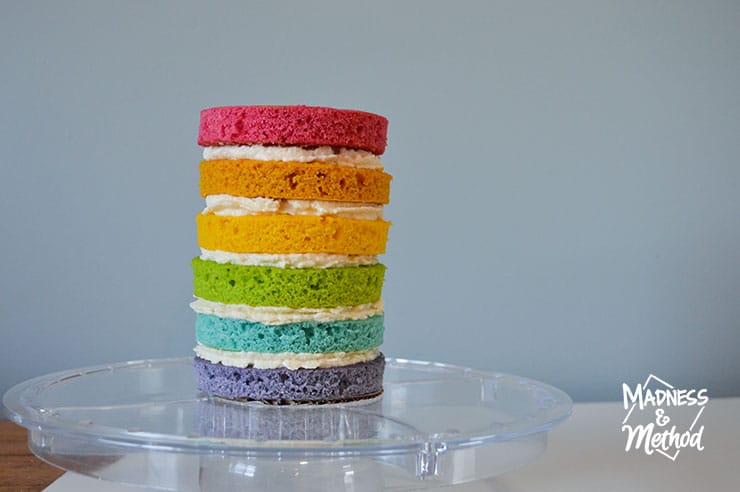
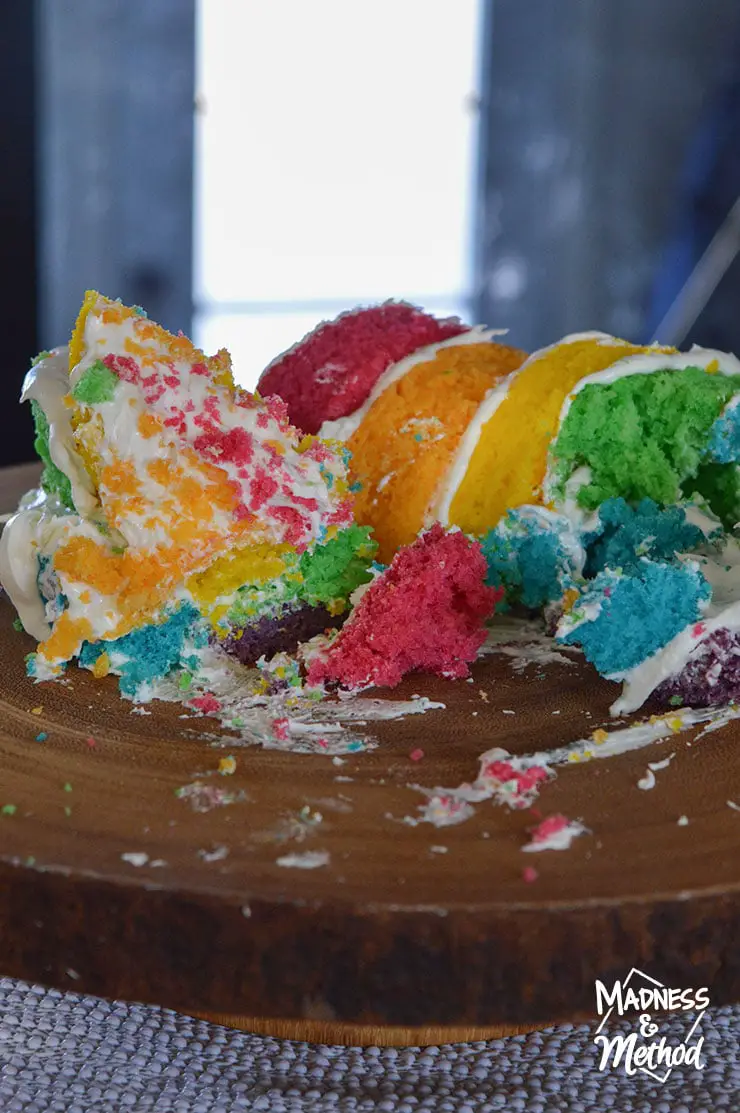
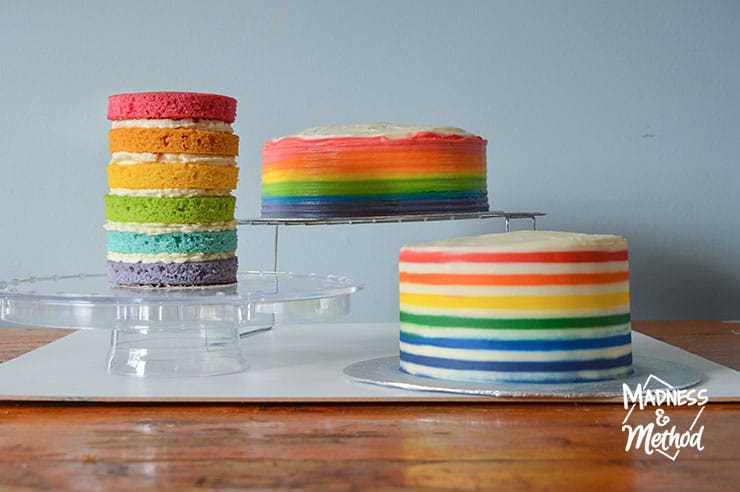
This was my first stab at doing a layered rainbow cake, but it’s not the first time I’ve eaten one :) I love rainbows, and a few years ago my friends surprised me with a rainbow birthday party. For this rainbow cake, I wanted the sides to be exposed (ie: no icing on them). It’s going to be one of my cake trios for this year’s charity cake auction. (This will be my third time).
PS: This post was written before I figured out the perfect size/stacking/icing. The cake recipe is the same, but I’ve updated some photos with the final cake.
I modified a regular white/vanilla cake recipe to add both colour AND flavour to each of the cake layers. That’s right, not only does the cake look good, but each colour has a distinctive/matching taste too.
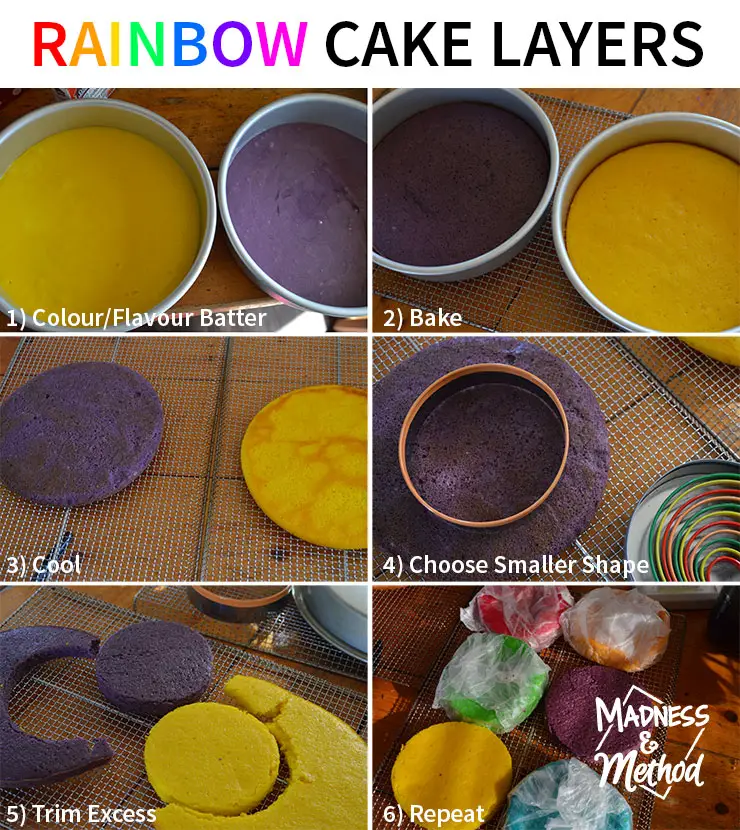
Here’s a recap of the baking process:
I made the first four layers a while ago, wrapped them, then froze them until I was ready. This past weekend, I made the last two layers and assembled my cake. (My birthday is coming up, so it made sense to have a cake).
Baking Tips
When you make a regular cake, the edges tend to get a bit brown. If you plan to ice your cake, you don’t have to worry about that. BUT I wanted exposed layers, so I decided to cut out a smaller circle (4″) from the inside with the big cutter here.
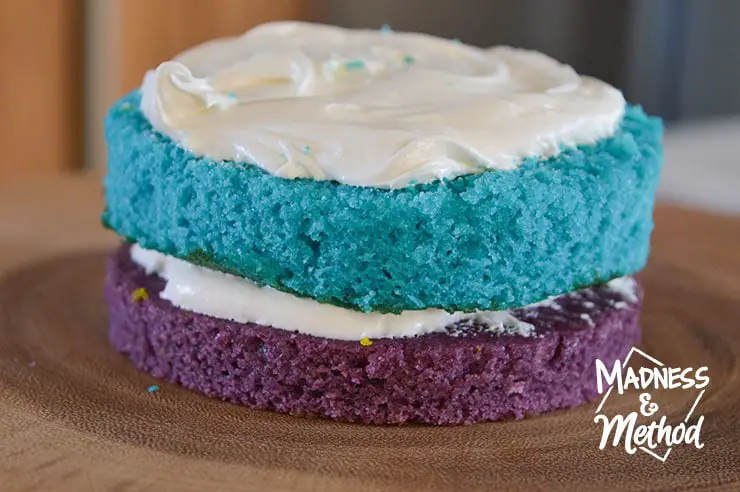
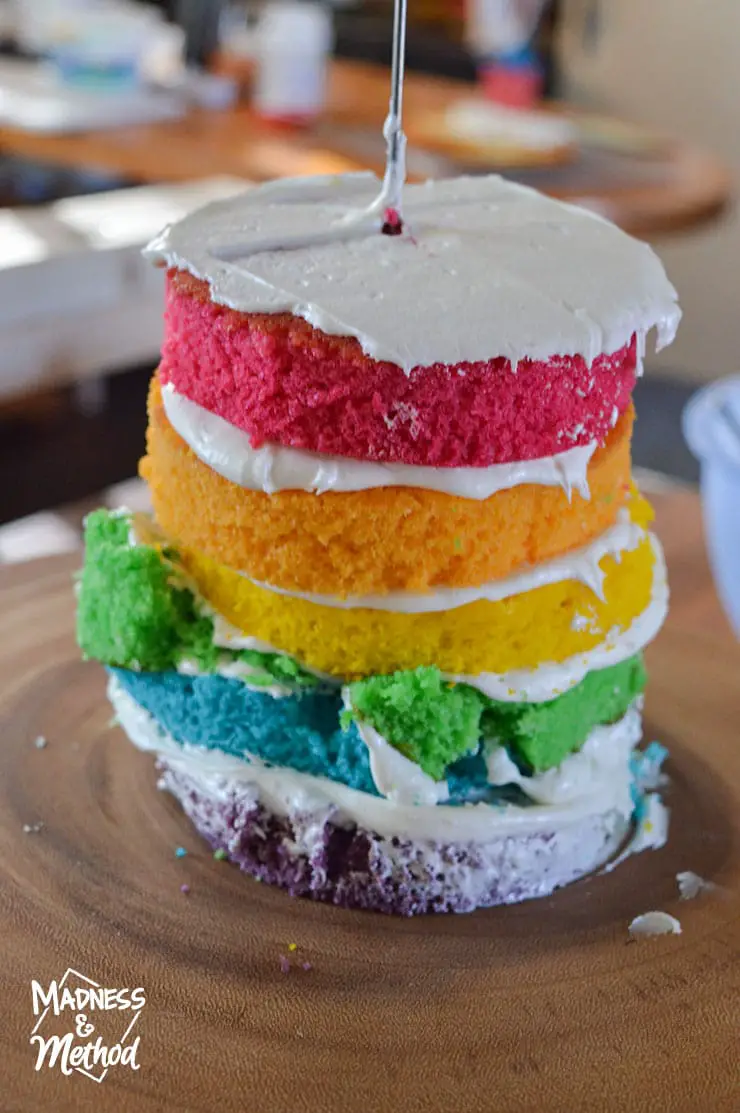
I made the first four cakes in a 6″ pan, and they were just over 1″ high after cooking. That was with approximately 1 cup of batter (the full recipe is below). I experimented with baking the last two layers in 8″ pans, and they were around 1/2″ high. (In the image above, the purple layer is smaller than the blue one).

Next time, I think I might bake the cakes in the 8″ pans, then cut them to about 6″ wide? Not sure if my cake was too narrow, or too tall (or a combo of both), but it tilted a lot. I’ve never used supports in my cakes, so I may need to look into that!
I found a random metal skewer earlier that day and tried to use it to hold the cake together. By the time I added the top layer of icing (I was attempting roses with a 1M tip), it was wayyyyyy too unstable.
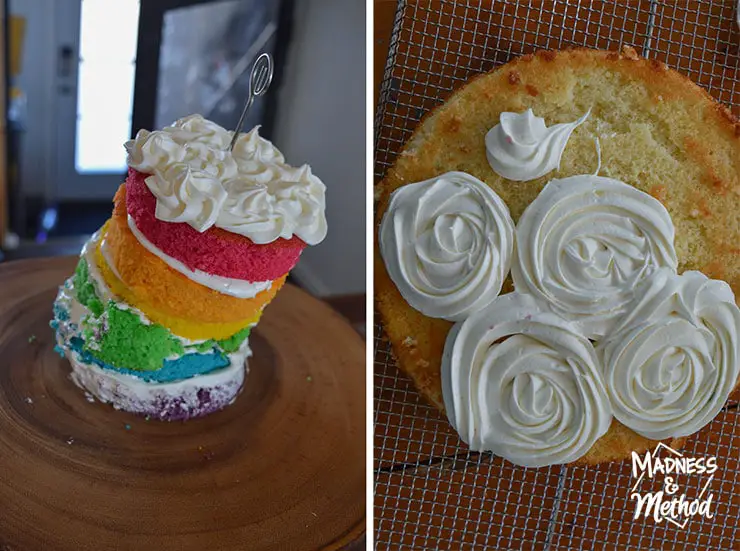
I also had another vanilla/plain cake layer, and the roses turned out much better there.
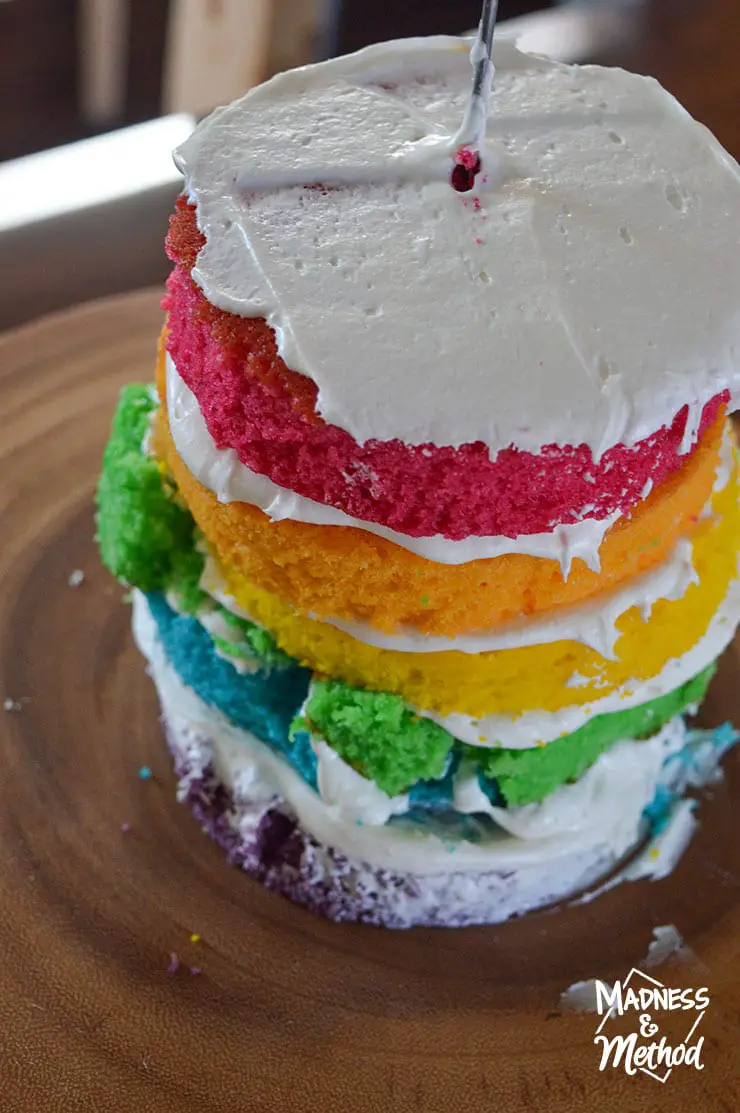
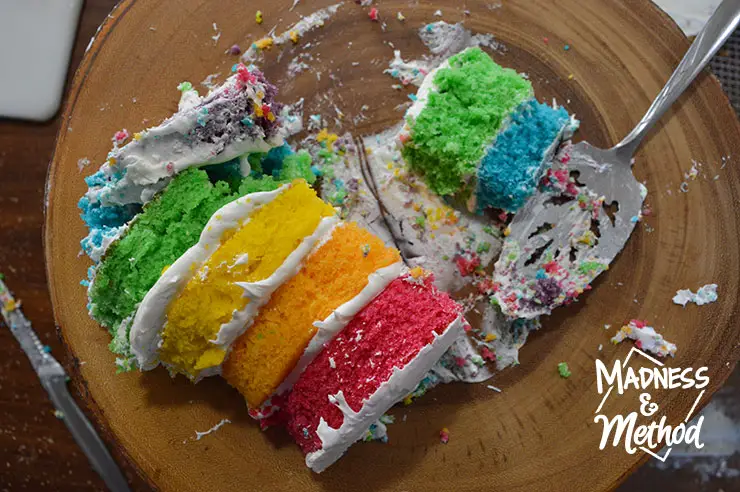
Scraping off as much of the icing as possible, the cake was sort of better. It probably also didn’t help that my green layer was in pieces before I even started. (Zachary thought he would just take a few bites before I froze it…).

Oh, and if you weren’t aware – we’re in the middle of a kitchen renovation and don’t have any counters installed. And we had just gotten our new stove the day before!
Flavourful Cake Layers

Either way, the kids loved the rainbow cake! I’ll probably be using 95% of the same recipe/flavour combinations, but might have to switch up the icing. I did a marshmallow fluff icing, based on this recipe, and I’m not sure if it was stable enough.
It was delicious though…
So, want to know which flavours were in each layer?
Red: Koolaid Cherry
Orange: Koolaid Orange
Yellow: Presidents Choice Lemonade (possibly similar?)
Green: Mio Lemon Lime
Blue: Mio Berry Burst (couldn’t find it online, but here’s a possibly blue Koolaid)
Purple: Mio Berry Pomegranate
The Husband always has a “squirt squirt” bottle or two around (that’s what we call them, or just squirts). After experimenting with adding flavours to my icing (the blue in the summer cake), I figured it could be done to the cake batter too.
The squirts also add colour, so I had to make sure to choose flavours that wouldn’t alter the colour too much. (It was trickiest for yellow, a lot of the yellow-sounding flavours were orange).
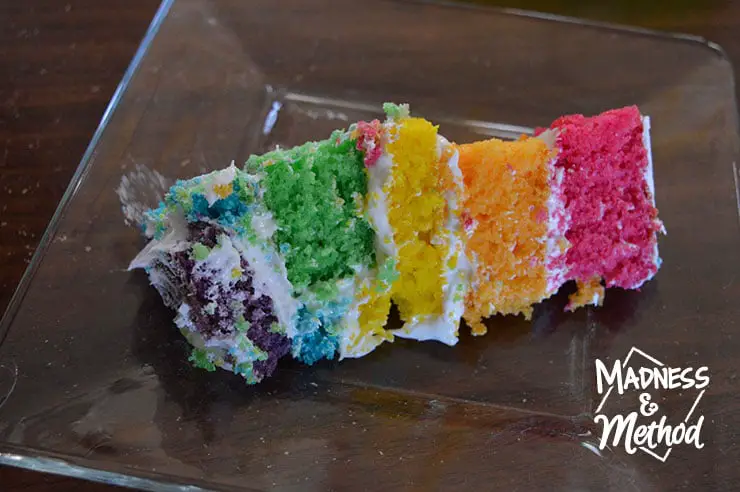
You can definitely taste the individual flavours in each layer. I would for sure use this method if I wanted to flavour a whole cake with something funky.
I really like how the colours turned out too! The yellow is the only one that I used a gel for, and the rest were all liquid food colours. I was worried the orange was too yellow, but it looks great all together!
If you don’t consider the structure/stability that is. Oh, and once I cut one slice, it was pretty much done for.
Here’s the recipe if you want to recreate this flavourful rainbow cake:
Flavourful Rainbow Layer Cake
Want a cake that is fun and delicious? This super easy recipe for a flavourful rainbow cake has bright layers that each taste different!
Ingredients
- 3/4 cup butter (1-1/2 sticks), softened
- 2 cups of sugar
- 3 eggs
- 1 tsp vanilla
- 3 cups flour (I use unbleached)
- 1.5 tsp baking powder
- 1 tsp baking soda
- 1/2 tsp salt
- 2 cups buttermilk (I always make mine with milk and lemon juice)
- Colour and Flavour Squirts as needed
- Frosting
Instructions
Preheat oven to 350ºF
(Prepare buttermilk if making)
Cream butter and sugar in a large bowl
Add eggs one at a time and mix, add vanilla
In a small bowl, combine the flour, baking soda, powder and salt
Mix the flour bowl alternatively with the buttermilk and mix well
Separate into six smaller bowls (about 1 cup of batter each)
Add 1/2 tsp of food colouring and 1/2 tsp of (matching) flavoured squirt to each bowl
Beat each one individually until flavour/colour is mixed
Pour the different colours into greased round 6" or 8" pans (see notes in the blog post)
Bake for 22-28 minutes, or until a toothpick comes out clean
Cool on a wire rack, then frost and layer as needed (cut off brown sides if wanted)
Notes
Read the cake flavour combos used in the "Flavourful Cake Layers" section This recipe can make 3 proper, 8" round layers if not separated into 6 bowls
What do you think of a rainbow layer cake? What about an “unfrosted cake”? I’m definitely going to experiment with making taller cakes now. But I’m still undecided if I’ll do a 6″ wide cake or a 4″ one. I guess that might depend on how stable I could get it, ha :)
Next time I share a cake, I’ll attempt a rainbow ombré icing. If you don’t know, I’m doing a trio of rainbow cakes for a charity cake auction in a few months. I want to do a naked rainbow cake (like this one, but better, ha), an ombré, and a rainbow-striped icing. I finally nailed the striped icing for my winter cake, so let’s hope I remember how to do it!
Wish me luck :)
PS Here’s how they turned out:

No Comments