
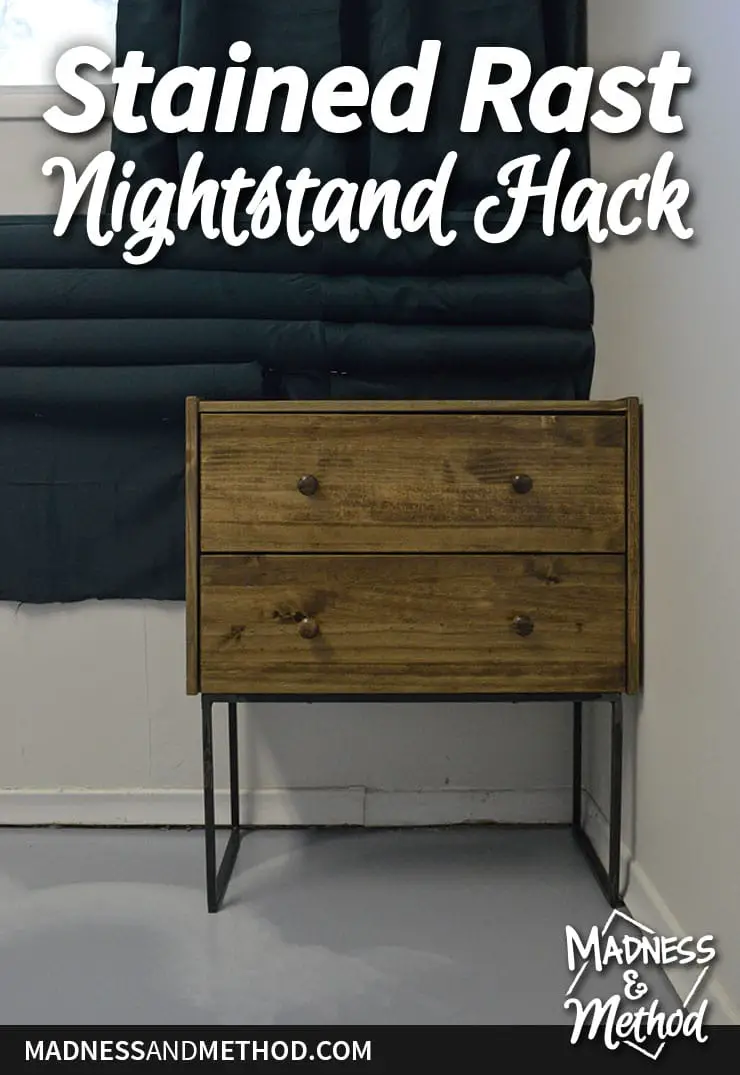
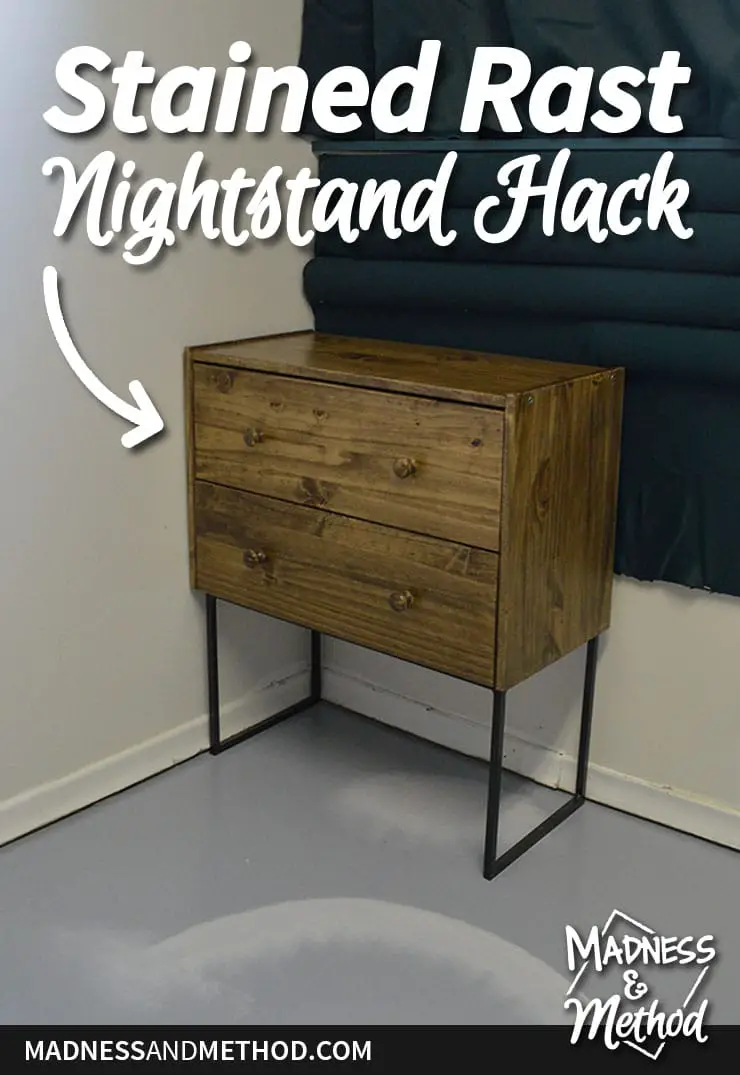
This week, I completed a project I’d been delaying for months! It was way back in March that I hacked an Ikea Rast dresser to make two nightstands. Then I decided to do another one to make 2 matching pairs. I even had the Rast Dresser sitting in the box waiting :) Well, wait no more, because today I’m sharing how I completed my two-drawer version for the guest bedroom. Plus, I made a video of the process, AND I think I know how I’ll finish the other ones too.
– Note: This post contains affiliate links. See more information about affiliates here. –
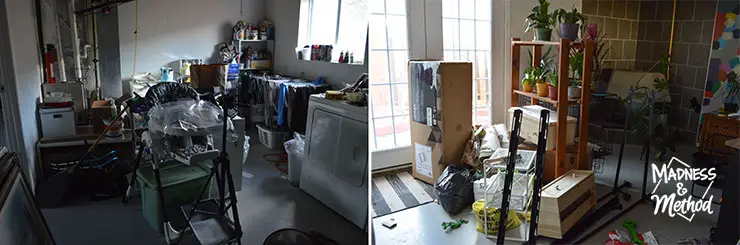
If this were a typical One Room Challenge, we’d be done by now! Thankfully, we still have a couple of weeks for my basement refresh. As a reminder, our raised ranch basement started out like this! (Although, it still is that messy, if not more). Anyways, in the second week, I removed old vinyl flooring, in the third week I painted the entry and in the fourth week, I removed the carpet in the bedroom. Last week, I shared the wall-mounted headboard and some painted hex tile floors.
I think that’s it for recaps, so let’s get straight to what’s new!
This post was originally titled “Cloud Floors & Stained Nightstands (ORC Week 6)”. It has been split into two posts, read about the Painted Concrete Cloud Floors here!
Check out the construction of this Ikea Rast nightstand hack here. I purchased a second dresser a few months ago, and finally got around to finishing this project!
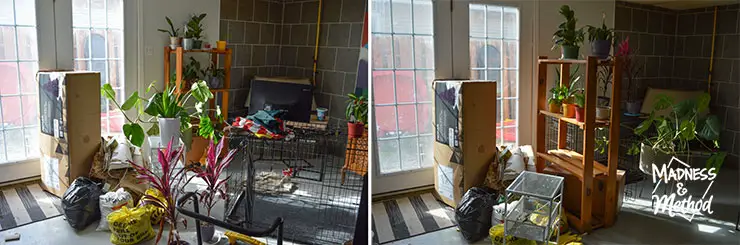
And, after WEEKS of shimmying around the dog crate in the middle of the floor, I decided to move that too. You can’t really see it in the photo on the right… but it’s next to the fireplace. I think I’m going to move the wooden shelf to the guest bedroom closet – just waiting on a shelf for my plants.
Ikea Rast Nightstand Hack
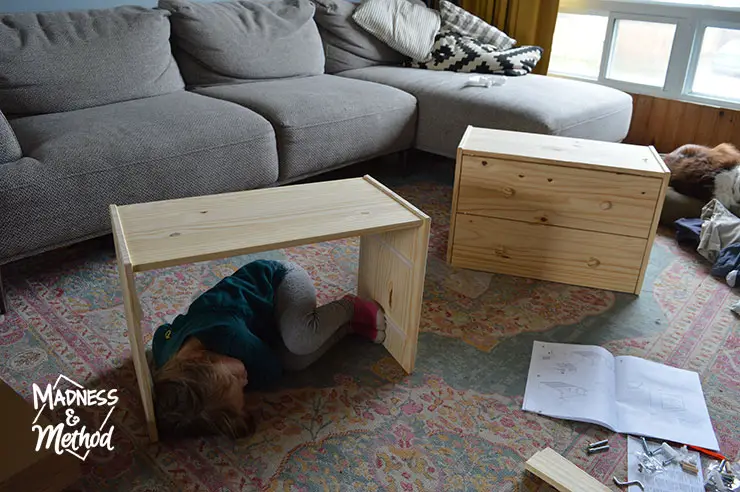
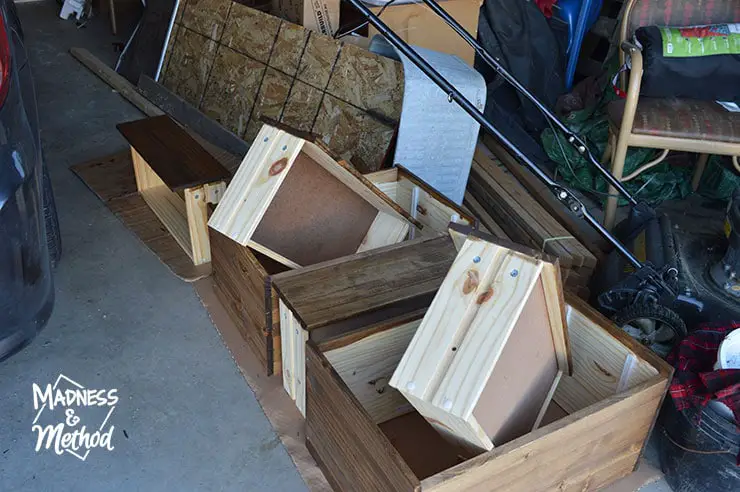
For my Ikea Rast hack, I compared my original version and copied that. I made a video this time and included some tips about how to make it better.
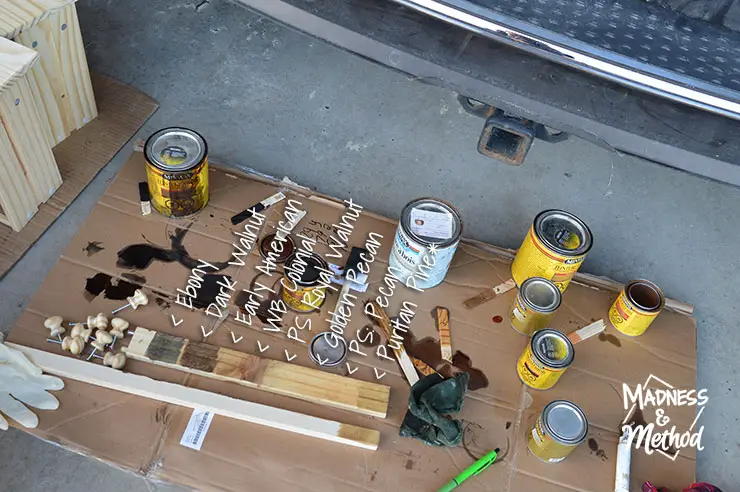
Once both styles were made, I tested all the stain colours I had. Another goal for my basement refresh was cleaning out my paints/stains stash. So I decided to mix and empty one of my containers. I did an approximate mix of 45% Early American, 45% Golden Pecan and 10% Dark Walnut.
Recreate This Look
- Ikea Rast Dresser
- 48″ Project Board
- Stain/Paint/Clear coat of choice
- Optional: Metal Bases
- Misc Tools: circular saw, paint brush, measuring tape, screwdriver, etc.
- AND more details available in the original blog post OR the Youtube video (embedded below)
The poll on Instagram Stories, had the most votes for a middle option. I think I’m going to mix the two PS (polyshade) colours for my single-drawer nightstands (that we’ll use at the cottage). I honestly don’t like those, so hopefully, that will help use them up. (And I wanted a more natural colour, so that should work since they don’t do anything much!).
OH and I did like the WB (water-based) colour, but that’s the same one I used for my VERY similar nightstands. I wanted something a little bit different this time. Finally, I think the Puritan Pine was a mix that I used on our countertops, so it’s not really that. It was reading a little green on the pine, and with green headboards, I wanted something with more contrast.
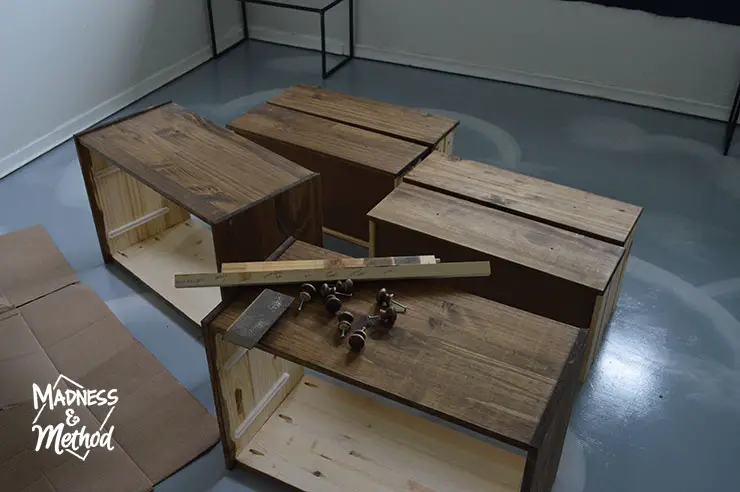
Once the stain dried outside, I brought everything in to add a couple of coats of Polyurethane. Luckily I had plenty of space in the empty guest bedroom :)
From there, I just had to screw onto the metal bases.
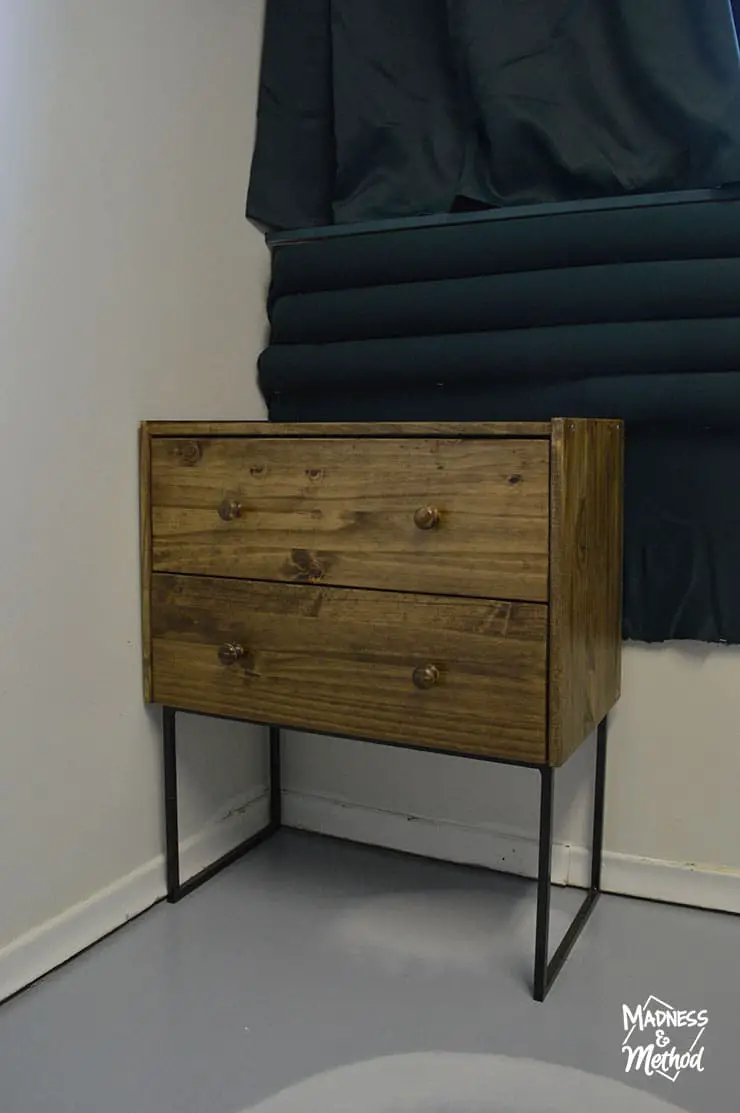
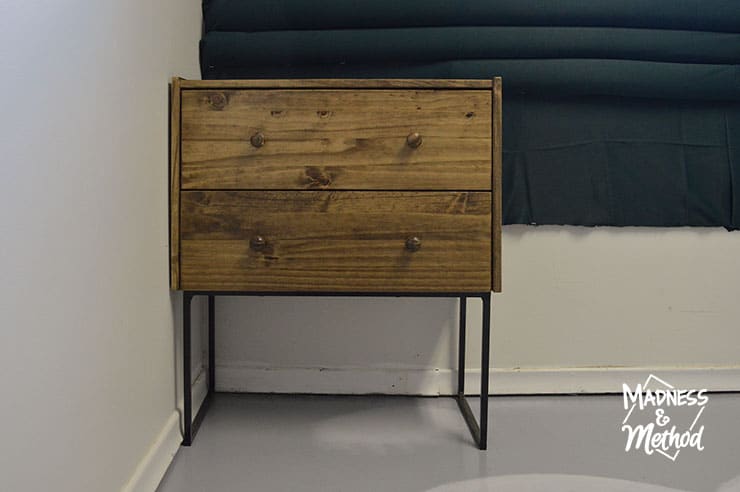
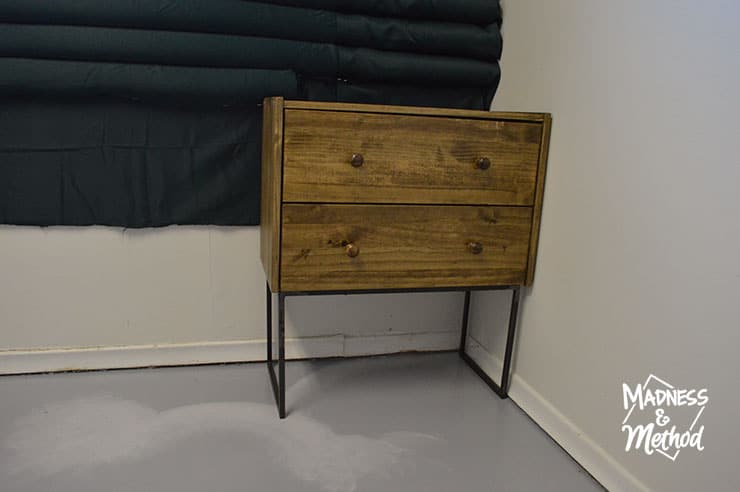
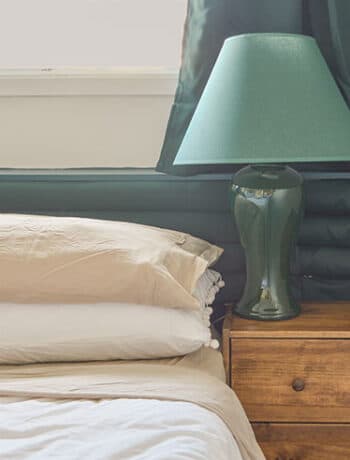
I find the colour looks a bit yellower with the fluorescent lighting. But otherwise, they’re cute (and done!).
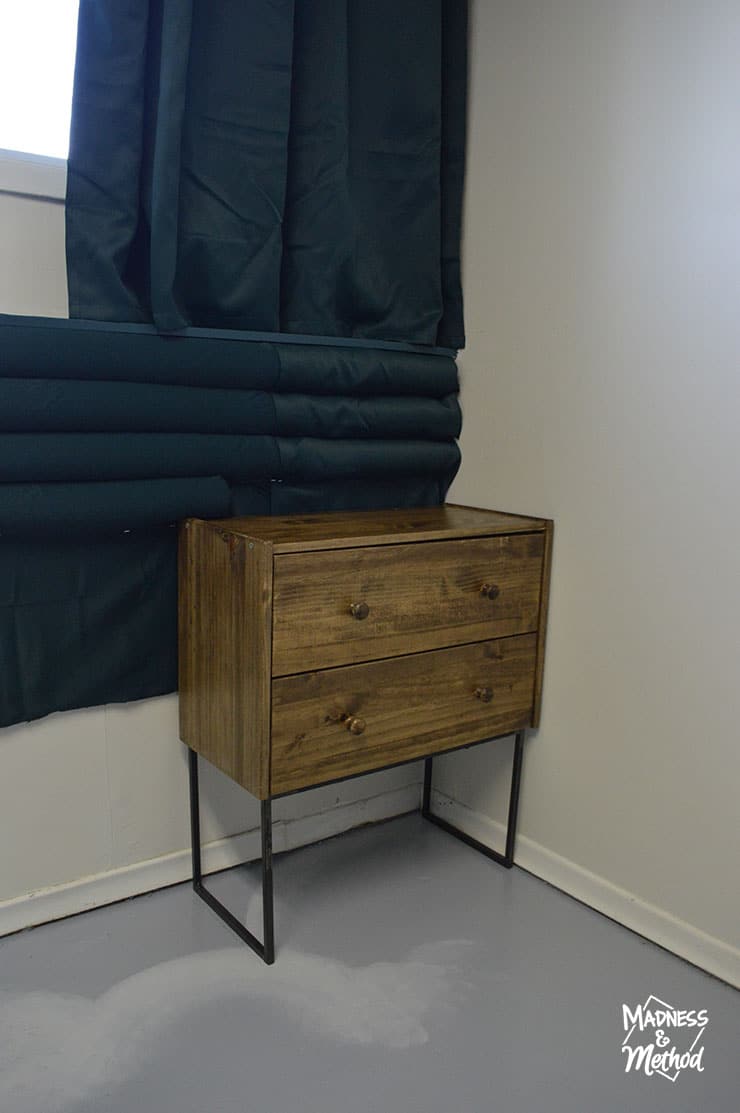
Now our guests will have plenty of space to store their clothes. (My mom did request drawers). And, the metal base allows easy access to clean underneath!
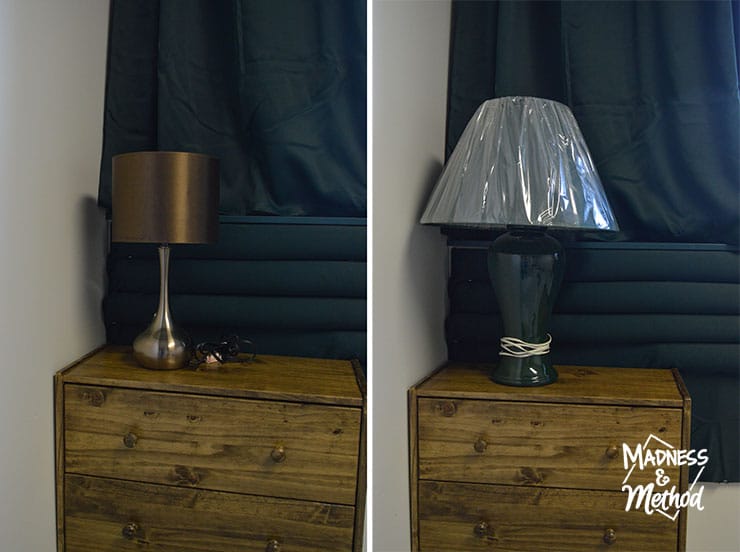
Oh, let me know which lamp option you prefer! The copper on the left, or the green on the right (just imagine no plastic). The ones that I don’t use here will go to the cottage.
Either way, I can’t wait to get the frame built and START ORGANIZING!
Hopefully, the basement will look a little less like this!
Check out the nightstand video below for more details :)
Ikea Rast Hack to Nightstands Video
And, let me know how you think this project is going so far!
About the One Room Challenge
Check out all 20 One Room Challenge featured designers and hundreds of linking participants!

Follow my basement project:
Basement Reset BEFORE (ORC Week 1)
Removing Old Vinyl Flooring (ORC Week 2)
Painted Basement Entry (ORC Week 3)
Removing Carpets & Painting Concrete (ORC Week 4)
Wall Mounted Headboard & Hex Floors (ORC Week 5)
Cloud Floors & Stained Nightstands (ORC Week 6 – now!)
And my budget breakdown:
2nd Week: – 2.95$
3rd Week: – 7.20$
4th Week: + 29$
5th Week: – 49.48$
This week I purchased wood for the nightstands at 40.67 and a pot for 7.90 (I didn’t include the Rast price since I bought it months ago and will use it at the cottage too).
Total: 79.20$ spent so far
I’m happy that I FINALLY finished the nightstands that I started so long ago. I was originally going to have two mismatched ones but decided to make another set. Now, we’ll have plenty of storage for our guests, and our cottage will have similar nightstands too.
Did I ever mention that the Husband thought the bedrooms at the cottage were a perfect ORC Fall project!? Ha, we are NOWHERE near being finish-ready there. We don’t even have the plumbing/electrical/HVAC yet. So that means no insulation/drywall/floors. This wasn’t my first rodeo waiting on contractors for an ORC project, and I wasn’t making that mistake again!

No Comments