
And this is where I am so grateful that the One Room Challenge got extended to 7 weeks this time, instead of the usual 6! I mean, I would have definitely hustled harder to get it done if we were on the original deadline, but it might not have been as good… Even though we’re still not done the garage, I did manage to get some tasks completed this past weekend, and am hoping I will need just a few more days to get this space completed!
– Note: This post contains affiliate links. See more information about affiliates here. –
A reminder that I’m doing this garage makeover as a linking participant in the One Room Challenge (there are also 20 feature bloggers, so you’ll get to see a LOT of makeovers if you click-through).
Anyways, here’s a recap of where we have been:
Week 1: Garage Photos and Intro | Week 2: Garage Design Plans | Week 3: Empty Garage + To-Do List | Week 4: Painting the Garage | Week 5: Our Garage Concrete
But let’s get right into some photos, (then I have the updated to-do list after that)!
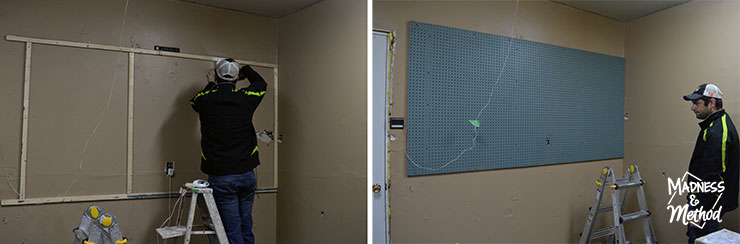
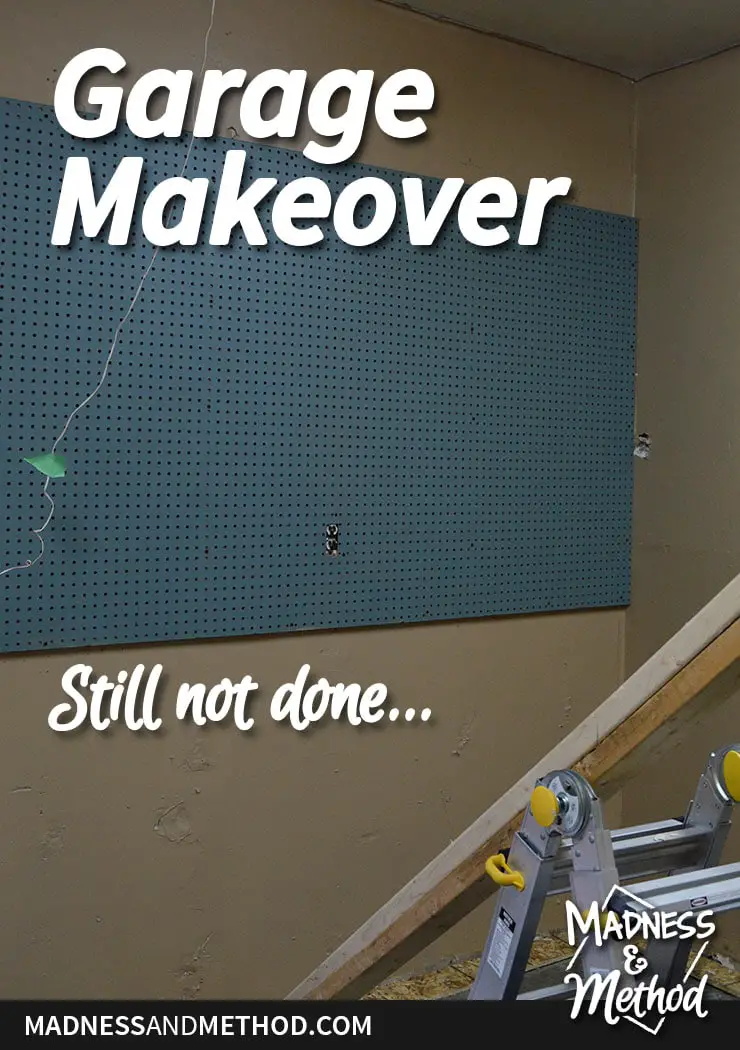
We installed the pegboard using some pieces of strapping into the studs. Emy from Semigloss Designs has a great tutorial and tips on installing a pegboard (she’s also renovating a garage for this One Room Challenge, and please don’t compare our progress… ha!). We also fixed the outlet so that it would be flush with our pegboard (in the past, it was sort of sketchy to plug things in since it was loose and would move around easily).
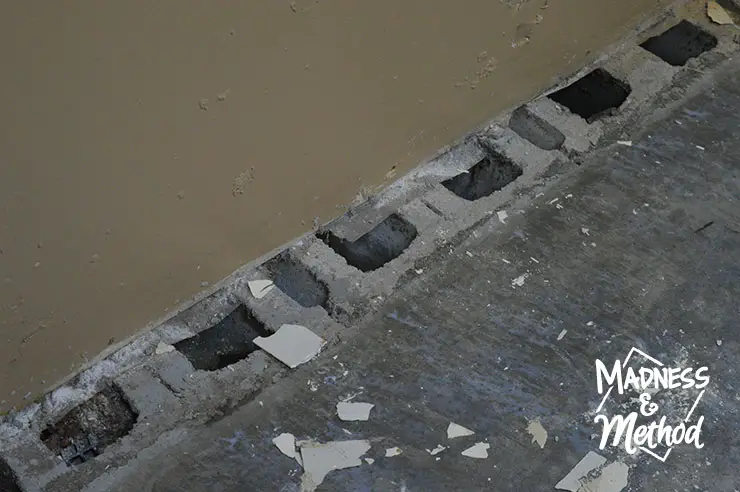
We’ve always had some exposed concrete blocks in our garage, and it was kind of annoying if you dropped something into them. They’re at least 3 feet deep, and I knew that I wanted to cover the holes so that we didn’t lose too many items (also, bugs and stuff!).
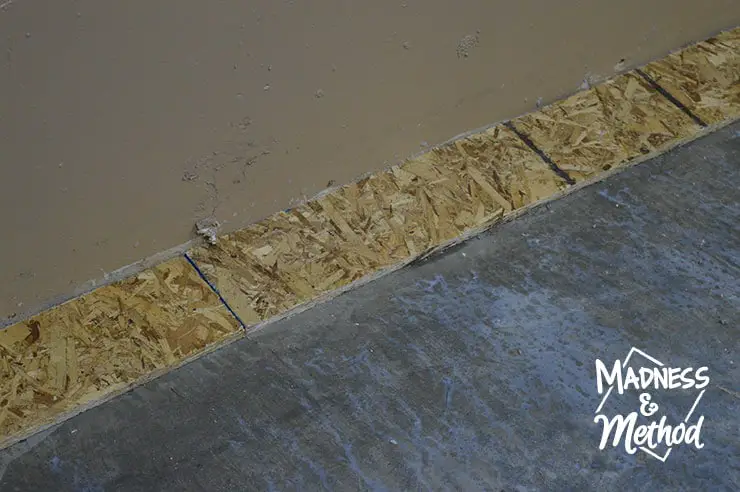
I had the Husband chop down some pieces of OSB/aspenite that we had laying around, and the plan was to screw them into place. You guys… even with a concrete drill bit, I could hardly make it in 1″ deep in less than 2 minutes! We had to go about 3″ deep per hole, x 2 holes per sheet, x like 8 sheets… not going to happen anytime soon! We decided to just keep the wood on top loose (I’d still be screwing the pilot holes if we went with Plan A!) and figure if they move around in the future, we’ll deal with it then. Either way, most will be covered by a heavy shelf… so we’re not too worried.
And now we won’t lose any more screws or random small things that fall :)
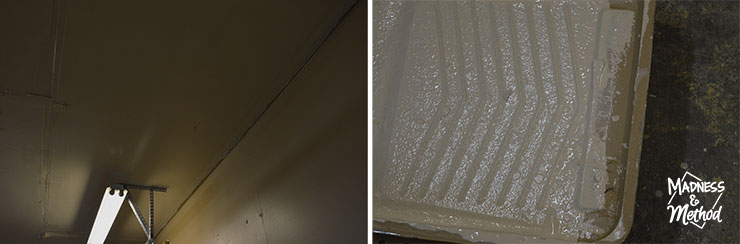
Alrighty, then I mixed the leftover beige paint we had (I kept some separate in case we ever have to do touch-ups) with some white ceiling paint and primer to lighten it up. I rolled the ceiling, but still have to cut the edges with a brush.
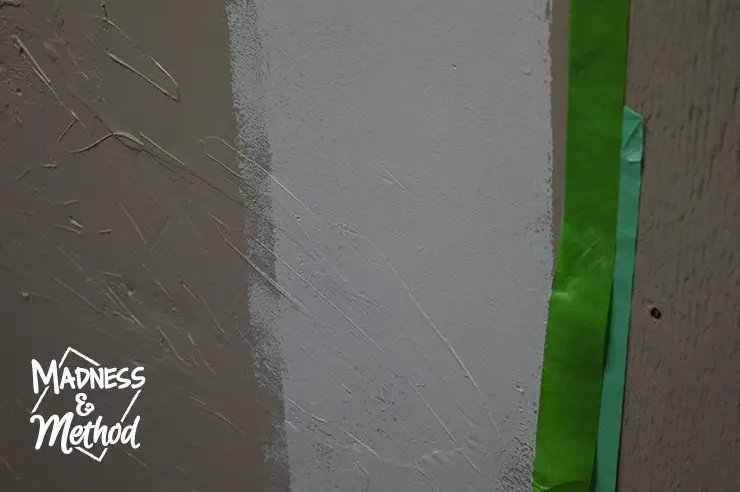
I am planning on doing a few random vertical stripes down the walls, but realized quickly that it’s way too cold in our garage for the painter’s tape to work! Not good, so I’m hoping we can solve the heating situation soon so that I can finish this…
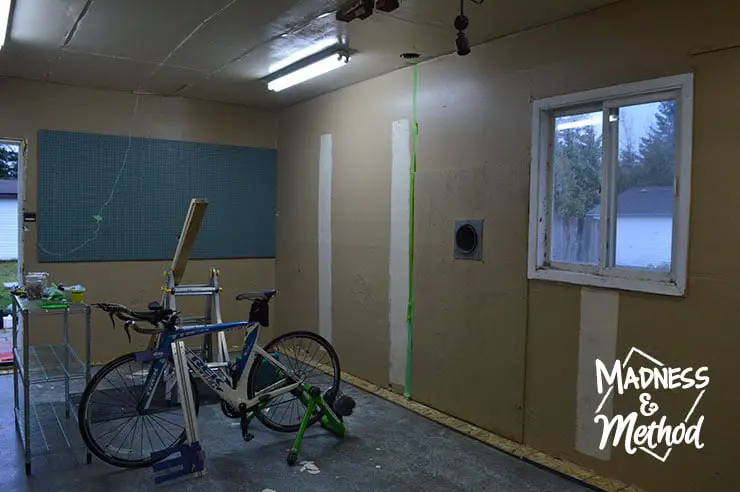
Either way, I’m going to have a few medium stripes in our “work zone” (ignore the Husband’s bike, having an unfished garage doesn’t deter him from having his bike zone setup!).
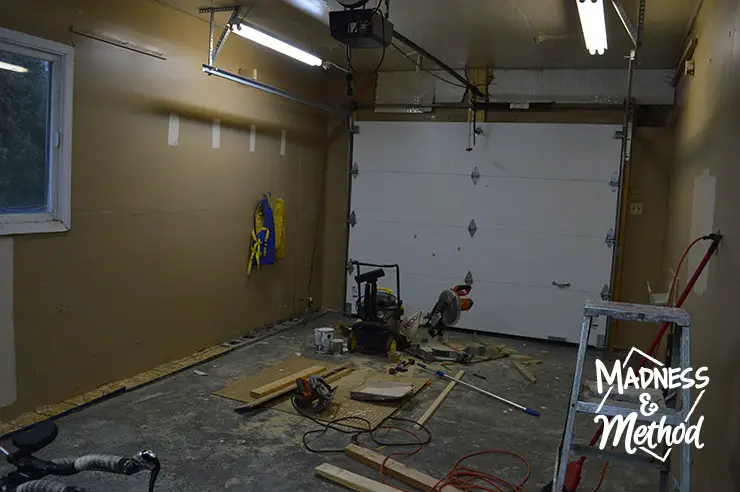
Then, they’ll be some skinny stripes on the wall to the right of the window. I think we’ll leave this wall empty for now, and that lifejacket will not be staying! (Oh and yes, we brought back in the mitre saw this past weekend because I had some woodworking projects I needed to do…)
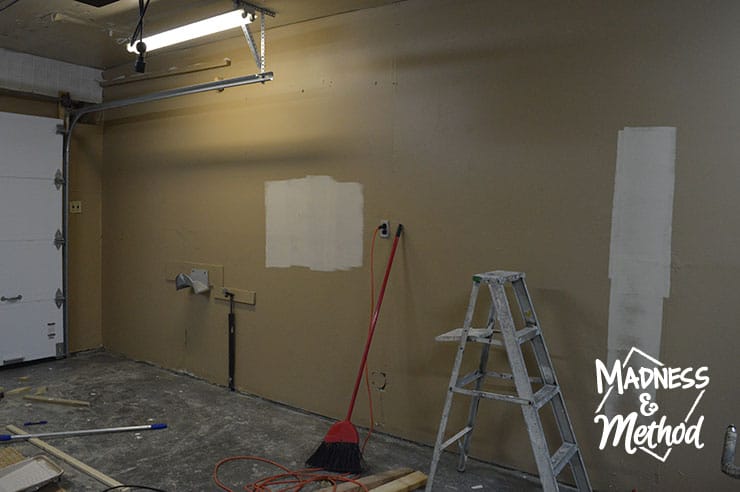
This wall section to the right of the garage door will house all our shovels/rakes/garden tools, etc. I’m planning on organizing where each will go and doing a cool painted silhouette so that they are always returned to their proper location!
Then there’s going to be a big fat stripe, then another medium sized one…

And finally, I left the last section of the wall blank for now. This is going to be the Husband’s bike zone, and I even suggested doing a cool hand-painted mountain-scape mural for him. He wasn’t immediately impressed with that idea, so let’s skip the hard work and leave it plain :)
Oh, he does want a TV in there now… so I guess my mural would have been covered…
And another “fun” thing that we decided this week: we’re not going to build the overhead wood storage ourselves. The Husband was very against my idea to build a shelf to hold 2x4s and misc. other wood (why do we need these he says?) so he did not want to help design and install it at all. He said it would be much easier to buy one that already exists, rather than trying to come up with our own solution.
After searching online for something that would fit the bill (should be ceiling mounted if possible, not too deep or low from the ceiling, but able to span a long area and be easily accessible) – I stumbled on this adjustable ceiling kit from the Home Depot. Since I didn’t know how far apart they could be placed, I ordered 2 sets and will see what works best for our area… the only problem is that I don’t think they’ll come in by next week :(
Here are the things we accomplished this week, and what we have left (reminder, full list was included in week 3!)
Updated to-do list:
Paint ceiling- Tape + paint wall pattern
- Edge around ceiling
Touch-up base of walls to cover concrete messInstall new pegboard- Install casing around door
Added: cover old concrete block holes- Install new shelving unit
- Purchase + install new heater
-
Build + install overhead wood storage(scratch this – we bought this overhead storage instead) - Figure out (and install) tool storage hooks
- Organize all our stuff
Technically, a lot of the tasks have to do with bringing back in all our stuff, so it should take too long to finish. The painting is literally the last “long” task on the list, so as long as I can get that done first, the rest is really just cleaning, tidying and last minute organizing.
But you guys, I’m SO EXCITED for the organizing part – like I can’t wait to get this stuff done so I can designate spots for everything :)
I even went ahead and bought some clear bins and pretty much know how I’m going to sort everything. We’ll actually be taking a few things out of our crawlspace, and locating a lot of stuff in the garage (instead of in the garage AND the basement). So having one central location will definitely make things easier to keep clean! Yay!
Even though we’re still not done the garage makeover, I feel pretty okay with our progress so far and am confident that we’ll have a completed space to show off next week! The only thing I’m worried about is getting the painter’s tape to stick, because I have those last areas to paint before we can bring our stuff back in…
Ha, but thankfully my parents will be coming up this weekend :) They always complain that I only have them come over to help with work around the house… but this time it’s totally not my fault that the One Room Challenge got extended another week. Hey, they just have to take care of the mister and I can work uninterrupted (did you notice the baby monitor plugged in when we were installing the pegboard?) – it’s always hard to plan projects around naptime!
Oh, and a little sunshine would be nice to take some better photos too (it rained/snowed/was gloomy all weekend!).
Wish us luck :)

No Comments