
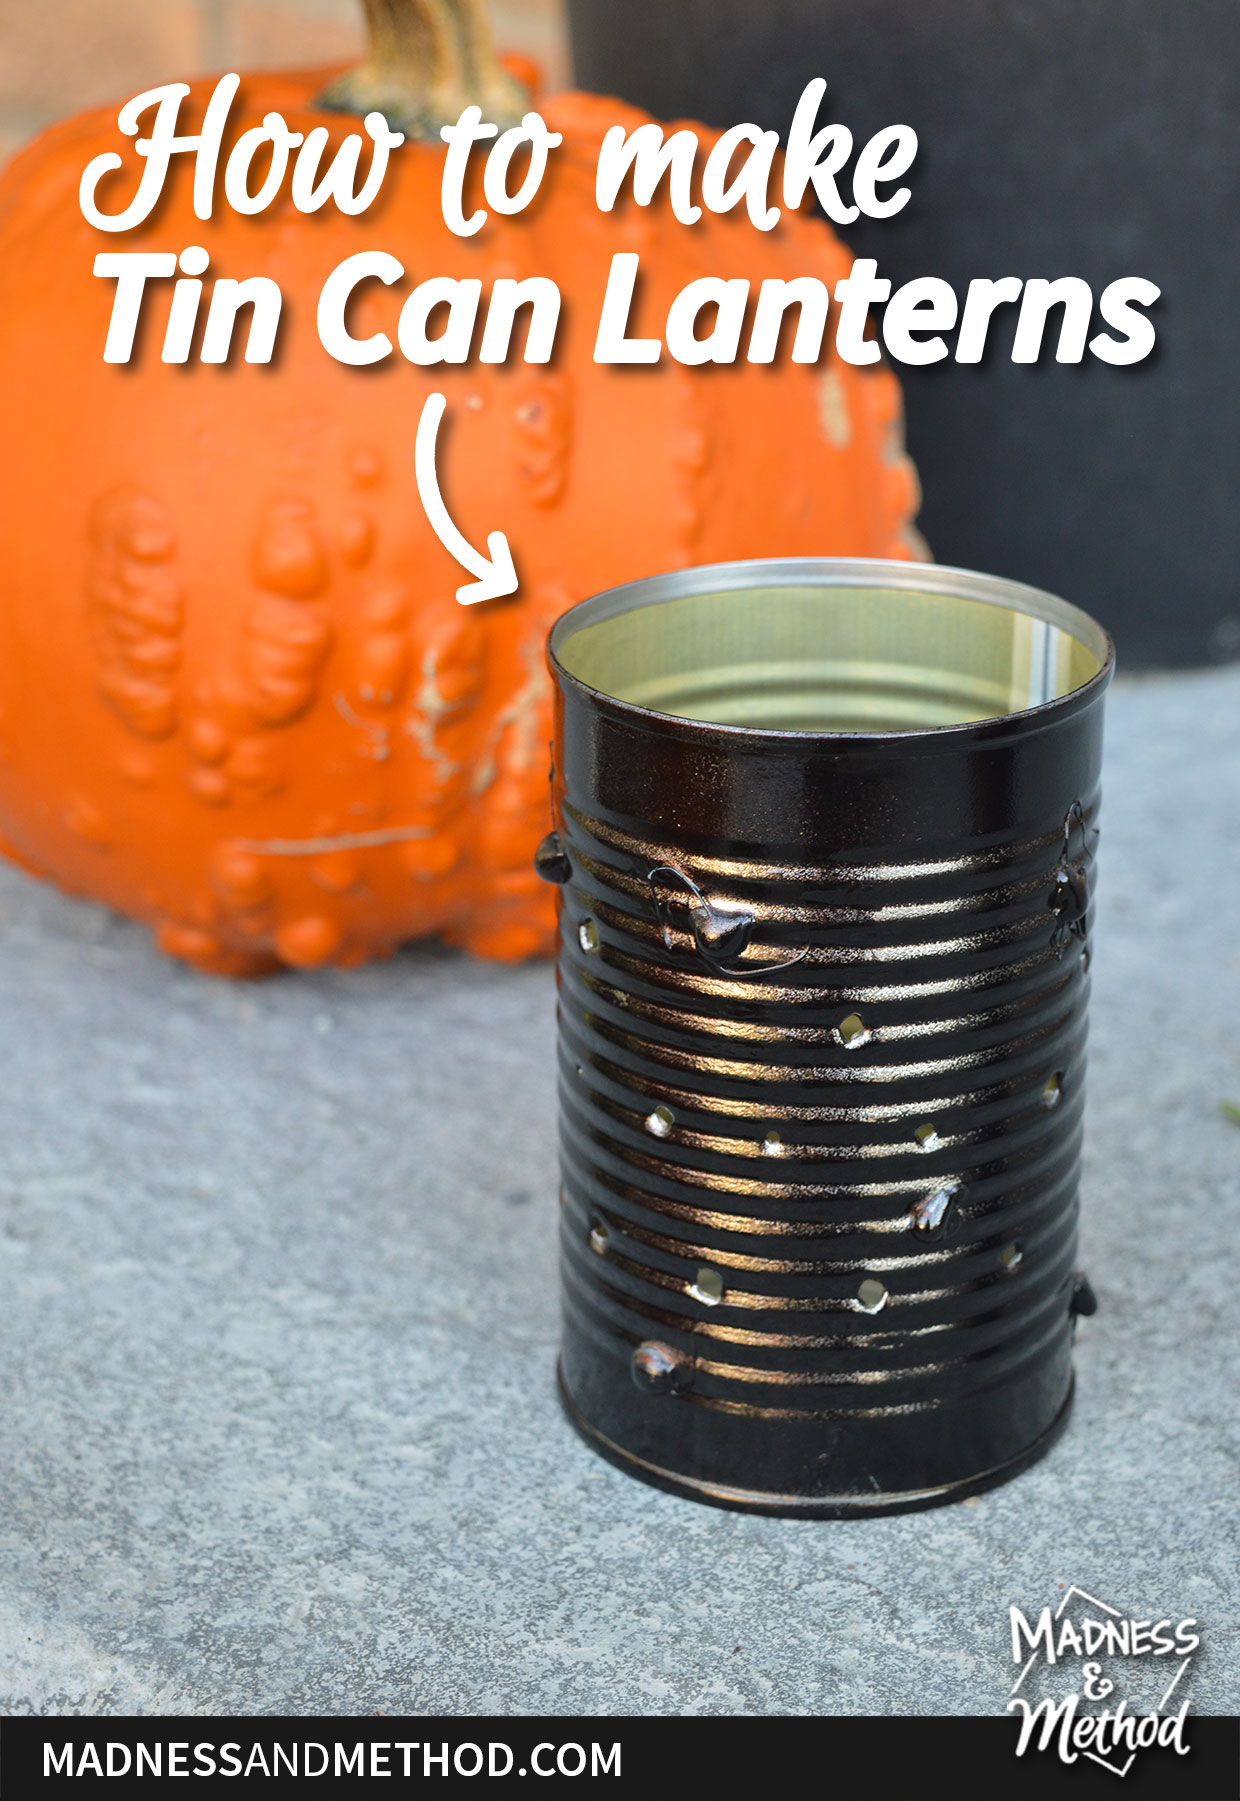
Have you ever tried to make tin can lanterns? This is an easy (and cheap!) project that can be customized however you want. Tin can lanterns are basically recycled aluminium cans with holes in them. However, once you add a light inside they create a lovely glow. Also called luminaries, these DIY lanterns are perfect for Halloween (or any holiday/occasion).
This tin can lantern DIY is an easy and cost-effective project, but it is a bit time-consuming. Especially if you choose to do a complicated/full pattern. Luckily, you can choose whatever design you want!
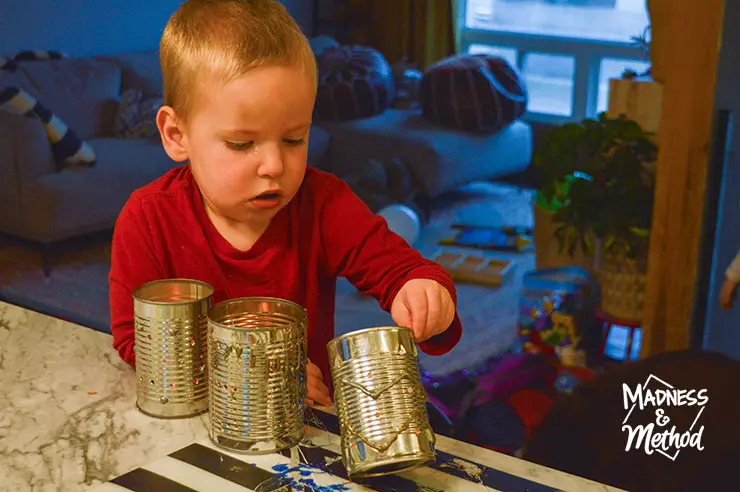
I originally made some of these by myself back in 2015 (so some photos are from back then). Flash-forward to this year, and I had three little helpers who were VERY into this project. My kids are 2, 4 and 6, and while they couldn’t all help the whole time, they definitely dictated the design direction.
So essentially, this is a good project for kids and adults!
Materials Needed
- Aluminium cans
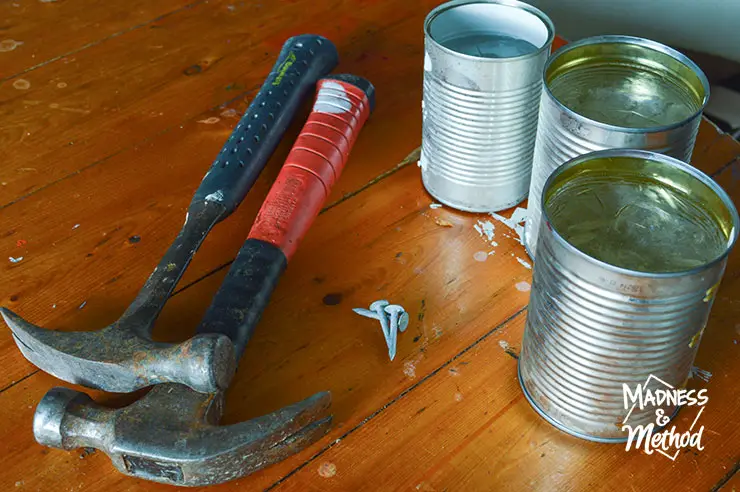
- Hammer
- Nail
- Optional: Marker, spray paint, hot glue
- Light (candle or electric tea light)
DIY Tin Can Lanterns
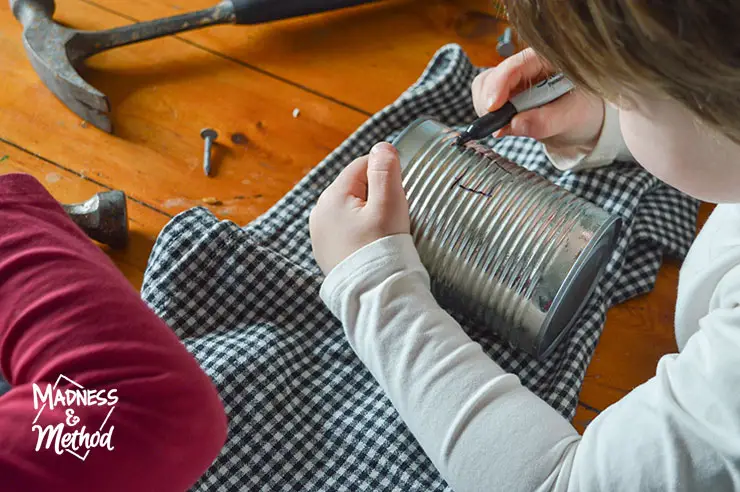
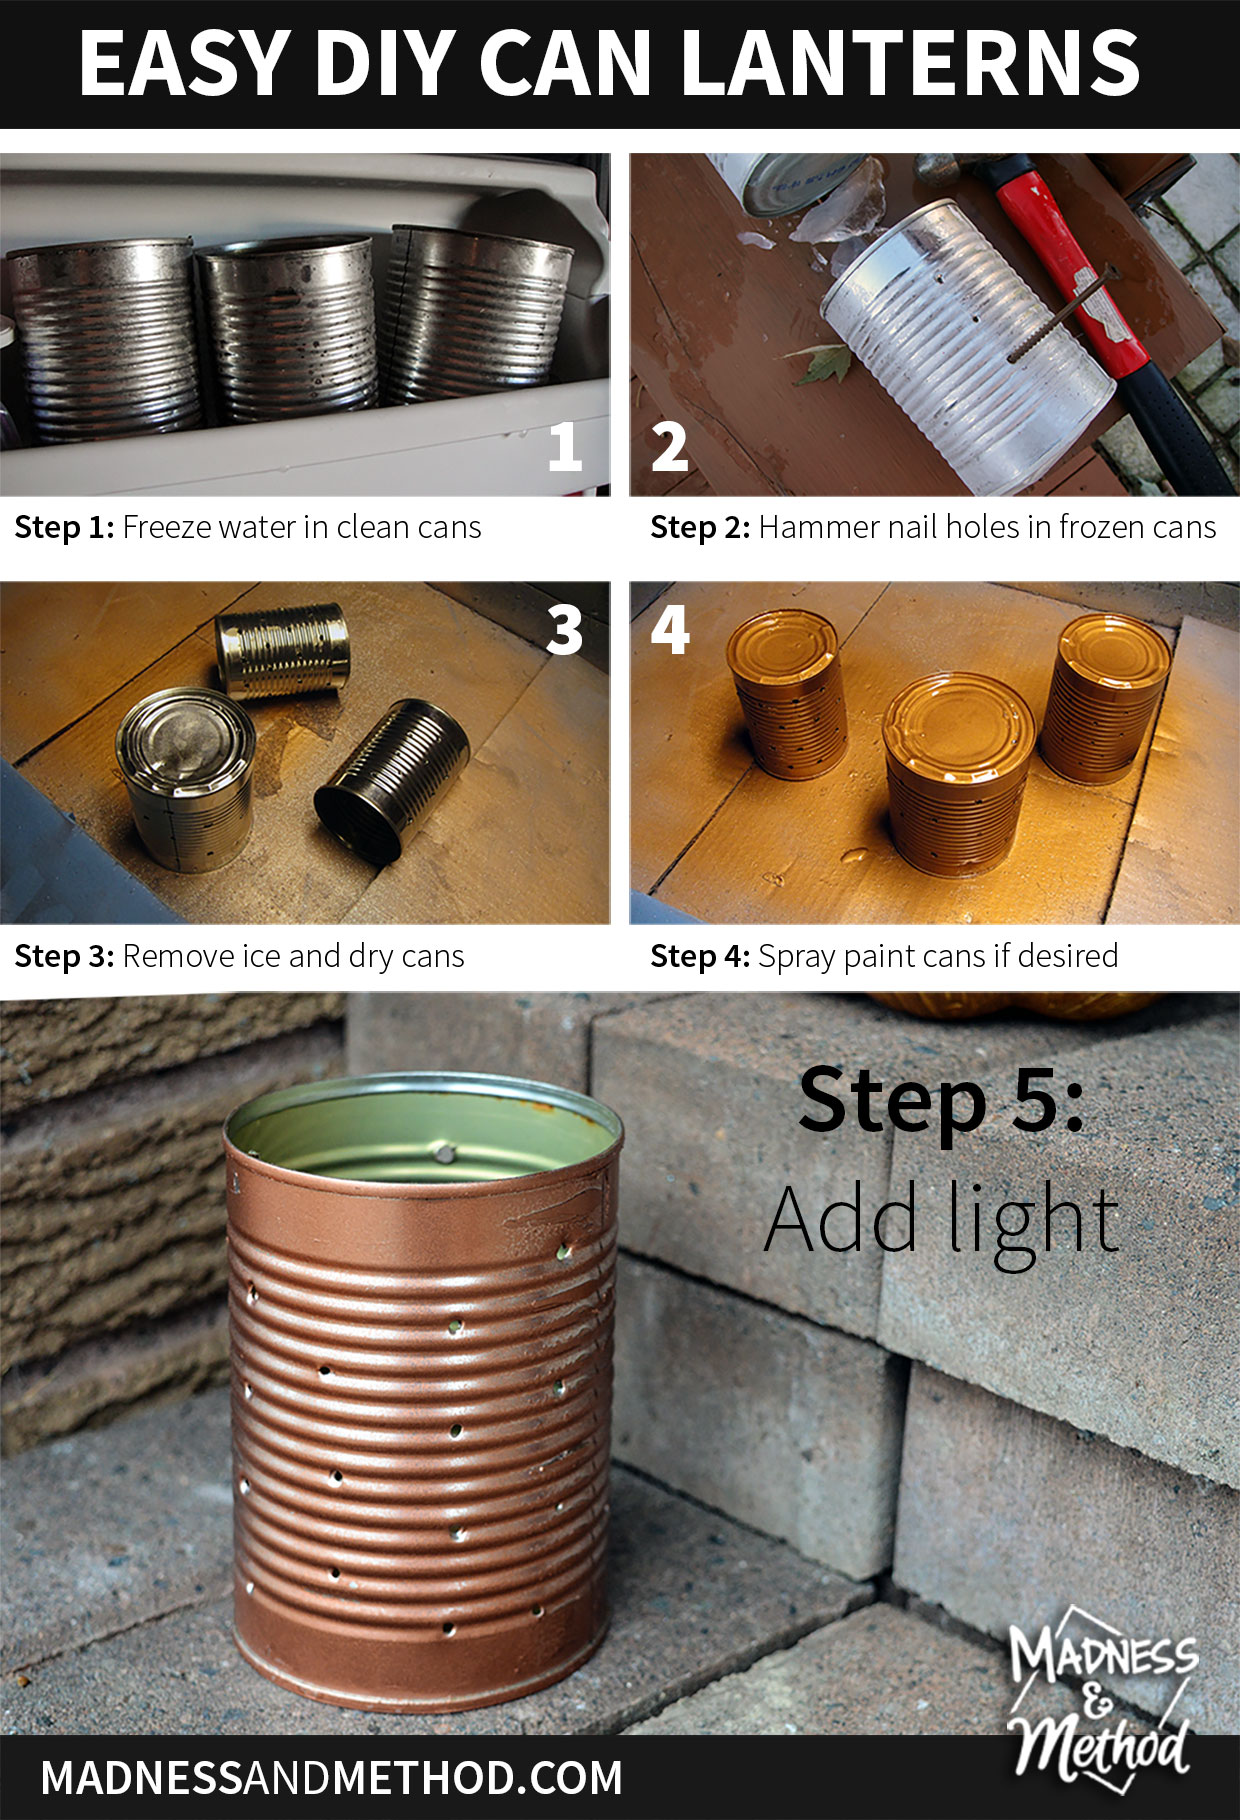
The first thing you’ll need will be some empty aluminium cans! Feel free to collect them over time (eat the contents), then rinse them out. If you have a pattern in mind already, use a permanent marker and draw it on now.
From there, you’ll fill them with water, and pop them in the freezer to harden. This will probably take the most amount of time for your project. Note: you need to mark any patterns before you freeze them, or the condensation will be too slippery.
Do you need to fill and freeze the tin cans? The ice gives good resistance when you are hammering in AND ensures that the can doesn’t bend and dent.
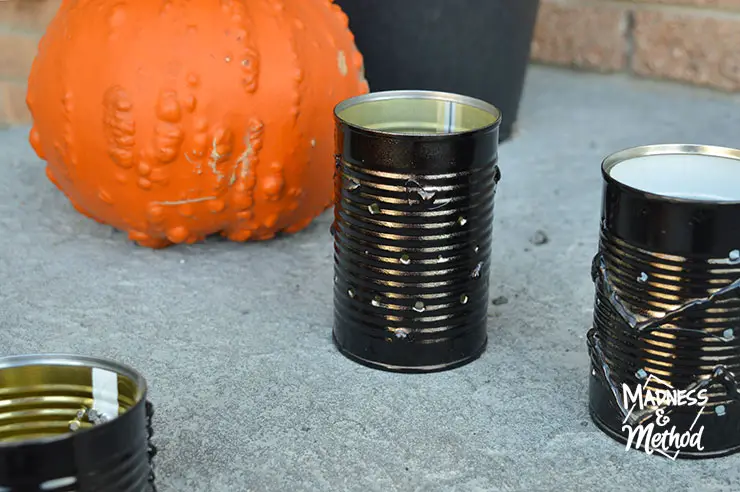
Then, simply hammer holes in using a nail! Skinnier nails will make smaller holes, but no matter what – it’s easier to choose a nail with a large head. If you choose a thick nail, you can always hammer it in at different depths to create various size holes.
Tip: I found it easiest to place a rolled-up towel underneath the cans. This helped the kids so that the can didn’t roll everywhere, and was useful to wipe up messes as the ice melted.
Can you use a drill to make the lanterns? Nailing the holes can take a long time, depending on how intricate your pattern is. The first time I made tin can lanterns, I experimented with using a drill instead. It made a bigger mess everywhere (aka jagged metal coming out of each hole). I was worried that would be more dangerous, especially if I didn’t clean up the mess properly. Metal slivers are not fun!
Decorating Tin Can Lanterns
Once you have your pattern all done, place your tin cans upside down in the sink to let the ice melt. (Or outside if you have warm weather!).
Our oldest has really been into hot glue lately, so we added some patterns to the lanterns when they were empty and dry. Dots, lines and other shapes add a dimensional layer but are totally optional.
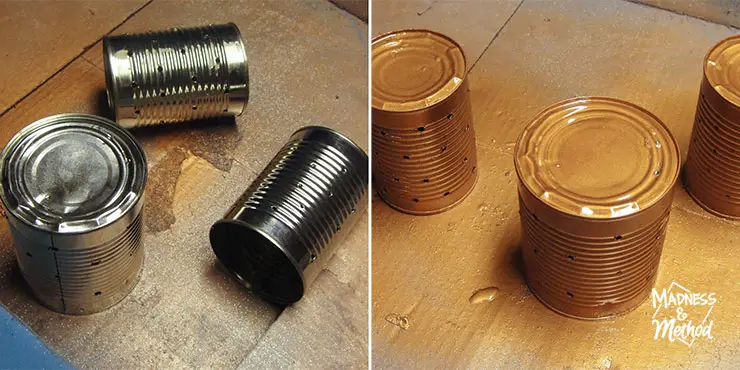
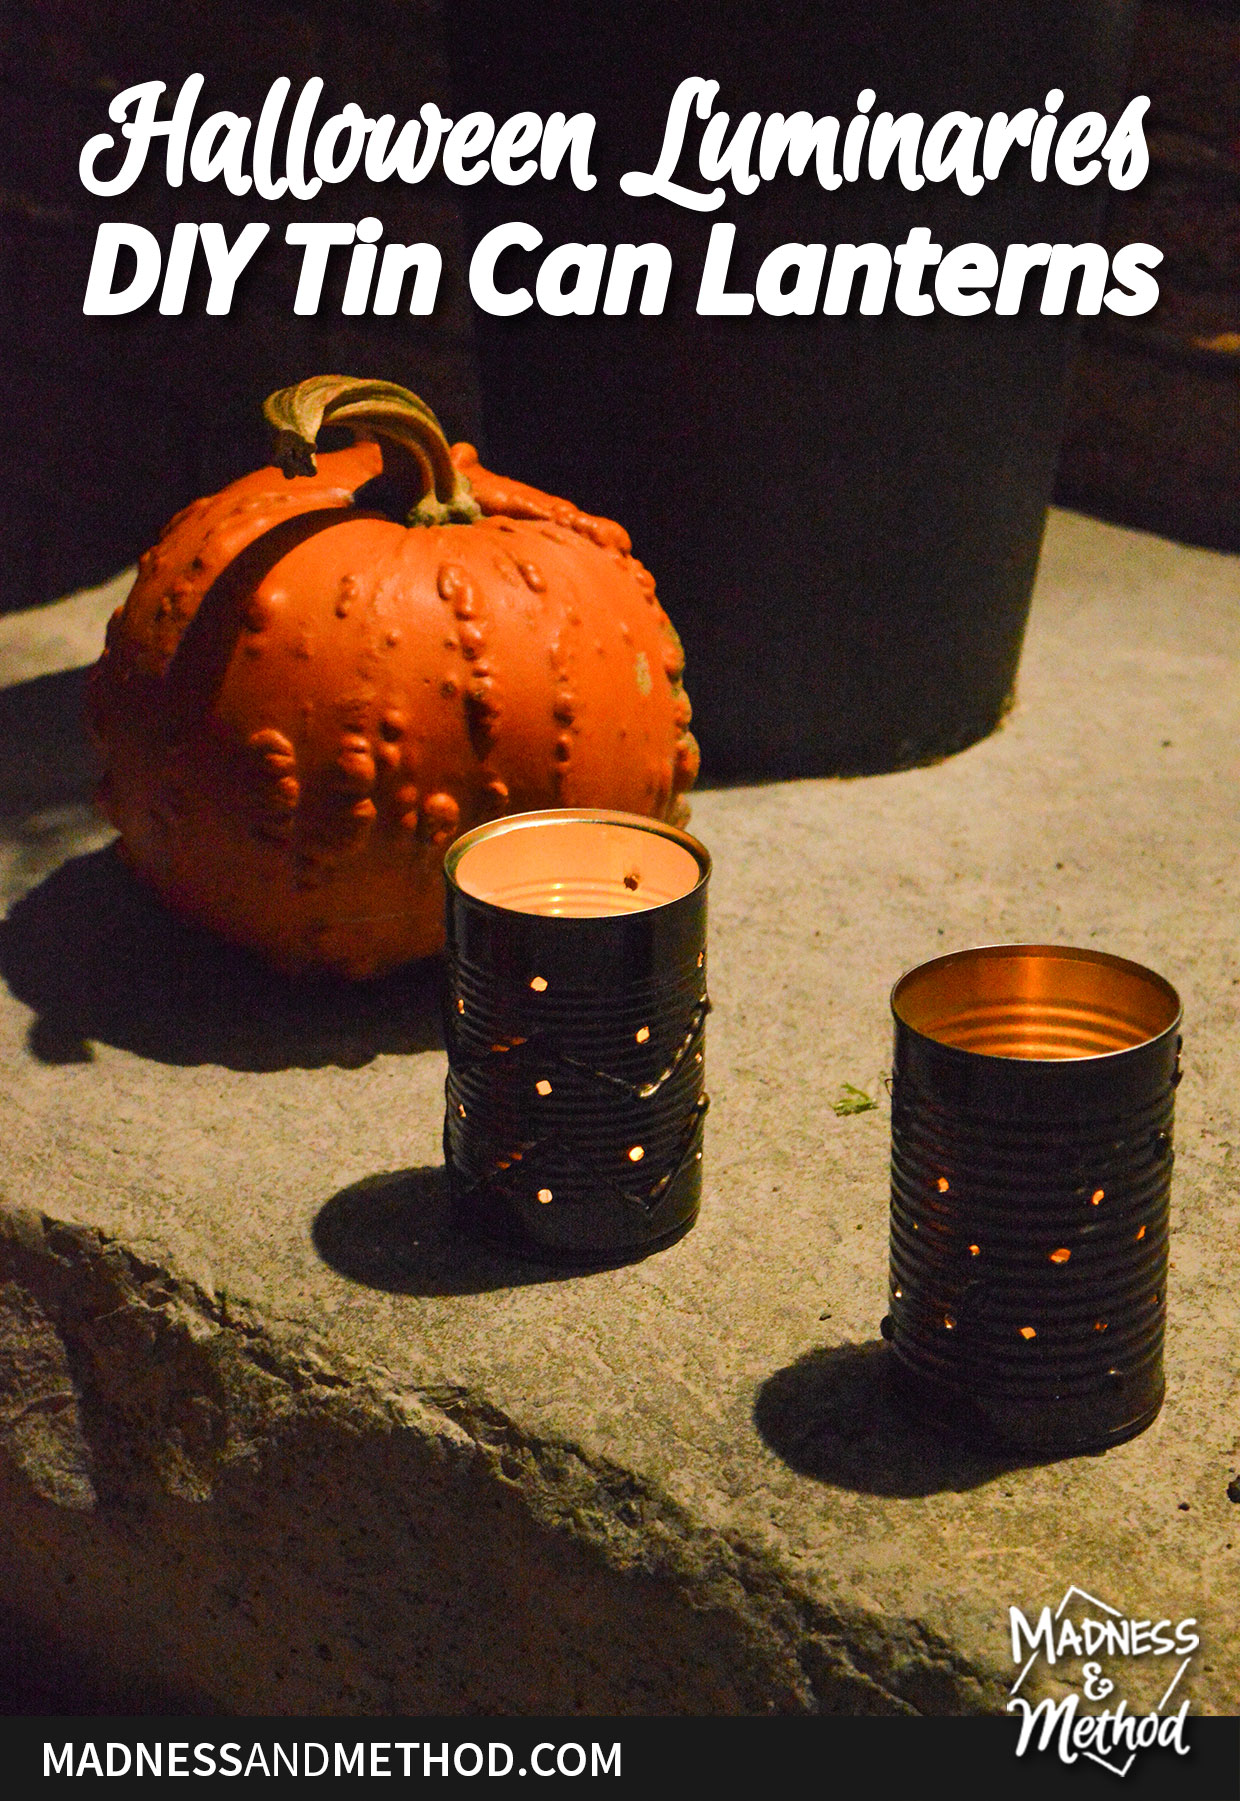
Also optional is painting your tin cans. I like to spray paint them in a fun colour – and the colour you choose can be dependent on the season/holiday. We wanted to do orange this year, but whomp whomp, didn’t have any spray paint in that colour. Leave the insides unpainted, because the metallic surface will help bounce the light around more.
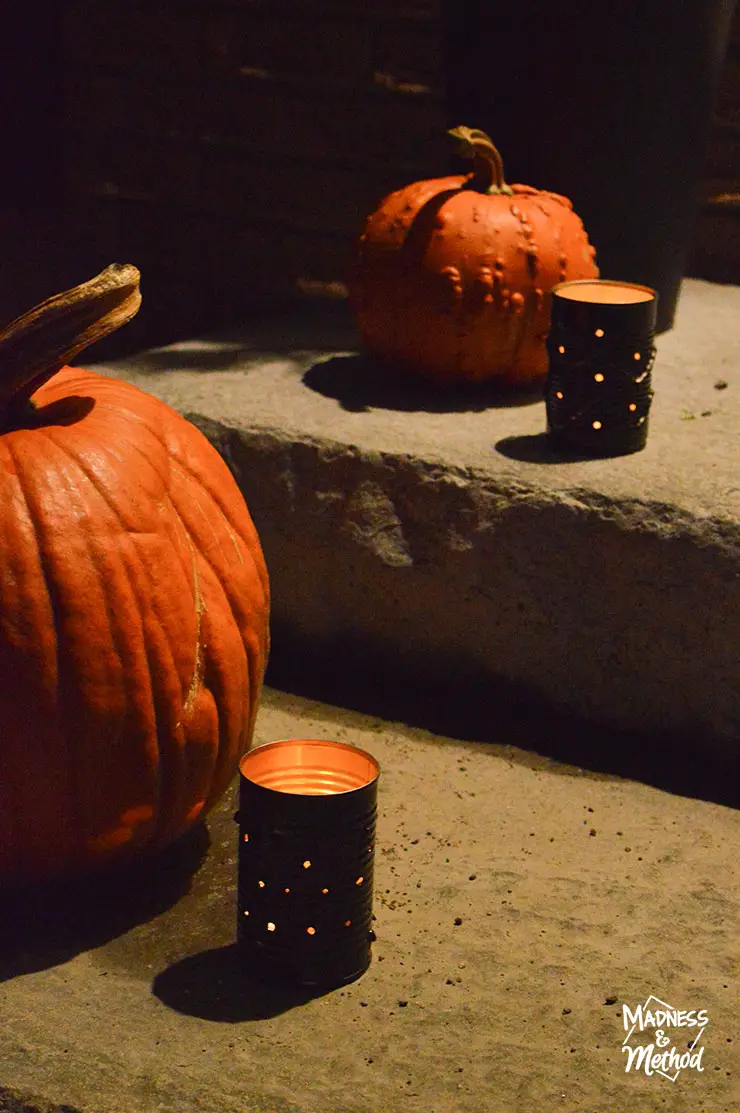
Finally, place a little light inside the tin cans and watch them glow in the night! Be careful, because the holes do have jagged edges.
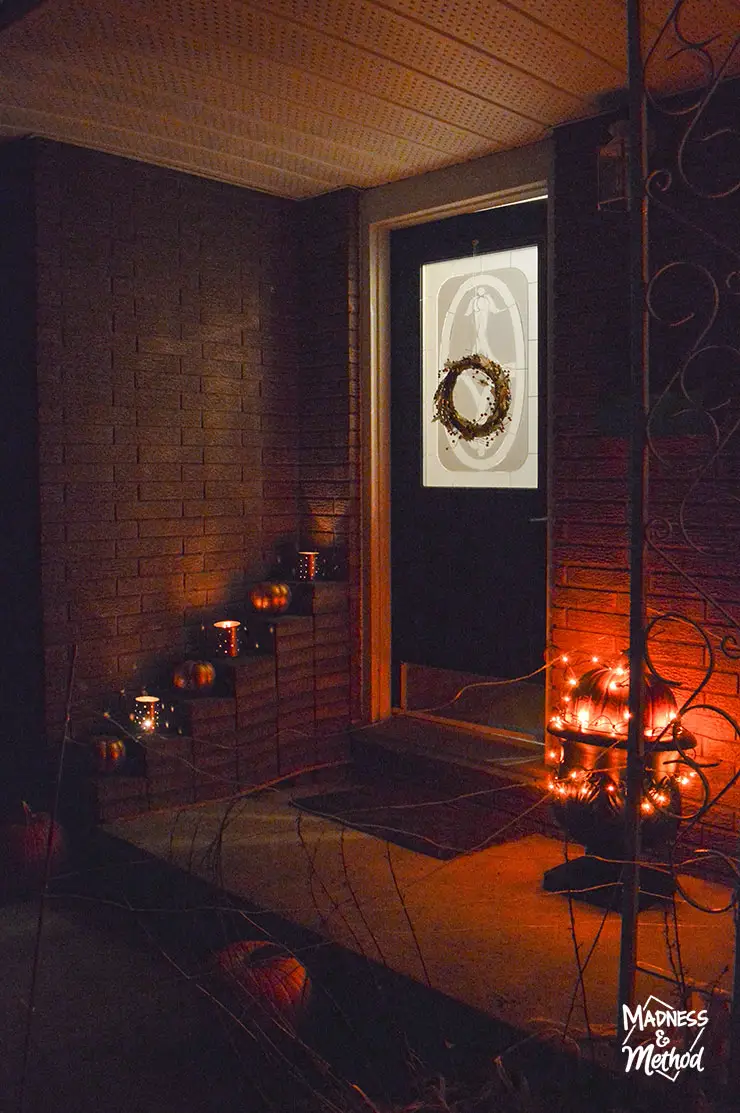
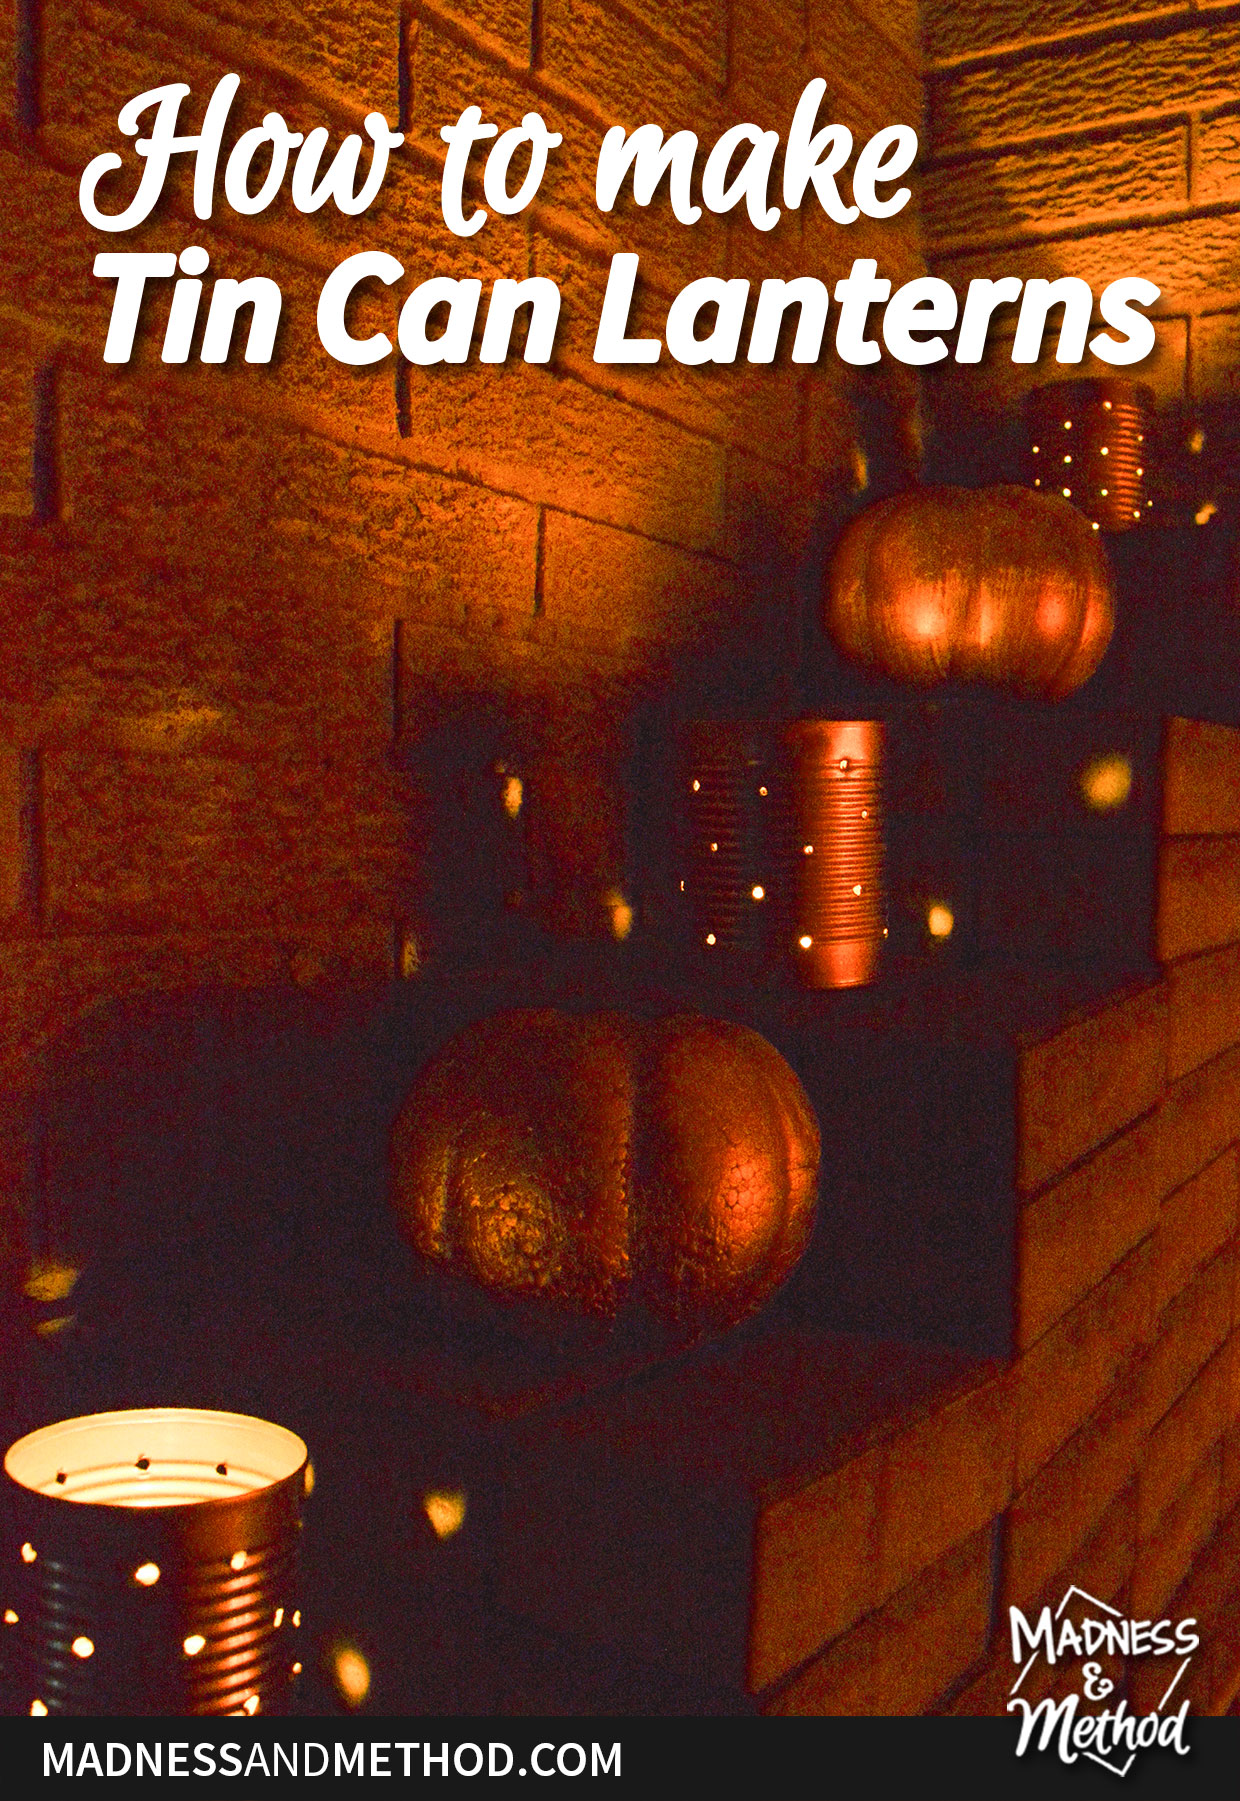
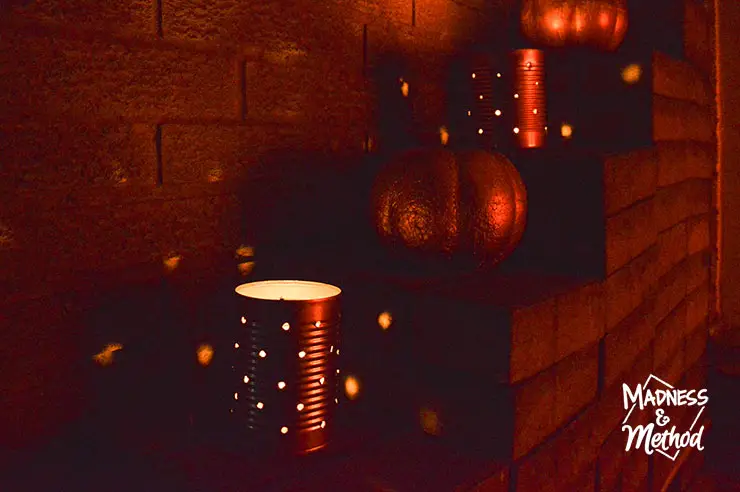
When I made tin can lanterns the first time, I placed them on a pile of patio pavers next to our house. I really liked the look!
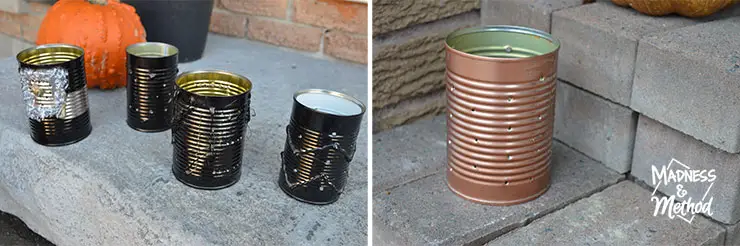
Here are the black tin can lanterns we made this year (Zachary, Félix, Élise and mine) compared to the copper ones I did.
They are in the house for now, but I will be putting them out on Halloween as added decor. (Maybe near the pumpkins, maybe on the flower bed stones?).
Making DIY tin can lanterns may be a project we do every year! You could always keep your tin can luminaries, but since they are so cheap to make, it could be fun making a new batch each time. Just like decorating a pumpkin is a Halloween tradition, this is along the same vein. Plus, less pumpkin mess :)
PS: I think the hot glue and spray paint on the cans are fine to recycle?


No Comments