
Ever since the little man has been able to crawl around, we’ve been hanging out in the basement. It’s a completely carpeted space, his toys are setup down here, and it’s newly updated too! Actually, our computers are downstairs… so he kind of has to be near me when I’m working :) I just installed a saloon style DIY baby gate, so now falling up the stairs is one less thing I have to worry about!
– Note: This project was not sponsored, however I did receive free product from Metrie for another post. I built these doors using mostly items I had on hand, but I linked to affiliate products in case you wanted to replicate this project. See more information about affiliates here. –
Just a heads up – I started building this door just under a month ago, and there were a few missteps I took that added to my timeline. I’ll make sure to point out my flaws so you can avoid them :)
It seems like before the little man could even sit, he taught himself how to climb the stairs. We would always be right behind him, but obviously we kept a tension baby gate up for the times when we didn’t want him going up.
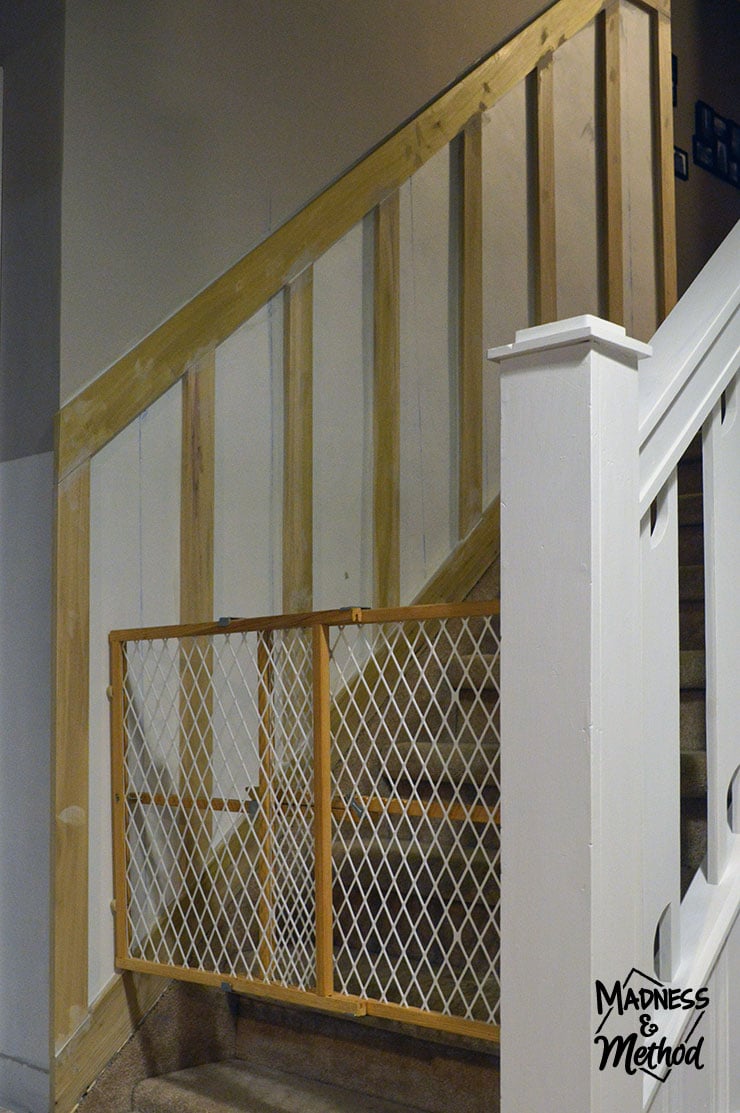
Photo First Appeared in DIY Board and Batten Staircase
Problem was, that gate was ANNOYING to setup. And you’d think once we set it up, we’d be good for at least an hour right!? Well… enter Tootsie. She could never decide if she wanted to stay with us, or go upstairs. Or whatever.
What about when we needed to go grab something upstairs quickly? You had to place the gate in the perfect spot to get it tight, and I was really the only person who could do it right. Oh, and it had to be low enough too so that the mister wouldn’t crawl under it (see the photo above – way too high!).
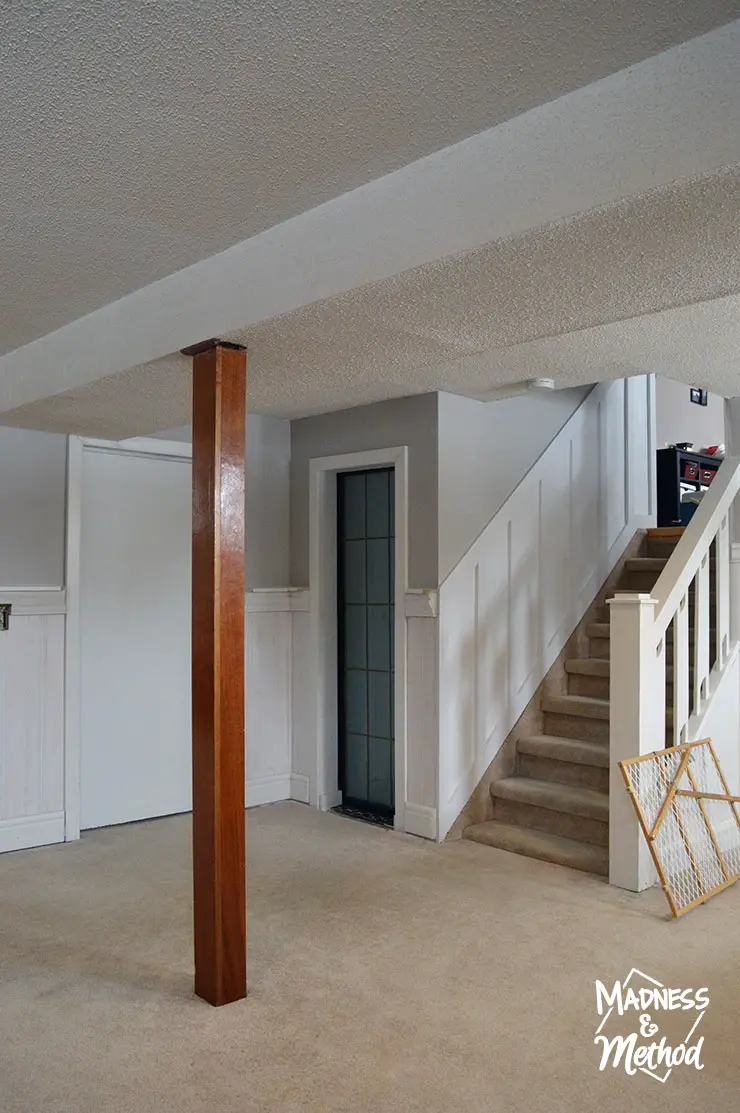
Photo First Appeared in Basement Renovation Progress
Another annoying thing? Whenever I took the gate down, we’d put it next to the stairs. There was a metal piece that always banged against our railing (my fault) and it was starting to mark the new white paint (that took forever to do remember!?).
Why saloon style doors?
I actually had leftover Metrie poplar flat stock from our board and batten stairs and was planning on building a normal sized baby gate for the top of the stairs. However, after living with a crawling baby for a few months, I realized that we needed one downstairs first. I didn’t want something that would swing open and block the pathway (either on the left to get to laundry room/bathroom, or the right to get to our desks).
I knew that a gate that would swing open in the middle, ie: two skinny doors, wouldn’t block the path too much in either direction. AND it might even be easy to open one of the doors and let Tootsie in.
Win win!
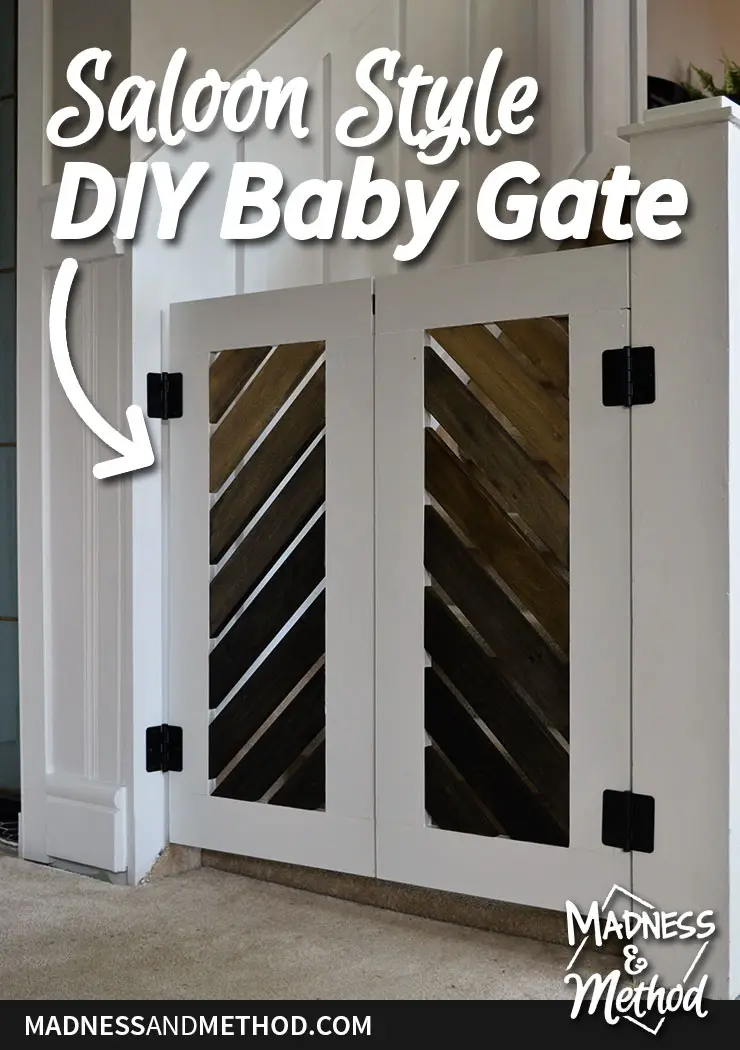
Saloon Style DIY Baby Gate Construction
Materials Required
- 3-1/2″ poplar flat stock, 2 lengths
- 2-1/2″ poplar flat stock, 2 lengths
- Saw (this is the mitre saw I use)
- Kreg pocket hole jig system
- Clamps (I used pinch clamps and table clamps)
- Drill (this is the drill we use)
- Screws
- Pocket hole plugs
- Sand paper
- Paint/stain (and brushes) of your choice (I used Minwax Ebony and Minwax Satin Polycrylic)
- No More Nails
- Nail gun and brad nails (this is the nail gun we use)
- Hinges
- Lock (this safety latch worked great)
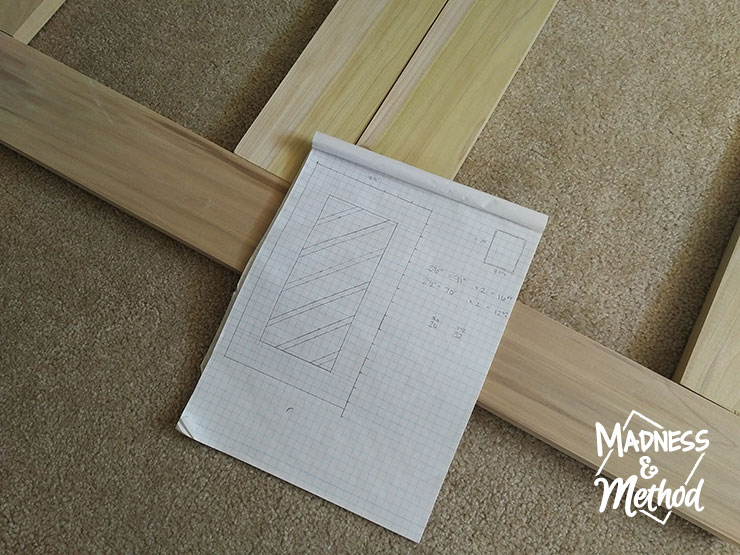
After measuring my opening area, I drew up a simple door that would incorporate both the 3-1/2″ poplar flat stock and 2-1/2″ poplar flat stock that I had.
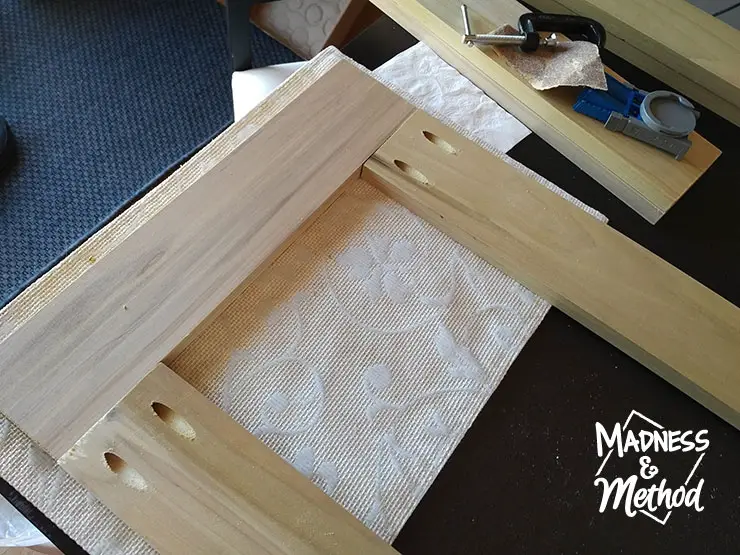
I used the wider pieces to create an outer frame, and attached them together using my Kreg Jig pocket hole tool.
Misstep Tip 1: If you want to hide your pocket holes, make sure to do it before you finish your piece!
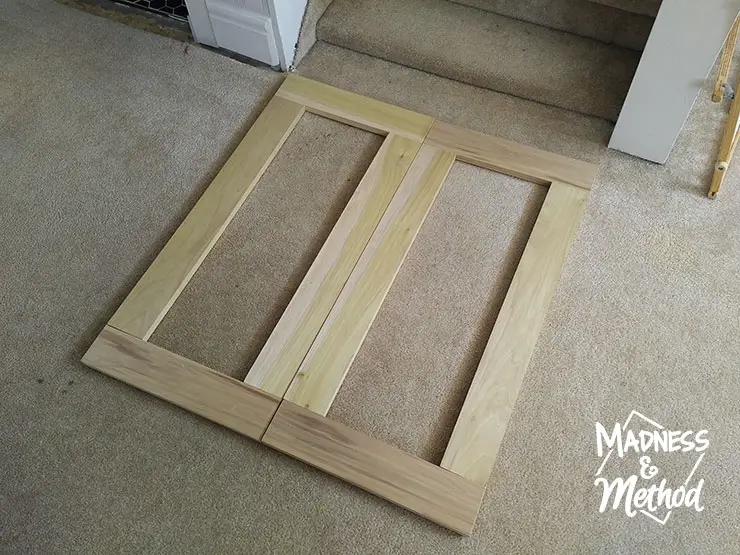
Once my outer frames were attached together, I made sure they fit in the opening (just in case I measured incorrectly!). I actually did test them in place, but couldn’t hold them up and the camera at the same time haha!
Real Misstep 0: Okay, I actually forgot to account for the width of the boards when I was doing my height pieces, so they were 7″ taller than I originally planned. I realized it when I went to attach them together, but they fit and looked good so I kept them tall.
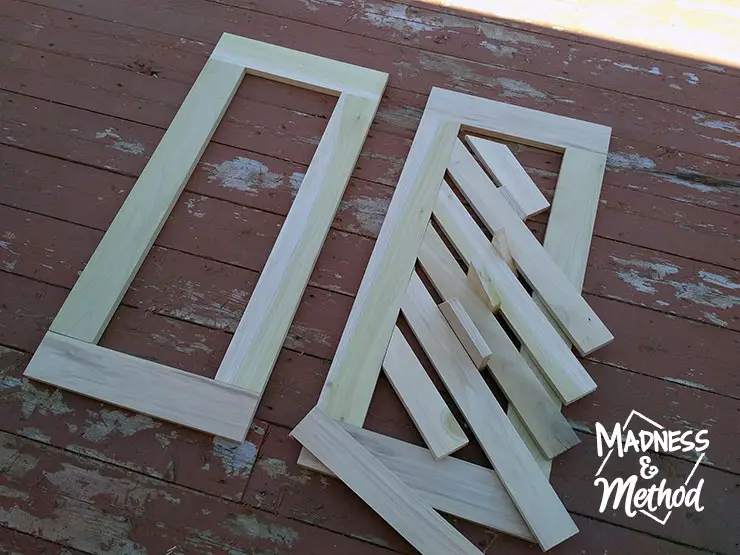
From there, I used the smaller pieces to do diagonal sections. I was going for a cool look, rather than to a straight across pattern (or whatever else). I used the thickness of the boards (3/4″) as my spacers.
Get this: I actually used just my off-cuts from the board and batten staircase to fill one of the doors completely. AND it ended up working perfectly that there weren’t any half boards I had to cut :)
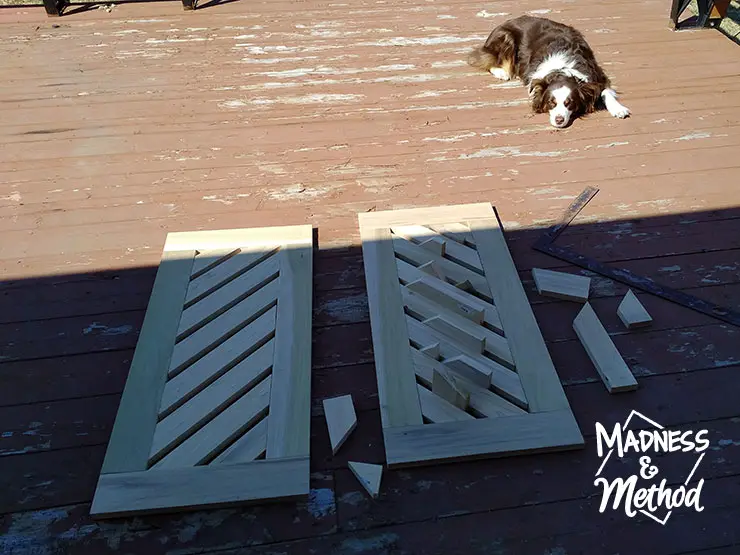
I then mirrored all the pieces for the other side, and was happy with the way it was looking so far! I actually marked the edges of every single piece so that I could match it up later.
Remember when I mentioned that I marked where all the pieces went? I didn’t paint on the pencil marks, but later ended up changing my mind and having to paint the inside section…
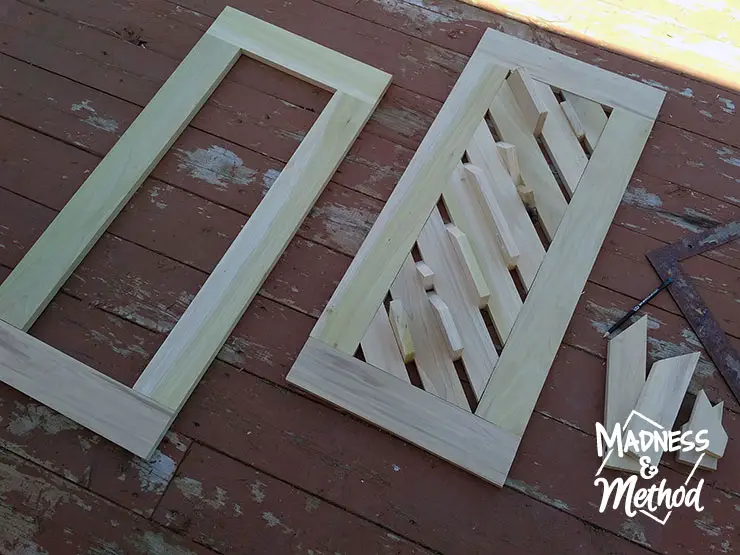
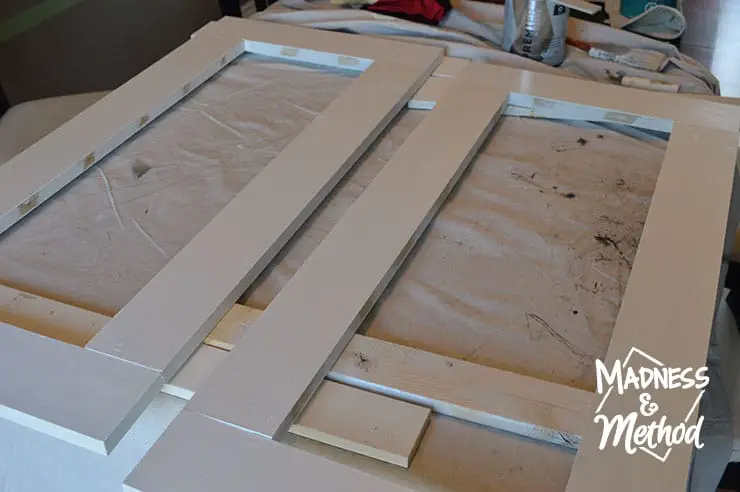
I didn’t attach the pieces together yet because I knew it would have been a hassle to paint all the little grooves when there was limited space. I sanded everything and gave the outer frame a couple of coats of white paint.
Before I painted the inside diagonals, I showed the Husband the progress so far (and by showed, I mean he saw everything laying on our dining room table and was wondering what was going on).
He said he preferred the wood-look, and said I should have left it bare…

I hadn’t painted the inside diagonals at this point, so I decided I would stain them instead! I figured that if I didn’t like it, I could just paint over them later, so it wouldn’t be a big loss.
But if I’m going to stain something, I’m going to use a colour I like (and had on hand already!) – Minwax Ebony. I was going for a cool black and white thing, BUT then decided to do an ombre look. Again, if I didn’t like it, I could just stain them fully dark.
It was actually SUPER quick to do (like WAY faster than painting) because the poplar took the stain so well.
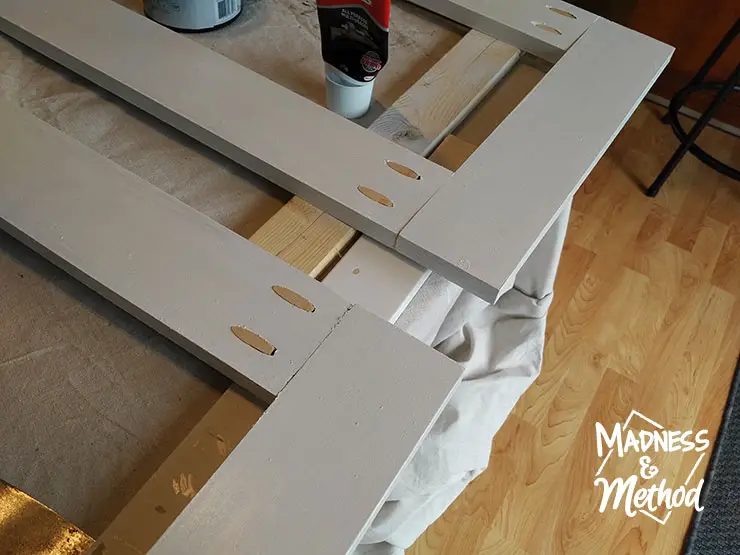
I decided to give them a coat of Polycrylic to protect them, and filled in my pocket holes at this point too. Then I had to patch and paint those…
Finally I gave the outer white frame a coat of Polycrylic, and once everything was dry I finished assembling.
To attach the inside diagonals, I started from the bottom pieces and worked my way up. I knew I would only be able to get nails in a few pieces before I ran out of room for my nail gun, and figured that the bottom ones should be more secure (that’s where the baby is and all!).
I would add some No More Nails to the inside edges, put a nail in the part that I could, and clamp the other side for 15-20 minutes. Then I moved on to the next board, and so on.
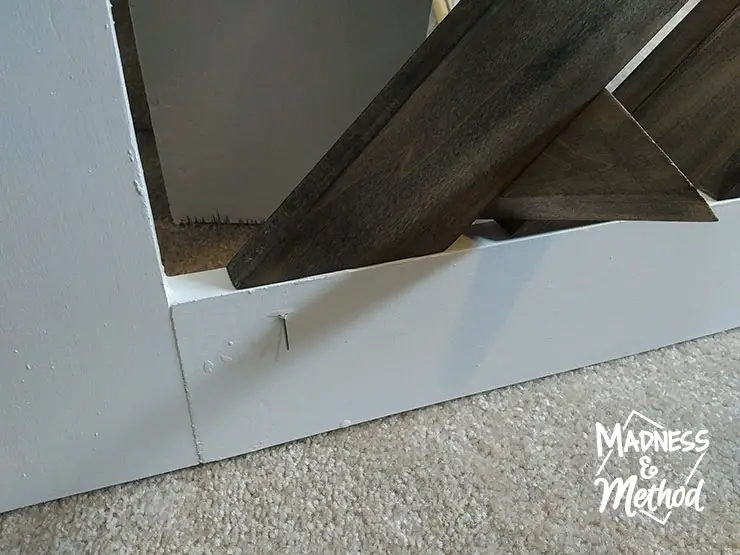
There were a couple of spots where I tried manoeuvering the nail gun into, but I ended up going through the wood…. ahhhhh!
Tip: Attaching the diagonal pieces was definitely tricky, so maybe thing of a different pattern haha!
Once all the glue was dry, I clipped the nails that were sticking out and gave everything another coat of poly.
Then the doors sat and waited for me to install them :)
Tip: You’ll definitely want to figure out a mounting plan BEFORE you start building your doors. There are different types of hinges available, and the ones you get depend on where/how they are installed.
I had the Husband help me hold the doors up for the installation, and we only had to move the hinges 3 times haha! The first was my fault because I forgot to account for the width of the gate when the hinges open and turns out the baluster for the staircase isn’t perfectly level…
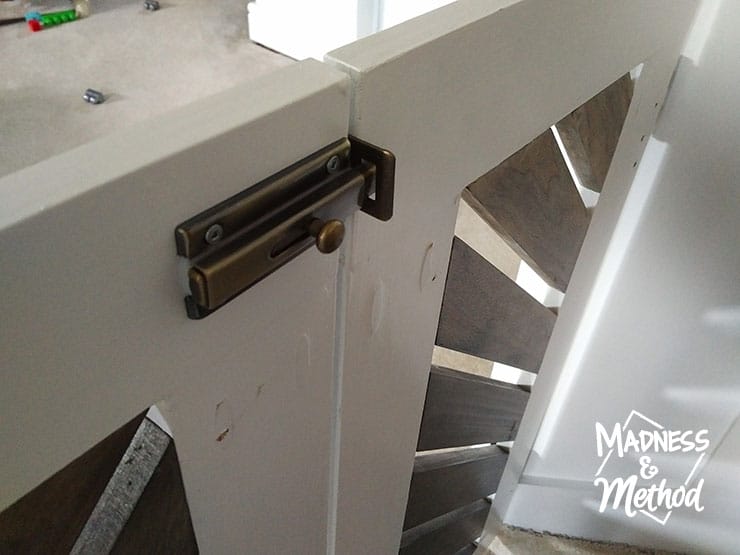
I also used a lock I had on hand (the one I was originally planning on using in our basement bathroom) but you can totally open the doors when it’s locked! We’ll need to fix that, and I’ll fill up the holes from the hinges then too :)
Update: We installed a plain hook and eye for a while, which worked until Zachary figured out how to open it. This locking hook and eye was the best solution and was super easy to install/swap.
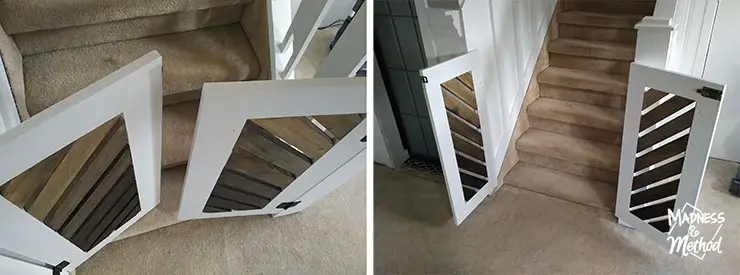
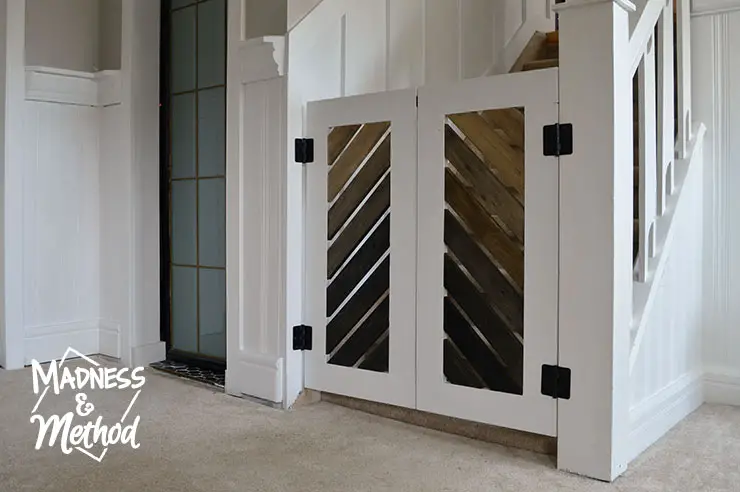
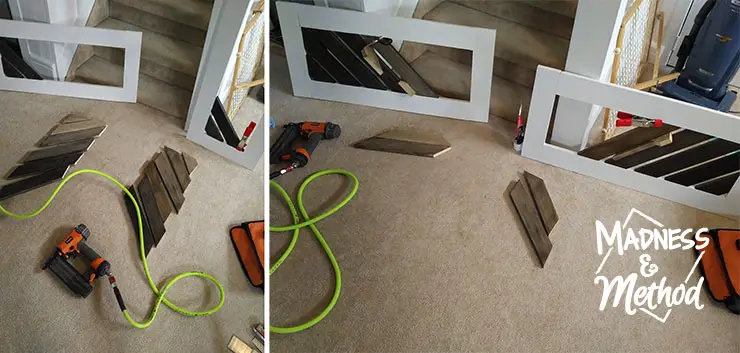
The original idea was to have the hinges hidden in the back (ie: where the stairs are) but I had to alter my plan when I realized how doors work. The photos above show how far the saloon style DIY baby gate doors swing in each direction, just in case you were wondering!
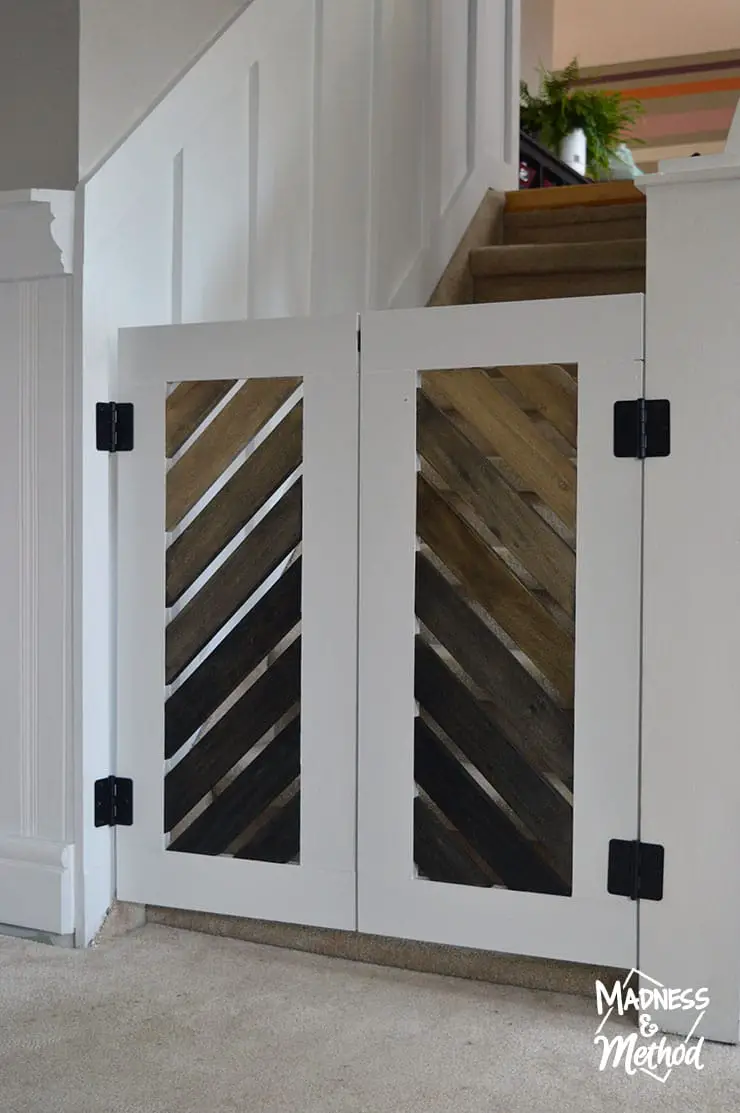
BUT the really magic is how cool they look when they’re closed right!? Ha, it was actually the Husband that chose the way the diagonals faced (ie: pointing upward or downward) because he said it looked like a cool saloon door this way.
(Which is how I came up with the name for this project haha!).
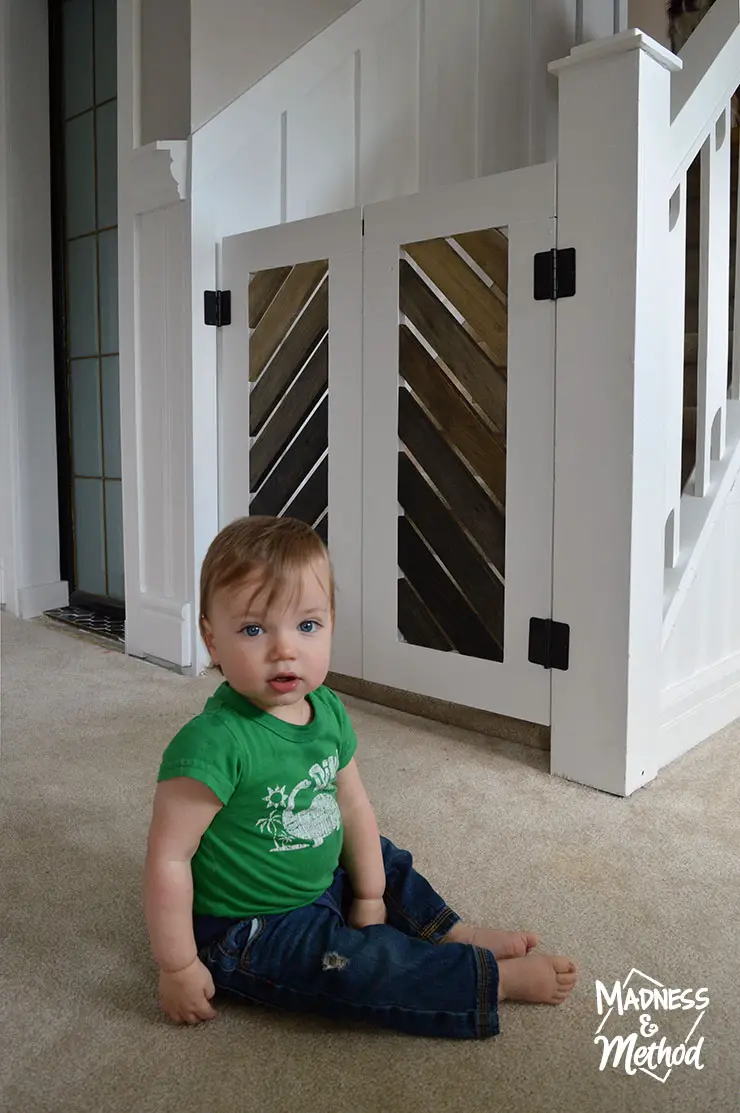
Anyways, you would think the mister would be all excited to check out his new baby gate (and you know, pose for Momma) – but no, he didn’t want anything to do with it at this point. Thankfully we have another cooperative child (right at the top of the steps there).
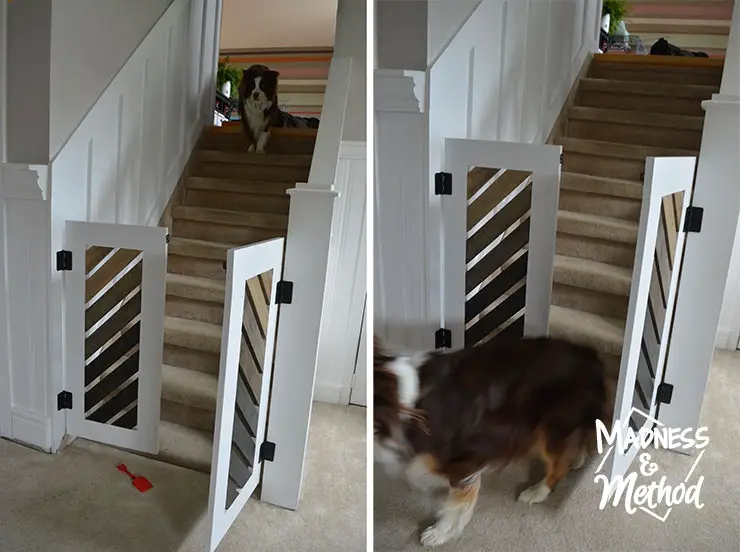
And here she is demonstrating how the doors work (although too quick for me to actually snap a good picture). Oh and the red shovel? I totally threw it there hoping the baby would want to grab it and be near the doors for my photos… but nope…
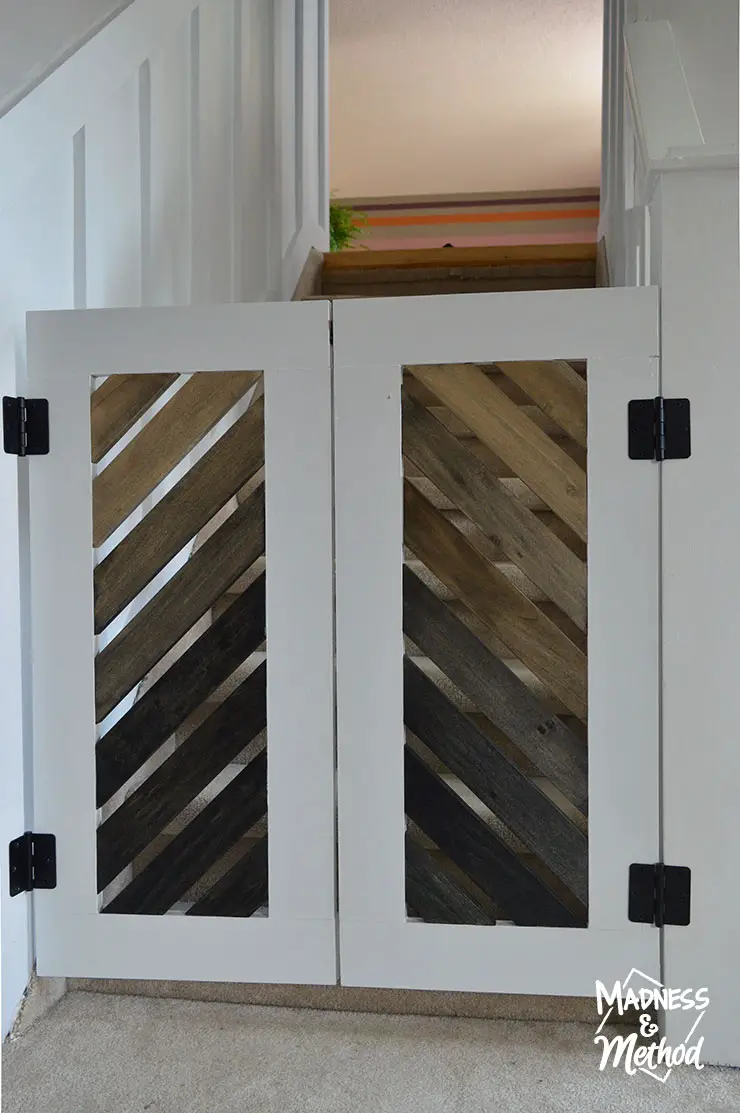
At least the saloon style DIY baby gate looks good on its own! I’m happy I decided to go with the Husband’s idea to highlight the wood, and the ombré looks really good. If it was all white, it would have probably blended in too much.
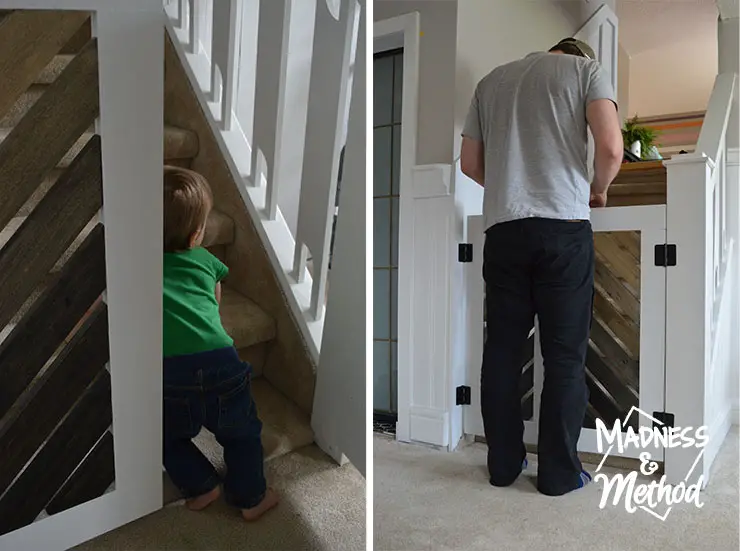
And I took a photo of the Husband’s bum to show the scale of the gates, in case you were wondering. And obviously as soon as I open them, the mister will gladly try and escape!
What do you think of our saloon style DIY baby gate? It’s a bit more rustic than what I normally go for, but it totally matches the look of the basement.
I mentioned at the top of this post that it took me about a month to complete these doors; but I could probably have gotten it done in a week (if I wasn’t travelling and working on other things). It took maybe 4-5 good nap times from the baby to do each step, and you do have to factor in dry times for paint and glue and what not. The flaws didn’t take a huge amount of time to rework, but it would have been more efficient had I done things in the proper order :)


7 Comments
11 DIY Baby Gate Ideas: Step by Step Instruction and Plan
May 19, 2018 at 3:00 am[…] Madness and method […]
Jen Dojack
April 18, 2020 at 11:58 pmHi there, love the gate! What did you end up using for the latch. We are in a similar problem with ours. Thanks, Jen
Nicole
April 19, 2020 at 8:19 amWe added a locking hook and eye (here’s an affiliate link to Amazon: https://amzn.to/2ROsWwM). You can probably find them at your local hardware store, sometimes called safety latches.
Amber
January 29, 2022 at 11:34 amThanks for including how many nap times it took to complete the project! I’m working on making an old door into a baby gate. So far, I’ve had two nap times and it feels like it’s taking so long.
Nicole
January 29, 2022 at 7:47 pmHa, no problem Amber! Good luck with your project :)
Jackie
December 5, 2022 at 4:47 pmThis baby gate turned out so good! I love it. Hoping to try and recreate one. We are painting our kitchen cabinets next week so maybe after that! Thanks for sharing!
Nicole
December 9, 2022 at 11:47 amSounds great, and good luck on the kitchen :)