
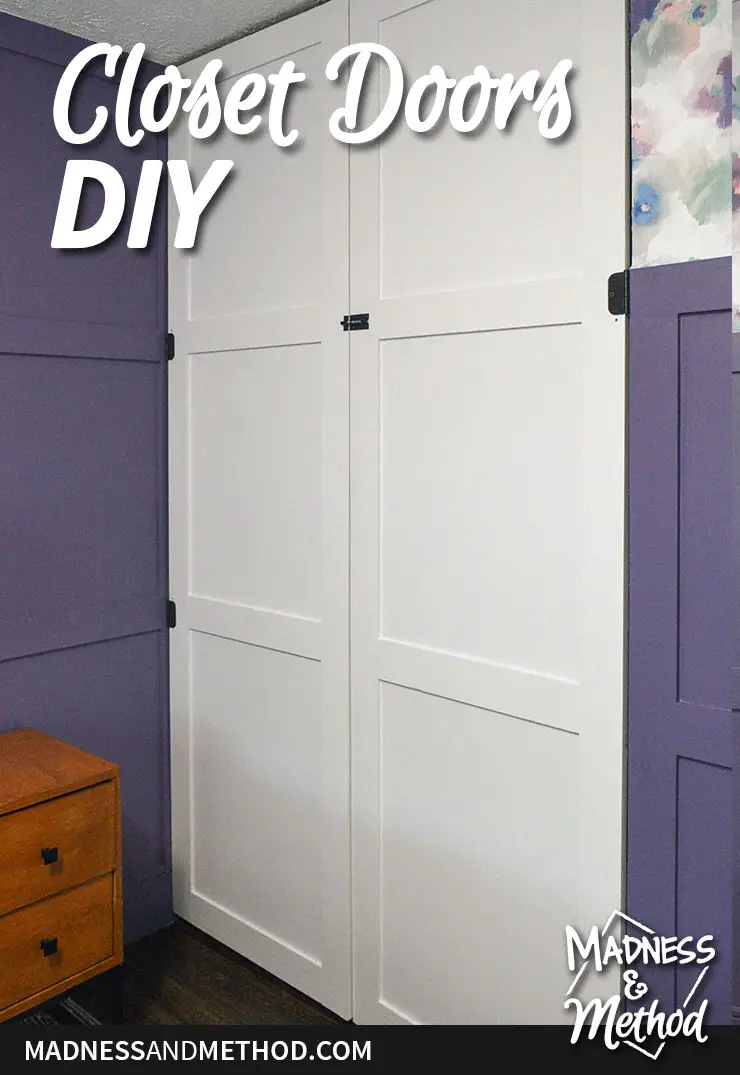
We just finished the last major project for our One Room Challenge master bedroom makeover! There are still a bunch of little tiny things that need to get done, but we’re in the home stretch :) Let me share the quick steps on how I built DIY closet doors.
– Note: This post contains affiliate links. See more information about affiliates here. –
Way back when I was planning this room, I knew that if we installed dressers in the closet, we’d need to address the closet doors:
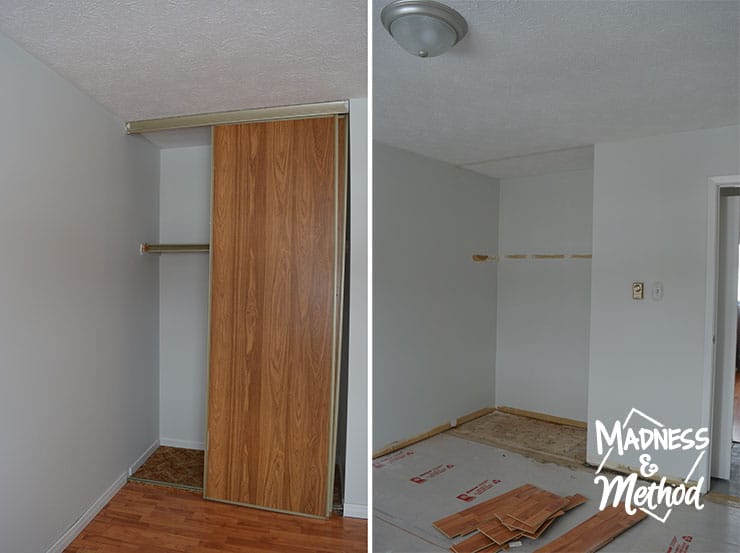
Having the two sliding doors (and only being able to access one side) wasn’t ideal. We took them out and I started thinking different doors we could install that would not block much of the closet.
But before I get ahead of myself, let’s quickly recap everything we’ve done so far for this bedroom makeover.
This is our first big project at our new house, and it’s being done in real-time as a linking participant in the One Room Challenge.

Follow Our Bedroom Progress:
W1: Master Bedroom Design Plan
W2: How to Plan Wall Treatments Video
W3: Bedroom Progress + To-Do List
W4: Purple and Modern Floral Wallpaper
W5: Cheap Custom Closet
W6: Bedroom Budget Breakdown
W7: You’re here!
Okay, now that you’re mostly caught up – let’s get back to the DIY closet doors!
Closet Doors Options
As I mentioned, I did a lot of research for closet doors. Similar sliding doors (if we were installing them new) cost a lot of money. Not to mention that they were only the standard height (and our doors go all the way to the ceiling). That would mean that I’d have to either look harder to find doors in a full height, or try to find something else.
In our last closet, we installed these adjustable panels (but I’d get white for this closet). I like that they reached to the ceiling and that the width was adjustable. The downside was that they still weren’t “completely” open to the closet and were not super rigid. Plus, we’d used them before… and I was ready for something different!
So, it was time to start thinking about DIY’ing some closet doors!
Not to rule out the sliding door option completely, I did consider building our own track system to keep costs down. The doors would only open on the one side (unless I built the track to go onto the next wall). But the track would have to be crazy long, and I wasn’t wild on having to move the doors way over.
Essentially, I wanted to be able to just have two doors that I could swing open and see the entire closet. So really, I just needed to make two normal hinged doors! (Or, a humongo version of our saloon baby gate).
Sounds easy enough, except that I knew that the dressers fit almost the perfect width of the closet. I didn’t want the last inch or two from the doors to block the drawers. (Luckily, the drawers fully open into the closet, so the doors would not have blocked anything).
DIY Closet Doors – Customizable Panels
Alright, so once I had my dimensions drawn up, I designed the most simple doors. Essentially, you want an outer frame and then you can add inner panels as you need.
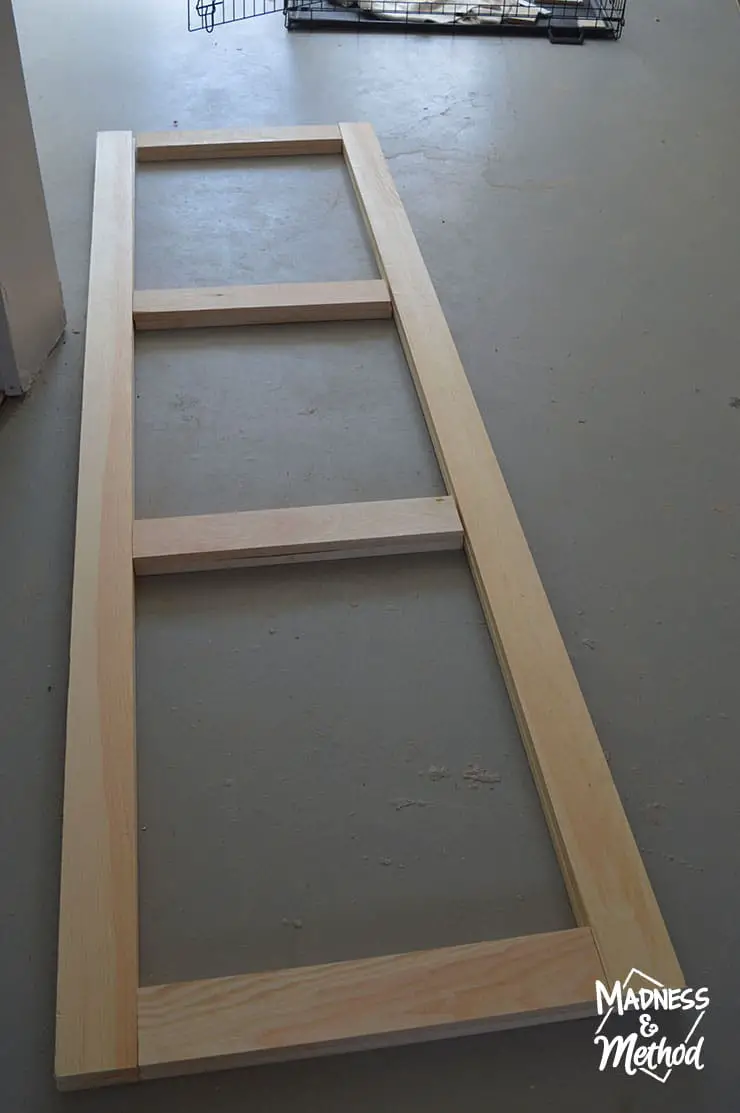
I chose to make 3 panels to match the board and batten accent wall. This was another big reason I decided to add the top piece of trim along my ceiling (it wasn’t in my original design).
If you’re building your own doors, you can use whatever “fill” panels you want. I thought about doing something cool like a plexiglass/acrylic sheet (that you could frost to hide the closet mess), or even a pegboard so you could see the inside peek through. In the end, I went with a simple/cheap melamine hardboard.
You’ll just cut some slots along the length of the boards (we know someone with a table saw). Make sure that there is a bit of play because after I had primed the pieces, we had to go back and get them recut :(
Then, cut your inner panels to fit, and slide them into place.
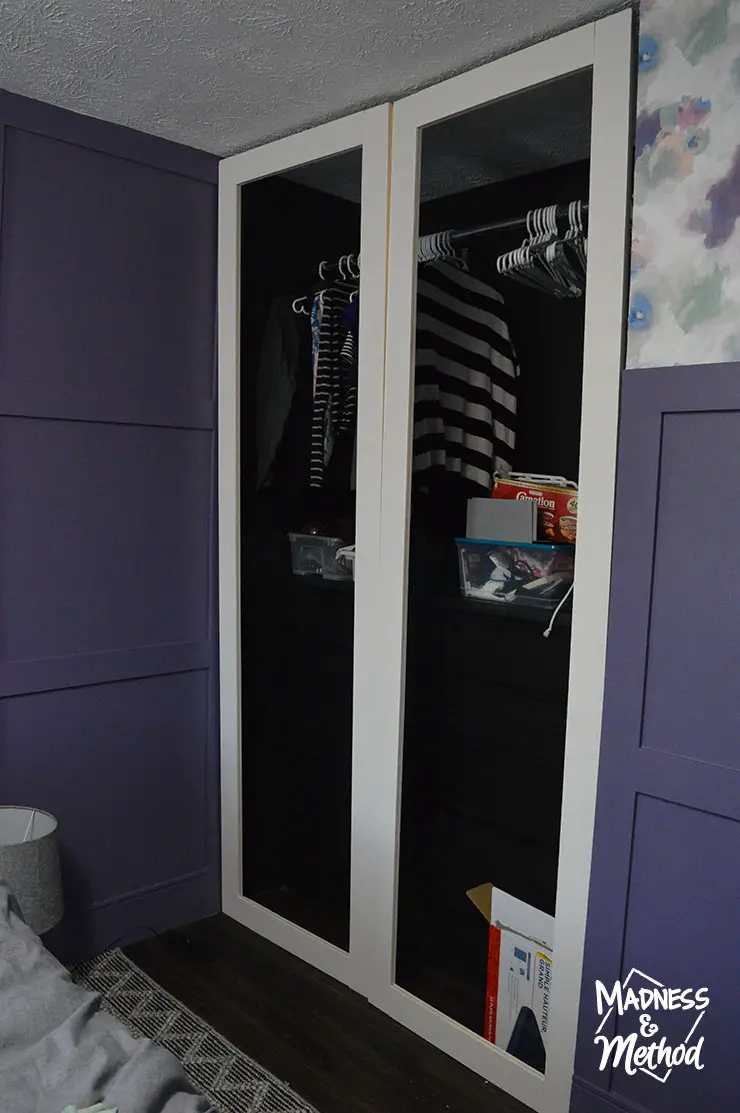
OKAY! So here is my next warning! Make sure to install the hinges on the door before you go through the trouble of cutting all your panels and making them fit perfectly. Although I had done a test fit on the outer frame (seen in the photo above), I forgot to account for the hinge width.
(I mean I did, but I measured the closet from the centre part). Unfortunately, the top and bottom of the left wall bowed in like crazy. Like almost an inch of difference.
Luckily, I did not have to cut my doors down to fit – but there was some very creative hinge installation going on last night.
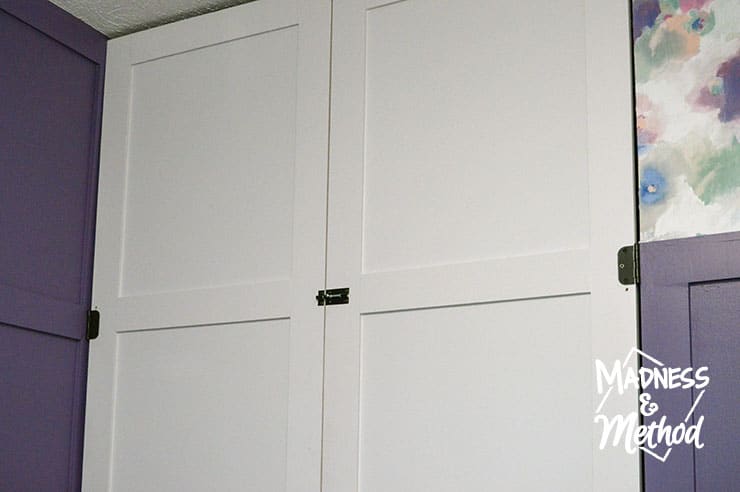
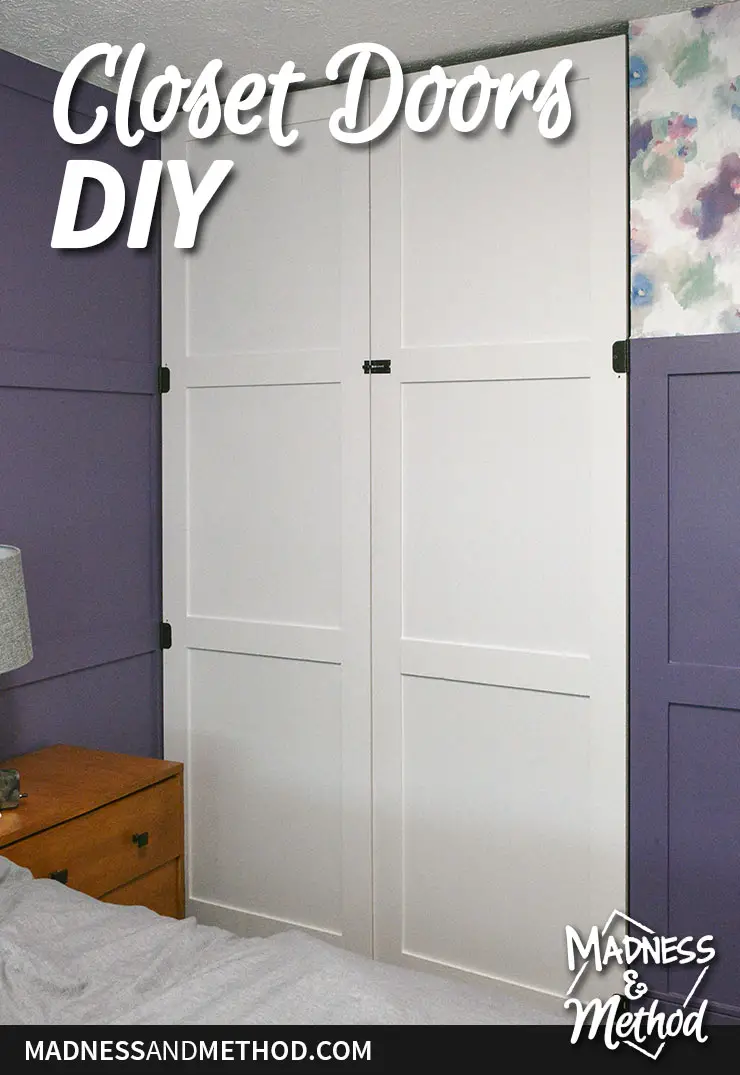
Our Custom Closet Doors
And now we have this:
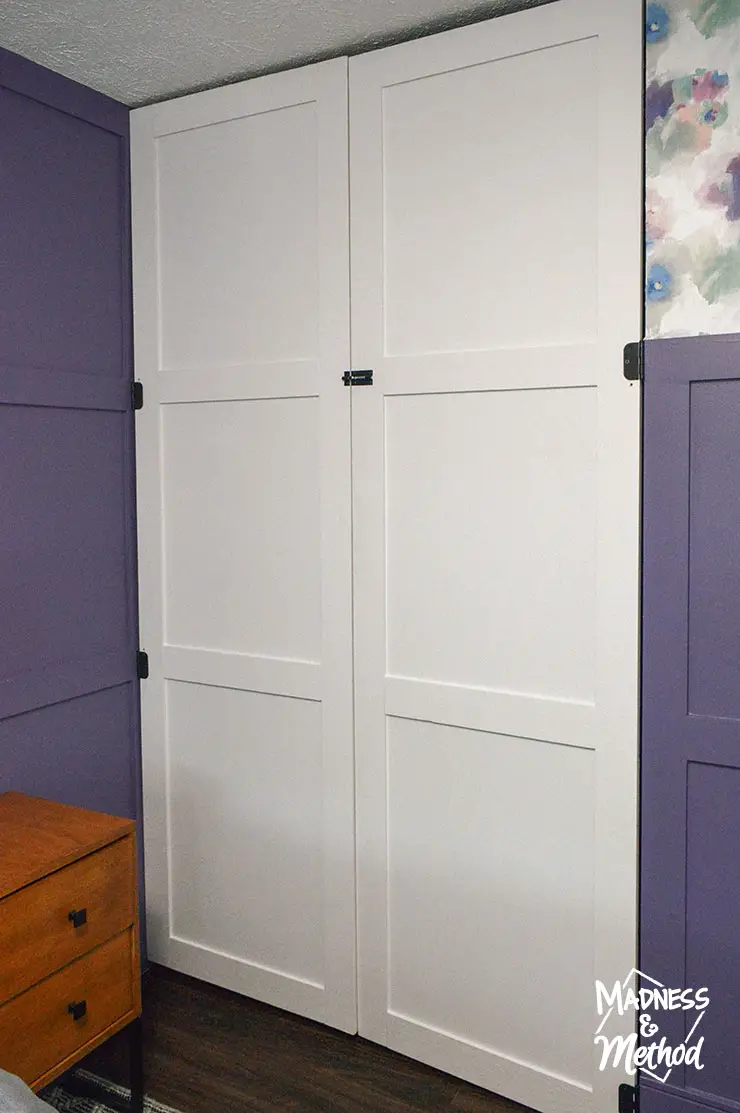
If you look closely, you’ll notice that there are only 2 hinges attached per door. On the left door (along the wall), the hinges are in the centre where we had the gap. On the right side, the panelling I added came out a bit – so we installed the hinges on that part only.
Oh, and I should also mention that I did have to cut the height of the doors after I had done my test fit. Our ceilings are 96″ high, and in the end, the doors are 94″ tall. (There’s one low part that dips down that would prevent us from opening the door all the way).
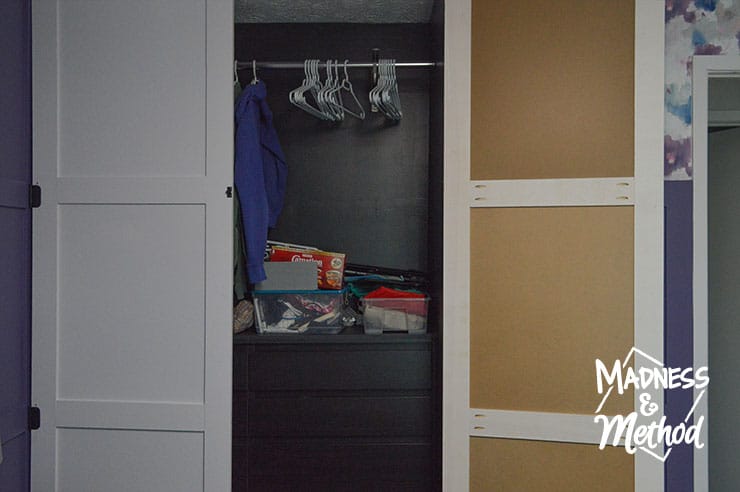
Only the outside is painted, but here’s a look at the inside to see the construction a bit better. I need to patch the holes where we re-adjusted the hinges, and then do a coat or two on the edges.
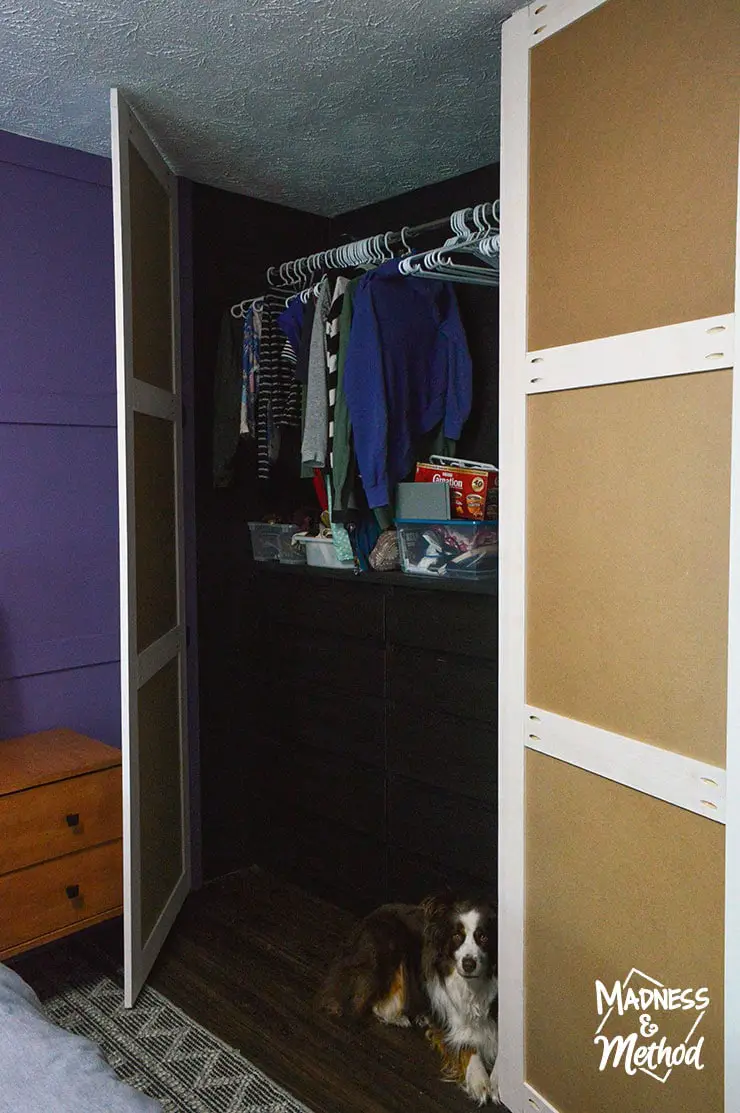
You might also notice that you can’t open the left door fully because of the nightstand. I knew this! But, our feature wall is perfectly symmetrical, so I’m going to take the photos for the reveal, then we’ll move everything one foot over.
(Oh, and Tootsie’s pretty upset that there are closet doors now! She used to sleep in the little nook and I heard her walk into them a few times last night).
We added a little lock to the center to keep the doors in place (the right door swings inward). I might add a doorstop/trim piece along the ceiling, and it would also hide the shadow/gap a bit better. We need handles too, and I think we might go crazy and do something custom.
I shared the big to-do list for the room in week 3, but have since added a few more small tasks. So far, we need to:
- Fill in the closet with the rest of our clothes (aka the Husband’s stuff)
- Repot plant (waiting on dirt to arrive)
- Decide on light bulbs
- Install blinds (I ordered these as well, but not sure if they will come in on time).
- Paint touch-ups/wallpaper fix in corner
- Patch + re-paint closet door edges
- Design/create/install closet door handles
I did a lot of little stuff the last couple of days, and I’m hoping everything else will come together soon! Don’t forget to check out the other One Room Challenge participants and featured bloggers too.
Reveals are next week!

7 Comments
Amie Druehl
June 22, 2020 at 8:54 amThe doors look so great! Gorgeous update.
Nicole
June 23, 2020 at 1:21 pmI like that they match the rest of the room :)
Breana Haselbarth
July 6, 2022 at 12:25 pmThese look amazing! I was wondering did you attach the hinges directly to the wall or was there already an existing door frame/ stud from the old closet frame? Thinking of DIYing a temporary door at my Uncle’s to create a bedroom and there is only an opening that you would walk through. There are studs behind the drywall so I was hoping to be able to install hinges directly over the drywall with long screws but not sure if it’s possible.
Nicole
July 6, 2022 at 3:16 pmThanks Breana! Yes, we used extra long screws (not the ones that came with the hinges) to go into the studs. There was definitely a stud at the corner part (right side) but we only went into the wall moulding and drywall on the left side. Going into studs is definitely better, and they should already be at the ends of your opening. Good luck!
43 DIY Closet Doors Ideas - lineup-mag
March 10, 2024 at 5:19 am[…] this approach, you gain customizable, ceiling-high doors that offer a sleek look and full access to your closet. […]
26 DIY Closet Door Ideas That Make a Stylish Statement – HausChic
November 24, 2024 at 3:22 am[…] Custom Closet Doors from Madness & Method […]
26 DIY-idéer för garderobsdörrar som gör ett snyggt uttalande – dekorora.com
February 4, 2025 at 7:22 am[…] Anpassade garderobsdörrar från Galenskap & Metod […]