
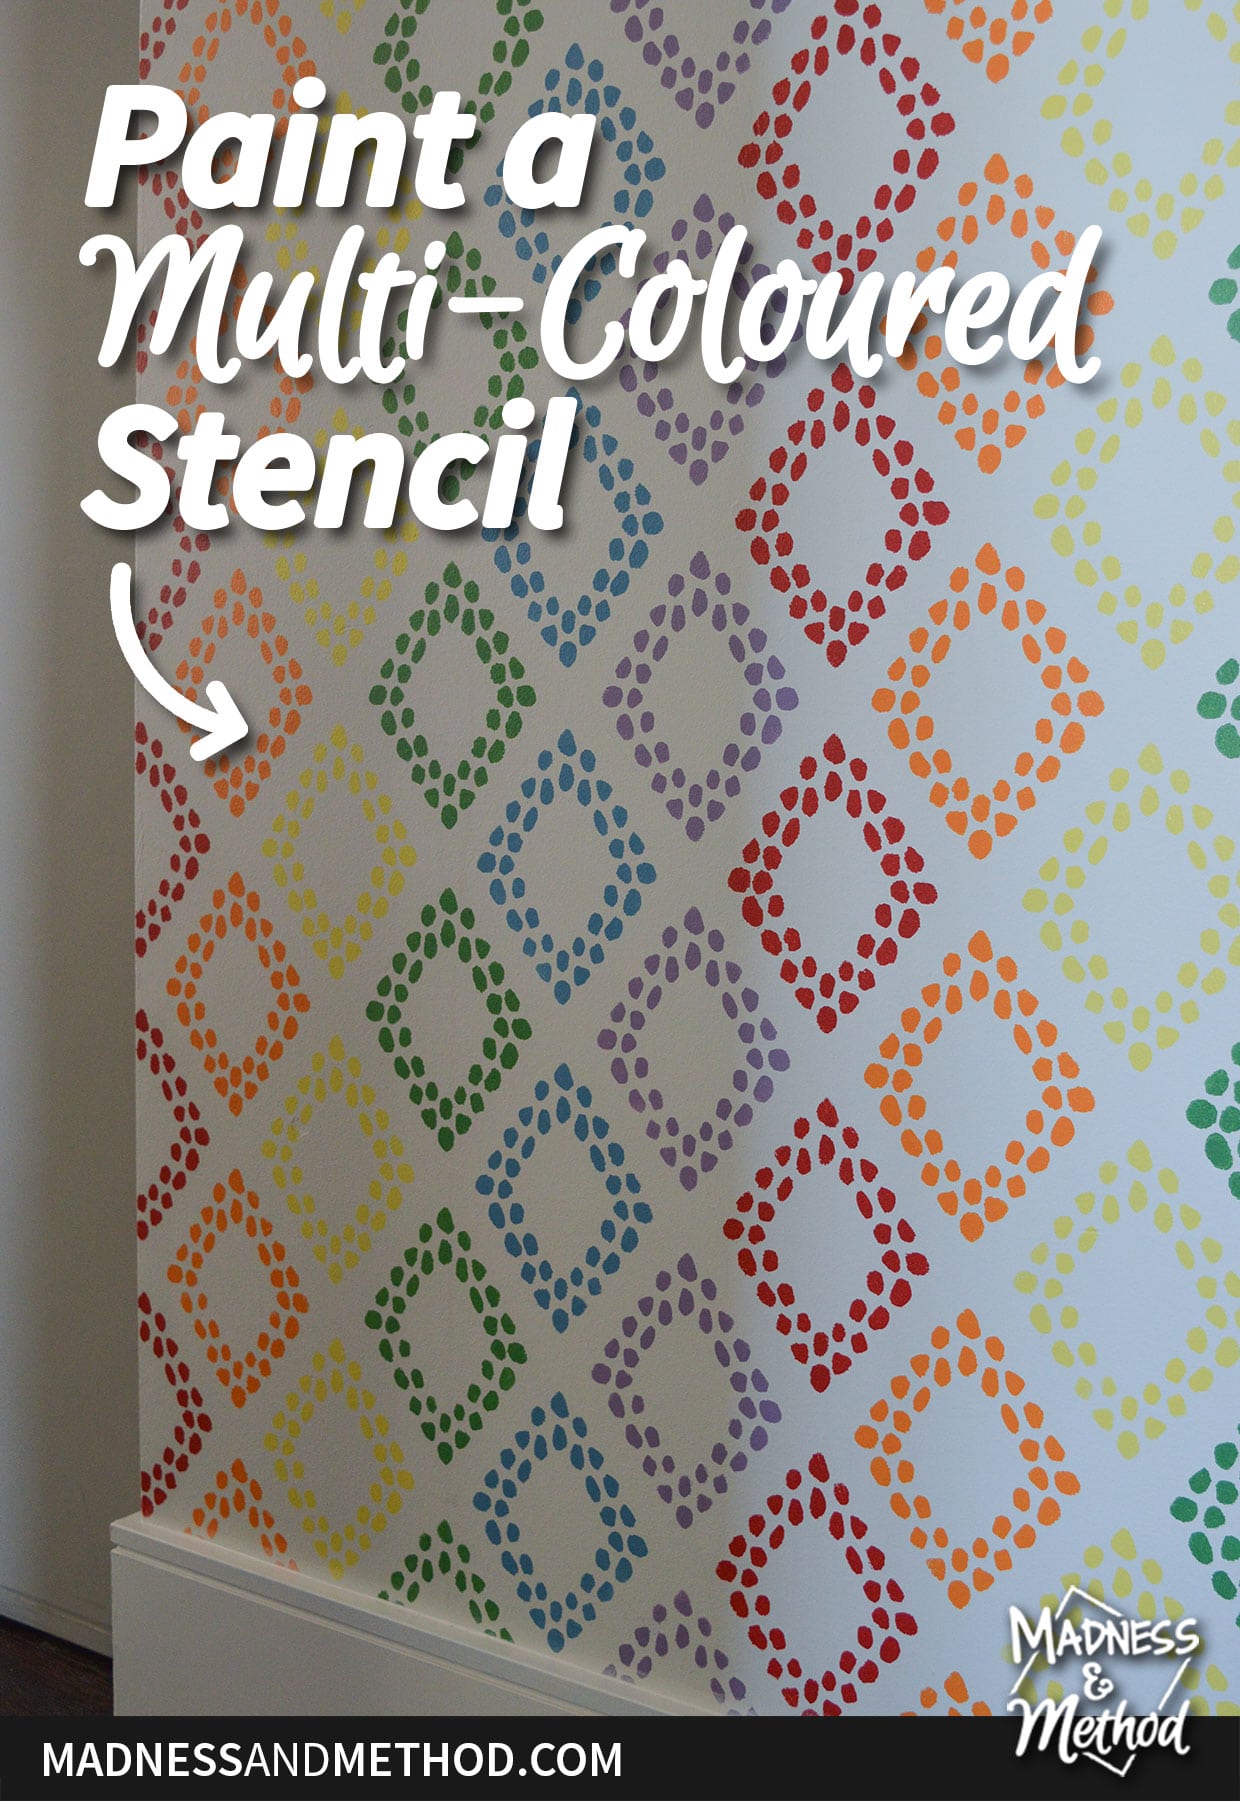
Have you ever painted with a stencil? You might not want to do a full rainbow theme like me, but it’s not uncommon to use different colours for a stencil. Obviously, it’s much easier if you stick to one colour… but where’s the fun in that!? Today I’m sharing my tips and tricks to paint a multi-coloured stencil, so let’s get to it!
– Note: This post contains affiliate links. See more information about affiliates here. –
We’re so close to the finish line for the hallway makeover! I have a few sneak peeks today along with my tips for painting a rainbow stencil. If you want to catch up on the whole hallway project, see the earlier posts here:
Before Photos and Plans | Textured Ceiling Repair | Painting Sliding Closet Doors | Mixing Paint at Home | Broom Closet Organization | Step-By-Step Baseboard Installation
I’m linking up as part of the 8-week Spring 2022 One Room Challenge. Remember to come back next week for the full reveal!
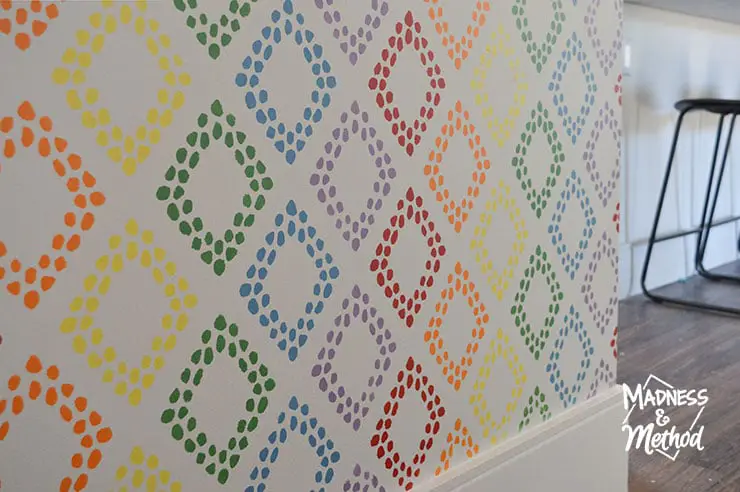
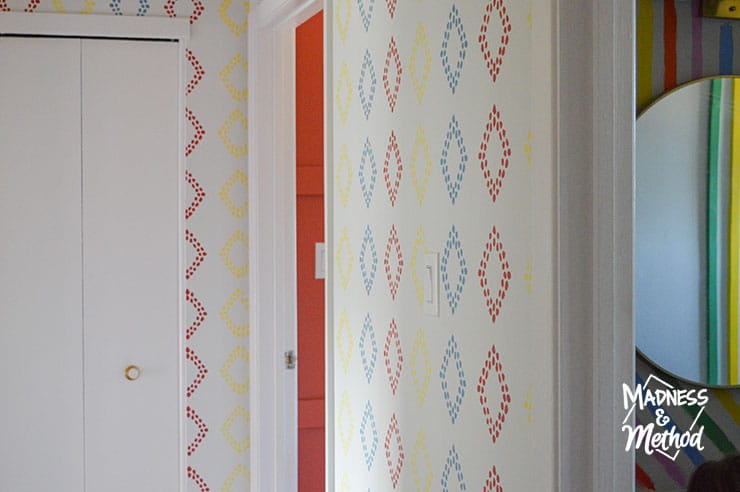
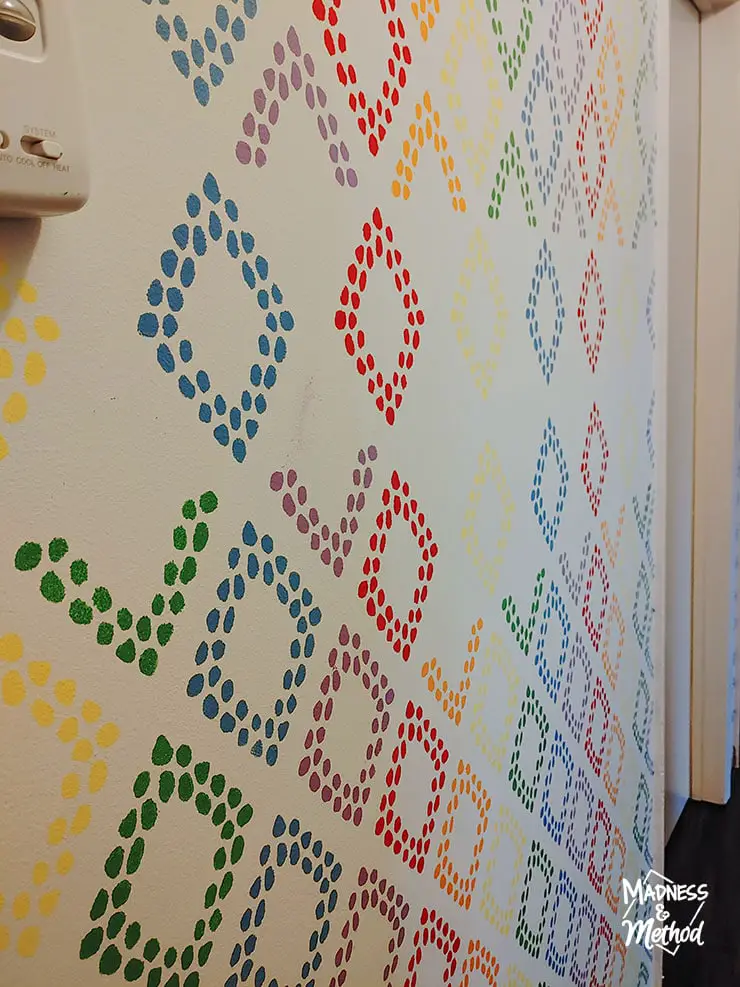
I wanted colourful rainbow-esque walls for our upstairs hallway, but couldn’t find the perfect wallpaper to match my vision. Enter a stencil and custom paint colours! I used this large diamond dots stencil but saved a bunch of others on my Pinterest Board if you’re looking for something similar.
Ideally, I was looking for something that I could easily add colours. Nothing where the stencil pattern was too tight, and I think this one worked out well!
Starting A Wall Stencil
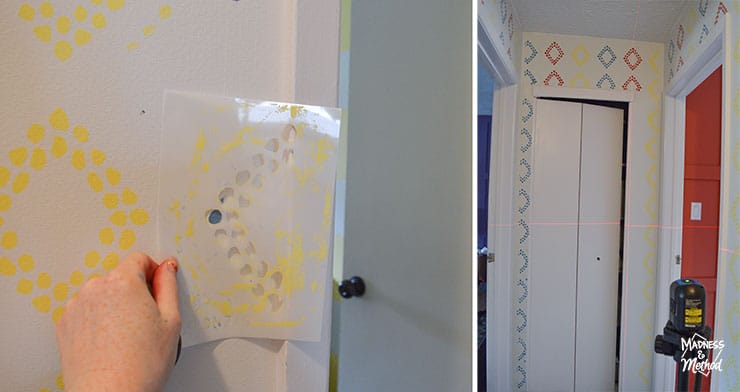
Do you start your stencil where you won’t see it as much and practice your technique? That’s what I debated, but in the end, chose the wall that would be the most visible.

Of course, I had painted all my walls a few days before (because I didn’t have any leftovers and wasn’t sure of the colour). I lined up the stencil with the wall, used a laser level to make sure it was even and taped it at the top. Notice how my thermostat was sticking out? You might have to deal with obstacles, and you can’t paint that close to them.
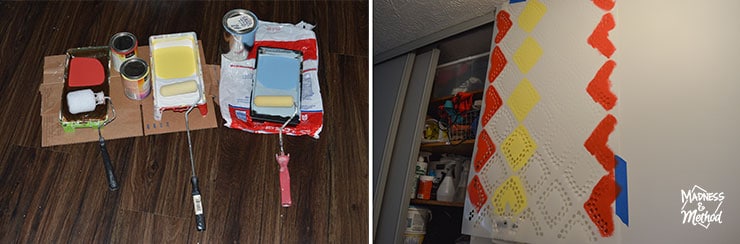
Only half the colours were painted in the first round for a few reasons, mostly because I:
- didn’t have that many rollers and trays
- didn’t want to overlap the paint colours on the stencil
- hadn’t purchased all my paint colours yet (more on the colours below)
- needed a clean area on the stencil to put my hands
You’ll notice in the photo above that I used two foam rollers and one regular (fluffy) roller. The foam rollers were much better for stencils!
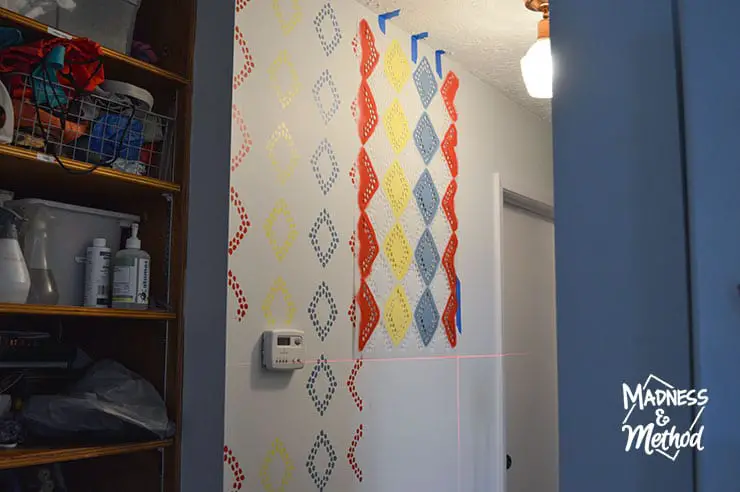
It was easiest to work from top to the bottom. Whenever I moved my stencil to the next column, I lined it up with the dots on the left AND made sure it was level too. If it wasn’t perfectly lined up, I’d split the difference and adjust as I went. See how there are some diamonds missing around the thermostat? I’ll add them after :)
Stencil Painting Products
- Wall stencil (this is the diamond dots stencil I used)
- Small foam rollers
- Paint roller trays
- Laser level (similar)
- Different paint colours (list below)
- Rags and water for cleanup
- Painters tape to hold the stencil
- Artist brush for touch-ups and tight areas

Working around corners is tricky. You don’t want to fold your stencil because it can get damaged – but it needs to be tight enough so that it still lines up. I was working around a lot of doors too, so I couldn’t always get my stencil nice and flat.
My stencil was large too! It was convenient because I didn’t have to move the stencil as much – and luckily a little half diamond came with my order. If you’re only working with a big stencil, you may need to order a second one that you can fold.
Once I was done with the big diamond stencil, I took the little one and filled in all the little diamonds that were missing. Again, I used the laser level to make sure the patterns lined up.
I finished my first three colours in a few hours (a long afternoon) and left everything while I picked up my new paint colours. There were also some messes that I had to cover-up (ie: paint over with the original wall colour) before I could start again.
Painting in Batches for a Multi-Coloured Stencil
My number 1 tip for painting a multi-coloured stencil: don’t be afraid to do it twice (or three times if you need!). Had I tried to paint all six colours at once, I would have for sure mixed the different coloured paints on my rollers. My hands would have been a LOT messier than they were, and there might have been more bleed-through, smearing, or other messes too.
Paint colours I used:
- BM Chili Pepper
- BM Carrot Stick
- BM Banana Yellow
- Behr Mixed Veggies
- Blue and purple (custom mix)
I stuck to a food theme, ha :)
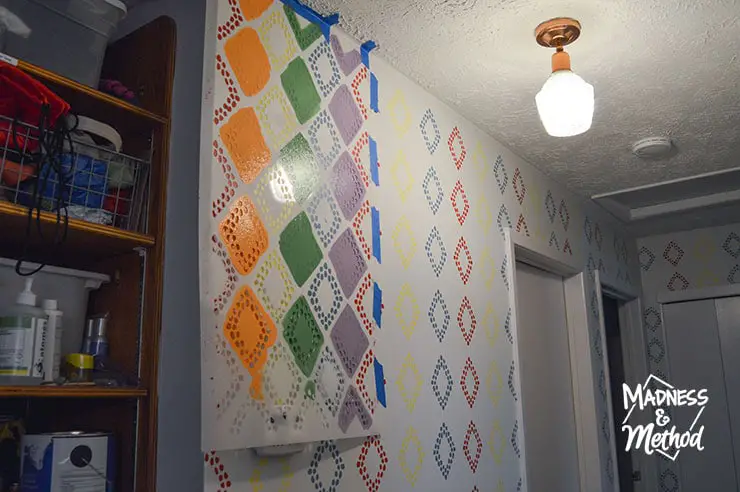
So, once my new paint was purchased, my stencil was thoroughly cleaned, and the few mistakes were repainted/dried, I did it again! Let’s be honest though, I also have three little children and I also had to wait for a good block of time ha. Turns out, it was another dark afternoon on a weekend.
Because I had already levelled and lined up my pattern the first round, it was much quicker this time too. My stencil covered less than half the wall, so I had to move it 3 times (2.5) to cover one column. To avoid placing it on the just-painted section, I lined it up at the top, and then at the bottom – then did the centre rows after.
Washing Wall Stencils
My other tip to stencil quickly? I didn’t wash/wipe my stencil each time. Heck, I didn’t wash it at all until I was done. Yes, there was some build-up of paint, but it didn’t drastically reduce the quality of the stencilled sections.
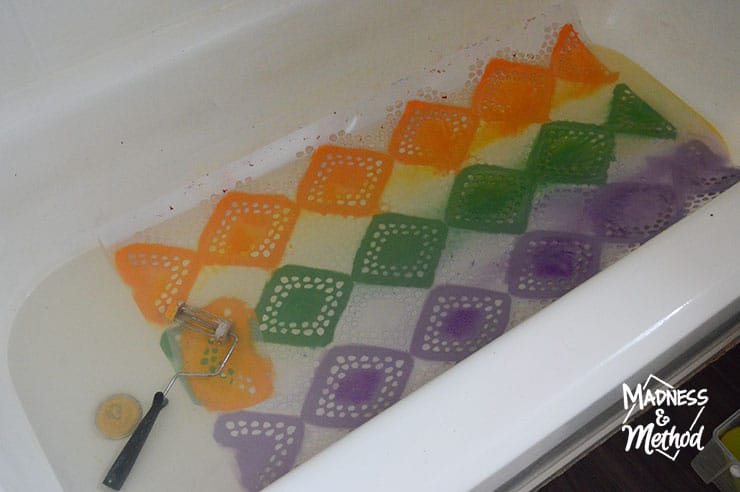
For washing, it was easiest to put the stencil in the tub and soak it for a while. Then, I simply peeled the paint off and scrubbed any stuck-on sections.
I don’t have any close-up photos of the bleed-through or other mistakes, but you can see a bit in the photo above. I filmed a quick video showing how to stencil, and you can see it there. Plus, how I hand-painted the dots.
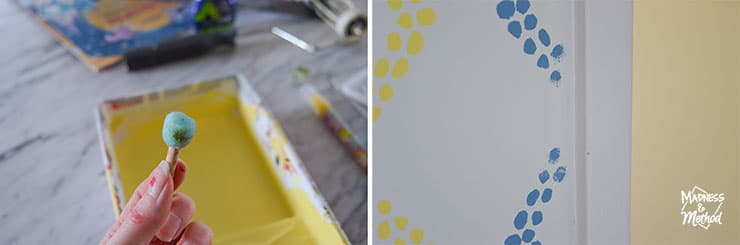
Speaking of which, because I had chosen a dot-based stencil, I thought I could use a paint dabber to add the missing ones. Unfortunately, it wasn’t as crisp as the others, and I much preferred just using a small artist brush.
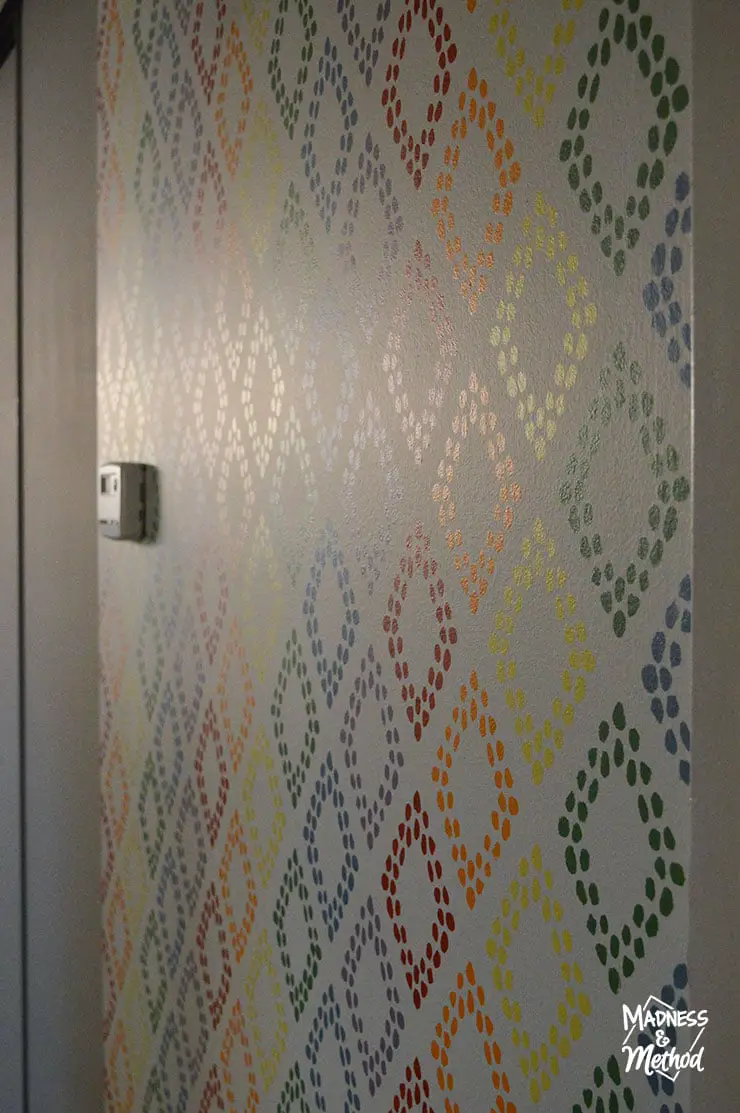
One thing you don’t notice as much during the day, is how the painted sections pick up the light differently. At night, the little diamonds shine if you look at a certain angle, so it’s pretty cool!
About the One Room Challenge
Visit the One Room Challenge blog to see other people completing room makeovers too.

Follow my hallway makeover:
Hallway Makeover Plans (Week 1)
Textured Ceiling Repair (Week 2)
Painting Sliding Closet Doors (Week 3)
Mix Paint at Home (Week 4)
Broom Closet Organization (Week 5)
Step-By-Step Baseboard Install (Week 6)
Paint a Multi-Coloured Stencil (this post!)
Last week I mentioned that I was going on vacation, and I’m there now! So… I’ve already finished my hallway makeover :) Please come back next week to see it all!
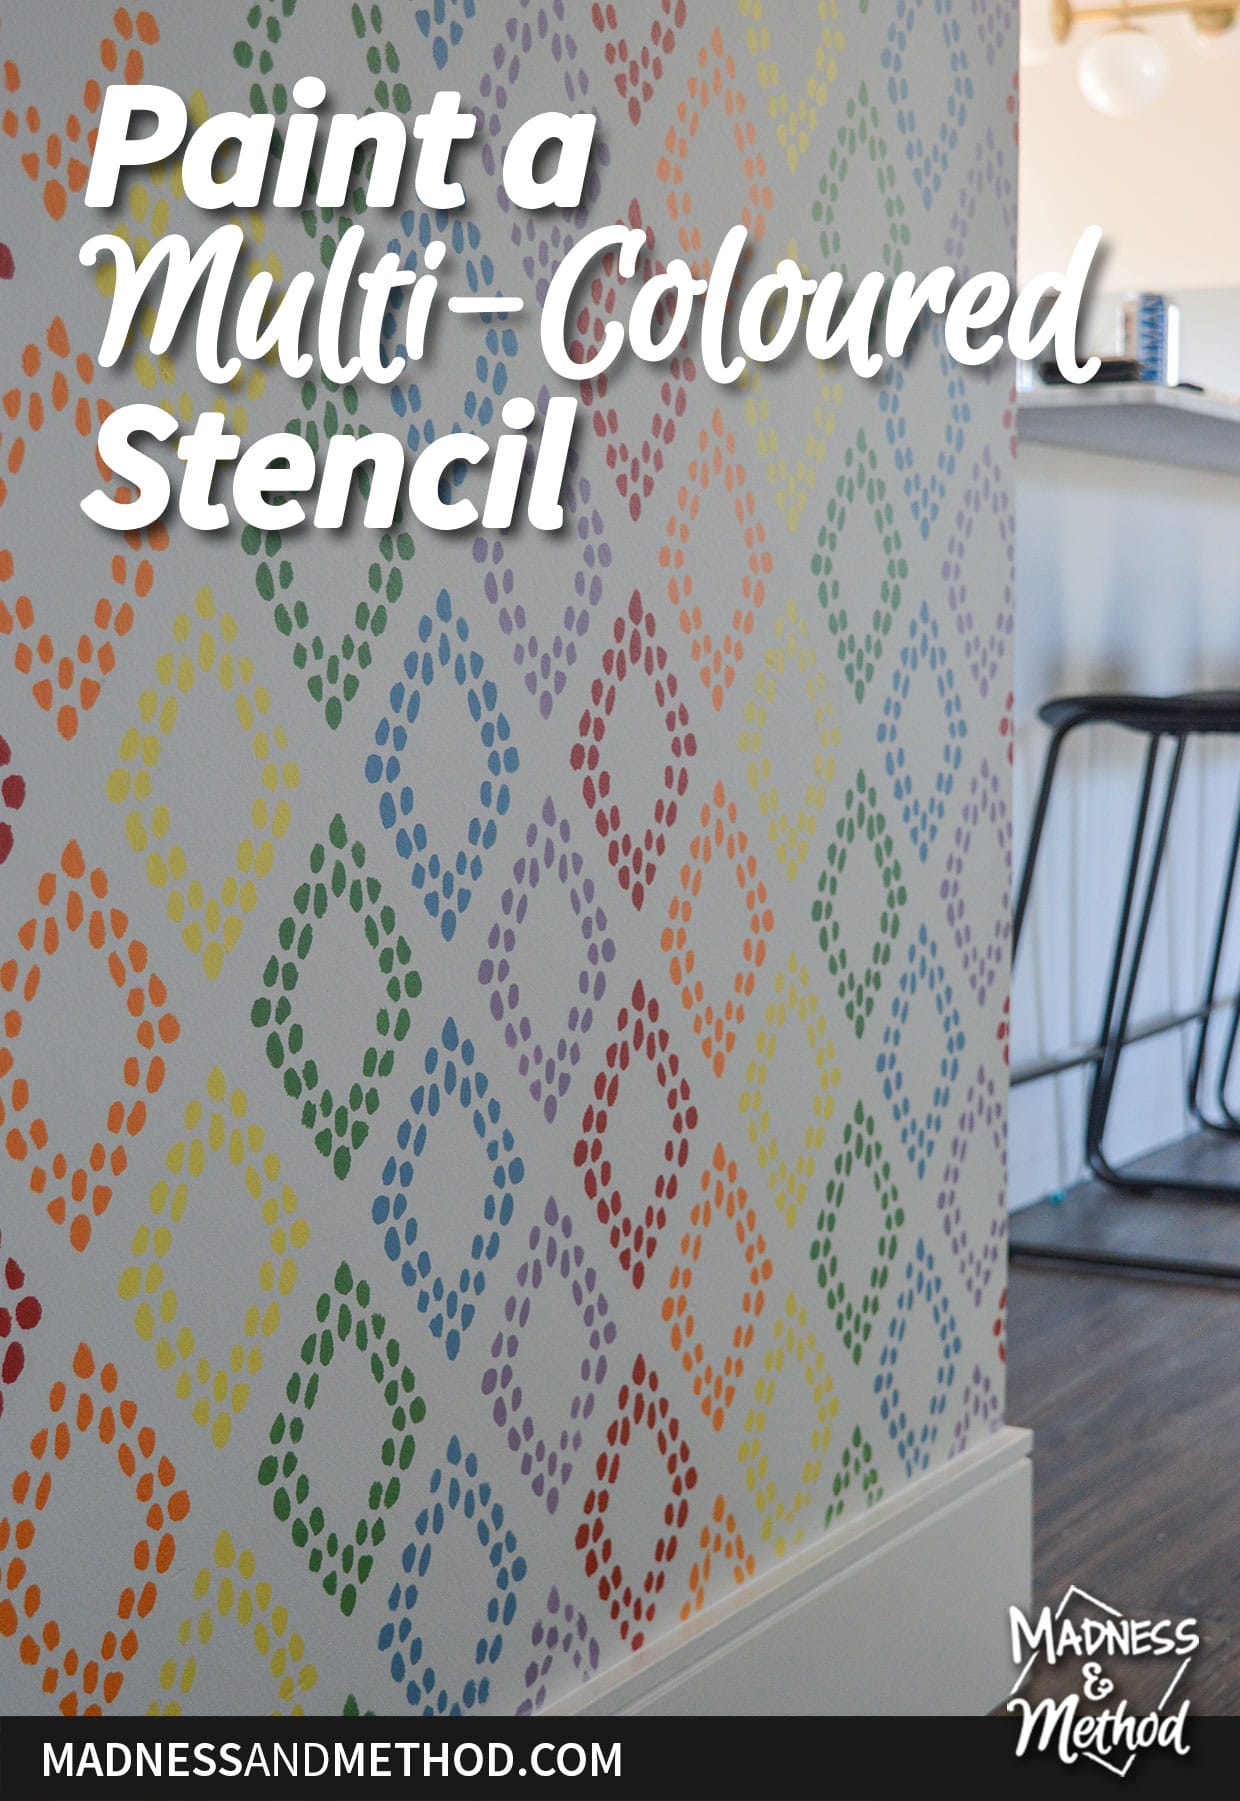
Technically there are probably a few more stencil imperfections that I could touch up, but I think that would be a never-ending project! If you’re someone who needs perfect crisp lines, I would caution against doing a stencil in a high-traffic area that you will walk by/see a lot. Even so, I think it’s only something that you notice as the stencil painter, and not necessarily as everyone else, ha.
Oh, and check out this post for other wall transformation ideas!

No Comments