

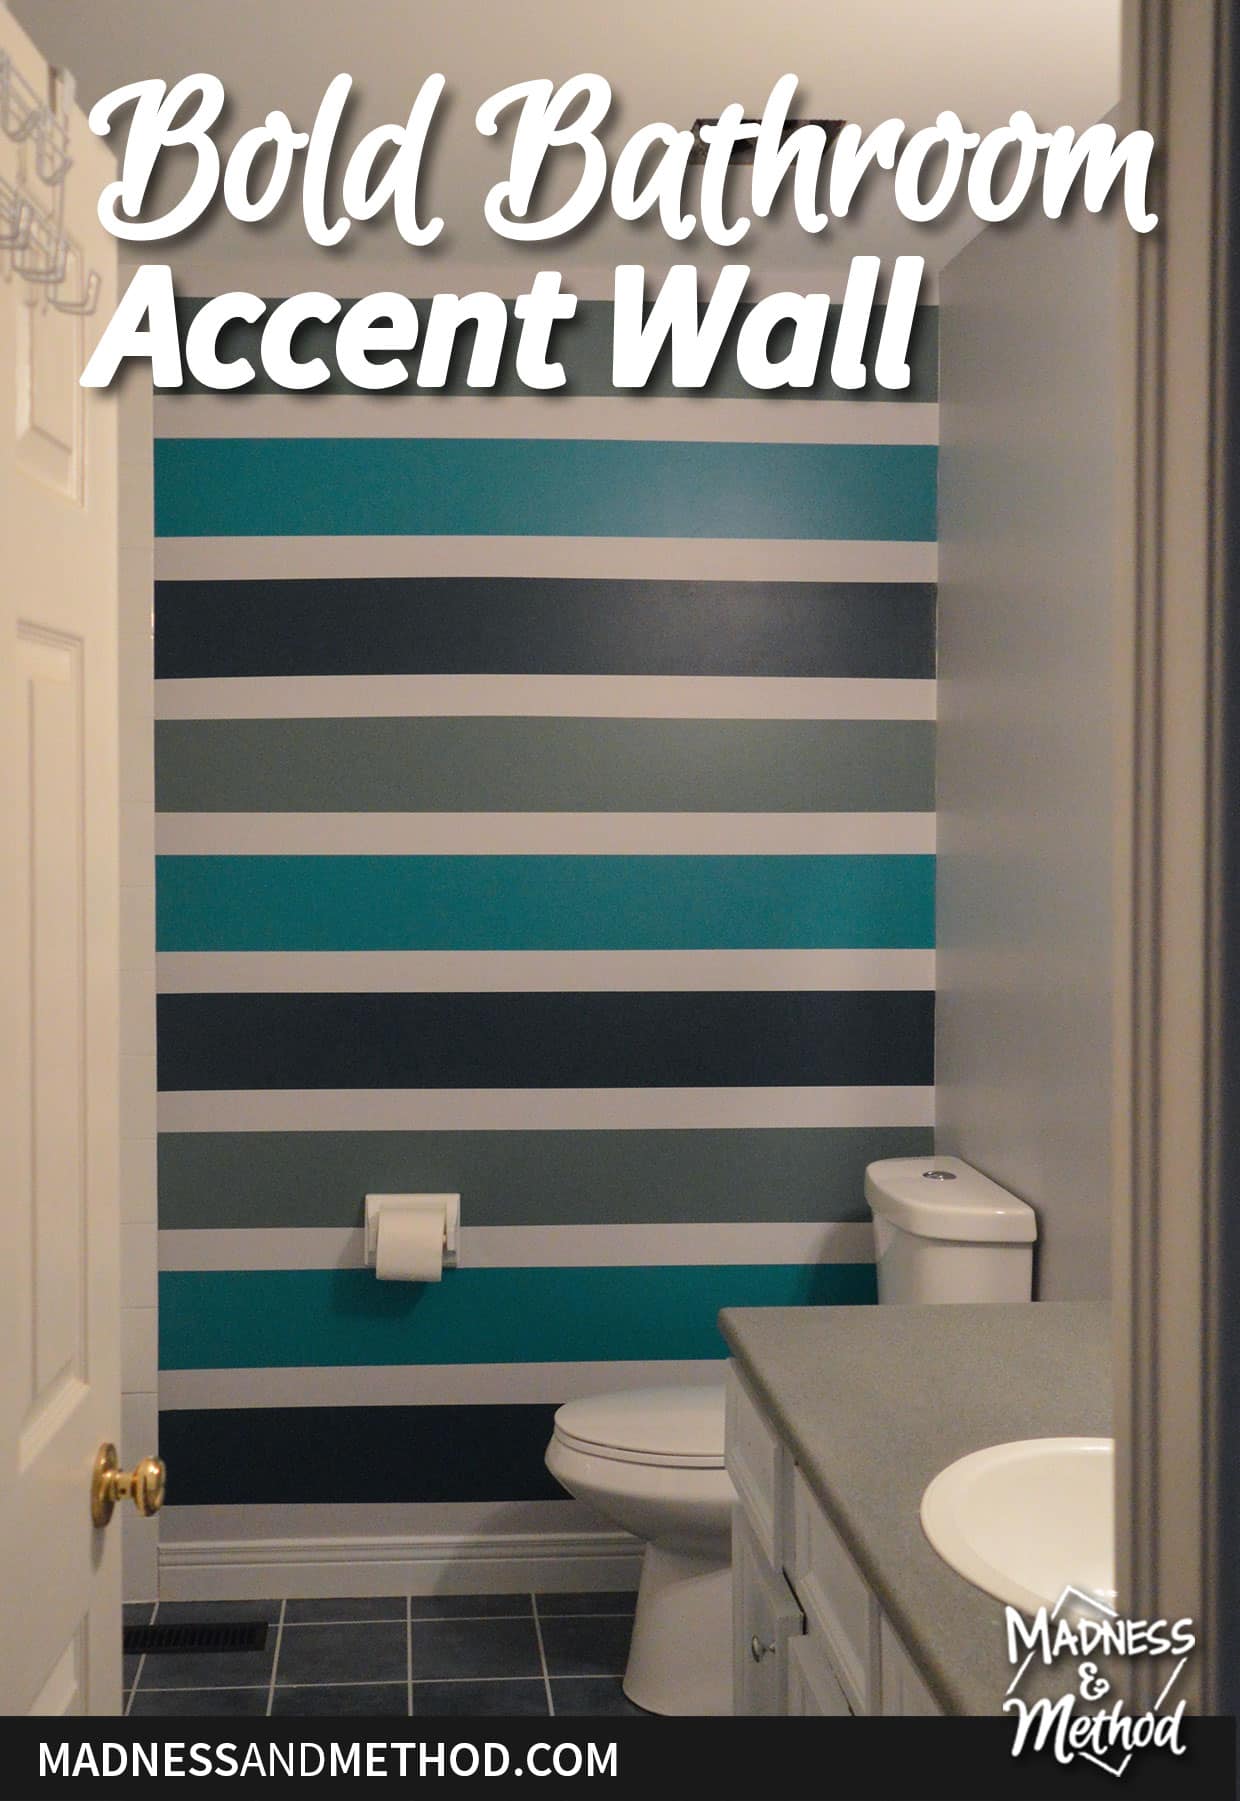
As I’ve been sharing my brother’s bathroom renovation the last few weeks, there’s one area that I’ve tried to keep hidden: the bold accent wall! We wanted to do something to match the diamond accent wall he has downstairs. So that meant we’d be using the same colours, but not necessarily the same pattern. I came up with a few options, and I’m sharing all of those and the whole process for painting this bathroom bold accent wall.
This is the 7th week of the Spring 2023 One Room Challenge! I’ve been sharing my brother’s bathroom renovation including his beige bathroom intro, painted floors, toilet installation, tub and tile paint, building a mirror frame and last week was the vanity transformation.
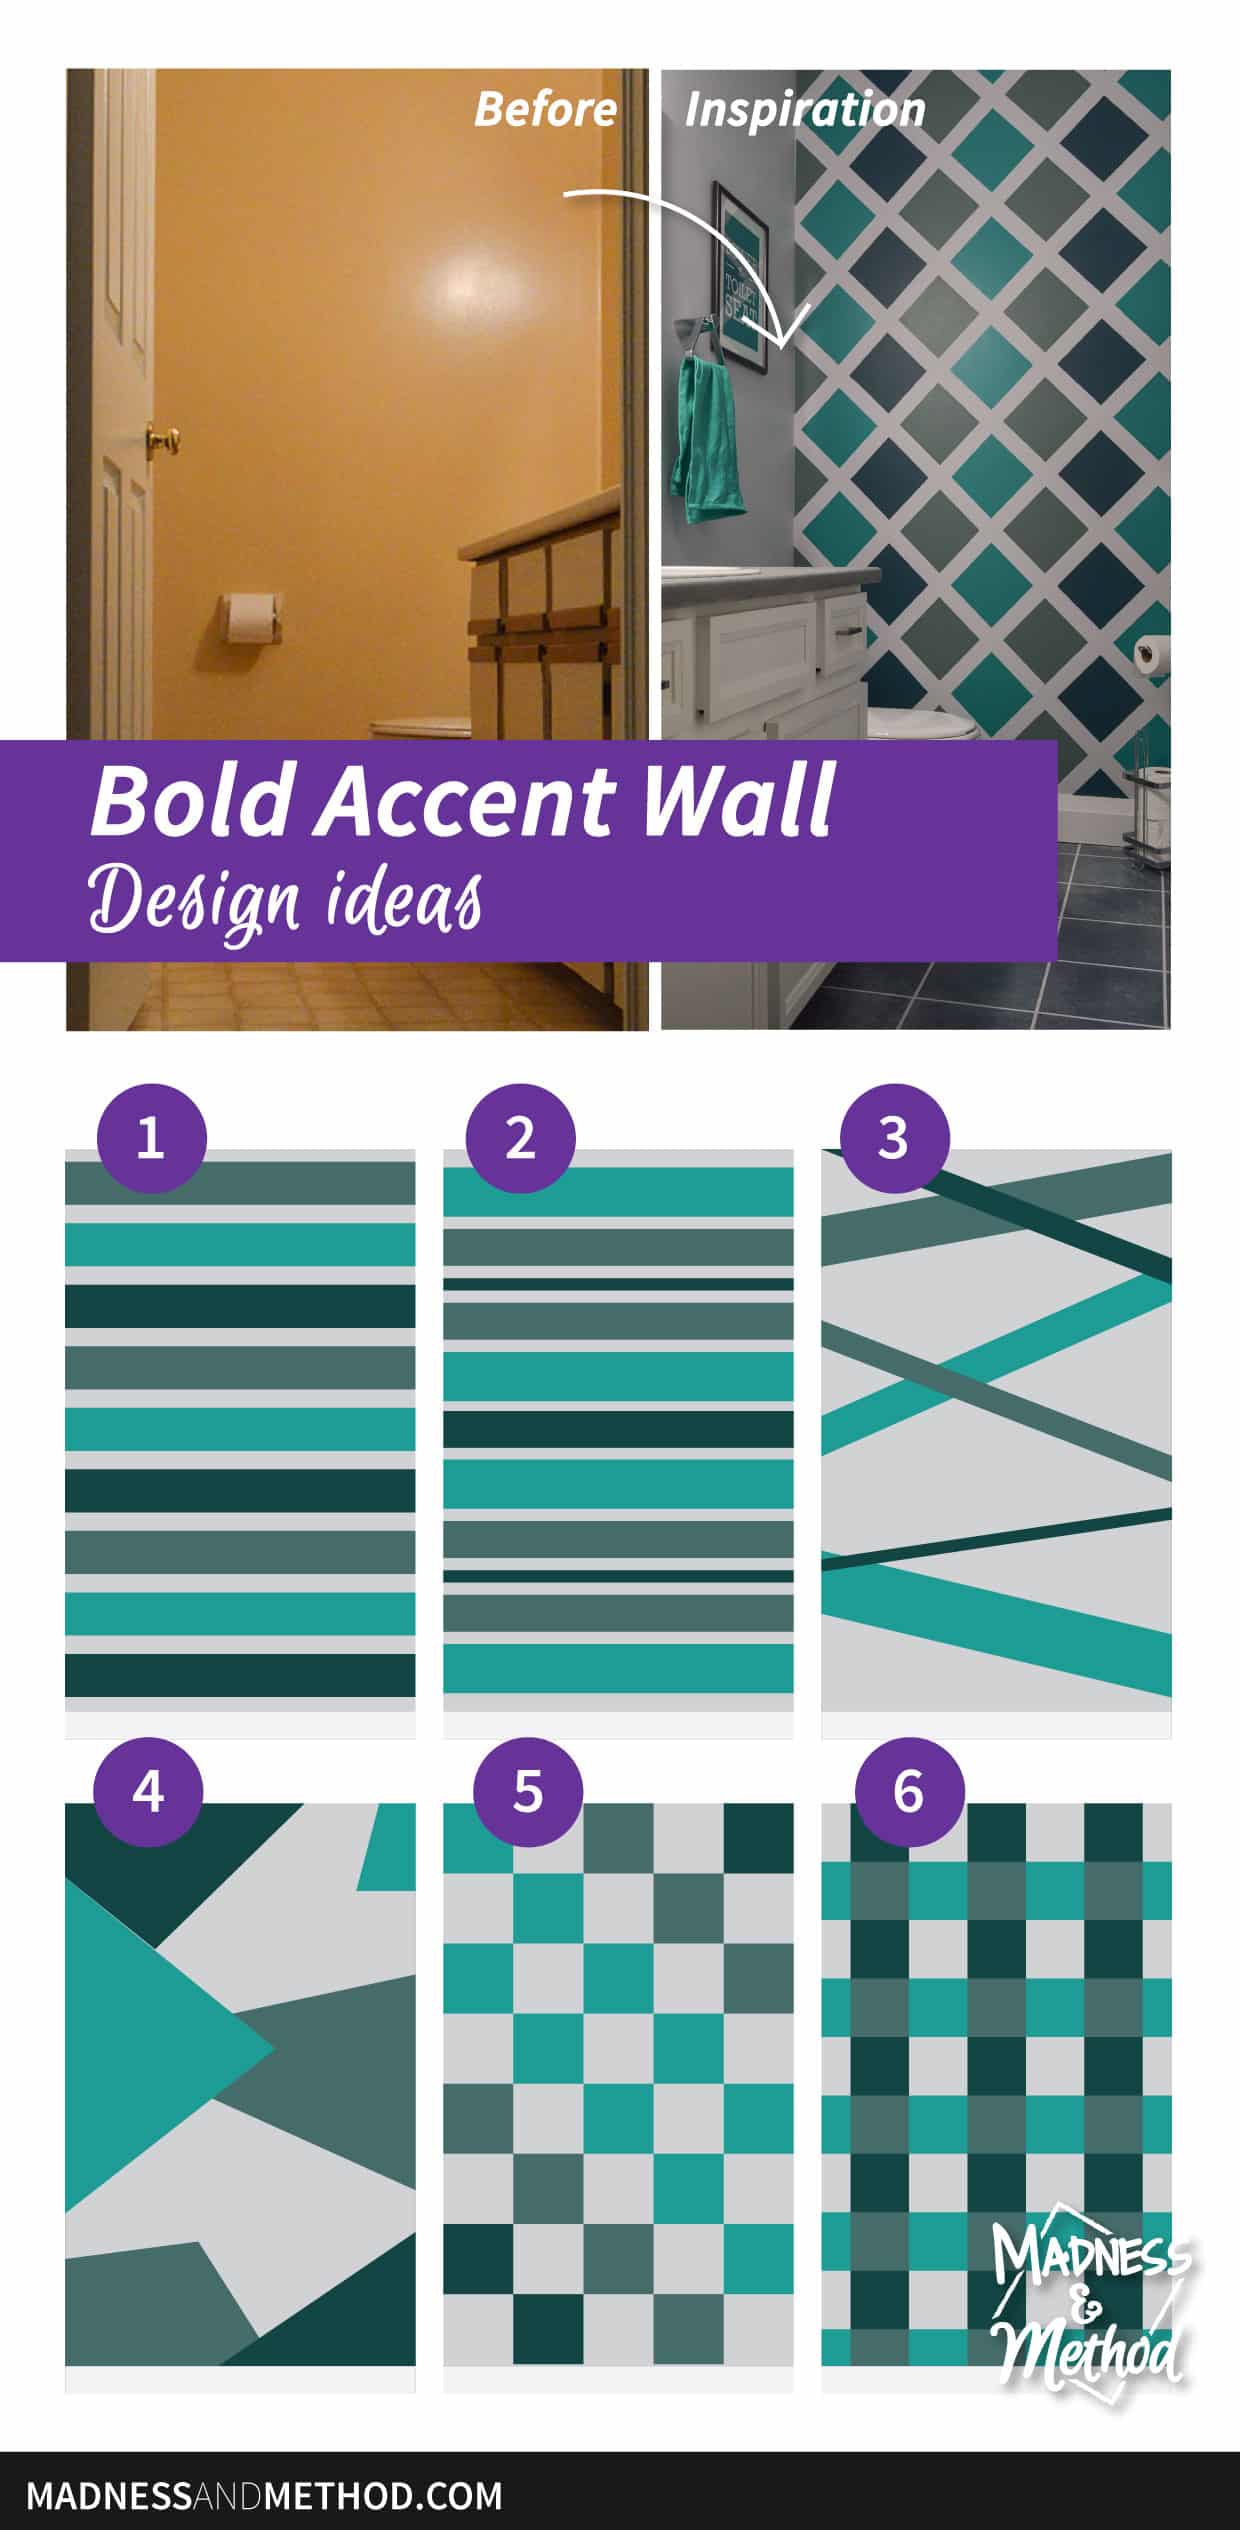
First up, drawing out and selecting a pattern! You can draw accent wall ideas by hand, but I love coming up with my designs on the computer. I made 6 different options for my brother (I shared them in Week 1 too) and he selected #1. (PS: He said he was very against #3 and #4 which was funny because his roommate had those as his favourite).
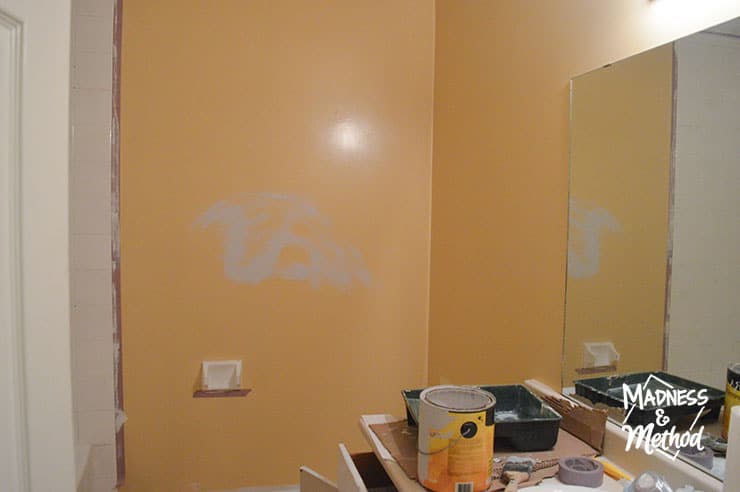
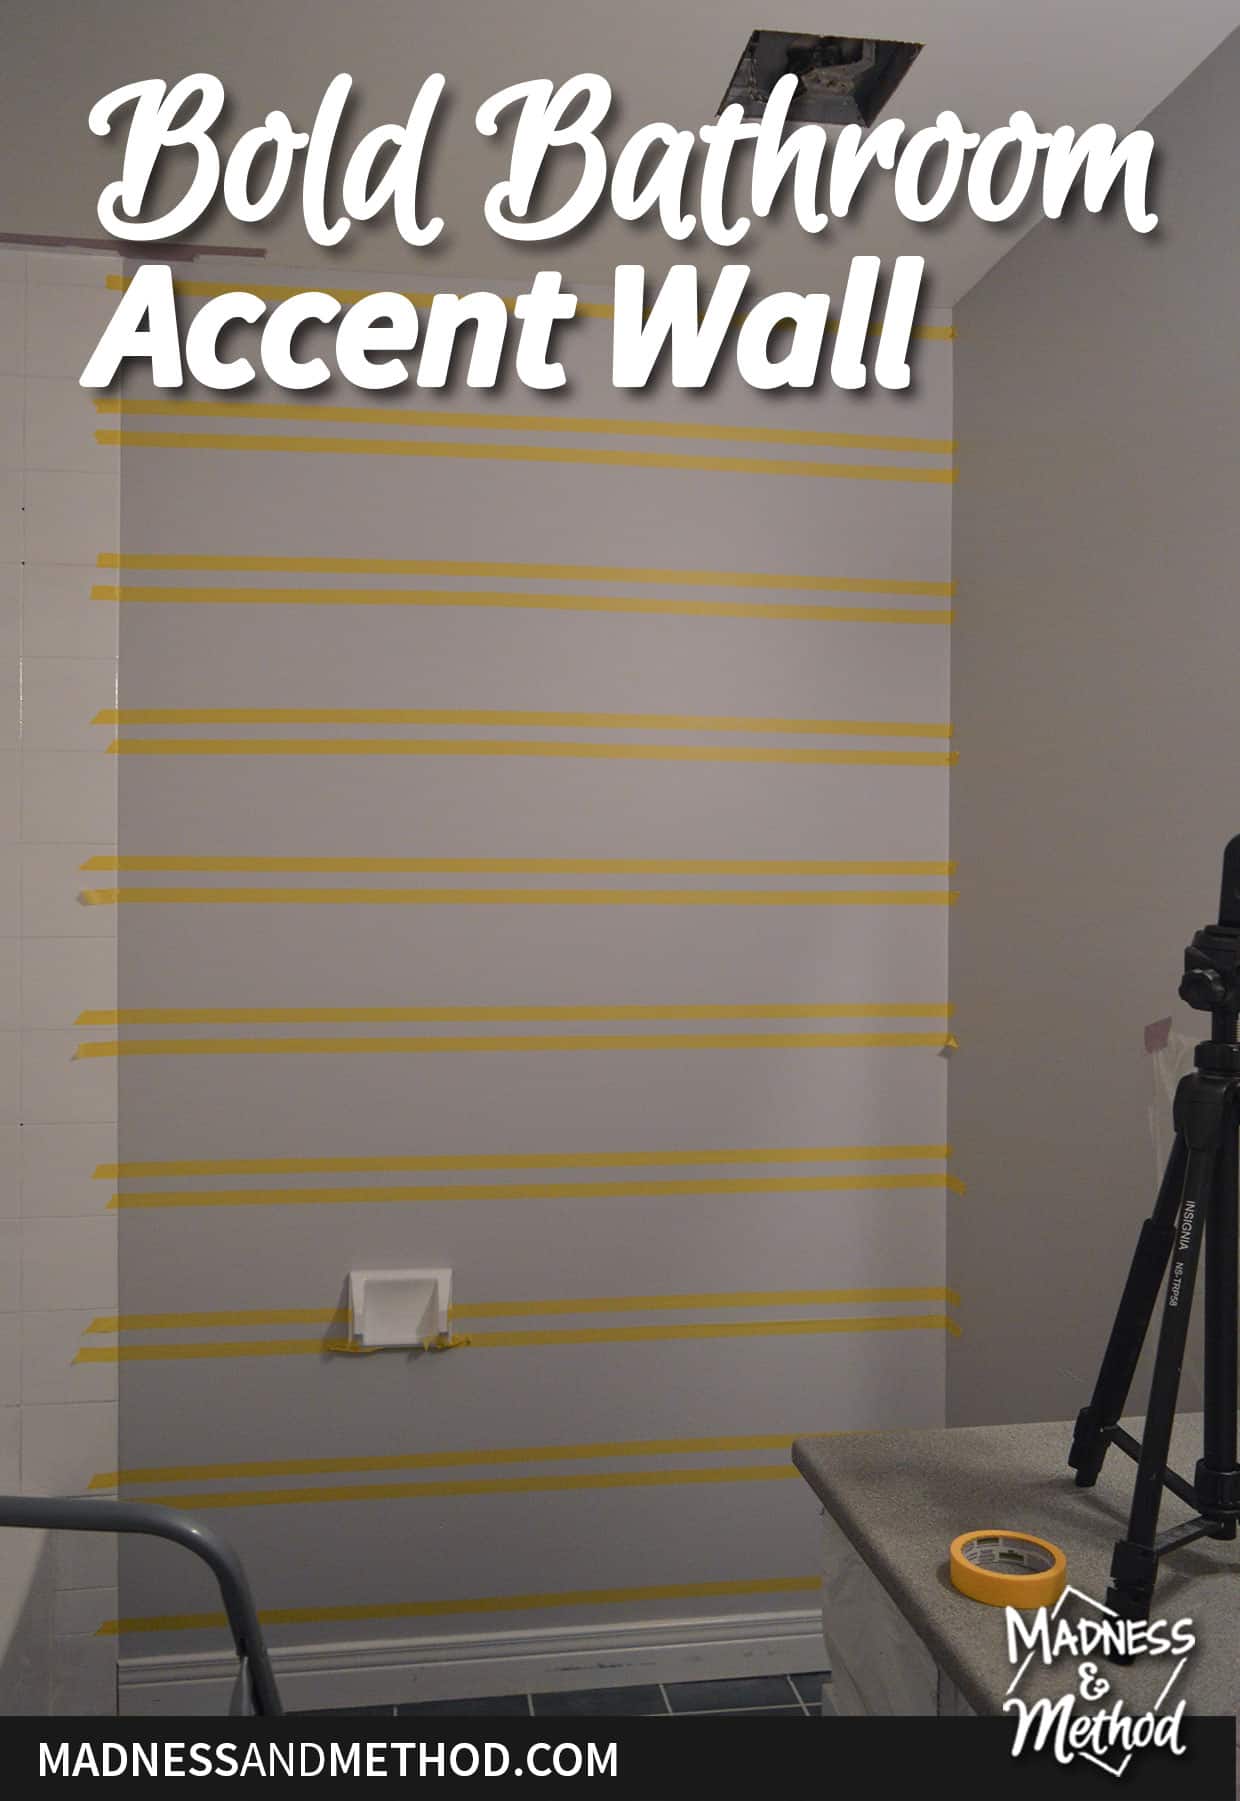
The first step was painting the walls a light gray colour to cover up all the beige! I’m pretty sure I cleaned them a bit too, but I had some paint tape removal issues, so maybe I didn’t?
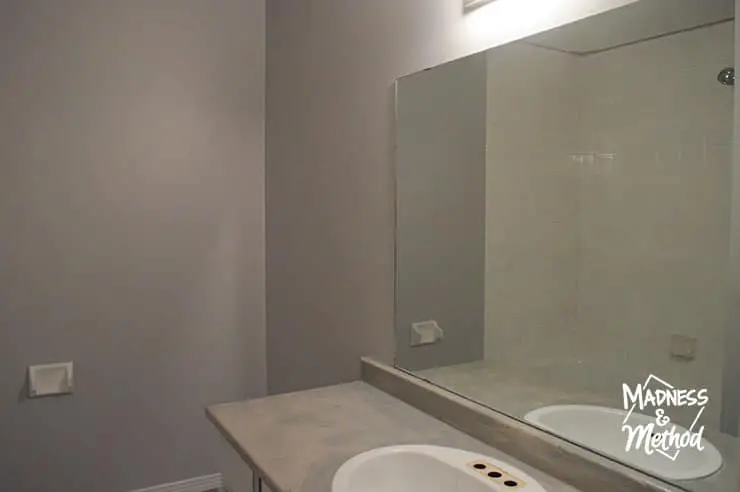
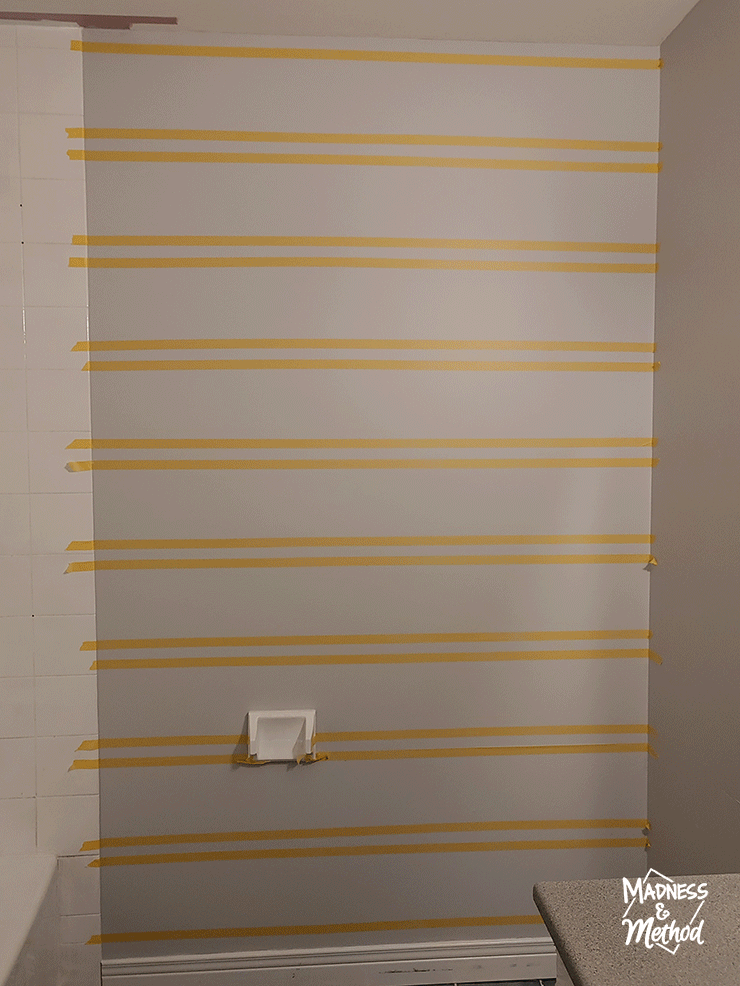
Once everything had two coats of gray paint, it was time to tape up the pattern. Remember, I did most of my brother’s bathroom all within a week, so that’s why you’ll also see the counters and floors change.
How to Paint a Bold Accent Wall
My quick and easy tips are as follows:
- Use a laser level
- Mock up your design to scale and measure 3 times before taping
- Once all taped, paint the wall colour again to seal in for crisp lines
- Paint 2 coats of each colour (or enough for even coverage)
- Carefully peel the tape away
- Touch-up if necessary
Here’s what happened…
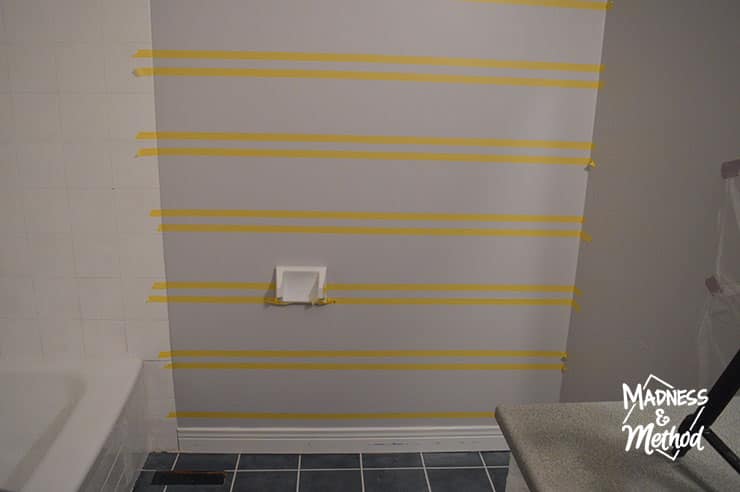
I started measuring from the ceiling and worked my way down, using a laser level halfway through. Completely forgetting that I could place my tripod on the counter and use it from there. Unfortunately, I noticed some of the top lines were a bit bowed because they followed the ceiling line, which obviously wasn’t perfectly level. So ya, had to go fix that later!
(Oh and my computer design was off by an inch or two, so I had to re-tape the top three lines once I figured it out).
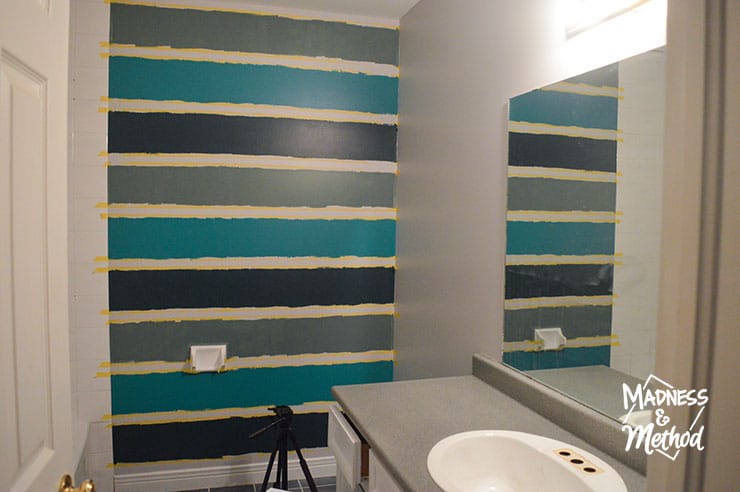
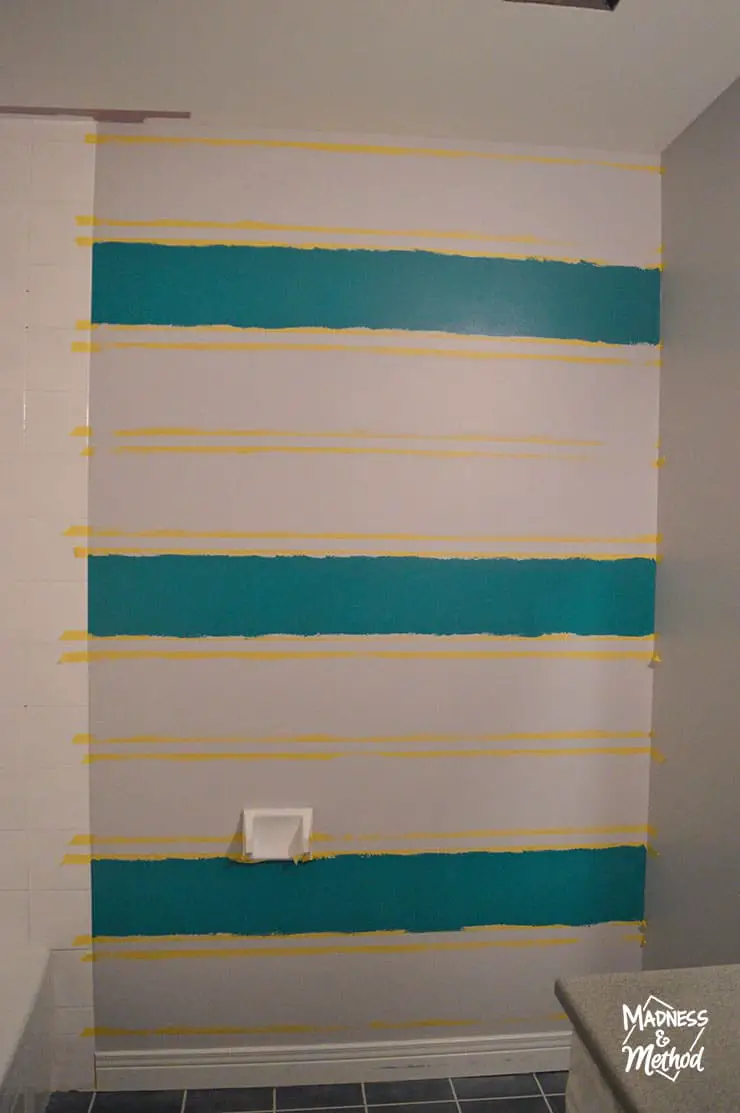 Anyways, once my lines were placed perfectly, I painted the edges to ensure straight stripes (I think I share more details here). Then I did two coats of each colour when it was dry.
Luckily, the toilet was not installed at this point, so I didn’t have to squeeze behind it :)
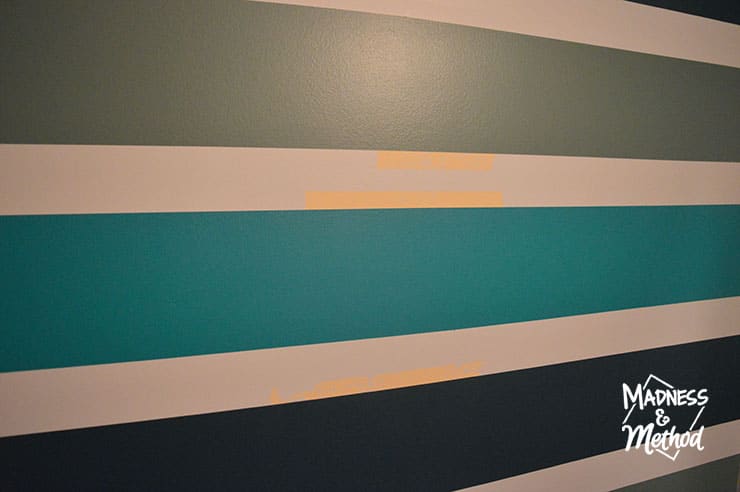
However, once it came time to remove the tape – I got some weird parts that came up. Almost like there were invisible patches on the wall – because it was it perfect boxed areas.
I did go back and fill in those sections…
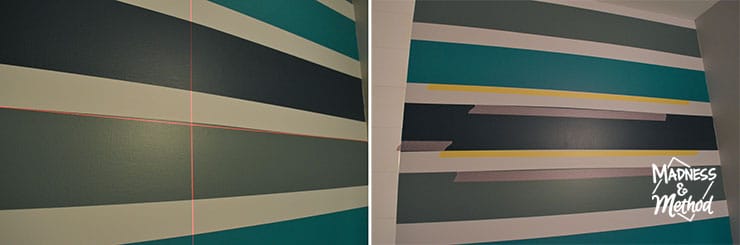
And then later also retaped and painted following the laser level instead of the ceiling distance.
Here’s a cute little animation that shows the whole process!
Painting a Bold Accent Wall Video
And, here’s a video with more details too. If the video player above isn’t loading, feel free to watch it directly on YouTube here.
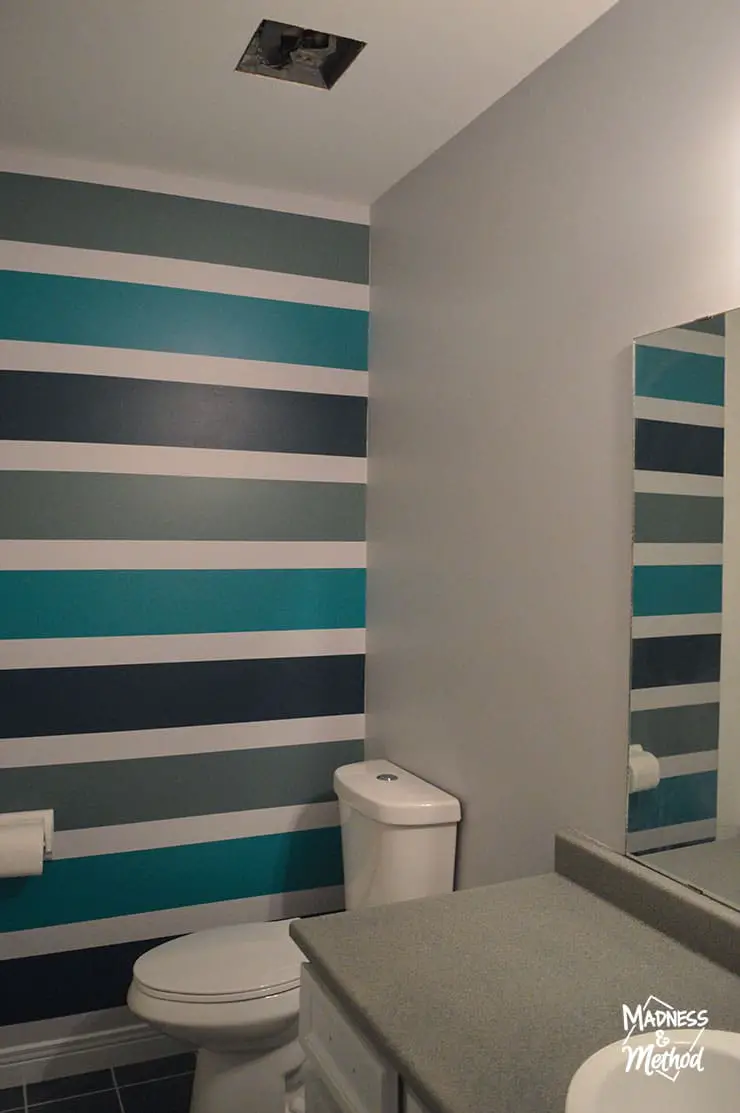
As you can see, most of the accent wall was completed on my first visit, before I added the mirror trim. Oh, and I also painted and re-installed the ceiling vent cover if you were wondering :)
About the One Room Challenge
Check out all the Spring 2023 One Room Challenge participants – next week is the final reveal!

Follow this bathroom renovation:
Beige Bathroom Before (+ Plans)
Faux Tile Painted Floors
How to Install a Toilet
Tub & Tile Paint Project
Build a Mirror Frame
Bathroom Vanity Makeover DIY
I hope you’ve enjoyed this bold accent wall post – since it’s the last project for my brother’s bathroom! The full reveal is next week, and I did update the light fixture and bulb colour, so everything will look a bit different than these photos.
And, even though I did finish the project a couple of weeks ago, I still haven’t gone back and edited any of the photos. So it will be a surprise for me too I guess :)
Related Posts

No Comments