
YAYYAYAYAYA we made it to the end of the One Room Challenge, and I was able to get everything done with little stress :) This time, I transformed the old nursery from our first baby into a brand new space for baby #3, and with a few weeks left to the due date, we’re looking good. Let’s check out all the details for this not-so-neutral nursery reveal!
– Note: This project was sponsored by Wayfair Canada and may contain affiliate links. See more information about sponsored posts and affiliates here. –
If you’re just joining me for the first time (hello fellow One Room Challenge link-uppers!), my name is Nicole and I live in Northern Ontario Canada. As I mentioned, we’re expecting baby #3 at the end of November, and I wanted to create a completely new nursery space for them.
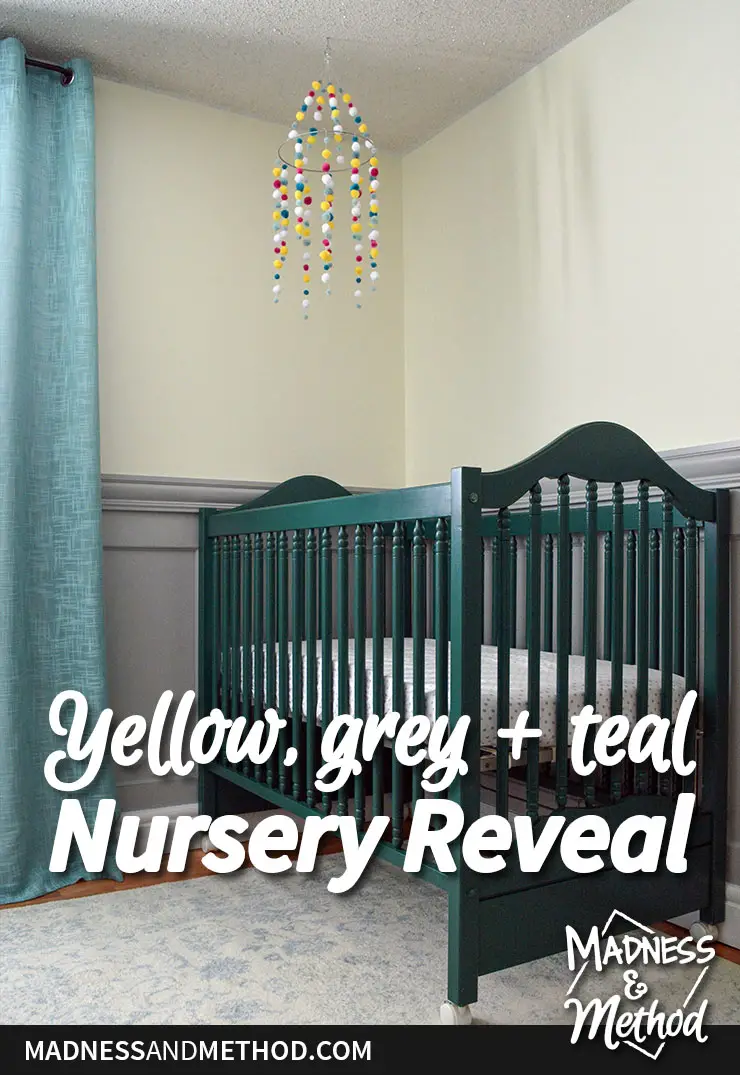
We don’t know the gender of this baby, so went with a yellow, grey and teal colour scheme for the space. I normally gravitate towards brighter/bolder colours, so it took me three tries to get the yellow just right. I also painted the hand-me-down crib a dark teal colour, built a custom pompom mobile and installed custom layered wainscoting.
Nursery to-do List
- Cleared out the room (including blinds)
- Removed old trim and unattached phone cable
- Patched any holes and primed top parts of walls
- Painted light yellow (did this three times!)
- Cleaned and painted crib
- Installed new trim for wainscoting (first casings, then flat pieces, baseboards, chair rails, panel moulds on doors and centre sections)
- Patched wainscotting, then sanded and patched/sanded/caulked
- Built a mobile and hung from the ceiling
- Primed and painted grey wainscotting
- Painted white baseboards and casings
- Clear coated the crib
- Paint touch-ups
- Reinstalled blinds, installed curtain rod and curtains
- Scraped paint from floors and mopped them
- Brought in furniture, accessories and a new rug
- Hung artwork and took photos!
- Started prepping for baby by organizing clothes and drawers
Nursery Before Pictures
You can check out how this bright blue room used to look when we first moved in and used it as a guest bedroom. Then, we painted three of the walls grey and turned it into a “neutral nursery” for our first baby. I shared more before/current pictures in the first week’s post here, but here is essentially the room half cleared out:
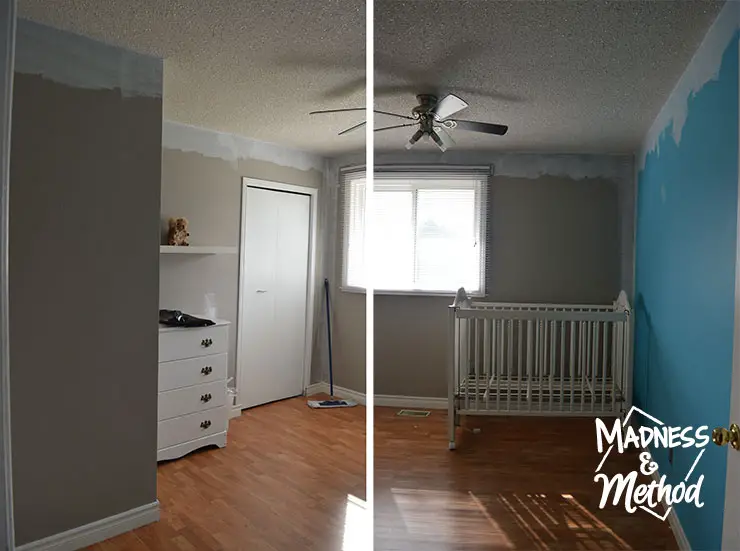
The room is just under 10×12, and there’s a bump-out section on the left side (where our staircase is).
I took some before/after shots of these same angles (you can scroll to the bottom to see those), but let’s dive into how the room looks like first!
Not-So-Neutral Nursery Reveal: Changing/Feeding Zones
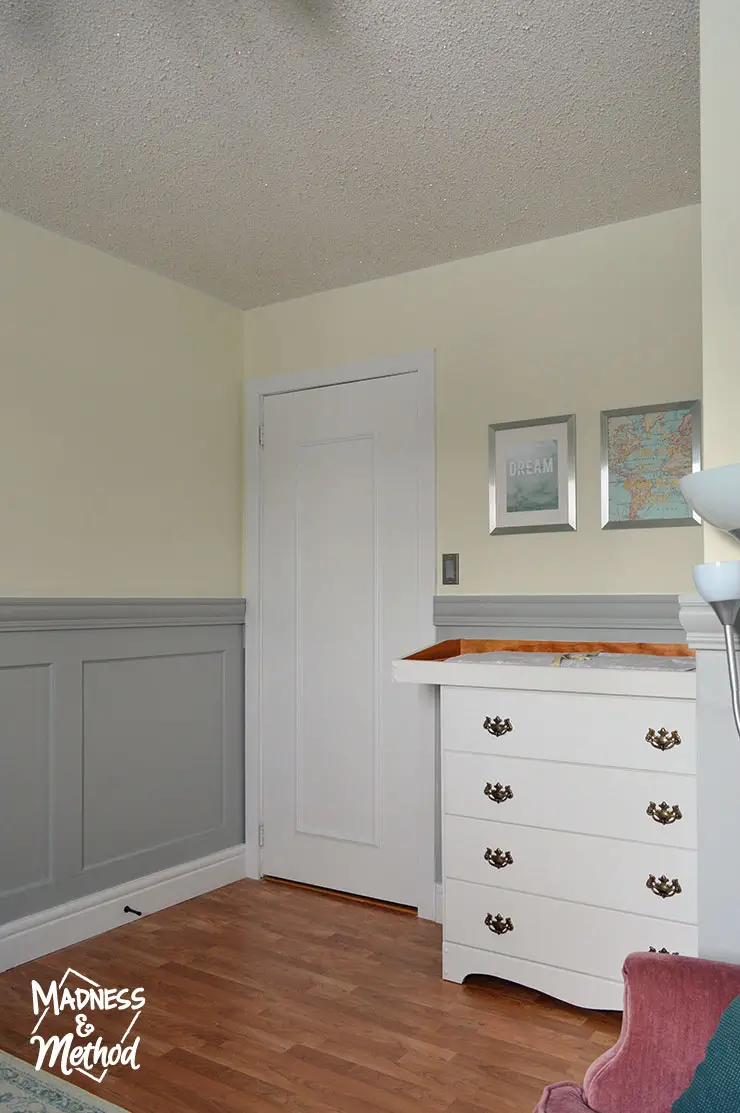
Alrighty, starting from the door (with updated trim, similar to how I did it here), we will go around the room clockwise.
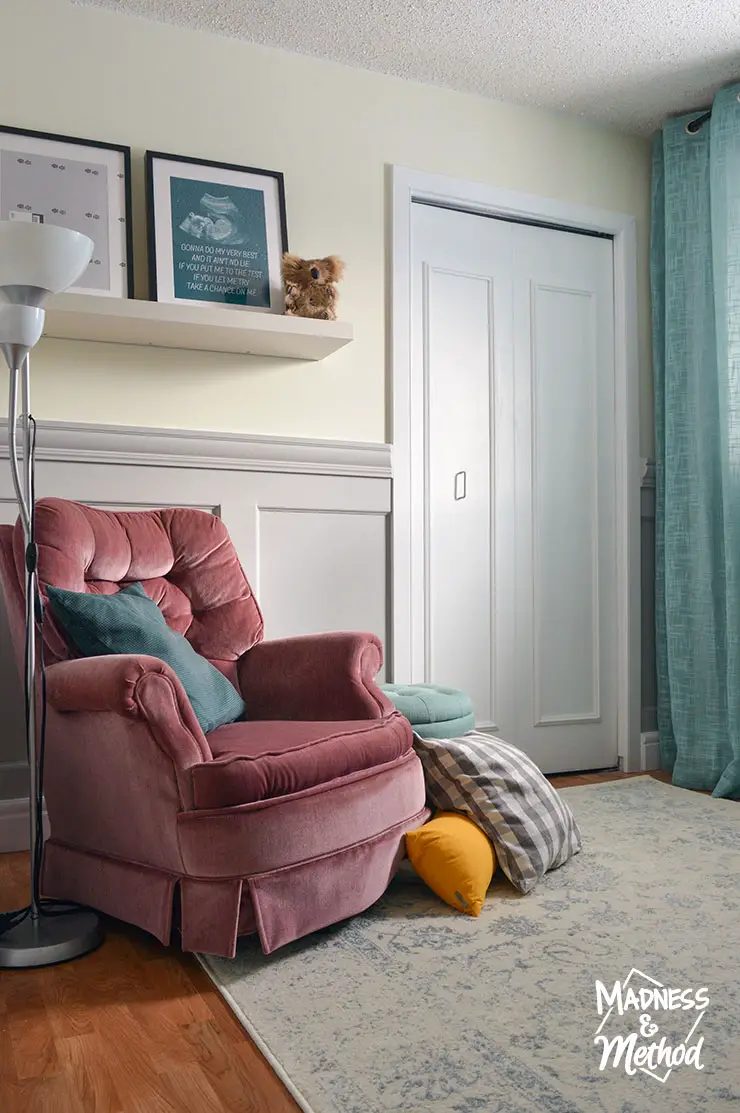
The first time I used this room like a nursery, I had the chair and dresser/change table swapped. I’m trying this new layout, and so far so good!
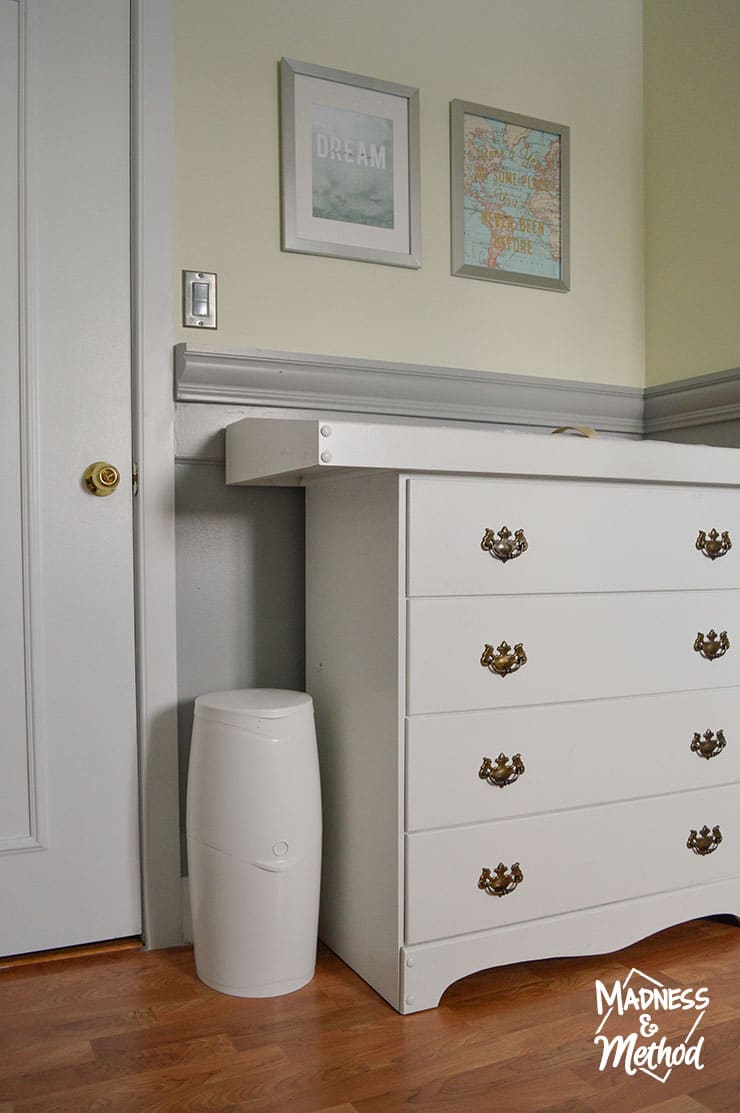
I even made sure there was enough room for our Diaper Genie, although it’s still being used in our combo kids room/nursery for now. (Baby #2 is just over 18 months, so still a bit of time left for diapers).

There aren’t many outlets in this room, so I had to bring in an extension cord so I could plug in a floor lamp. I realized that it’s a lot easier to use a lamp for late-night diaper changes than turn on the overhead light and blast baby (and momma) with light.

It was the light I was using in our master bedroom, but I redid that space last One Room Challenge.
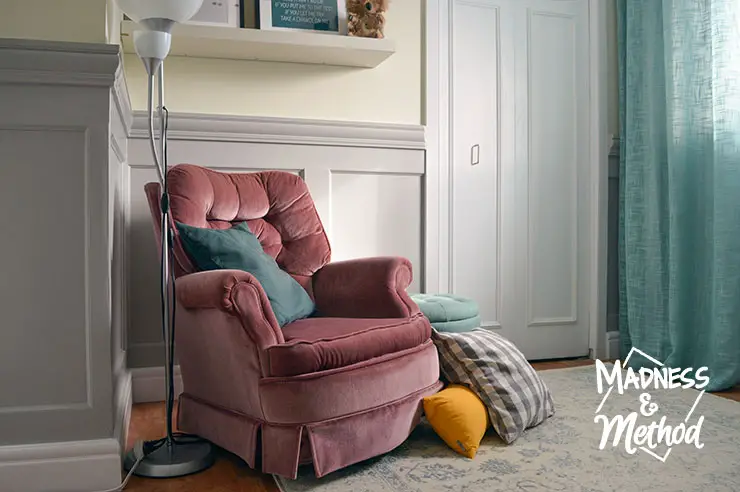
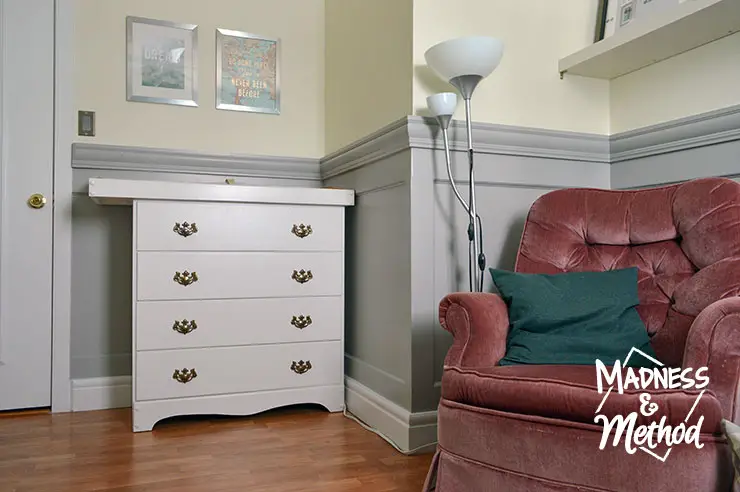
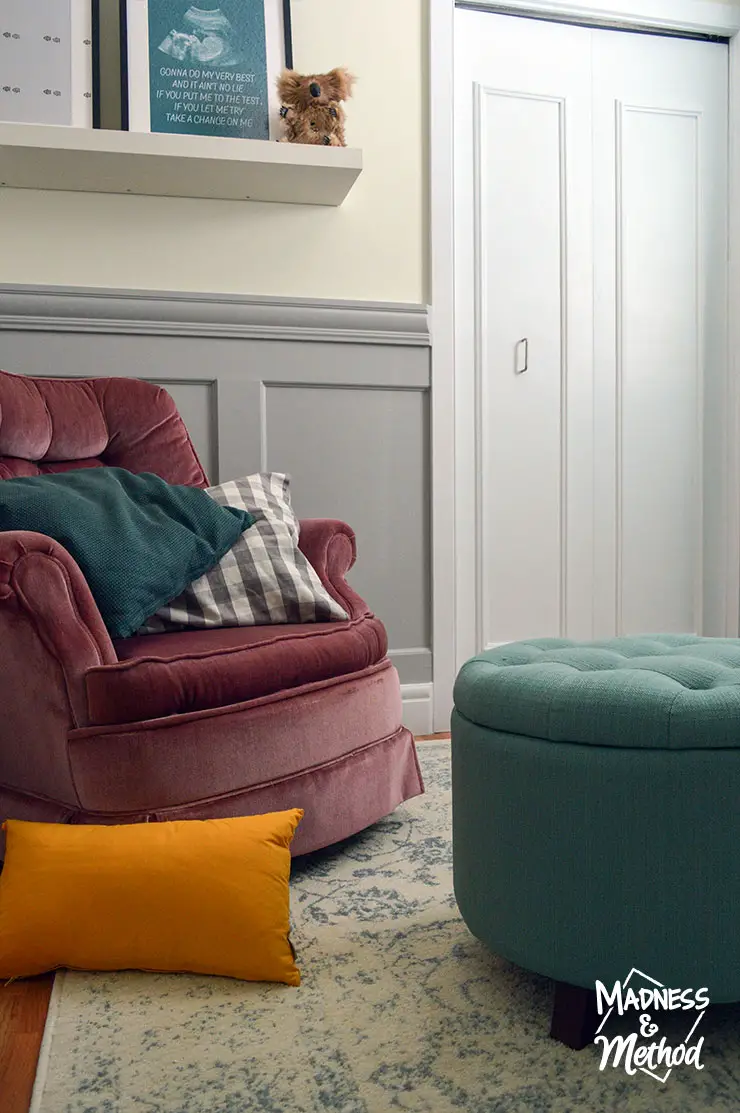
This free chair has been my nursing go-to, and I couldn’t imagine changing it for anything else. Notice the updated closet doors as well? I decided to go with the vertical handle placement (instead of trying to find a knob).
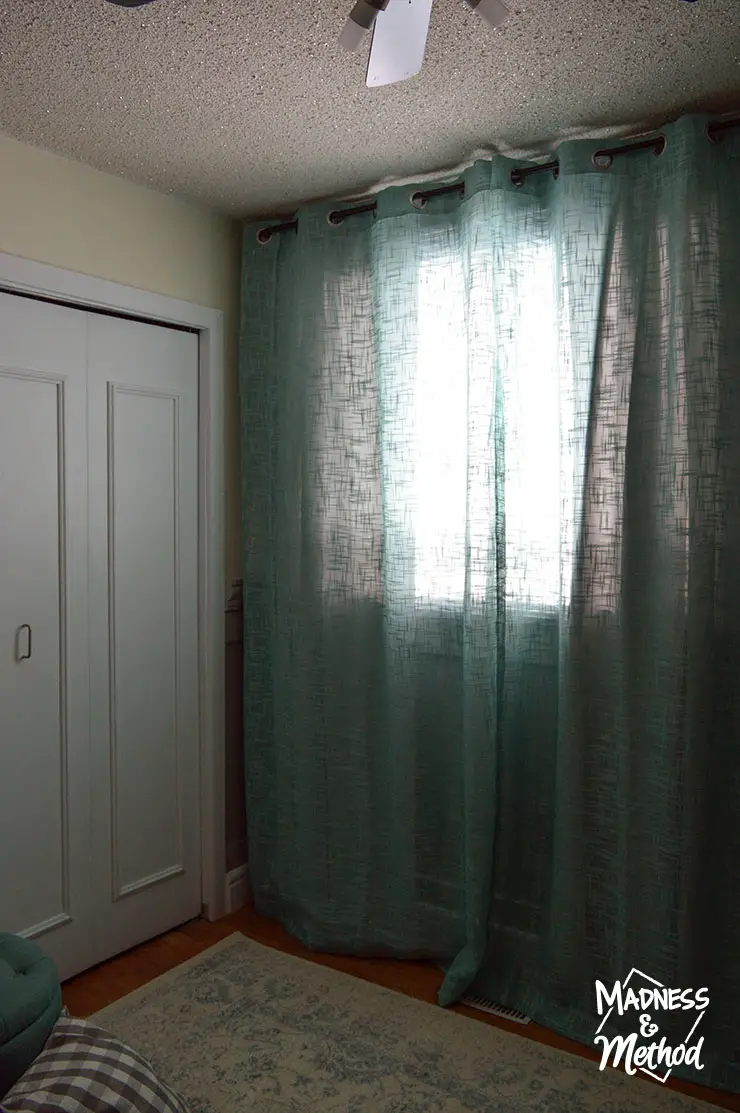
We had actually purchased a double curtain rod and curtain liners when our toddler was in here but didn’t install them until now. Although, the liners aren’t as good as the blackout curtain we have installed in the other bedroom (as you can see from the photo above).
I picked out these (similar) seafoam curtains from Wayfair.ca for the room to match the colour of our ottoman (similar) (that I had in the other nursery).
Normally, I’m not a curtain-touching-the-ground-person, but the Husband said we needed clearance to latch the rod in… I guess this will do.
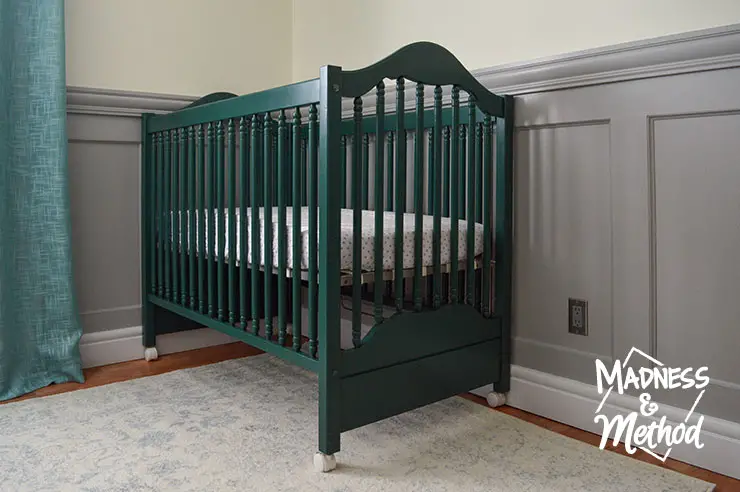
Not-So-Neutral Nursery Reveal: Crib Area
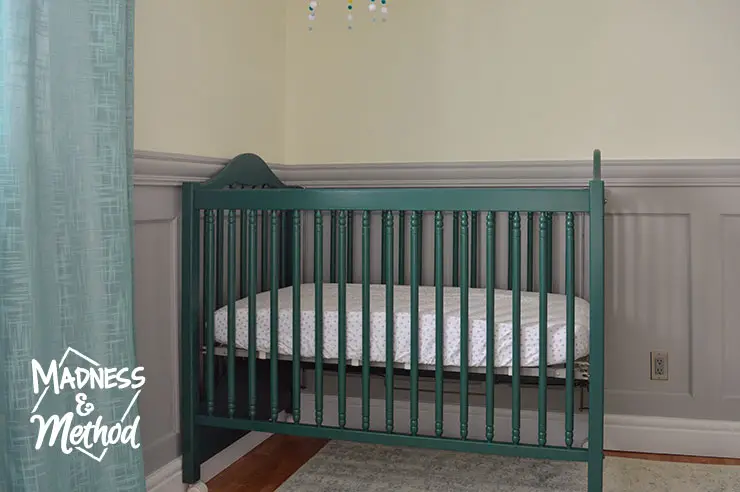
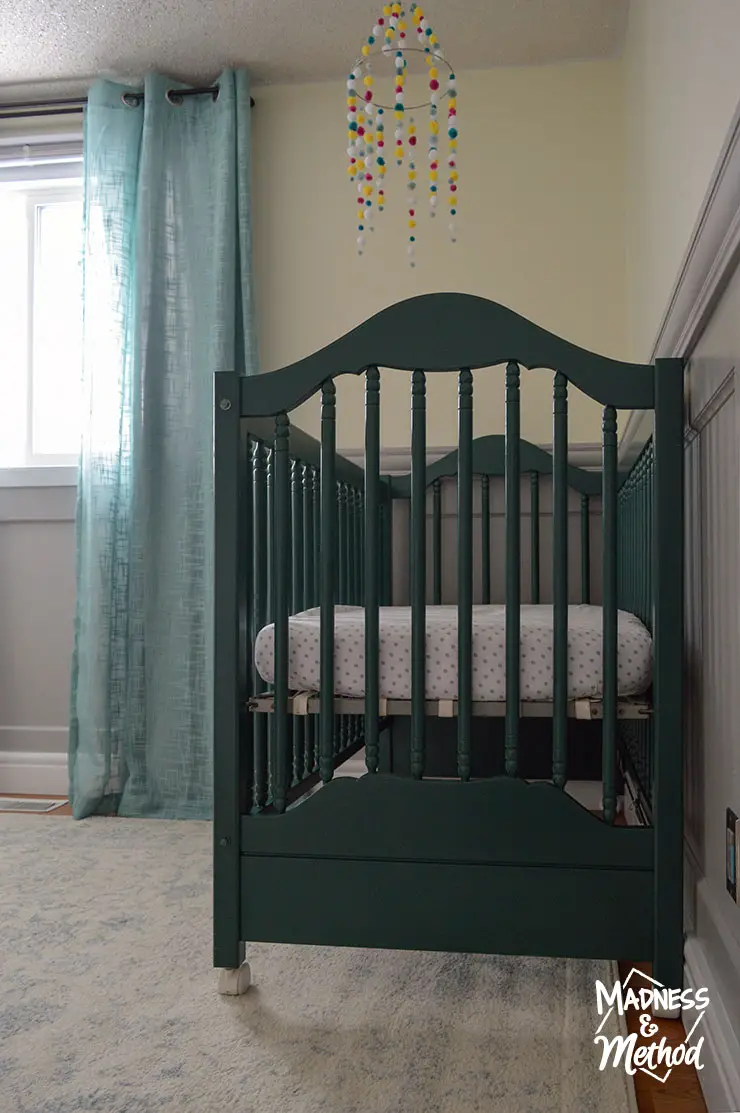
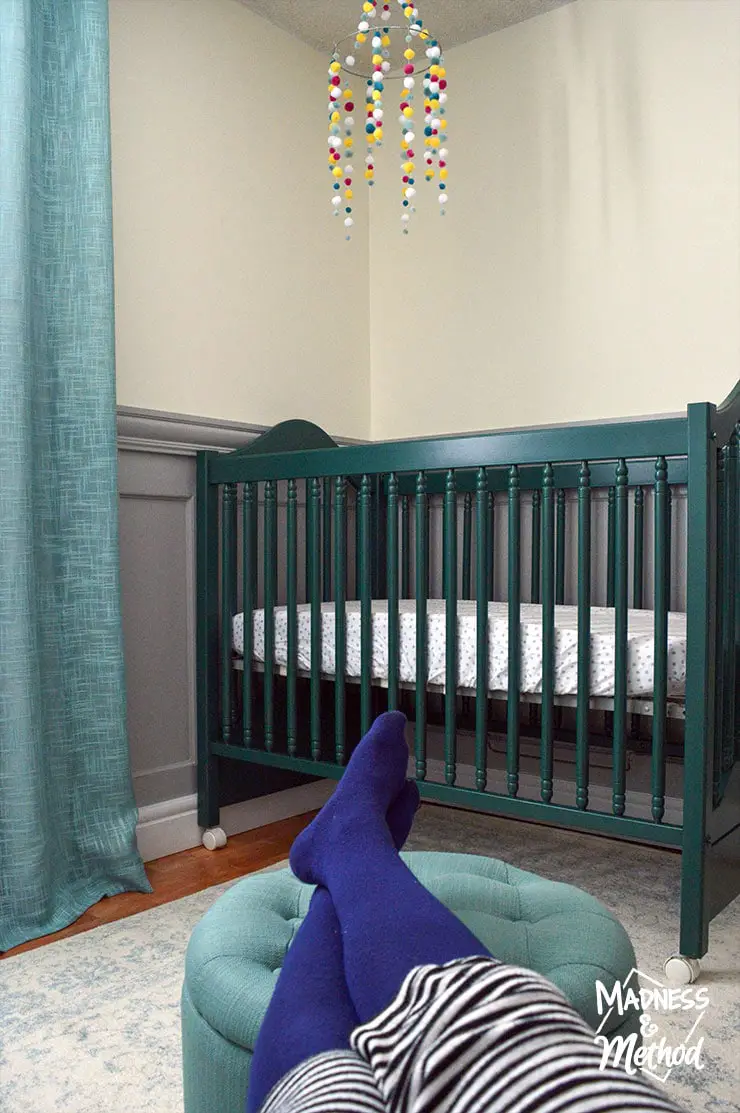
I think the piece that people have been asking about the most has been this dark teal crib! I painted it the third week of the challenge, and just got the clear-coating finished up this past weekend.
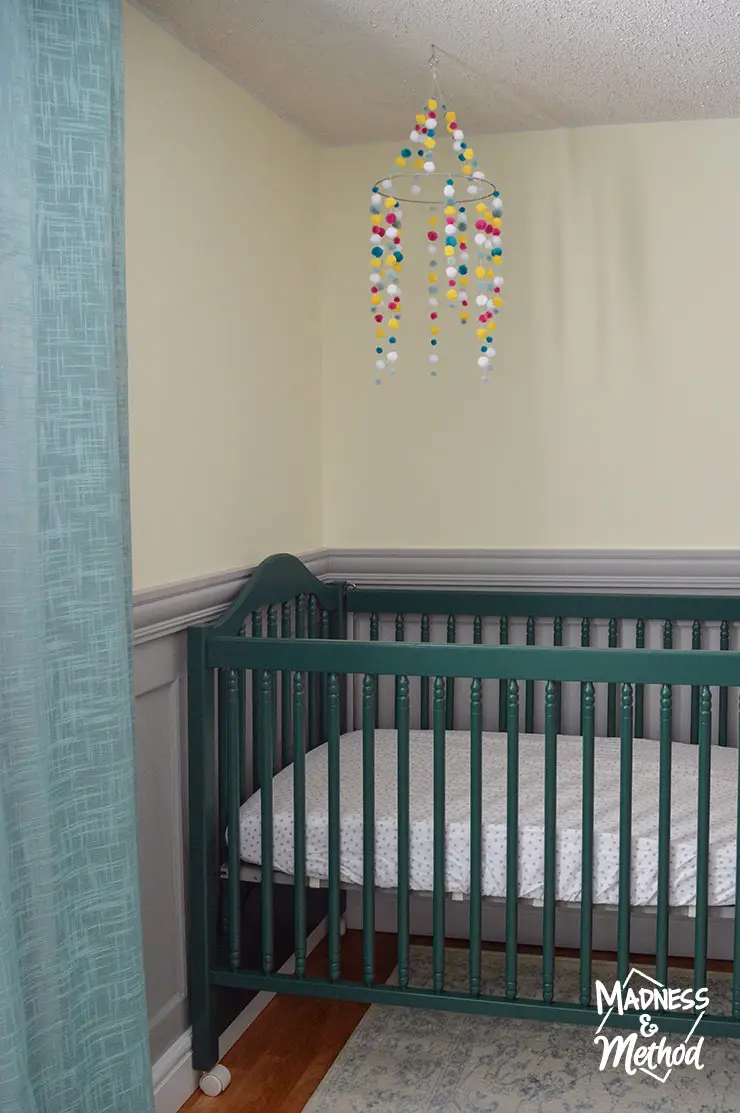
It used to be a dingy off-white colour, and looks very sharp now, especially with the bright pompom mobile hanging above.
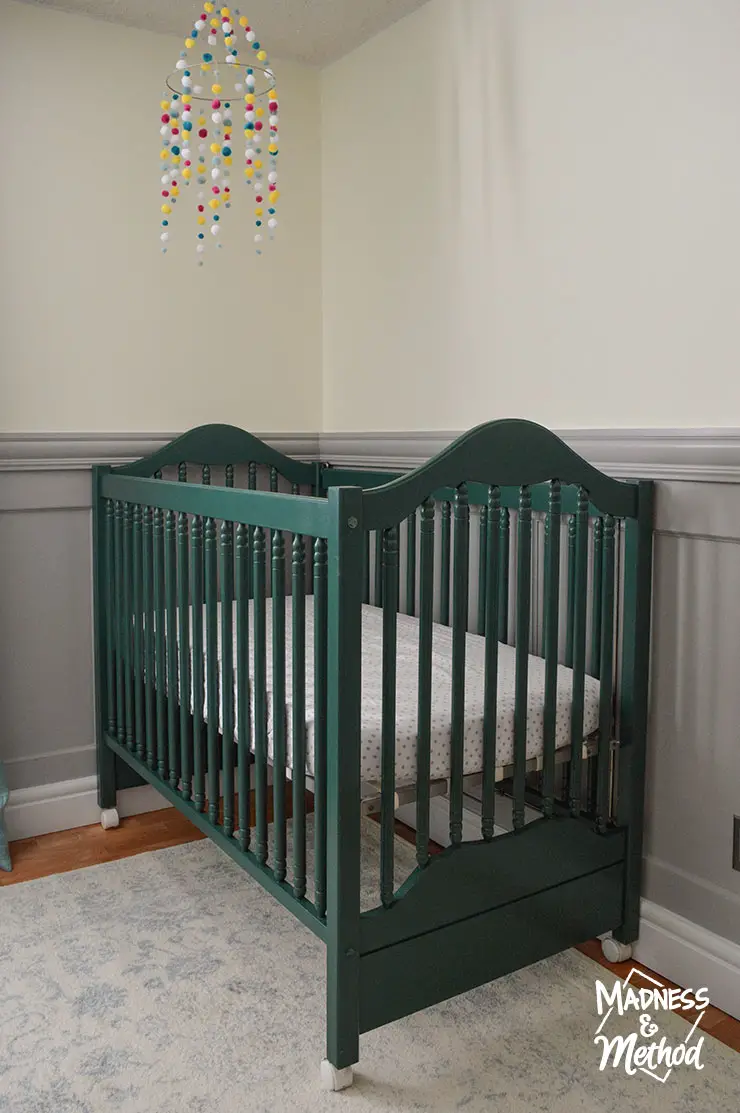
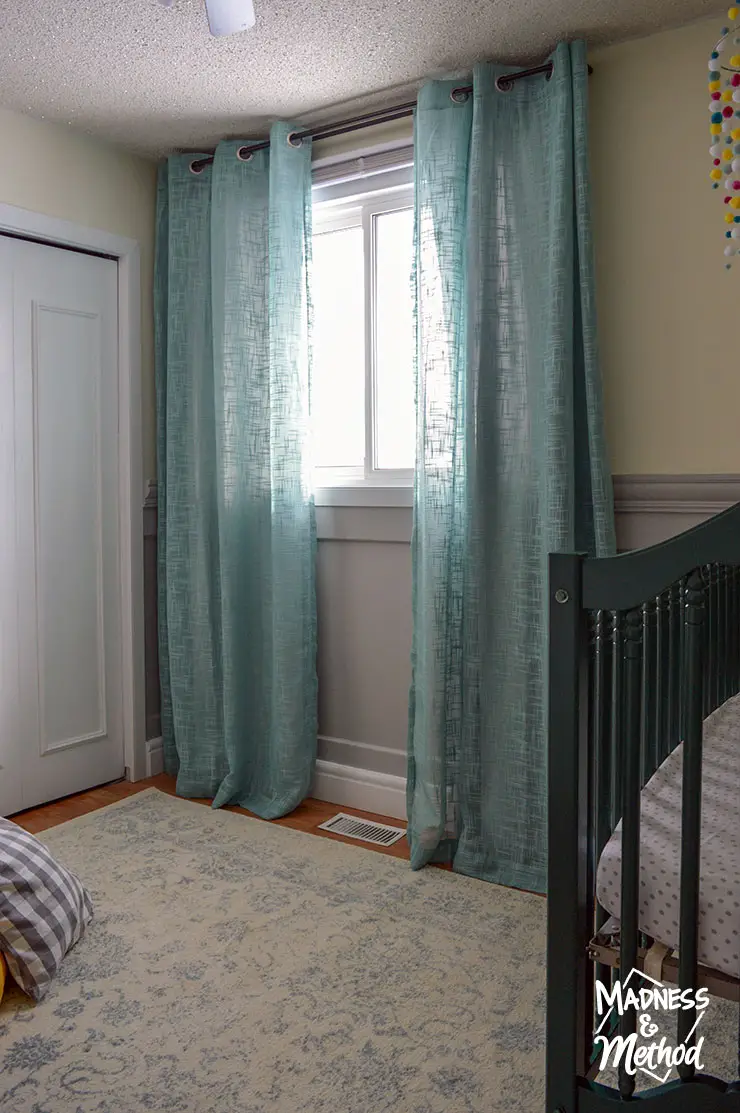
I also oriented the crib the other way to take up more space on the long wall.
When you’re trying to make a nursery into another nursery, you have to be creative to make it look different, ha!
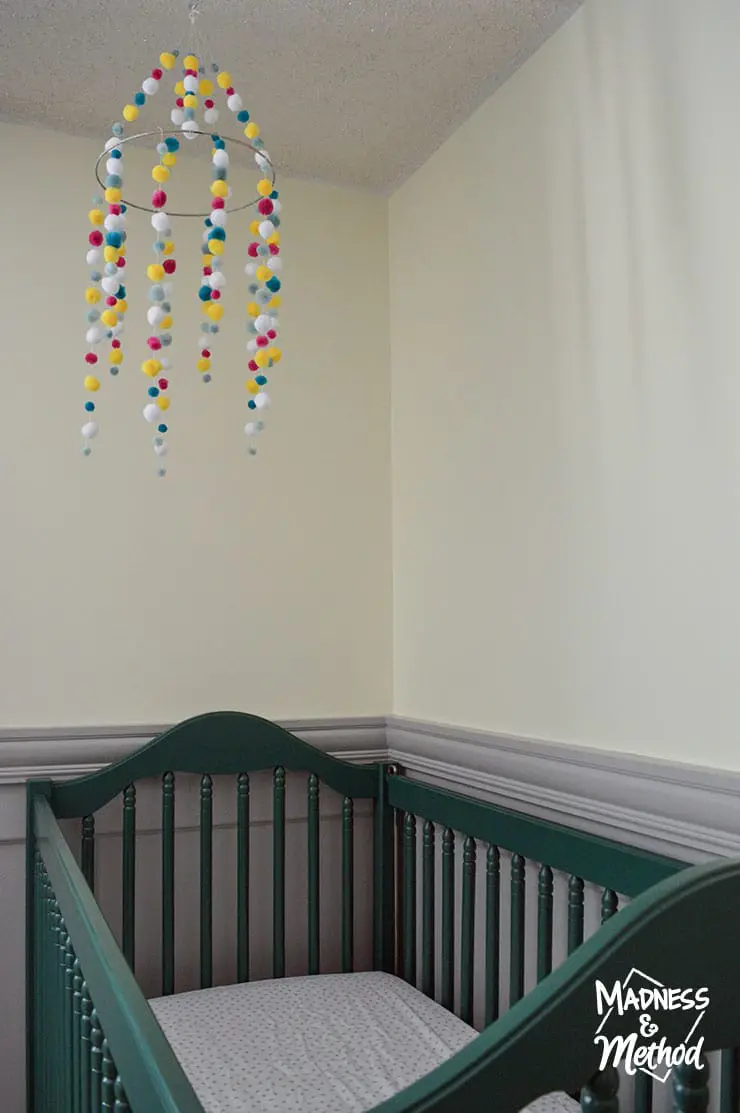
We hung the mobile on the joists, so it doesn’t perfectly line up with the centre of the crib – but I’m not too worried.
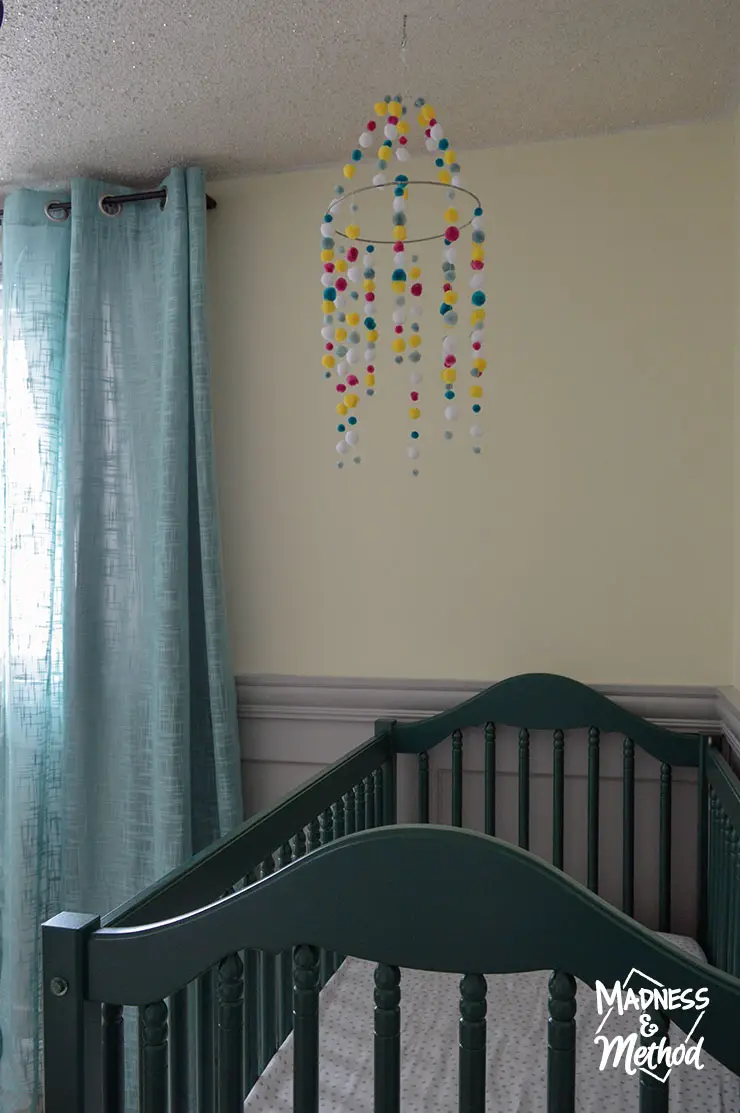
I do really like how all the colours come together in the room! Do you think it’s a fun take on a gender-neutral space?
Oh, I also really like the new ivory Wayfair rug in the room. This 9×6 is a bit larger than the previous 5×8 shag we had in here, but it’s also a lot lighter so brightens up the floor. It’s actually more blue than teal, but once everything is together, you hardly notice.
Not-So-Neutral Nursery: Other Room Details
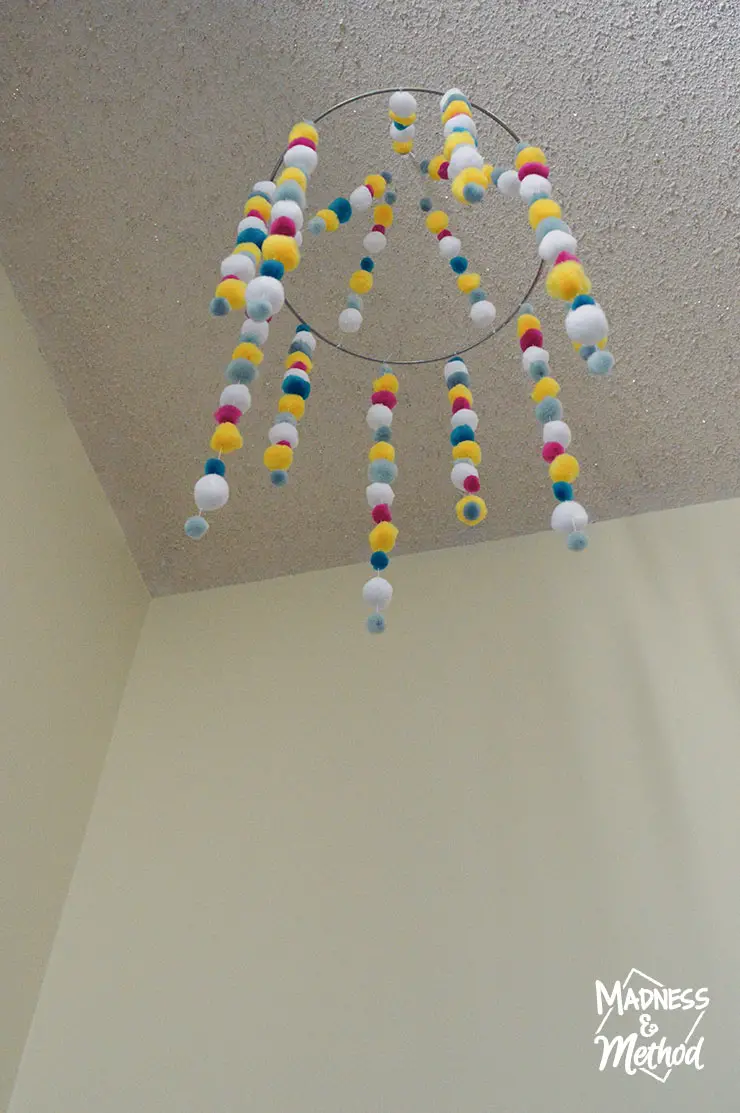
For those wondering, I ended up just hanging the pompom mobile to the ceiling hook with some string. If I ever need to remove it, I can just cut that little section off.
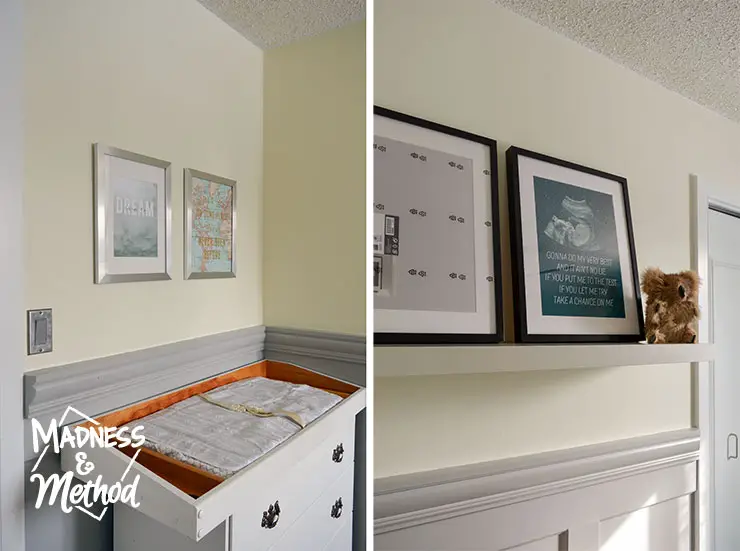
Artwork-wise, I bought this Dream Print and this map print to hang over the change-table. I was originally going to put them on the bump-out but liked this placement more.
I also did another custom baby print (with a photo from the ultrasound and song lyrics). This time, the Husband helped me pick the song lyrics (he complained about the other two), and I just got confirmation to use them this week, phew!
We’ll be slowly adding handprints to the empty print as the months go by, so you can check out how that will look here.
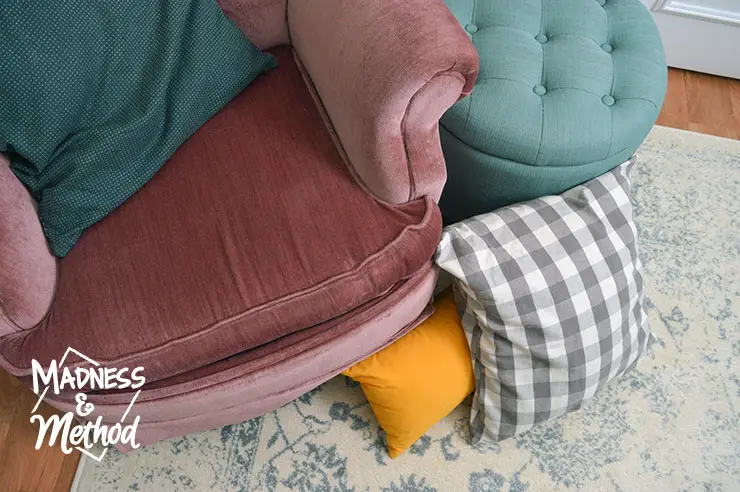
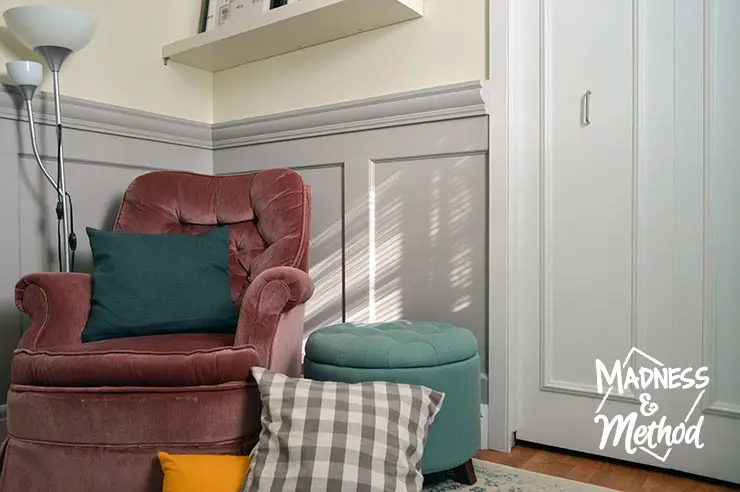
Pillow-wise, I just used everything I had before (remember, I wanted both nurseries to be similar, but different). I have a pretty extensive nursing setup, but it’s worked and is comfy – so why change it!
I’ll probably also use the ottoman as a footrest (that was the best discovery I made for baby #2!), so I imagine things will move around a bit in this area.
Now I can just relax and enjoy the room until the baby comes… (Just kidding, I have two other littles, ha!). So far we’ve already enjoyed being in this room together, and the other monkeys have helped get the clothes and stuff organized. (This ottoman is filled with nursing stuff already!).
Follow the One Room Challenge
It’s final reveal time, which means you HAVE to go see all the links for the One Room Challenge here. I’ll be busy the next little while checking out the rooms! Sign up for my email newsletter to get a recap of my favourites.

Week 1: Yellow, Grey and Teal Nursery Plans
Week 2: Painting Yellow Walls
Week 3: Painting a Dark Teal Crib
Week 4: Easy DIY Pom Pom Mobile
Week 5: Installing Layered Wainscoting
Week 6: Not-So-Neutral Nursery Reveal (you’re here!)
Oh, and if you liked this transformation, check out my past One Room Challenges here:
- Spring 2016: Basement Half-Bathroom Addition
- Spring 2017: Bro’s Budget Bathroom
- Fall 2017: Garage Makeover
- Fall 2018: Basement Kitchen Renovation (we didn’t finish until much later, you can check it out here)
- Spring 2019: Master Bedroom 1 AND Master Bedroom 2
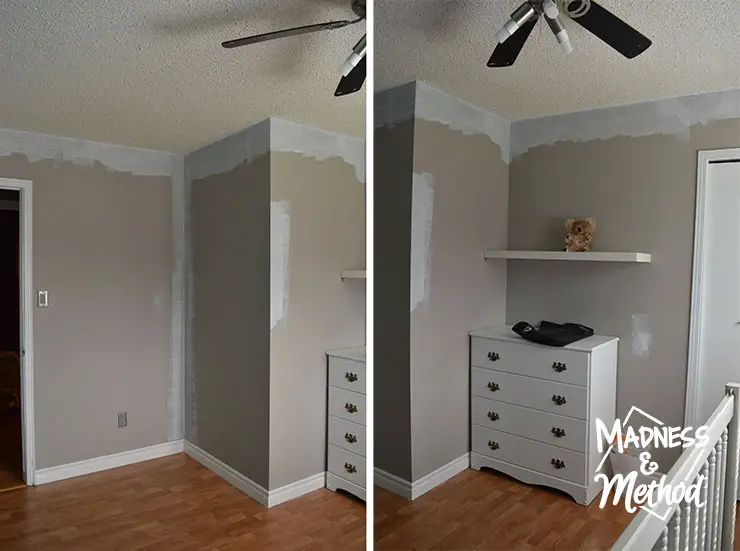
Some before and afters of this nursery for good measure:
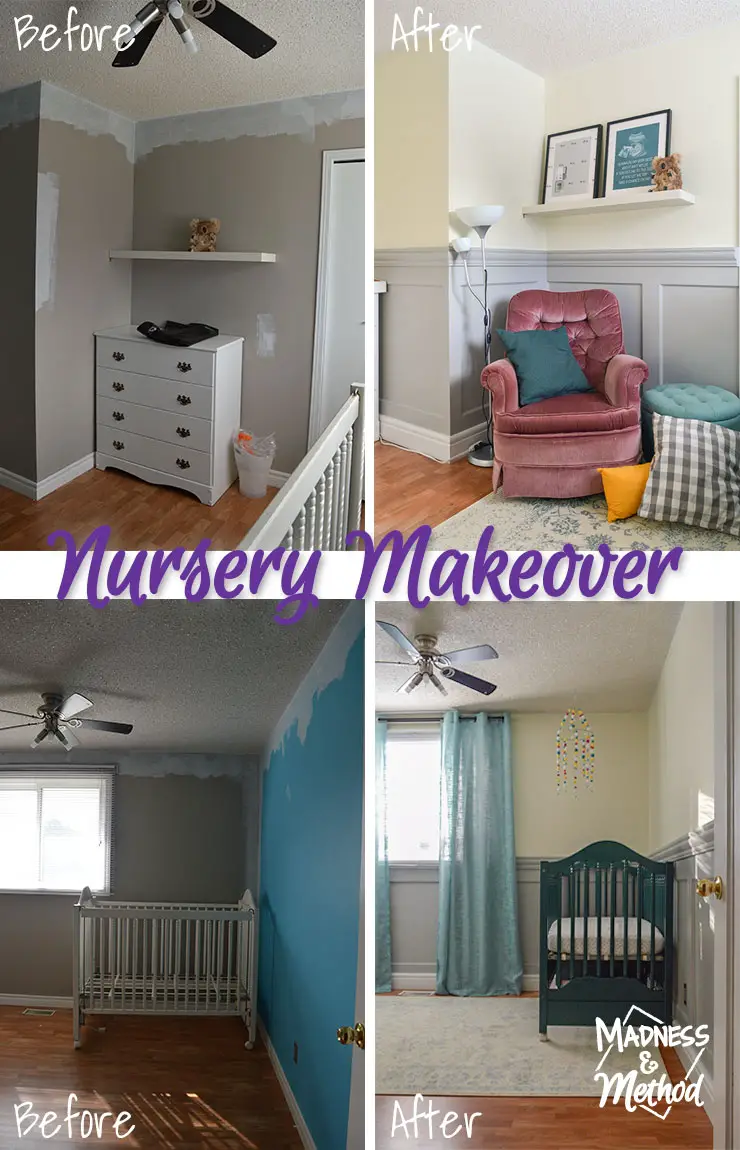
Here are the same views of the room, before we started the makeover (ish) and now.
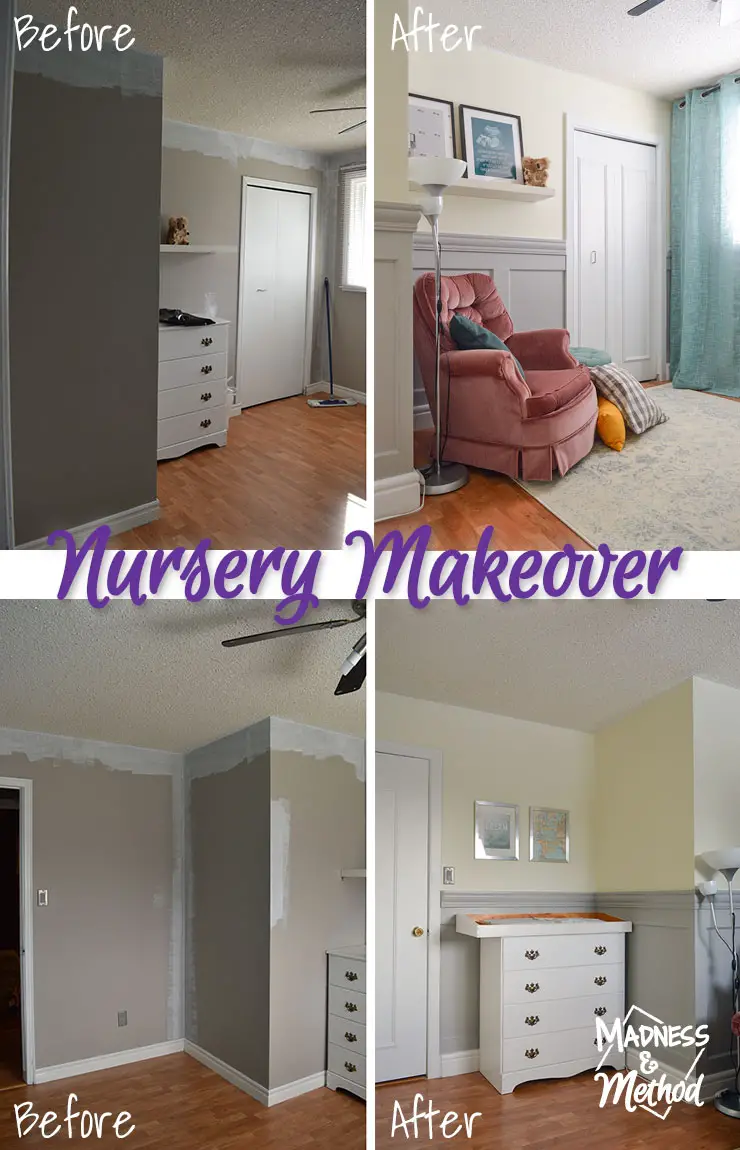
I’m pretty sure I’ll be adding wainscoting (or other wall treatments) to every room I ever do because the transformation is crazy! I also really do like the light yellow colour on the walls, even though it took a while to get there :)
Shop This Post
Let me know what you think of our not-so-neutral nursery! I’ll definitely share some in-use photos once baby is here. You can subscribe to the blog in your favourite feed reader so you don’t miss anything. Or, follow me on Facebook, Instagram, YouTube and Pinterest to really immerse yourself!
OH and have to add that I offer design services too. Think more in terms of layout planning vs. mood boards, but definitely reach out if you need help :)
Thanks for coming to check out the room, and a big thanks to Wayfair Canada for sponsoring this project!


4 Comments
Angela | MidModernMama
November 11, 2019 at 5:49 pmSuch a sweet nursery! Baby will be very happy! Cheers to a great challenge!
Nicole
November 13, 2019 at 10:39 amThanks! It’s such a light and bright space compared to our last nursery, I’m happy with how it turned out :)
Jen @ Noting Grace
November 21, 2019 at 9:02 pmWhat an adorable nursery! You baby will love all the colors!
Nicole
November 25, 2019 at 10:29 amI’m hoping so, although they don’t really have a say for a few years, ha!